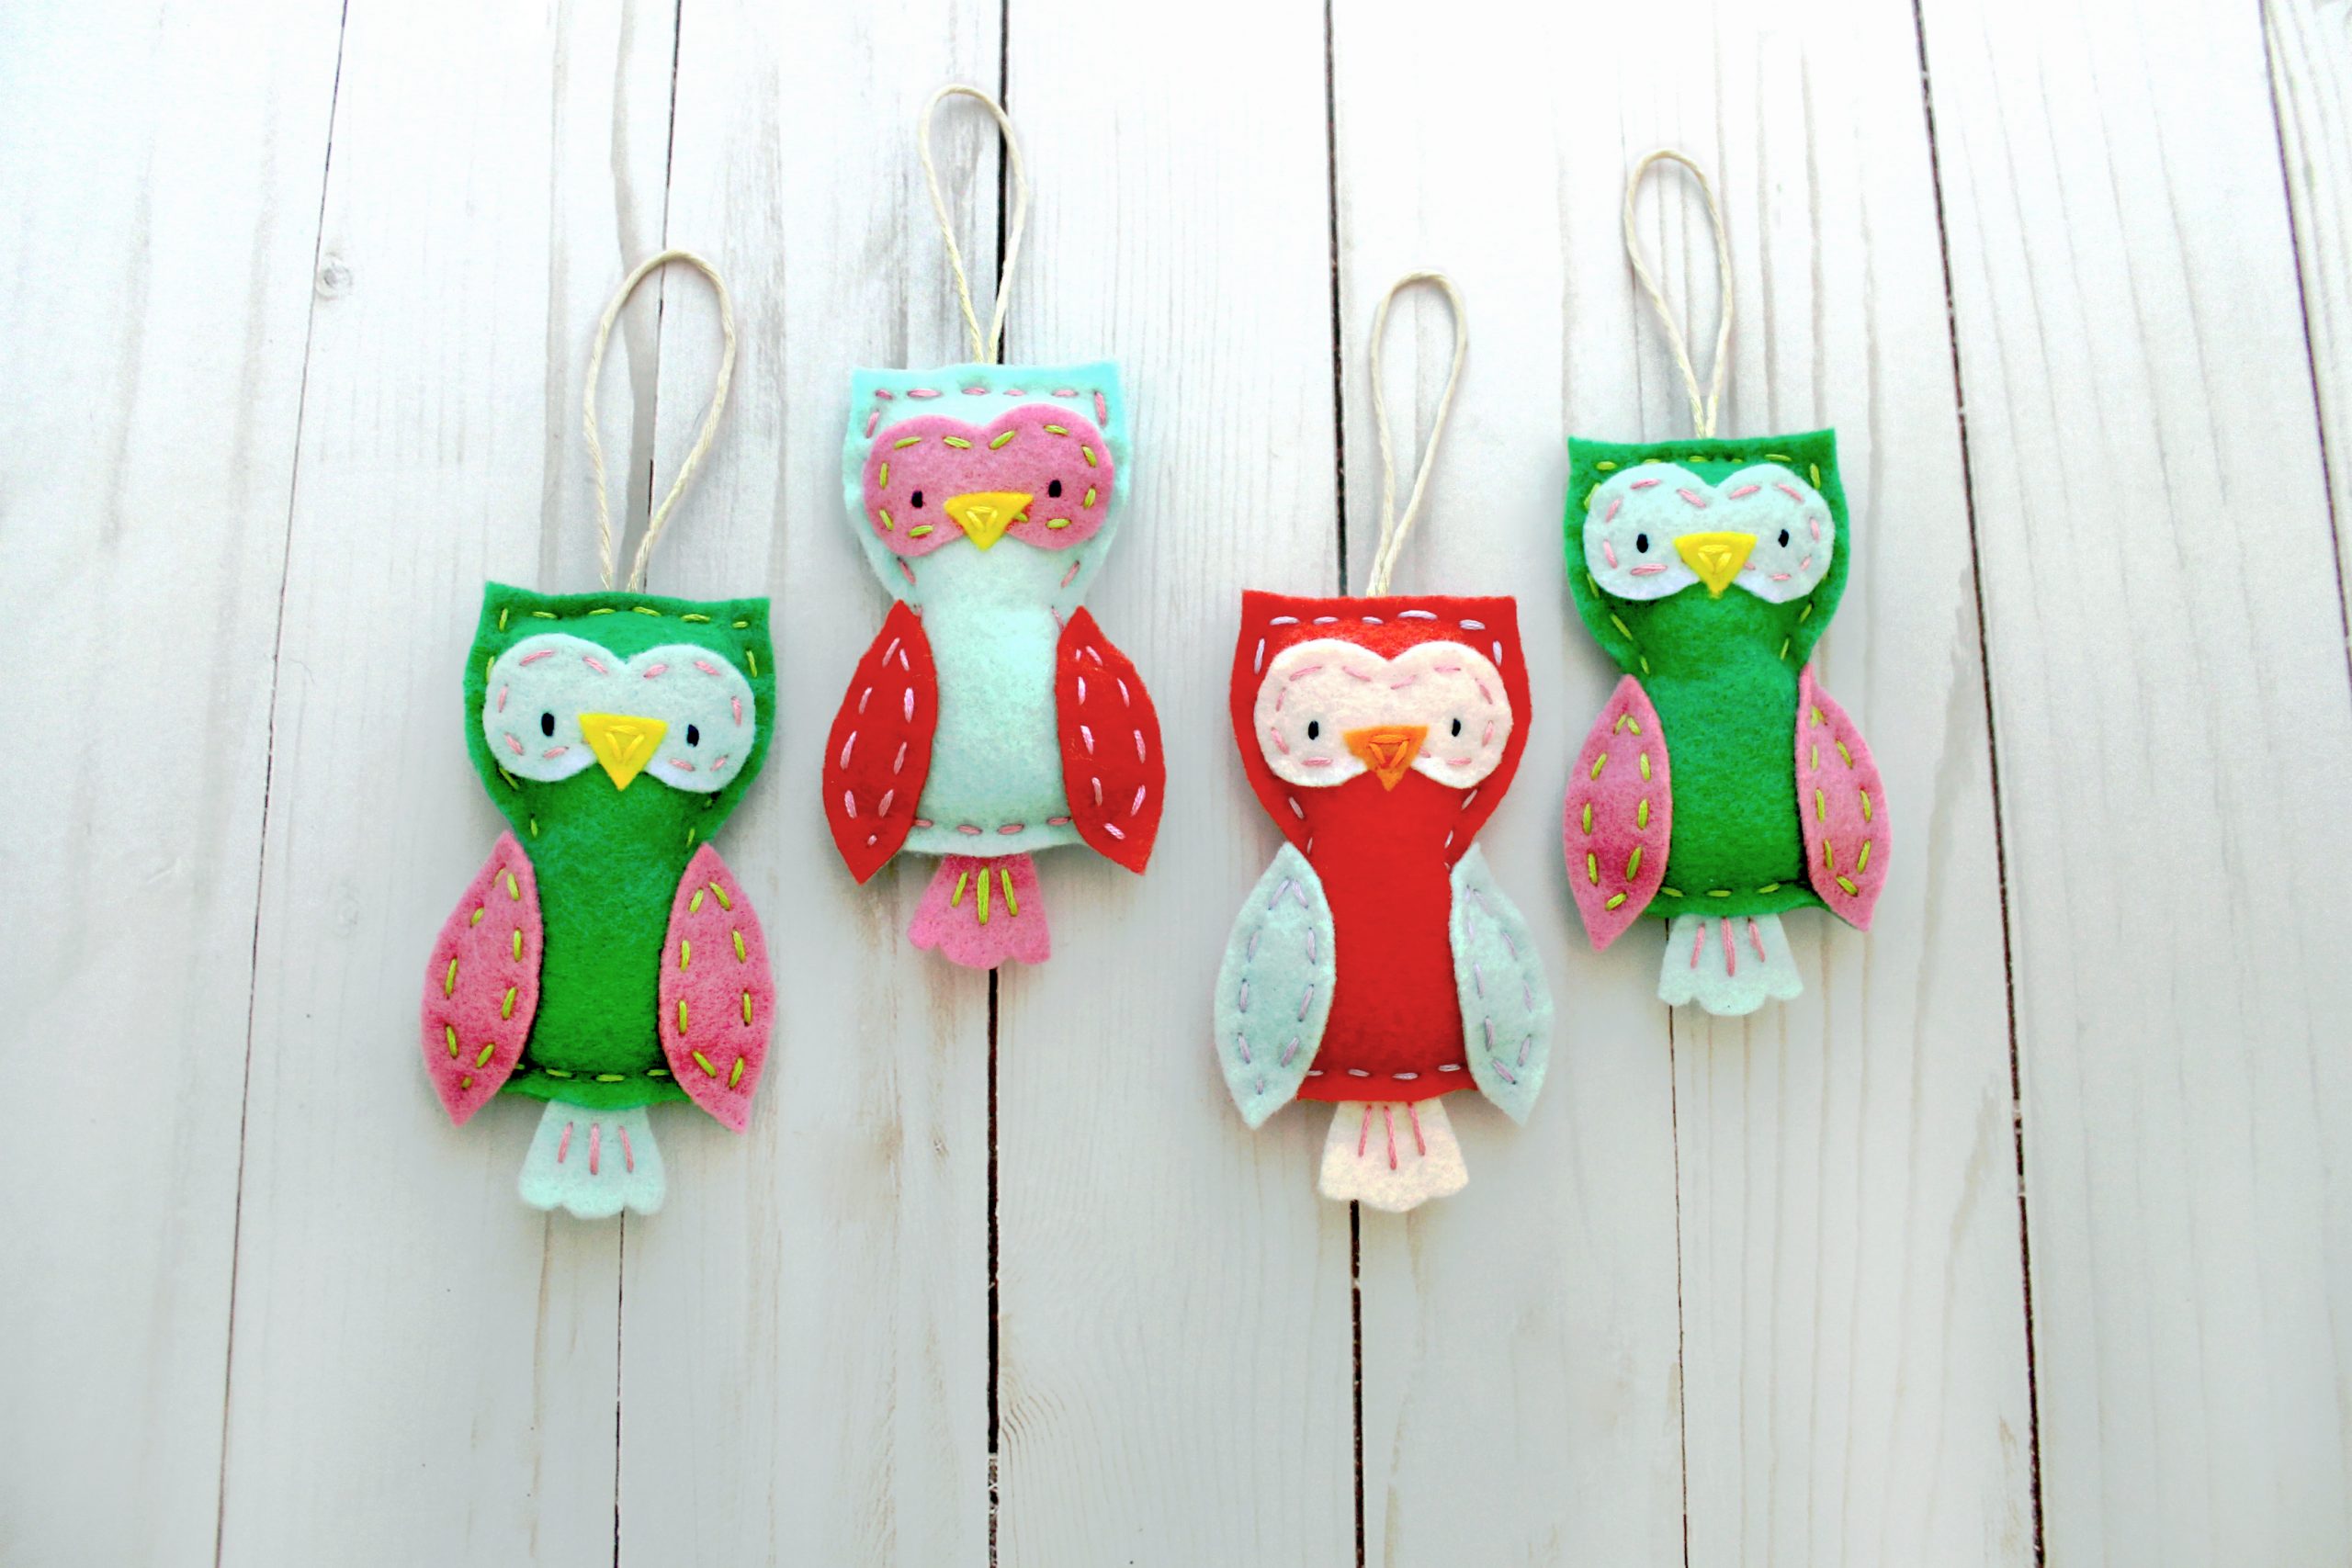
It’s official: we have never seen anything cuter than these DIY felt owls. They’re the perfect holiday project for gift giving, stocking stuffing or hanging on your tree. Go on and make a whole flock!
DIY Felt Owl
Level: Easy
What You Need
Instructions
1. Cut Out the Felt
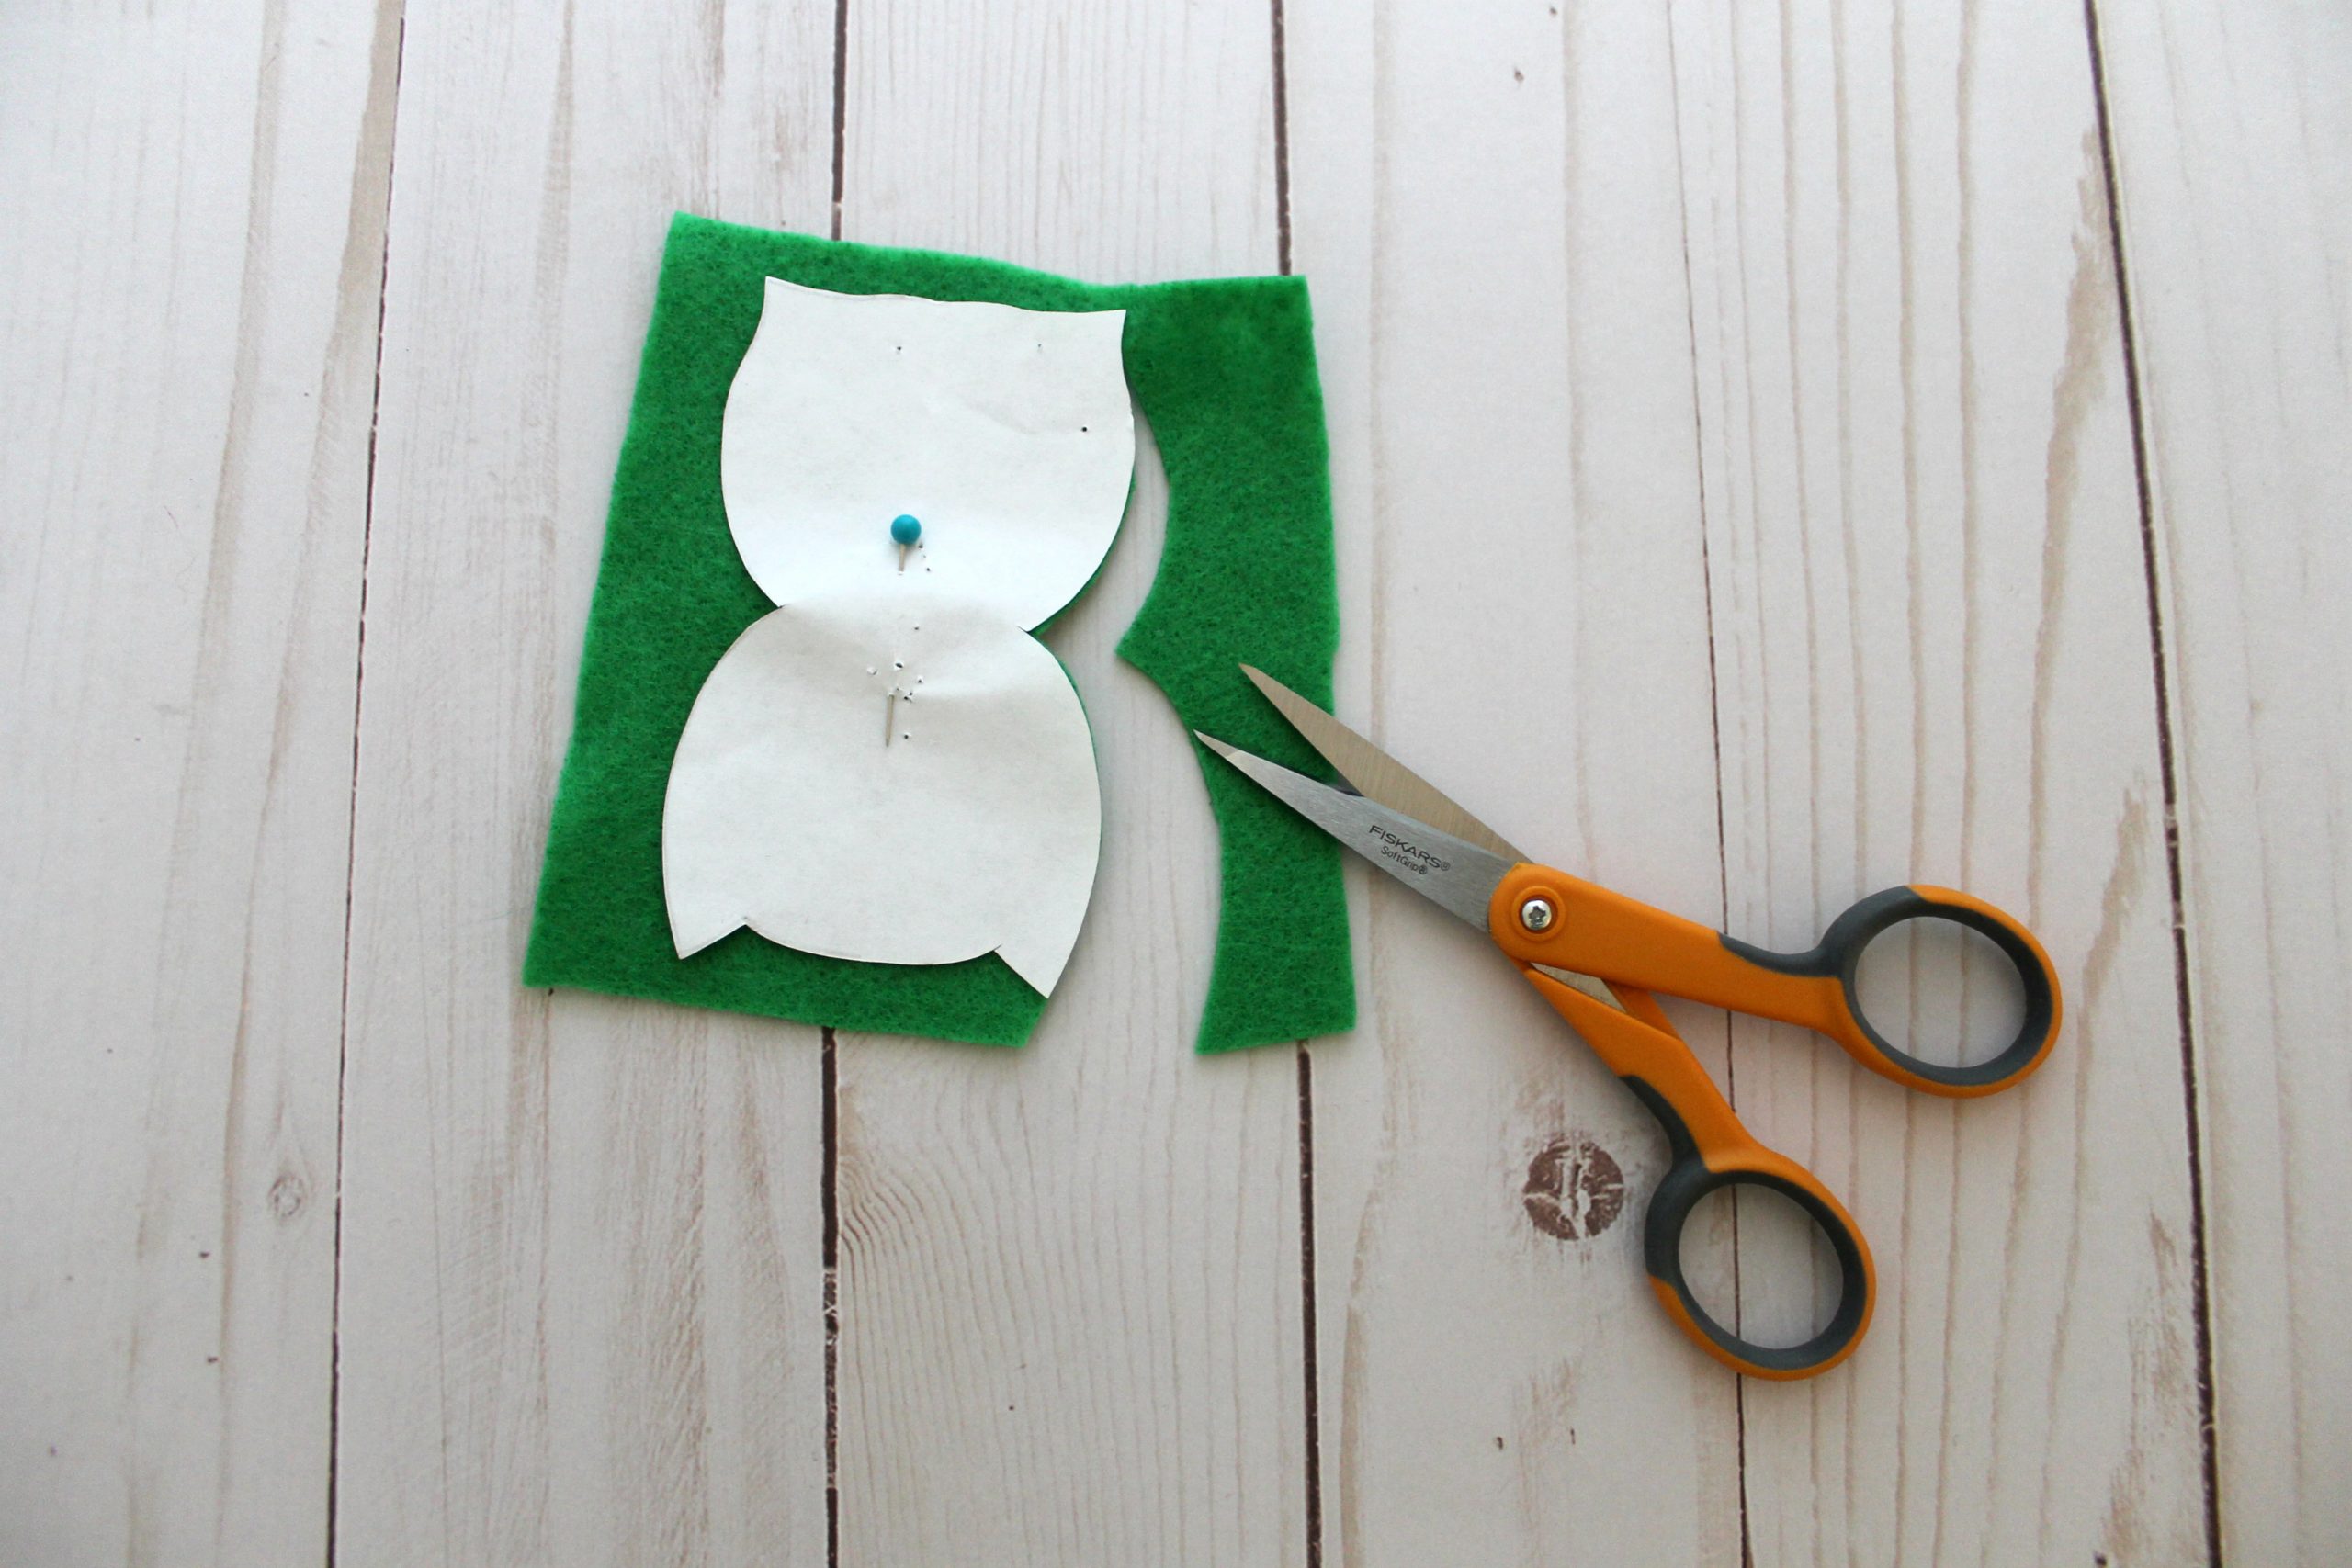
Print the pieces of your owl template onto thick paper or card stock, then cut them out.
Pin your template pieces onto your felt and cut two body pieces from your main color and two wing pieces from a contrasting color. Pick a third color and cut out a piece for the owl’s eyes and a piece for its tail feathers. Finally, cut a little triangle out of yellow or orange felt for the beak.
2. Give Him Wings
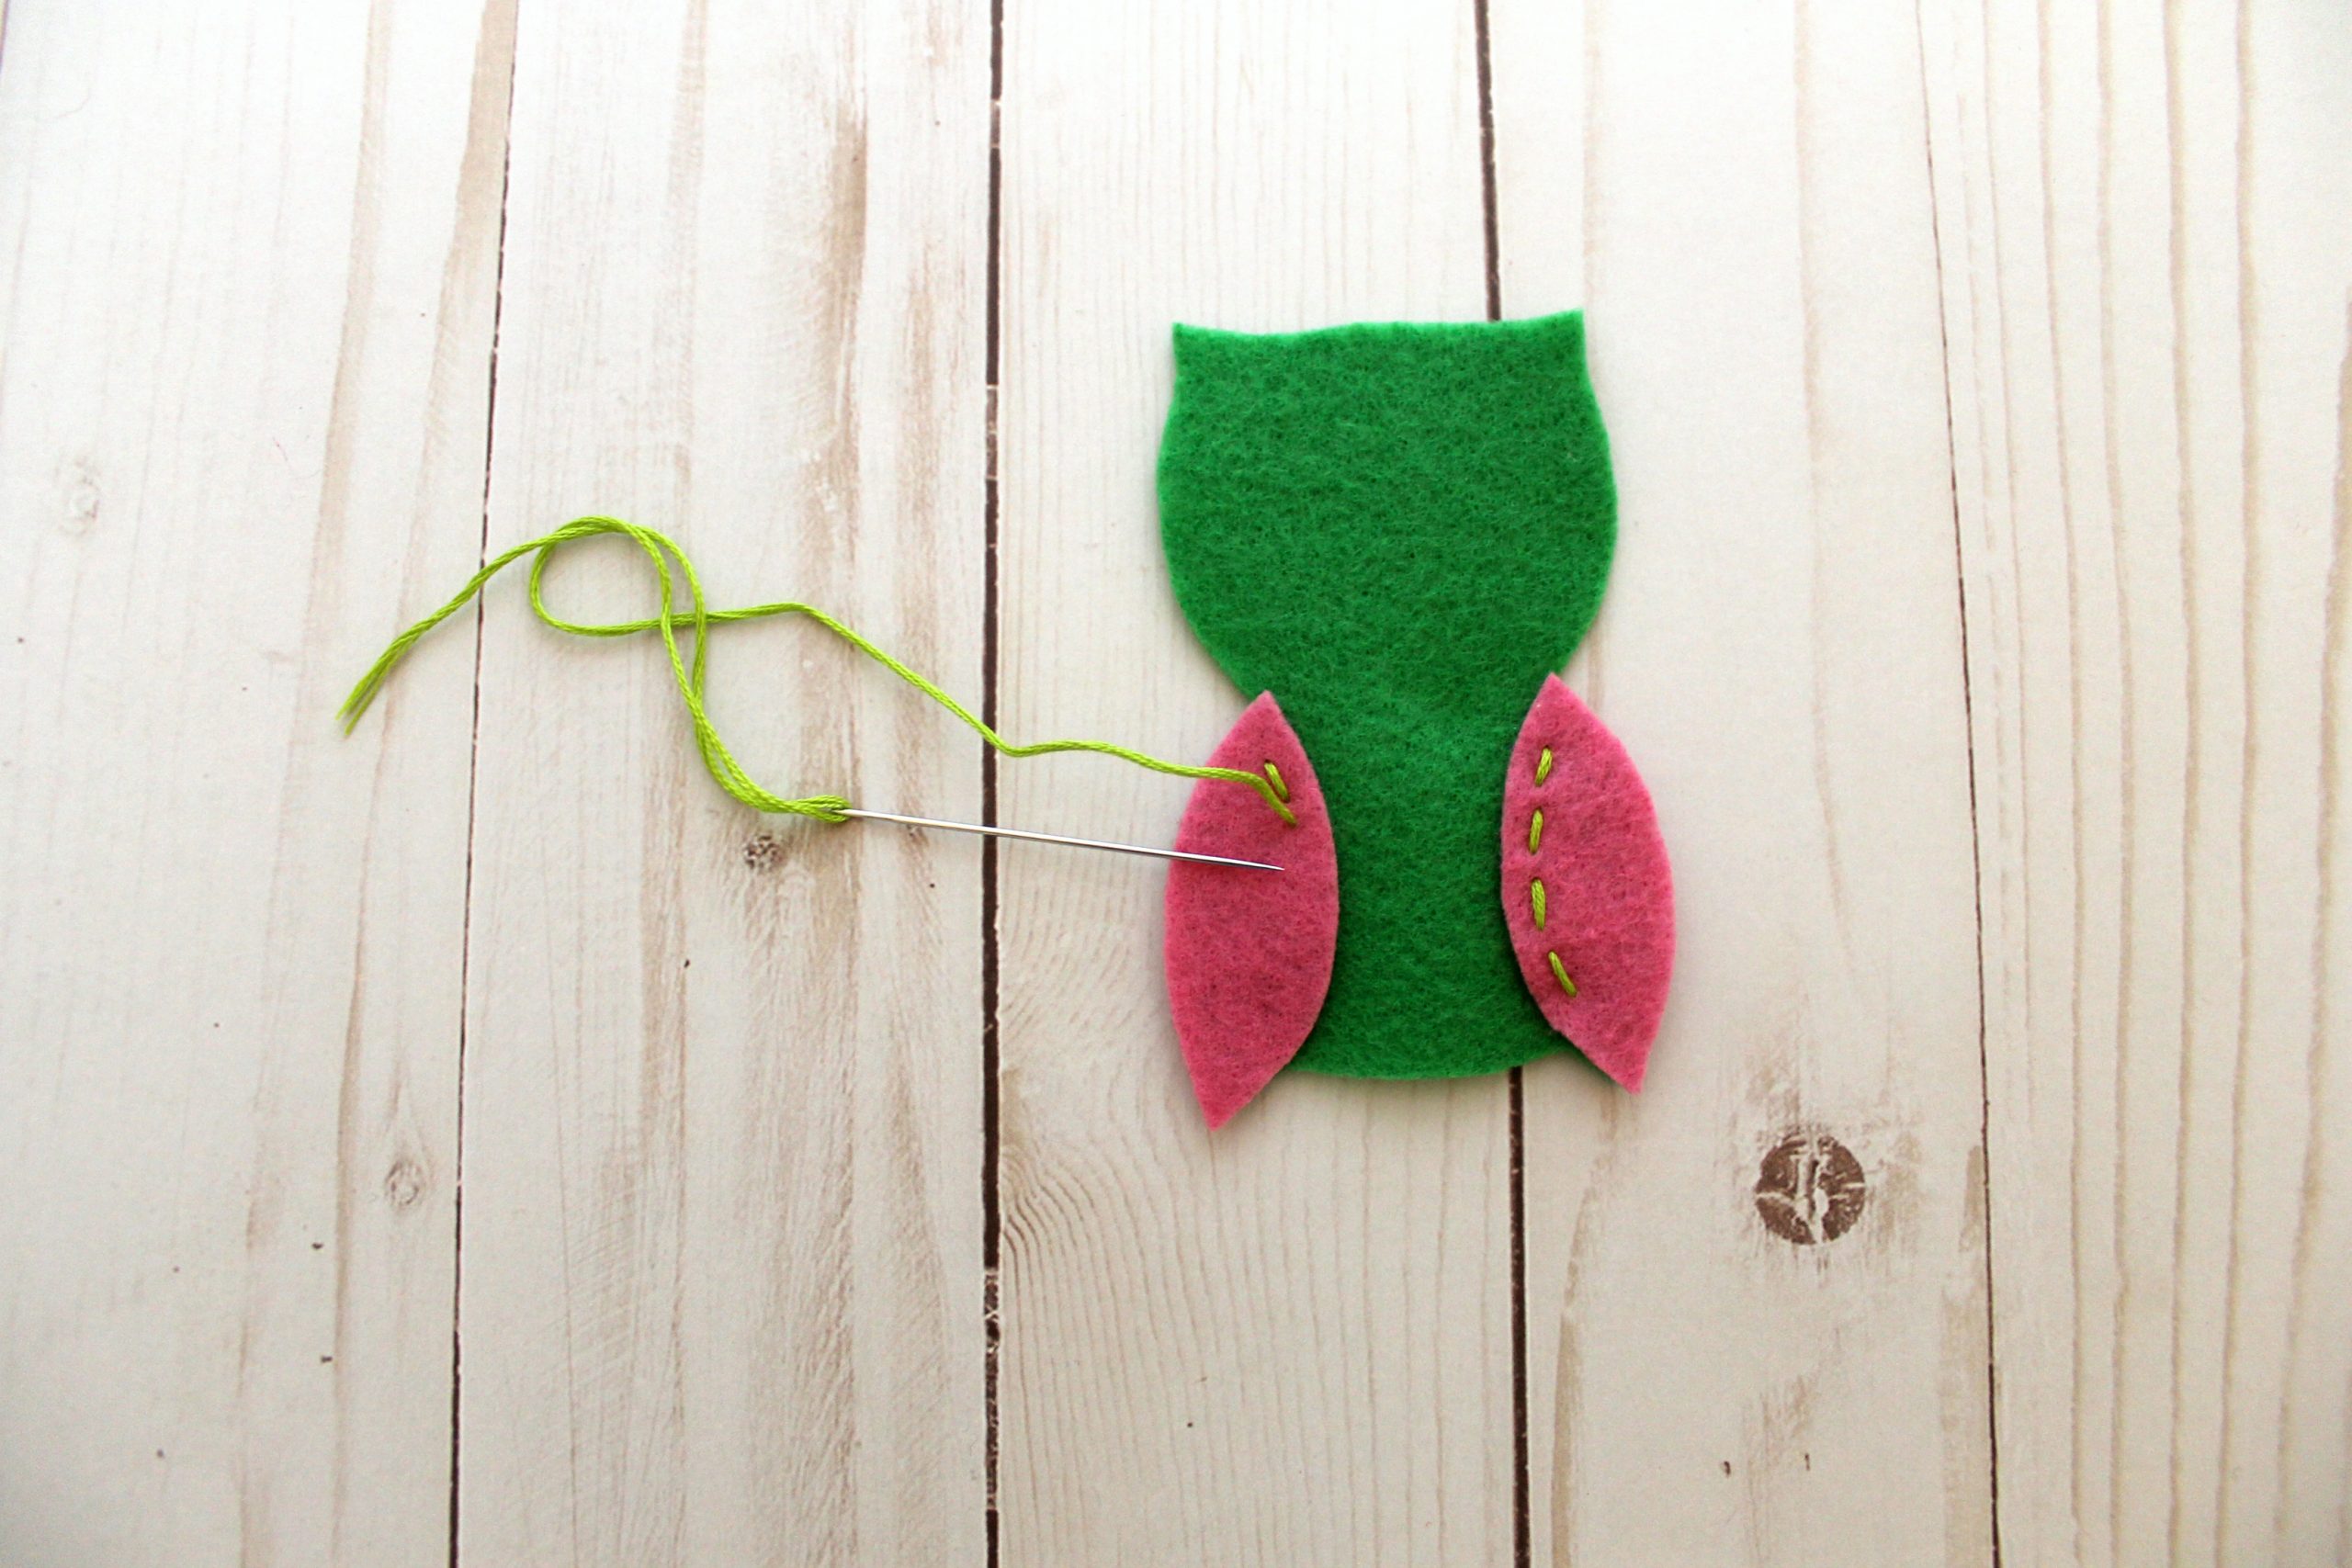
Select which color of embroidery floss you want to showcase the most, and line up the wings so they rest along the outside edge of your owl’s felt body. Make sure you’re only handling one of the two body cut-outs — we won’t use his back side until later.
Thread your needle and stitch the wings using a running stitch. At this point, only sew the inside edge of your wings to attach them to the front piece of your owl’s body. (We’ll sew the outside edge when we stitch the front and back of the body together.) When you’re finished fastening the wings, tie a knot and snip off any excess floss.
3. Make a Face
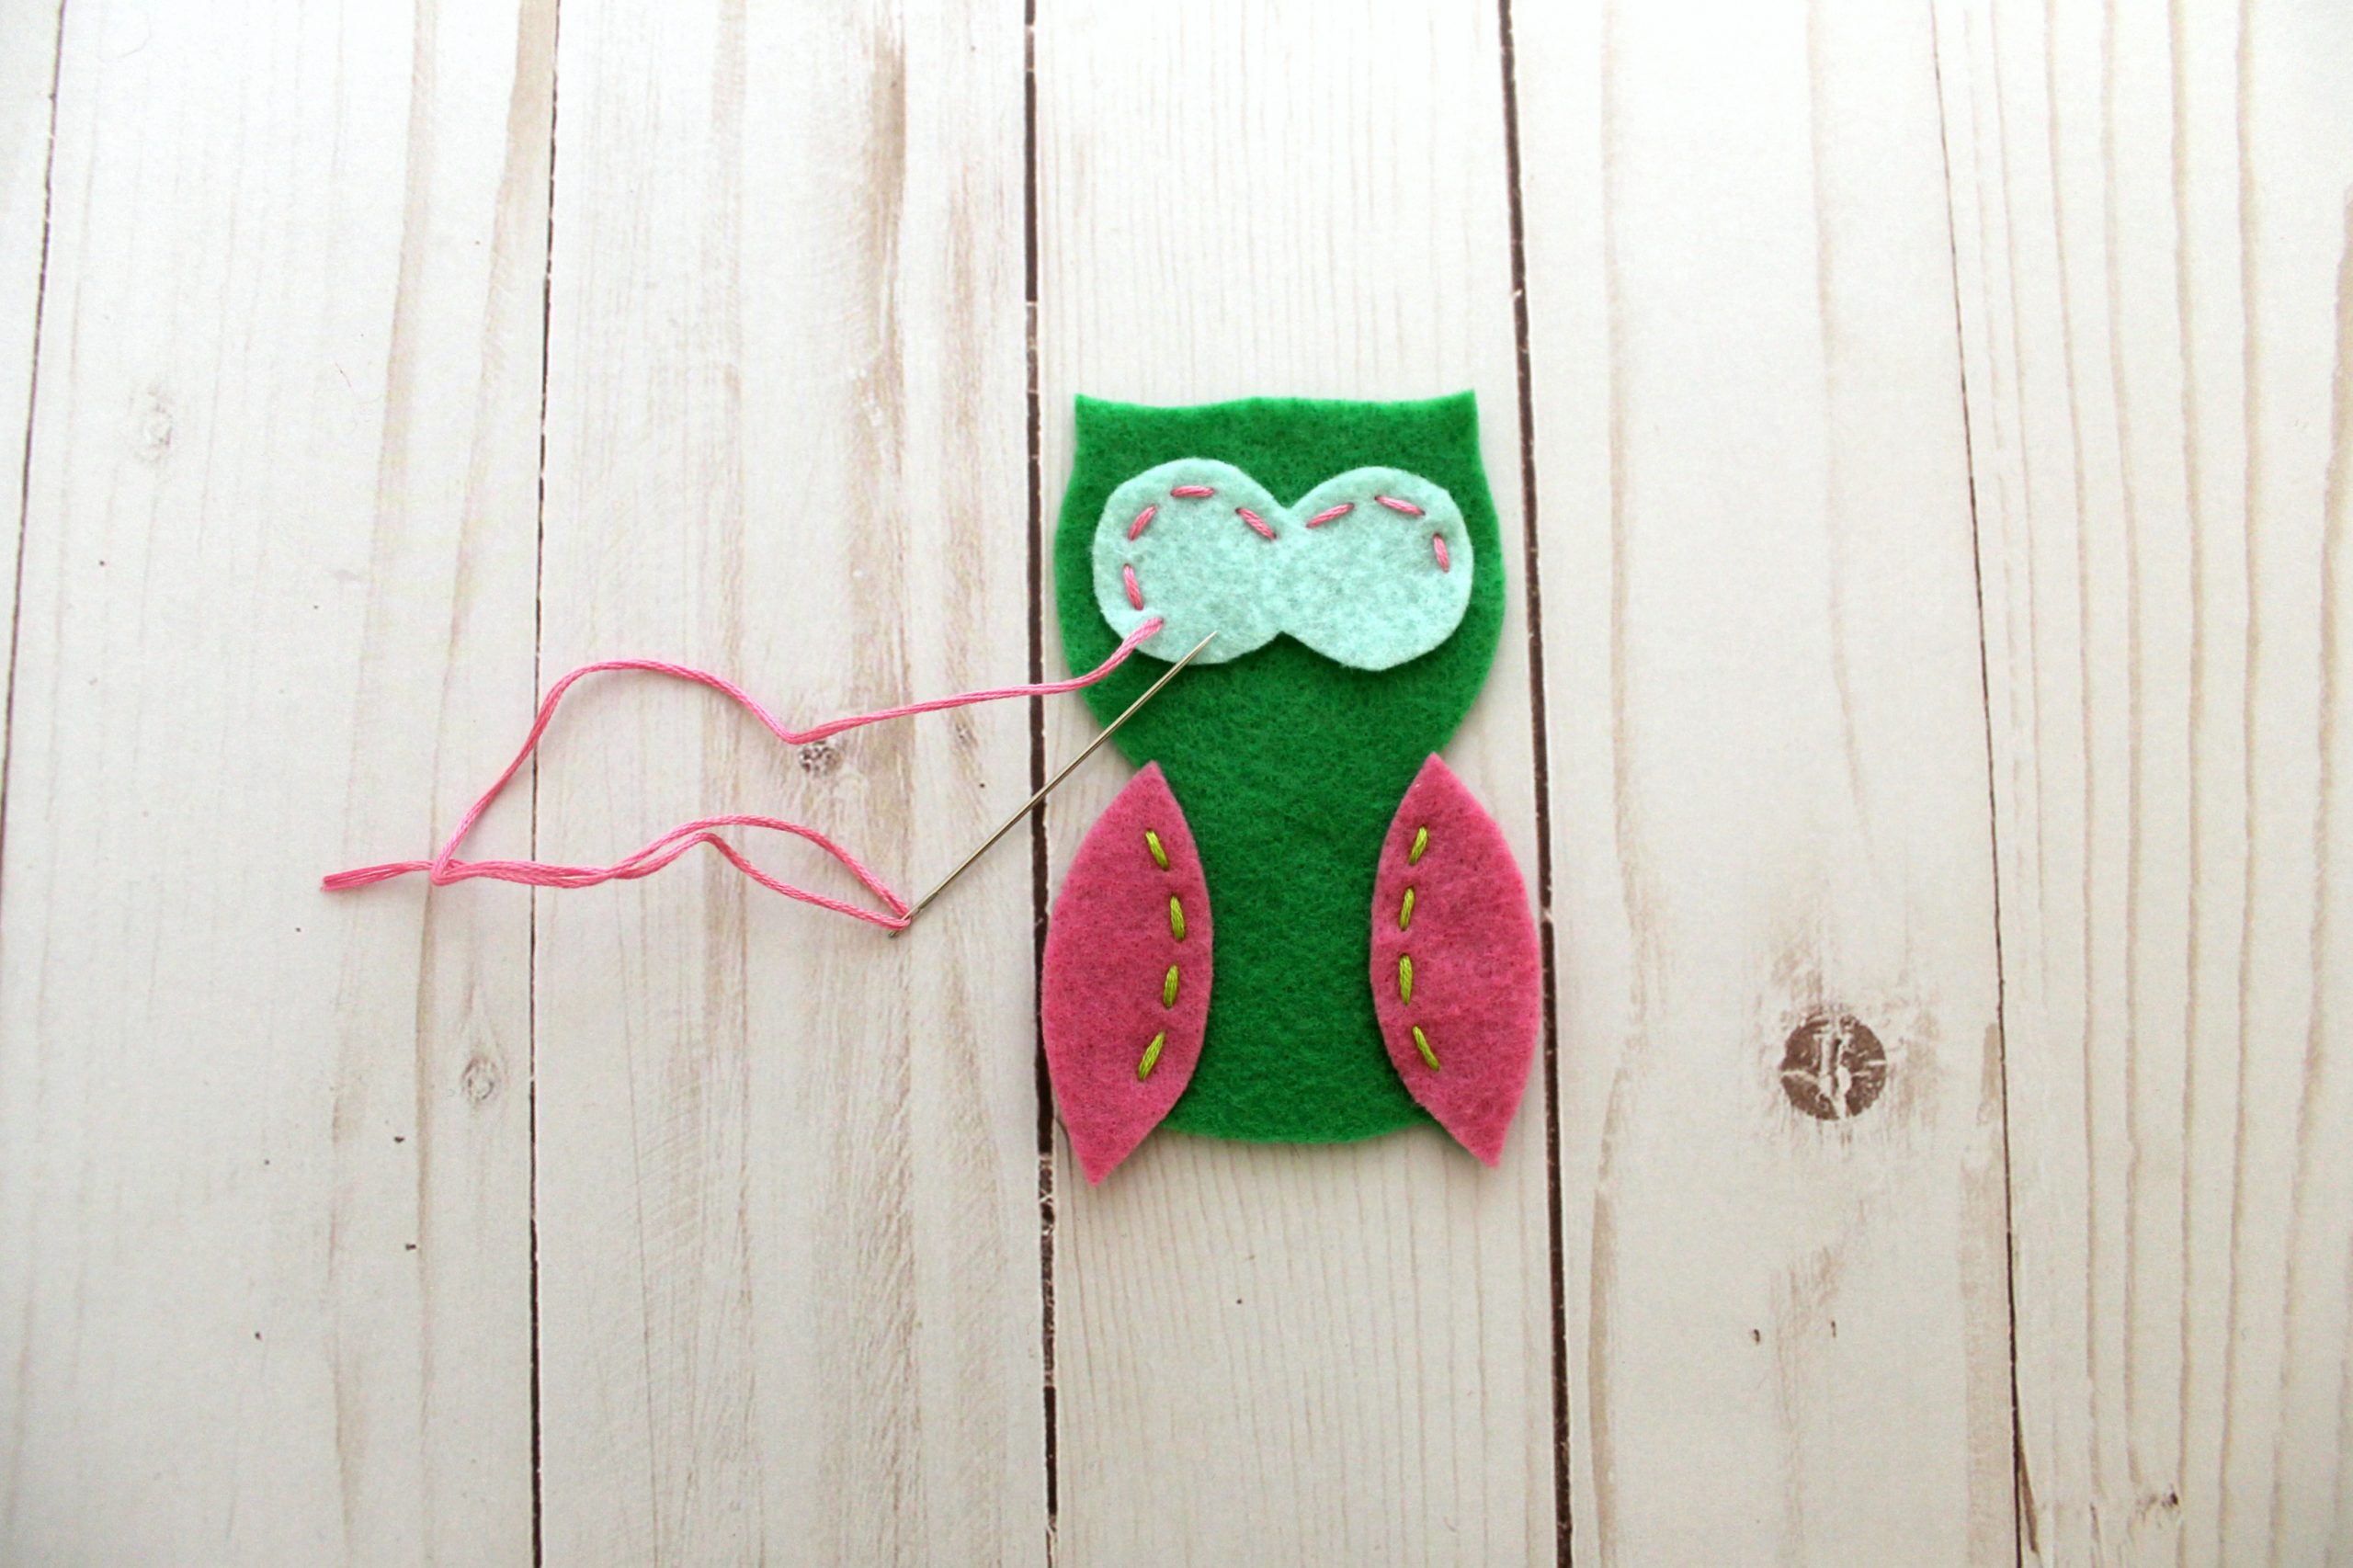
Lay the felt eyes so they are centered on the owl’s face. Use a different color of embroidery floss to stitch around the eyes’ perimeter, securing them in place. When you’re finished, tie it off like you did for the wings.
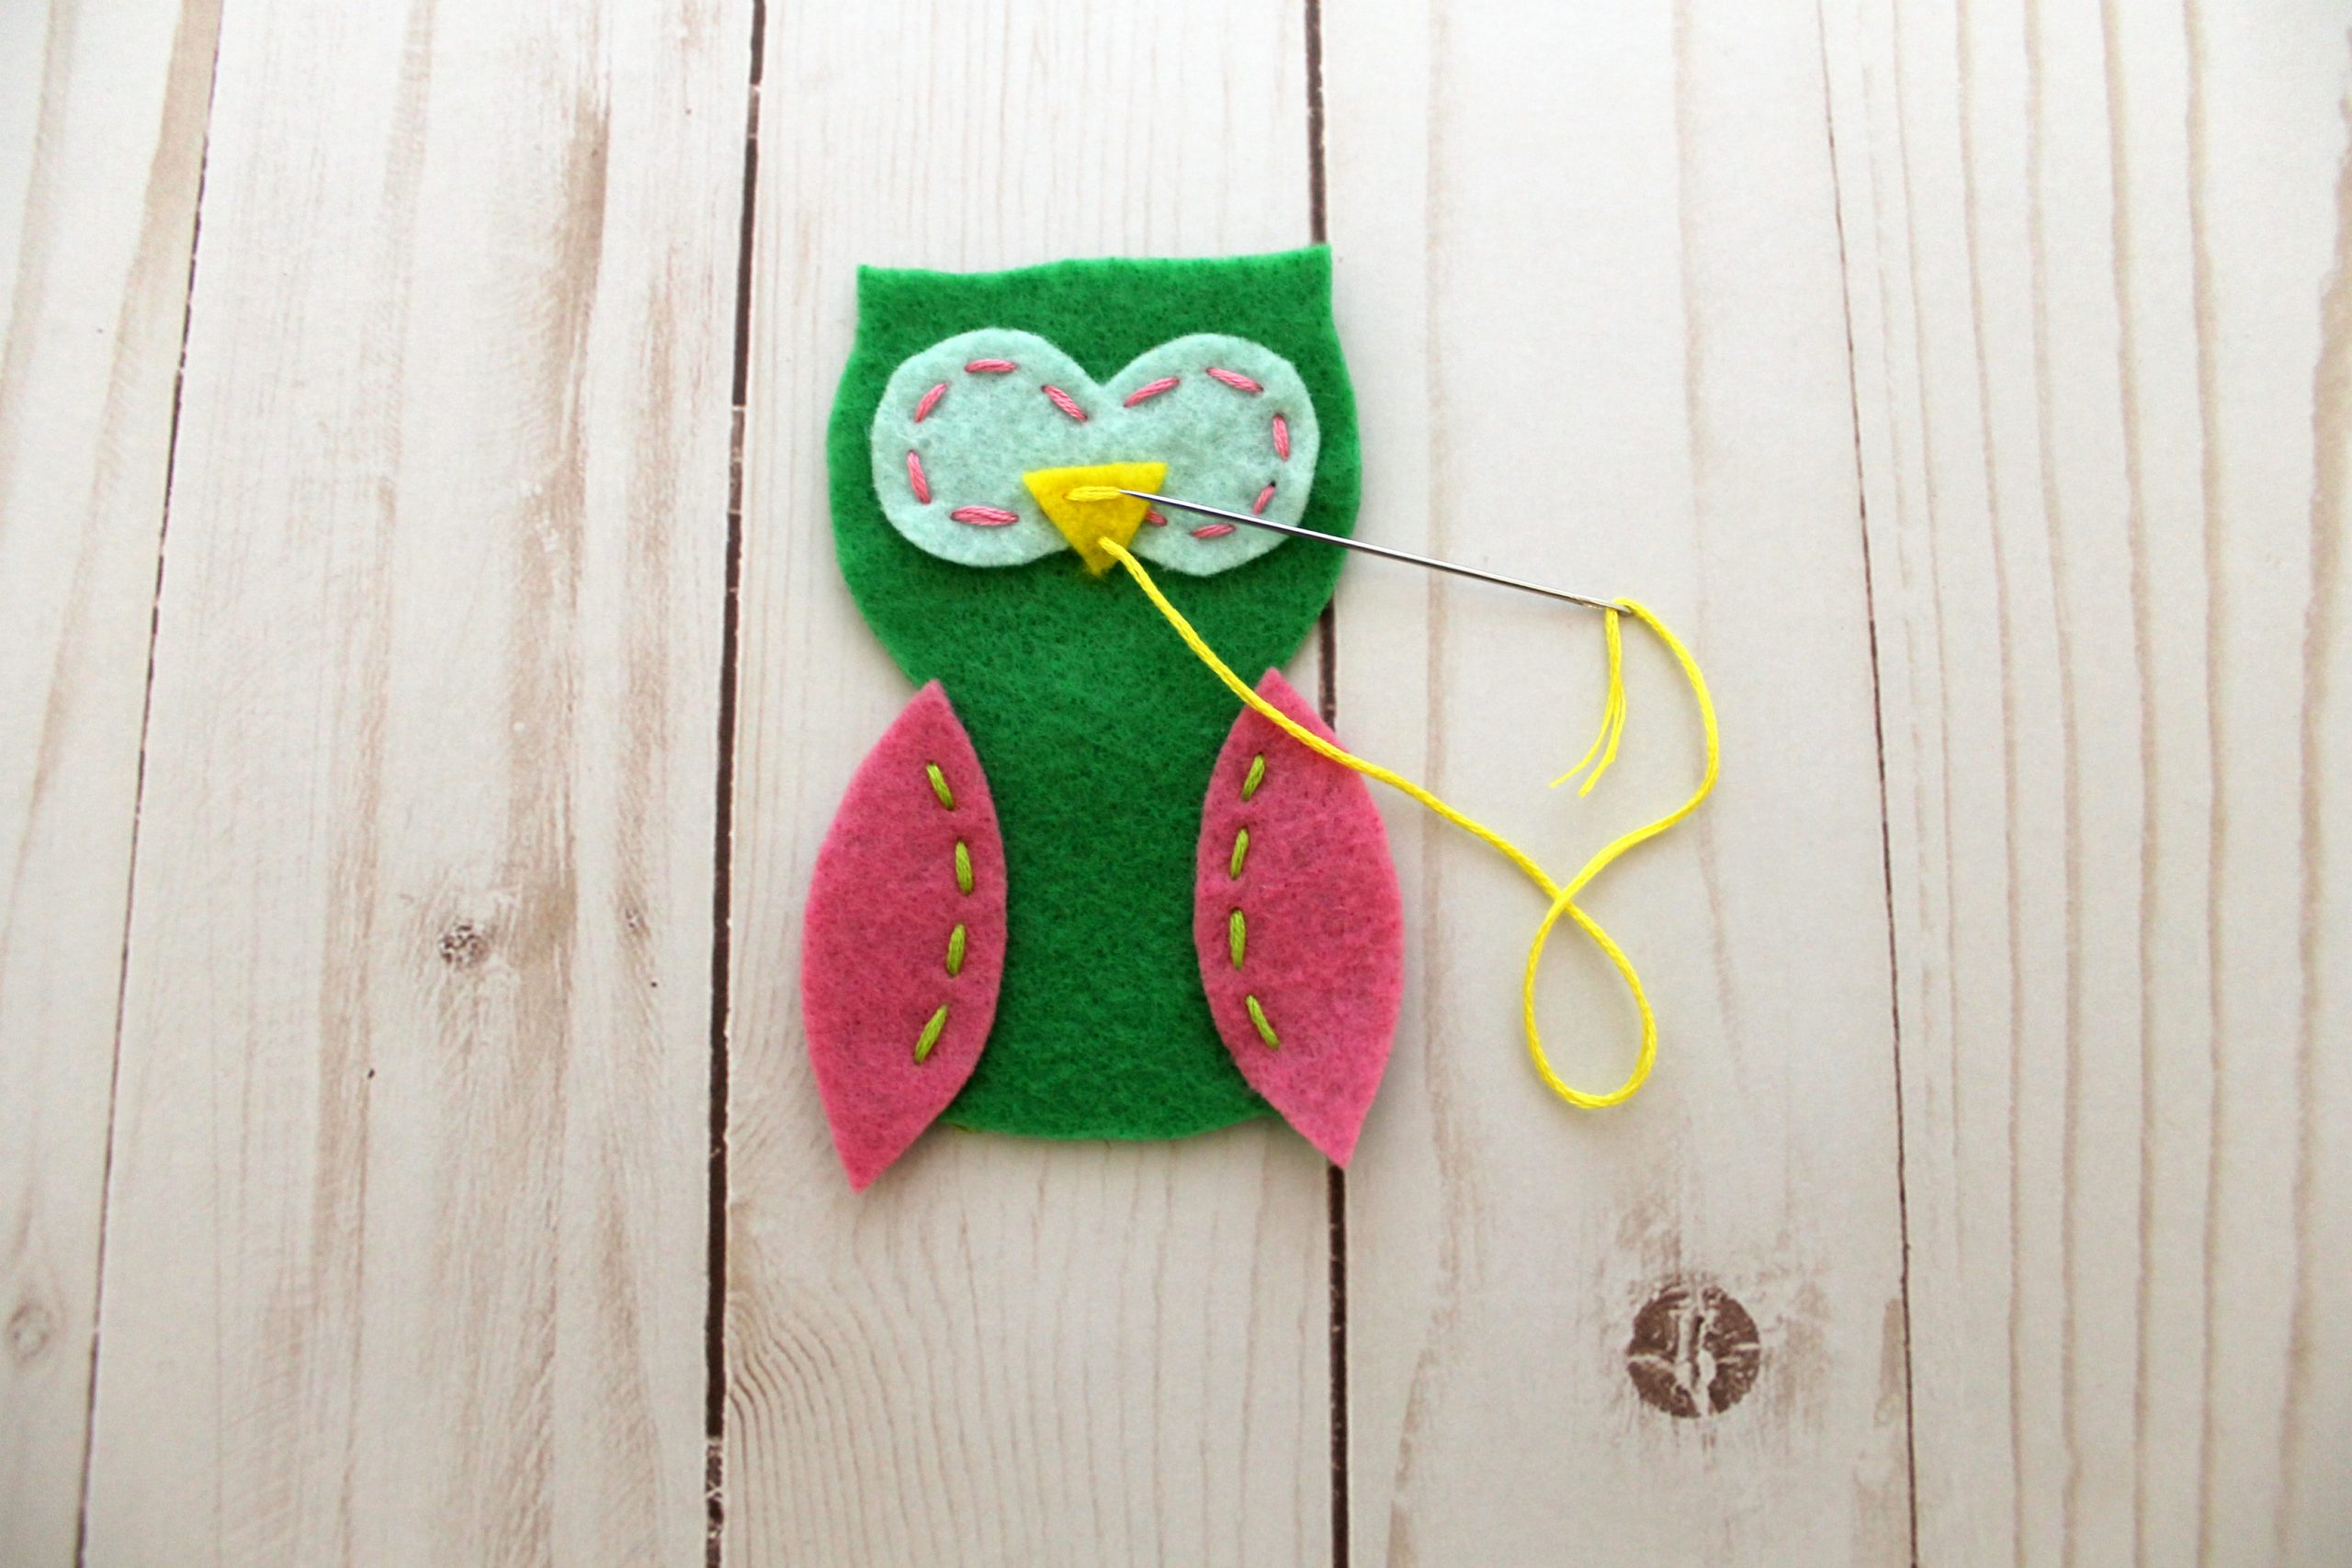
Place your yellow triangle in the center of your eye piece and sew it into place with matching yellow or orange floss. This only takes three small straight stitches.
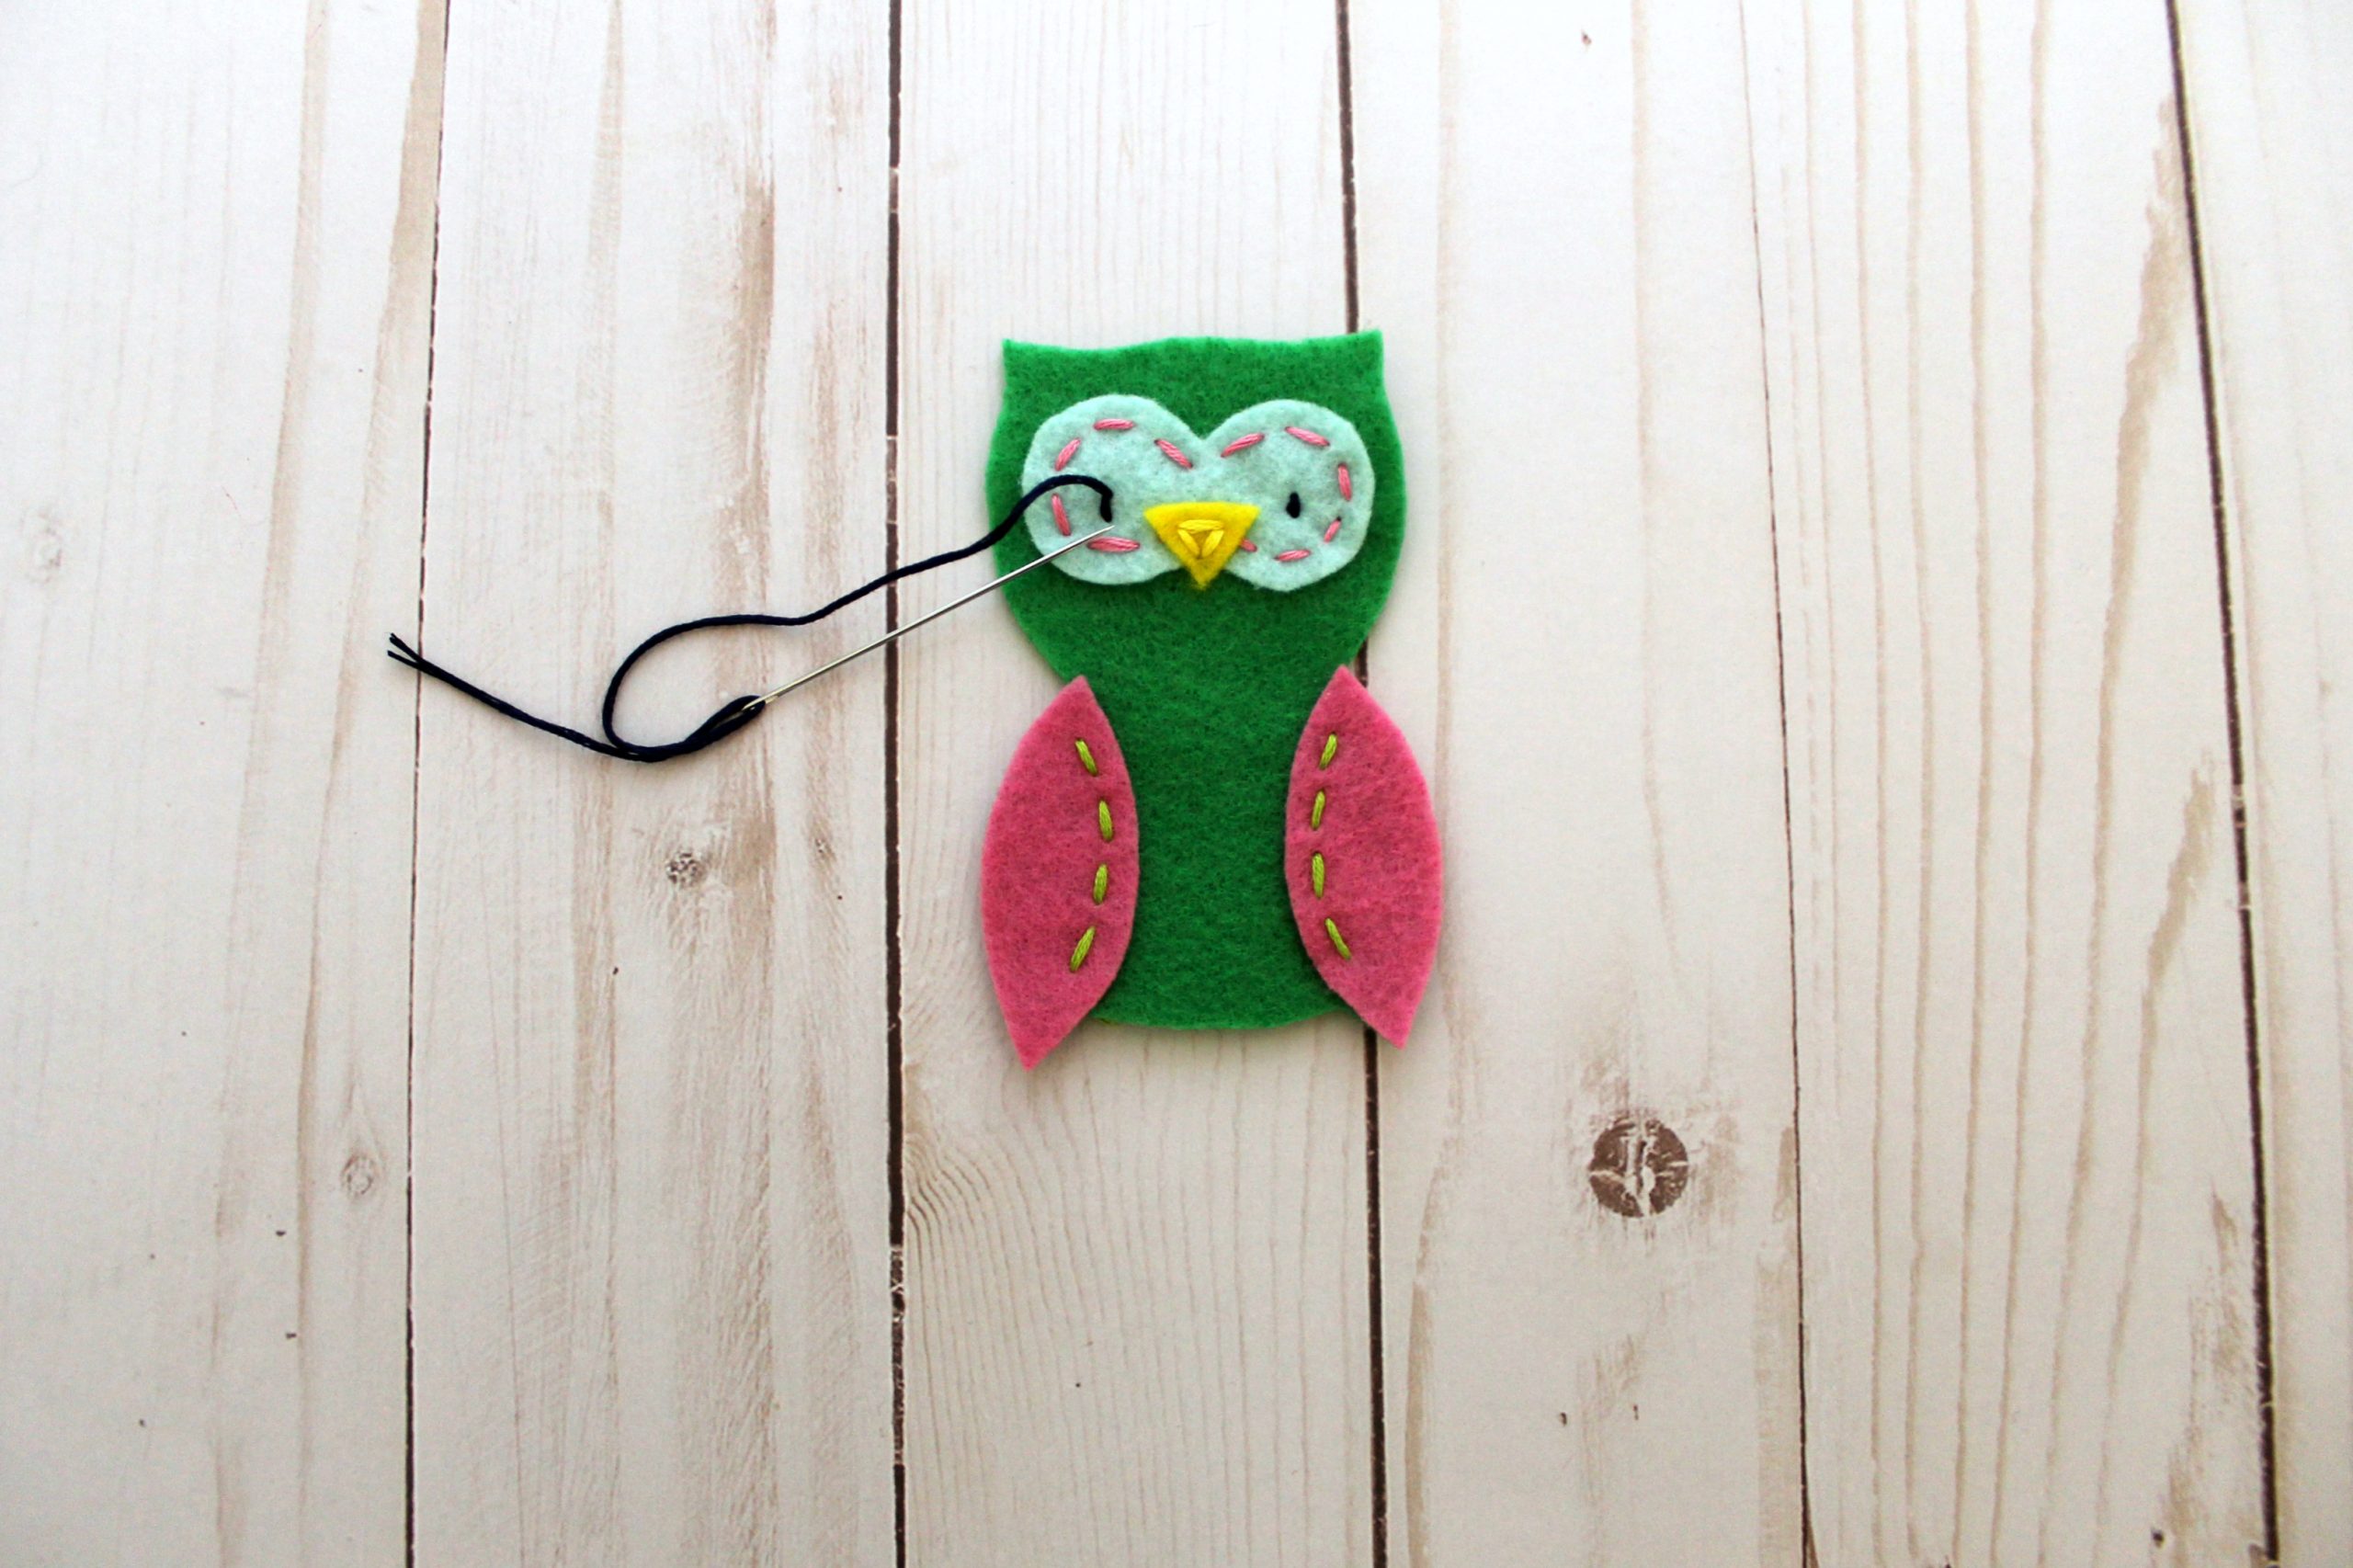
Once the face is in place, make two tiny, parallel stitches on either side of your beak to create the owl’s pupils.
4. Stitch the Tail Feathers
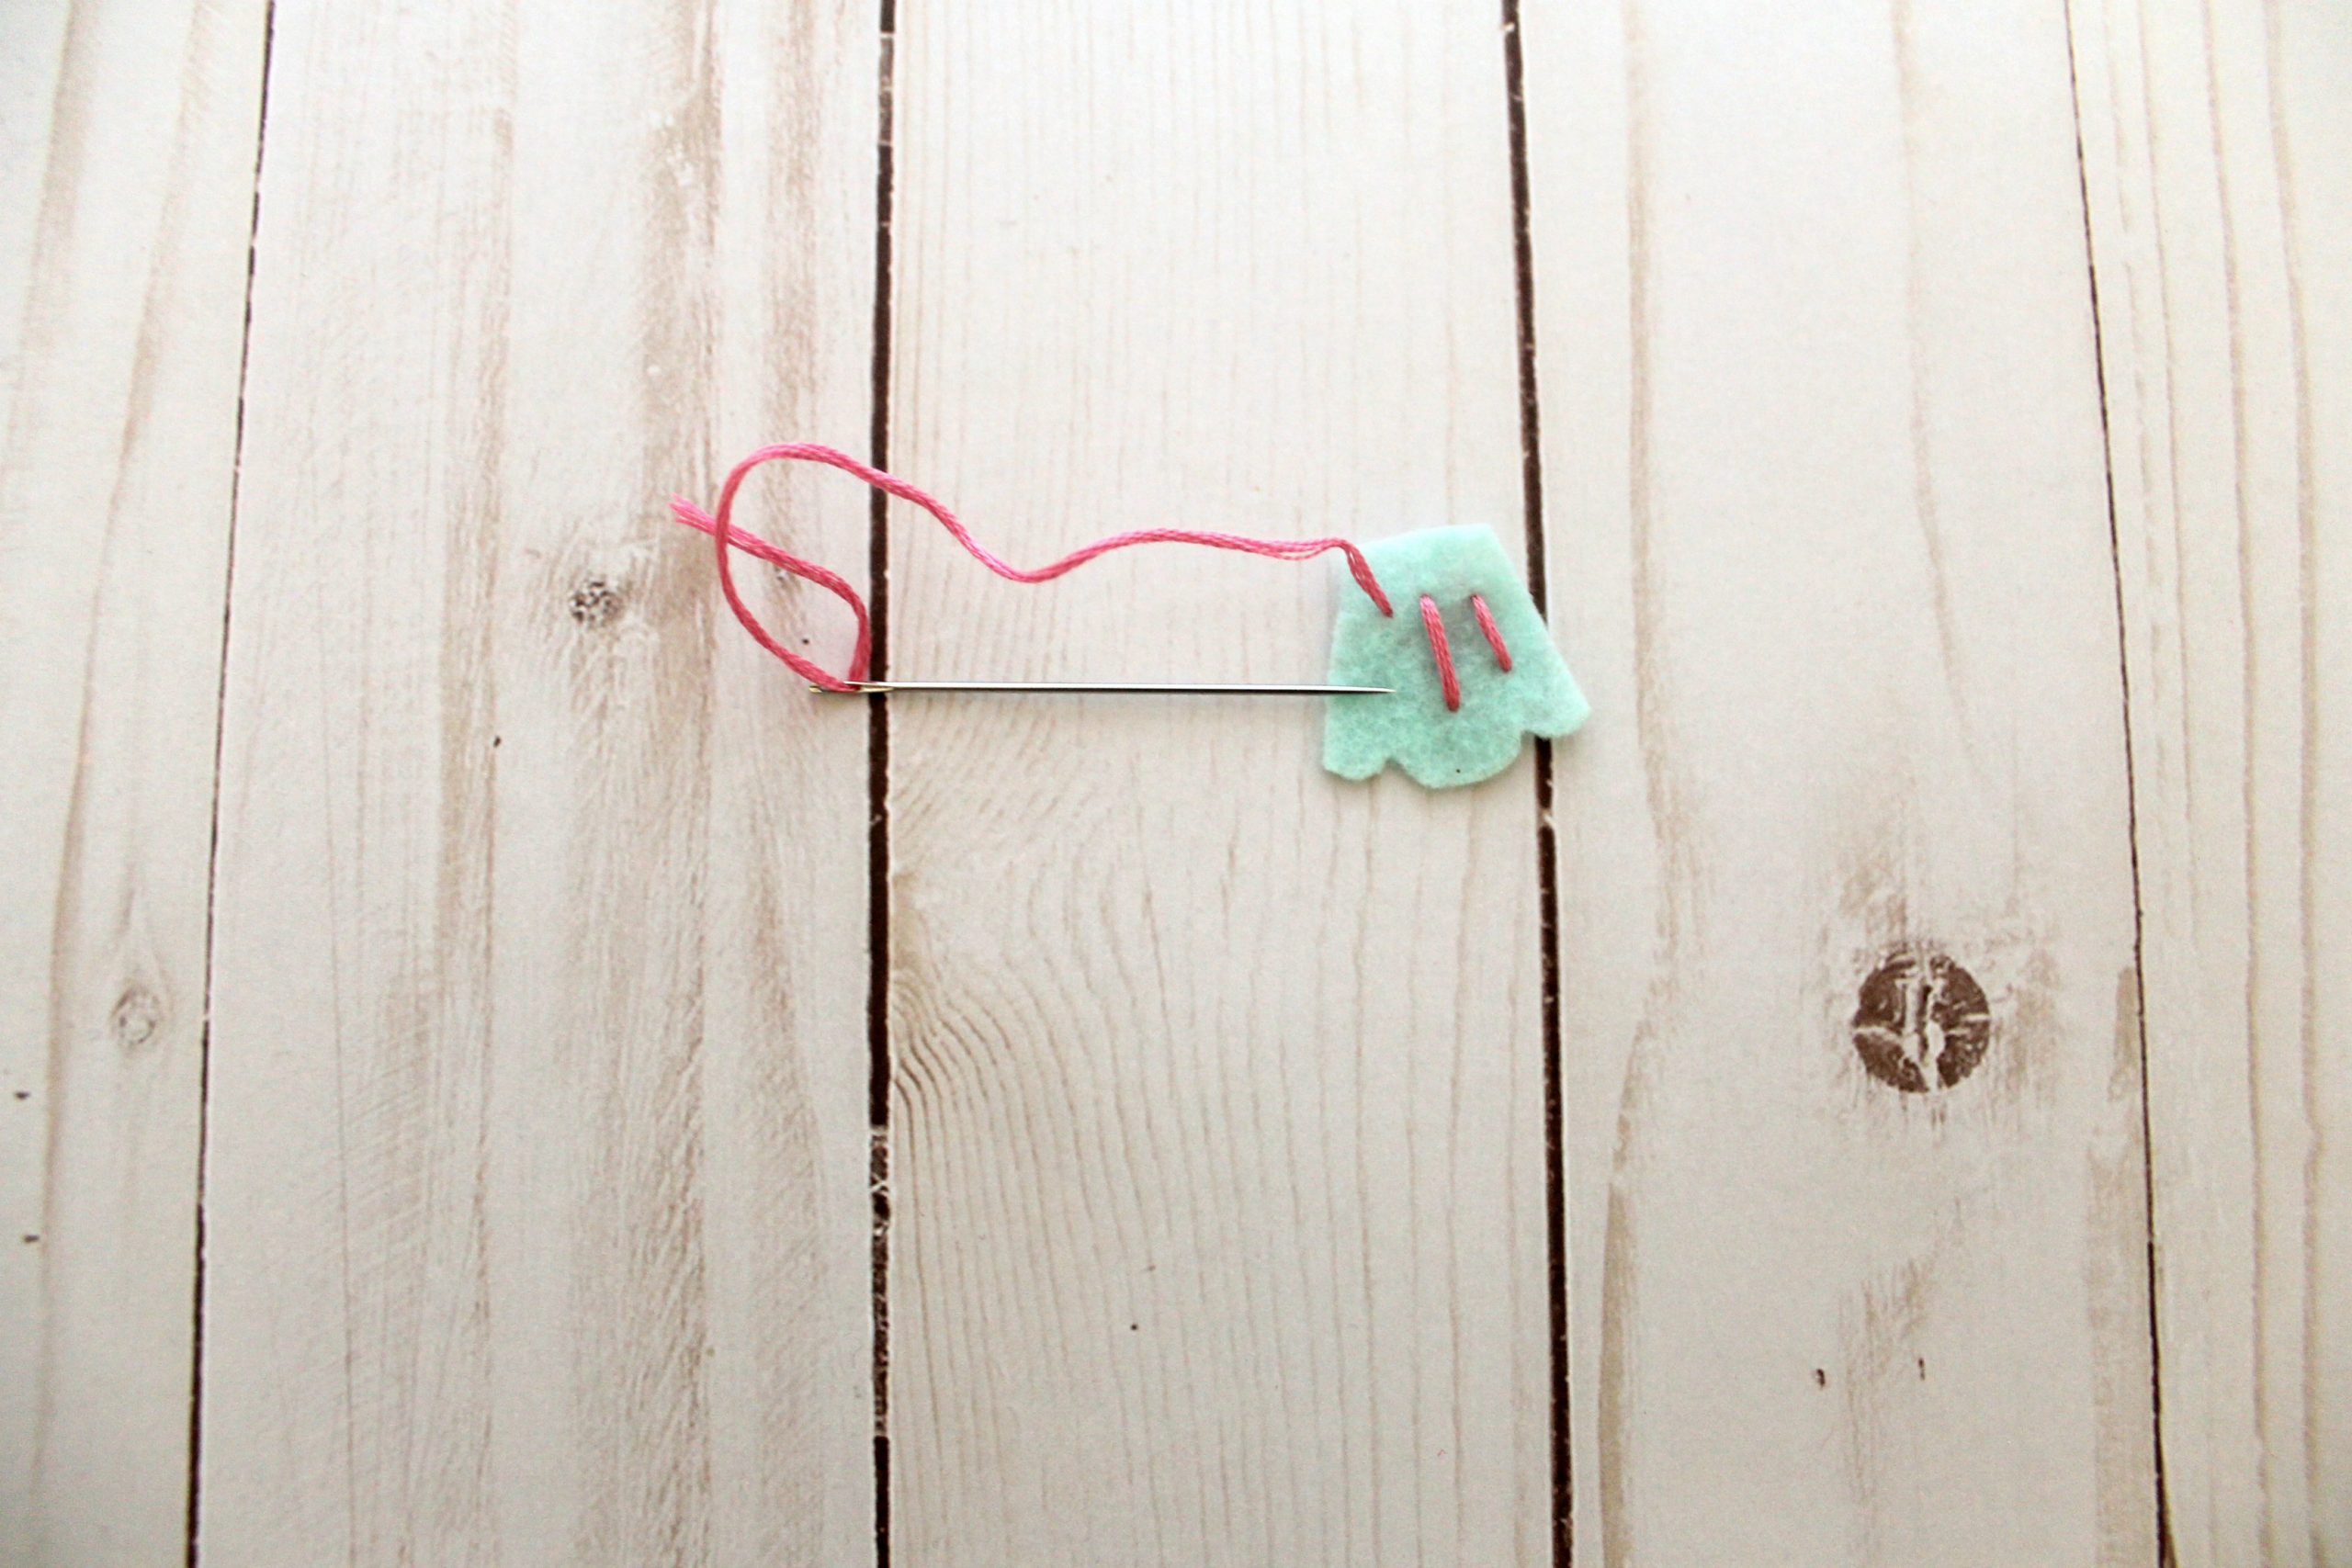
Using the same embroidery floss you used for the eye piece, stitch three vertical lines onto his tail feathers. Place this piece aside for now.
Cut off a piece of ribbon or cord. Make a good-sized loop and tie the ends together. Set it aside with your tail feather piece.
5. Put It All Together
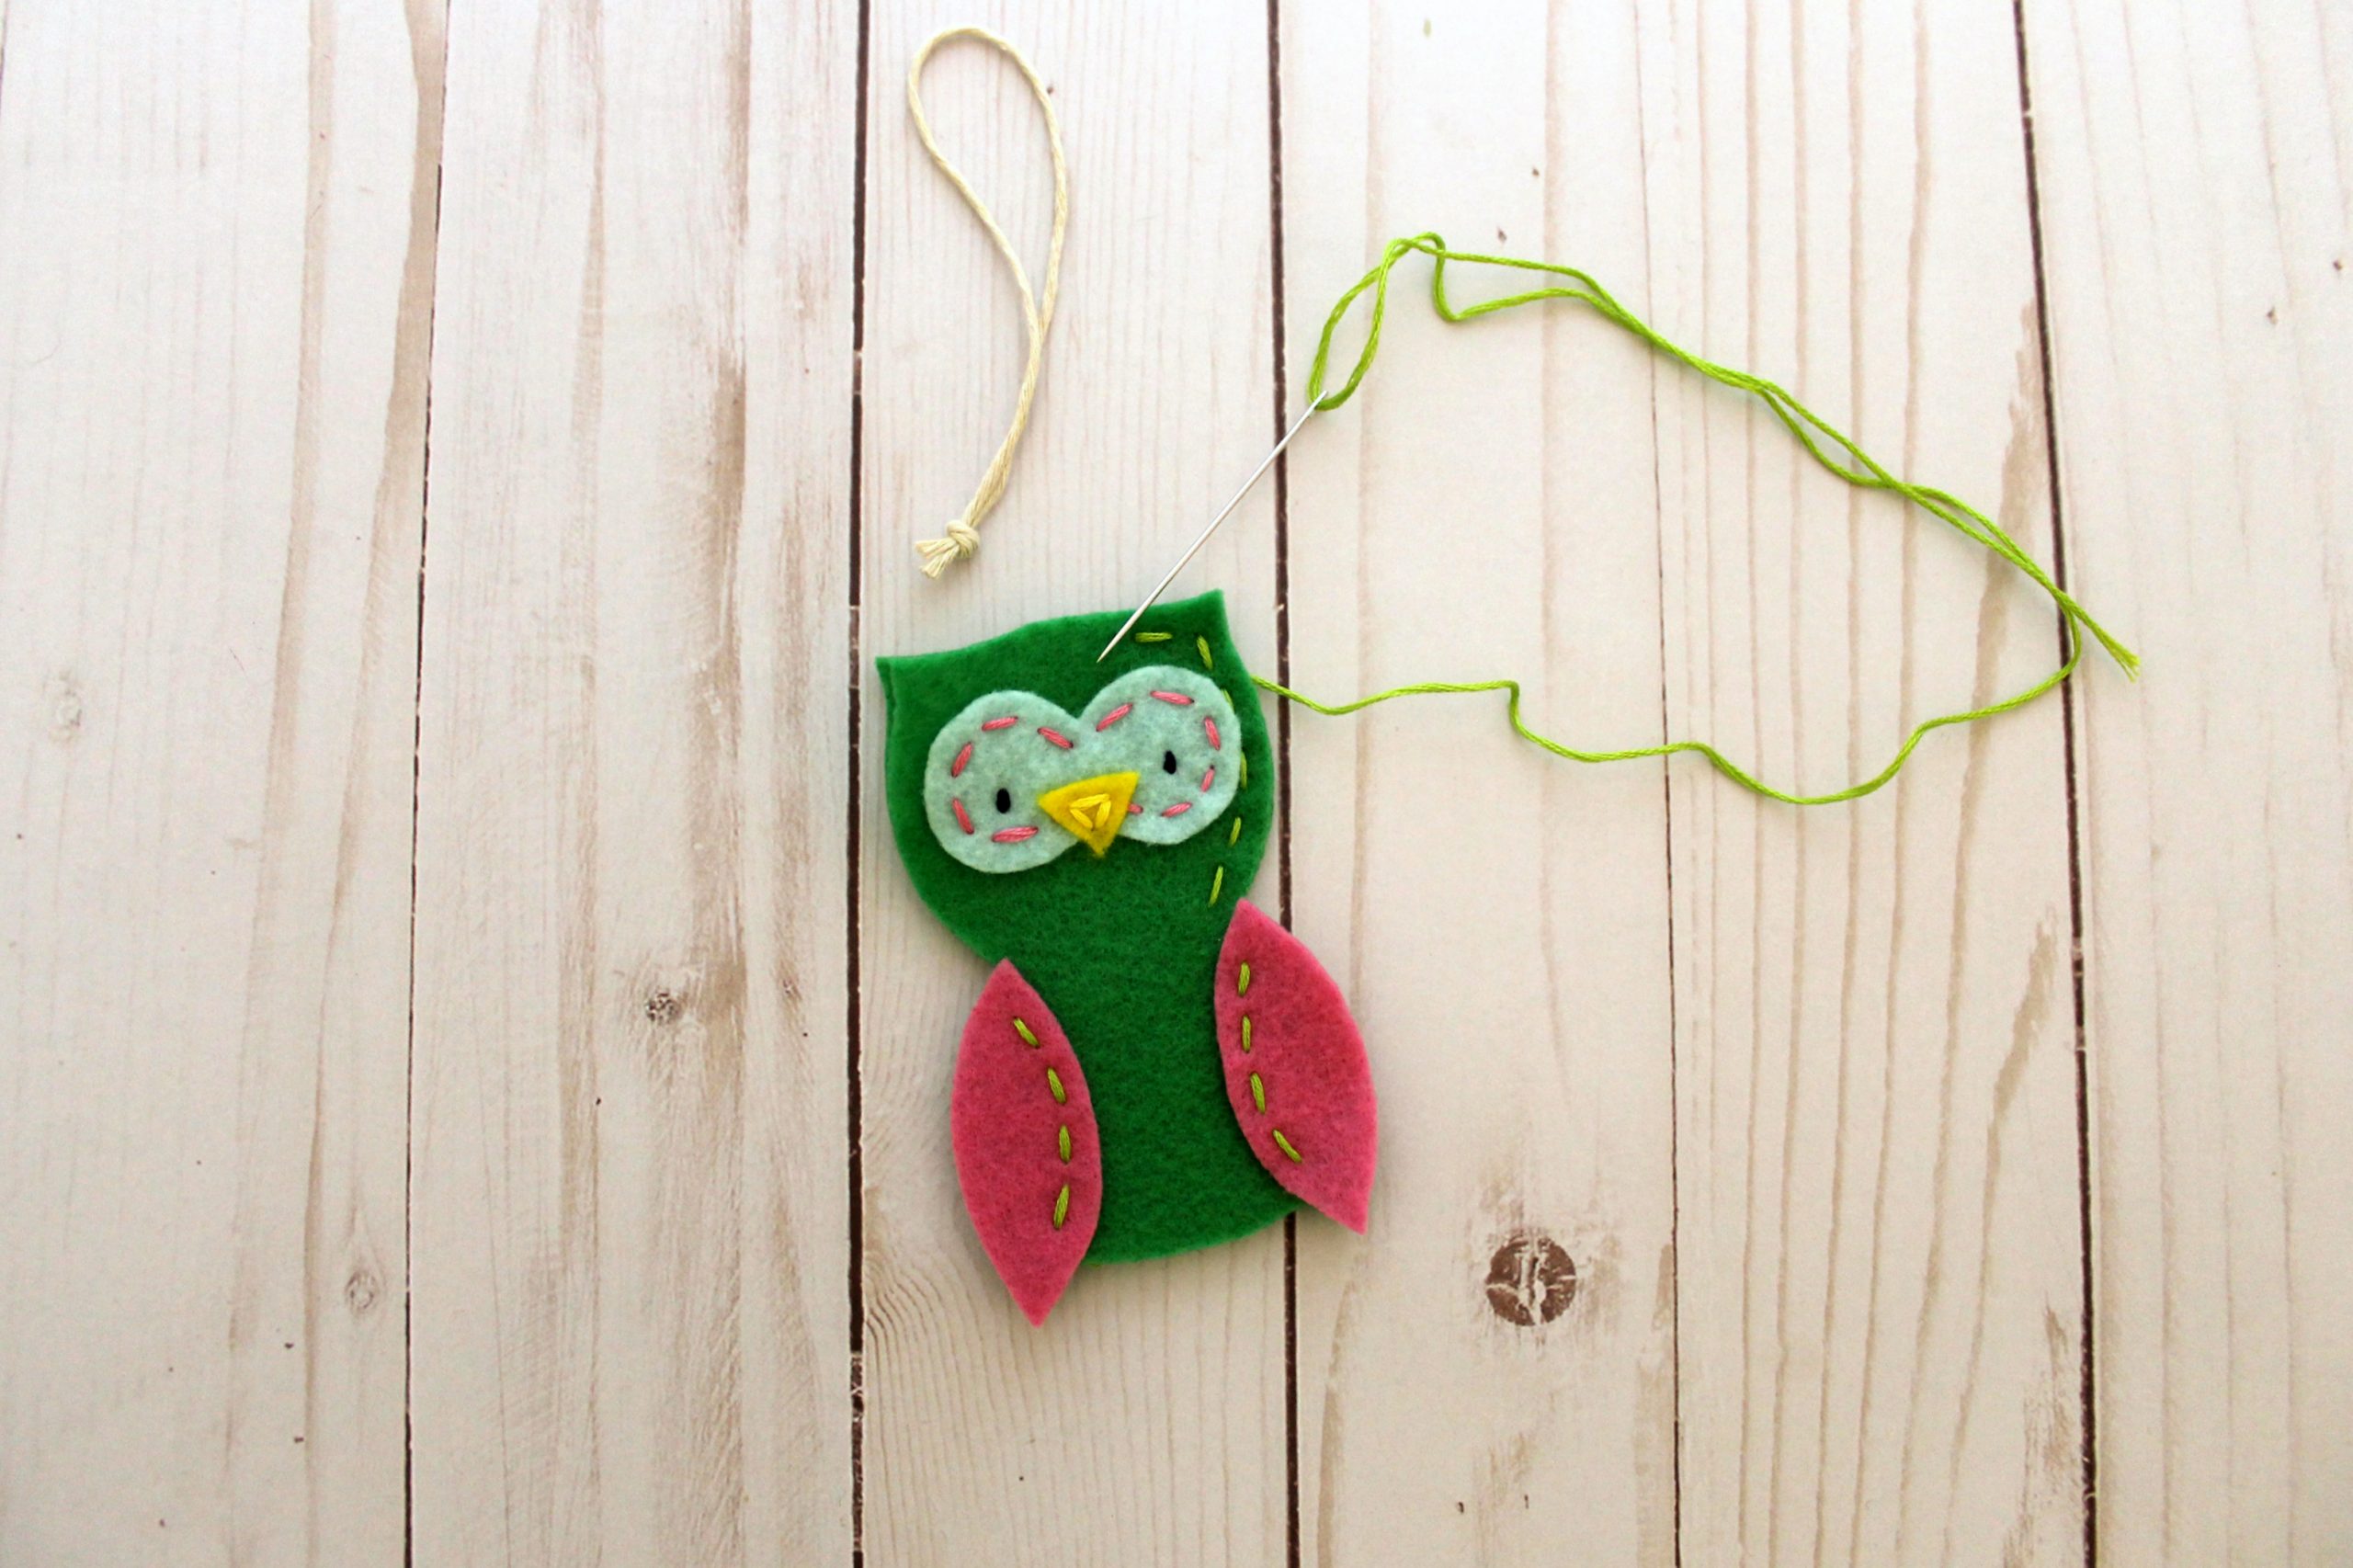
Place the second body piece onto the back side of the appliquéd piece and pin so the edges are aligned. Using your main color of embroidery floss, stitch the two pieces together. Start at the top of a wing and move toward the head.
When you reach the top center of the owl, place the cord or ribbon loop between the two pieces of felt, hold it in place and stitch to secure it. Continue stitching around the owl. (Now is when we sew the outside of a wing!) When you come to the bottom center, place your tail feathers between the layers of felt and stitch into place.
Stop stitching when you reach the bottom of the second wing.
6. Stuff and Stitch
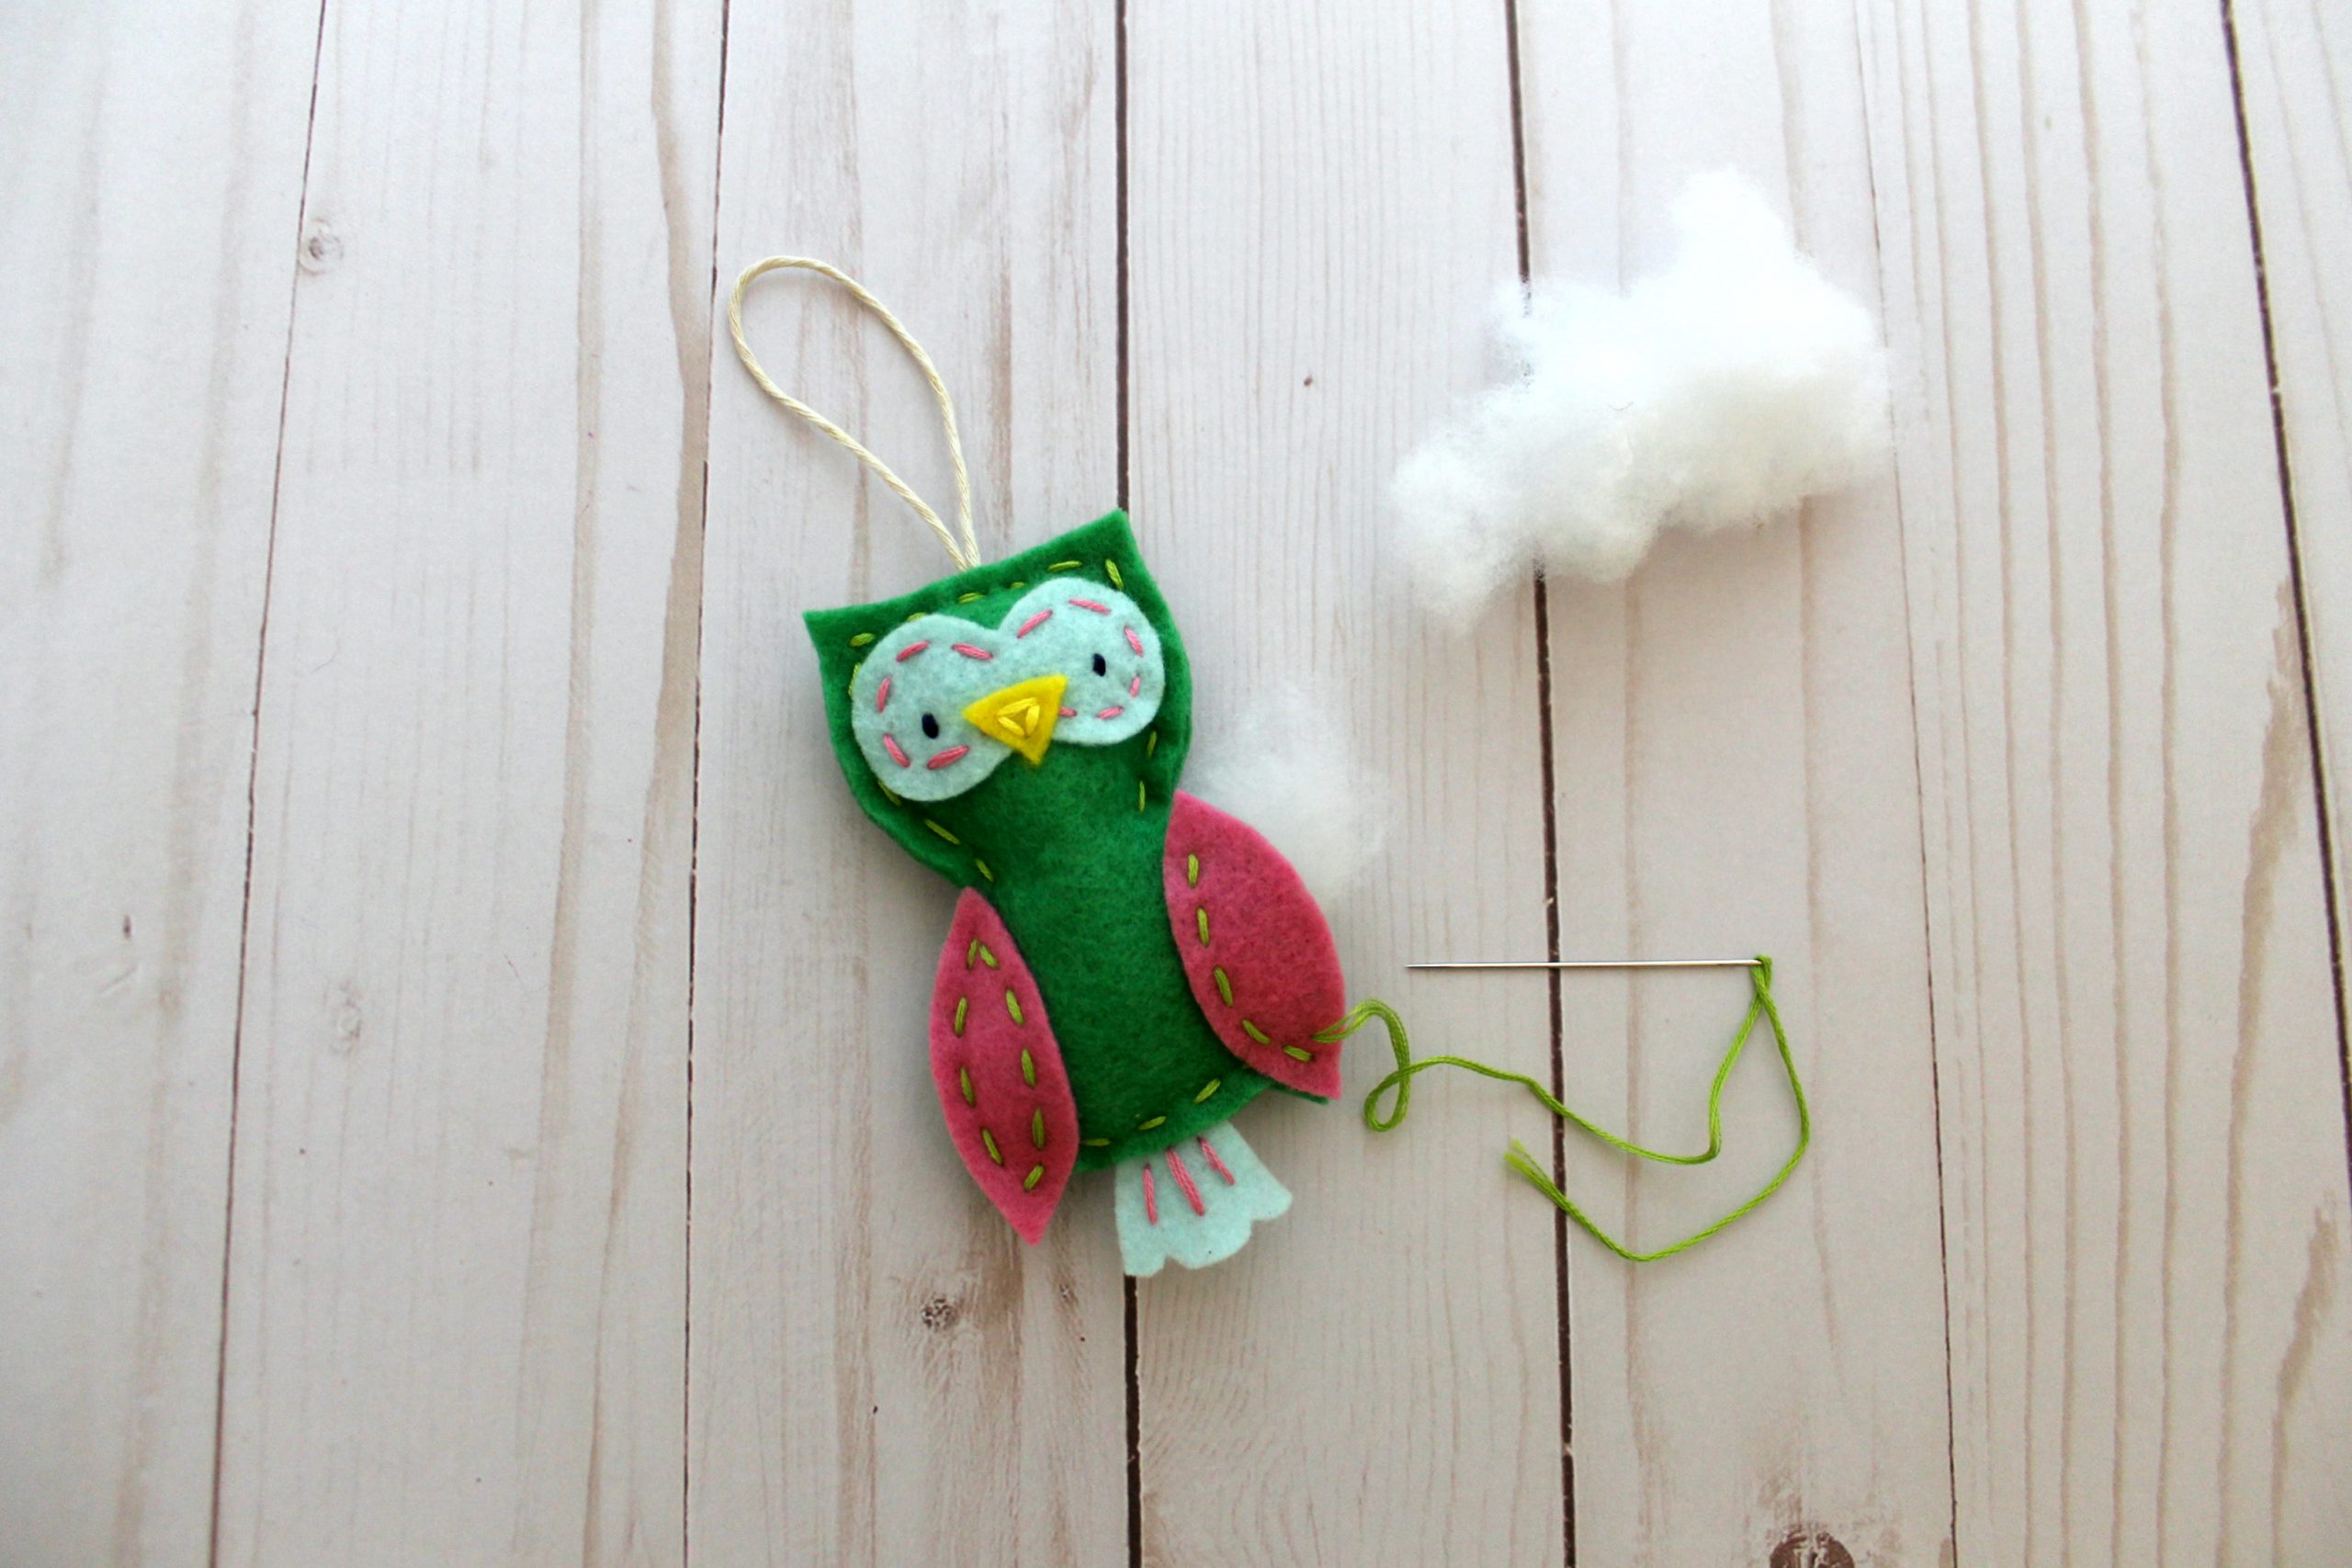
Stuff your bird through the opening on the outer edge of the wing. Once stuffed to your liking, finish stitching up the wing and hang your felt friend on your tree!
For those of you looking for the template, look up above under "What You Need" and click on "Owl Template".
Is thereapattrenfor the owl
Is there a downloadable template for this owl ornament?