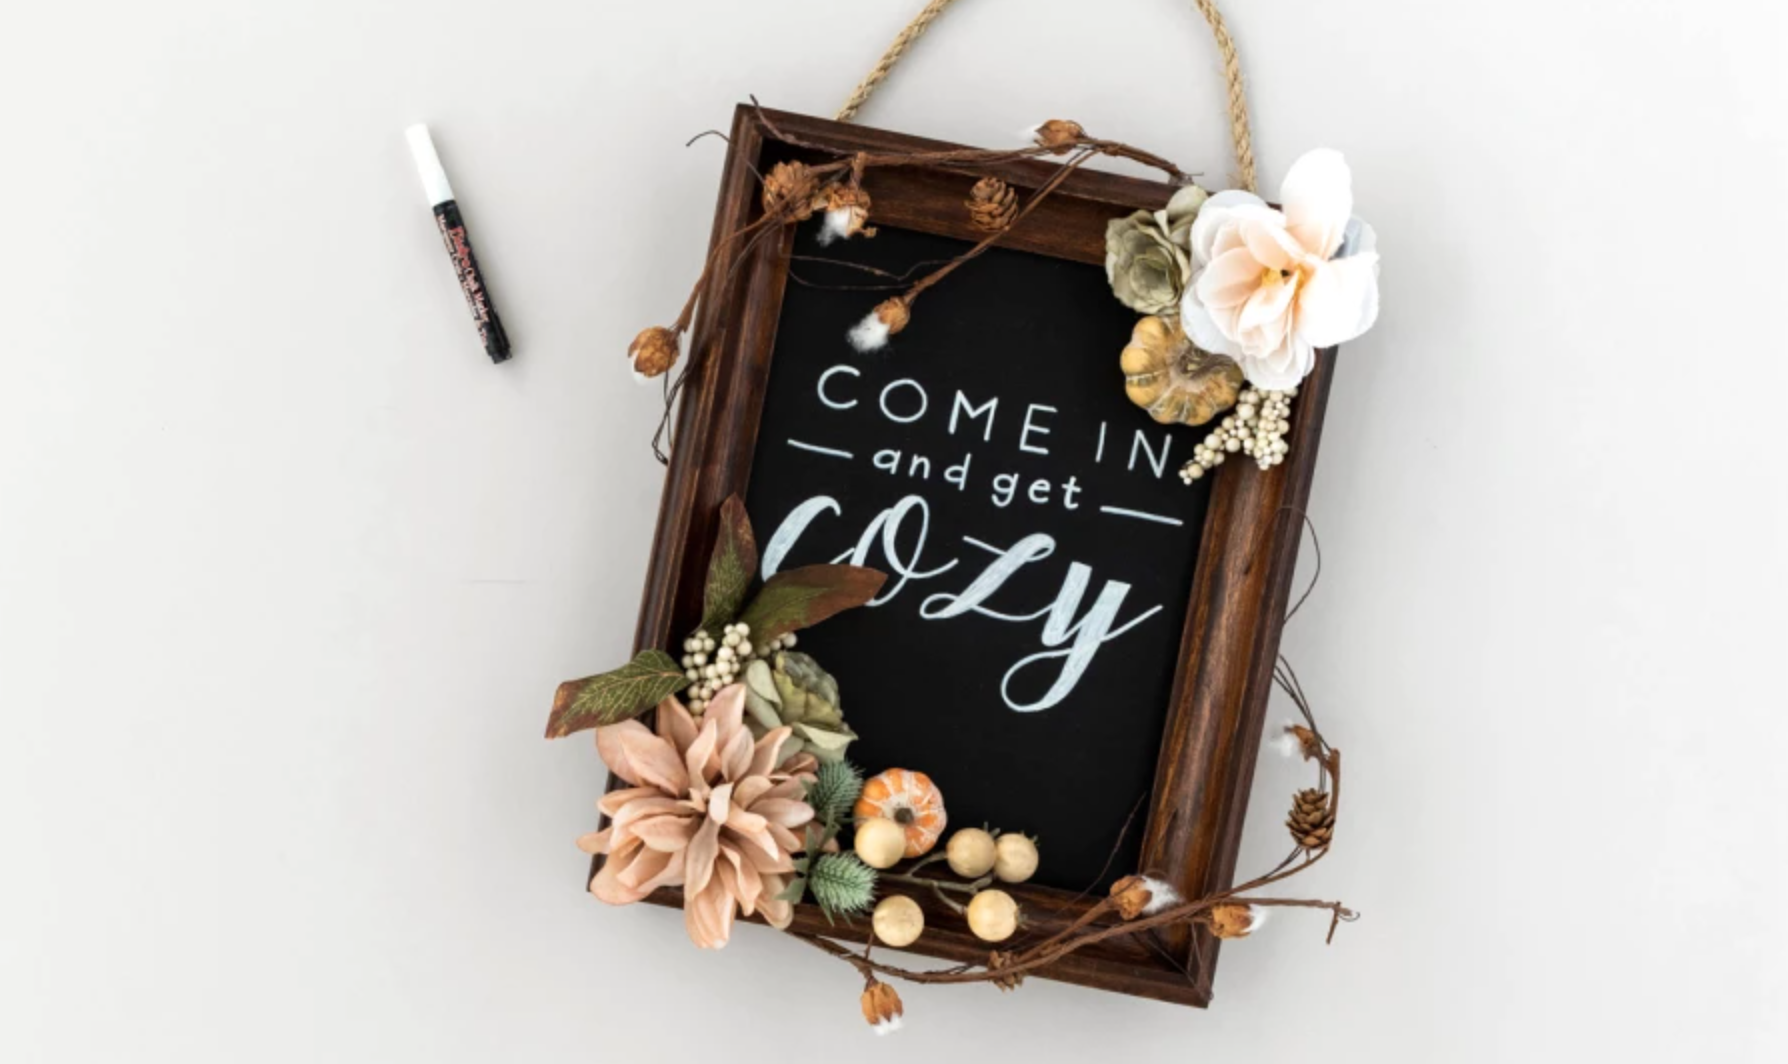
We love a good mashup, and this fall wreath/chalkboard is no exception. It's easy to make from a repurposed picture frame, and it brings that cozy vibe we're all craving hard right now. Think of it as a pumpkin spice latte for your walls.
Fall Chalkboard Wall Hanging
Level: Easy
What You Need
Instructions
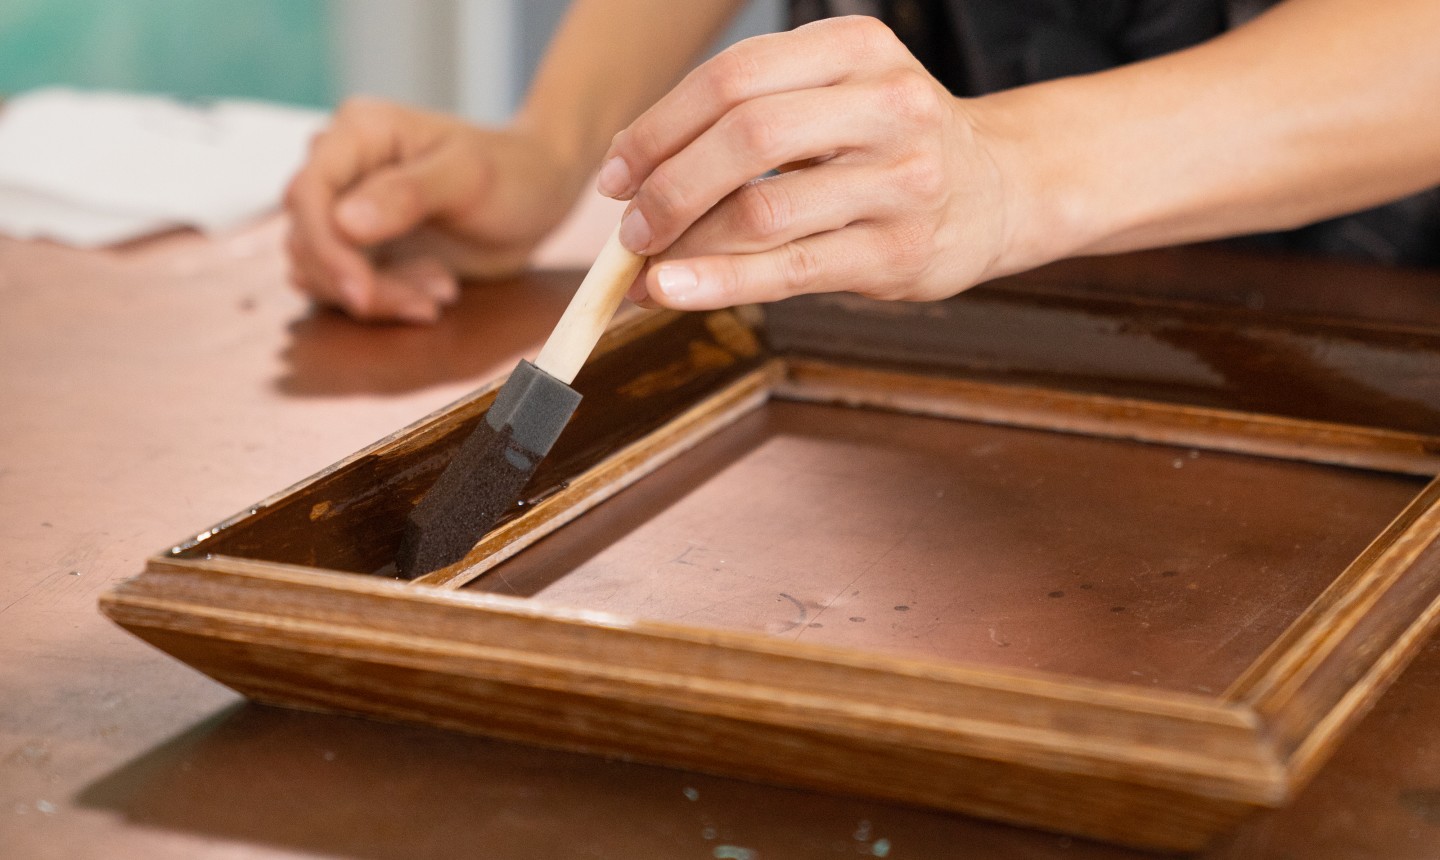
1. Apply the Chalk Paint
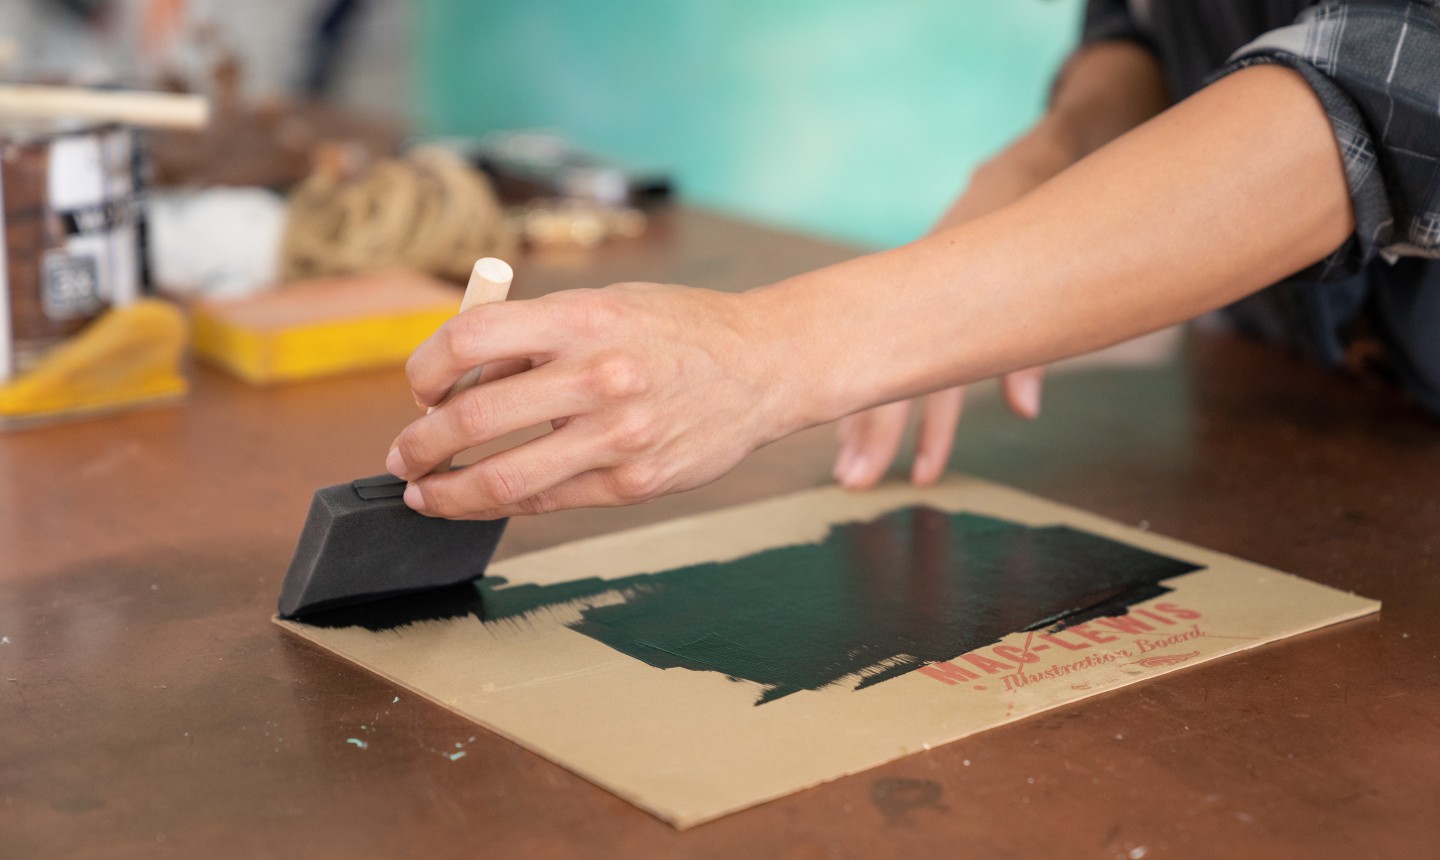
Remove the backing and glass from the picture frame, and paint the backing with chalkboard paint. Pay attention to the directions on your paint — some types require more layers than others.
2. Sand the Frame
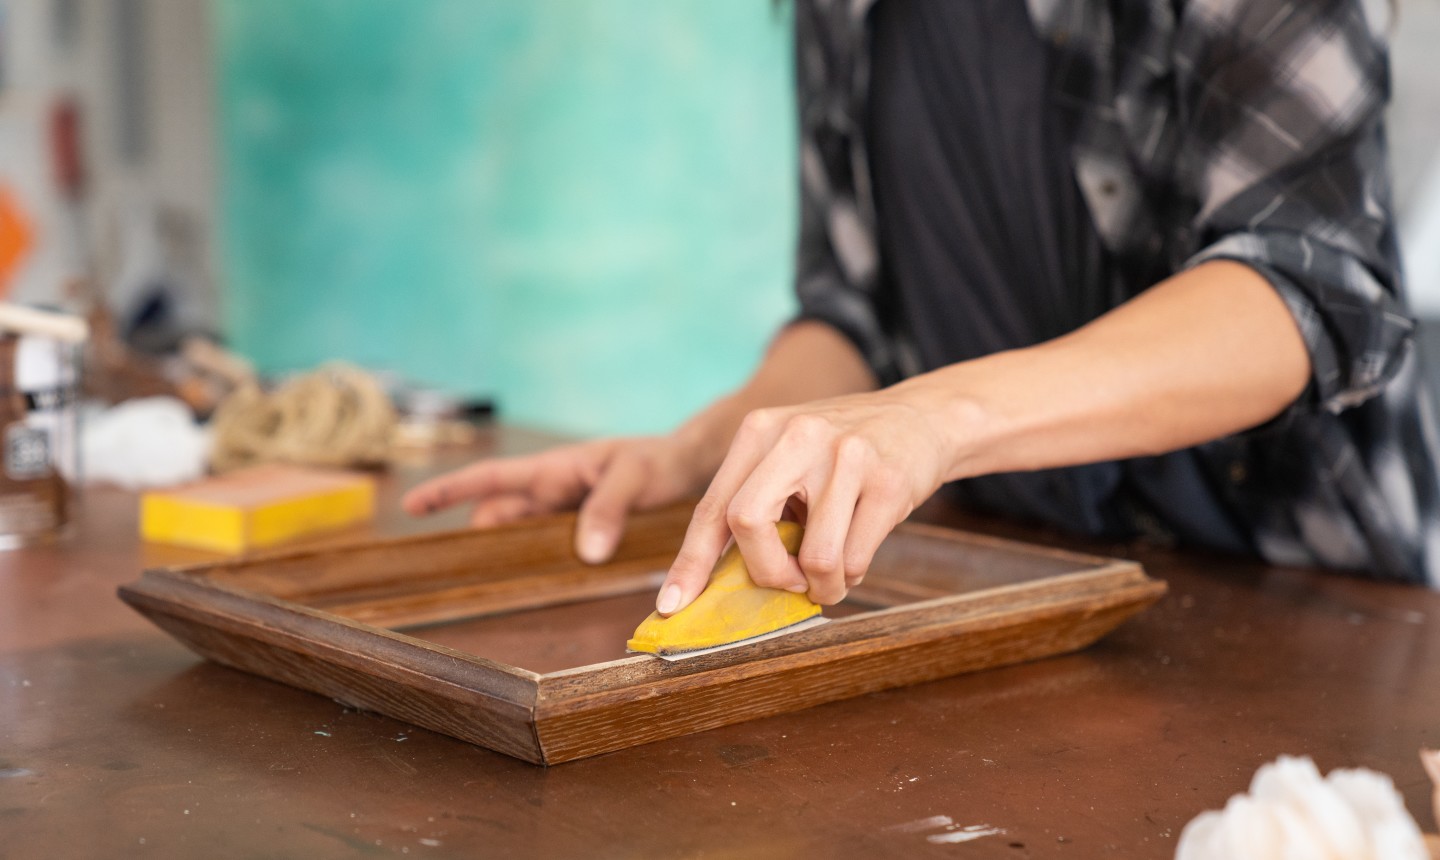
As the backing is drying, sand down the wooden frame — don’t forget to wear a dust mask! After sanding, use a damp, lint-free cloth to wipe down the frame and remove any dust particles before you start staining.
3. Paint the Second Coat
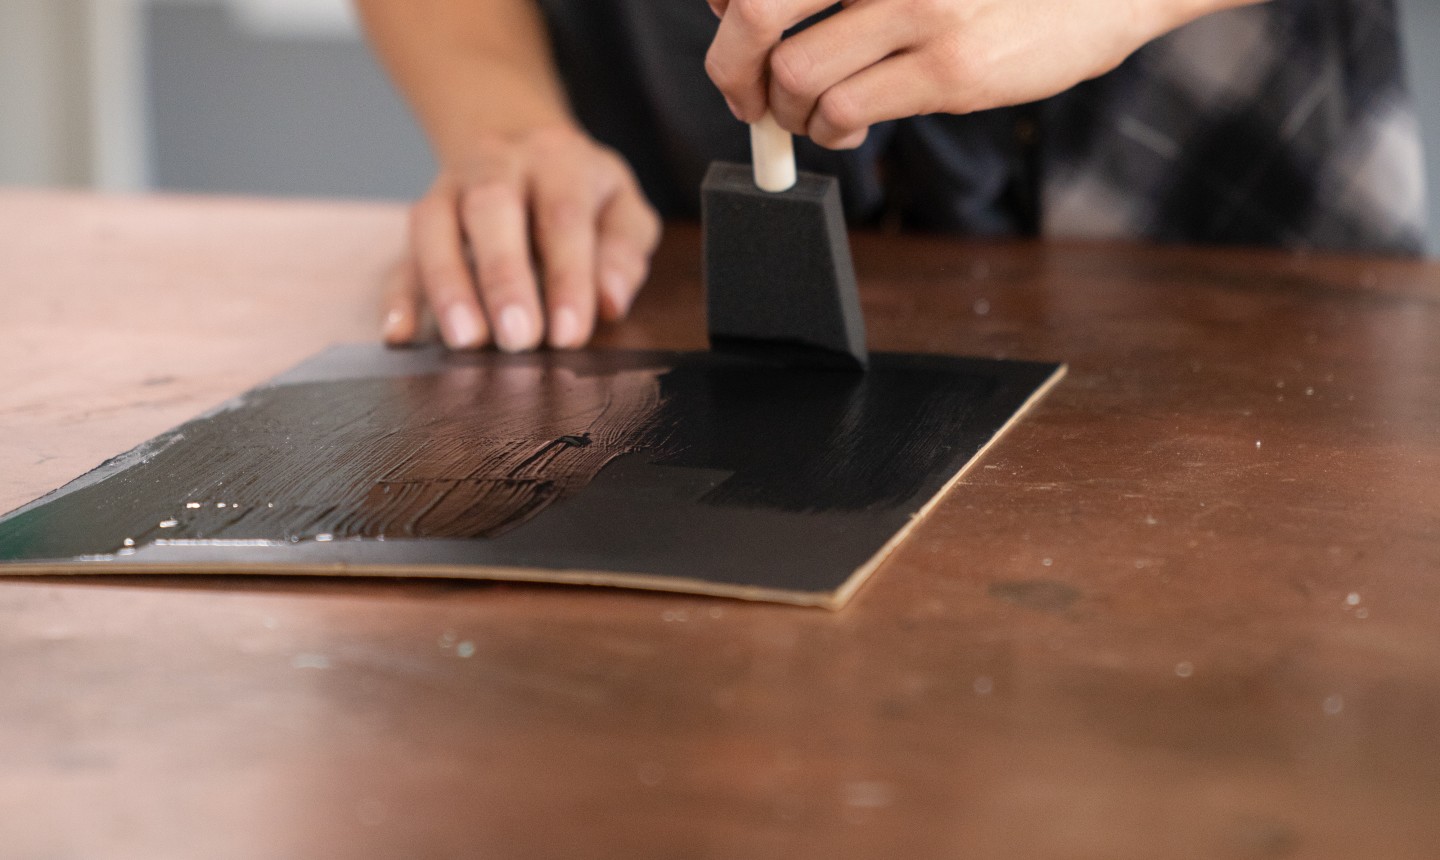
After your first coat of chalk paint dries, apply a second coat. Pro tip: as you add this layer, paint perpendicularly to the direction of your first layer. This will create a surface that catches the chalk better.
4. Stain the Frame
While the chalk paint dries (again!), refinish the frame with your desired stain. Once the frame is finished, set that aside to dry as well. Prefer paint over stain? Go for it.
5. Glue Down the Backing
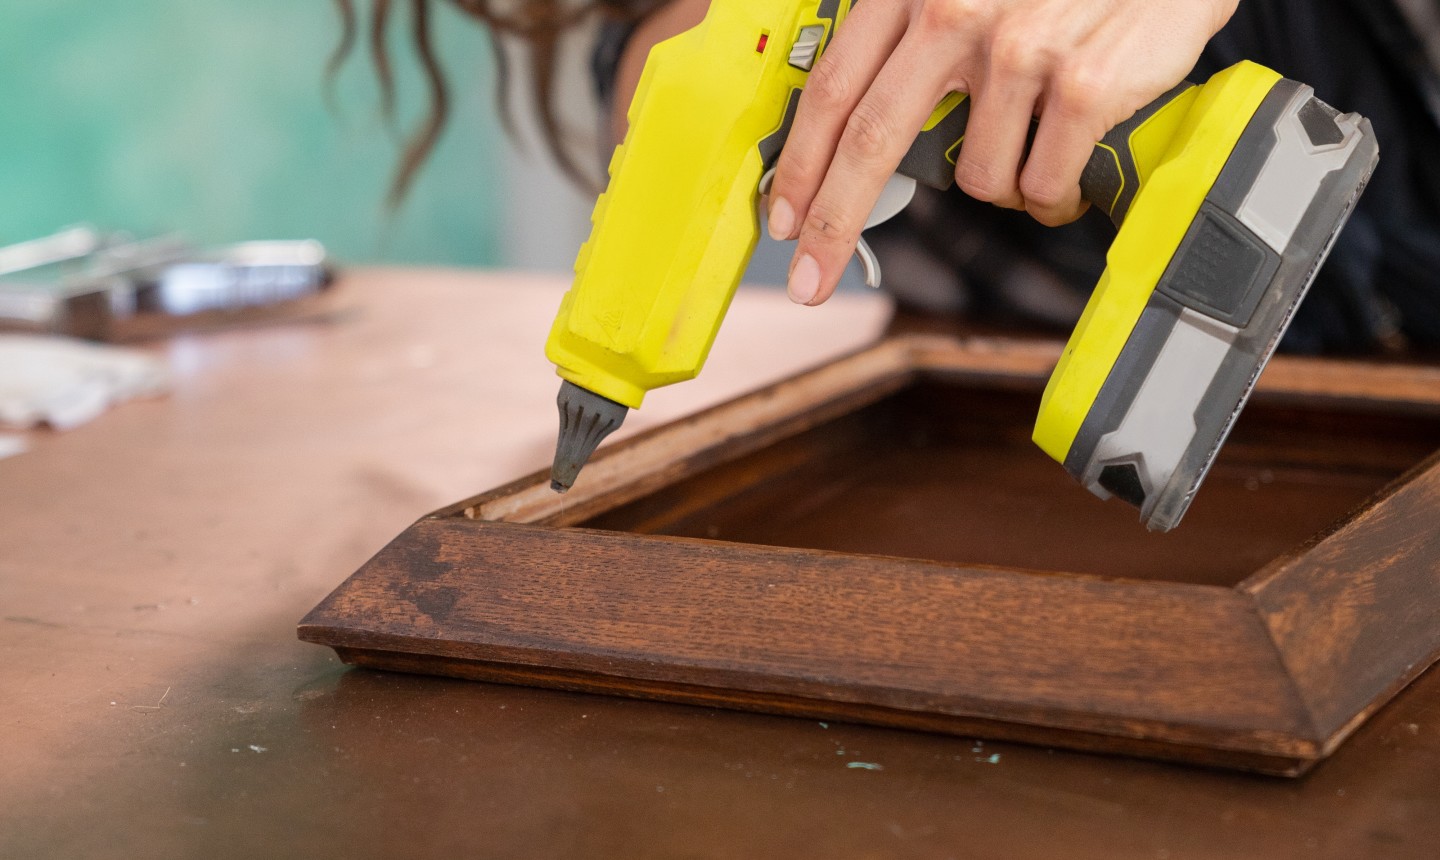
Once both the backing and frame have dried, flip the frame over so the back is facing up. Use your hot glue gun to secure the chalkboard backing to your frame. When fastening your chalkboard, make sure it faces down and away from you, just like the front of the frame.
6. Staple Down the Rope

To make your chalkboard hang-able, cut a length of ribbon or rope and use your staple gun to attach each end to the frame’s top corners.
7. Decorate the Frame
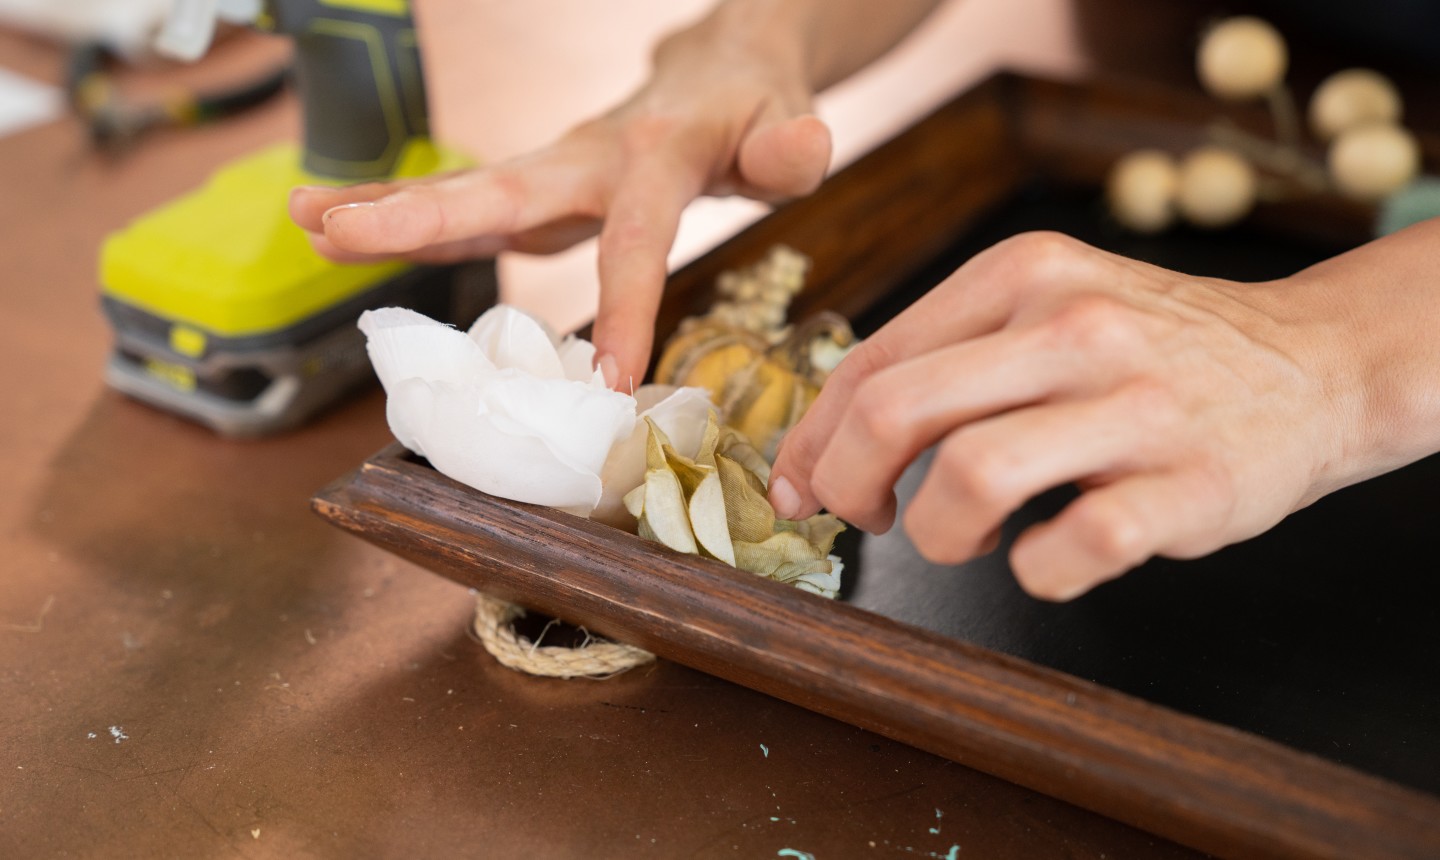
Now we make the frame go full fall! Use the hot glue or e6000 adhesive to secure your favorite autumn foliage around the frame — mini pumpkins and gourds, red and orange leaves, berries, whatever you want (just stick with the fake stuff if you want to keep it around for a while). For added texture and depth, wrap some fall vines and twigs around the frame as well.
8. Write Your Message
And for the finishing touch, write a fall-themed message! If you're brave you can free-hand with a chalk ink marker, or you can use a stencil to get the perfect lettering. Simply print out a piece of paper with your lettering designed on it, flip it over and cover the ink with regular pencil.
9. Trace
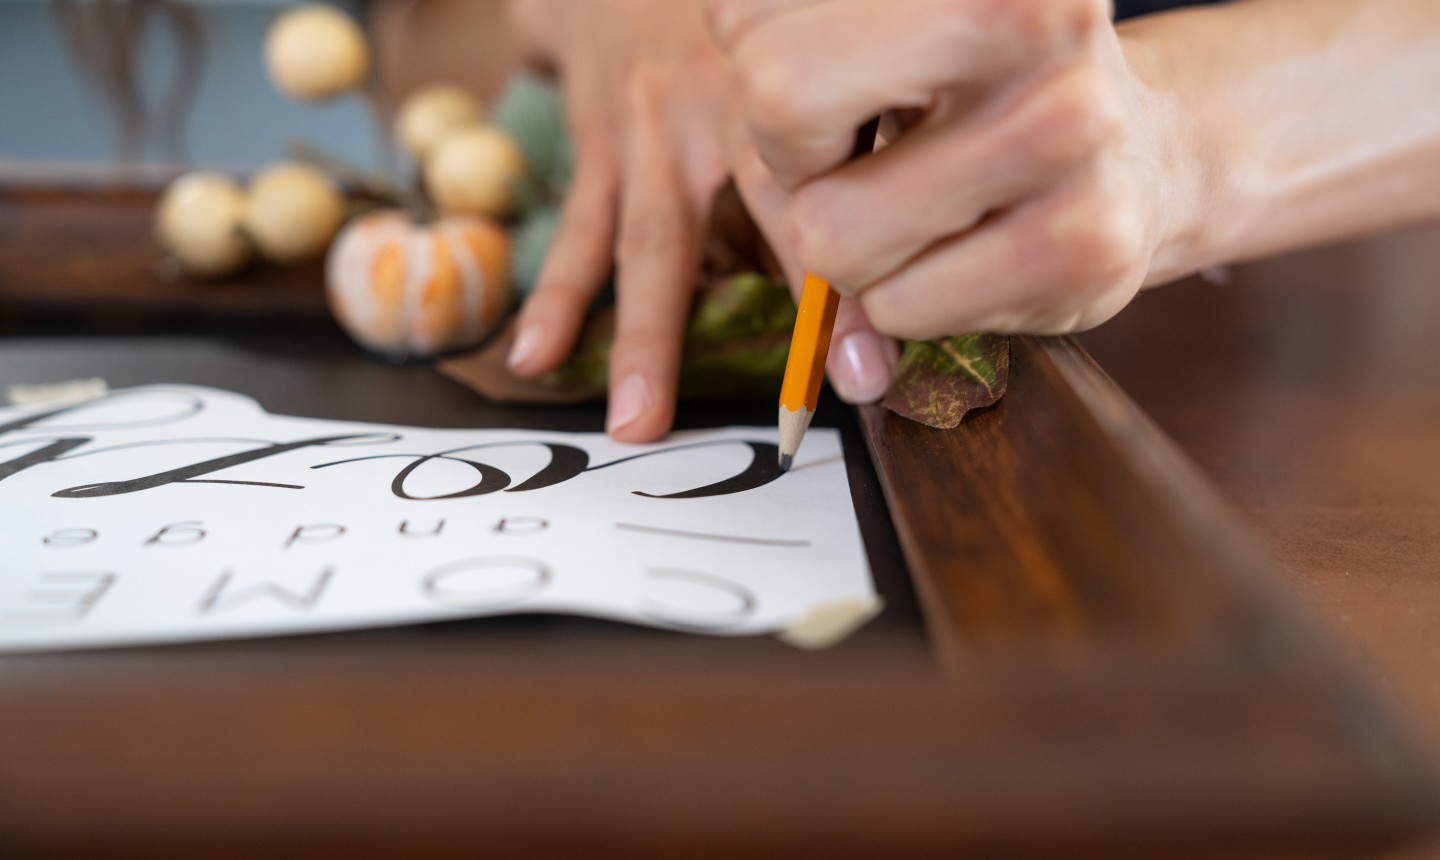
Tape your paper to the chalkboard front-side-up and trace the letters with your pencil. This will transfer the graphite on the back of the paper onto your chalkboard.
10. Make Your Mark
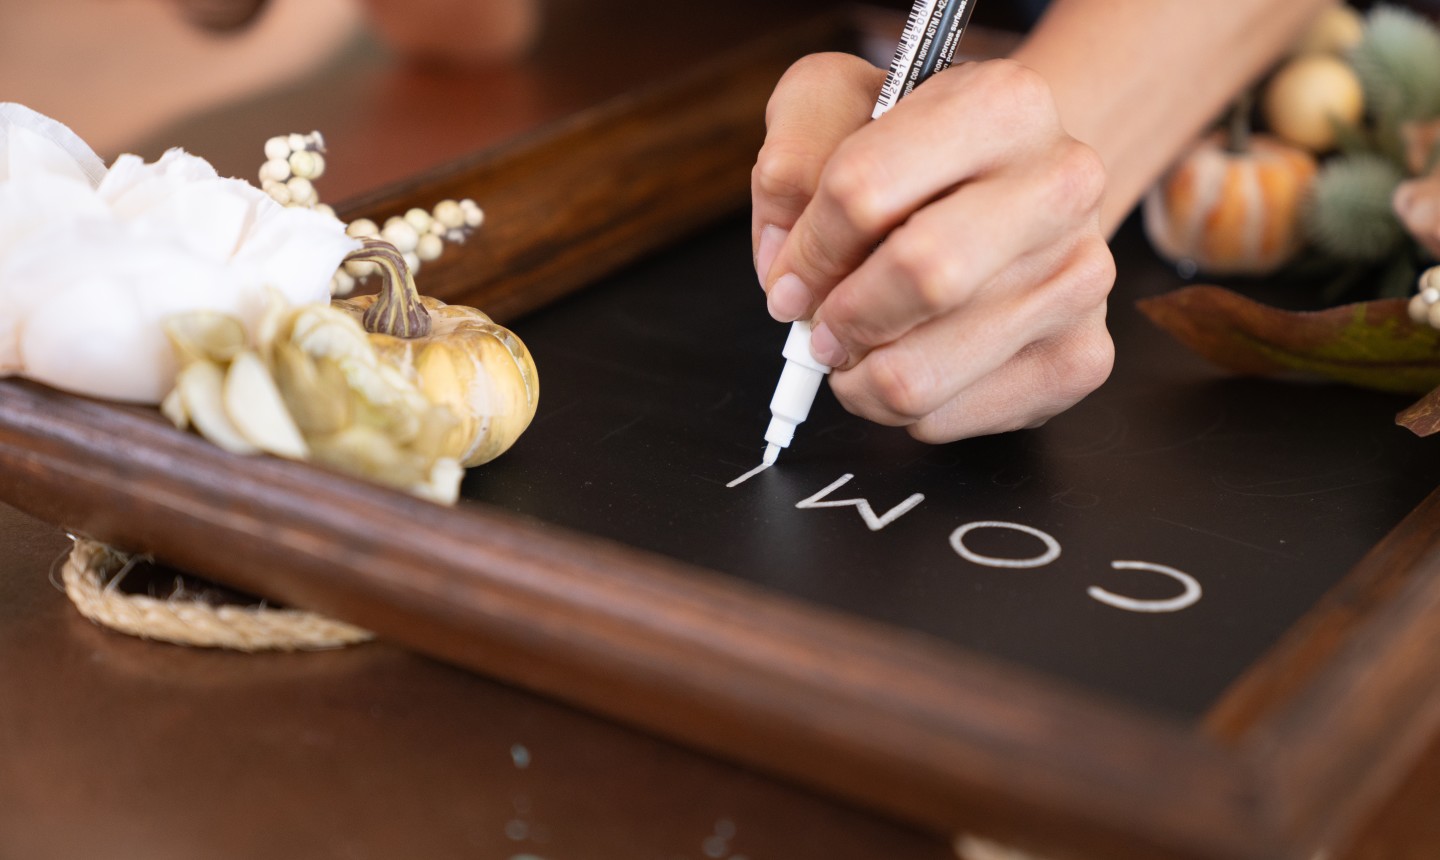
Then remove the paper and trace your pencil lines with chalk.
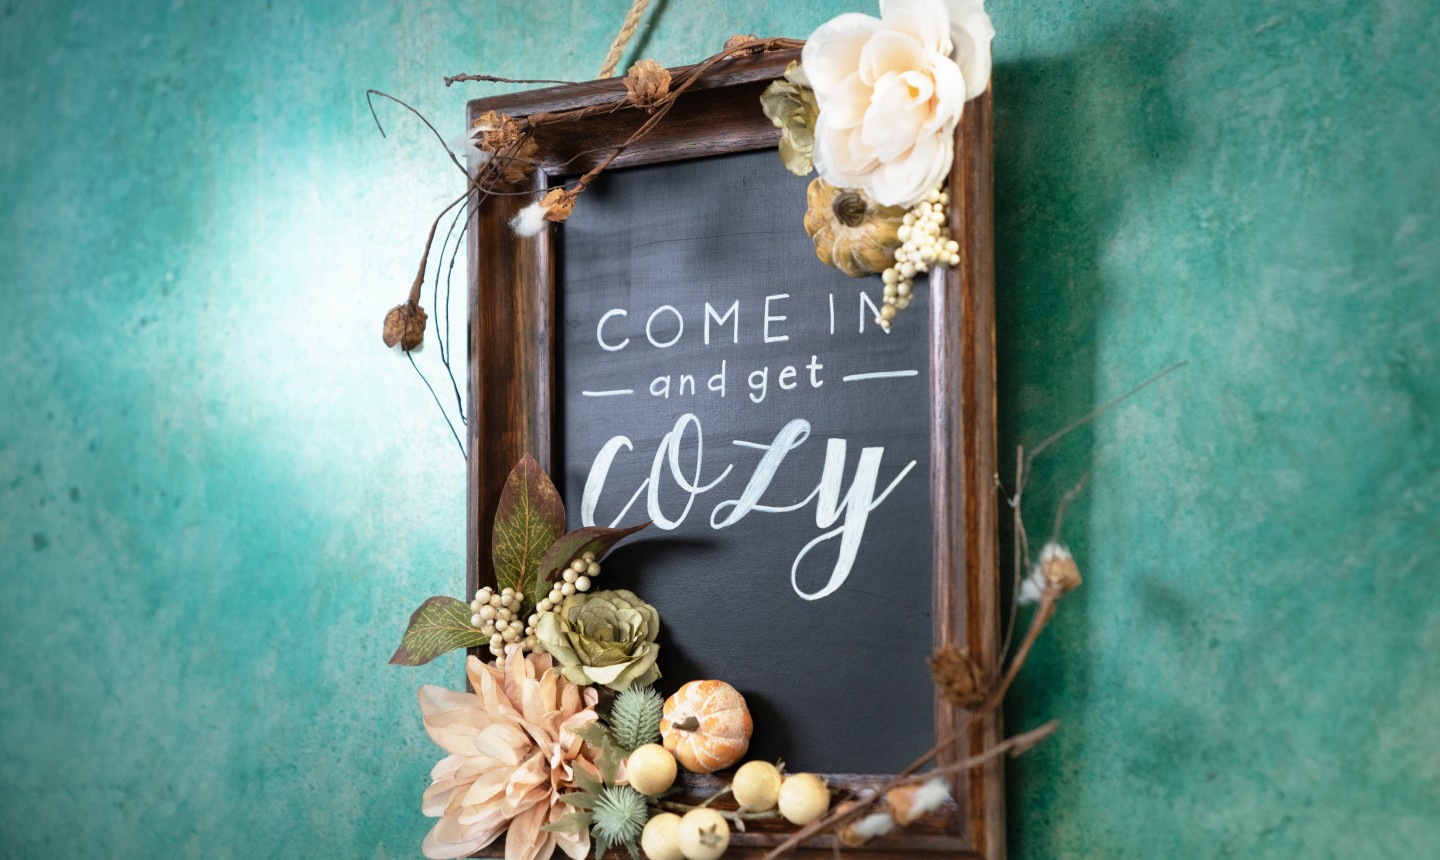
Hang your board, step back and feel warm and cozy all over!

Share tips, start a discussion or ask other students a question. If you have a question for an expert, please click here.
Already a member?
No Responses to “Greet the Season With This DIY Chalkboard Wall Hanging”