You know those amazing flower drawings that almost look real? That’s the magic of colored pencil, and learning how to do it is easier than it seems. Start with a photo you love, or even a real bloom, and see how far you can get!
Once you get comfy with these techniques, you can interpret and apply them to any type of flower (not to mention the rest of your colored pencil projects). Happy sketching!
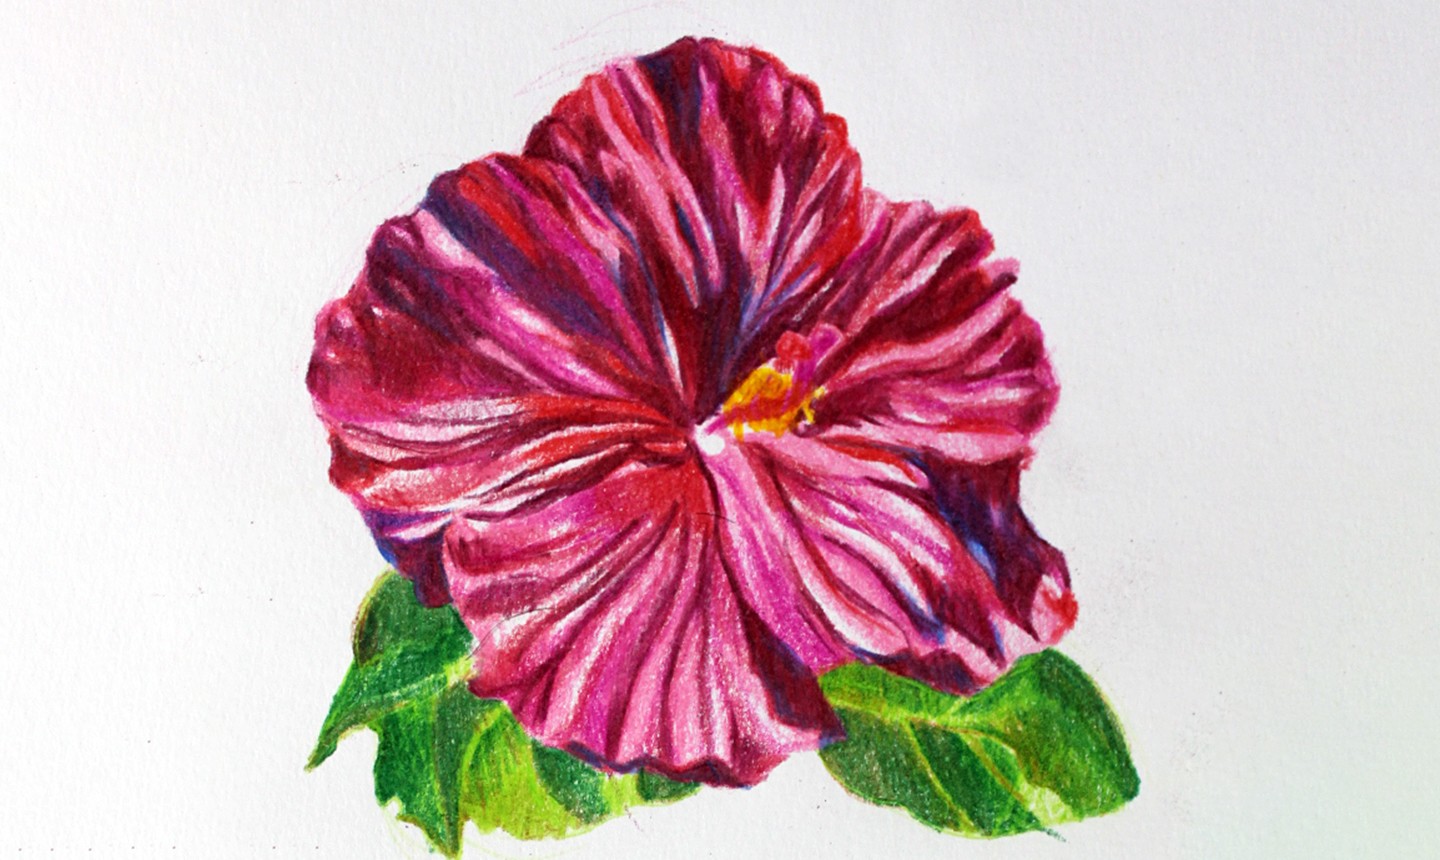
Vibrant Colored Pencil Flowers
Level: Easy
What You Need
Instructions
1. Pick Your Colors
Before putting pencil to paper, you’ve gotta know which colors to use. It might seem like a no-brainer, but it’s important to select at least three colors — a light, medium and dark tone. This is the secret that brings dimension and transforms a 2D doodle into a lifelike drawing.
2. Draw the Basic Shapes
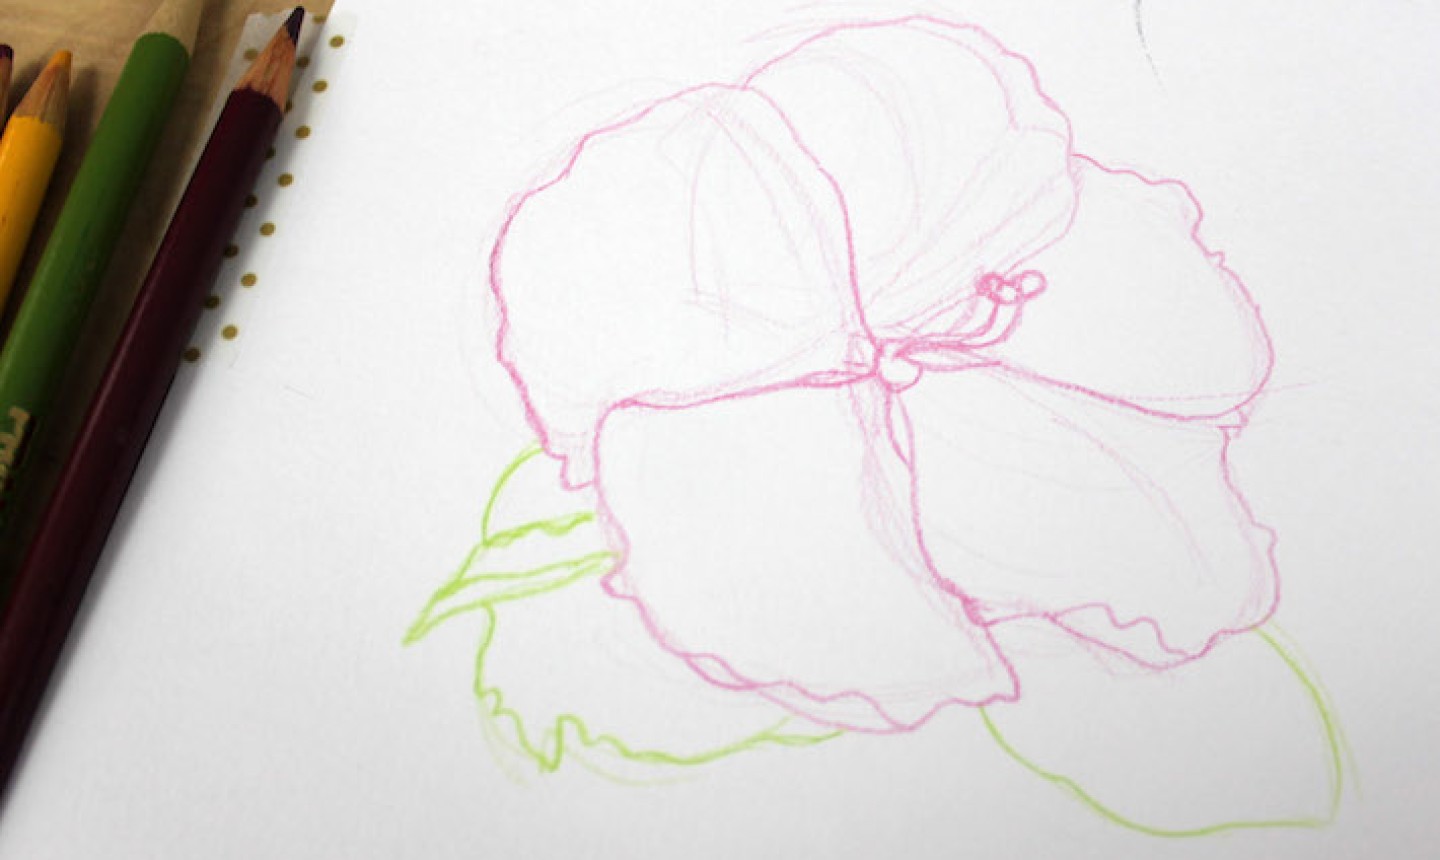
But don’t draw ’em in graphite! The graphite will clash with the flower’s bright colors and can be really hard to remove from your drawing later.
Instead, sketch out your flower using the lightest of your colored pencils. Sketch large, general shapes, like the outside of the petals and leaves.
3. Refine the Details
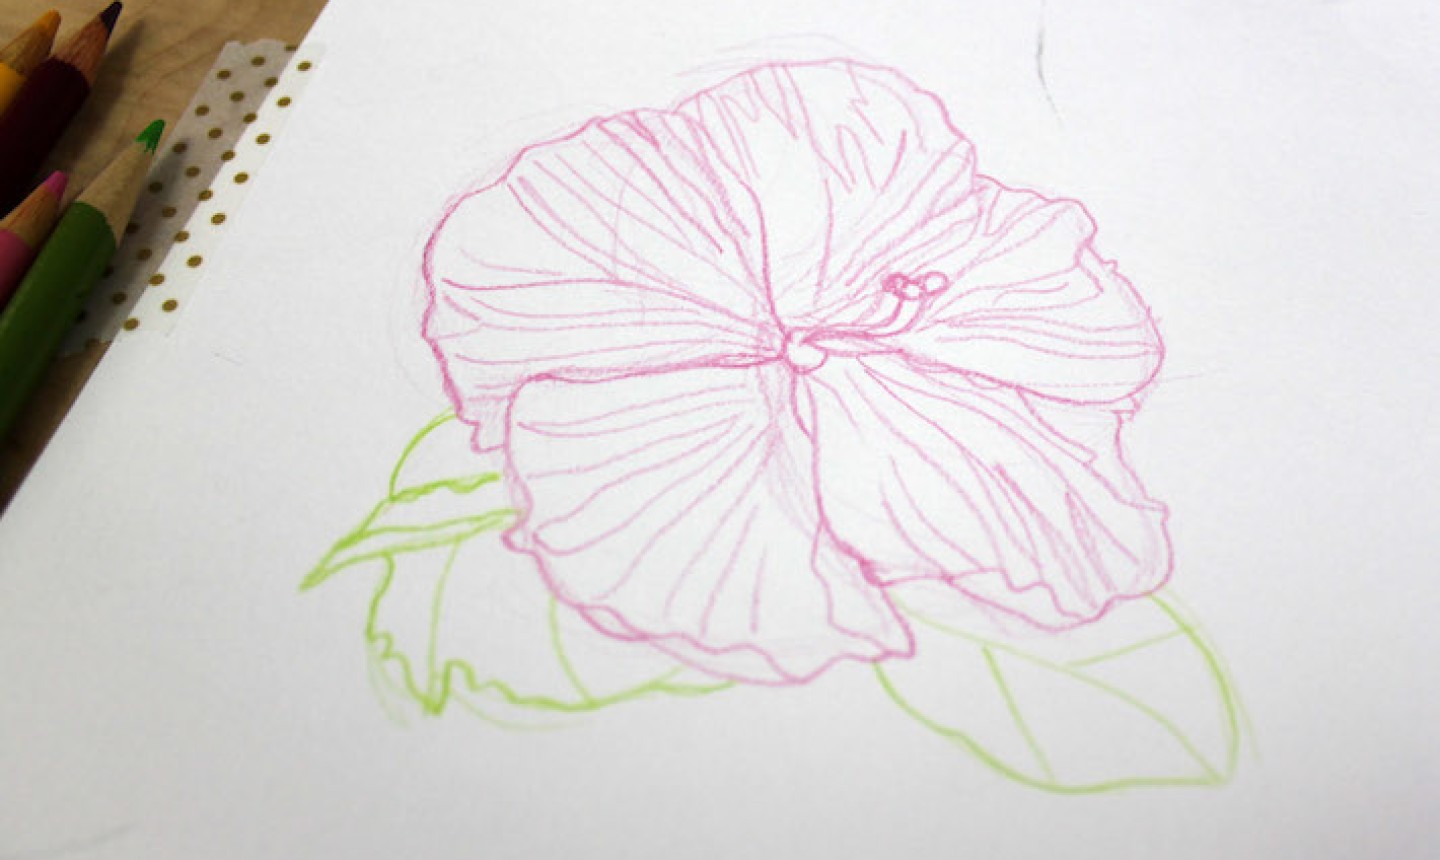
With the lightest colored pencil still in your hand, sketch in the smaller, more intricate details. Focus on things like the petal’s veins or the pollen in the center of your flower.
4. Shade and Highlight
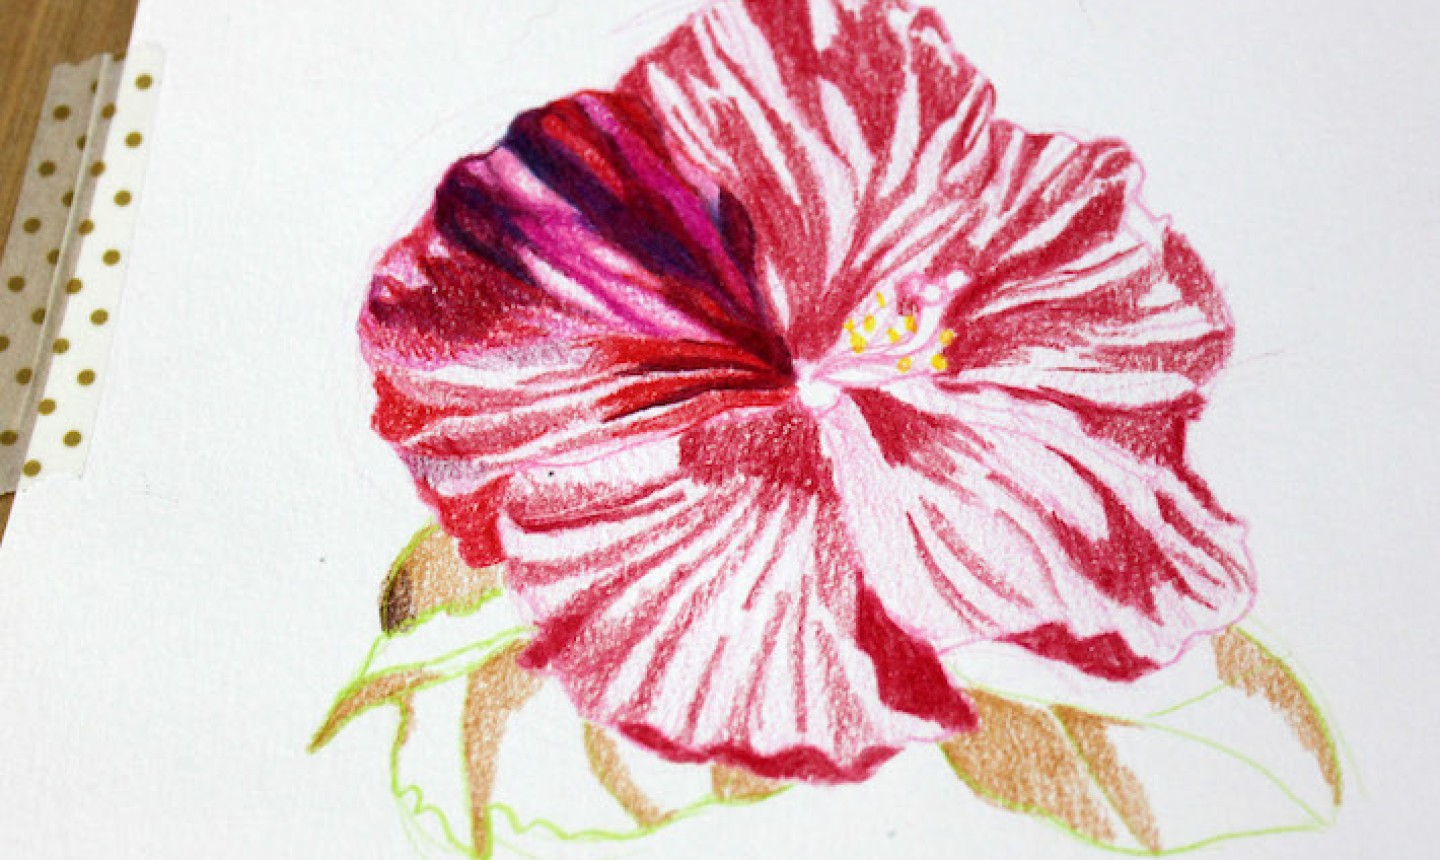
FYI: this step is the longest and most painstaking of the whole process. But it’s also the most fun and — believe it or not — relaxing.
After you’ve mapped out the details, color in the flower using the lightest of light touch . This will establish a “base” color from which you’ll build the hues and textures . This base also doubles as highlights later on, as you start to add darker tones.
Now begin filling in the darker areas of your bloom, working gradually.
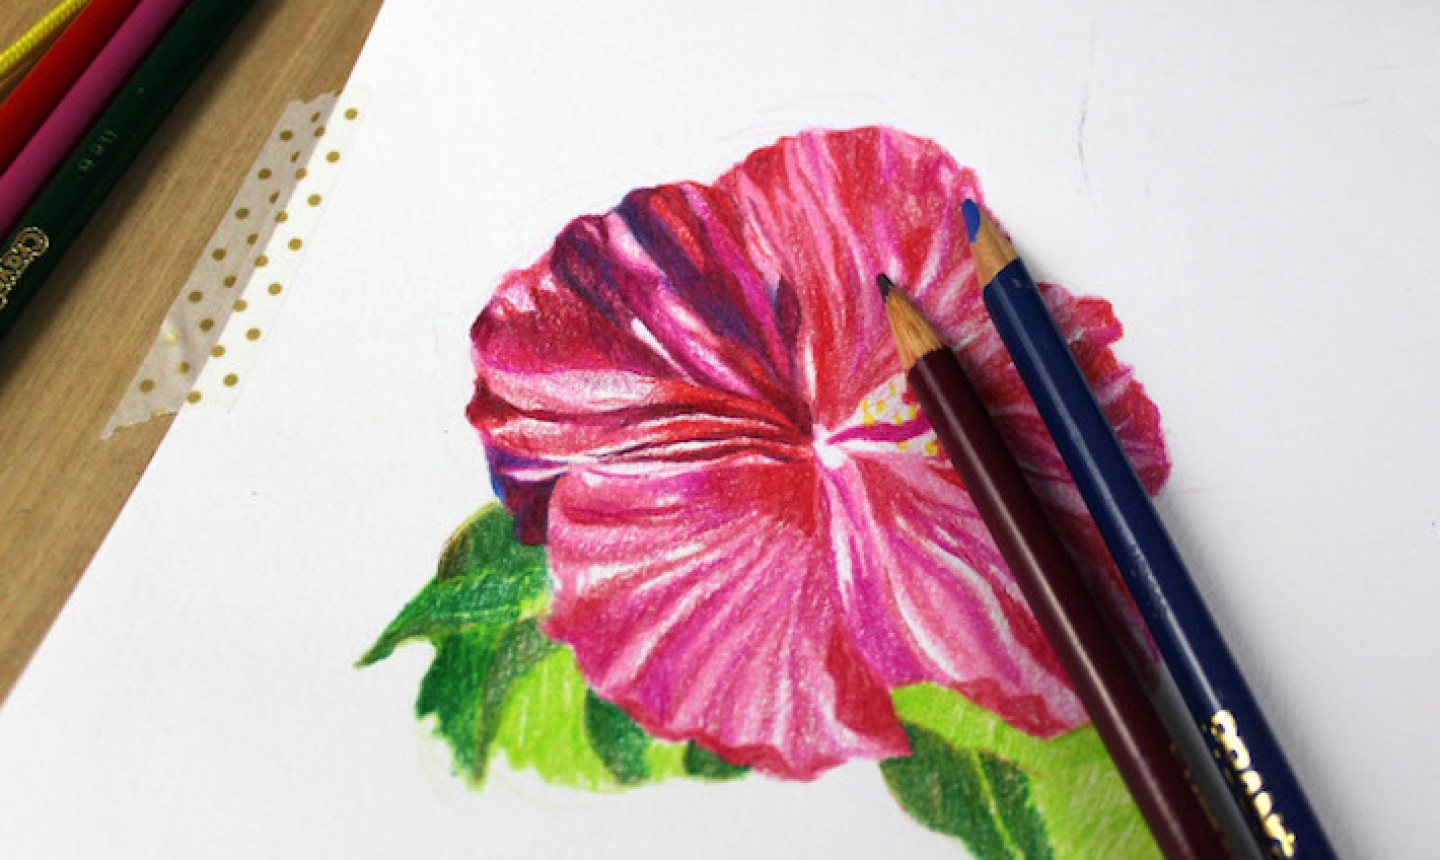
Use a single color and go around the flower, petal by petal. Then pick up another color and work your way around.
Always start light and slowly darken your shadows. This gives you lots of control, since it’s easy to add more color… but can be tricky to take it away.
You can also layer colors on top of each other to get exactly the hue you want. For instance, layering a bit of blue on top of a bright red will give you a deep, purple-ish shade.
Really get to know that flower! The more closely you study the tiniest details of your reference flower, the better your drawing will end up.
5. Blend
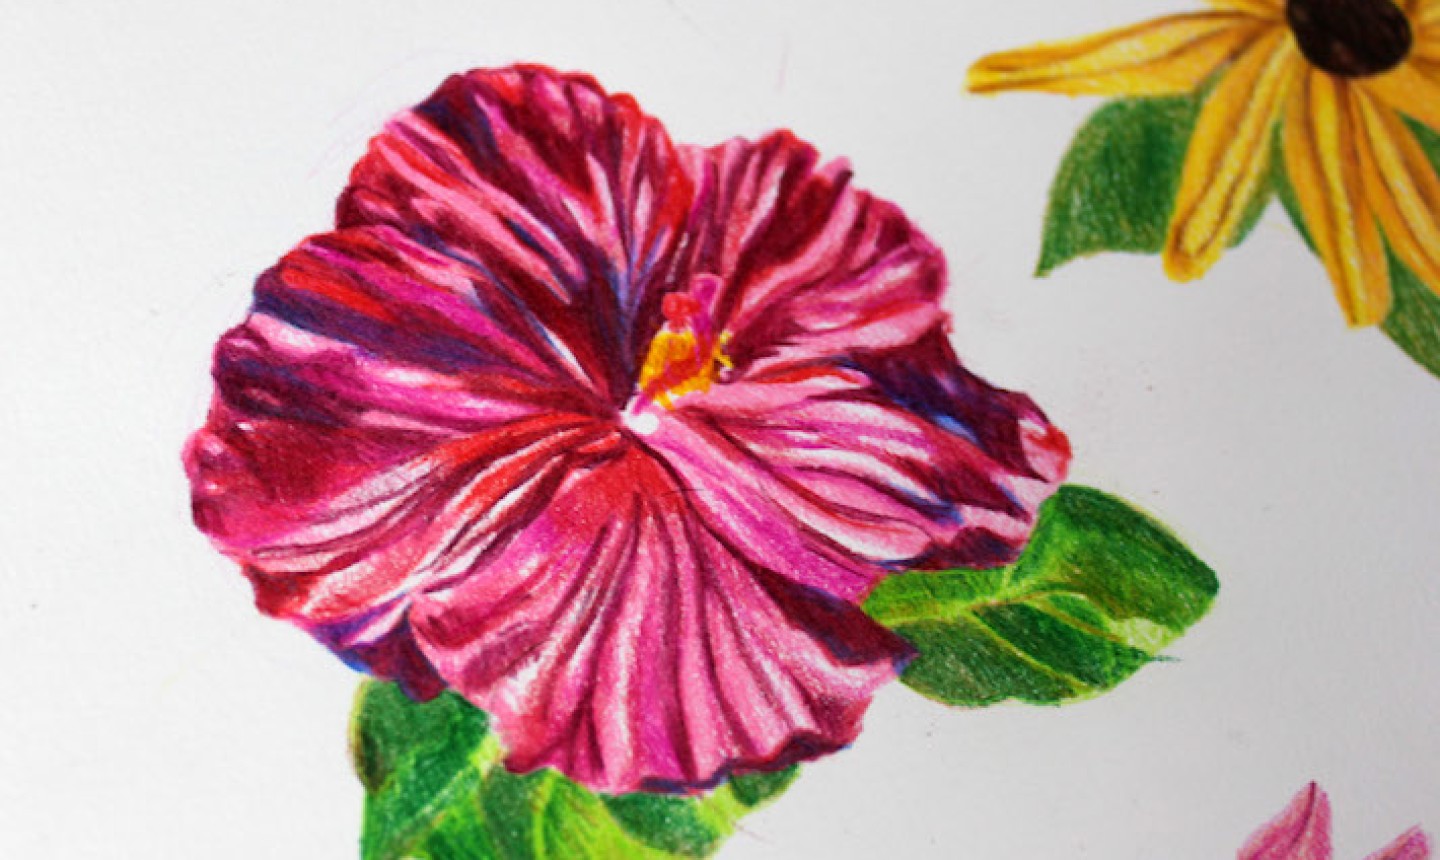
Once all your shadows and highlights are layered in, finish up your flower by blending to create a smoother look.
Your lightest-colored pencil is actually your best blending tool! Just grab it and color across the entire flower. This will subtly merge the lighter and darker areas for a finished look that’s incredibly rich and lifelike.
cOoL
Only been using graphite excited to start using colour for my flower sketches and designs