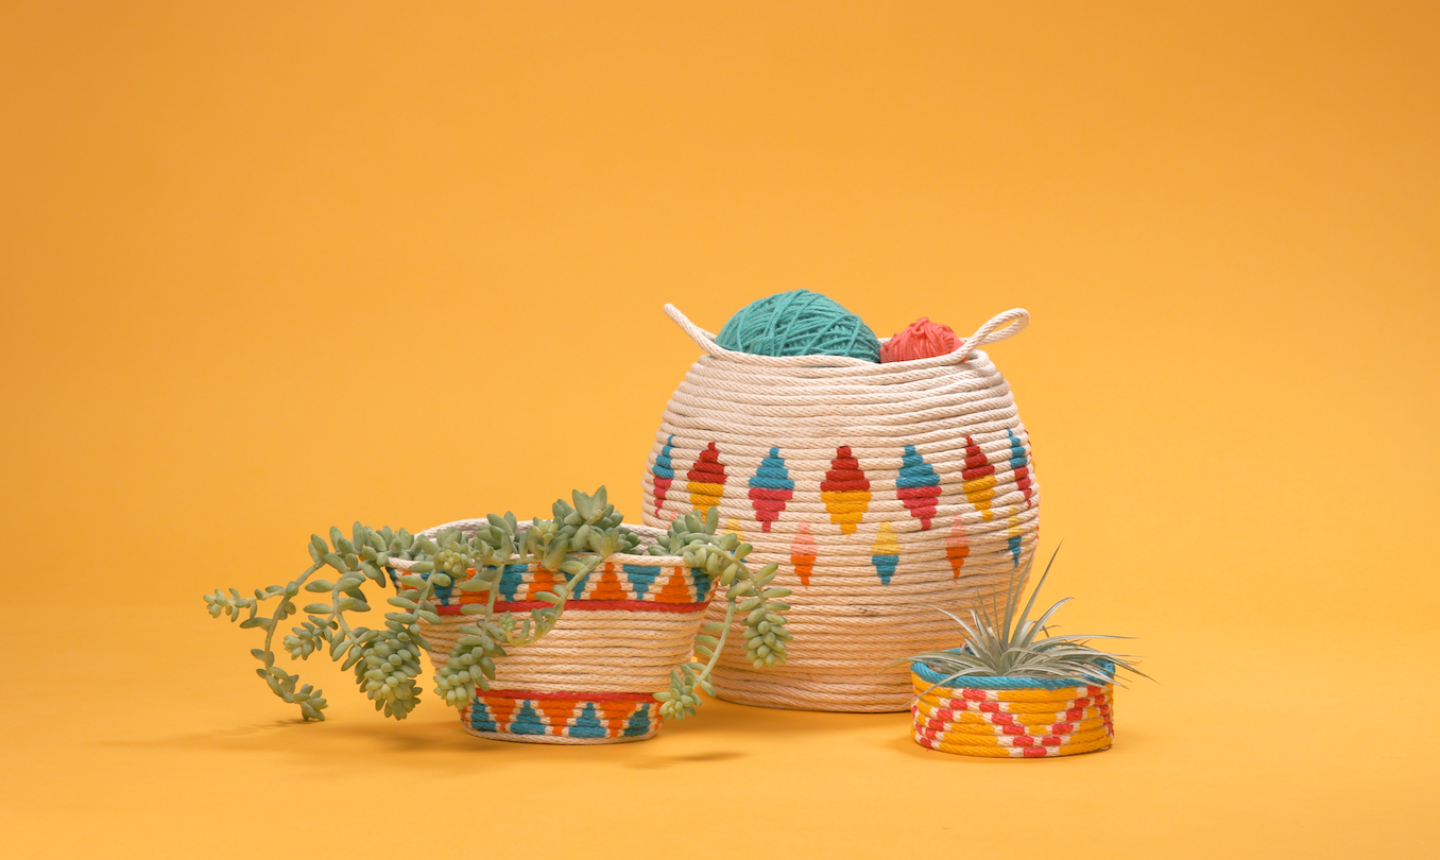
Hey crafters, this basket is a lifesaver. Make it in a day, paint it to match your personality, then use it to store all that yarn you’ve got laying around. Of course, these baskets can be used in all kinds of ways (cute plant cozy, anyone?).
Painted Rope Basket
Level: Easy
What You Need
Instructions
1. Begin Winding the Basket
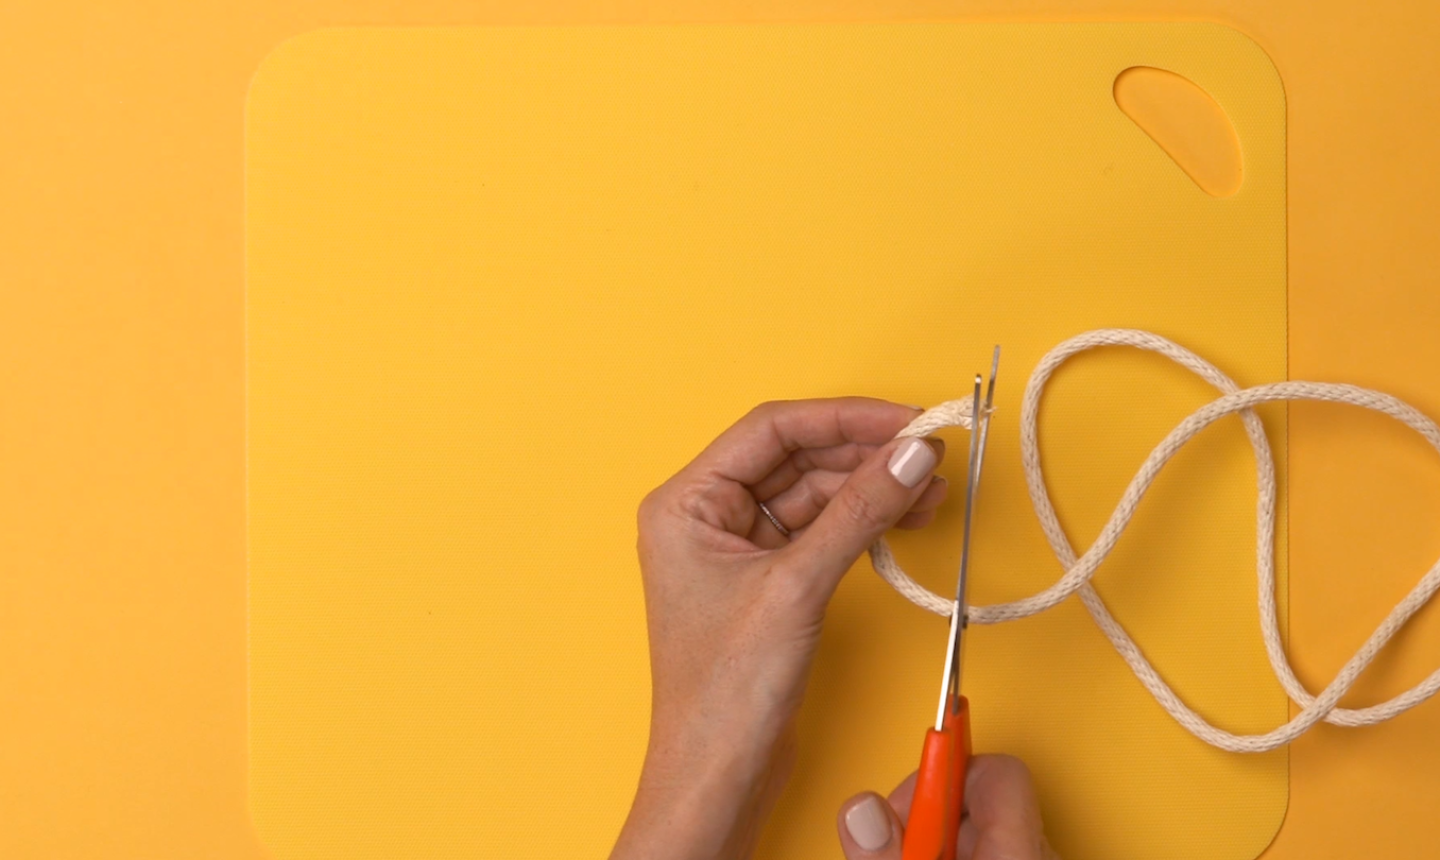
Unwind a bit of clothesline rope and snip the end diagonally. Don’t cut the rope from the skein — you’re going to use a lot of it and it’s much easier to work with one long, continuous piece.
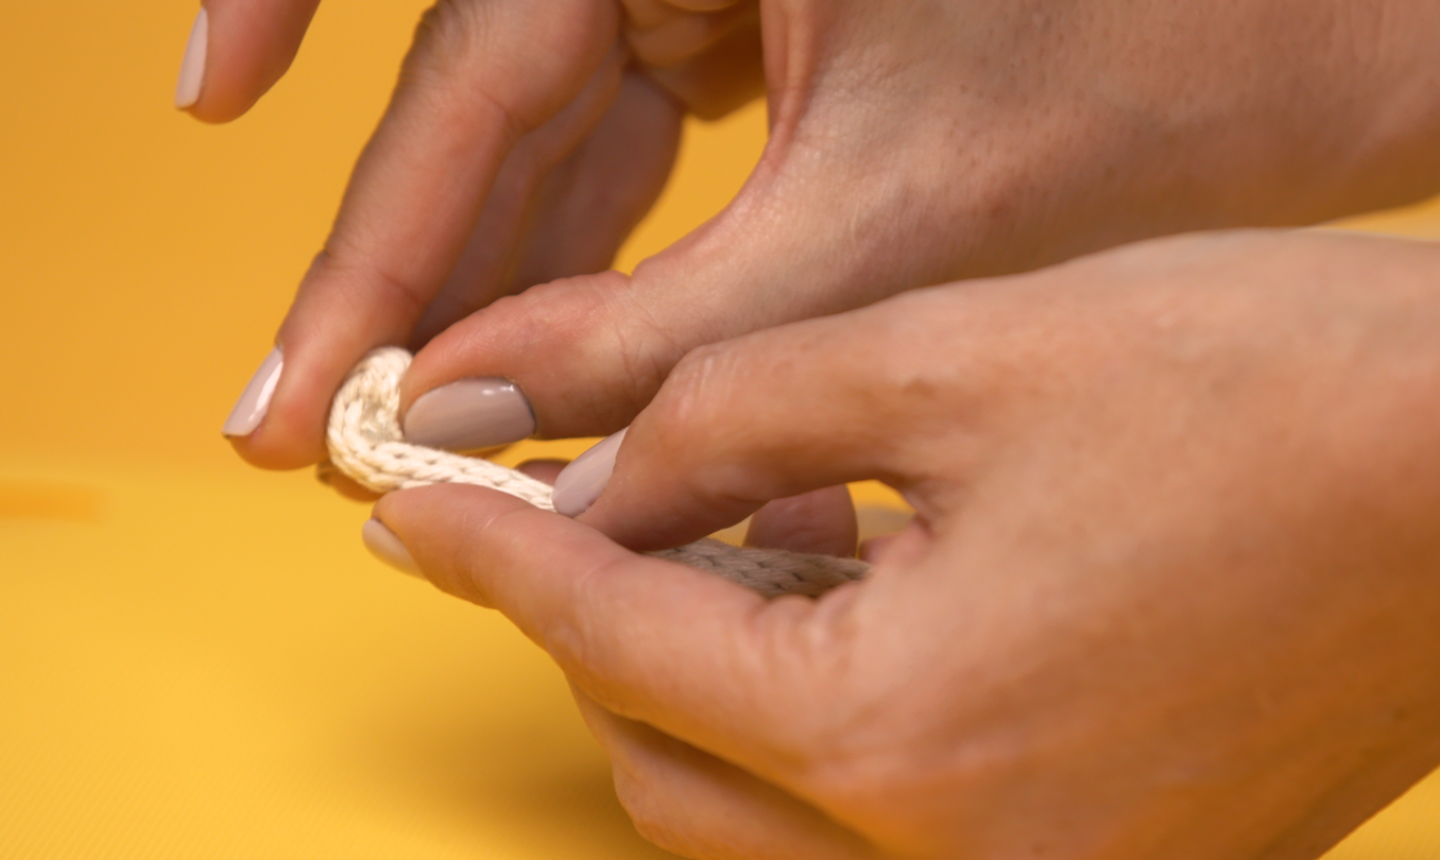
Dab some hot glue onto the end and start coiling the rope to form a circle.
2. Make the Base
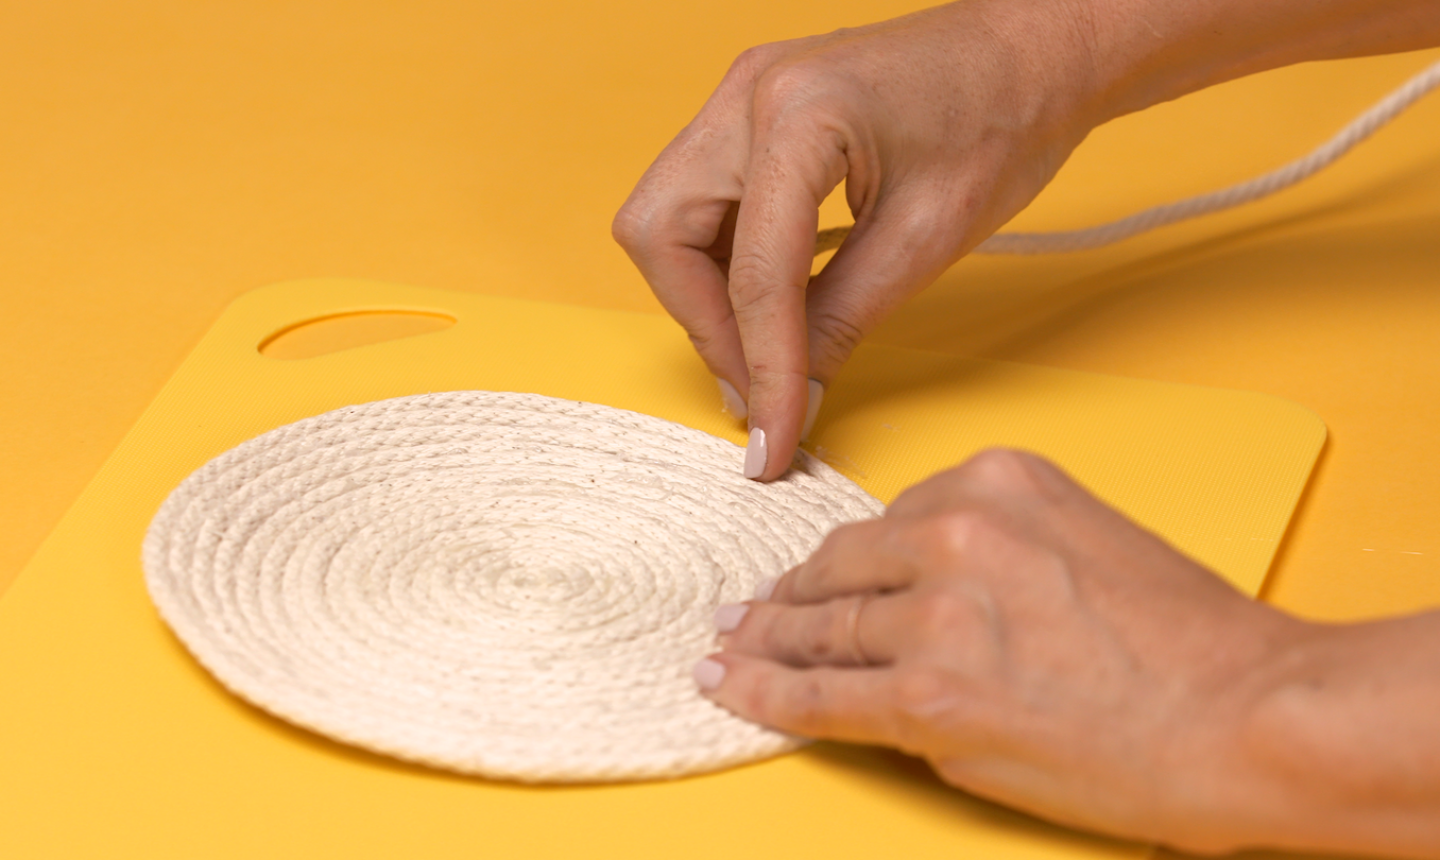
Keep wrapping the rope around itself, securing it with hot glue as you work. Wind it until you have a circular base as big as you want your basket to be. (This should match the diameter of the plant tray you’re using.)
3. Create the Form
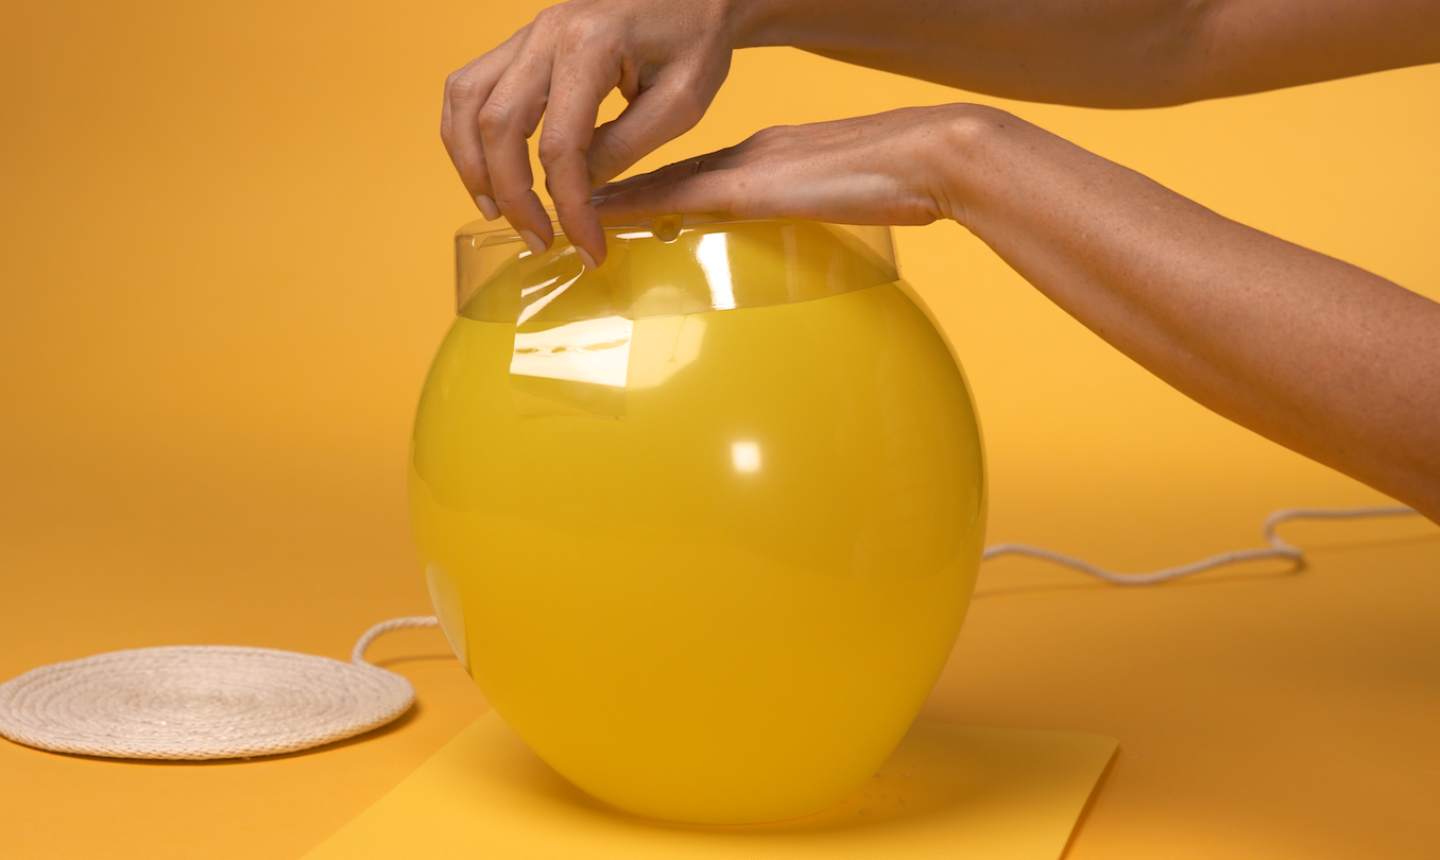
Blow up a balloon and tape the plant tray to the top. Then flip it over so the tray is on the bottom and the tied end of the balloon is facing up. Place the rope circle underneath the tray.
4. Build the Basket
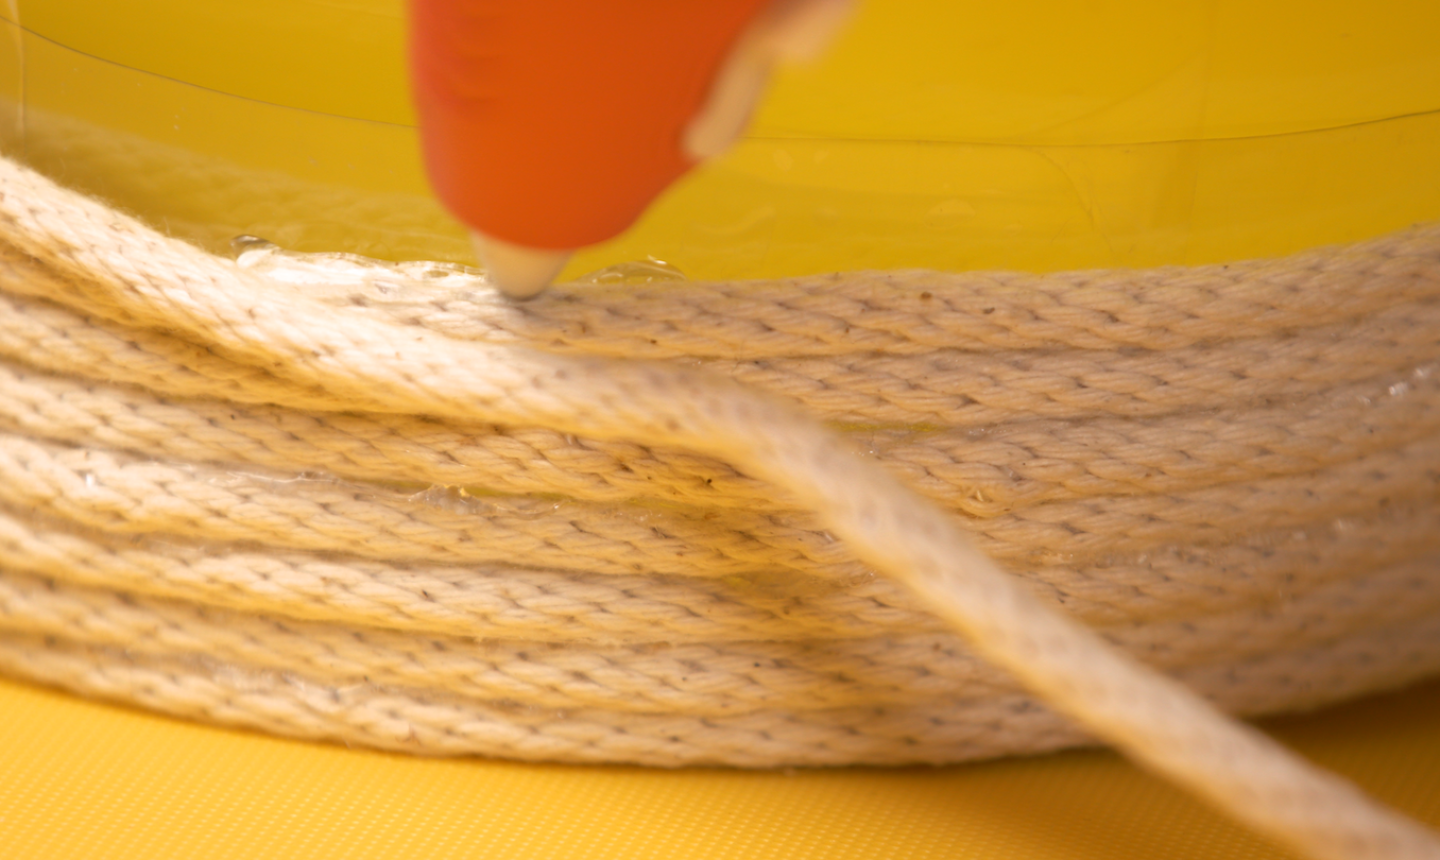
Build the rope up around the tray and balloon, applying hot glue to each section as you work.
Pro Tip: Add small sections at a time. Hot glue dries fast, so if you apply glue to a long length of rope it may dry out before you get there with your next layer.
5. It’s Poppin’ Time
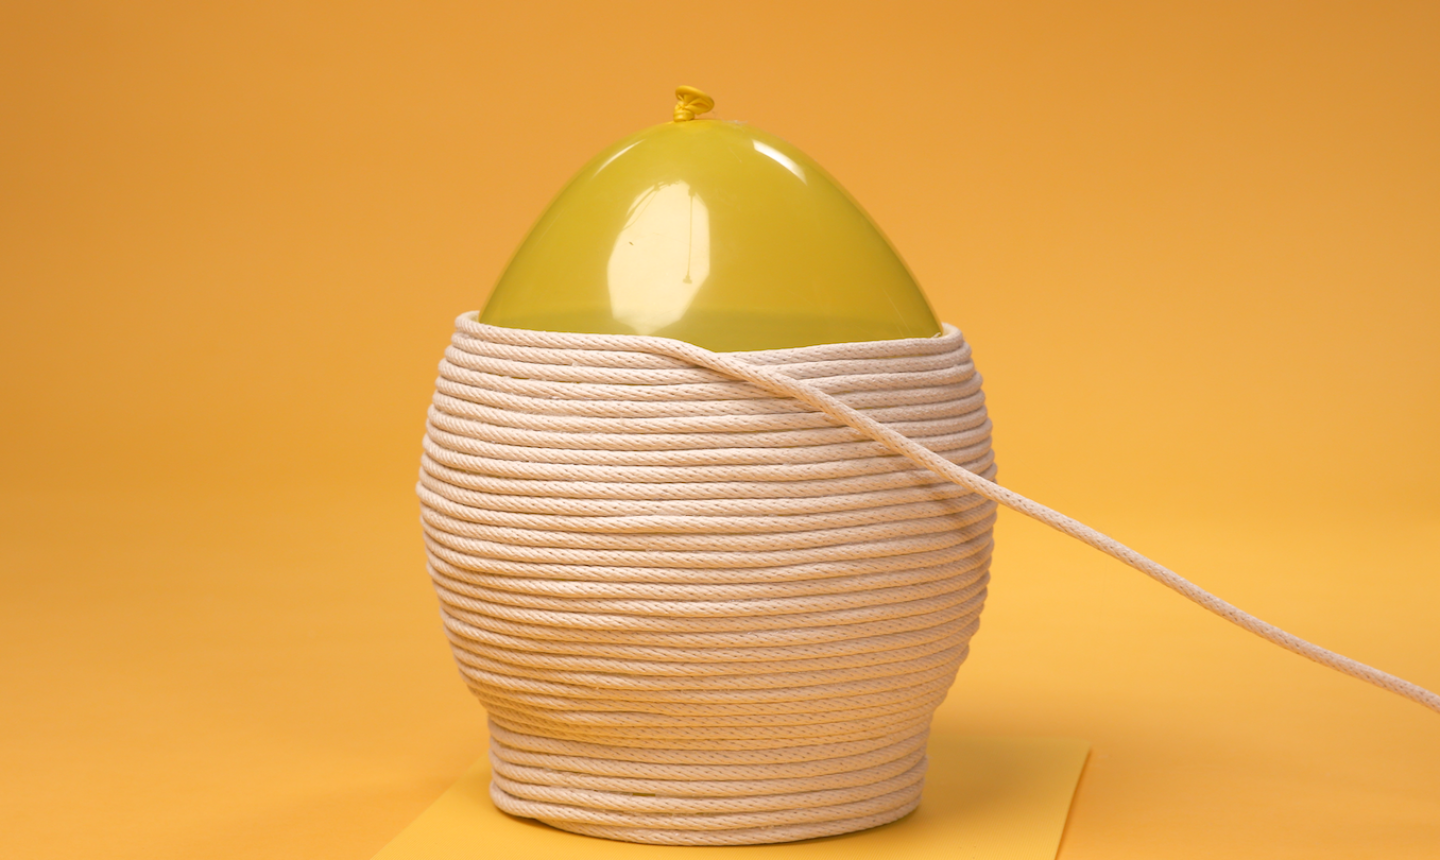
Keep wrapping until your rope basket is rounded and you’re nearing the end of the balloon.
Use a needle (or anything pointy) to pop the balloon, then remove the pieces from the basket. Your rope will keep its shape without the support!
Pro Tip: Don’t remove the plant tray. It keeps your base sturdy and helps the basket keep its form.
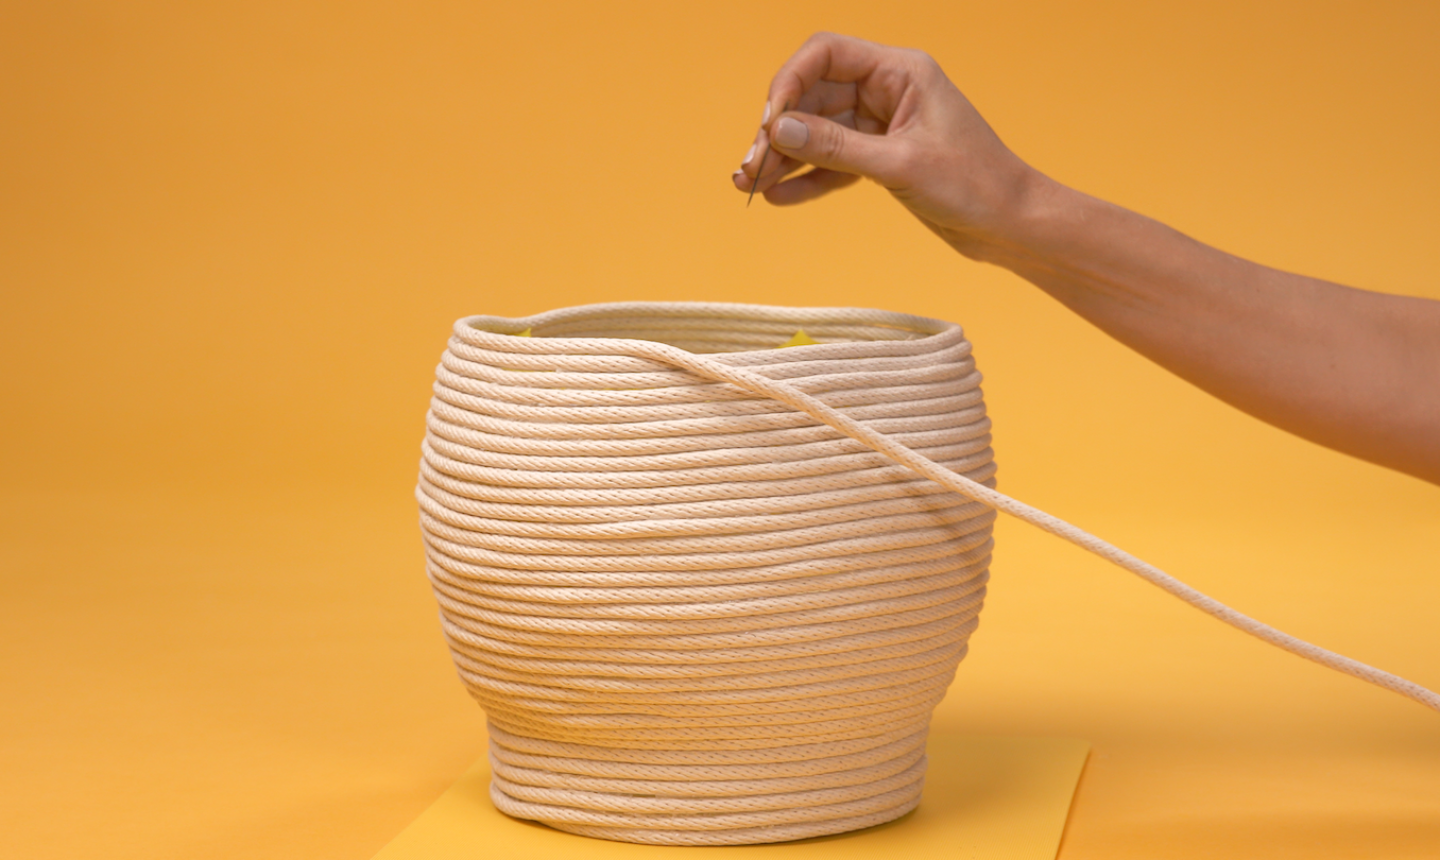
6. Add the Handles
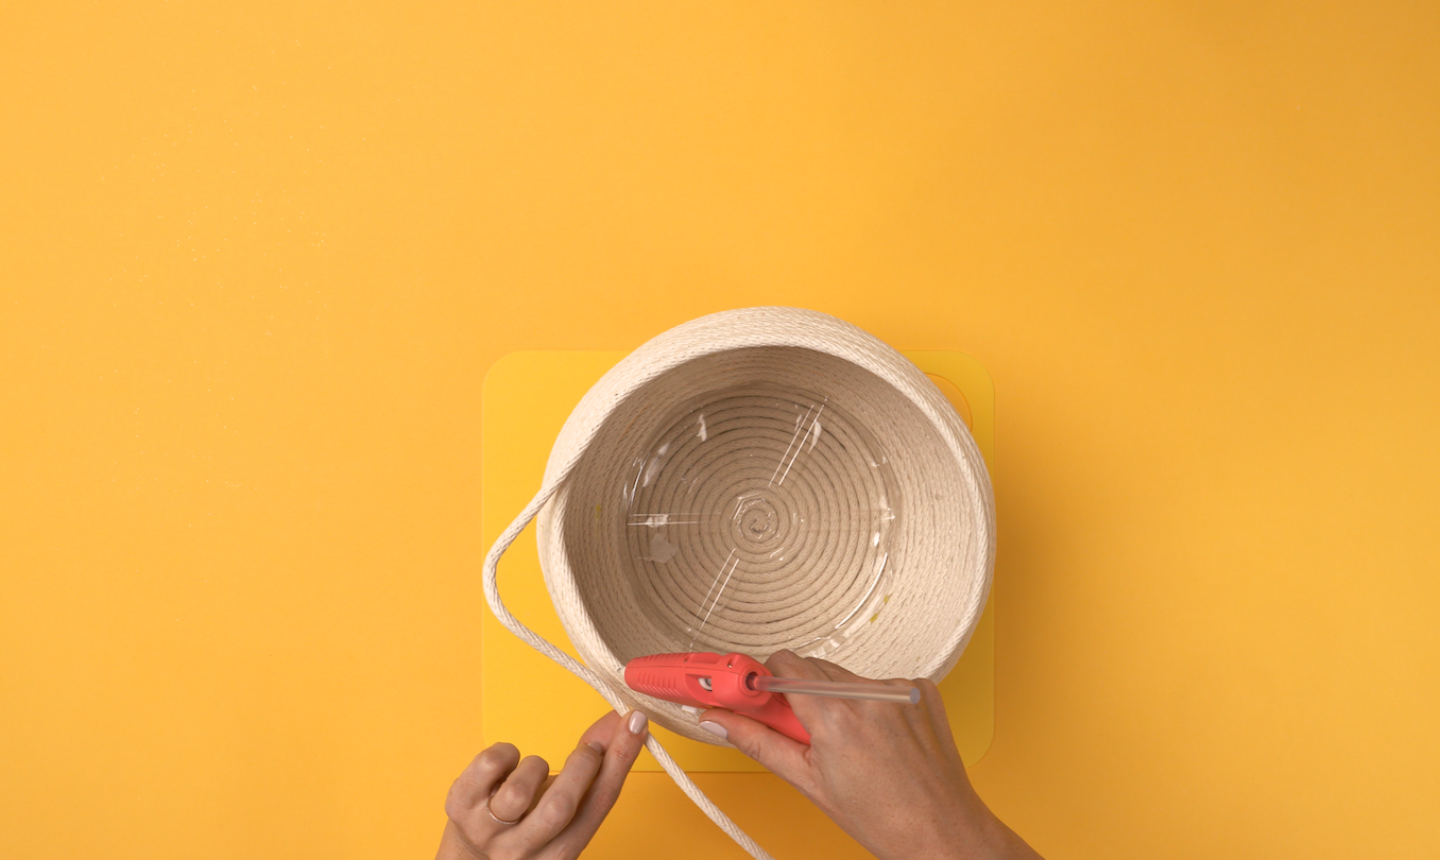
Give the rope some slack and shape the handle. Add a dab of hot glue to secure it in place. Repeat this step on the opposite side for the second handle.
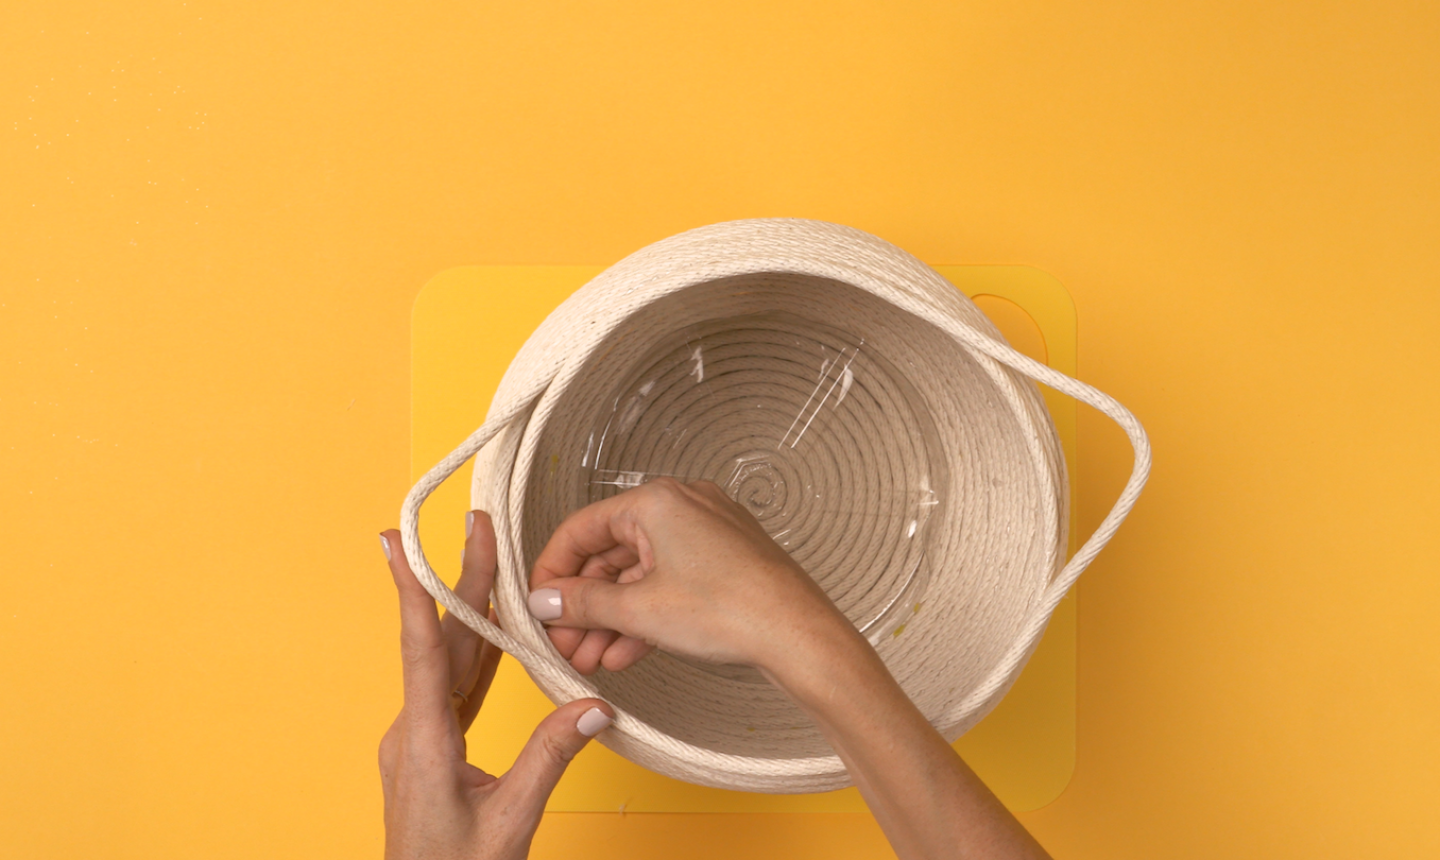
Once both handles are glued into place, cut the rope from the skein, leaving a small tail. Add hot glue to the excess rope and wrap it down inside the basket to secure it out of the way.
7. Paint
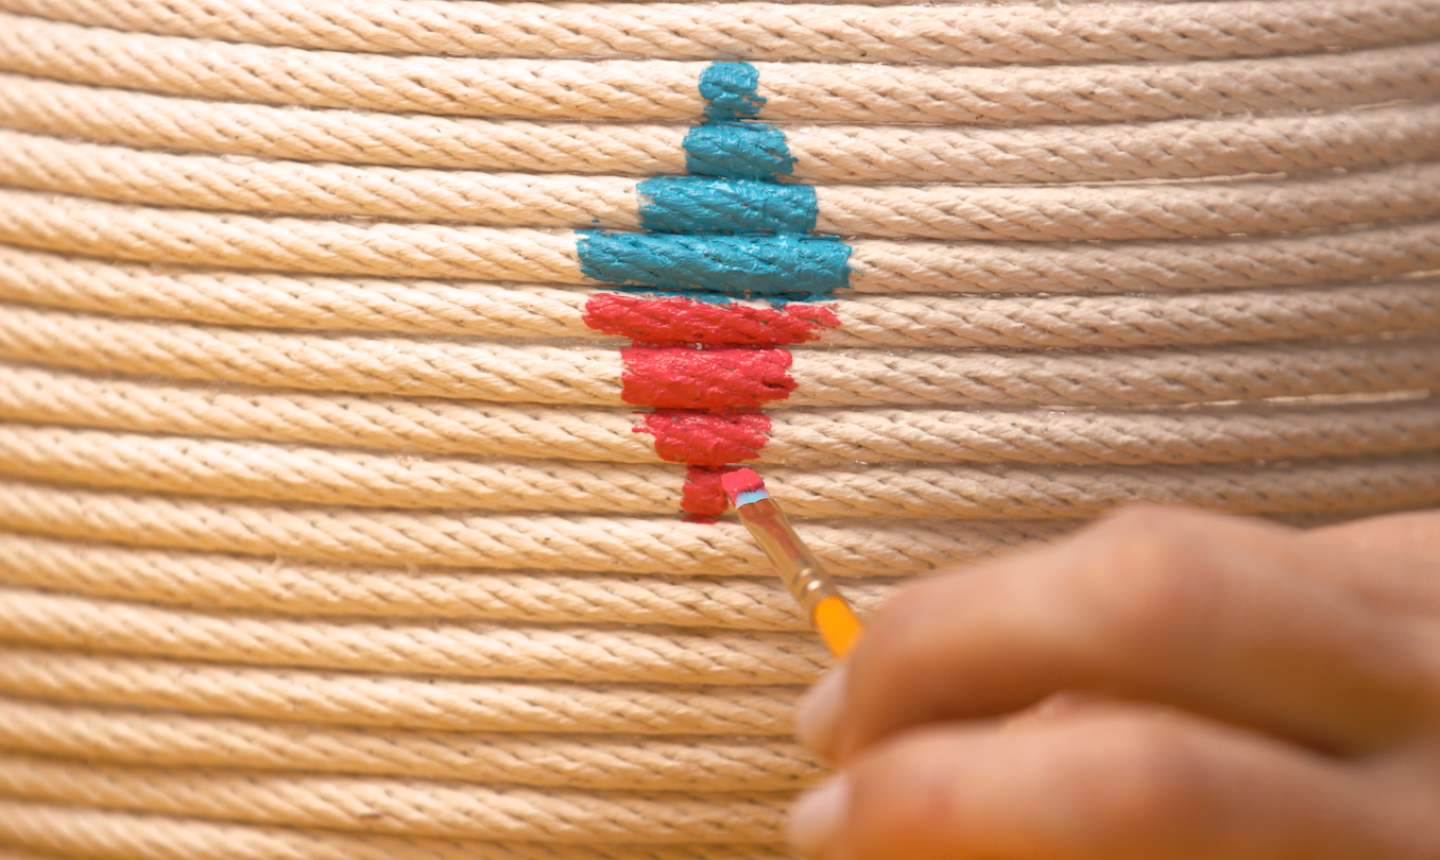
Jazz that plain basket up a bit! You can paint geometric shapes like we did, or make your own design. You have total creative freedom here.
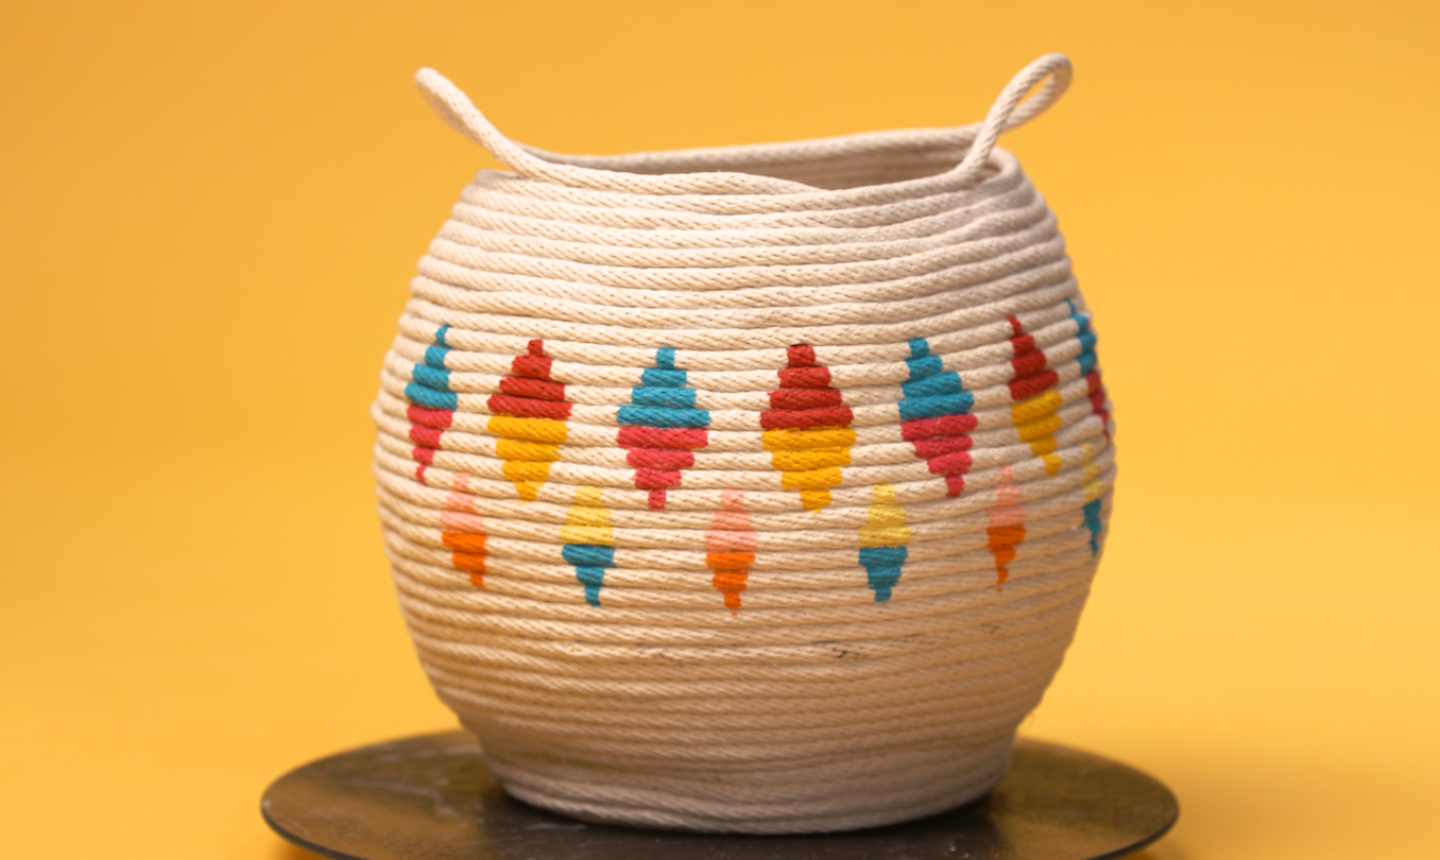
Ta-da! You’ve got one fab basket.
I have attempted several rope baskets, but each time I end up with excess hot glue drying mostly on the inside (of open baskets), and I’ve not found an effective way to remove it. I tried using less glue when coiling, but the rope did not adhere properly. Any tips?