
Want a place to keep all of your notes, drawings, lists and writing utensils organized? Make this fast and fun book cover and keep all your information safely tucked into one place!
Buy a lined journal if you prefer to write notes and lists only, or use a graph journal for drawing. These covers are so easy that you’ll be able to sew up several and share them with your friends!
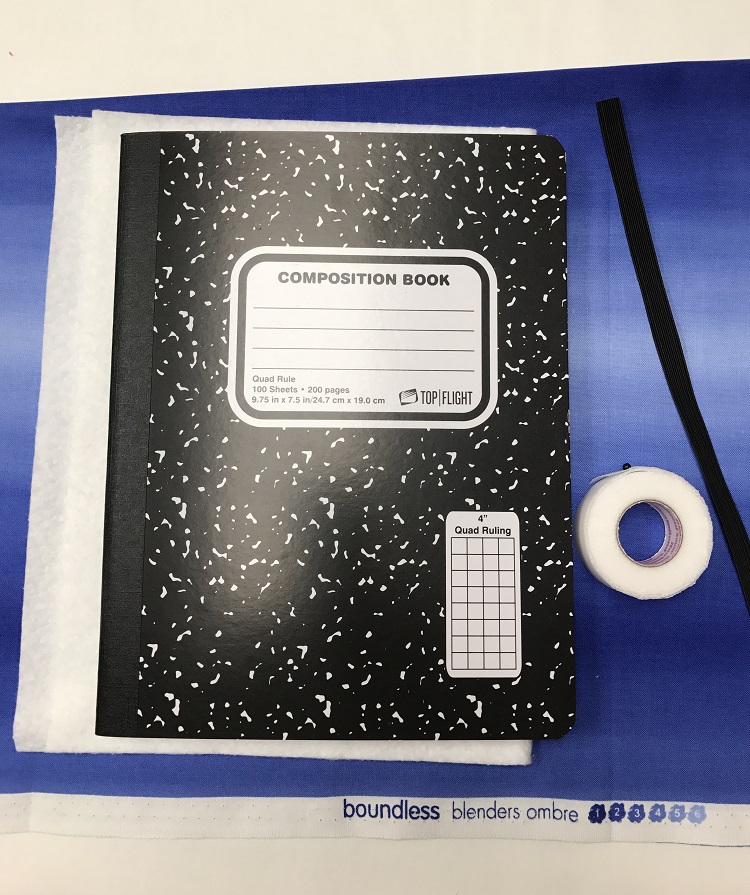
Supplies needed
- One standard size journal
- ½ yard of fabric for cover
- 10½” x 16½” piece of batting
- 10½” of elastic
- 16” of fusible hem tape (cut into two lengths of 8” each)
Start by measuring your journal cover.
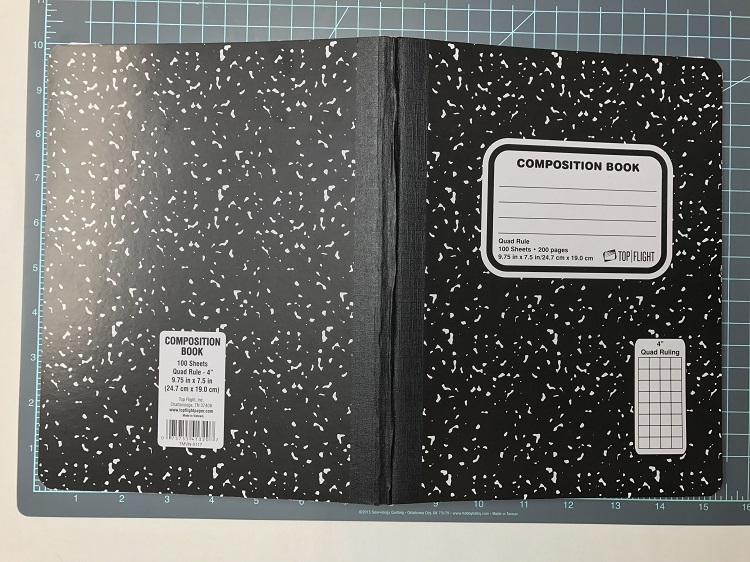
The standard-size journal I used was 9¾” by 15½” when opened flat. For the main covering, I cut a piece of fabric 10½” x 16½”, which is an additional ¾” to the height and an additional 1½” to the width. This allows for the seam allowance and the bulk of the batting. It will make a snug cover that will loosen slightly over time with use.
If your journal or book is a different size, simply measure it and add those additional measurements to get the size of your main fabric.
Once you’ve measured, cut your fabric.
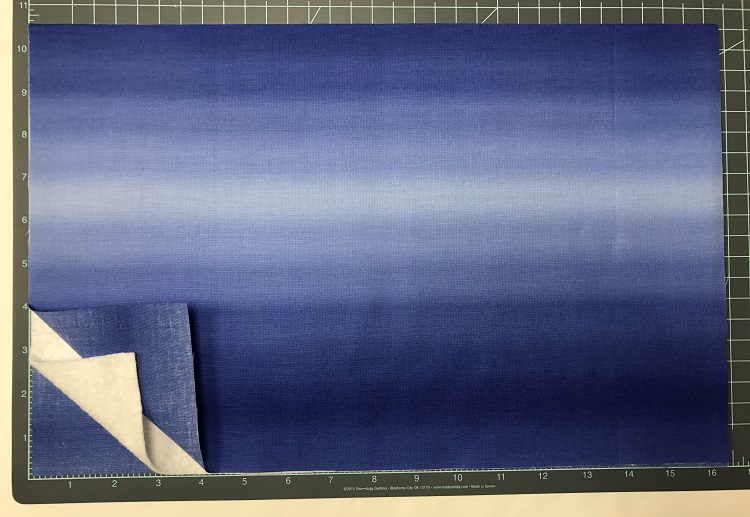
I used Boundless Blenders Ombre fabric by the yard for my journal cover.
Cut the selvage off of the half yard piece of fabric. With the fabric folded wrong sides together, cut the following pieces:
- For the cover and lining: One 10½” x 16½” piece (this will make two pieces, since the fabric is folded together)
- For the sleeves: Two 10½” x 8″ pieces (press each one lengthwise, wrong sides together)
- For the hems: Two 3″ x 9″ rectangles
- For the pockets: Two 5″ squares
- Batting: One 10½” x 16 ½” piece
Ready to start sewing? Let’s begin with the pocket.
Step 1:
Layer the 5” squares right sides together. Sew a seam ¼” seam around the entire square, leaving an opening on one side for turning.
Step 2:
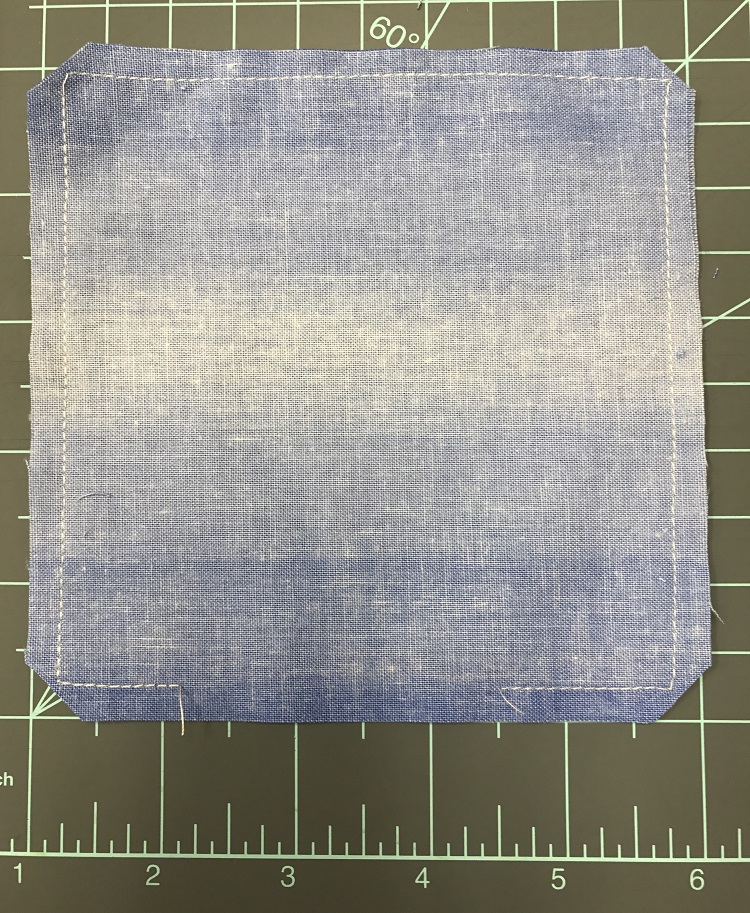
Trim the corners and turn the pocket right side out. Press the pocket flat and tuck the open seams into the pocket.
Step 3:
Finger press the pocket in half to create a mark for the sewing line. Then finger press another crease 1″ on either side of the center for additional sewing lines, which will create dividers in your pocket:
You can customize your journal cover with as many or few pocket dividers as you need (pictured above).
Step 4:
Lay the journal pieces on your work surface as follows: Lining fabric with thewrong side up, batting, cover fabric with the right side up.
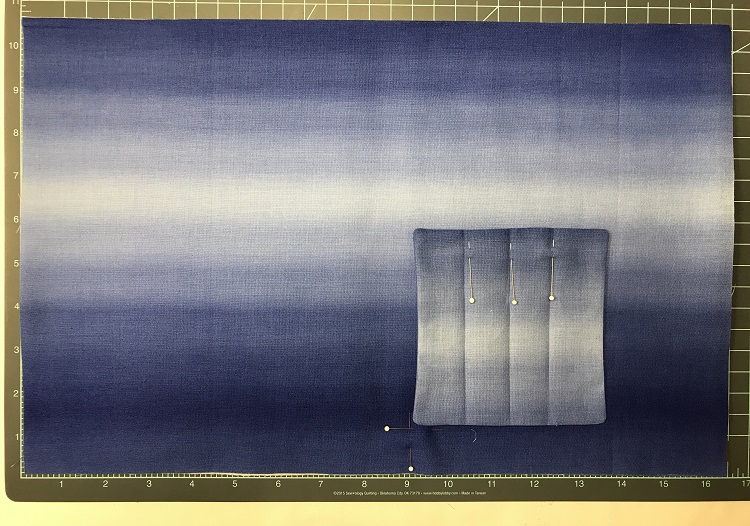
Use pins to mark 1″ from the bottom and 9″ from the left (see pins in photo above). This denotes your pocket placement. Lay the pocket there and secure the pocket through all three layers of the journal cover with additional pins.
Step 5:
Sew a seam ¼” seam around the edge of the pocket (except for the top), and along each creased seam. Back stitch at the beginning and end of each seam to secure the seams.
Next, we’ll add the elastic closure and sleeves.
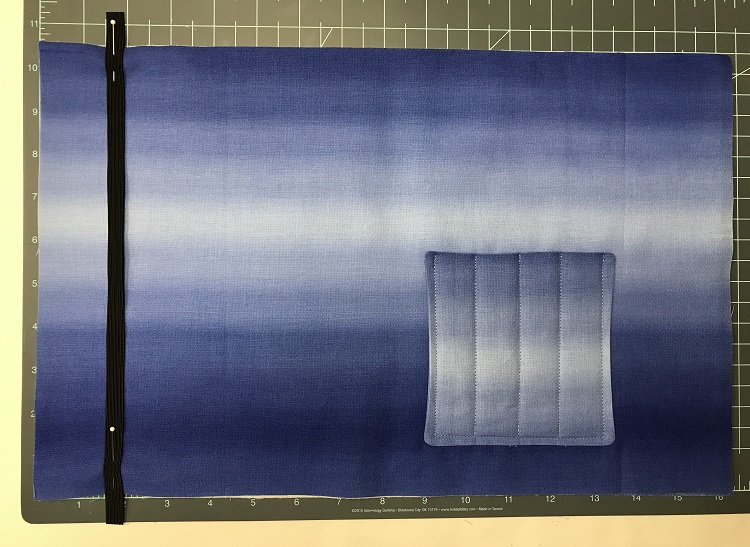
Step 6:
Pin the elastic 2” from the left edge of the journal cover, as shown below. Stretch the elastic first to release it, then lay it on the journal cover (not stretched) for sewing.
Step 7:
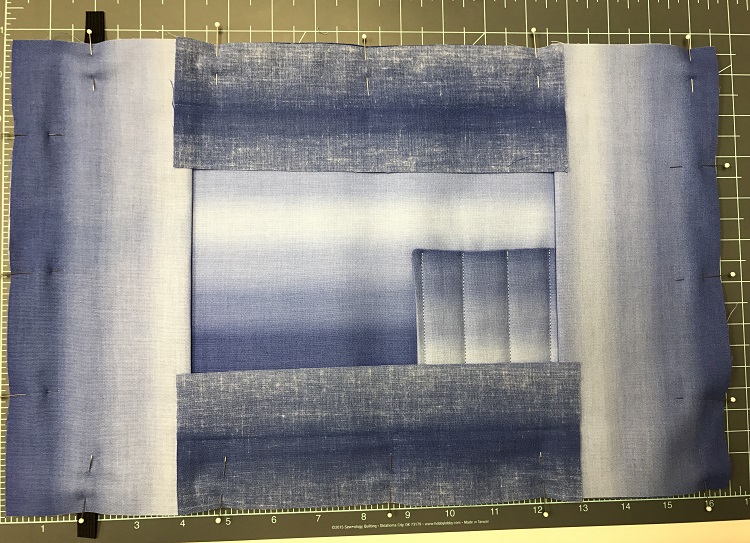
Layer the sleeves on each side of the journal cover as shown above. The raw edges of the sleeves should be directly on top of the raw edges of the journal cover. Remove the pins from the elastic strip and re-pin through the sleeve fabric.
Layer the hems along the top and bottom as well, with the wrong sides facing the journal cover.
Use pins to secure all of the layers together before sewing. Note that the ends of the hems should overlap the sleeves slightly.
Finally, it’s time to sew!
Step 8:
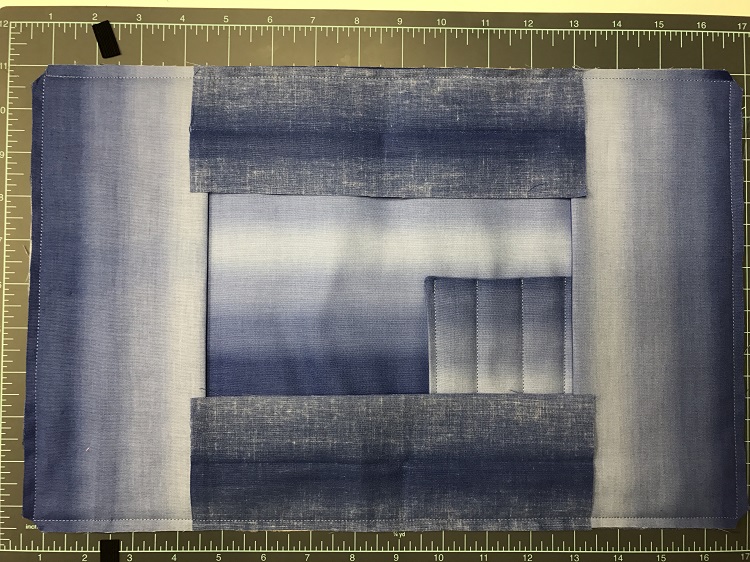
Sew ¼” seam all the way around the journal cover. Clip the corners as shown above.
Step 9:
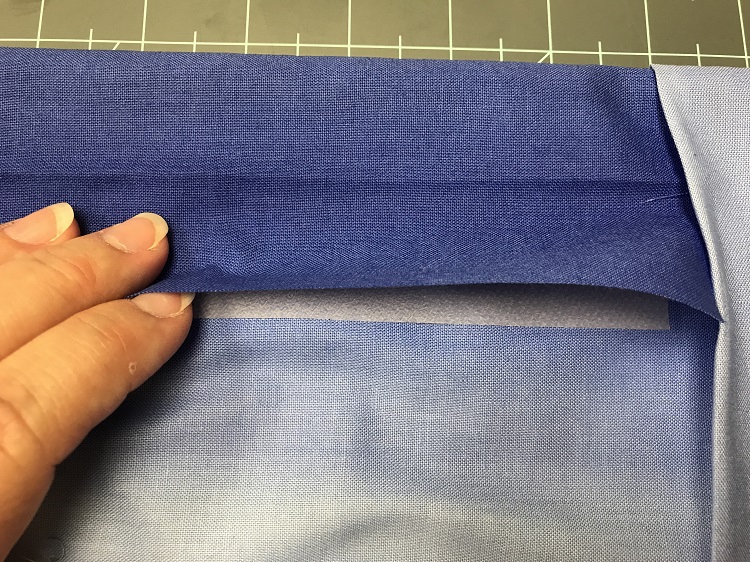
Turn the journal cover right side out and press the edges flat. Insert the hem tape under each edge of the hems and fuse in place.
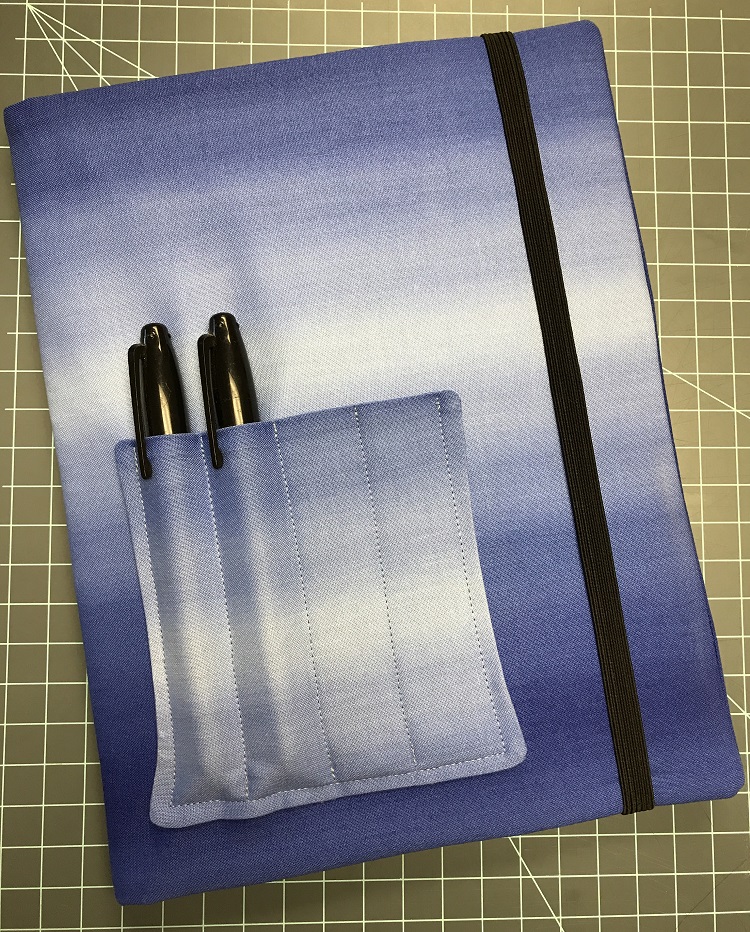
To finish, insert the journal into the cover and fold closed. Pull the elastic to the front to secure the journal. Insert pens or pencils into the pocket. Have fun with your journal!
Share tips, start a discussion or ask one of our experts or other students a question.
No Responses to “Make a Quick DIY Journal Cover With Just ½ a Yard of Fabric”