
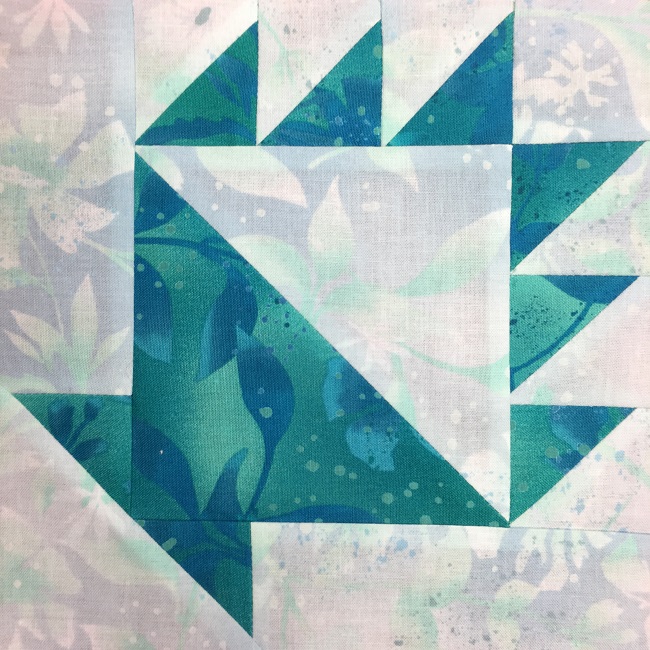
Nothing says spring like pretty floral prints sewn into bright, cheerful blocks! Follow this free tutorial for traditional cake stand blocks using 10” pre-cut squares to create your own springtime block.
It only takes two 10″ squares and a few minutes to sew up a block. Before you know it, you’ll have a whole collection of these pretty blocks for your next quilting project.
Supplies needed
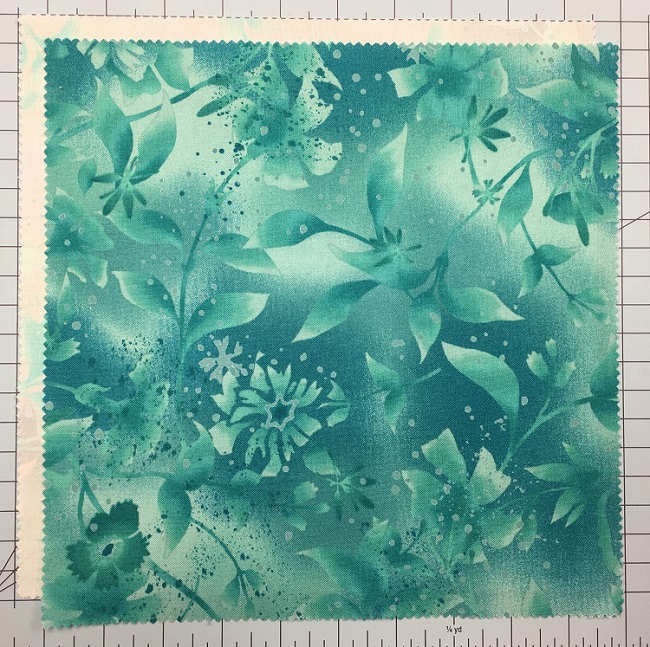
You’ll just need two 10″ squares — one light square and one dark square. I used the Boundless Blenders Botanical 10″ Squares.
Cutting instructions

Layer the light square and the dark square before cutting, so you can slice them both at once.
- Cut two 2″ x 10″ strips
- Cut one 6″ square
- Cut one 4″ square
- Cut two 2″ squares
Making the small triangles
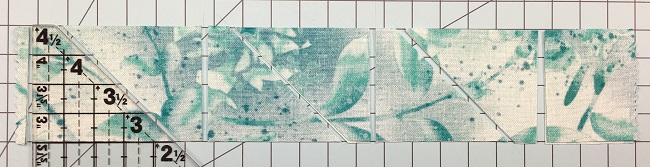
Layer the light and dark strips, right sides together before cutting. Using any 45-degree ruler, cut the triangles as shown in the photo above. By rotating the ruler, all six triangles sets can be cut from one strip.
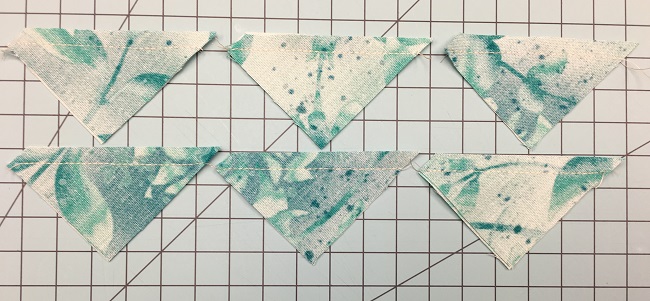
Using a ¼” seam allowance, sew the triangle sets together along the long side of the triangle. Press the seams toward the dark fabric.
Making the larger triangle
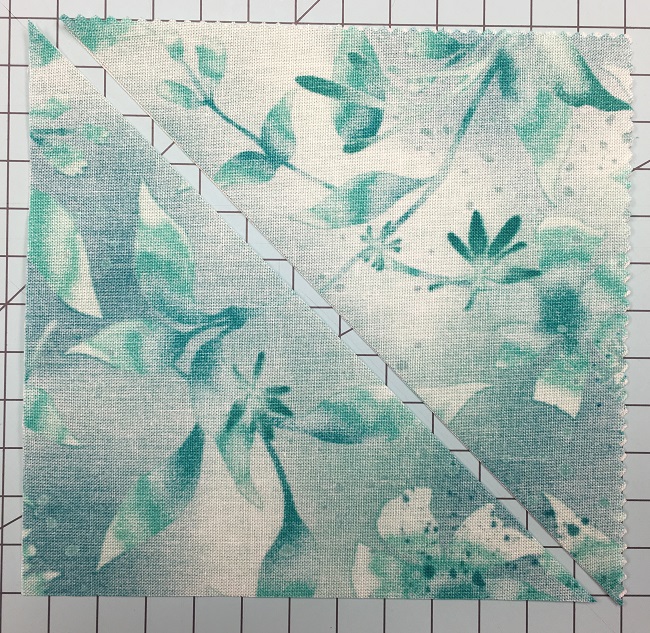
Cut the 6″ squares in half on the diagonal and sew one dark and one light together along the long edge using a ¼’ seam, in the same manner as the small triangles. Press the seams toward the dark fabric and trim the unit to 5″ square. There will be one light and one dark triangle not used.
Making the side strips
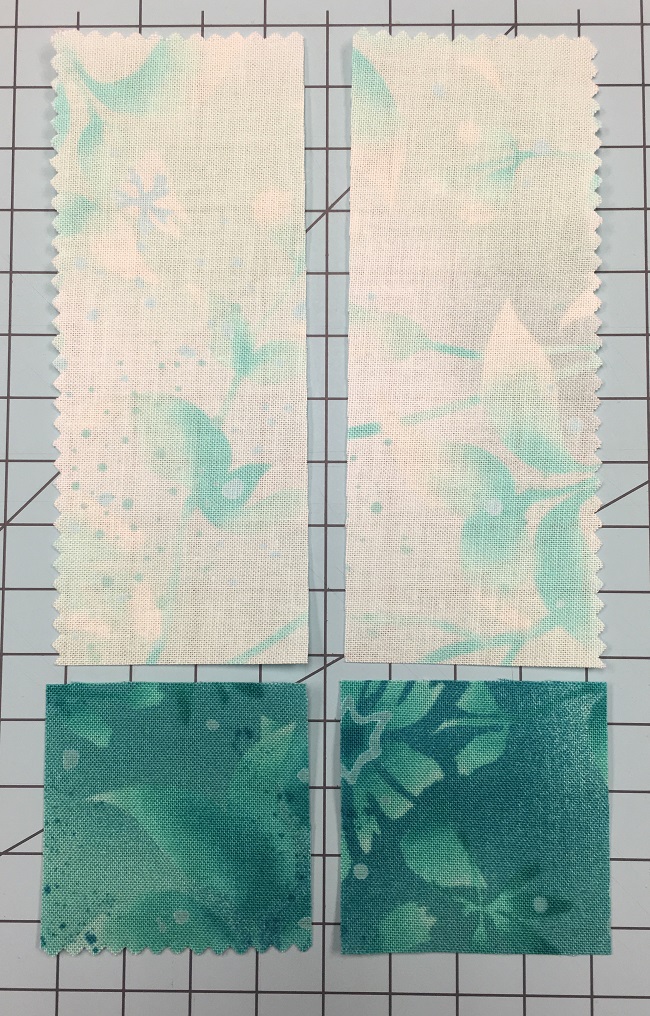
Take the remaining light strip (the one you didn’t use for the small HSTs) and cut it in half, making two 5” x 2” strips. Pair each of these strips with a dark 2” square. Sew the dark square onto the end of each of the light strips.
Sewing the units together
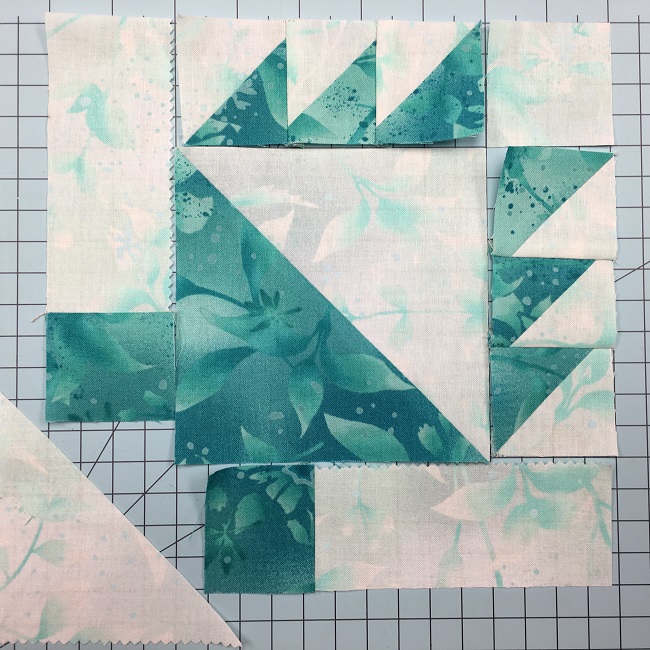
- Sew the three small triangles in a row as shown; repeat with the other set of three triangles. Press the seams in one direction.
- Sew one row of three triangles to one side of the large triangle. Press the seams toward the large triangle unit.
- Sew one 2” light square to the end of the other row of three small triangles. Press the seams toward the small square.
- Sew the triangles-and-small-square row onto the large triangle with small triangle row unit. Press the seams toward the large triangle unit.
- Sew the long strips to each of the two sides of the unit as shown above. Press the seams toward the strip units.
Trimming the base of the cake stand
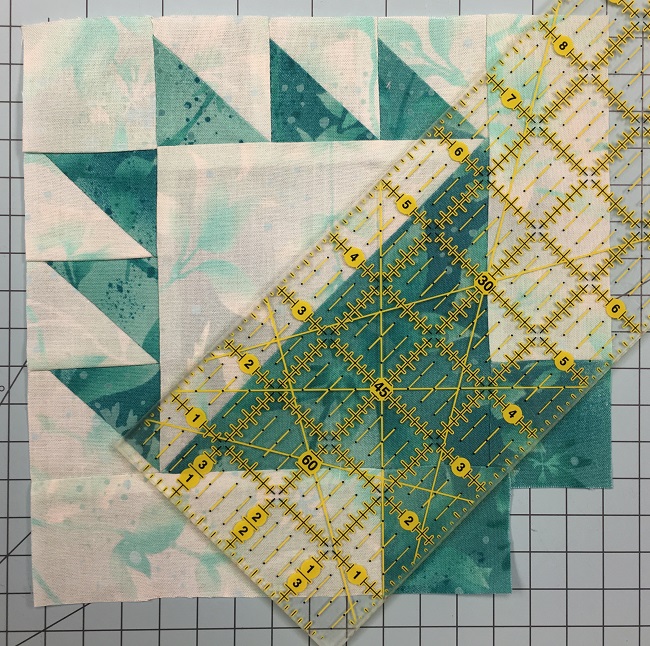
Using a ruler and rotary cutter, line up the ruler as shown above. Take care to cut the straight line from one corner of one dark square to the opposite corner of the second dark square, leaving a ¼” seam allowance at the seam intersection at the corner of the large square.
Sewing the final corner
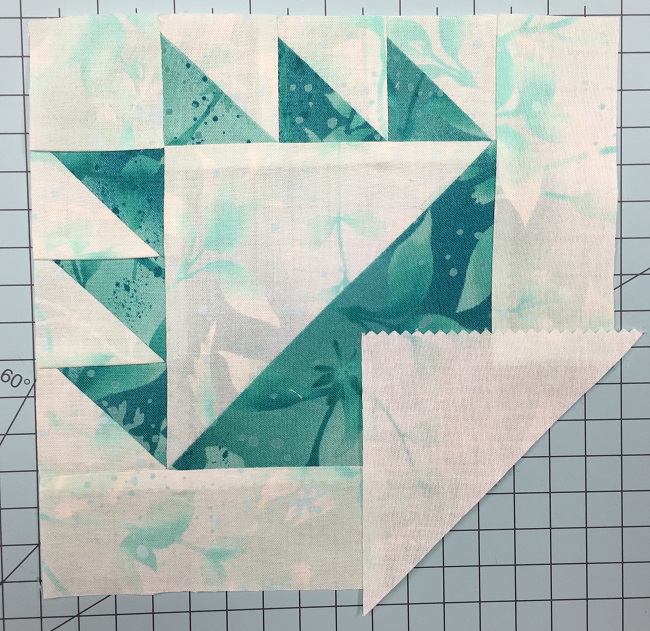
Cut the light 4” square in half on the diagonal, in the same way the you cut the large triangles for the center of the block.
Layer one of the triangles on top of the cut edge of the block. Sew a ¼” seam along this diagonal edge. The triangle ends will stick out past the edges of the block. This is necessary for the triangle to be placed properly, resulting in an accurate seam. Press the seams toward the corner triangle.
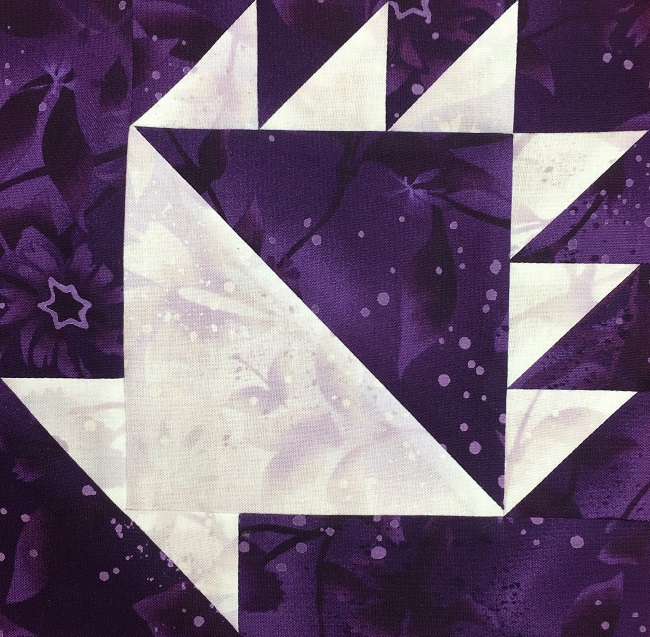
The finished block
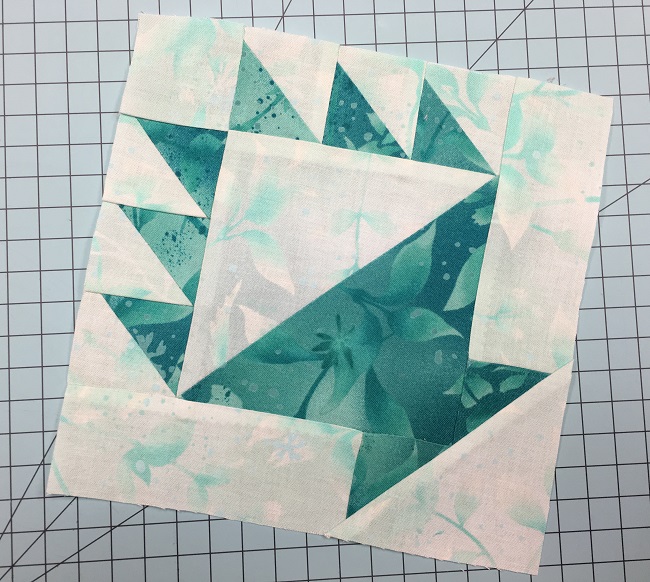
The finished block will be 7½” square. Trim the edges if needed.
More variations for your block
- Make another block reversing the light and dark fabric placement.
- Set lots of blocks on point for a traditional quilt.
- Sew borders on the block for a pretty placemat or pillow cover.
- Share this pattern with some friends and swap blocks!
Here’s another setting option
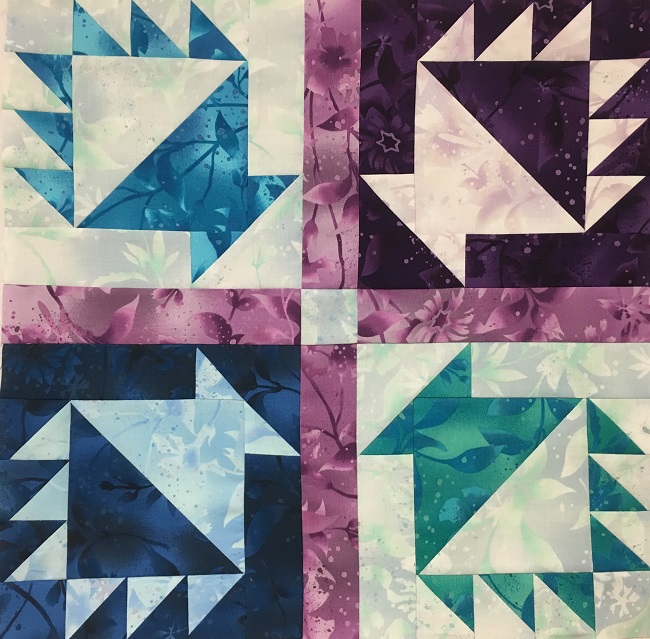
Create sashing by cutting four 2” strips from another 10” square, and using a leftover 2” square for a cornerstone. Sew them together in a four patch to create a much larger block. Add borders to make it a small quilt or make multiples to set together in a larger project.
The number to blocks you can sew from one 10” precut bundle will vary depending on the combinations of light and dark that you choose. It will also depend on whether you use some of the squares for sashing. No matter how many you sew, or how you set them, you’ll have a pretty springtime project you can enjoy for years to come!
Share tips, start a discussion or ask one of our experts or other students a question.
No Responses to “Make This Quick Block With Just Two 10" Squares (FREE Pattern!)”