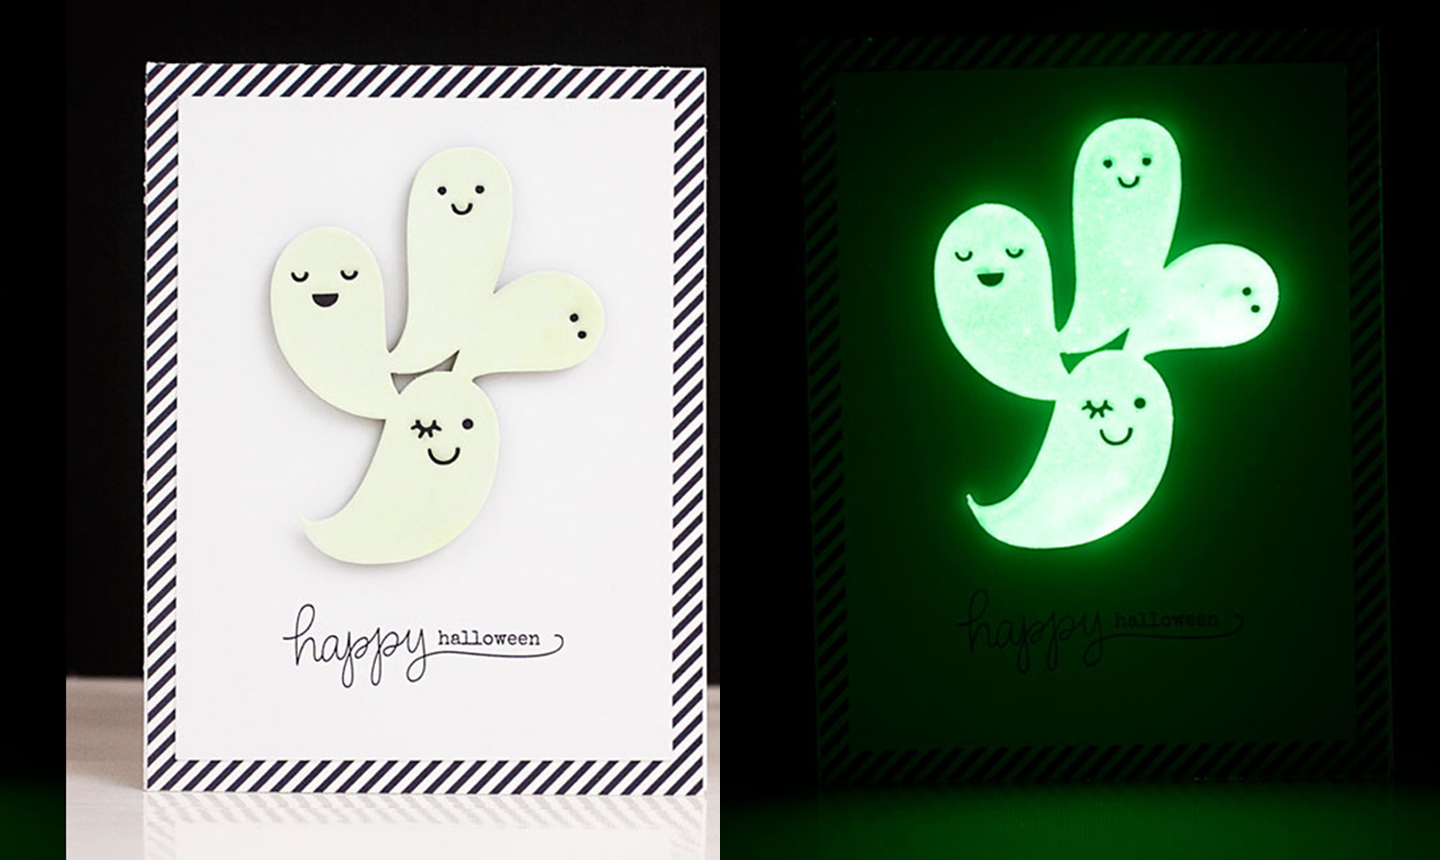
Halloween is all about things that go bump in the night and things that glow in the dark. This handmade halloween card definitely fits the bill — it's cute in the daylight, but spooky once the lights go down.
Glow-in-the-Dark Halloween Card
Level: Easy
What You Need
- White card stock
- A2 card base
- Digital or physical Halloween sentiment stamp
- Patterned paper
- Printer (if using digital elements)
- Paper cutter
- Double-sided adhesive
- Craft glue
- Ruler
- Die-cut Halloween shape (we used ghosts)
- Scrap paper
- Heat embossing tool
- Versamark watermark stamp ink
- Glow-in-the-dark embossing powder
- Craft tweezers
- Foam adhesive
- Scissors
Instructions
1. Make the Base
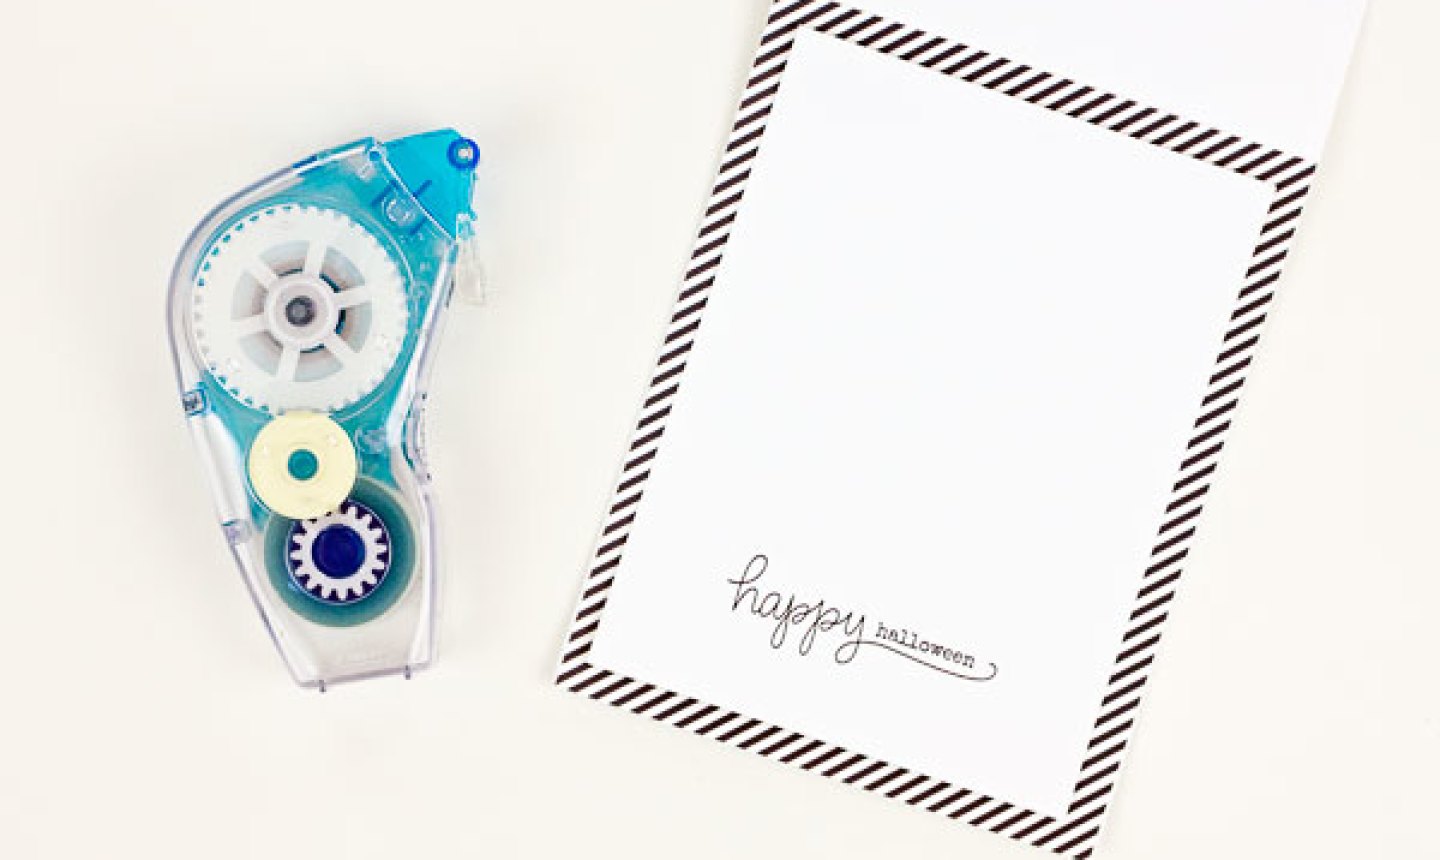
Cut a piece of patterned card stock to A2 card size (4¼” x 5½”) and attach to an A2 card base using double-sided adhesive.
Cut a piece of white card stock to 3¾” x 5” and stamp it with a Halloween sentiment in black or dark gray ink. Center the stamped piece on top of the patterned card stock and attach with double-sided adhesive.
Good to Know: If you're using a digital stamp, create a 3¾" x 5" rectangle shape in Silhouette Studio. Open the PNG stamp file you want to use, resize it to fit inside the triangle and place it toward the bottom and centered. Print the sentiment onto the cardstock and cut the rectangle out.
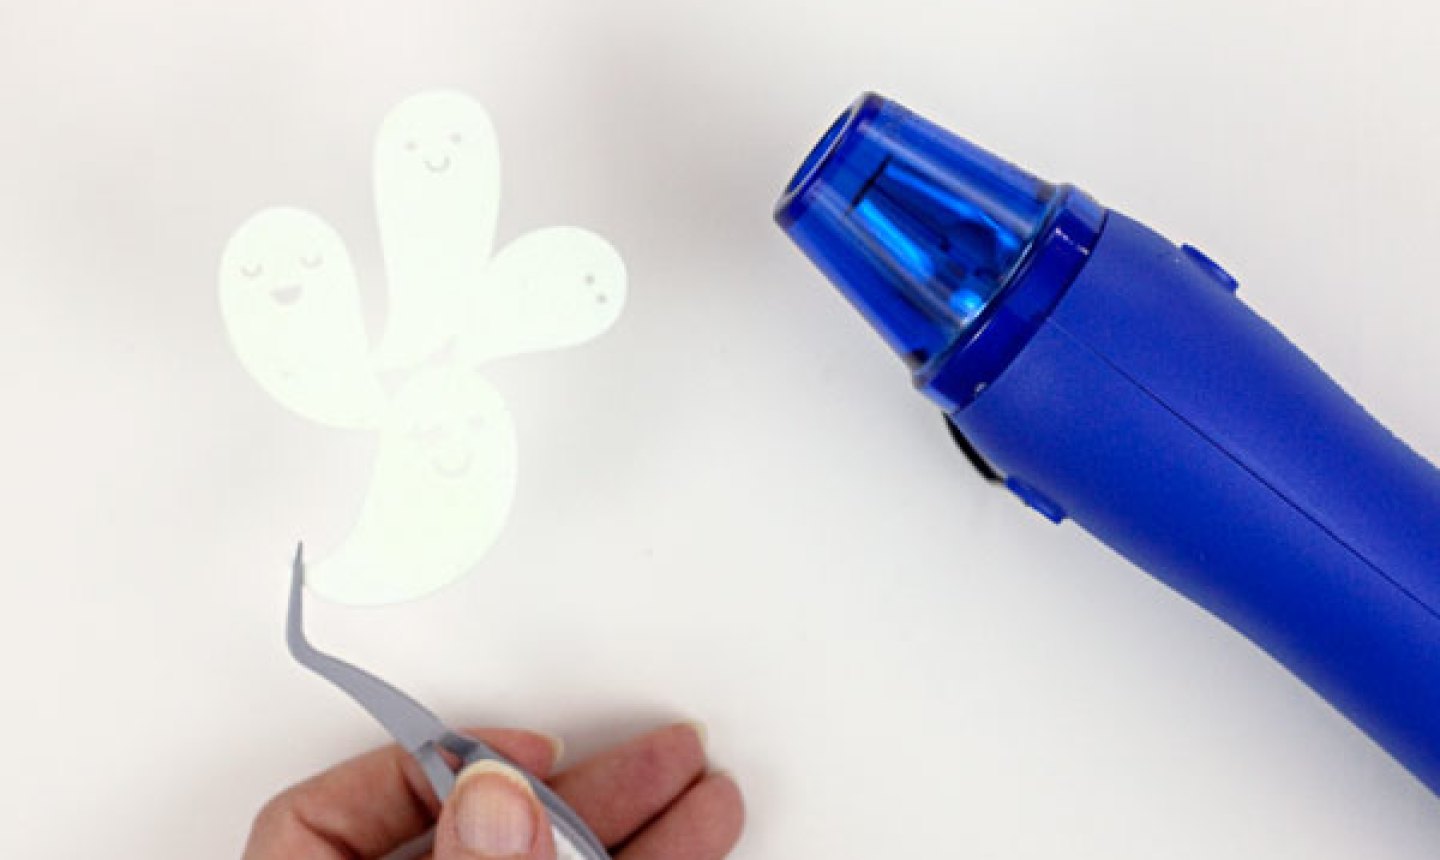
2. Prep the Ghosts
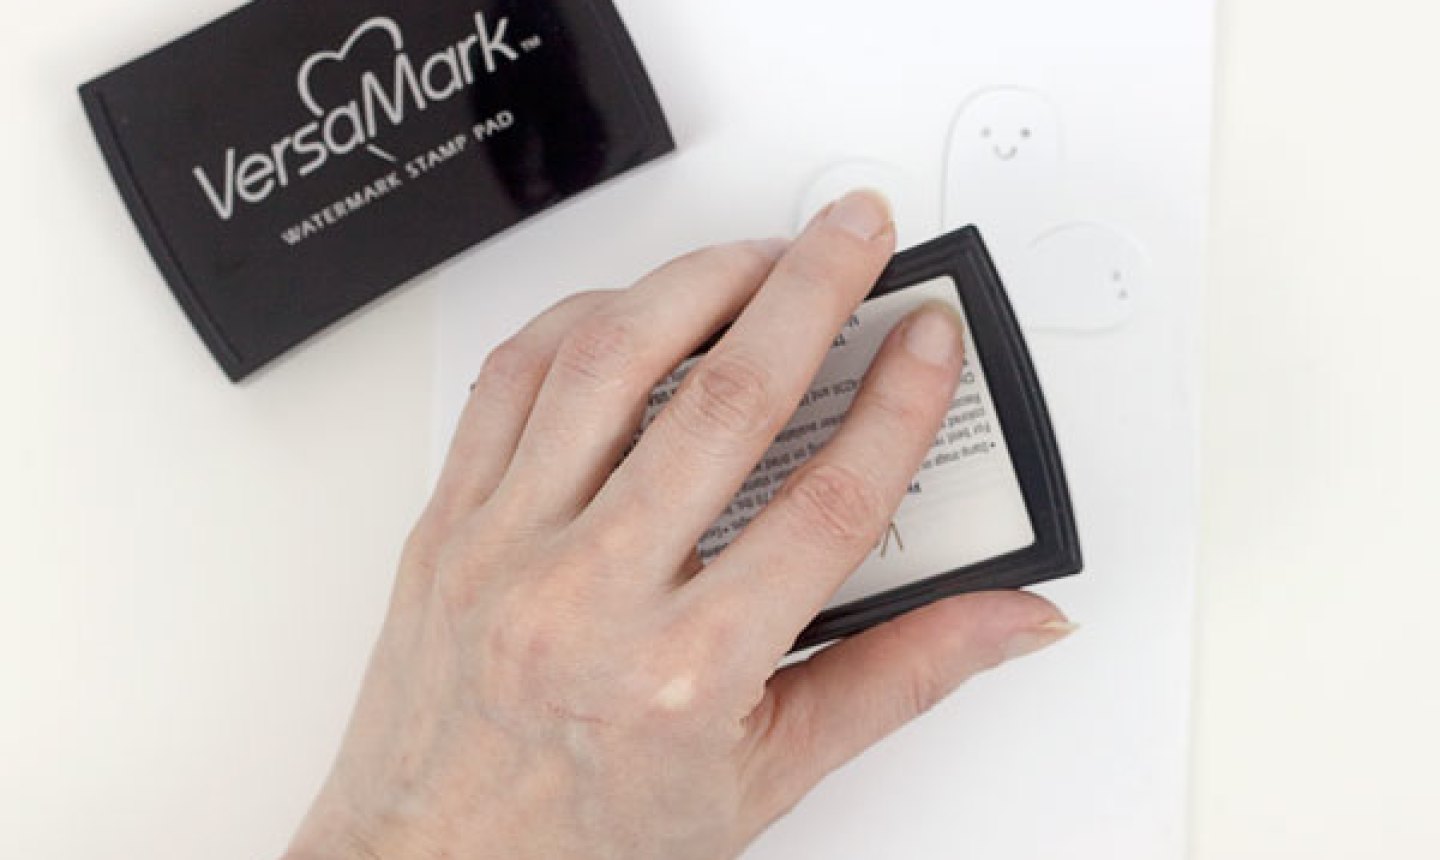
Place the top layer of the die-cut ghost shape (or whatever shape you're using) onto a piece of scrap paper. Completely cover it with Versamark watermark stamp ink.
Good to Know: Watermark stamp ink is sticky, so it's great for adhering embossing powder to card stock for heat embossing.
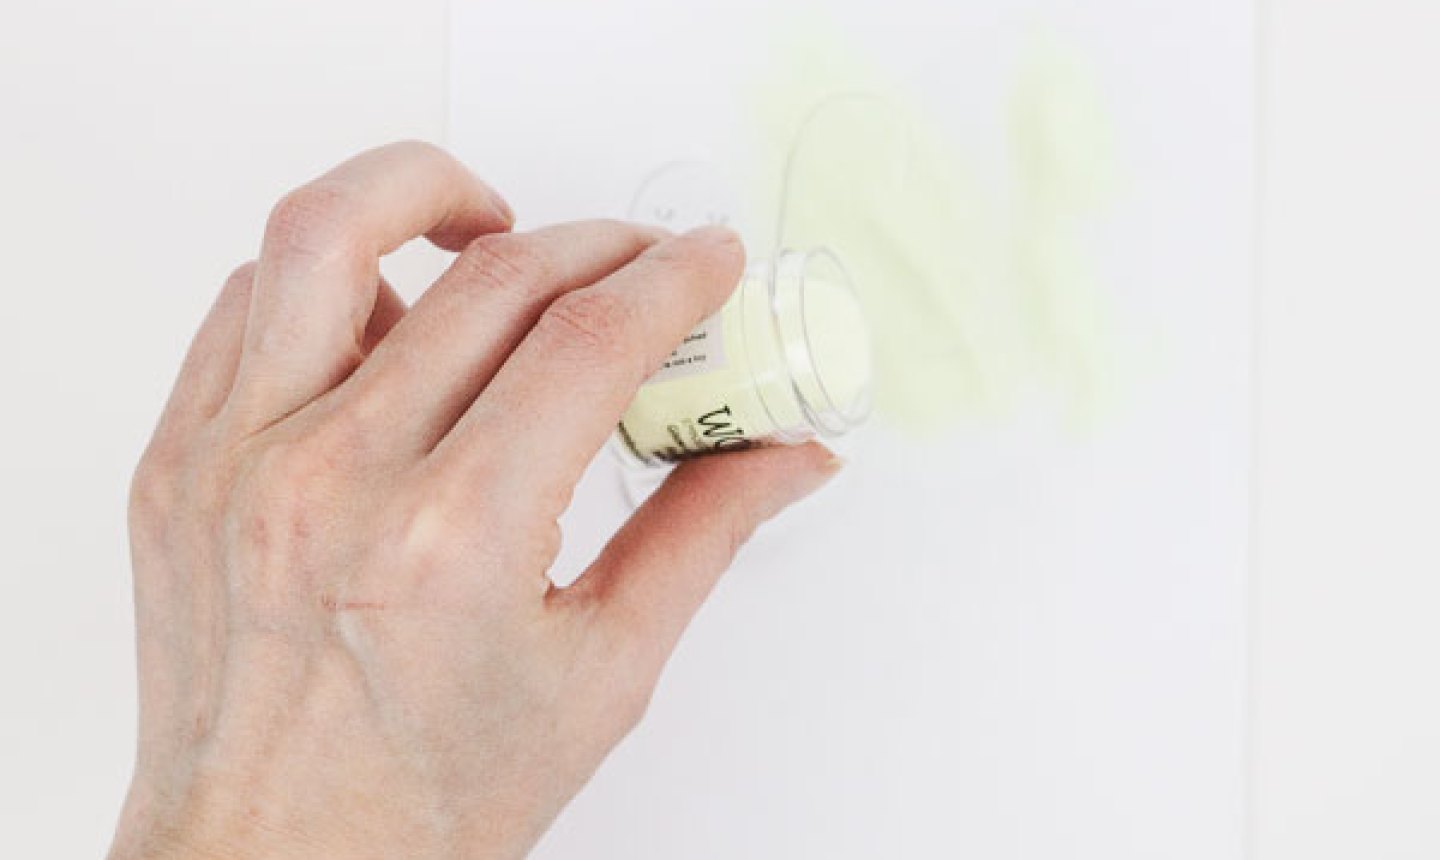
While the die-cut ghost is still on the scrap paper, cover it with glow-in-the-dark embossing powder. Tap the ghosts against the paper to remove any excess powder.
3. Emboss
Using craft tweezers to protect your fingers, hold the die-cut shape as you melt the embossing powder with a heat-embossing tool.
Pro Tip: After the melted powder has cooled completely, you may notice spots where no embossing powder adhered or have lighter coverage. Simply cover those areas with another layer of watermark ink and embossing powder and use the heat embossing tool to melt the additional powder.
4. Glue the Layers (Optional)
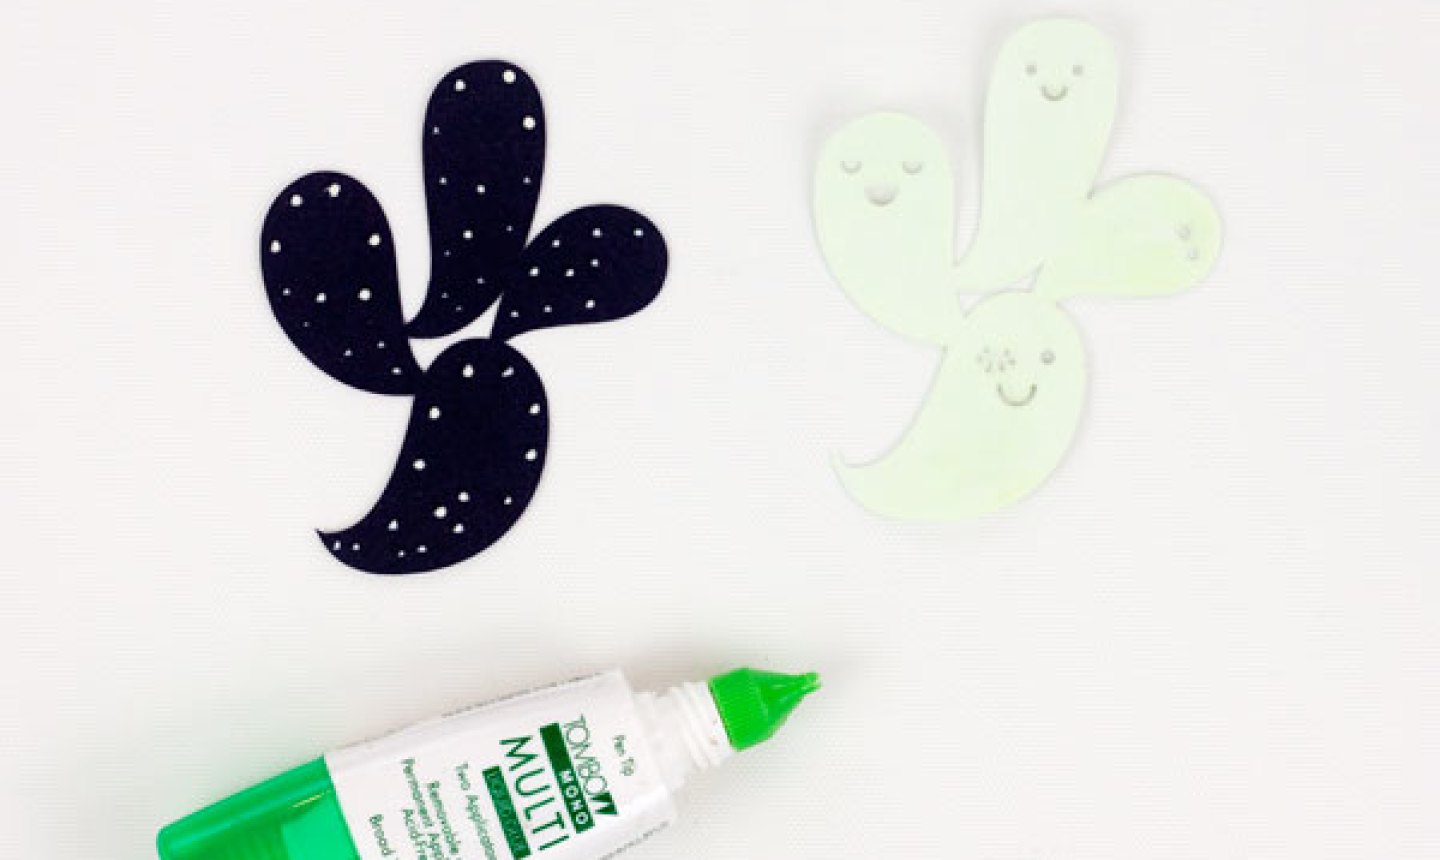
If your die-cut shape is only one layer, skip this step. Otherwise, use craft glue to layer your shape together as needed.
5. Attach
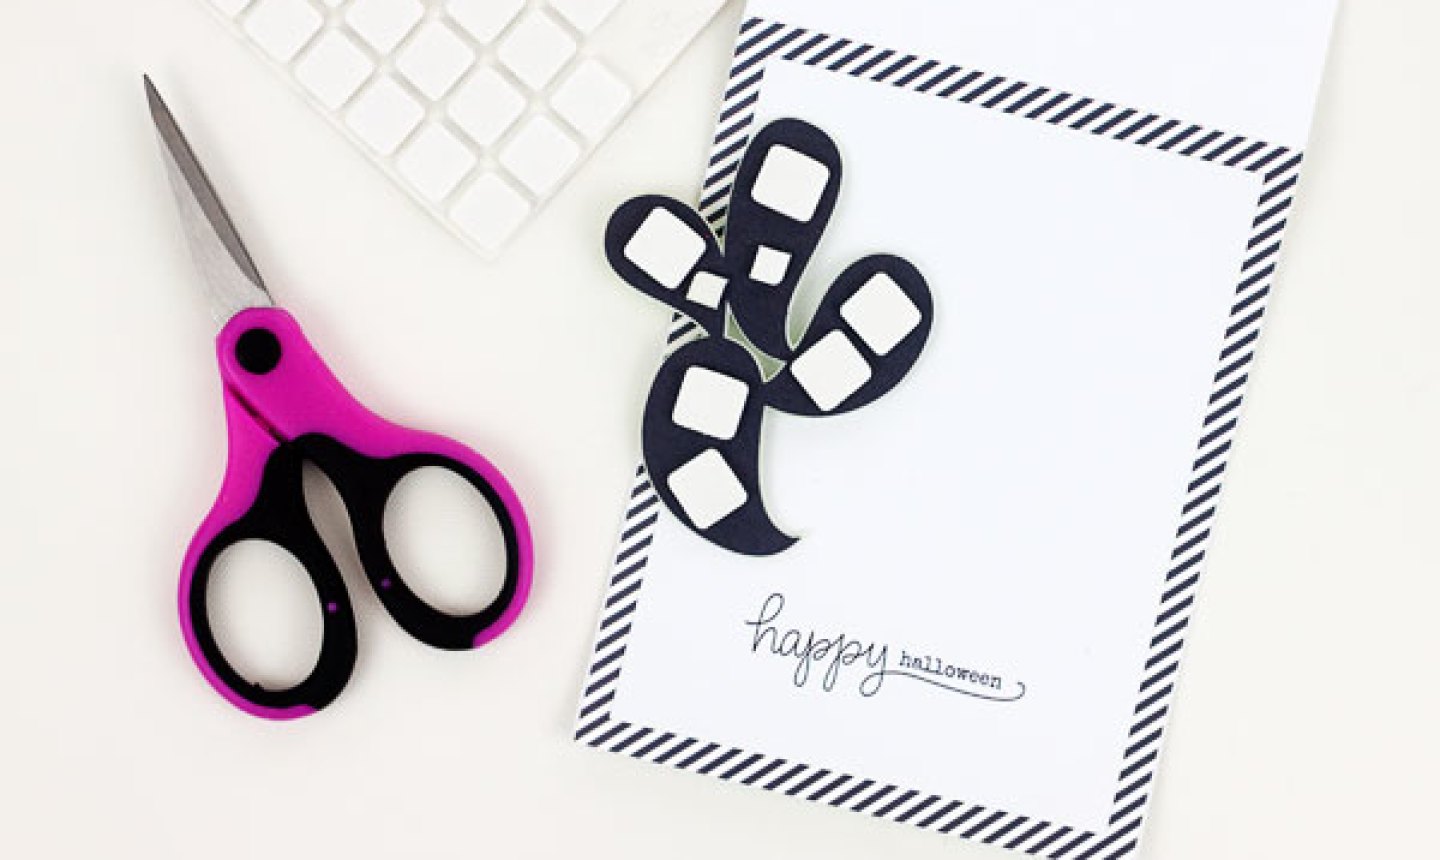
Cover the back of the ghosts with foam adhesive. If necessary, cut the foam with scissors to fit smaller areas. Attach the shape to the front of your card.
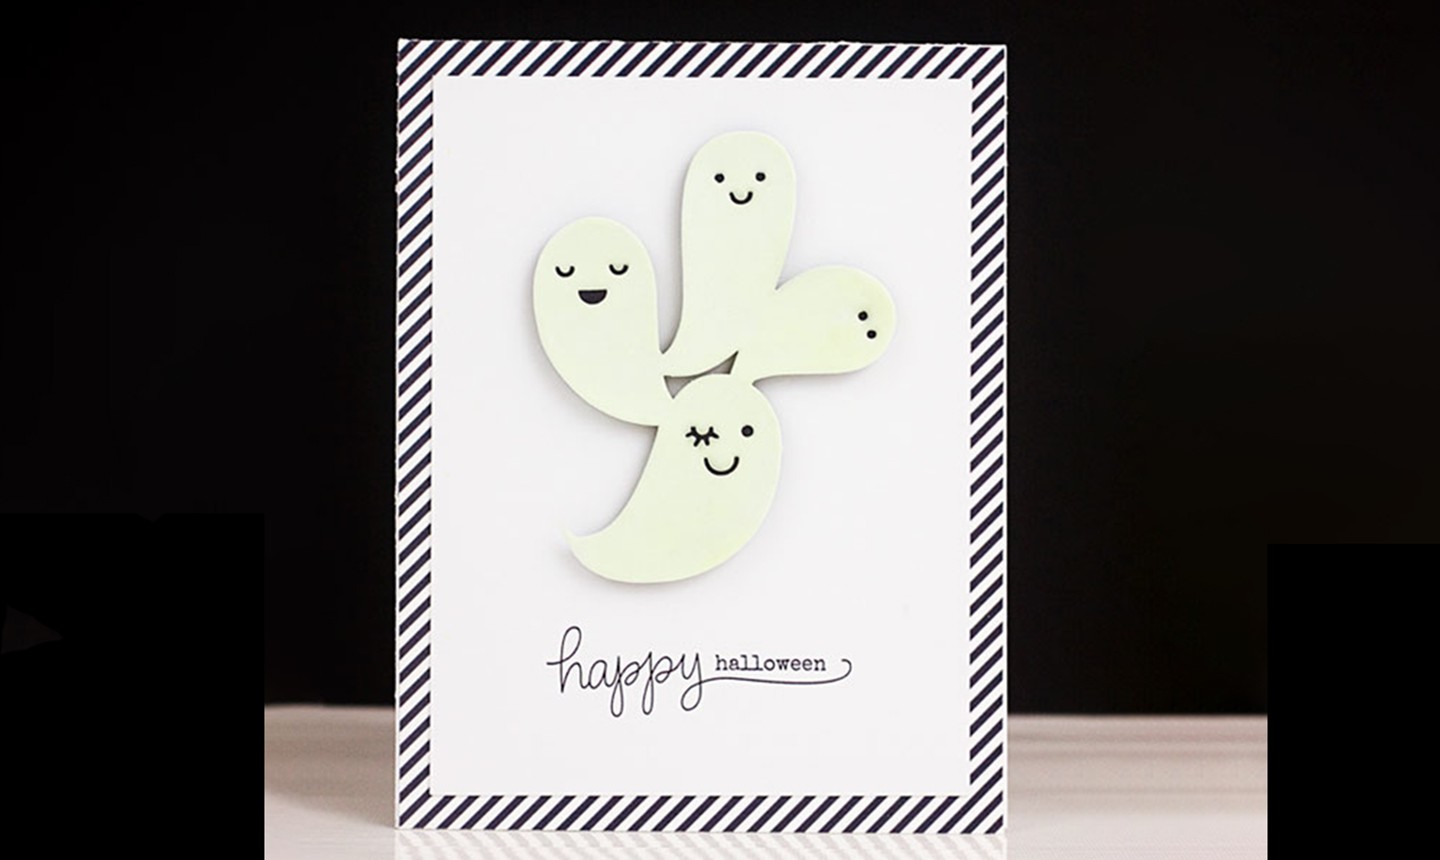
You're done! Turn off the lights and watch it glow.
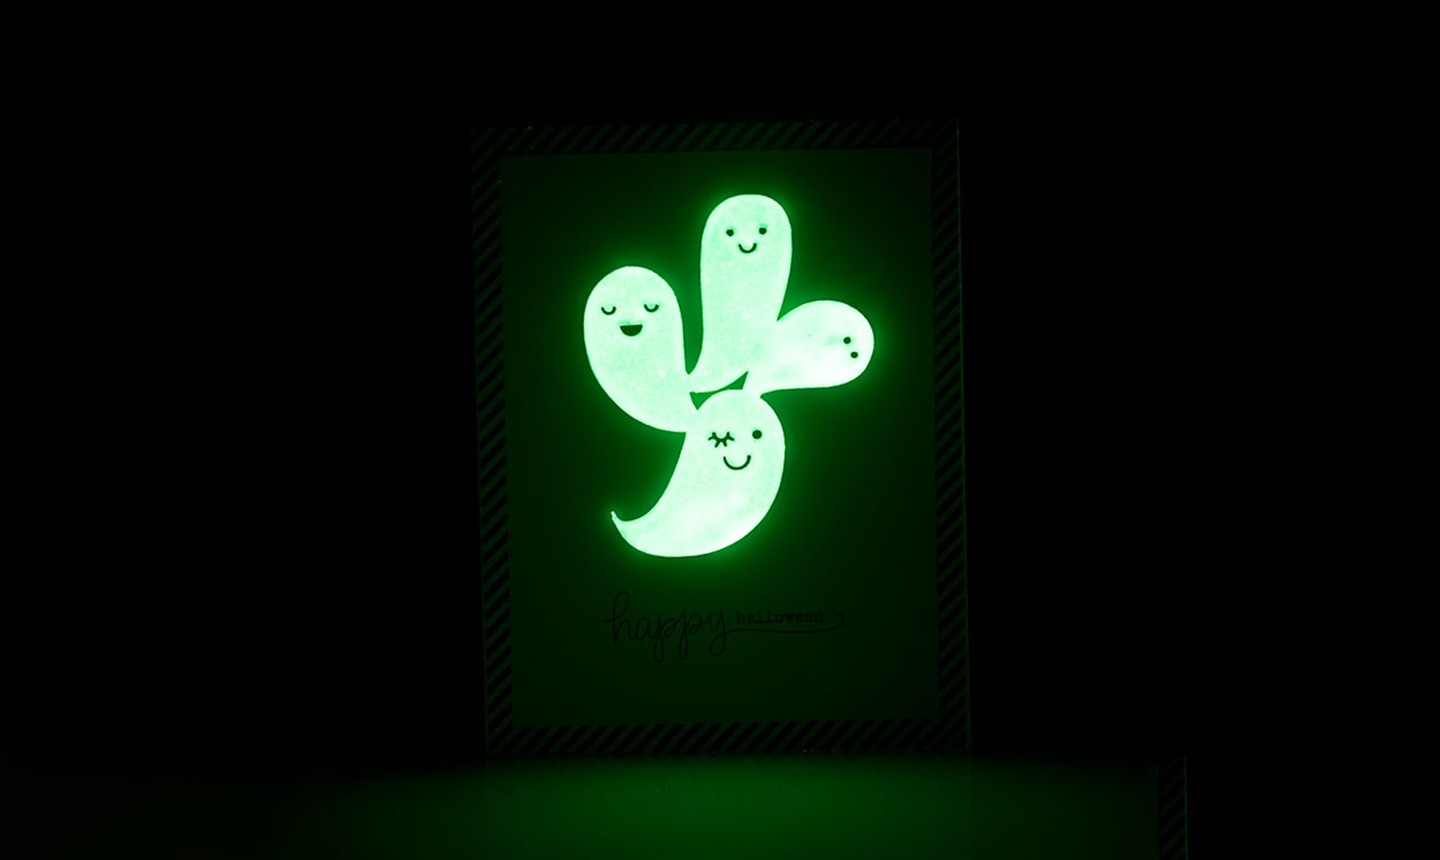
Spooky!

I recently purchased Glow in the Dark acrylic paint in a bottle at Walmart,
I bought glow-in-the-dark embossing powder from Scrapbooking.com.
This is so cute
I would like to print the pattern
Those ghosts are really cute! Great card!
This looks like ton of easy fun! I wish I saw this a week ago, to send something to my grandkids, who I (we) haven't seen in over a year now! Even the older ones! I don't have a die cutter, but could probably wing that... Can hopefully buy the glow in the dark medium @ Michael's/JoAnn's tomorrow morning. Mail it tomorrow. The mail is running slow... with fingers crossed they may have it by Halloween. Designs dancing in my head now! Oh my! Not that I don't have other things to do, have to try this. Thank you so much! Those who are crafty probably knew about glow in the dark medium! Thank You!
Terrific fun for handicapped children and adults.
I just love this card! Where did you get the ghost stamp set?
Wow, that is so cool.
I might try this after I get all the equipment.