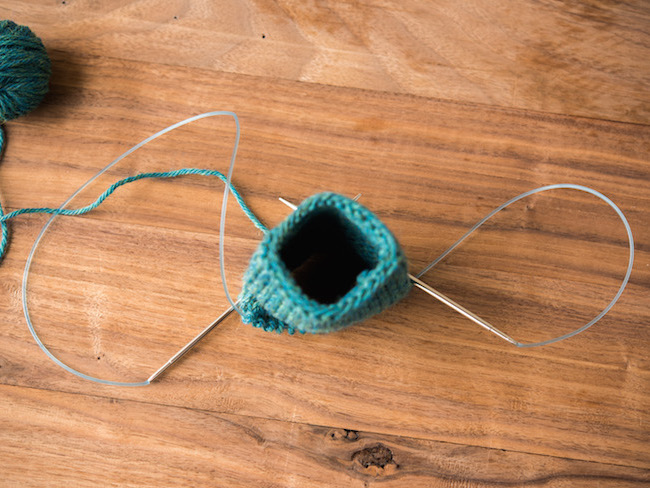
When working on large garments like sweaters, many knitters find knitting in the round to be faster. But what about when you knit projects in the round that have a smaller circumference like socks, sleeves and mittens? That’s where the magic loop method might be your best choice.
When it comes to knitting in the round, there are double pointed needles, knitting in the round on two circulars, and (my favorite) the amazing magic loop! Read on for a step-by-step tutorial on how to complete the magic loop in the round.
What is magic loop knitting?
The magic loop method is a method for knitting small circumference pieces in the round on one long circular needle.
Magic loop knitting can be done on any needle size with a cable length of at least 32″ or more. I personally prefer a 40″ cable for magic loop, but I know some who prefer a 24″ cable. It’s just a matter of trying out a few lengths to find the one that will work the best for you and your knitting. For this photo tutorial, I am using a 40″ cable with worsted weight yarn.
How to knit the magic loop method
Step 1:

Begin by casting on the required number of stitches.
Step 2:

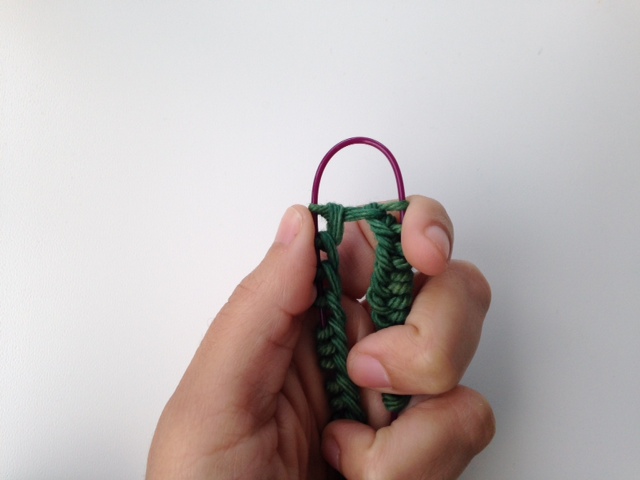
Move the stitches to the center of the cable and find the middle point in the stitches. Gently bend your cable to bring a bit up between the center stitches.
Step 3:

Pull the cable gently to the point where the cast on stitches are now resting on the needles and not the cable.
Step 4:
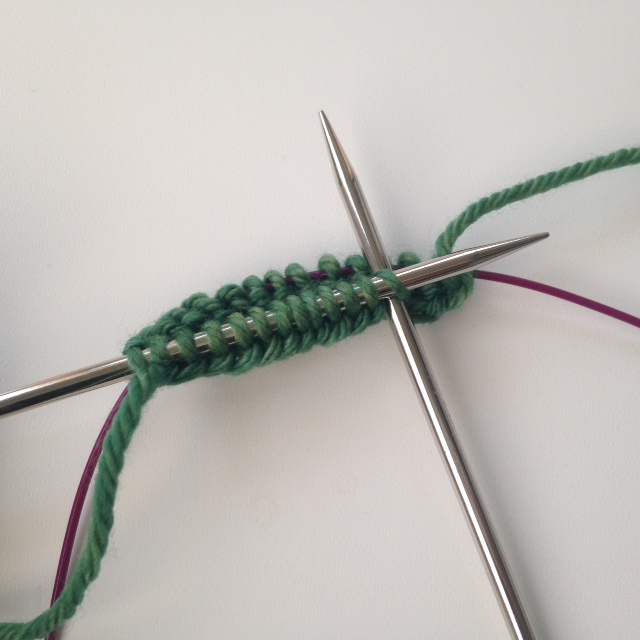
Turn the needles so they are horizontal to the ground and the first stitch cast on is on the needle closest to you.

Hang the tail of the yarn down, and lay the working yarn over the back needle. (This is done because we will be knitting our first stitch. If you are purling, you will let your working yarn hang down between the needles).
Step 5:

Pull the back needle out so the back stitches are on the cable now. Be careful to keep the working yarn toward the back. Bring the needle into the first stitch to knit.
Step 6:

Knit across all the stitches on the front needle.

Step 7:
To turn your work: Once you have knit the first set, turn your needles so the unworked stitches are now closest to you.
Pull the back needle (the one you just worked) so the just-worked stitches are resting on the cable. Then slide the unworked stitches onto the front needle. Keep the working yarn toward the back.
Step 8:

Bring the back needle around and prepare to knit the first stitch on the front needle.
Continue knitting in pattern all the way down the front needle. When you complete this set of stitches you have just worked one round.

Continue this way for as many rounds as you need! Now you’re magic looping!
Quick tip
When magic loop knitting, I don’t use a stitch marker to mark my beginning of round. Instead, I use the tail end of the cast on. While this (to me) is less fussy, if you aren’t paying attention to where you’re at, you could lose track easily. In this case, I’d suggest clipping a locking stitch marker to a stitch at the beginning of the round.
I love magic looping sleeves and socks especially. Once I learned this method, I never wanted to go back to dpns!

Master Magic Loop!
Join popular knitting instructor Lorilee Beltman for hours of high-def, close-up instruction on knitting the magic loop.

Share tips, start a discussion or ask other students a question. If you have a question for an expert, please click here.
Already a member? Sign in
No Responses to “Confidently Knitting the Magic Loop Method”