
Once you find your favorite knitting cast-on, you may find yourself using it for just about everything (hello, long-tail cast-on). But it’s a good idea to have other cast-ons in your repertoire, because you never know when you’ll need to whip them out.
Meet the crochet cast-on! This method makes a nice, neat braid that looks just like the bind-off edge. If you’re a crocheter and a knitter, this one will be a total breeze. If you’ve never crocheted, though, don’t worry. As long as you can hold a hook, you can pretty much nail this.
Pro Tip: You can also use this as a provisional cast-on, which is temporary. Make sure to follow the variation at the end of our tutorial to chain a few extra stitches if you’re doing a provisional cast-on.
Crochet Cast-On
Level: Advanced beginner
What You Need
Pro Tip: If you’re using this cast-on as a provisional cast-on that’ll be removed later, you can use scrap yarn. Just try to use scraps that are a similar weight to the yarn you’re using in your project.
Instructions
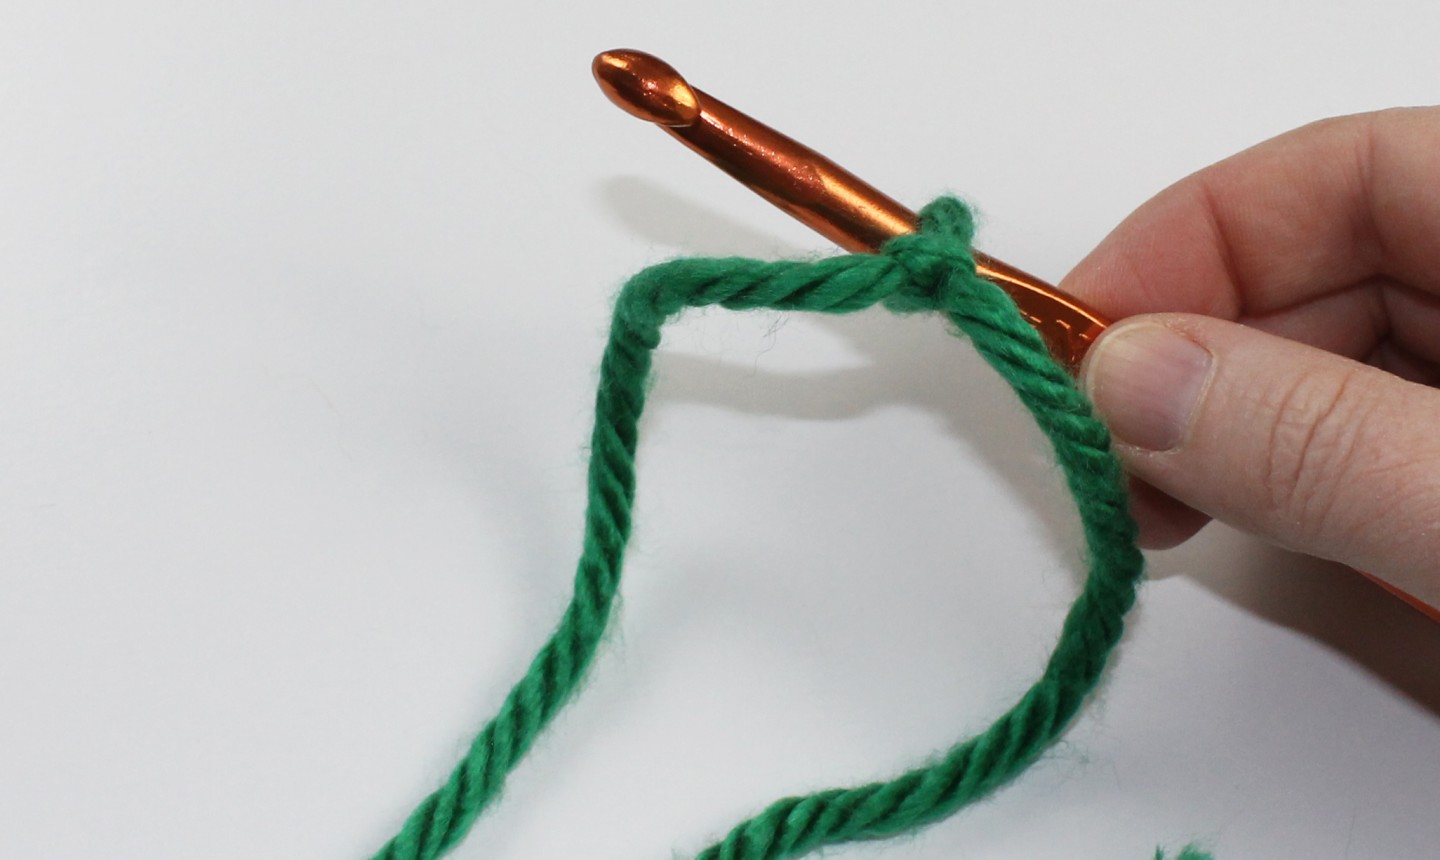
1. Tie a slip knot onto the crochet hook, leaving a yarn tail just long enough to weave in later. Then hold the crochet hook in your dominant hand.
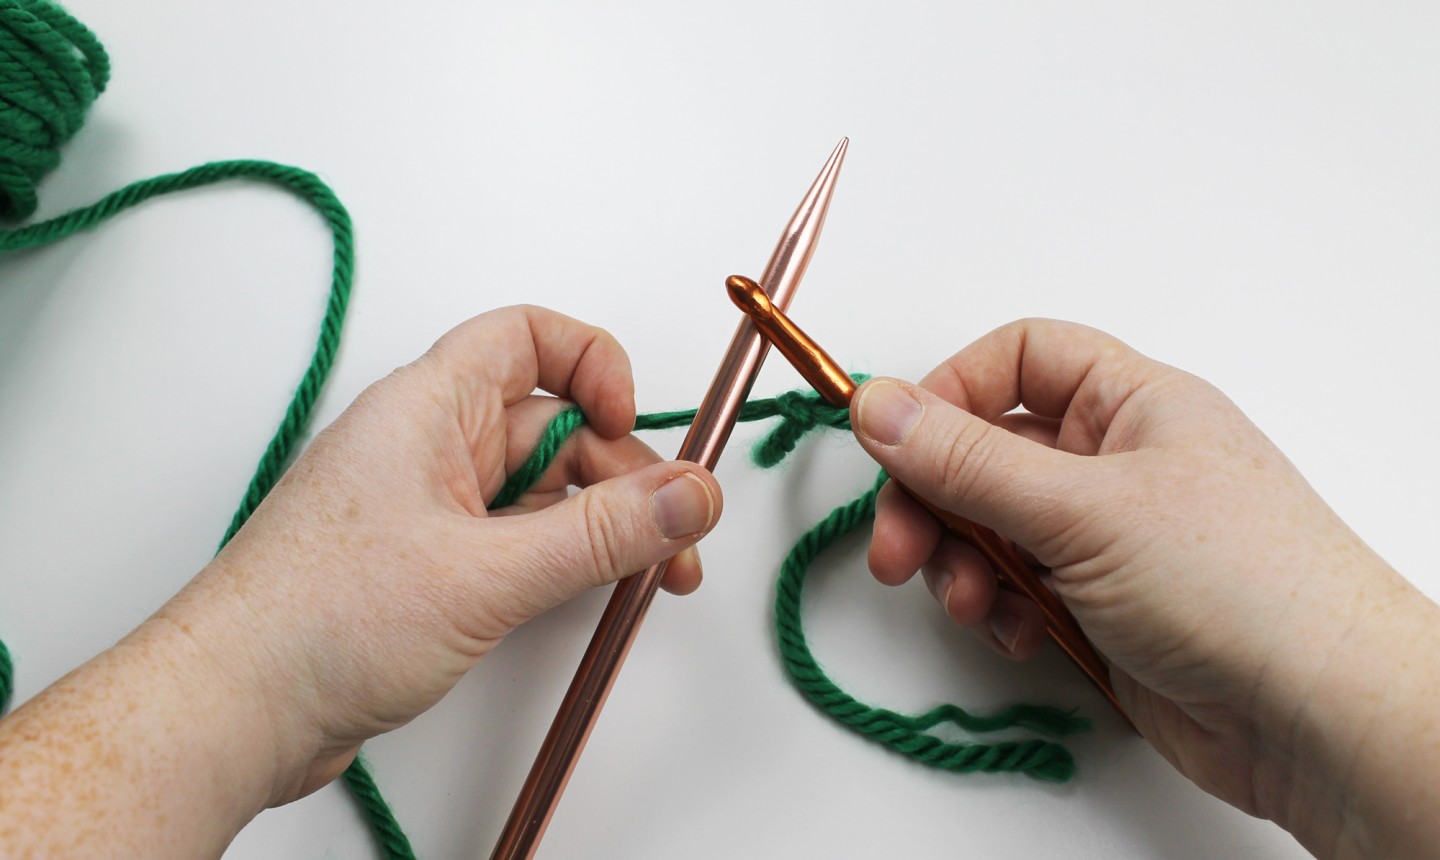
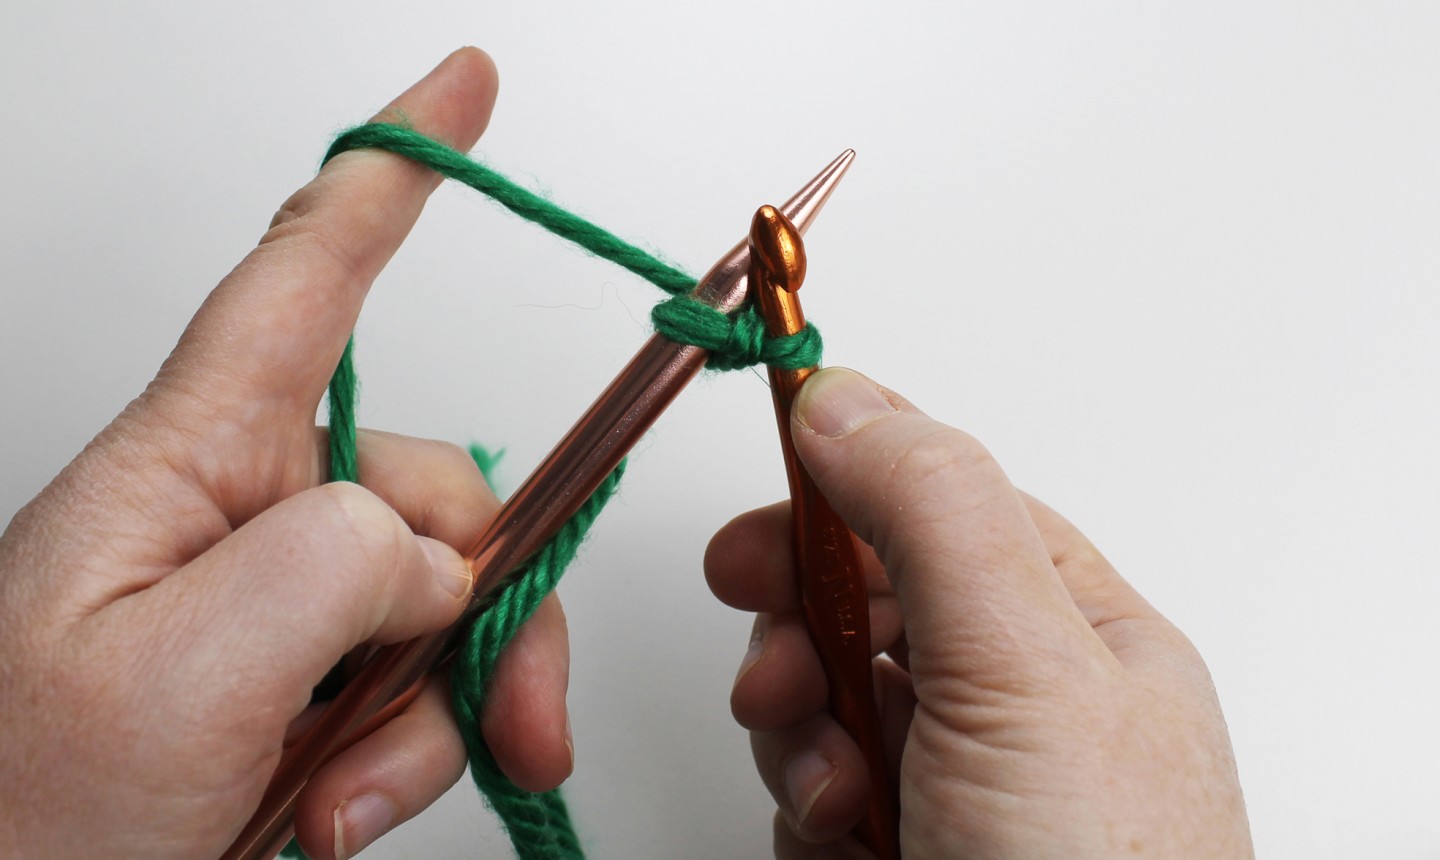
2. Hold the knitting needle in your non-dominant hand and place the knitting needle on top of the working yarn.
3. Wrap the working yarn over the hook, above the knitting needle.
As you’re wrapping the yarn for the first cast-on stitch, you might want to hold onto the yarn tail, too, or just give it a little tug after you make the first stitch. That’ll ensure the tension is even.
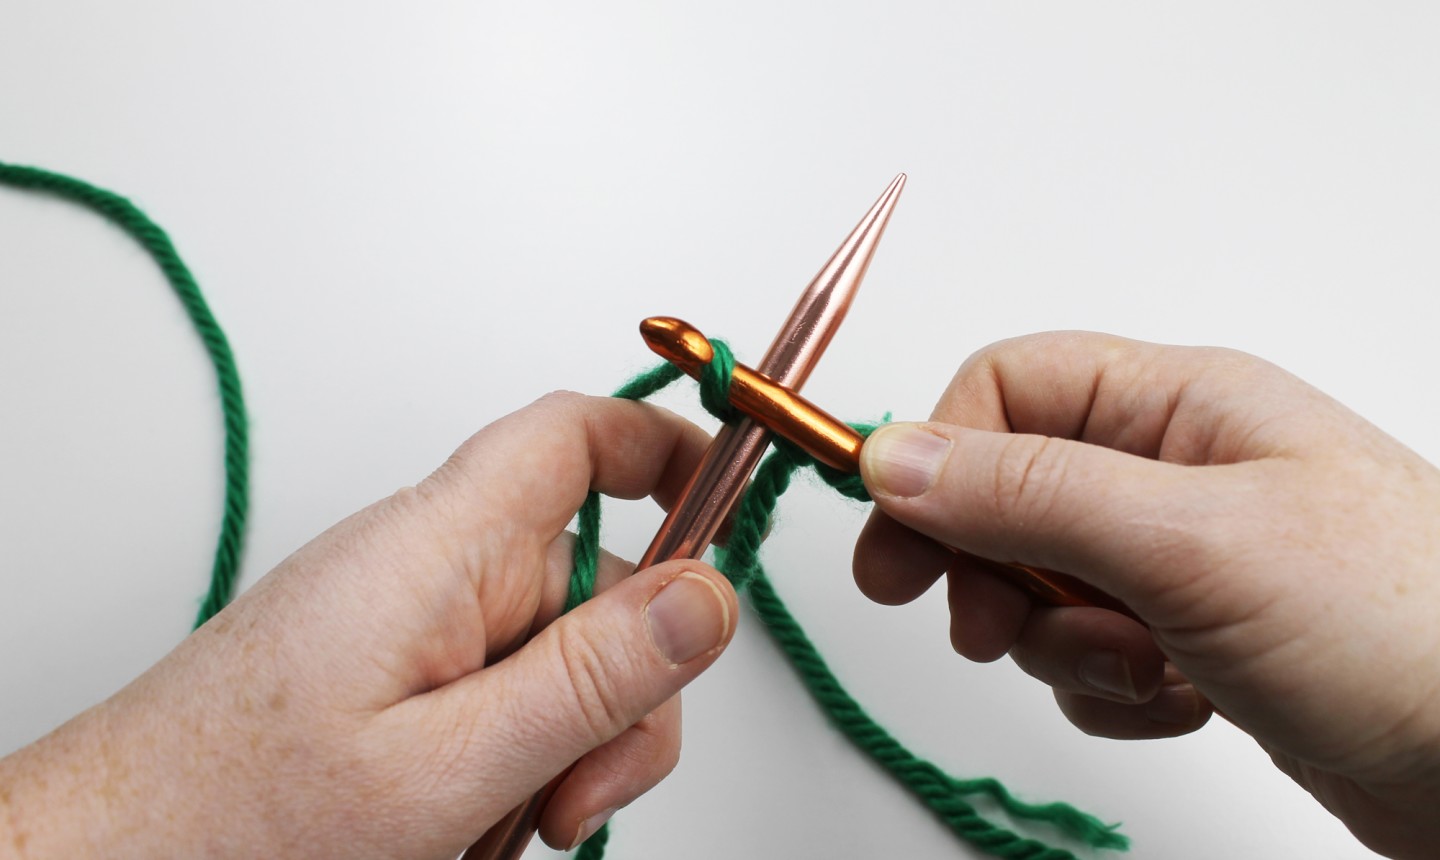
4. Pull the working yarn through the loop that’s already on the hook (from your slip knot). First cast-on stitch: complete!
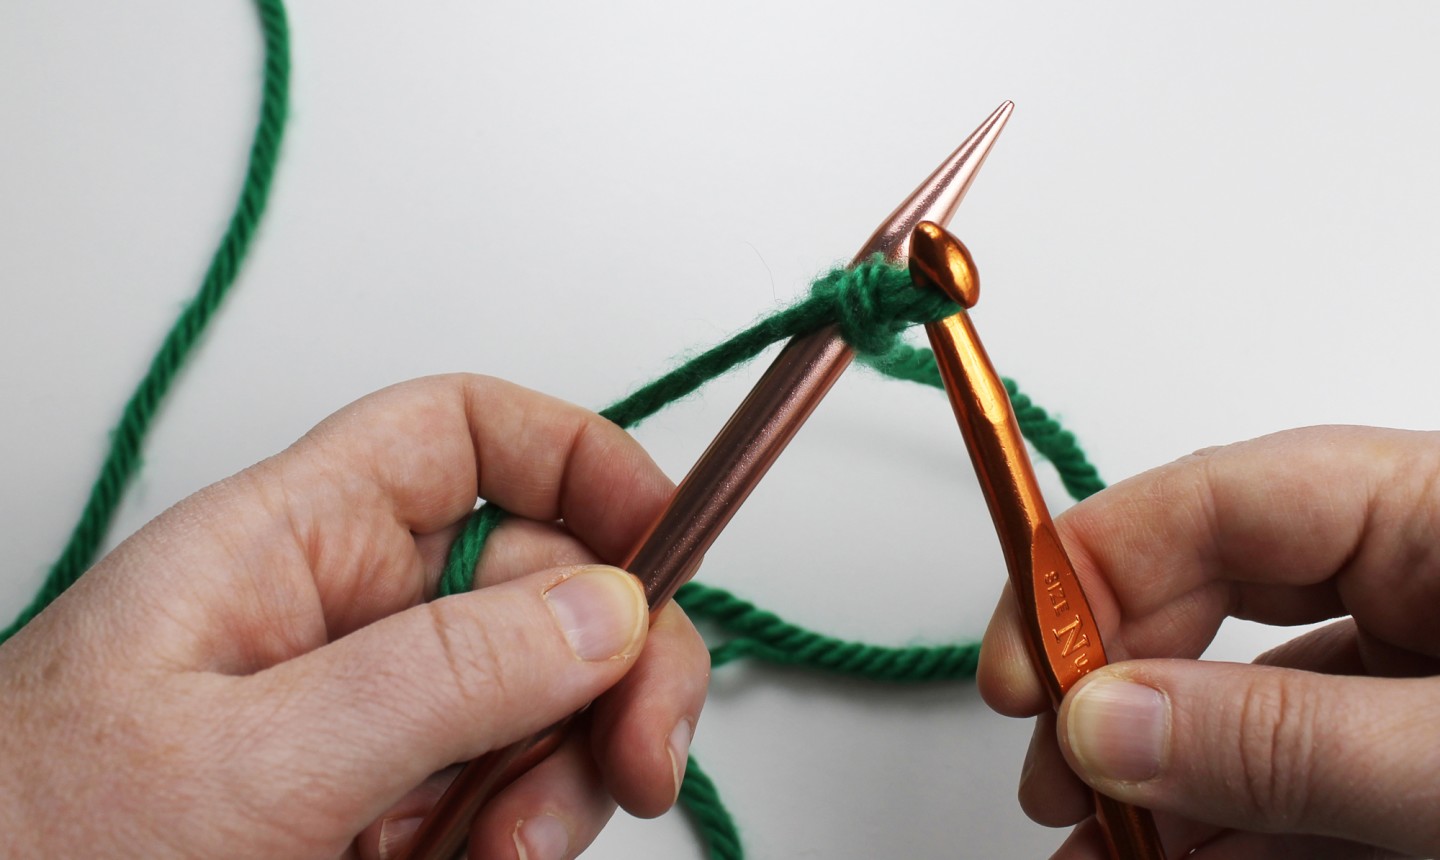
5. Move the working yarn to the back, again placing the knitting needle on top of the working yarn.
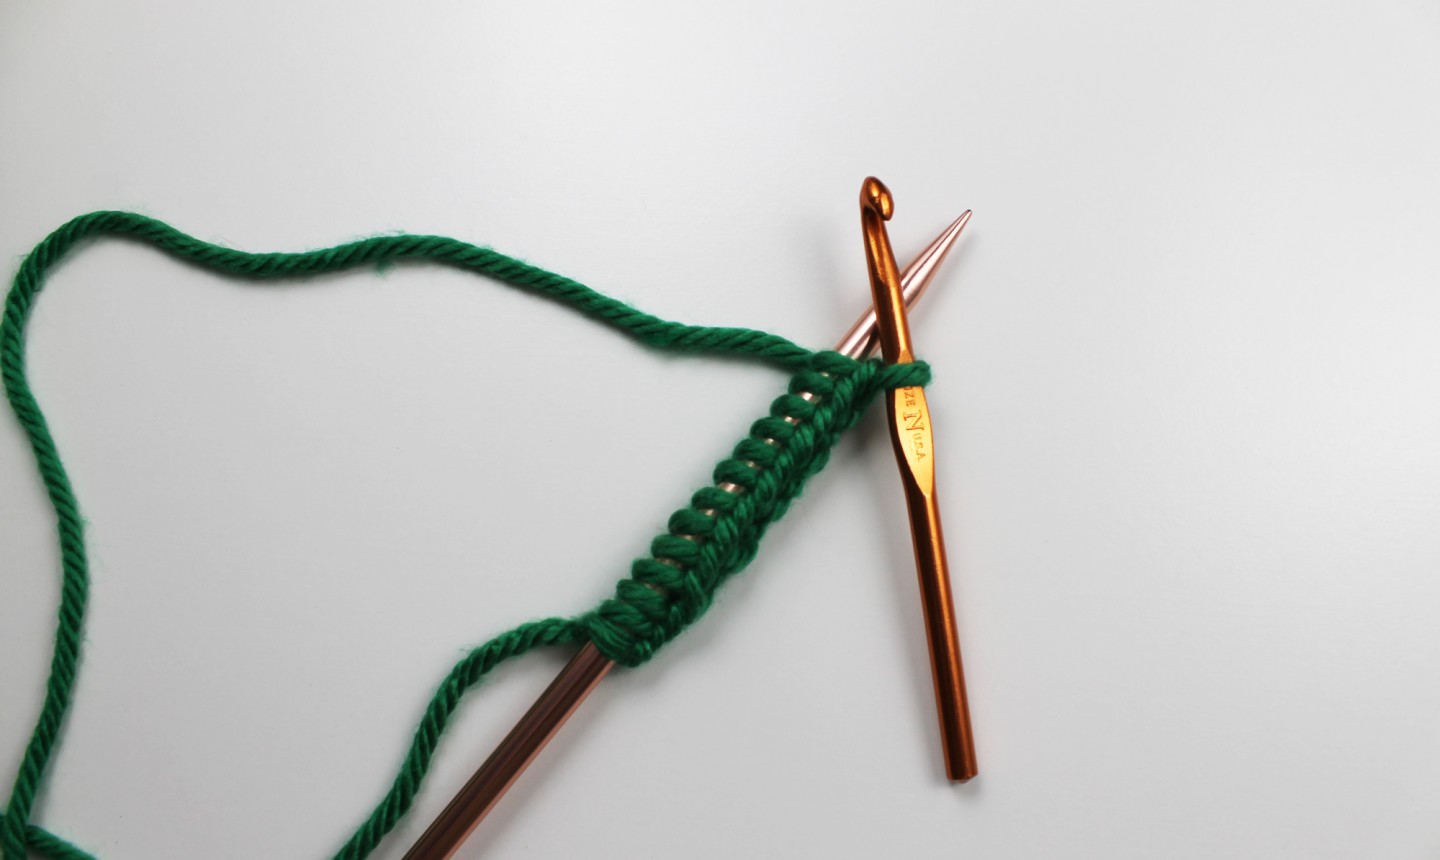
6. Repeat steps 3-5 until you’ve cast on the number of stitches called for, minus 1. So if your pattern asks you to cast on 38 stitches, repeat steps 3-5 until you have 37 stitches. (Suspenseful, right?)
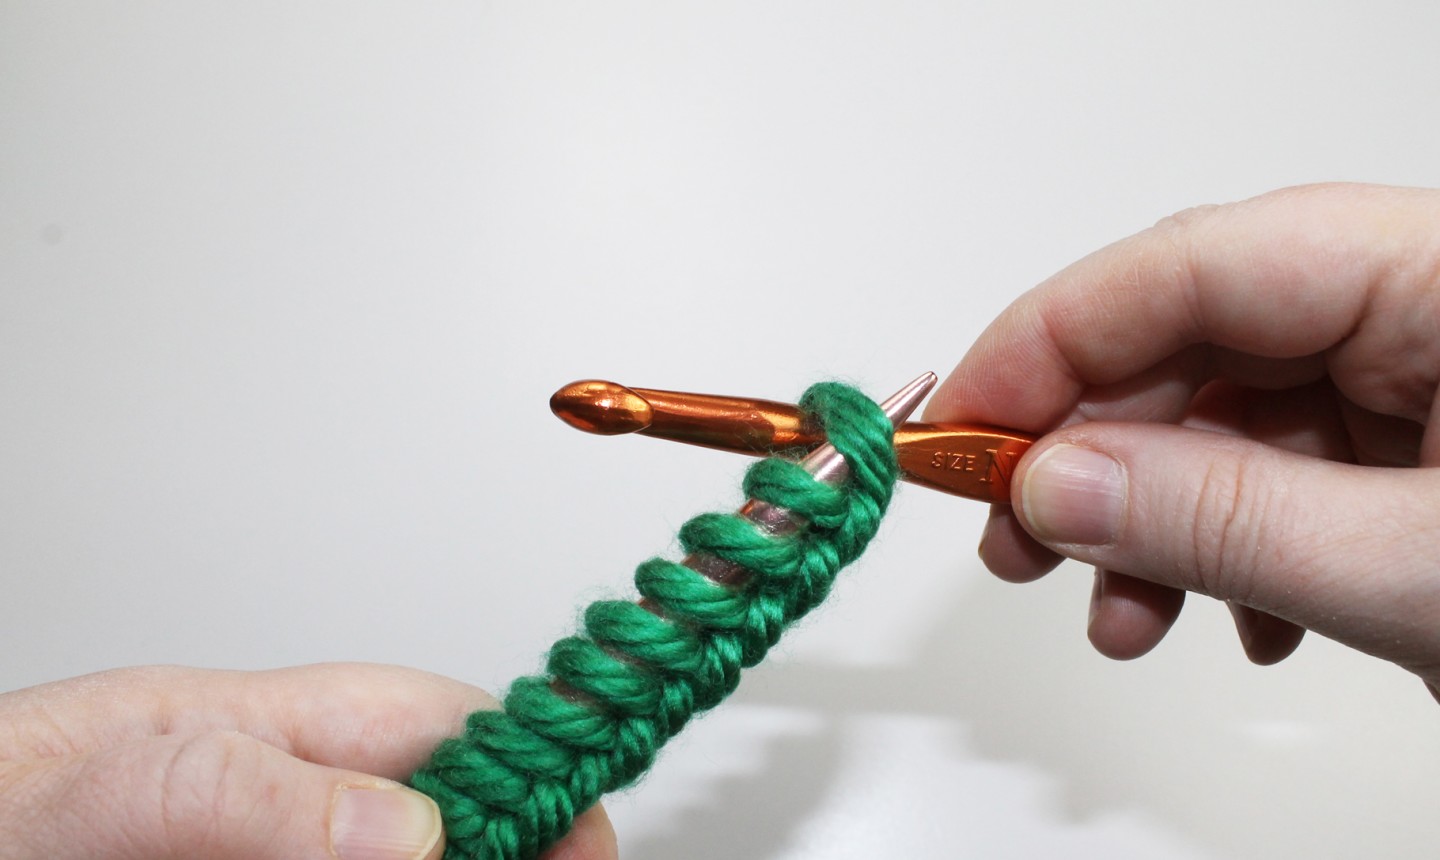
7. Now let’s cast on that final stitch. You’ll notice that you still have a loop around your crochet hook. That’s your last cast-on stitch — just pull it up and slide it onto your knitting needle.
After you add the final stitch, you can put the crochet hook aside and start knitting.

Variation: Provisional Crochet Cast-On
If you’re working the crochet cast-on as a provisional cast-on, skip step 7 and chain stitch a couple extra stitches instead. When you’re ready to take out the provisional cast-on, you’ll start by pulling out the chain.

This is great!! Since I’m deaf & not all tutorials are cc ur description & pictures are very GOOD!! I have question can’t find answer. I’m using this crochet cast on for a blanket using bulky yarn on circular needles. Want to do slip stitch first stitch purlwise with yarn in front but the working yarn just hanging from last CO. I can’t seem to figure out how to make that first st in the front. I’m using circular needles but knitting flat. I’m hoping I’m making sense. Thanks!!
It's do able but I have the knitting needle tucked up under my arm pit. May need more practice. ☺Thanks for this Ashley.