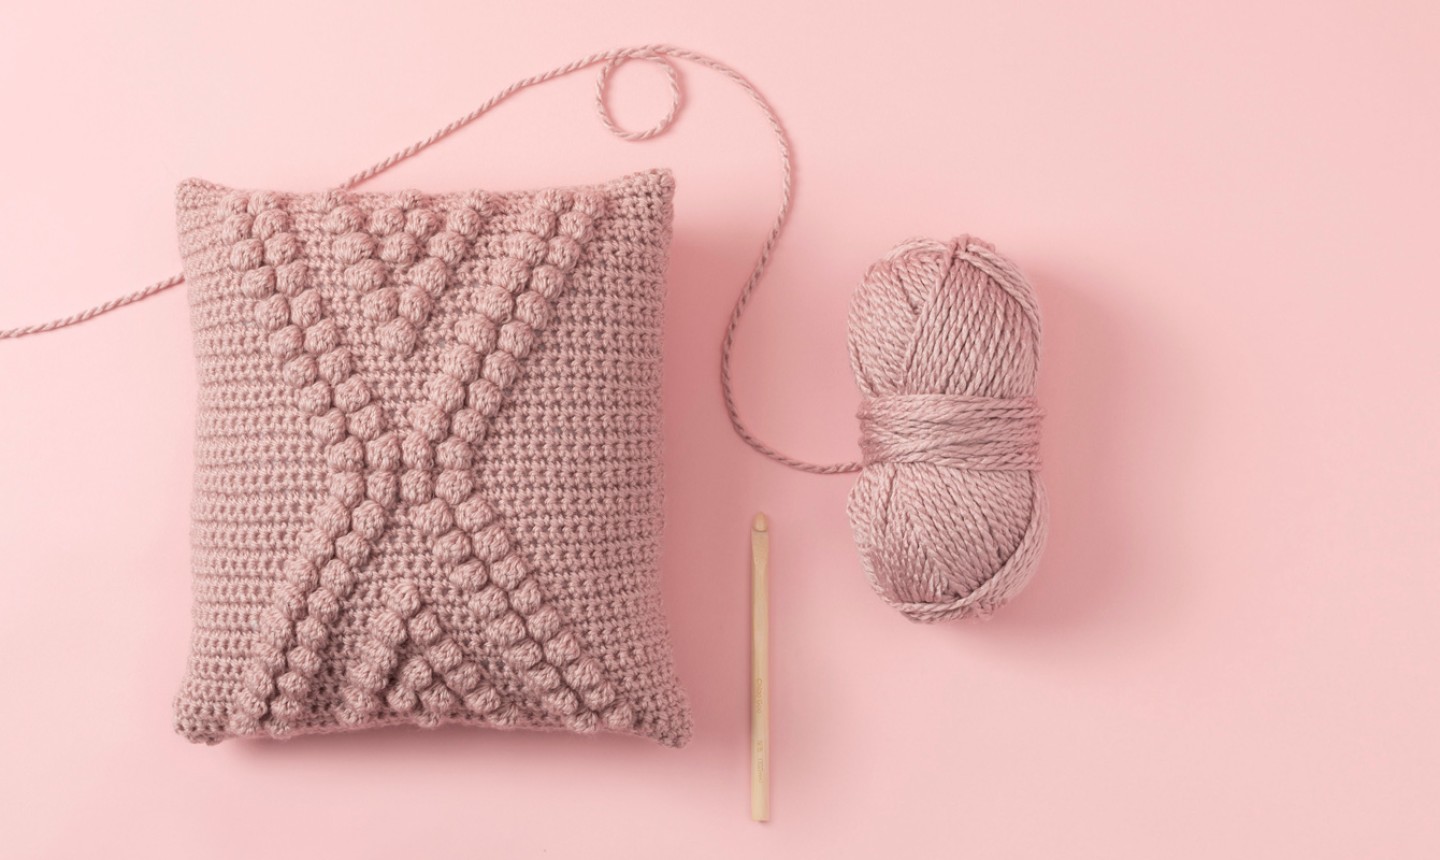
We’re so smitten with this totally touchable pillow, we’re blushing! The pattern is worked from a chart, but don’t let that scare you away — it’s easier than you think!
Oasis Bobble Pillow
Pattern by Toni Lipsey of TL Yarn Crafts
Level: Easy
Size: 11¼” x 12″
What You Need
Gauge
13 sts x 14.5 rows in single crochet = 4″
Abbreviations
Special Stitch
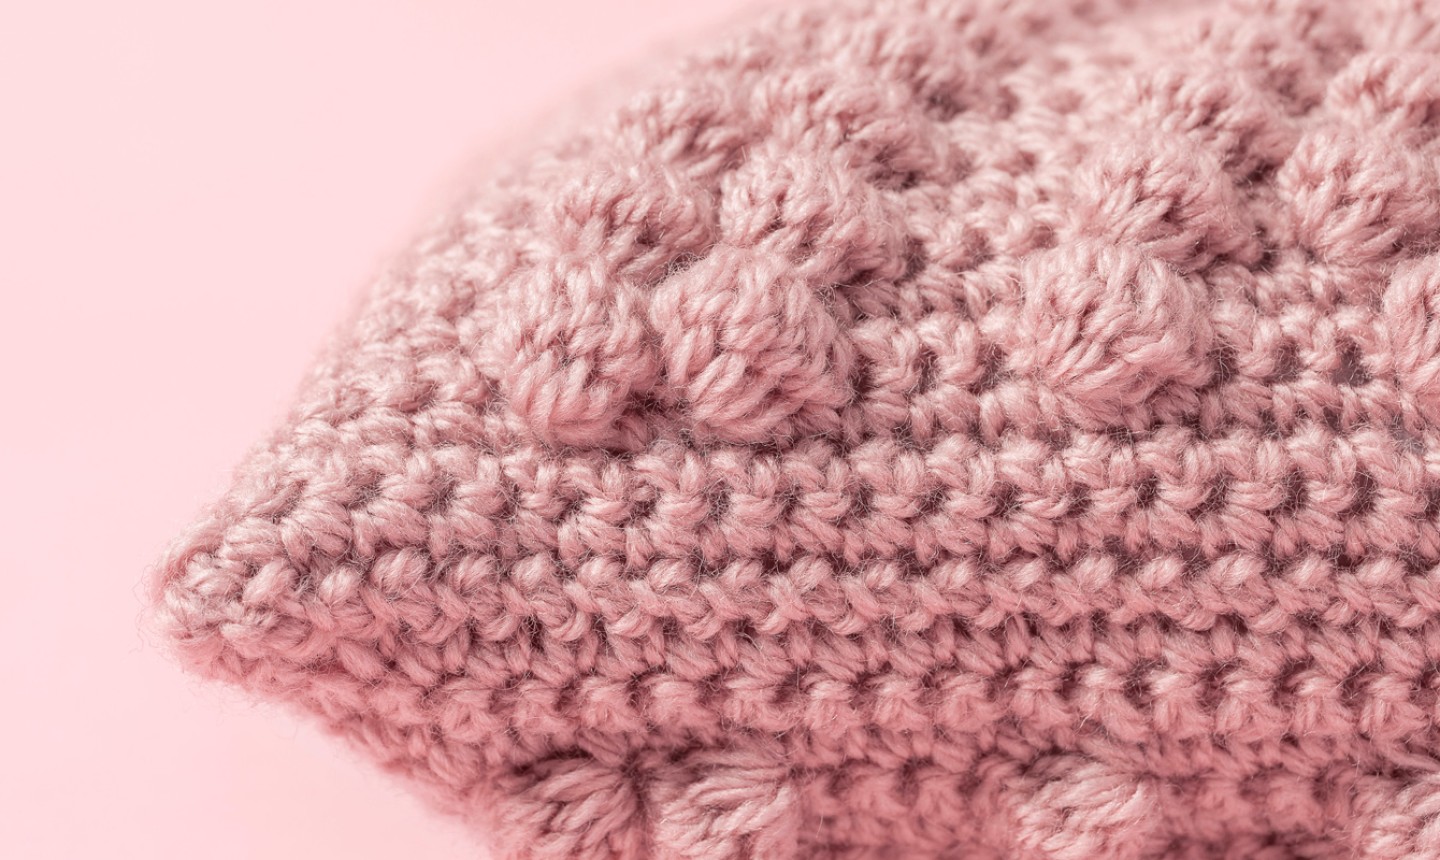
Bobble (bo): Yo, pull up a loop in indicated st, yo, pull through two loops on hook, (yo, pull up a loop in the same st, yo, pull through two loops on hook) 4 times total, yo, pull through all 6 loops on hook, tighten loop on hook before proceeding. Push bobble to RS of work as needed.
Pro Tip: Bobbles can be made by working various numbers of stitches within the bobble. The bobble in this pattern is essentially 5 double crochet stitches that are crocheted together. Watch the 4-stitch bobble demo in our class Next Step in Crochet and you’ll get the idea.
Notes
Work each piece by reading chart and written instructions, as follows:
Instructions
Make 2.
Ch 38.
Work the Chart
Row 1 (WS): Sc in 2nd ch from hook and in each remaining ch across, turn — 37 sc.
Row 2 and all even-numbered rows (RS): Ch 1, sc in each sc across, turn. (37 sts)
Row 3 and all odd-numbered rows (WS): Read chart.
Row 44: Ch 1, sc in each sc across.
Cut yarn, and weave in ends.
Finishing
Hold pillow panels with RS facing each other, lined up so Rows 1 are at the bottom. Seam along three sides. Turn the pillow right sides out, and insert the pillow form. Seam along the final side. Weave in any remaining ends.
Pro Tip: There’s no wrong way to seam this pillow together, but we love the whipstitch because it’s so quick. Since this pillow is worked all in one color, it’s okay that it’s not totally invisible.
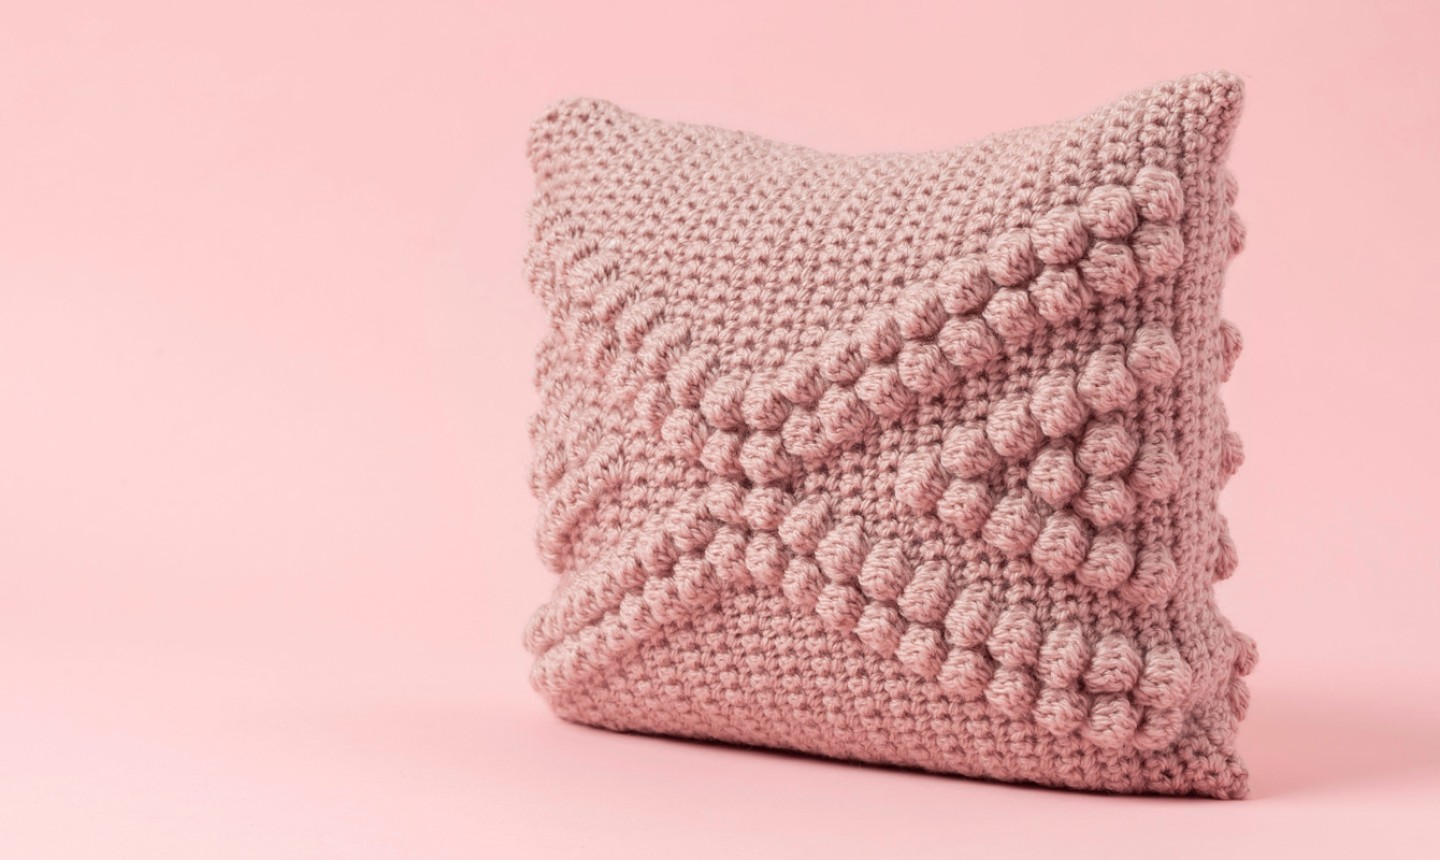
Now you’ve got a stylish new pillow for your couch!
Can this pillow be made larger (18 x18 or 20 x 20) and, if so, how?
This pillow is stunning! Thanks!
Is there a video I can watch to make this pattern.
thank you, very pretty !
So pretty. I used to make bobble pillows of various patterns and can’t wait to make this one. Thanks for sharing.
Such a pretty pillow! Please email pattern. Thank you!
Please send instruction,love the pillow
very nice and unique pattern
Please send a video on how to make a bobble
Please send instructions