Sewing your own clothes gives you the opportunity to sew a custom fit. But before starting on a project, we all face the question of which pattern size to use. Ease, style, garment shape — all these factors come into play when choosing which pattern size to start with.
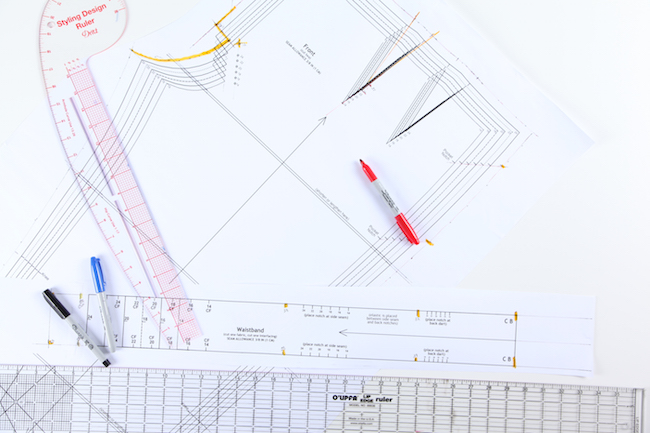
Remember that the sewing pattern is just the starting point — it’s rare to find a pattern that fits you perfectly. They're designed to fit consistently across a range of garments based on the size chart for that company. Once you've determined your starting size, you can then work out the adjustments you need.
How to choose the perfect pattern size for you
1. Take your measurements
Measure the body circumference at the high bust, full bust waist and hip. Keep the tape straight and parallel to the floor. Don’t pull it the tape too tightly!
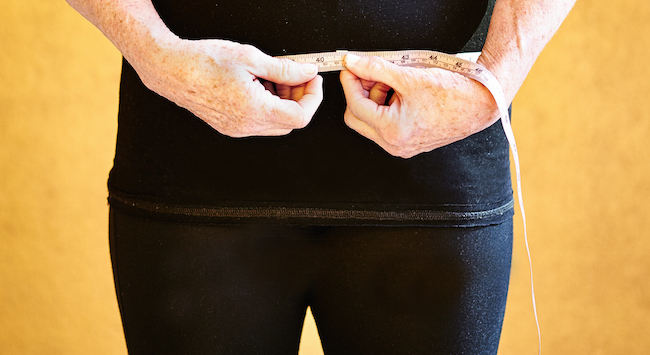
For the waist measurement, measure the natural waist, which is at the smallest part of the torso. For the hip measurement, take that at the fullest part of the lower body, which could be around the abdomen or the top of the thigh instead of at the hipbone.
2. Examine the size chart on the pattern
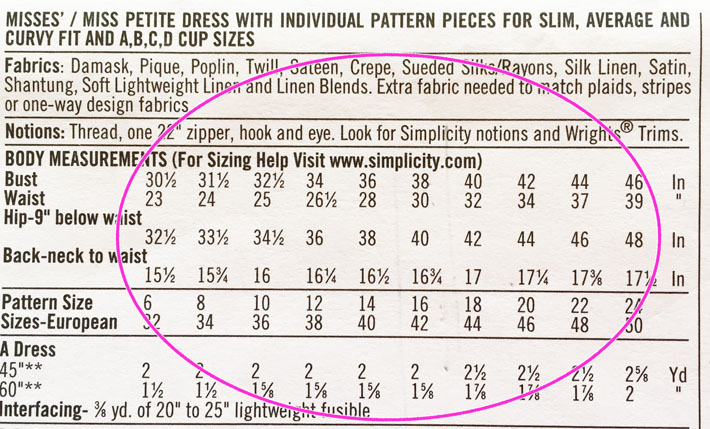
Compare your measurements to the size chart on the pattern information and see which size is closest to you. It’s very possible that your measurements fall across a number of pattern sizes. Most current patterns are multi-sized, which allows you to choose the appropriate size for that portion of your body and blend between sizes.
These are the body measurements the pattern company used to design the garment — not what the garment will measure when you are finished sewing. Pattern companies include ease into their designs, which is a measurement difference between your body measurement and the actual garment measurement.
There are two types of ease: One is fitting ease, which is necessary for garments so that we can move, walk, sit, stretch and be able to actually wear the clothes comfortably. Style ease is the other type of ease, which is part of the design of an item — think of a loose, flowy dress or full skirt. A slim pencil skirt or a very close-fitted jacket probably has some of both types of ease.
3. Choose pattern size to fit hip or neck and shoulders
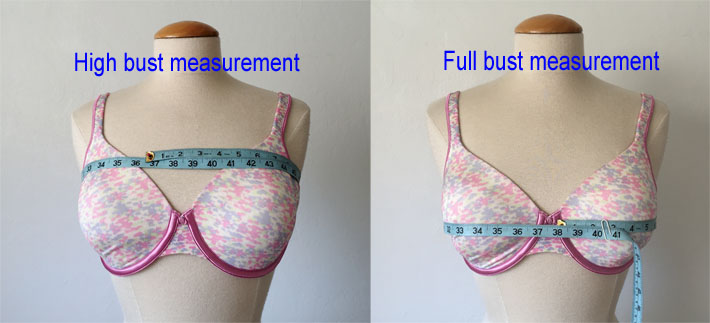
For a skirt or pants, choose the pattern size by the hip measurement. For the upper body, the high bust measurement is very useful and can help avoid starting with a pattern that is too roomy in that area.
Looking at the example above, the high bust measures 36.5" and the full bust is 38". In this case, I'd go with a Size 14 pattern. According to the chart, Size 14 is designed for a 36" bust, but it will likely provide a better fit across the neck, shoulders and upper back, and avoid a gaping neckline. However, it will probably require a full bust alteration, or FBA, to provide room for the bust.
Some patterns such as the one pictured above offer a range of cup sizes, so they've basically done the full bust alteration for you. However, don't go by your bra cup size: Read their instructions on how to calculate which cup size to use, as these differ from bra sizing.
4. Look for finished garment measurements

Finished garment measurements can be really informative, as they can tell you how the garment will fit on you. For the example above, if you had a 36" bust measurement and chose Size 14, then the finished garment will measure 40.5" at the bust, giving 2.5" of ease. Note that they are calling this both "Design and Wearing Ease." Since more fitted garments are currently in style, most patterns use around 2 - 3" of ease.
5. Double check with the tape measure
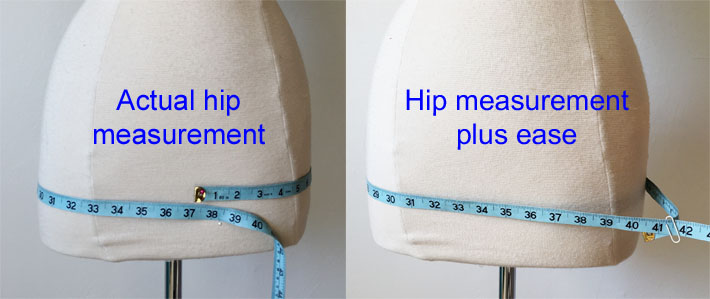
To see if you're comfortable with the amount of ease, make use of your tape measure. Hold the tape around your body at the point you are checking, such as the waist or hip. See how that number feels. Is it too loose or too tight? Be sure to sit down, as the body spreads when seated and uses up some of that ease.
Another way to determine how much ease you like is to measure an existing garment. Check the finished garment dimensions on an existing item and see how much ease you actually like.
6. Double check by flat pattern measure
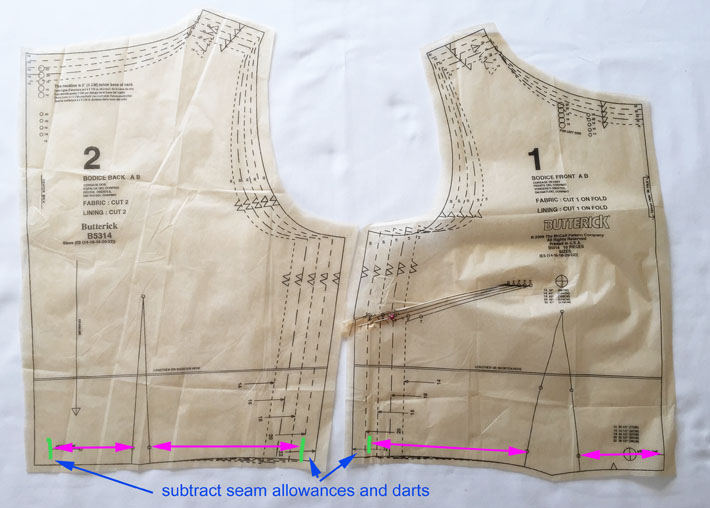
Many patterns note the actual size dimensions on the pattern tissue, typically with a line or circle on the front pattern pieces.
The pattern pieces pictured here list the bust and waist circumference for each size. These are really helpful when deciding to grade between sizes. Circumference notations aren't on all patterns, but they are easy to measure on your own.
If your pattern includes seam allowances or darts, then be sure to remove them from your measurement. Once in a while, your careful measuring may result in a different number than the one printed on the pattern, so it really pays to double check these. Plus, it familiarizes you with the dimensions of the pattern so you can turn it into a body map customized just for you.

Is there a chart or diagram I can use to record measurements?
Do you have the way how to take body measurement diagrams?
Help!!!! #6 photo it shows the bottom of the shirt patterns where darts and seam allowances are. I have a vintage pattern that is only one size. All measurements are fine except for the waist. I need to add 4 inches. This is a project for my granddaughter at school and I've tried watching everything I know how to fix just the waist of a shirt and I can't find anything. Getting desperate.
Thank you. It took many years to get an explanation of what the circle with a cross pattern marking means.
Thank you. This is SO helpful to me. I think I can actually use patterns Now. This along with Nancy Zieman Patterns with confidence.
It would be more helpful if you included the measurements in cm as well for those of us who use metric system, which is over 90% of the world.
Are there any pattern makers that list the high bust measurement on their pattern envelope?
good luck with that, the measurements on the envelope back vs the finished garment measurements printed on the tissue paper are different and no one knows why
Helping my granddaughter with a project