The collar is front and center on a button-down shirt, and of course you want it to look great. Here are two methods for achieving a nice, crisp collar for your next shirt.
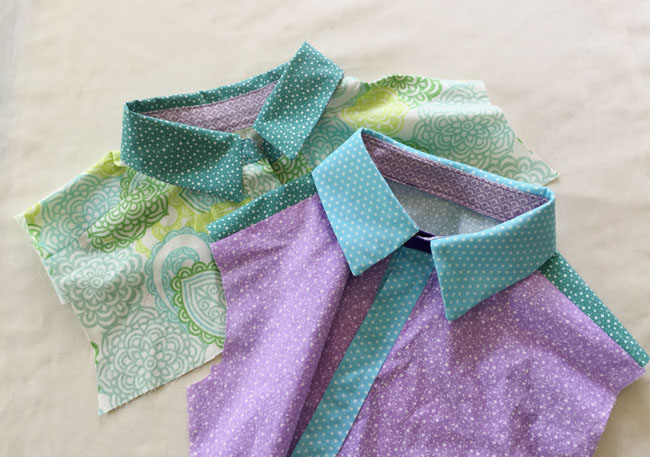
All these examples are sewn using contrasting fabrics so you can keep track of the inner and outer collar stand, as well as the two different construction methods. Of course, your fabrics may all be the same color or print.
We’re going to focus on attaching the collar stand to the shirt neckline, so for both methods you’ll sew the actual collar, press and turn, topstitch and then set that piece aside until needed.
Method #1
Step 1: Staystitch the neckline
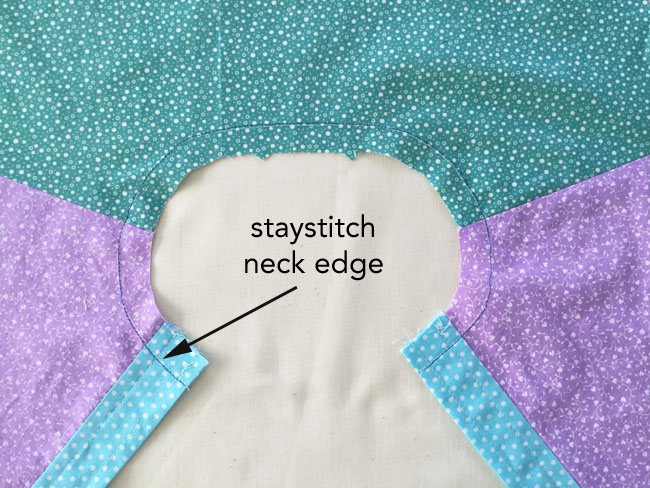
Sew the shoulder seams of your shirt, joining front to back. Apply any button bands or finish the front closure edges as instructed by the pattern. Staystitch the neck edge where you’ll attach the collar — as you’ll need to clip this seam allowance.
Step 2: Prepare your collar and collar stand
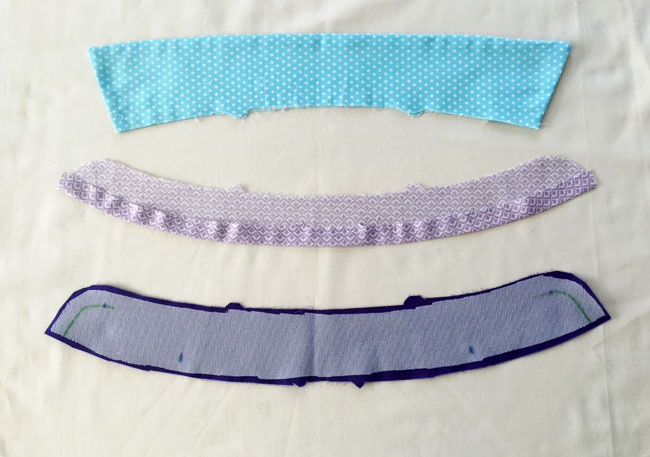
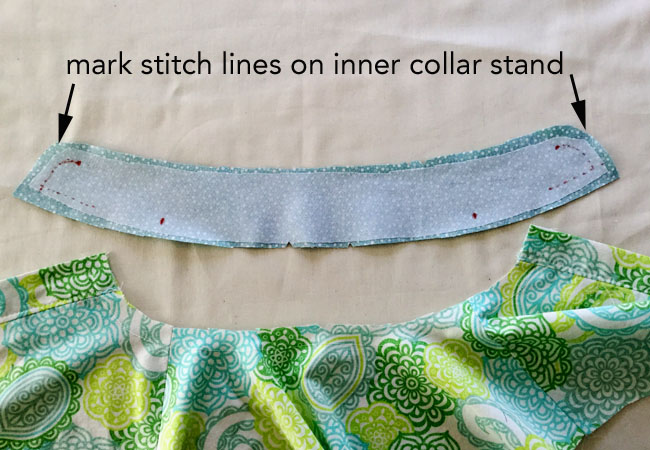
Apply interfacing to one of the collar stands. This will be the collar stand on the outside of the neckline, in case you are using a contrast fabric.
Once you’ve applied the interfacing, transfer the pattern markings to the interfaced side. You can use a felt pen, chalk, colored pencil or tailor’s tacks. Mark the stitching line at either end of the collar stand as shown. This help in accuracy and making sure the collar is symmetrical.
For the inner collar stand (shown in the middle above), press the neckline edge upward along the seam allowance. You can trim this seam allowance down to ¼” if you prefer.
Step 3: Sew collar stand edges
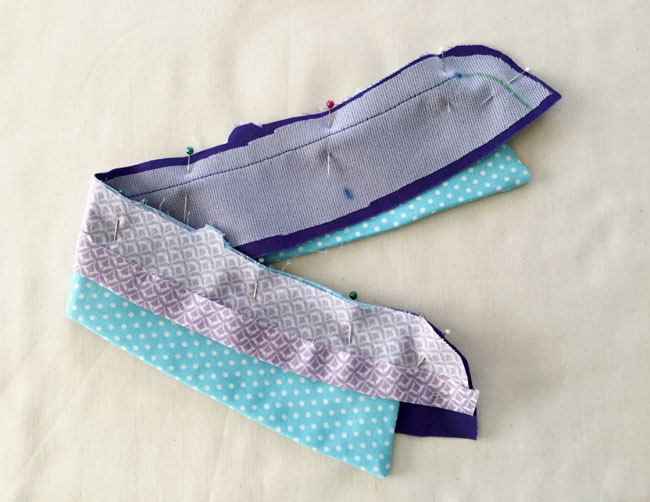
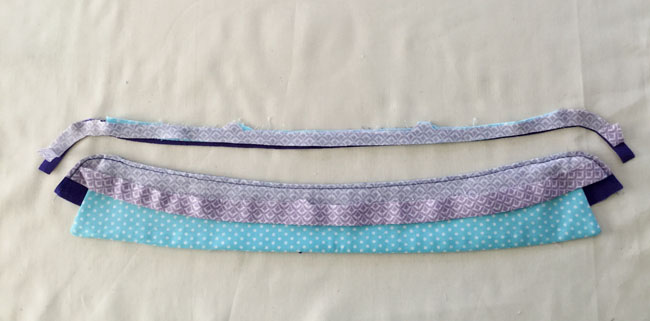
Stack your two collar stands and collar so that the collar is sandwiched between the stands. The stand should be wrong side up. Align the upper edge of the three pieces.
Sew the upper edge of the two collar stands together. Stitch on the interfaced side so you can follow the guide line you made in Step 2.
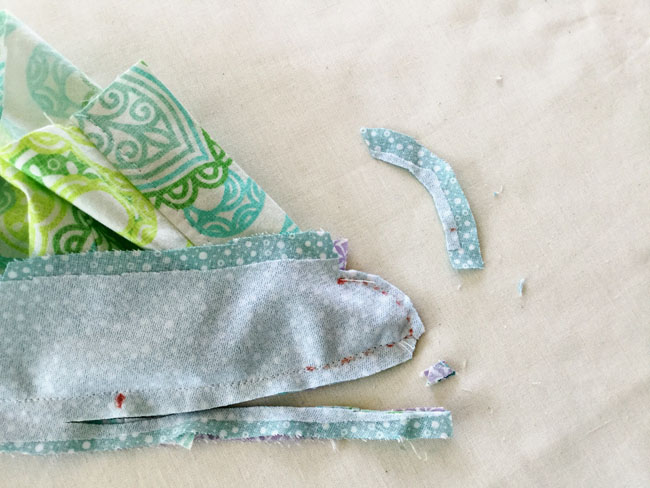
Step 4: Trim seam allowance
Now the the two collar stands and the collar are sewn together, trim that seam allowance to leave 1/8″ along the stitching — this way, you won’t need to add any notches. Make sure that the two ends match, with a similar curve.
Step 5: Turn and press
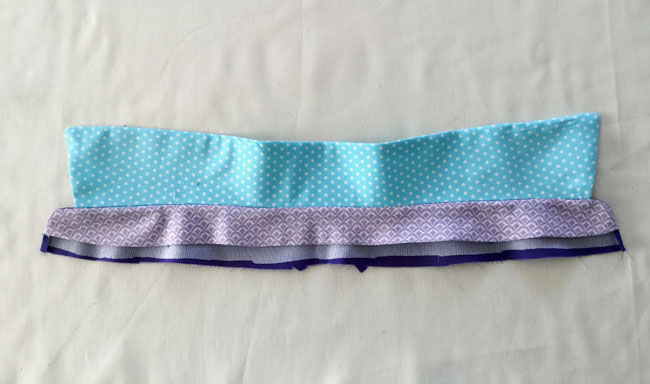
Turn the collar stands right side out and press. It’s starting to look like a shirt collar now!
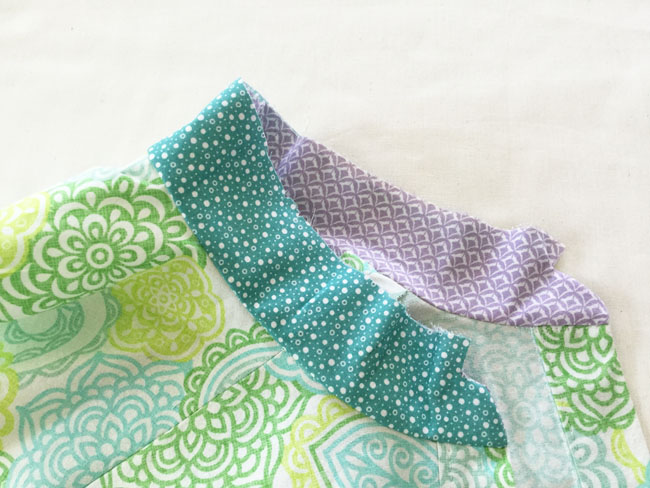
Step 6: Attach to the neck edge
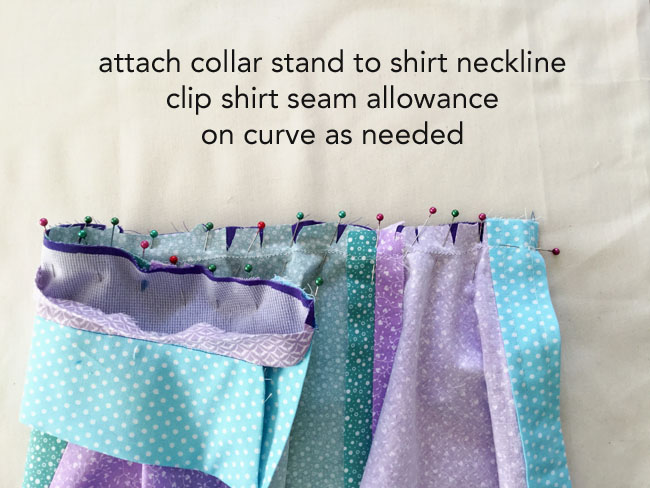
Attach the collar stand to the shirt neck edge, matching dots and notches. You may need to clip the seam allowance on the shirt as shown above. Be careful to match at the end points so the end of the collar stand lines up with the edge of the shirt front.
Sew the collar stand to the shirt. Don’t catch the inner collar stand in this stitching — that will be completed in the next step.
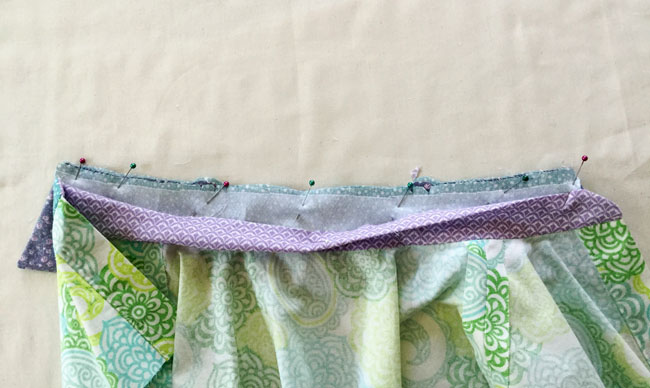
Step 7: Press and edge stitch
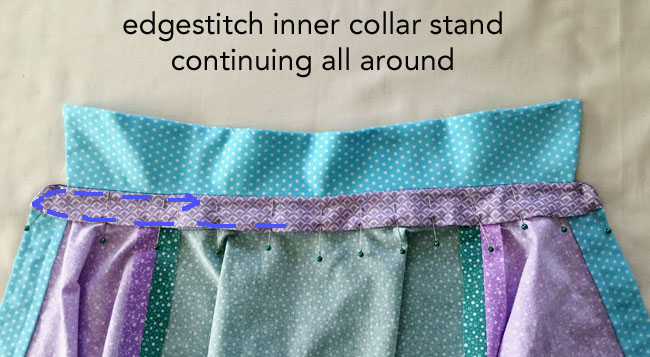
To complete the collar assembly, press the collar and stand over a ham (since it’s a curved seam, a ham is better than an ironing board). Pin the bottom edge of the inner collar stand to enclose and then edge stitch all around, starting in the center and continuing around the entire edge of the collar stand.
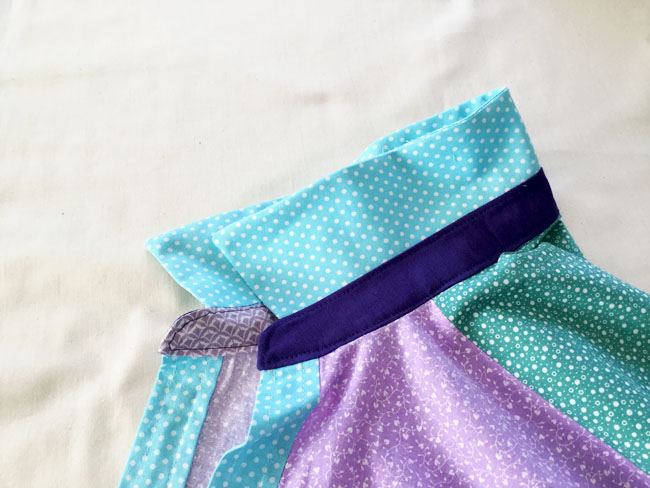
There you have it: Method 1 of attaching a collar with stand to a shirt!
Method #2
Step 1: Prep the collar pieces
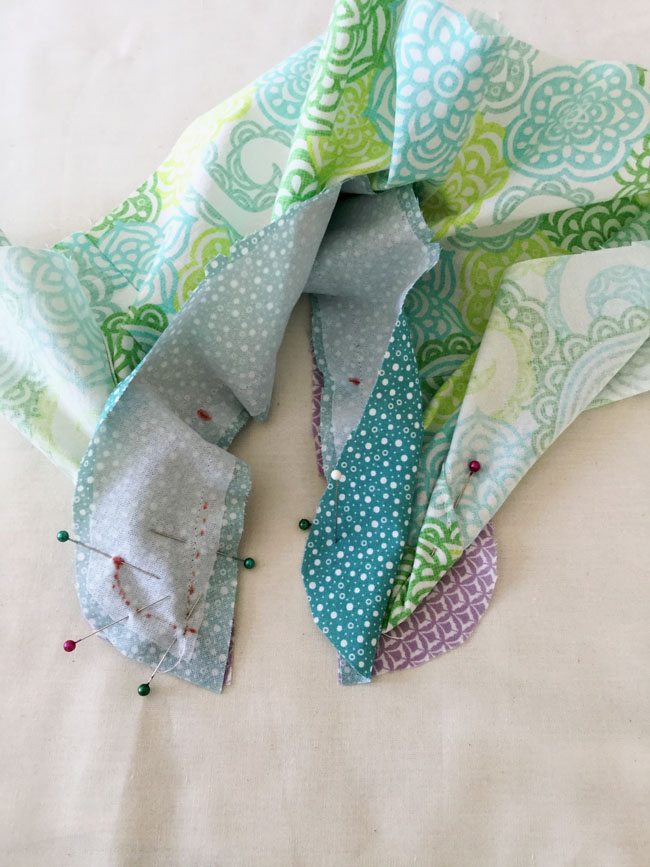
The second method uses some of the same steps as the first. To start, staystitsh the neck edge of your shirt. Apply the interfacing to the collar stand piece that will be on the outside of the neckline. Mark all the dots, notches and the stitching line on the collar ends.
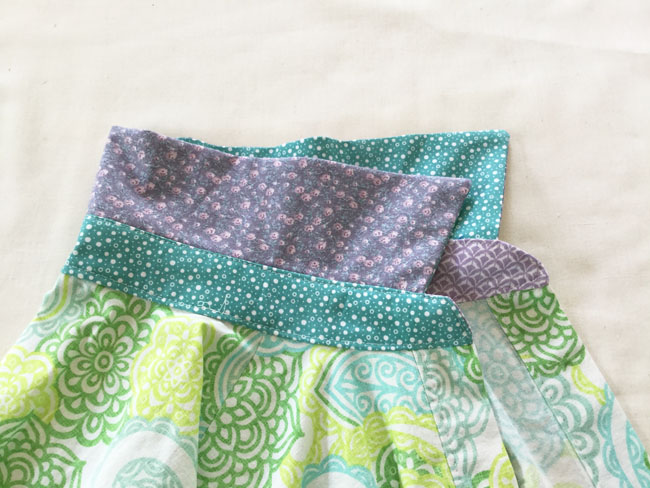
Step 2: Attach collar stands to shirt
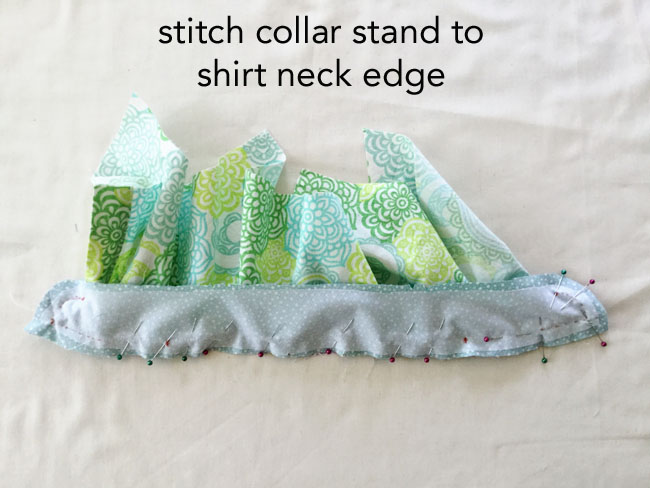
Pin the collar stands to the shirt neckline edge. In this photo, I have pinned both of the stands on, so the shirt neckline is sandwiched in between.
With any sort of tricky fabric (such as a silk), pin and sew one the interfaced collar stand on with a long basting stitch just to get it in place; then place the second collar stand piece in place, pin and sew that. The trick is to fold the front of the shirt away from the corner, as shown on the right. You will pin the collar stands together up to the dot on the top edge.
Step 3: Stitch collar stands to shirt
Stitch as indicated (where I’ve marked with the red felt pen, or according to your pattern). Be sure to pivot at the exact point where the edge of the shirt begins to create a crisp edge. Also, keep the front of the shirt away from the stitching so it doesn’t get caught when you sew.
Step 4: Trim seam allowances
Trim the neckline seam allowance to reduce bulk. Then, trim the corner where you pivoted to the curved portion. Trim the curve down to about 1/8″ (this eliminates the need to notch the seam allowance and keeps this area from being lumpy). Clip the upper edge seam allowance to the marked dot — careful here — cut one side at a time making sure the shirt front is away from your scissors.
Step 5: Turn and press
Once you’ve trimmed the seam allowances on the curved edges, they should turn right side out easily. Press, making sure the collar stands are smoothed away from the body of the shirt. Fold the seam allowance at the upper edge of the collar stand in at the seam allowance, and press that edge.
Step 6: Add the collar
At this point you can baste the shirt collar, right sides together to the outer collar stand. That way it will be in place and in the next step you can concentrate on the edge stitching. Alternatively you can insert the collar between the collar stands and attach it in the same step as the edge stitching in the next step.
Step 7: Edge stitch to complete the collar

If you didn’t do it in the previous step, place the collar in between the two collar stands, matching the seam allowance and pin in place. Enclose the collar stand as in Step 7 of Method 1, by edge stitching all around.
And there you have it — another way to sew the collar and stand!
Please I want the two methods of attaching collars
I am new to sewing, and have been having trouble sewing a collar, with a collar stand. This tutorial is very good.