Greetings crafters! Amy Gibson here, of Stitchery Dickory Dock, and the Craftsy Block of the Month – a free year-long quilting series here on Craftsy!
Quilters, trust me, I know, there is nothing more frustrating than cutting up your favorite fabrics and laboring over a ridiculously awesome quilt block, only to discover that it’s come out too small, or the pieces don’t fit together well. Ugh! Hate that! It happens to EVERY quilter at some point, but don’t despair — there are things we can do to prevent this frustrating experience. Join me in this post as offer 5 basic steps you can take to help improve your quilt piecing accuracy.
1. A scant 1/4″ seam is a quilters secret weapon!
The fact of the matter is, it’s more difficult to achieve a true 1/4″ seam than one might think. Very often, the 1/4″ markings on your sewing machine, or even your 1/4″ presser foot, can be noticeably off. Unfortunately, the only way to really make sure, is to stitch a 1/4″ seam following whatever markings you’ve been using, and measure it with a clear ruler. Is the seam right on 1/4″? Or is your stitching just a touch over?
Even using my ¼ piecing foot, I found that my seams were too big! See? In the seam on the right, I followed the edge of my presser foot, which resulted in a seam that was just on the outside of the 1/4″ marking.

But what’s better than a seam that’s exactly 1/4″? A seam that’s a hair under a 1/4″ of course! This is a scant 1/4″ seam. In the seam on the left, I made sure I could not see my drawn line outside of the presser foot, but rather kept it just under the very edge of the foot. This small change will keep your seams just a couple of thread widths under 1/4″, and will account for not only the seam itself, but also the actual fold in the fabric when your press your seams under.
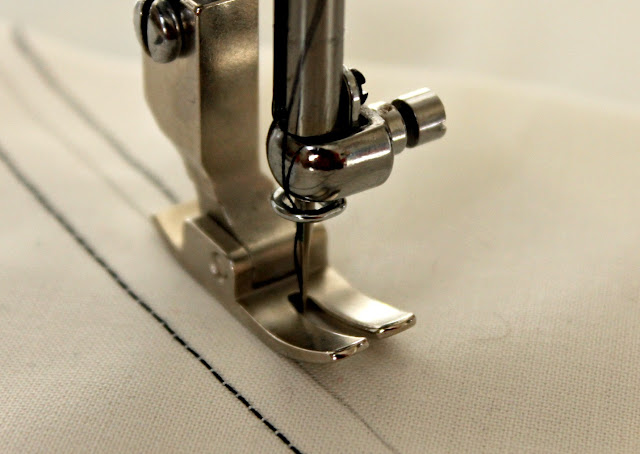
It doesn’t seem like it would make much difference, but even this tiny amount can really add up over the course of a block, so get in the habit of stitching a scant seam, and your blocks will thank you.
2. Press well
When you press your pieces open there are several things to keep in mind: make sure your iron is on the highest cotton setting, use steam, and be sure you are “pressing” and not “ironing”. By this I mean to only place your iron straight down on the fabric, and not move it back and forth like you would normally do when pressing garments or linens. Moving a hot steaming iron back and forth over your delicate quilt pieces will almost certainly stretch and distort them, regardless of if the edges are on grain or bias.
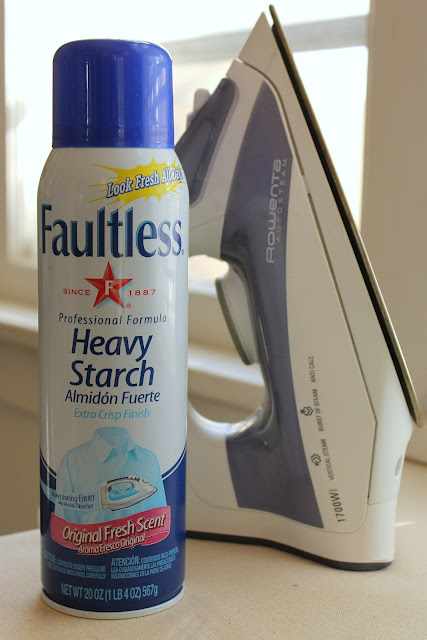
3. Starch is your friend
I know, it seems like this would just go along with pressing, but I think it’s so important, it deserves a spot of it’s own! Heavy spray starching while you press is one of the absolute best ways to help keep your accuracy spot on. As the sweeties over at my darling local quilt shop say, “It makes your fabric BEHAVE!” I couldn’t agree more! Starch stiffens your fabrics to prevent distortion when you’re handling & pinning your pieces. It rinses right out in the wash, leaving your quilt soft & snuggly.
Don’t be fooled — there are many starches available on the market, and some are even advertised as specifically made for quilting (here’s where I sound like an advertisement, but trust me, it’s not!), but in my experience, nothing does the job quite like Faultless Heavy Spray Starch. Seams lay flatter, fabrics stay crisp throughout the piecing process, and it even has a lovely scent (that’s probably just me reminiscing about my Dad, always always heavily starching his shirts when I was a kid!).
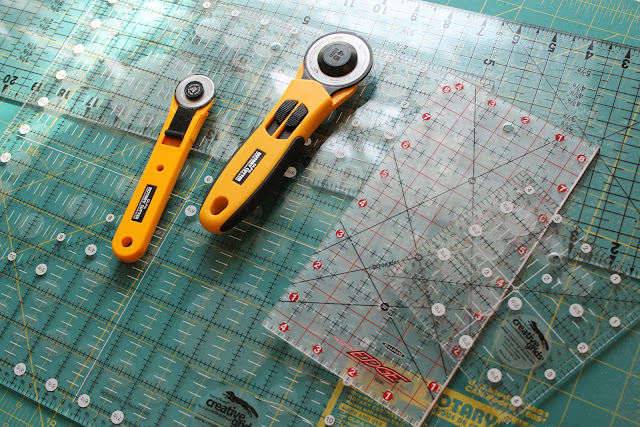
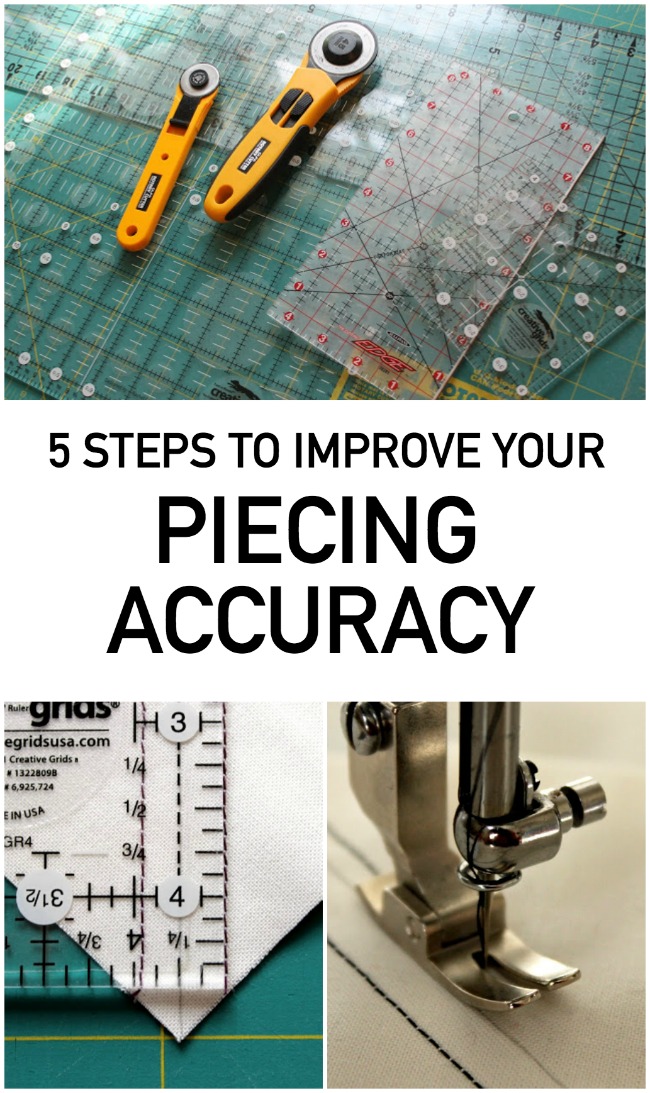
4. Use the right tools
Sharp things: Keep your rotary blades sharp, and change your needle often. It’s easy to get lax about this, and forget to change them out. If you make it a habit before each new quilt project, you’ll find it’s worth the extra expense! (that’s what big discount fabric store coupons are for!)
Rulers: Have a nice assortment of clear, non-slip rulers available. Even though it may seem unnecessary to have zillions of them, including a 12.5″ square, a 4.5″ square, a small rectangular, a 6″ X 24″, etc, it really can aid in accurate cutting and a more relaxing experience when you can grab the right sized ruler for the job, instead of strain your eyes to make sure you’re cutting on the right line on a ruler that’s too small or too large. I also love adding a product called Omnigrid “InvisiGrip” to the underside of all of my rulers, and have found it the most effective way to ensure a steady grip. It’s crystal clear plastic that works like a window cling on the back of your rulers- stays put, and has nearly eliminated that annoying slippage.
Mat: Do invest in a high-quality self-healing mat, but try not to get in the habit of using the markings on the mat for cutting. These can be helpful if you need to cut a really big piece, but for most things your rulers will provide much better accuracy (ie the ruler should be completely covering the part of the fabric that you are cutting & using, not the remaining fabric).
5. Be familiar with basic quilt math and don’t be afraid to use it!
I hate math, I’ll admit. But quilting requires a TON of it, so I’ve long since surrendered to the fact that I need to be comfortable with it. This means understanding how pieces add up, to equal a total measurement on a block or quilt, and even calculating how much fabric you’ll need to purchase at the quilt shop, or how many strips to cut for your binding. Once you know the basic equations, your trusty calculator can do the hard part.

Here are a few of the most basic formulas that I use nearly every day when I’m quilting:
- The total width (or height) of a block or quilt = the width of each piece X the number of pieces, minus .5″ for each seam
(So for example, our Balkan Puzzle block from February- 3.5″ Half Square Triangles X 4 Units = 14″ – 3 seams at .5″ each = a 12.5″ block. This one really comes in handy if you want to stop and measure part way through a block to see if you’re close.)
- Total inches needed for border = quilt width X 2 + quilt height X 2 + border width X 4
- Total inches needed for binding = quilt width X 2 + quilt height X 2 + 24″ excess to join
- Number of strips to cut for binding = total binding length (see previous equation) divided by 44″
Well, thanks so much for joining me for this little refresher post! I don’t know about you, but I can use a reminder of these things now and again, and surely we all love our quilts to look as crisp and precise as possible- it’s just more fun that way! Hope you’re enjoying following along with the BOM and I’ll see you March 1st with 2 new blocks!
Cheers!
Amy
Want to save this post on Pinterest? Pin the image below!
Thank you
I’m grade school, my dad insisted we had to learn math and said no matter what you do in life you need math. I think of him often as I use math in my quilting and knitting projects. Thank you for these tips.
Thank you for sharing. I’m a new at guilting so much to learn, haven’t completed any projects yet . Just collecting knowledge. So many nice people ready to help. Thank you so very much I
thank you for the help and great info
Great reminder thank you
I need a ruler like the one in the picture with all of the measurement’s
You are correct about, we can all use a little refresher now and again 😉.
This will be very useful in the future
This was very helpful for me. Thank you so much. I'm hoping I copied it right. Need help many times yet. 1-5-2022
Thanks for the good information.