We’ve all been there. You’re fairly deep into your quilting process, and you realize you’re out of border fabric. Or your seams are so wavy, they become unintentional improv piecing. And somehow, after taking all those measurements, your blocks are all different sizes.
Thankfully, each quilting project is a learning experience! But it’s also helpful to learn from others’ mistakes as well as the methods that work best for them. Here are some quilting tips that will help you avoid some common quilting mistakes the next time around.
1. Free-motion follies
Bluprint blog reader Judy has this dilemma: “There are far too many times when I realize I did not allow an out while doing a quilting design and I get stuck in a corner with no place else to go. Or if I need to go on to the next block, I am in the wrong location and cannot go into the ditch along the seam to the next block. While doing free-motion quilting, how do you handle the thread when you cannot go any further for one reason or other? Very tiny stitches, stitching in place before cutting or burying the thread? Are there other tips we can try?”
Great questions! We reached out to free-motion quilting instructor Angela Walters, and here’s what she had to say: “If I find myself stuck in a corner, I will travel along a seam or a previously quilted line until I get where I need to go. I don’t mind if it’s not perfect!! When I start and stop a line of quilting, I take several tiny stitches and then start quilting.”
2. Running out of fabric
Have you ever miscalculated your quilting fabric, only to run out in the middle of piecing your quilt top? There are many free tools you can use to help you avoid this mistake before it happens. One of the most popular quilting calculators is available for free online at Quilter’s Paradise. You can use this tool to calculate your yardage needed for quilt backing, batting, binding, borders. It also has some great tools for calculating how many fixed-size pieces you can cut from fabric yardage.
If you use a particular fabric often, such as solid white for background fabric, it might help to order it by the bolt. Finally, if you run out of a specific print mid-quilt and can’t find it anywhere, you may wish to take a photo of the desired fabric and post it with the letters ISO (“in search of”) to Flickr or other social media sites.
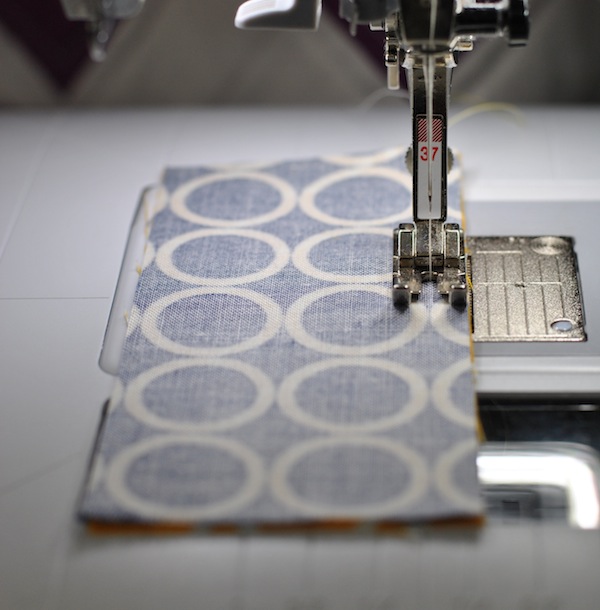
3. Inaccurate seam allowances
Have you ever followed the instructions to make a quilt block and ended up with a block that’s too small? This may be due to inaccurate seam allowances.
A scant quarter-inch is generally recommended across the board for quilting patterns. There are a couple ways to achieve this. If your sewing machine has a quarter-inch foot (pictured above), you can use this to get an accurate seam allowance for quilting. Your foot may also have a metal ridge to mark a precise quarter inch.
An alternate method is to place a piece of masking tape or a sticky note on the base of your sewing machine to mark the correct distance away from the right edge of your foot. This method is demonstrated by Kathy Patterson of McCall’s Quilting.
Pressing your seams after each step can also help with piecing accuracy. Be sure to press your iron up and down instead of waving it from side to side, which can stretch or distort your fabric and make straight seams look wonky.
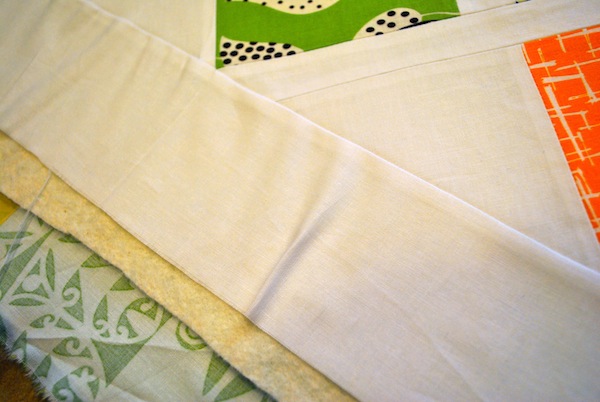
4. Mismatched rows
Because fabric stretches, you may end up with mismatched rows even if you use sewing pins at every seam. This can be frustrating for quilters, because it may mean ripping out stitches.
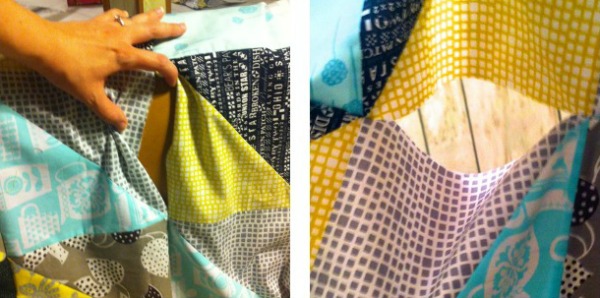
One method that has worked well for me does not involve pinning at all. Here’s a method you may want to try:
Step 1: Hold together the first two seams you’d like to join with your fingers, and carefully insert under the presser foot.
Step 2: Sew a few stitches back and forth just along the intersection.
Step 3: After backstitching, cut the thread and move along to the next intersection.
Once you’ve finished this step, open up the joined rows to see if any of the seams are amiss. (See photos above.) If they are inaccurate, you can rip out just a few stitches and try again. For me, this added step can be a real time-saver! Once all the seams are aligned to your liking, finish stitching the raw edges together to join the rows.
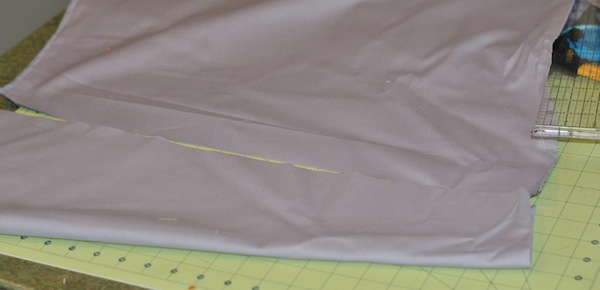
5. Wavy borders
Have you ever been plagued by wavy quilt borders?
If the left side of your quilt strangely measures 2 inches longer than the right side, you’re going to have trouble getting an accurate border.
- The first step to accurate borders is to make sure your quilt top is even lengthwise and widthwise. Trim off the excess anywhere you can before adding borders.
- Instead of measuring the length and width of your quilt and cutting that exact border length, try sewing a longer piece of fabric to the side of the quilt and trimming off the extra. This way, you will avoid easing in too much fabric, which causes wavy borders.
- If you don’t have extra border fabric to spare, measure the length and width of your quilt by placing a tape measure in the center of your quilt instead of the edges. Cut your borders to these dimensions and pin the exact center of your border to the exact center of your quilt side. Pin outward from the center and stitch in place.
I have 4inch squares & want to put a strip in between the the 4 inch squares what the size I should I cut strip? Tks
I've cut too close to the pattern on a t shirt quilt how CA I repair it?
I am a long armed and I need to correct the ripples in the bottom of a quilt. I have quilted the quilt until the last 5 borders and have ripples in the borders I can’t quilt out. Help! What did the quilter not do or is it my fault as the long armed? This quilt has embroidered blocks and some blocks that are on the bias. How can I fix this quilt?
I just noticed fabric tension issues on the back of a quilt I am free motion stipple quilting. Do I need to use my seam ripper and take out the threads from the bad area? It won’t show since it’s on the back, but I am wondering if the top thread will unravel over time. What should I do?
Great tips!
When I am sewing either strips OR squares, and I start from the left and move right OR top to bottom of my quilt top, I always have asymmetry. In other words, If trying to make a Bargello out of my tops, when I go to sew the ending strip to the beginning to make a tube, the tube is completely twisted! How do I control this? Is it a tension problem?