Build a Cordless Tool Station
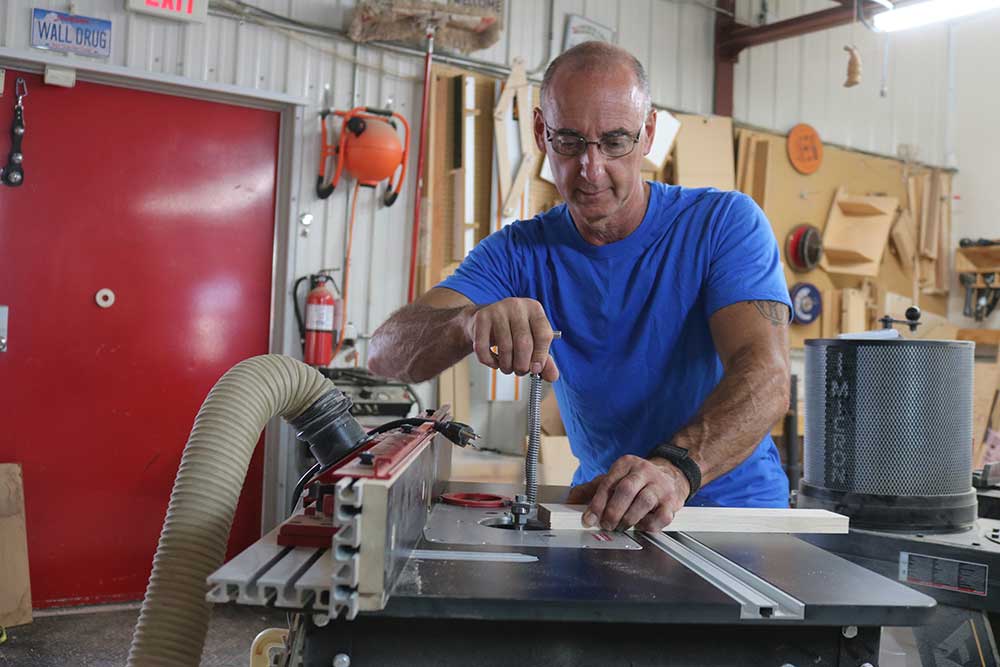
George Vondriska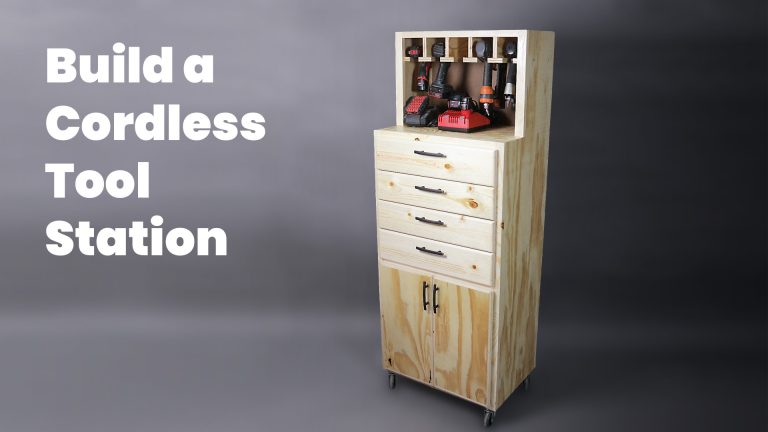
Class Preview
2:52
- In-depth Instruction; over 100 mins
- On-demand video access anytime
- Bonus downloadable PDF resources
- Access to class Q&A
Introduction
4:25
The entire Cordless Tool Station comes out of one sheet of plywood. The case construction is very typical; dadoes and rabbets hold it together. The face frame is held together with pocket screws. The drawers are on full extension slides, and the banded plywood doors swing on European hinges. With casters on the cabinet, you can position it wherever you want in your shop.
Dados & Rabbits
6:07
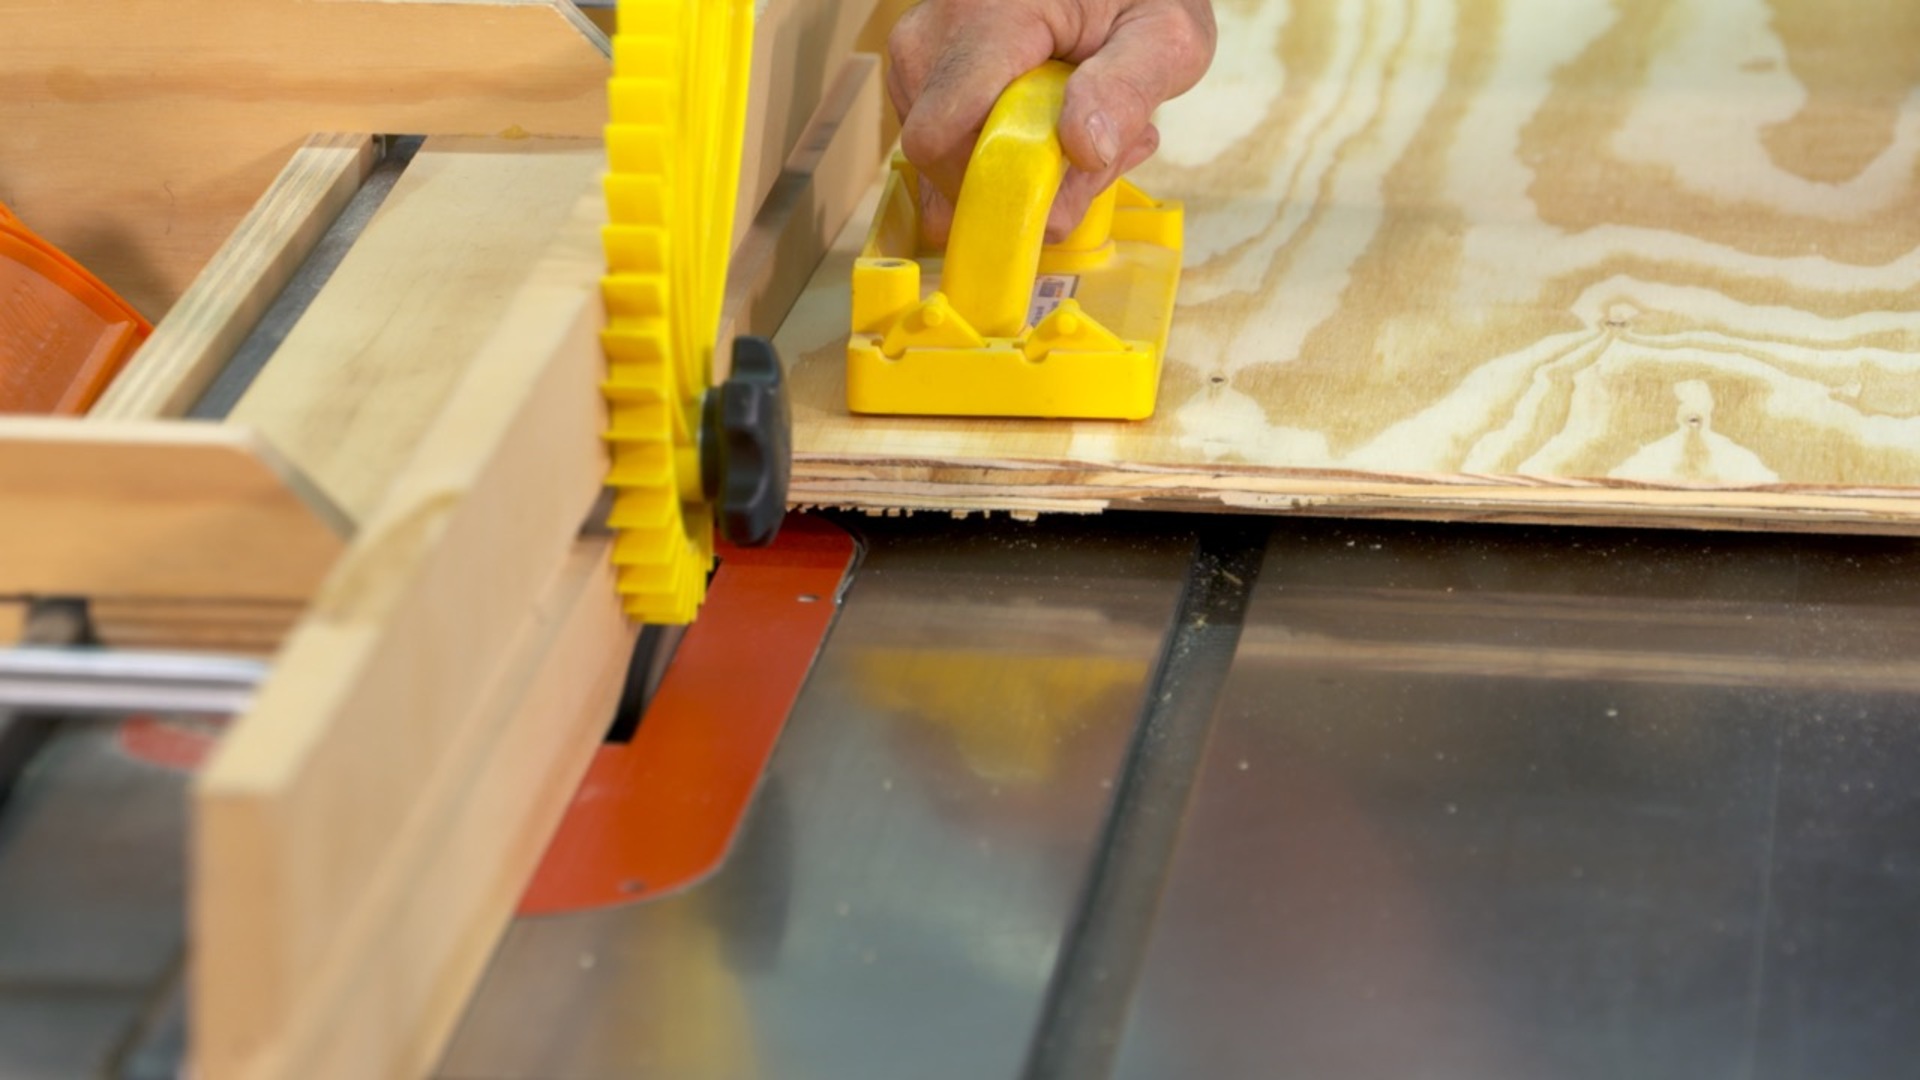
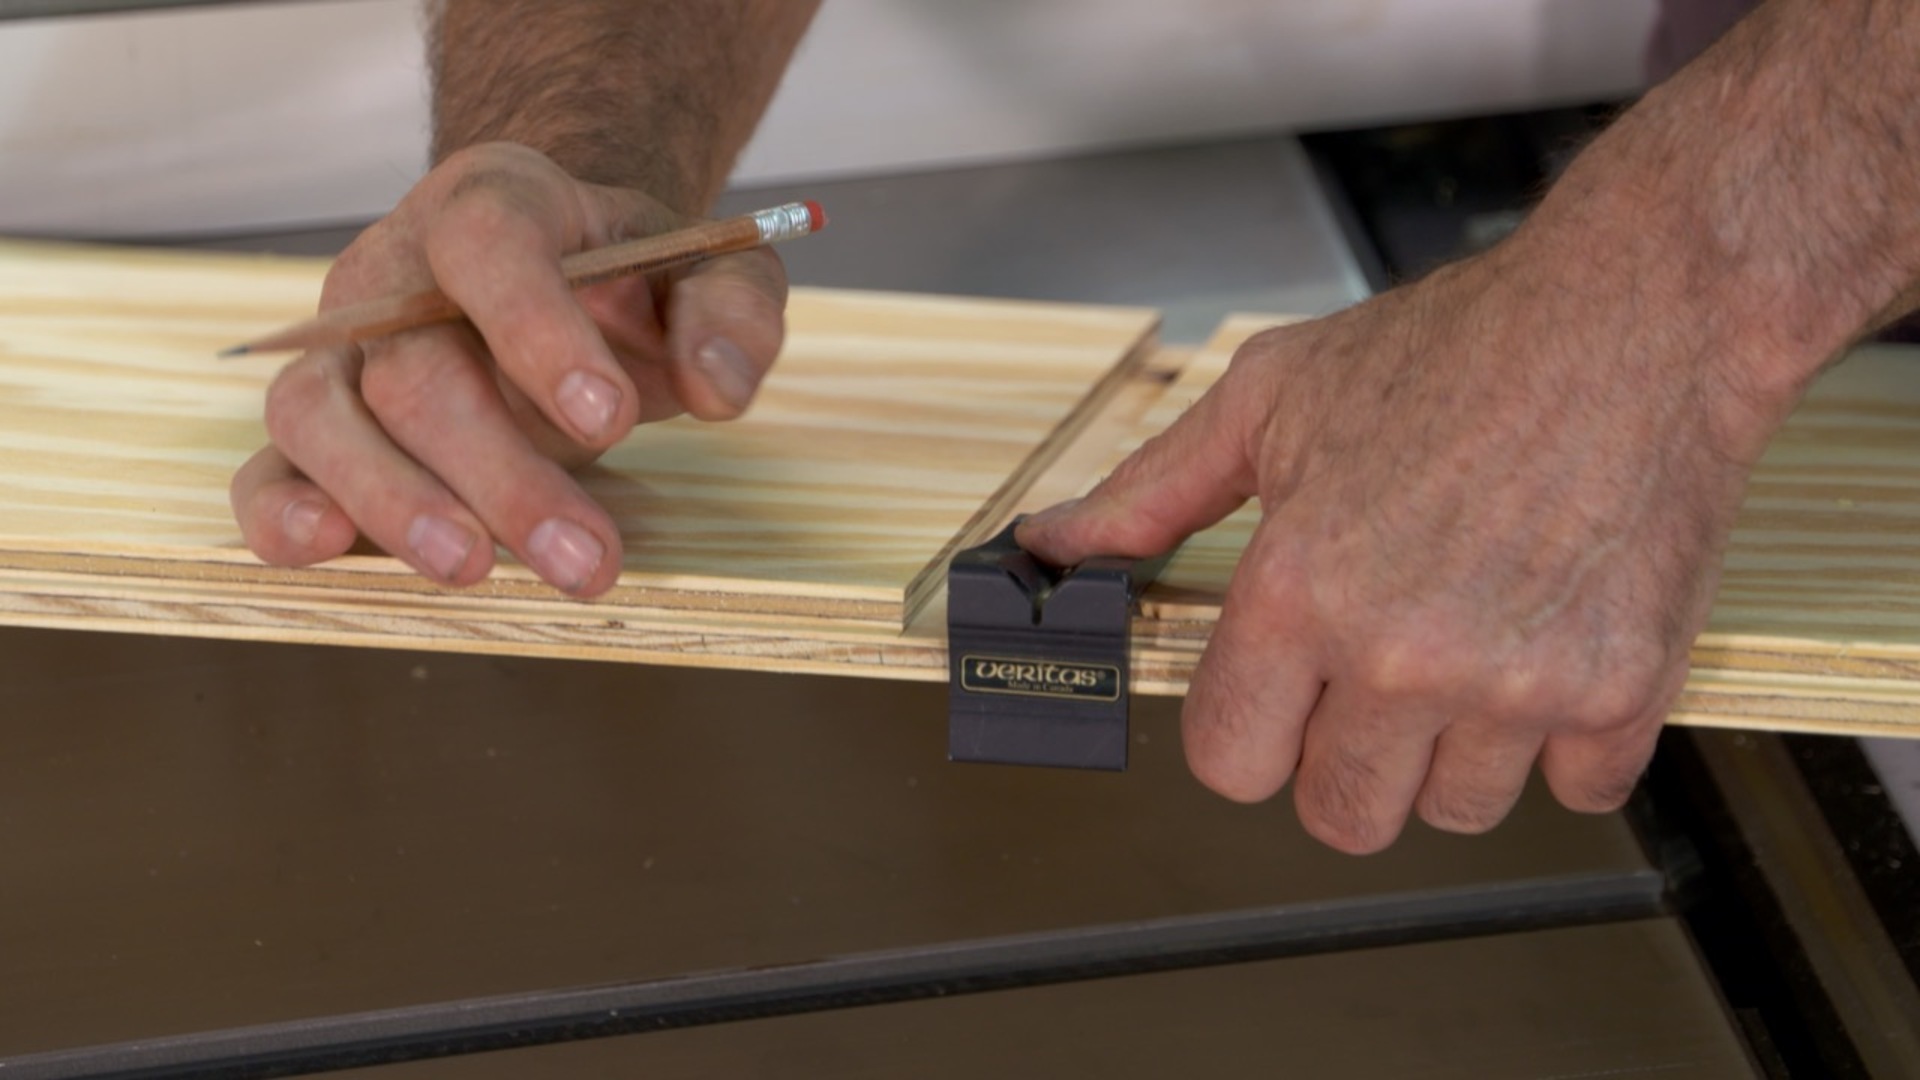
Before heading to the table saw to do dado and rabbet joinery, cut the plywood down to a more manageable size. A track saw provides an easy way to do this. Make sure the cuts are square to the edge. Once the parts are cut to final size, you’re ready for dado and rabbet joinery. Follow the plan to locate these joints.
Adjustable Shelf Holes
3:02
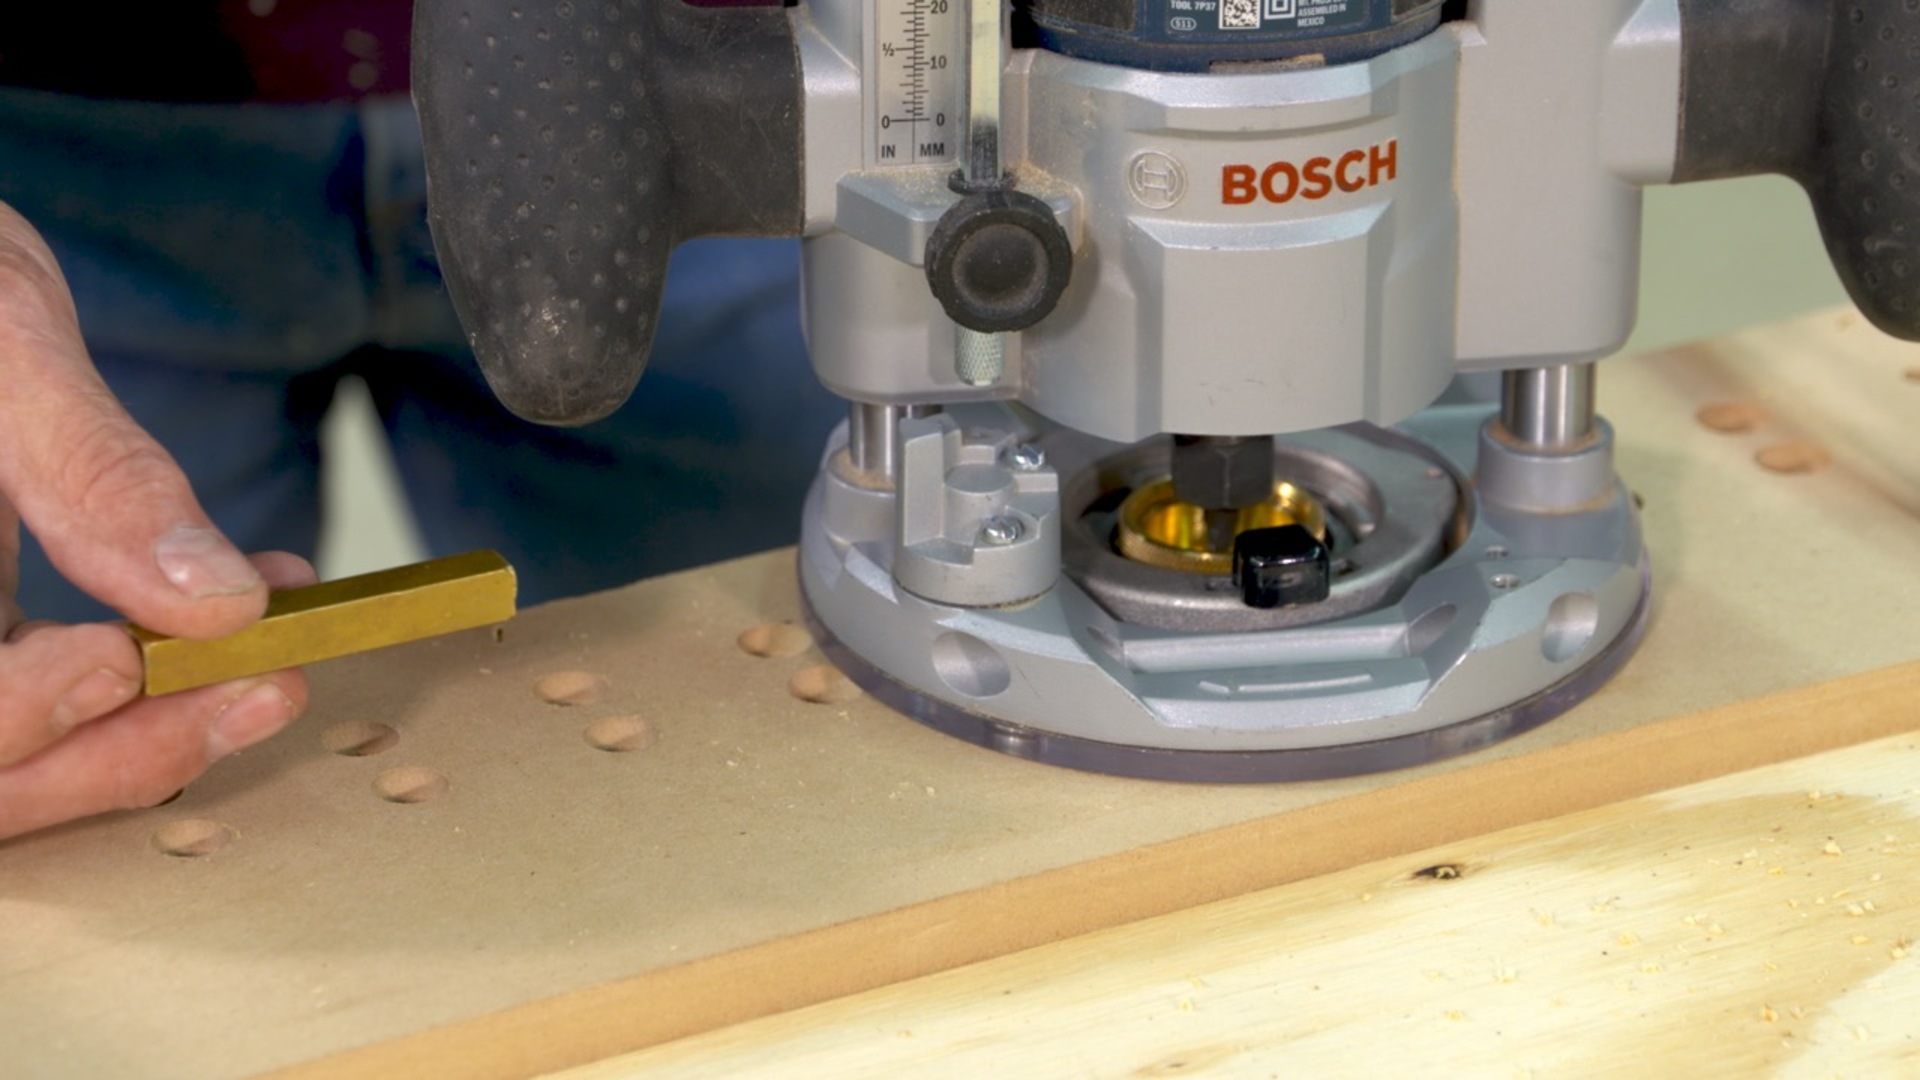
The lower section of the cabinet needs adjustable shelf holes. Make sure you’re positioning the jig consistently so the shelf doesn’t wobble. There are lots of ways to make adjustable shelf holes. A plunge router works great, providing fast and clean holes.
Cut the Narrow Upper
6:07
The cuts required to produce the narrow upper section are a little tricky but can all be done on the table saw. This involves making stopped cuts, which means determining where on the saw we need to stop. This is a cool technique, and a great woodworking approach to learn.
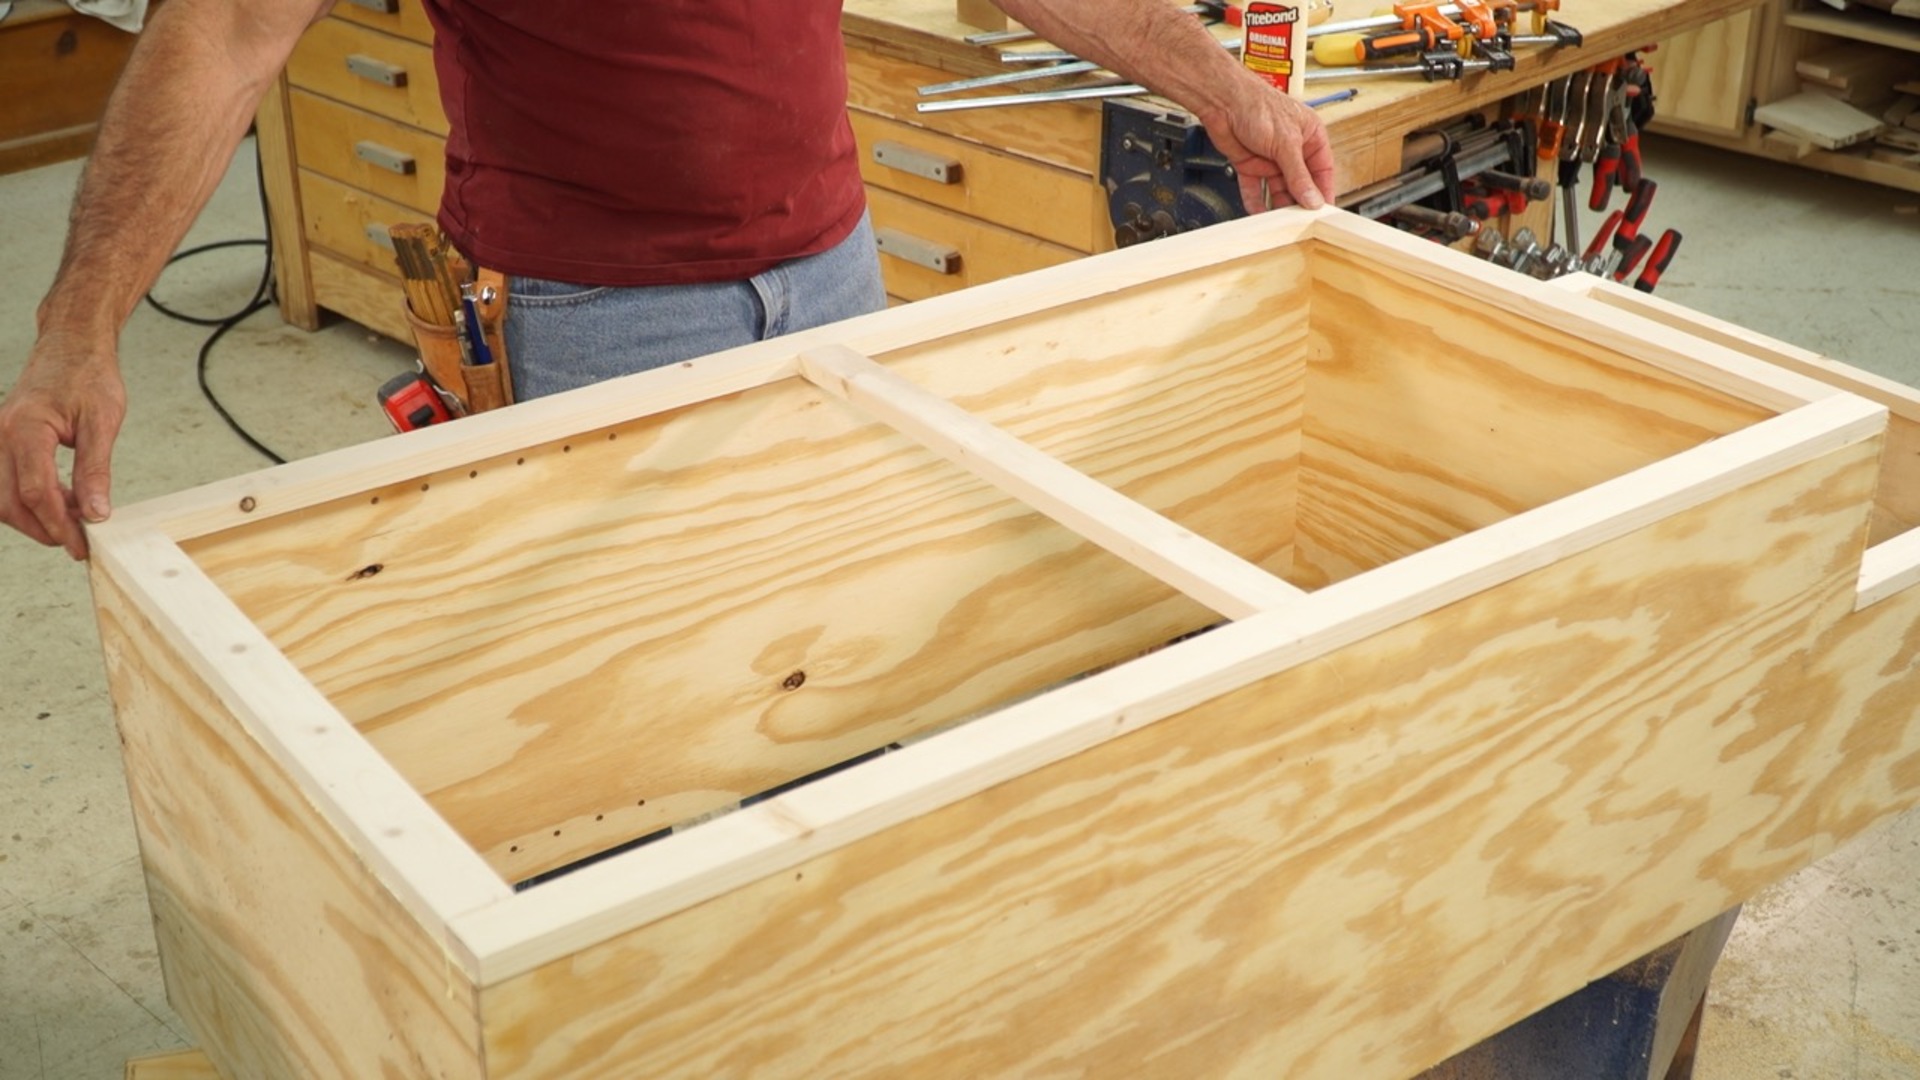
Assemble the Case
7:56
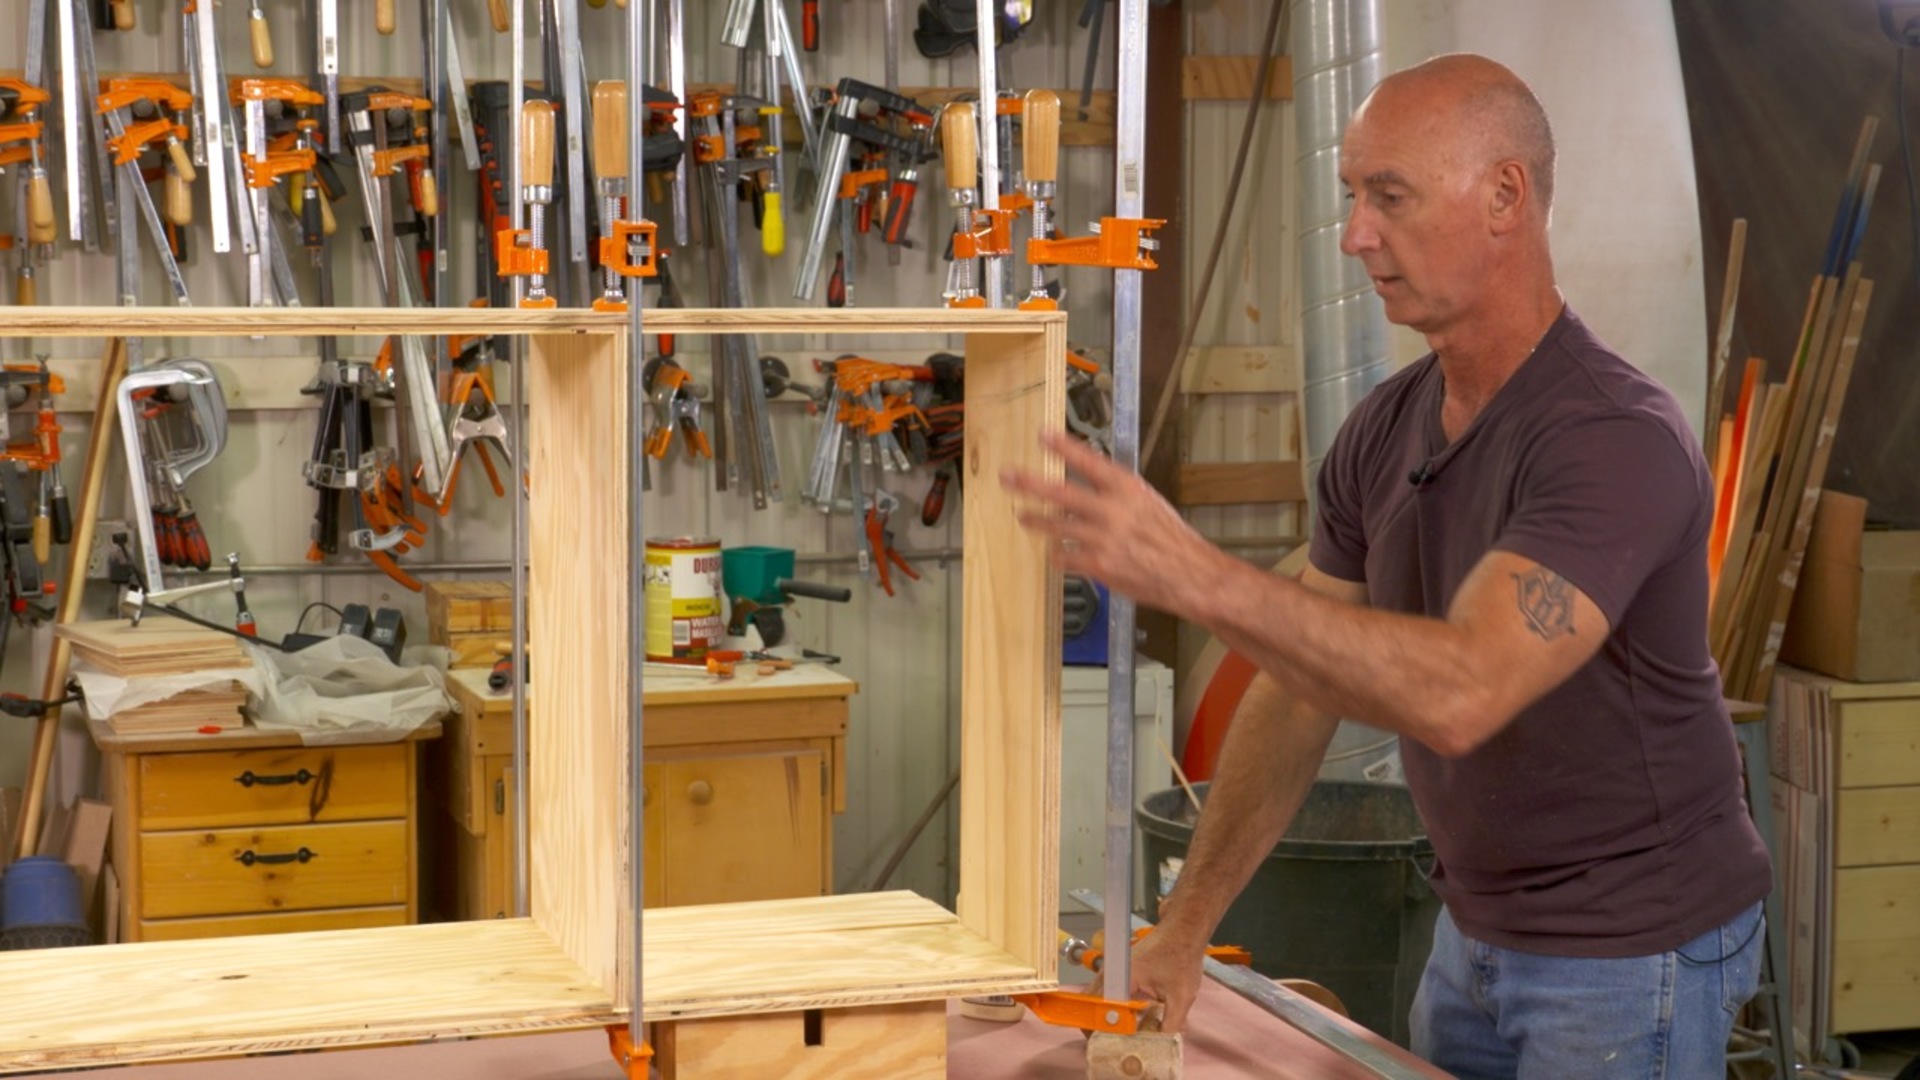
Sand the interior faces before assembly. Brush glue into the dadoes and rabbets and bring the case together. Double-check to make sure the front is flush, clamp the joints and check for square. George’s tips for careful clamp alignment will help you keep a carcase square as you assemble it.
Trim the Upper Cabinet
5:09
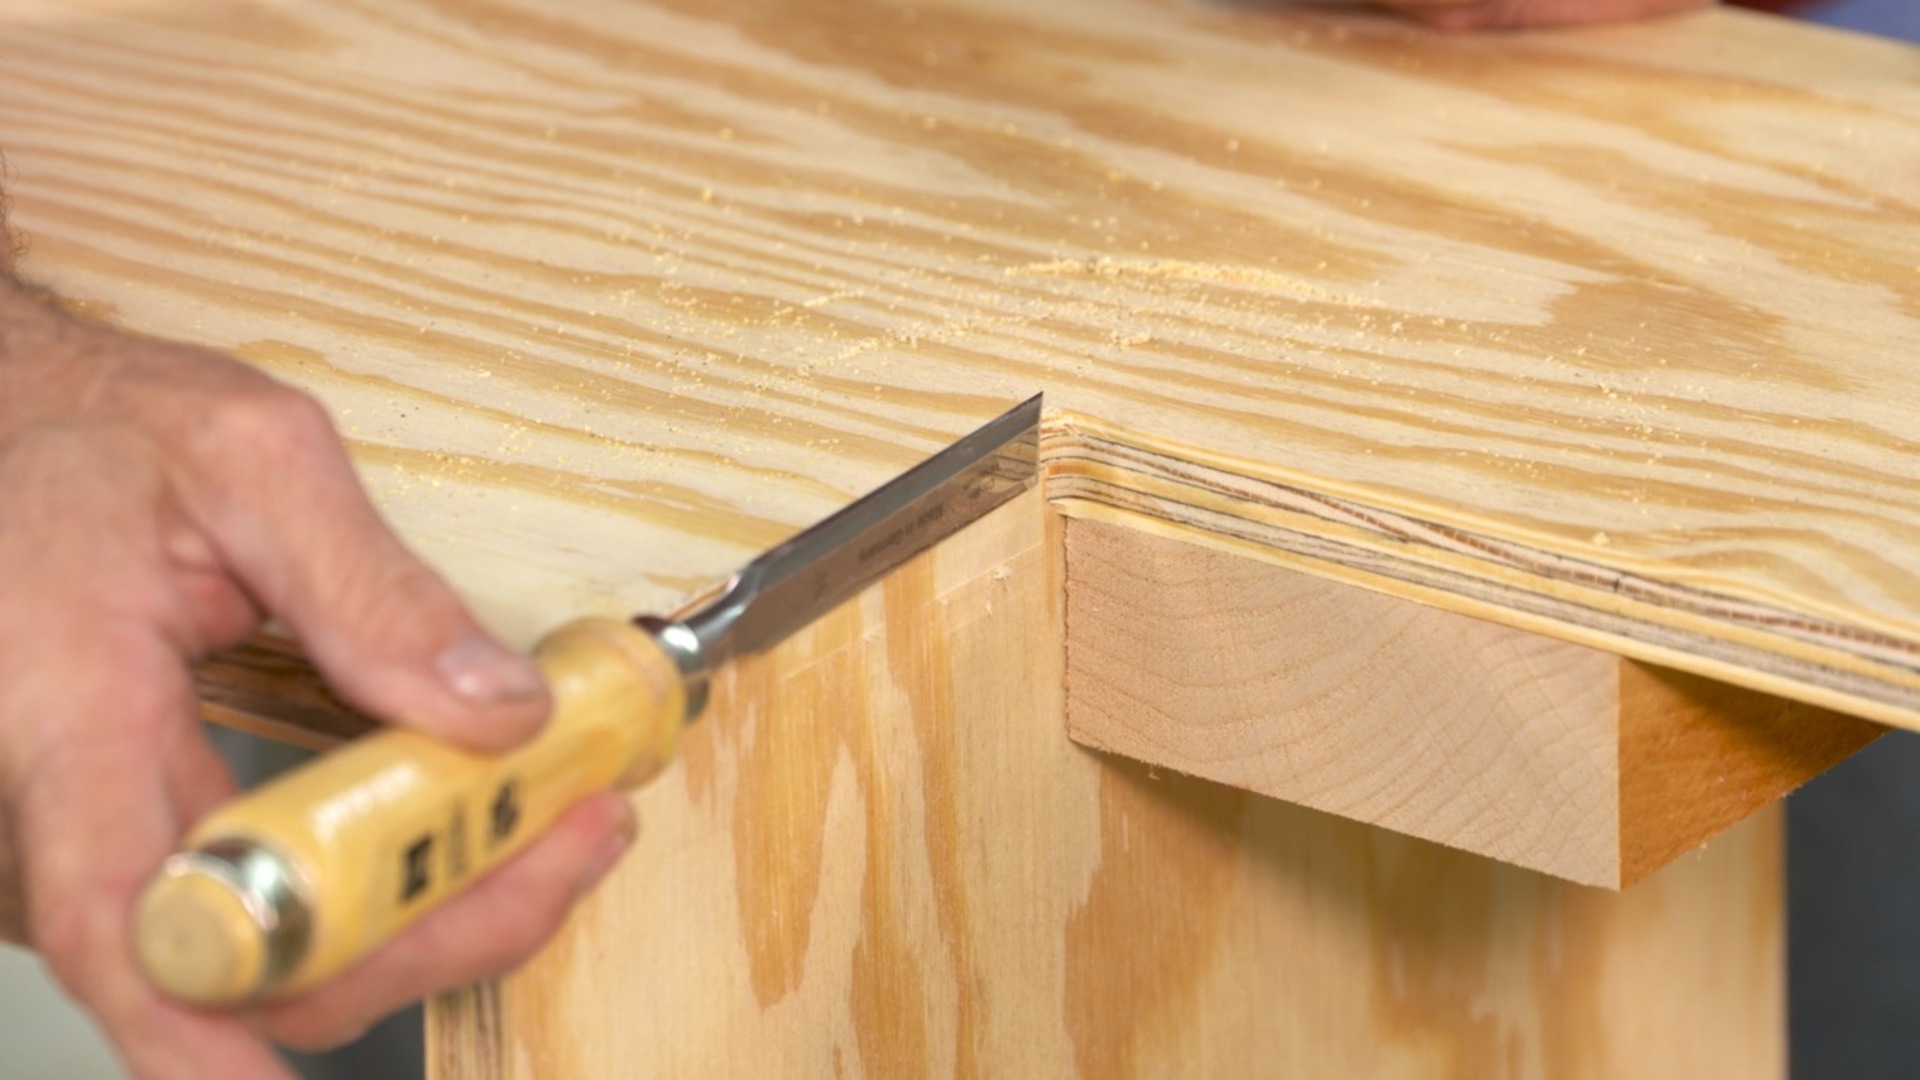
Making the narrow upper is easy, with a few key steps. The process consists of rough cutting the notch, then using a flush trim router bit to finalize the notch. Your results will be perfect. Add a little fine tuning with a chisel, and you’ll be all set.
Make the Face Frame
7:52
You’re going to love George’s no-measure approach to making a face frame. With this technique the face frame MUST fit when you’re done. After the face frame has been glued on a flush trim router bit finishes it off. The upper section requires a little hand work to wrap up.
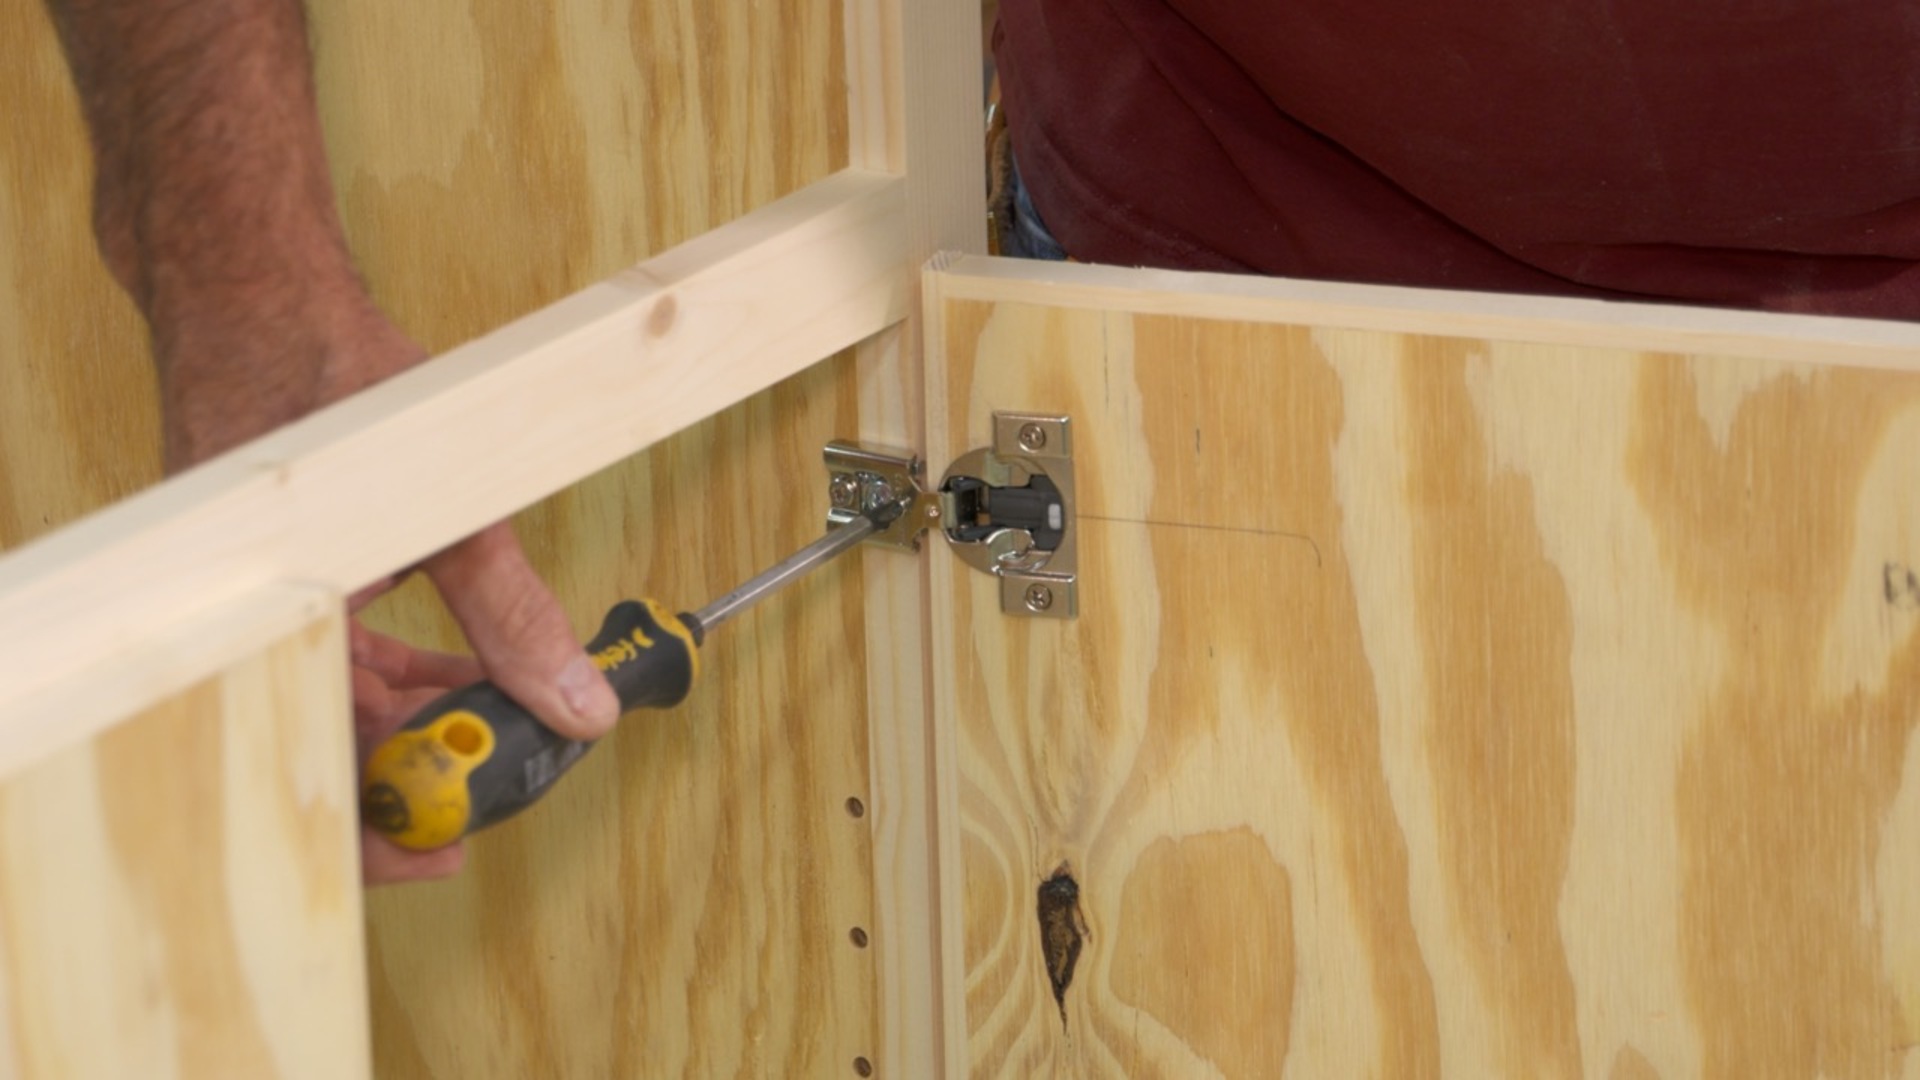
Making the Doors
18:26
Never worked with European hinges before? Don’t worry, you’ll be taken through the process step by step. It’s critical that you get the dimensions correct. The plywood doors are edge banded on all four edges. That can be fussy, but not with the banding sequence George teaches you. You’ll be amazed by how simple this process makes edge banding. With the doors installed on the cabinet you can finesse their position by adjusting the hinges.
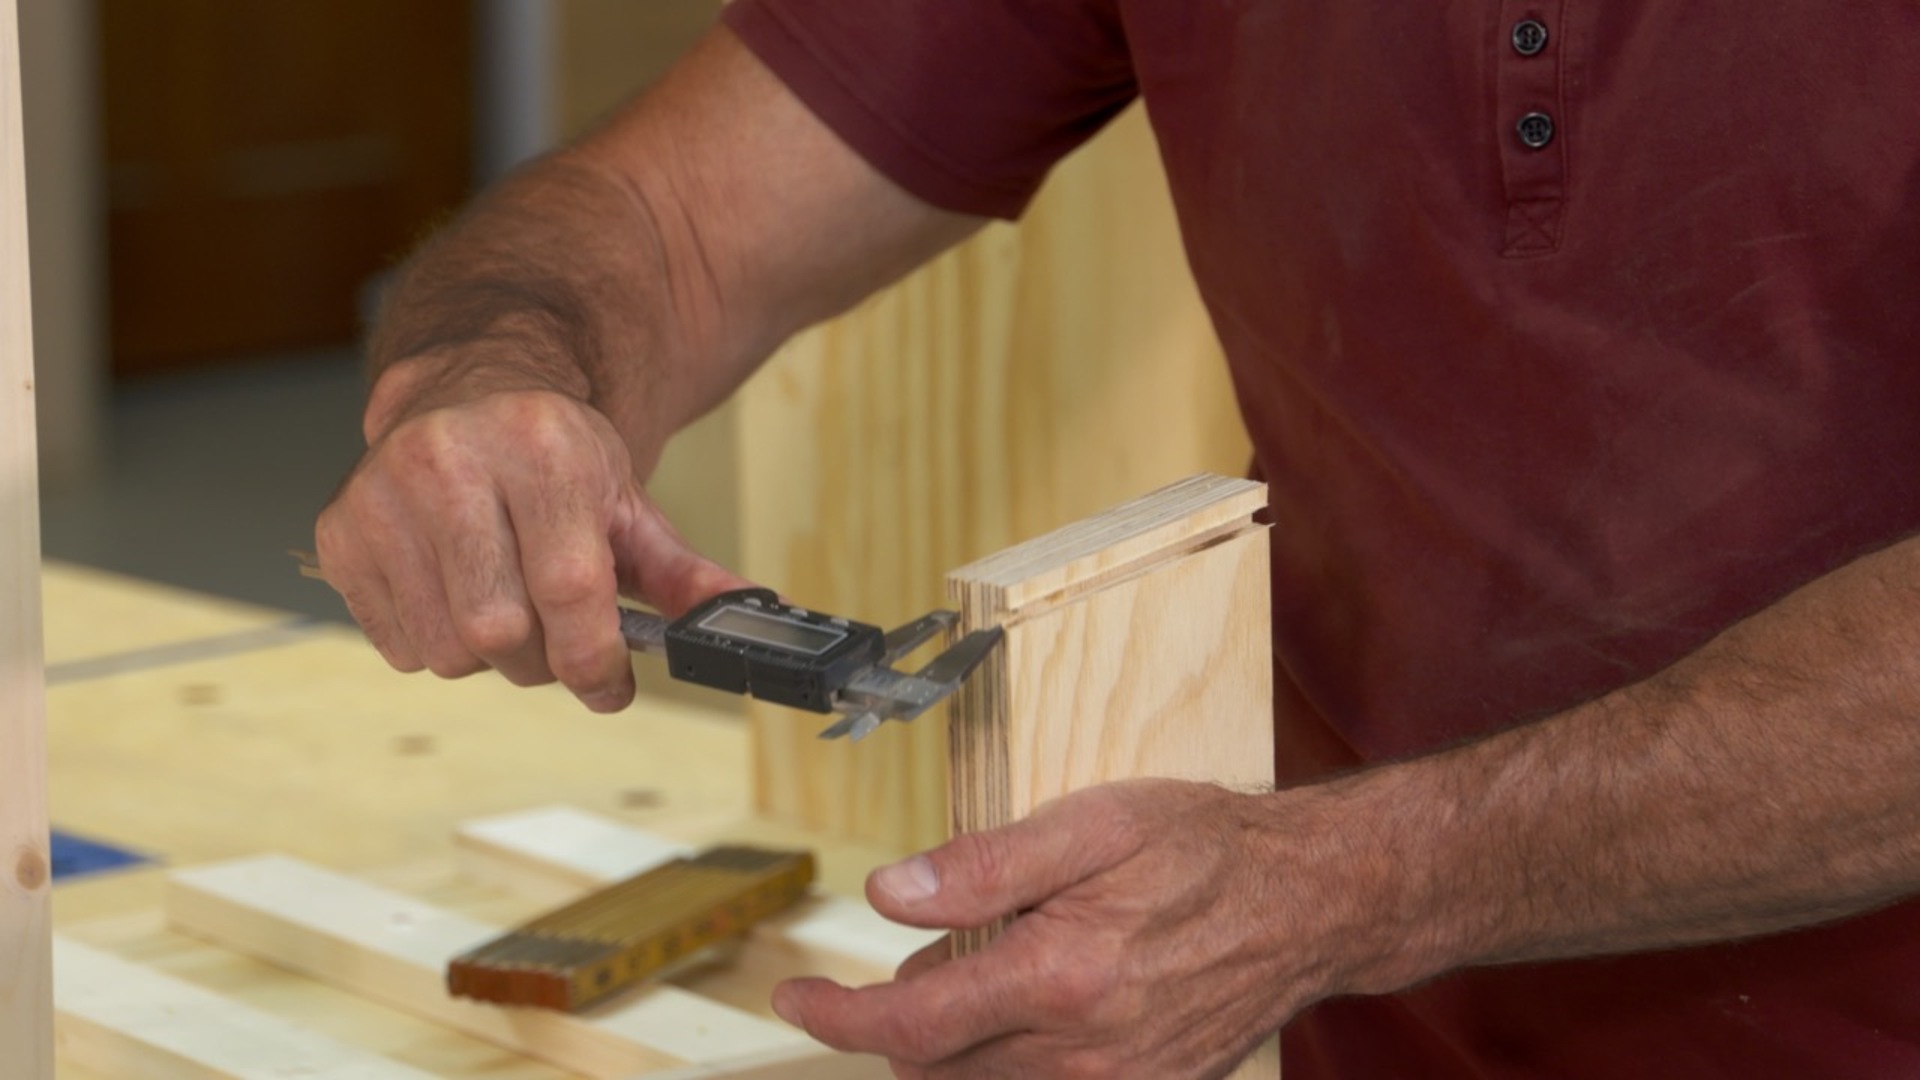
Drawer Construction
20:34
It’s important to be methodical in drawer construction. The first step is adding fillers between the case and the face frame, and then installing one pair of slides. Make a sample lock rabbet joint and you’re ready to dimension your drawer boxes. You’ll get lots of tips and tricks that will make producing perfect drawer boxes, and getting them in the cabinet, and getting the drawer fronts installed, easy.
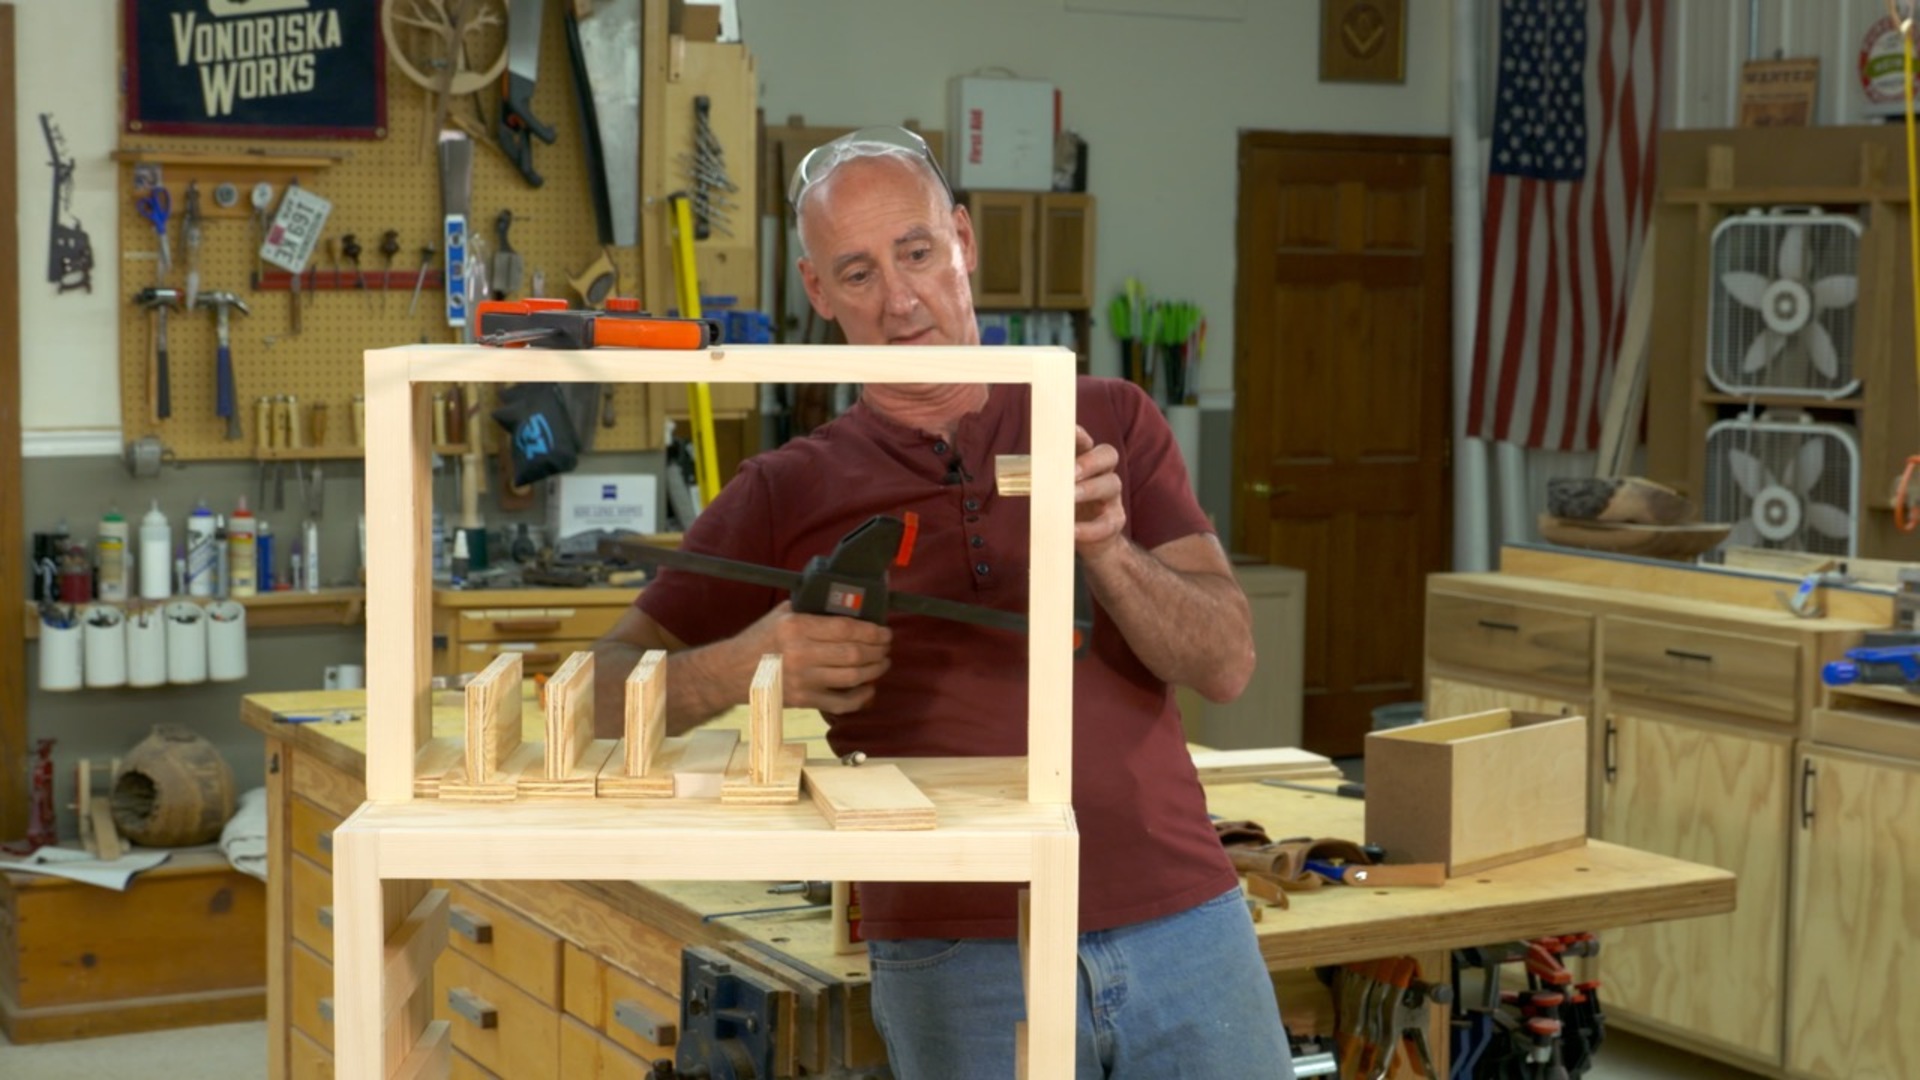
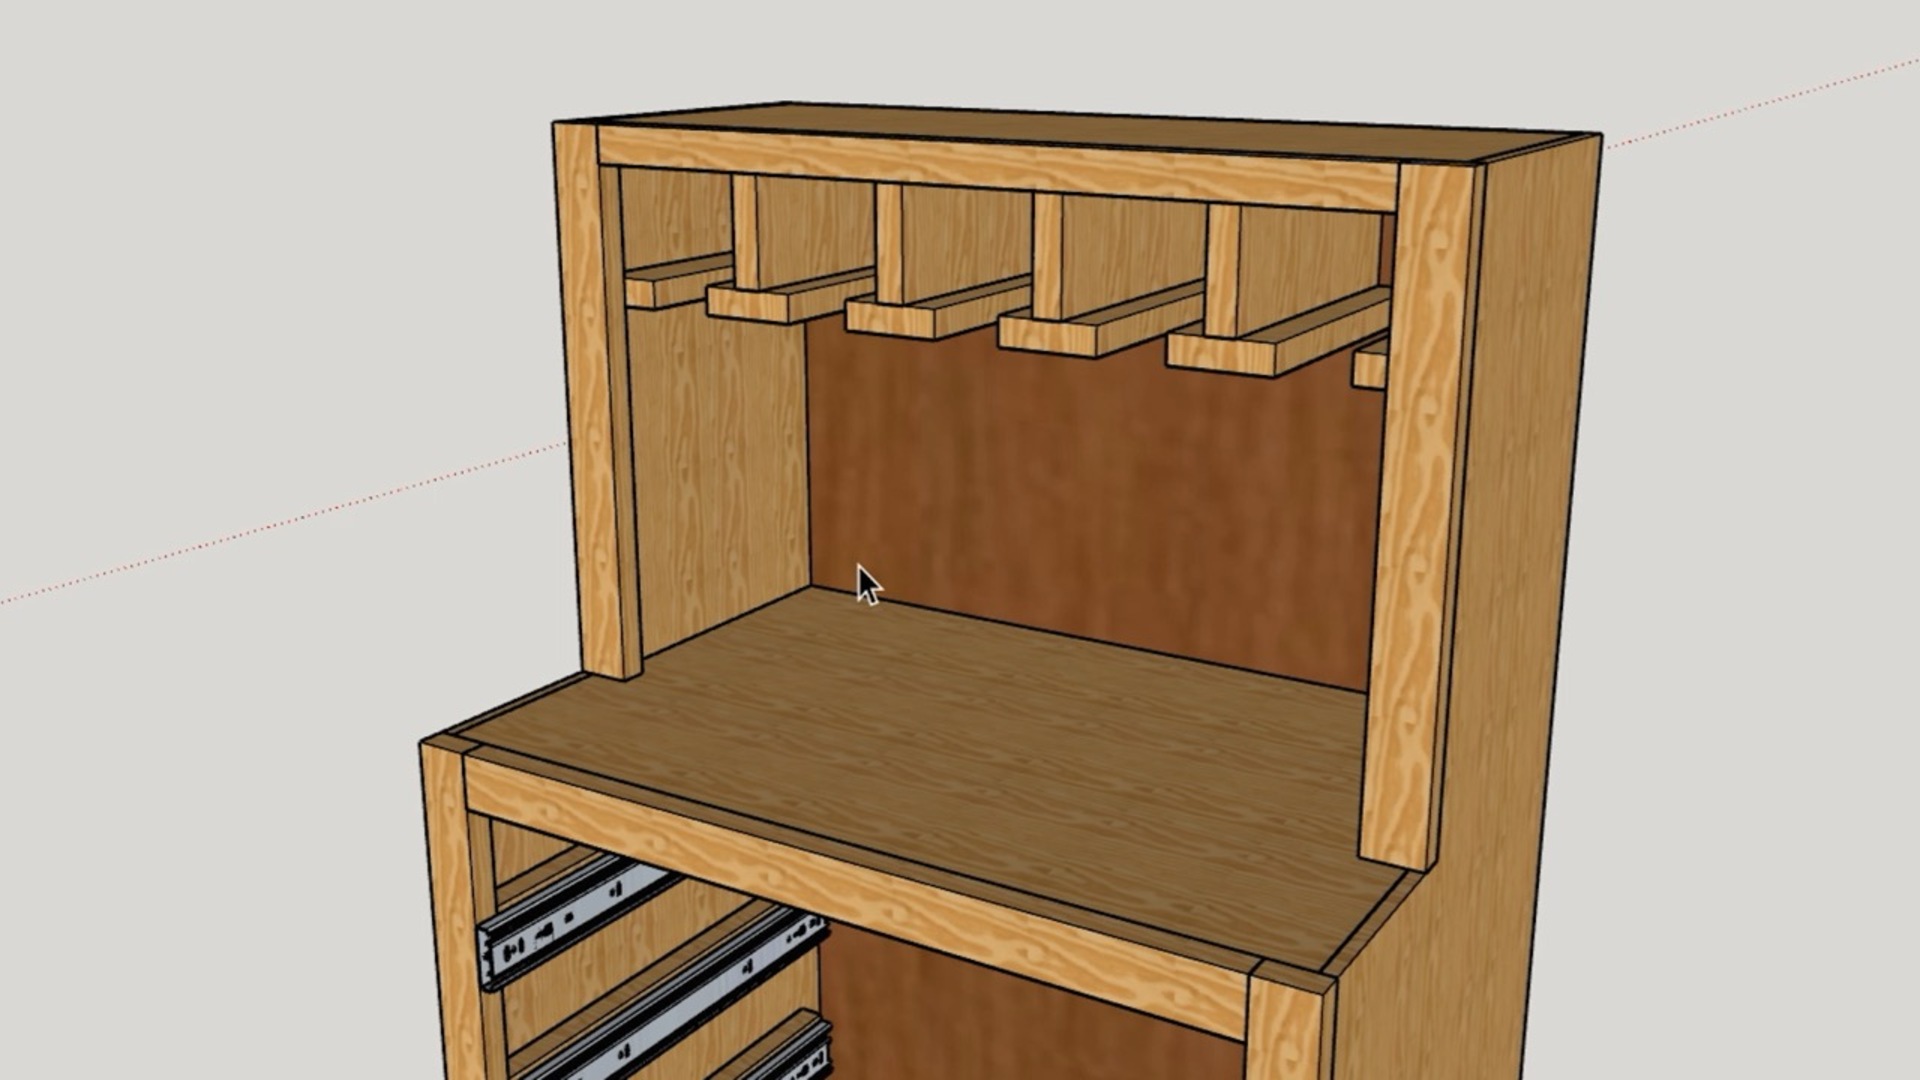
Make & Install Hangers
7:47
The drill hangers are simple Ts so they’re easy to make but need to be spaced just right. Cutting a correctly sized spacer simplifies installation, a lot. Glue and screw the hangers in place, and you’ll be ready to store drill in no time.
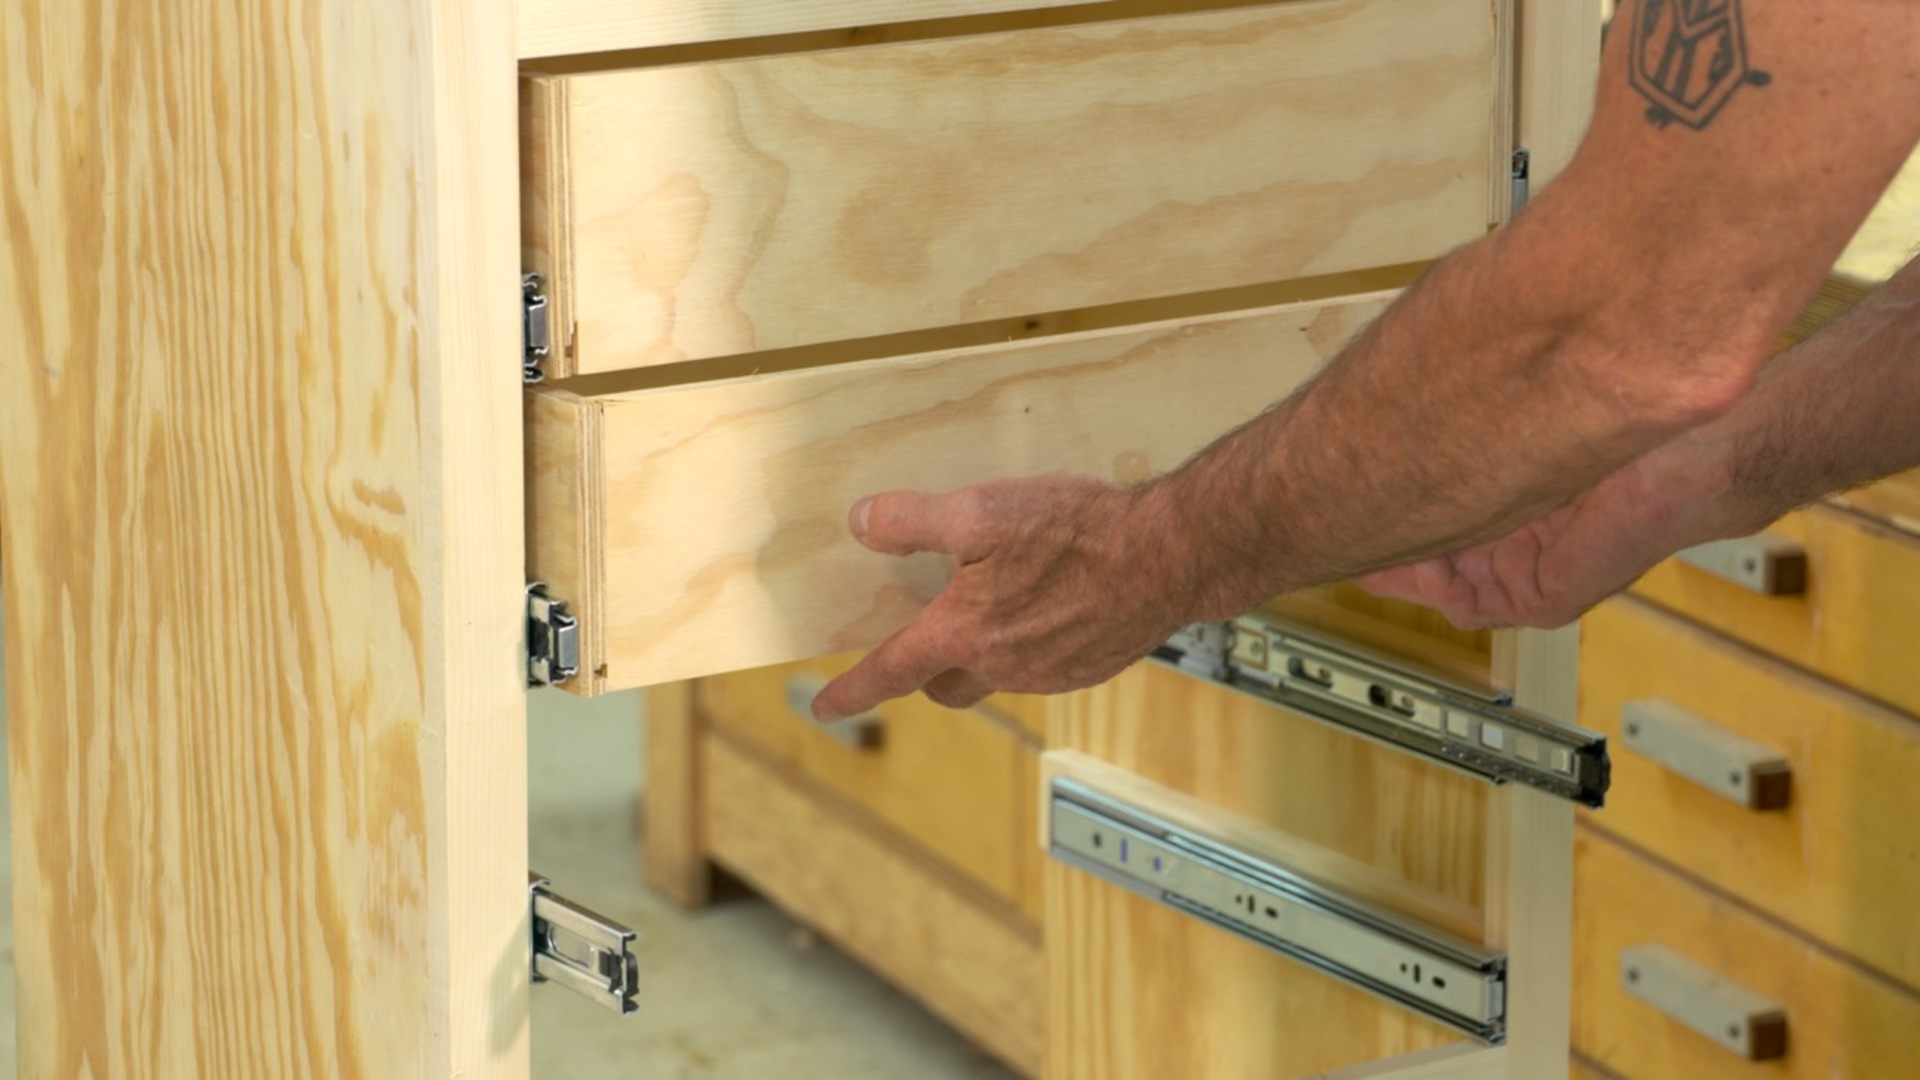
Install Drawers & Drawer Fronts
7:36
Once again, it’s spacers and stop blocks to the rescue as you install drawer slide hardware on the drawer boxes. Then you can install the drawer boxes and work on installing the drawer fronts. A jig helps get the drawer fronts on with correct spacing.

Install Back & Casters
4:01
Installation of the back is easy, but we need to accommodate the plug for the power strip. With the cabinet on its back install the casters. Add the pulls of your choice, and your cabinet is ready to go to work. A coat of tung oil or Danish oil is a great finish for shop projects.
Cordless tools are becoming more and more prevalent in the shop. We’ve designed a task-specific tool station, just for your cordless tools. It provides hangers for your tools (the hangers also work well for pneumatic tools), a shelf where your chargers can live, drawers to hold your fasteners, and a two-door cabinet for larger tools.
This project consists of standard case joinery; dadoes and rabbets. The face frame is held together with pocket hole screws, and the drawer boxes are made with a lock rabbet joint. You can, of course, substitute other joinery methods for your project.
The Tool Station provides you with the opportunity to work with full extension drawer slides and European hinges, great hardware to be familiar with.
George Vondriska
Formally trained in technology education, George Vondriska has been teaching woodworking since 1986. He has been the managing editor of Woodworkers Guild of America since 2007. In addition to classes at his own Vondriska Woodworks School, George teaches at woodworking shows across the country and has taught woodworking for the Peace Corps, Andersen Window, Northwest Airlines and the Pentagon.
Bonus materials available after purchase
