Build a Little Library
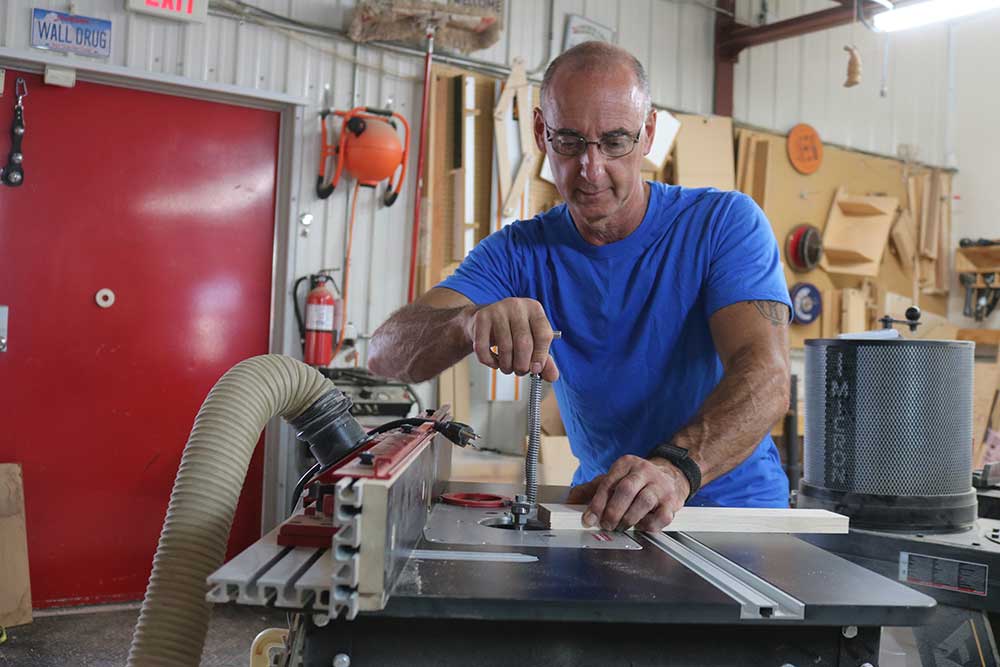
George Vondriska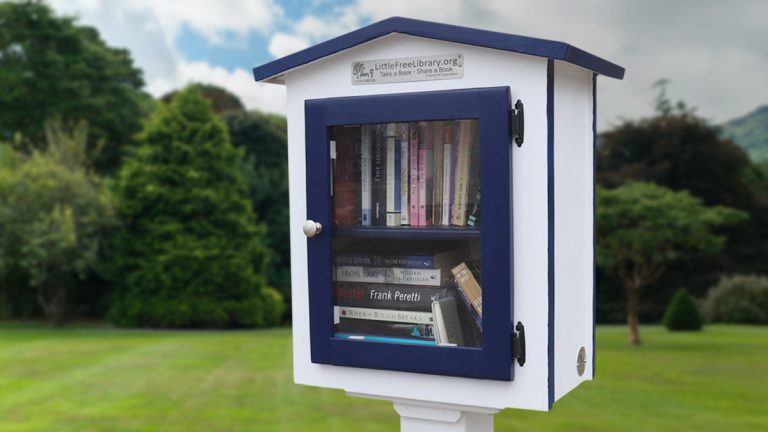
Class Preview
1:43
- In-depth Instruction; over 98 mins
- On-demand video access anytime
- Bonus downloadable PDF resources
- Access to class Q&A
Session 1: Introduction
1:20
This project uses less than a full sheet of plywood, and in addition to being a fun project, it’s a great way to master dado and rabbet joints.
Session 2: Project Overview
4:03
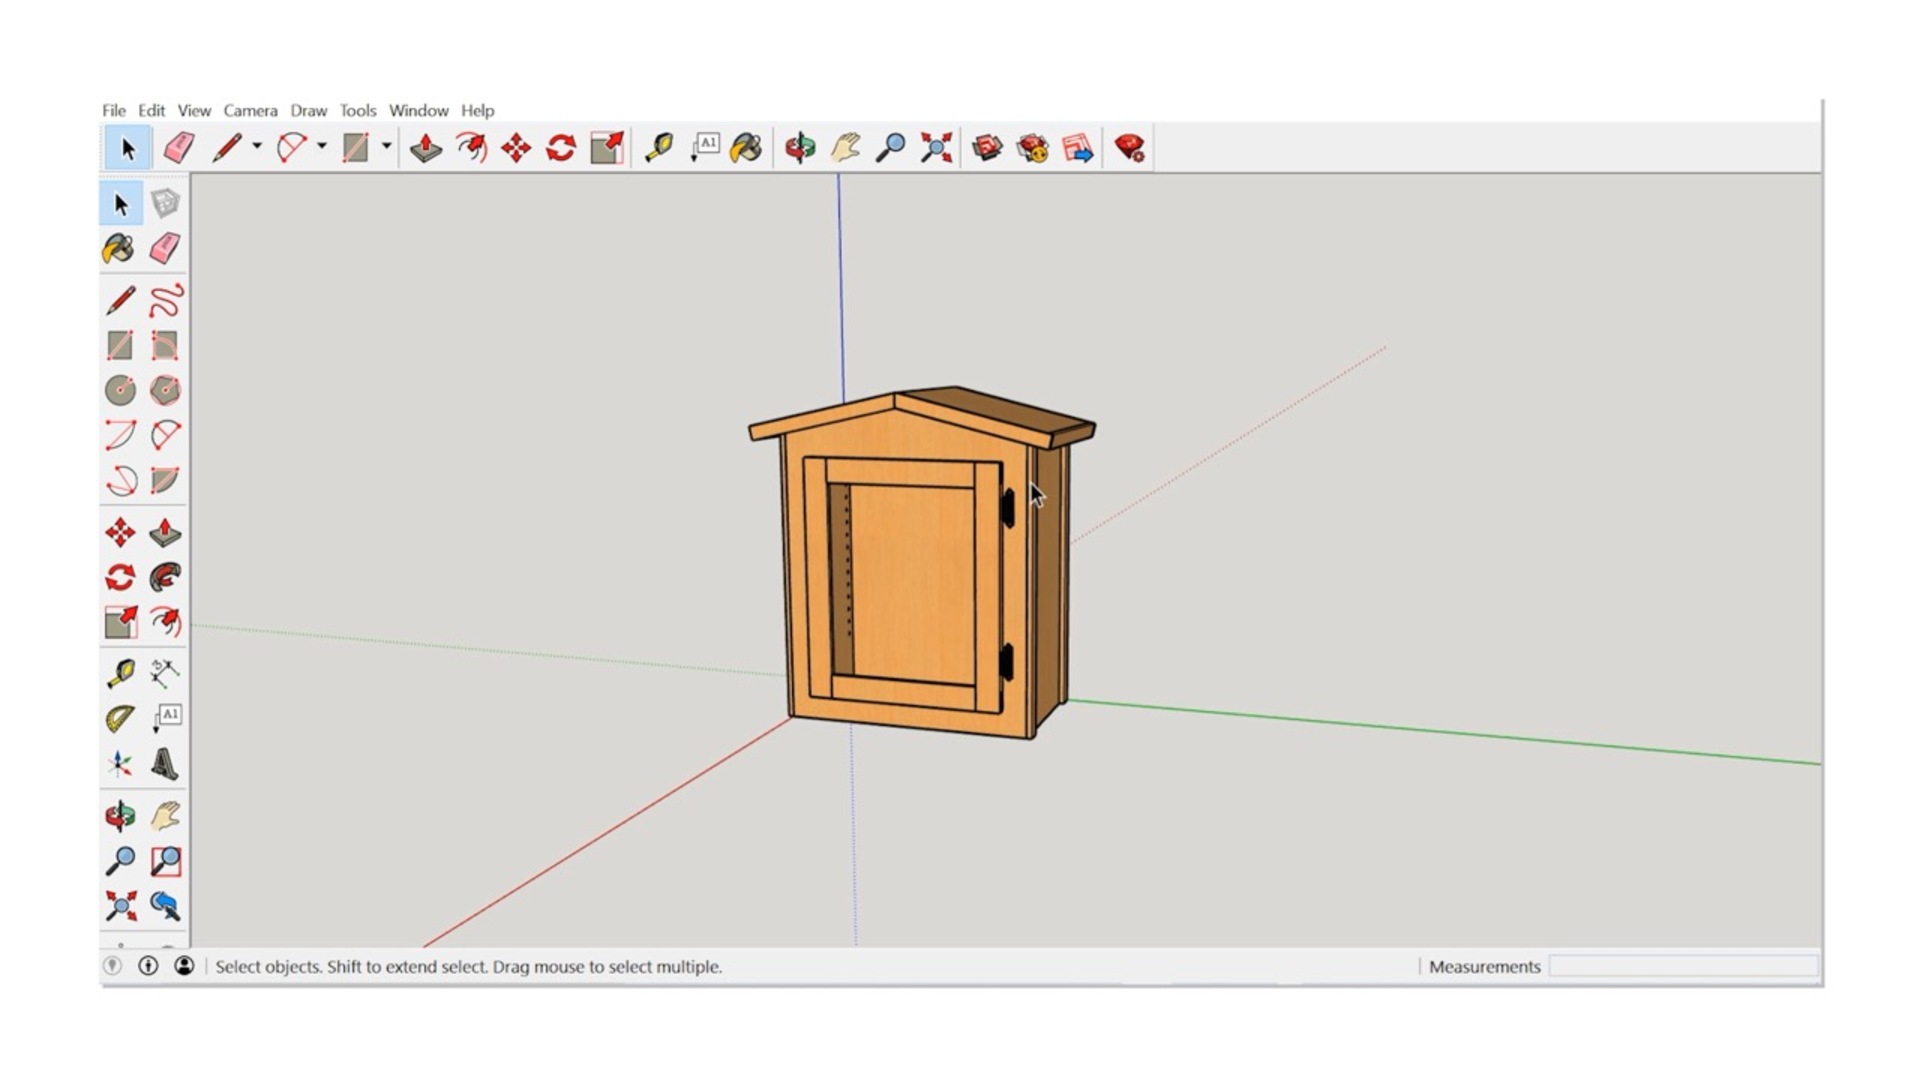
SketchUp is a great way to develop your projects on the computer before going into your shop and cutting wood. The project overview gives you a great look at the parts required to build a library and how they relate to each other.
Session 3: Joinery
12:03
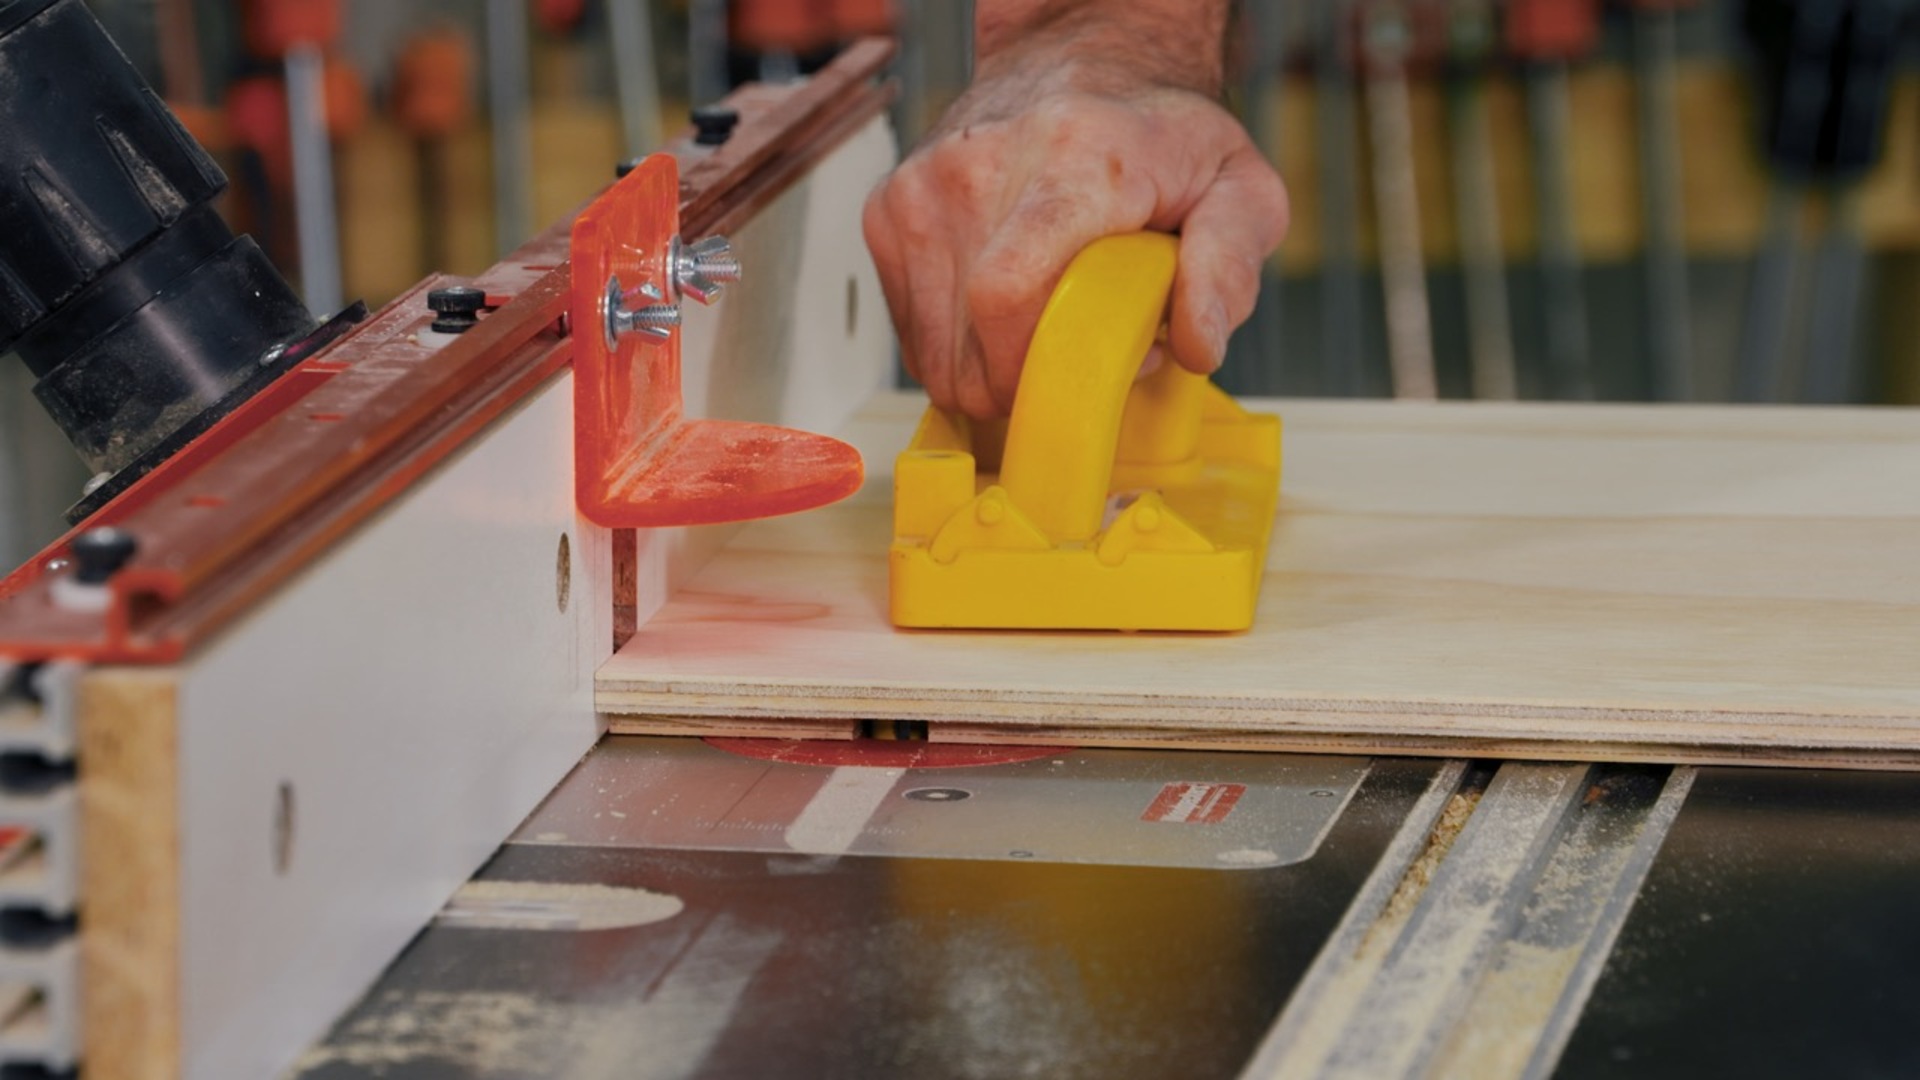
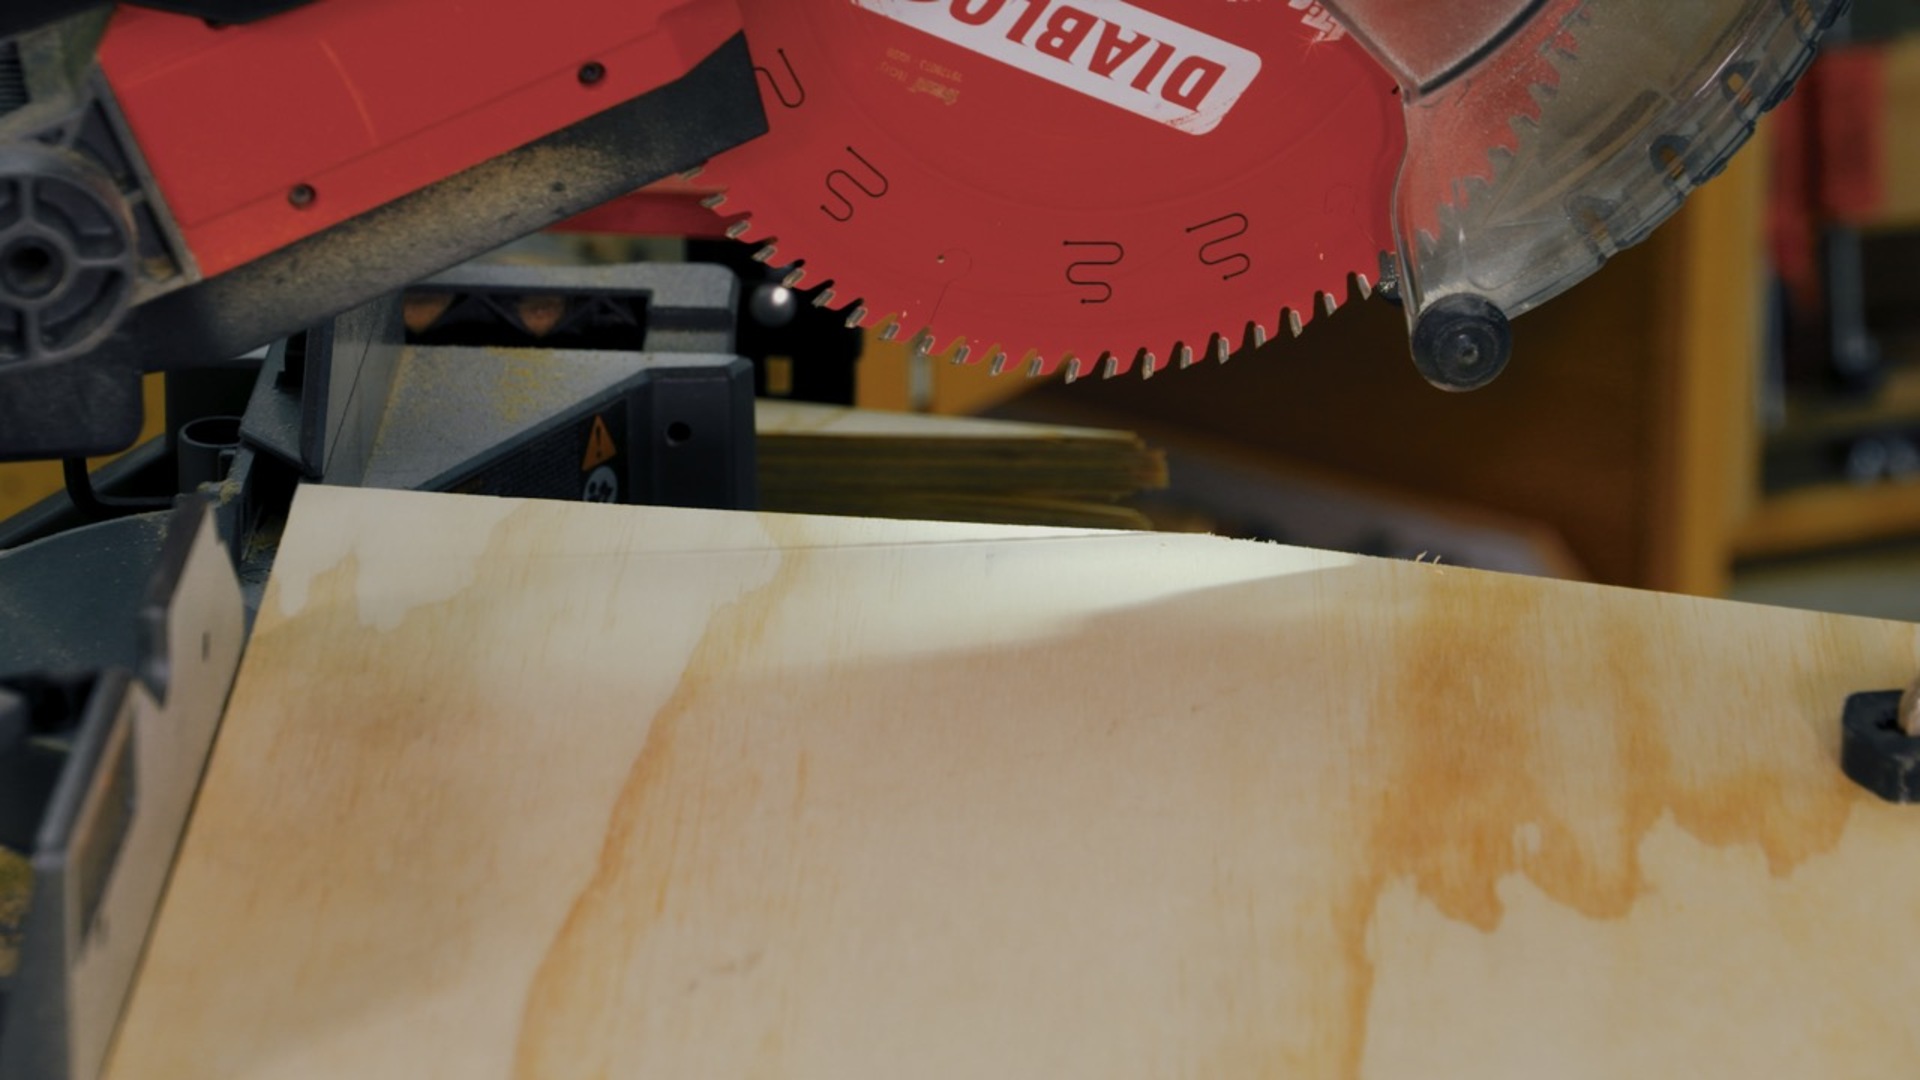
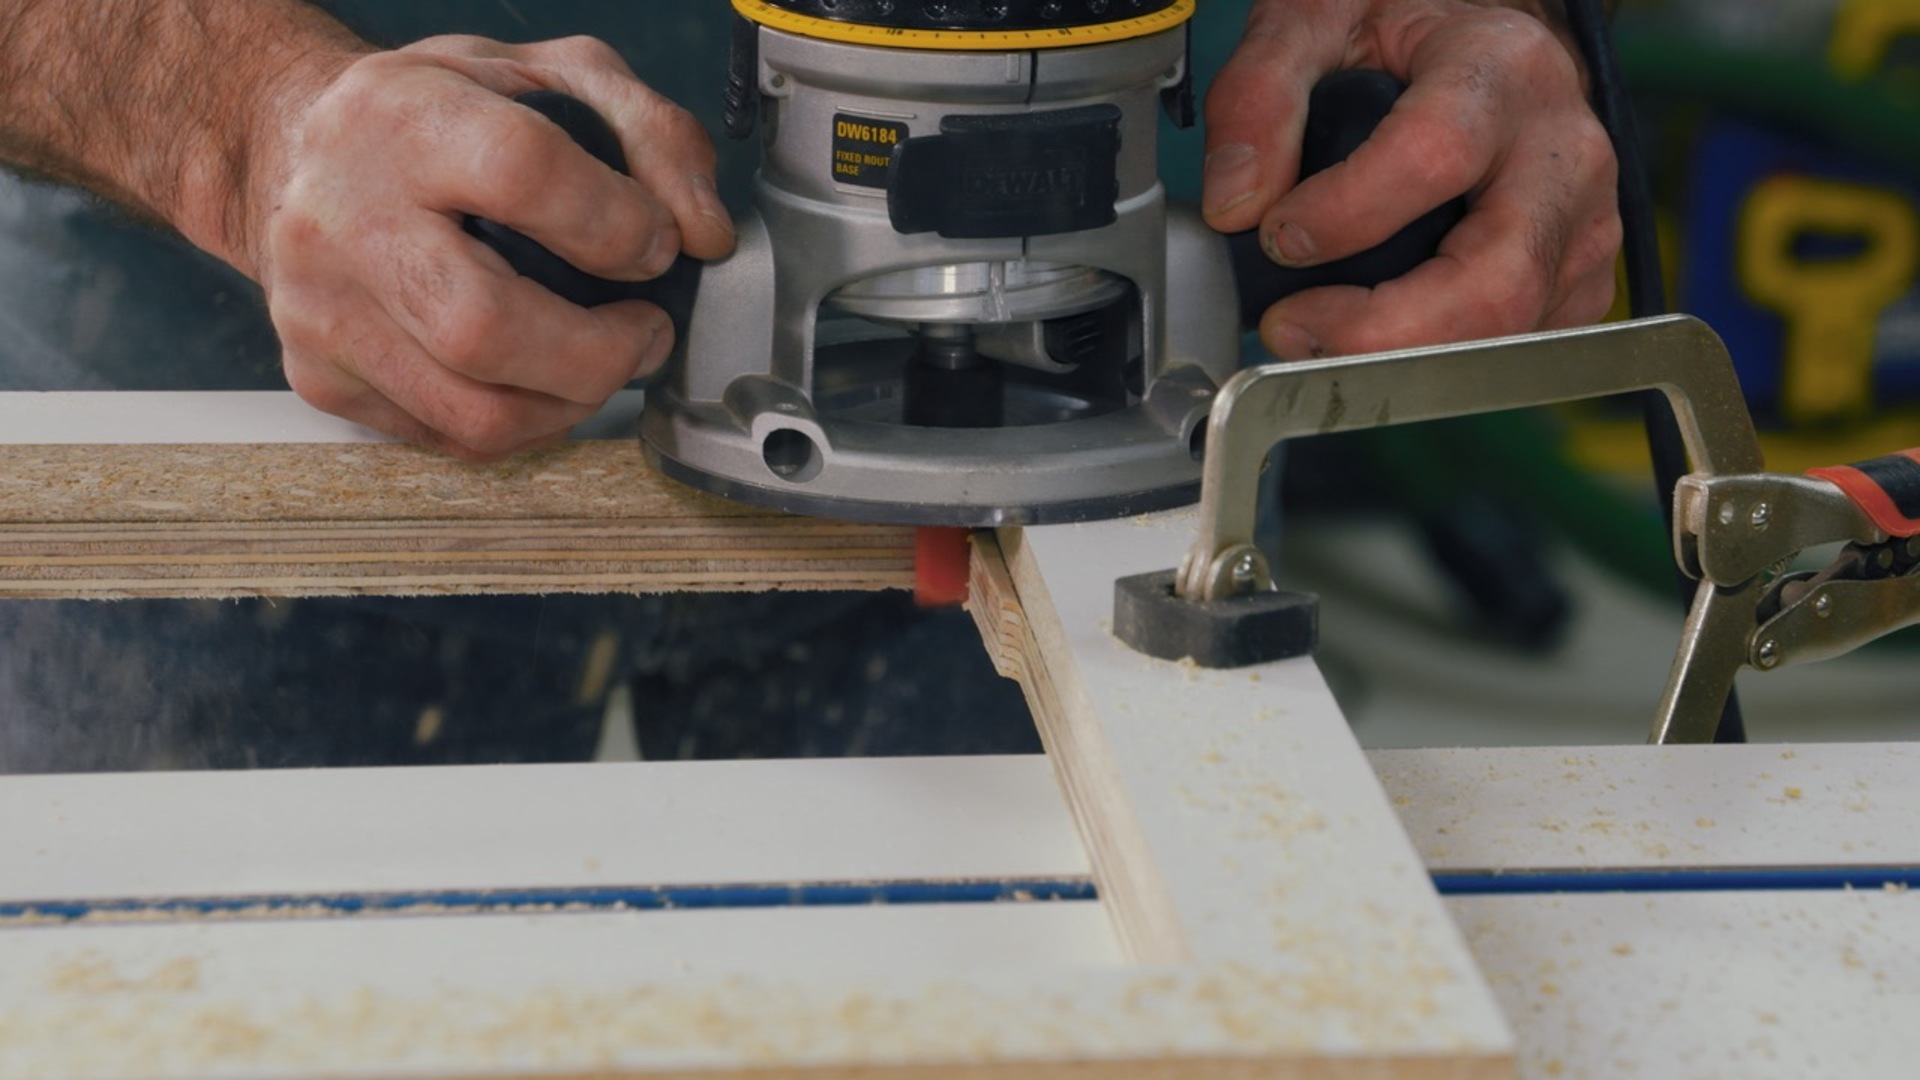
After rough cutting your sheet of plywood into manageable pieces, head for the table saw to finalize part dimensions. You can do the rabbet and dado joinery on a router table like I do here, or with a dado head on a table saw. Use the provided cut diagram as a map to make sure you get all of your parts from one sheet.
Session 4: Cut the Roof Angle
4:00
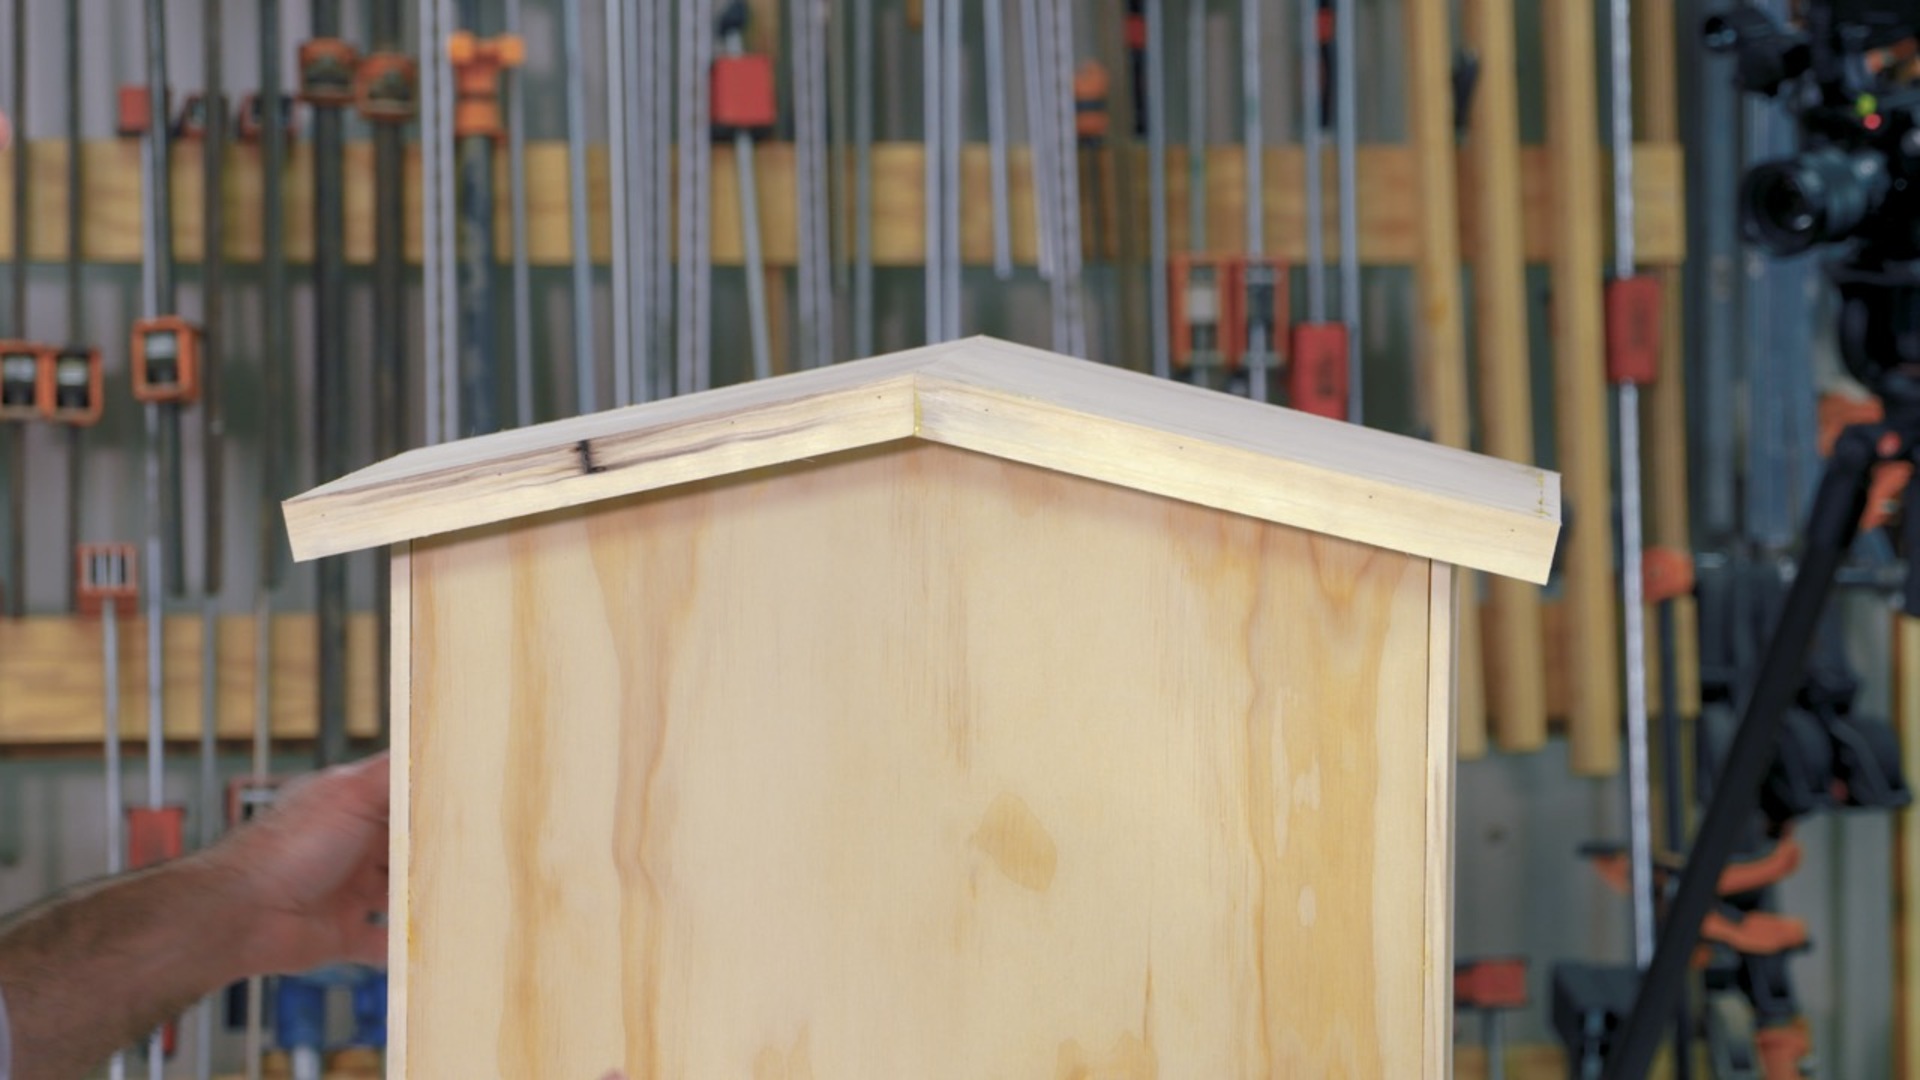
It’s important for the roof angle to be correct and for the front and rear pieces of the library to be identical with the same angle. There are a handful of useful tricks that will help you with the roof.
Session 5: Make the Door Opening
9:20
A very simple shop-made template gets you started on the door opening. A plunge cut with a jigsaw and flush trimming with a handheld router makes the opening perfect.
Session 6: Finish the Interior Surfaces
1:50
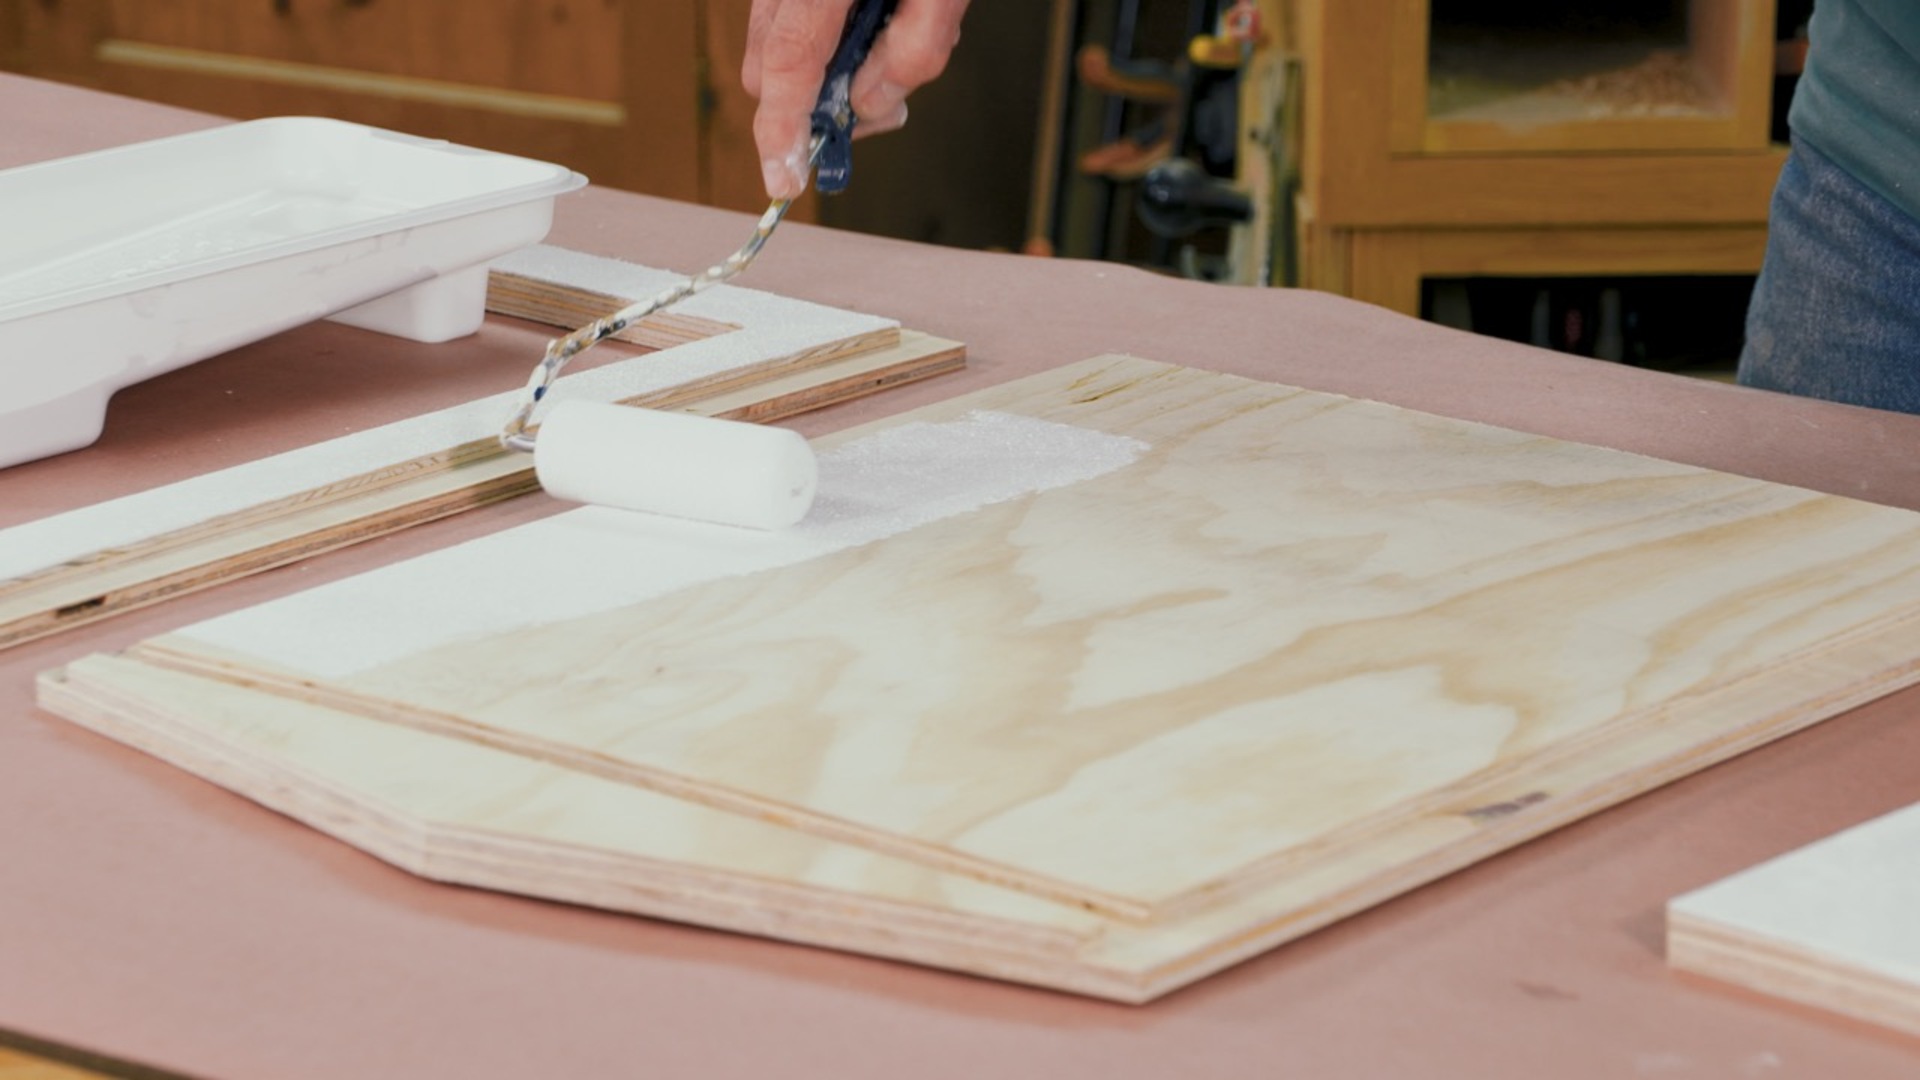
This project really lends itself to applying finish on the interior surfaces prior to assembly. A coat of white paint makes the interior nice and bright.
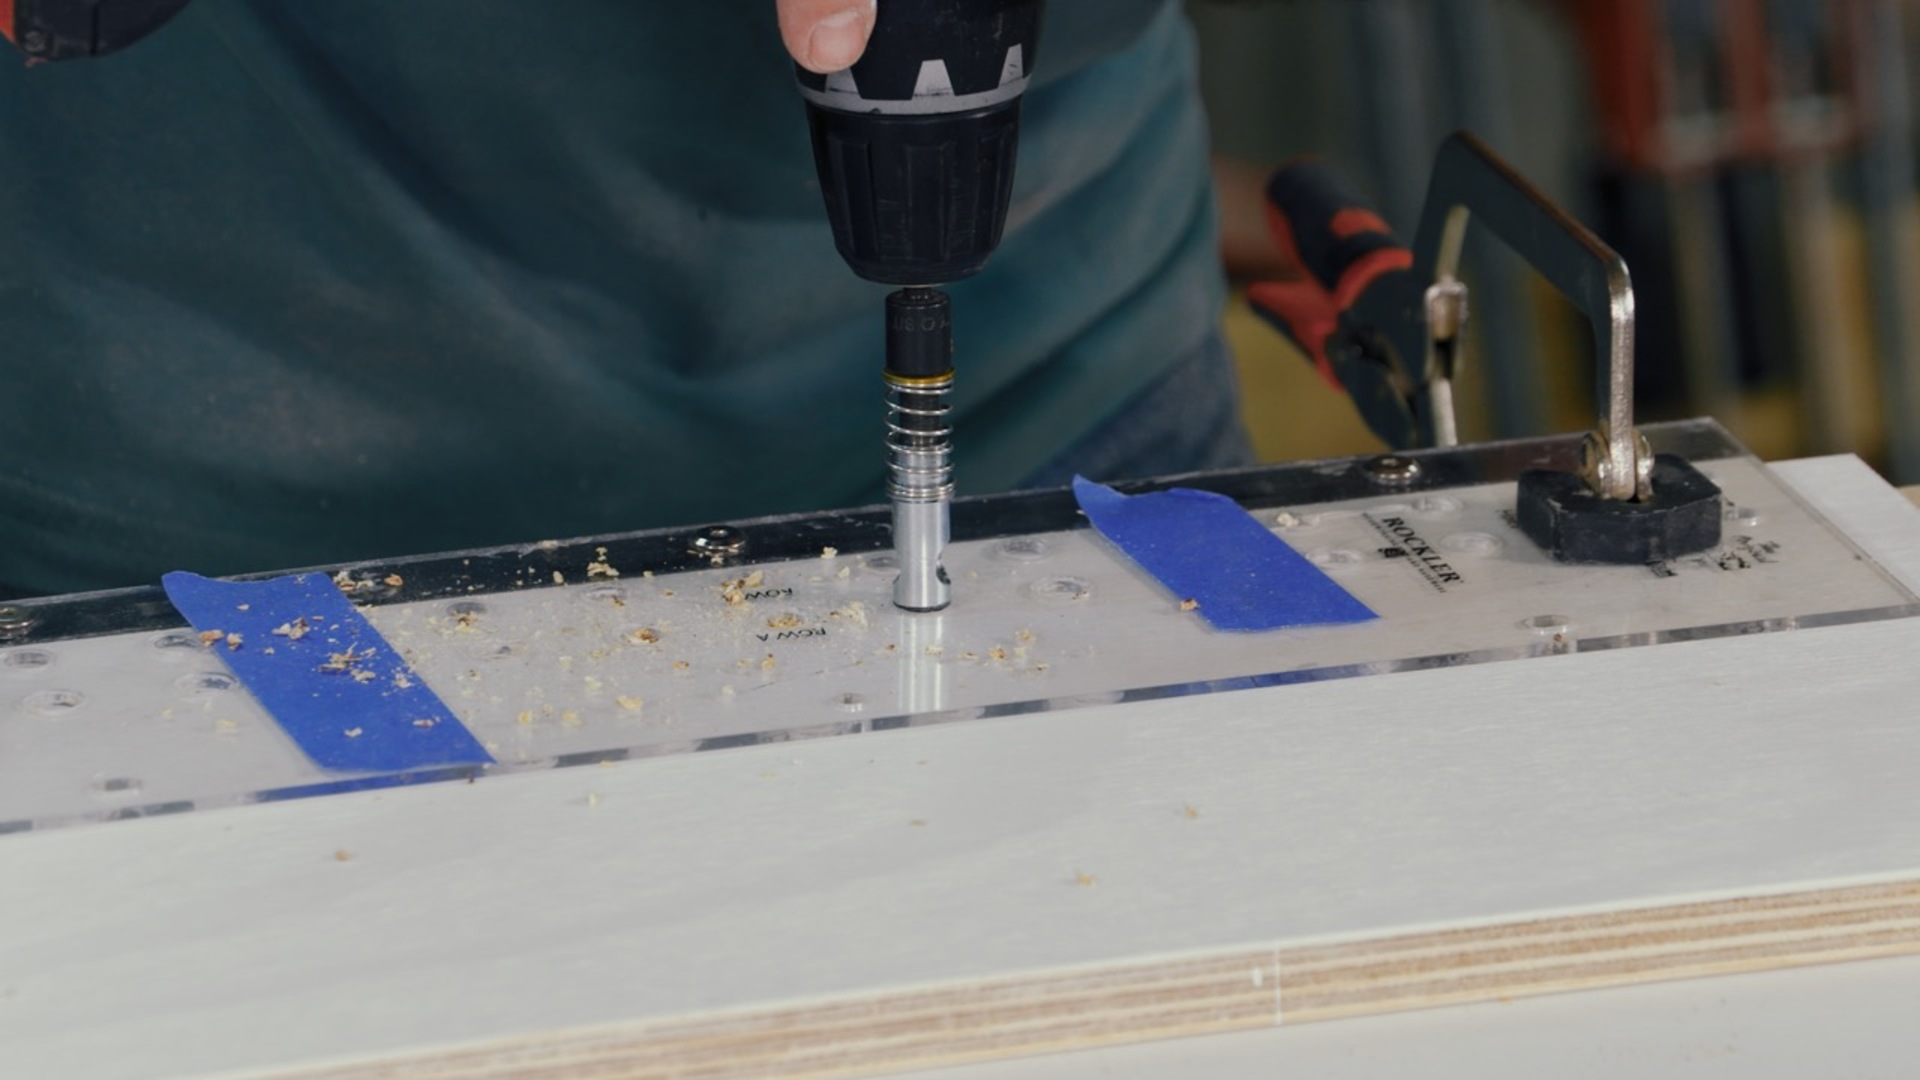
Session 7: Drill Adjustable Shelf Holes
2:32
The library has one adjustable shelf, so you need a set of adjustable shelf holes. There are some tricks for accurately centering the holes on the sides.
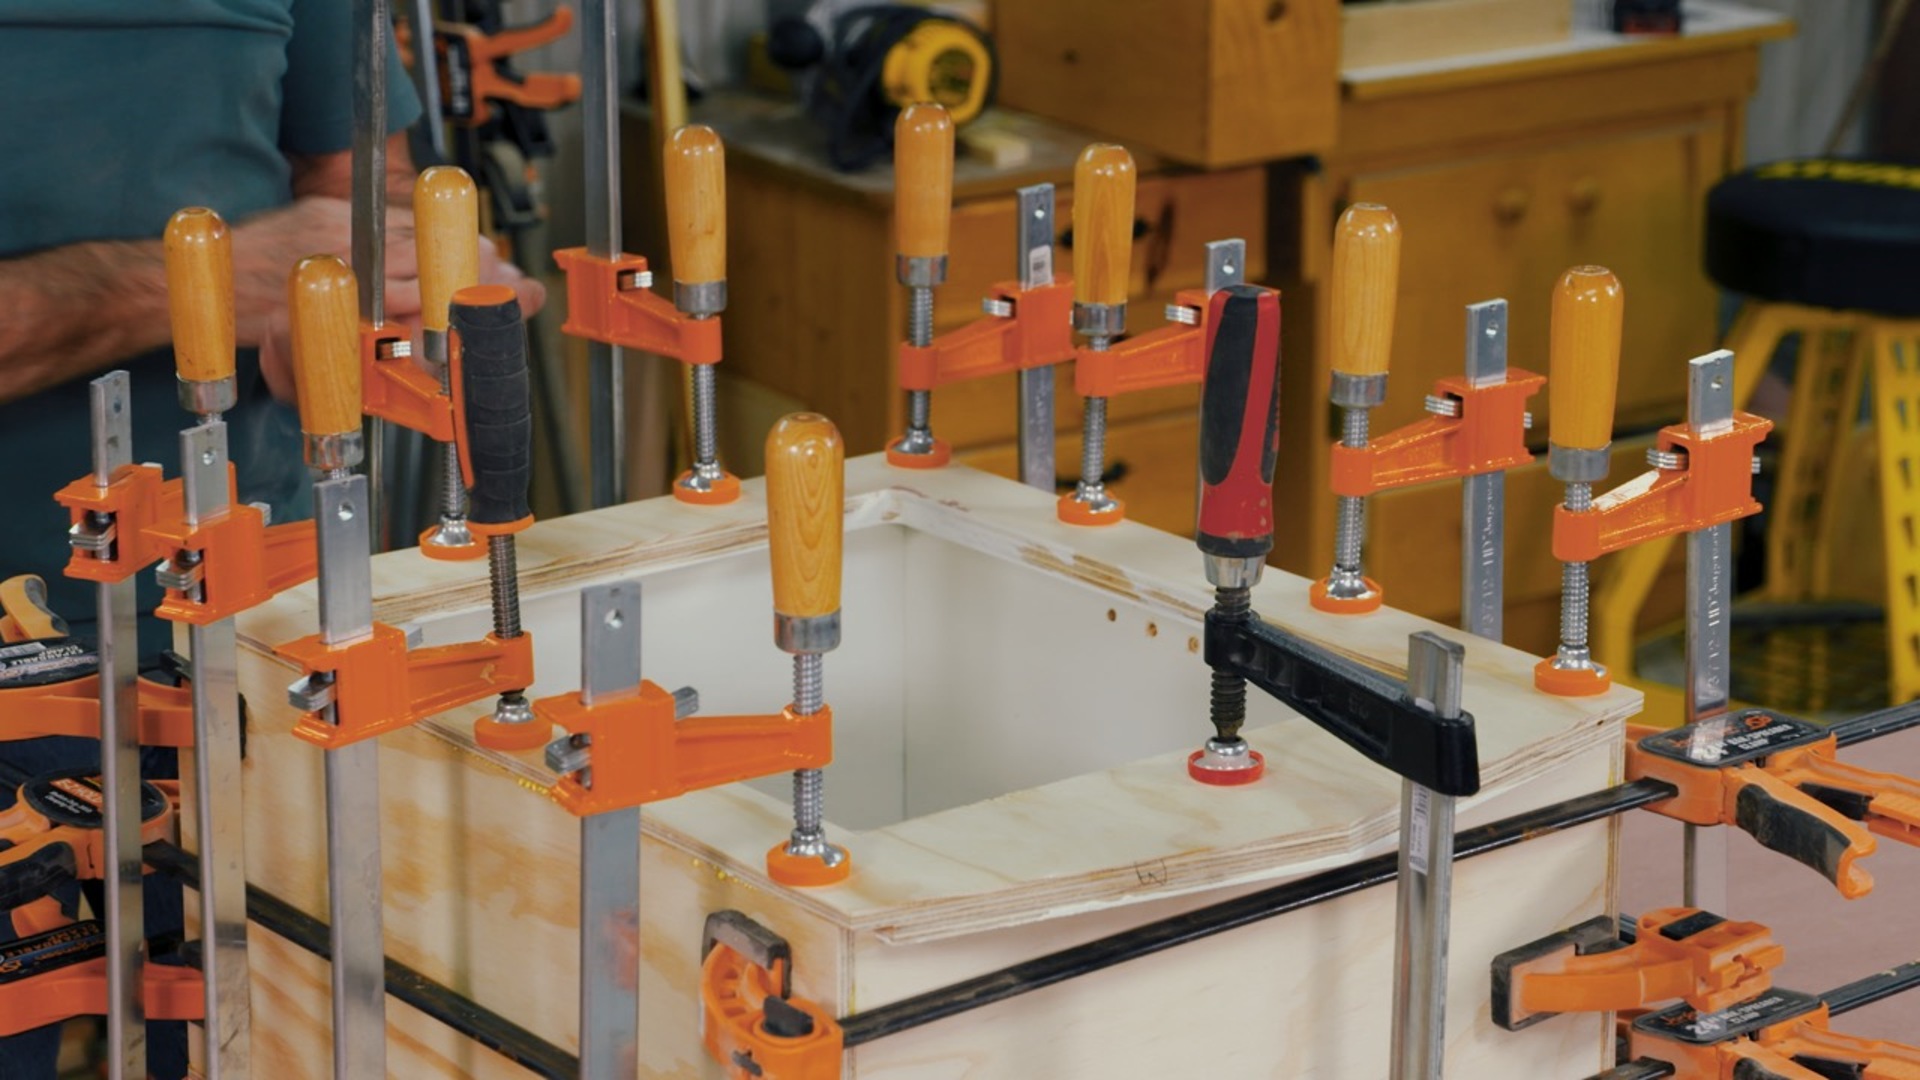
Session 8: Assembly
7:01
The entire case of the library can be assembled at one time. There are a couple secrets you need to know to make this process simpler, starting with a dry fit and choosing the right glue. Then, get your glue brush and clamps ready.
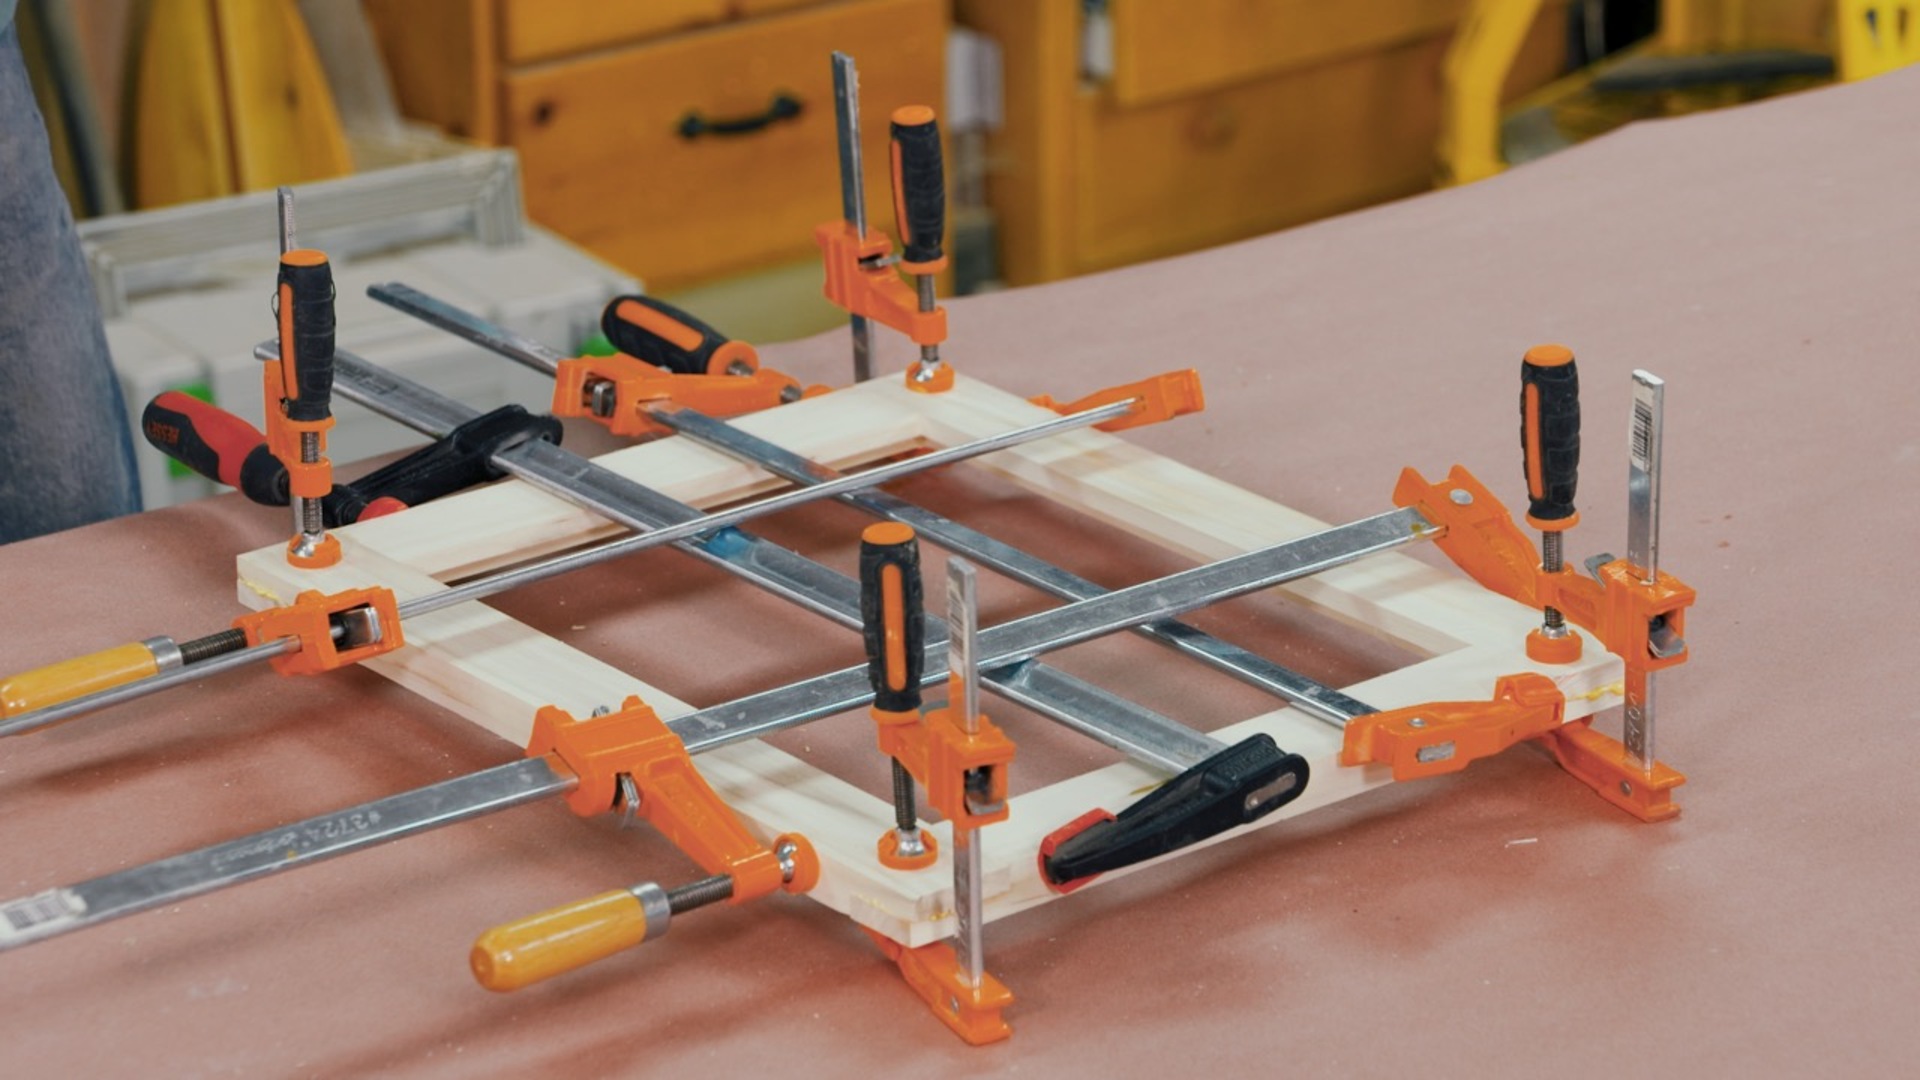
Session 9: Make the Door
16:01
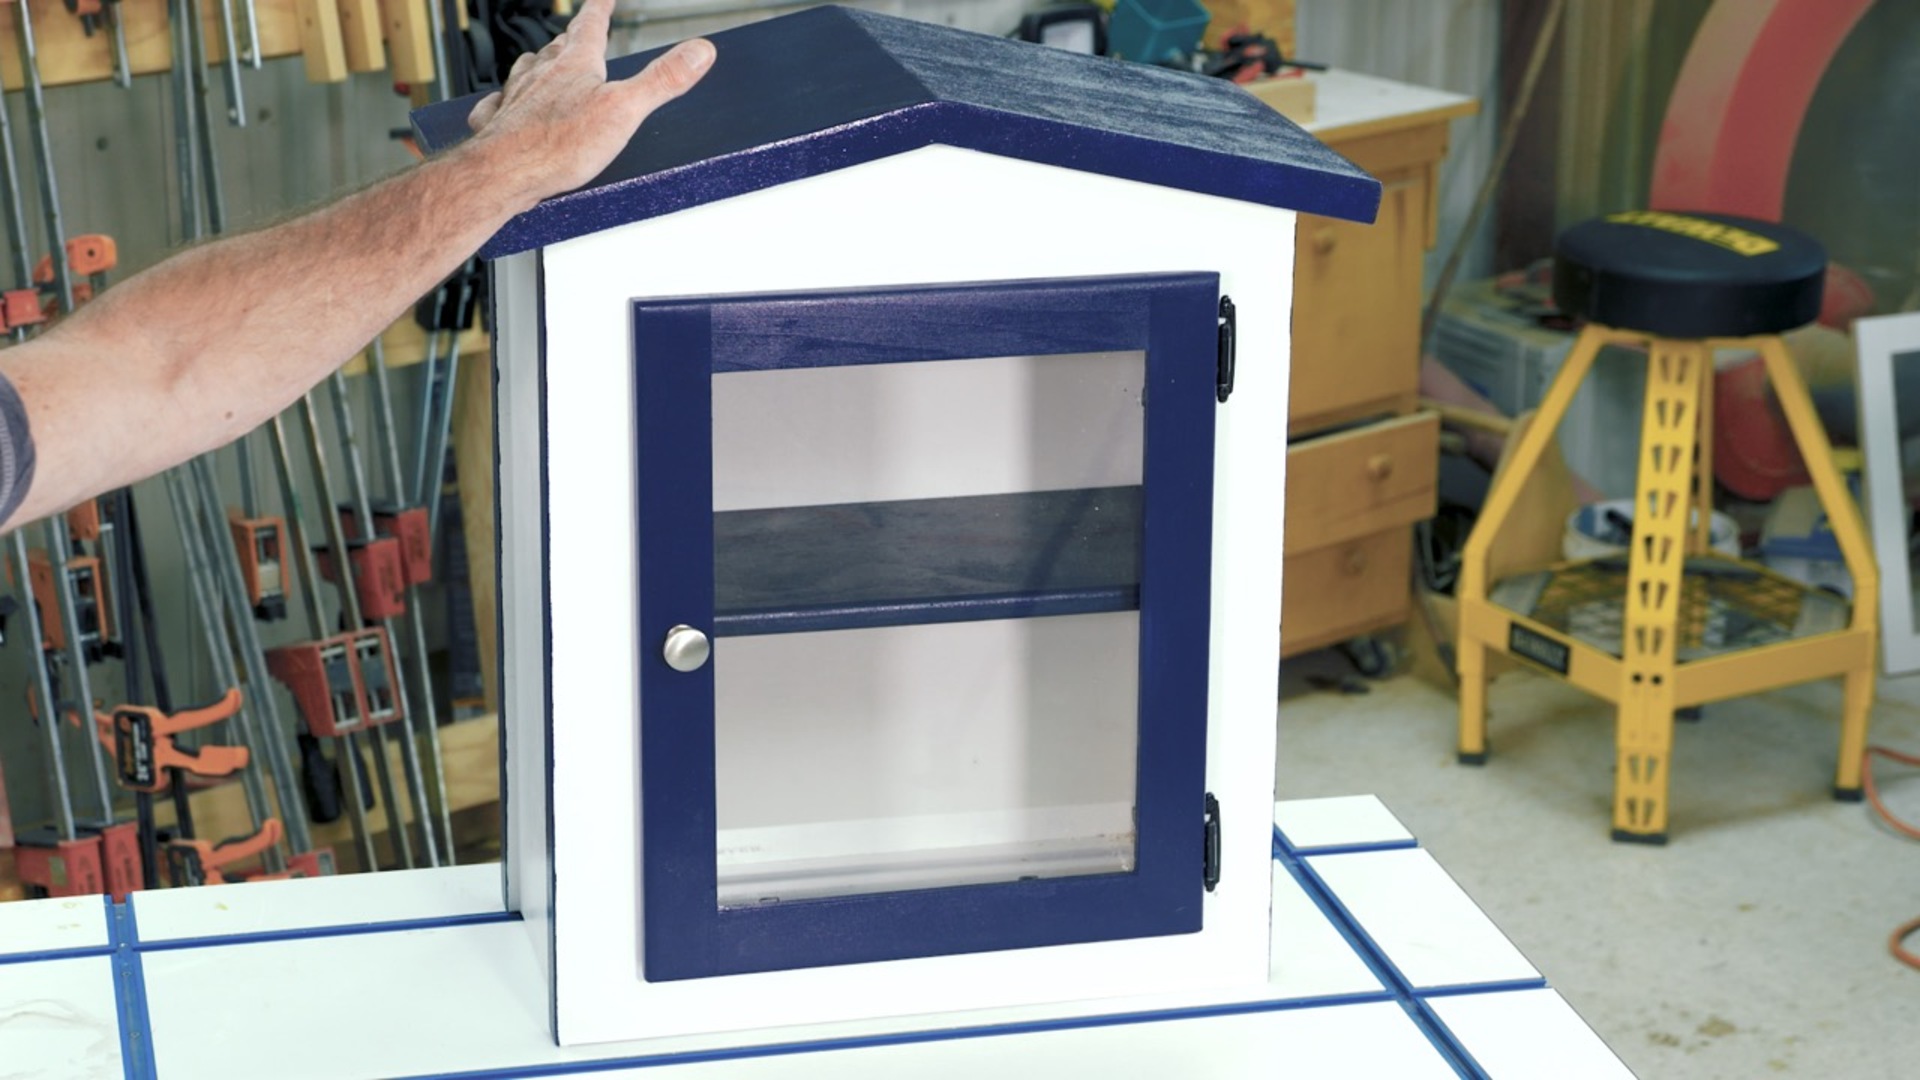
The library will live outside, and the door will be handled frequently, so it needs to be robust. This project uses a rabbeted half lap so it can hold the plexiglass. It’s hard to beat a half lap joint for strength since it allows for lots of glue surface.
Session 10: Finish the Roof
11:21
With the library case assembled, the roof can now be completed. This involves cutting the grooves in the bottom of the roof, cutting the angles so the roof pieces meet, and cutting the roof pieces to their final dimension.
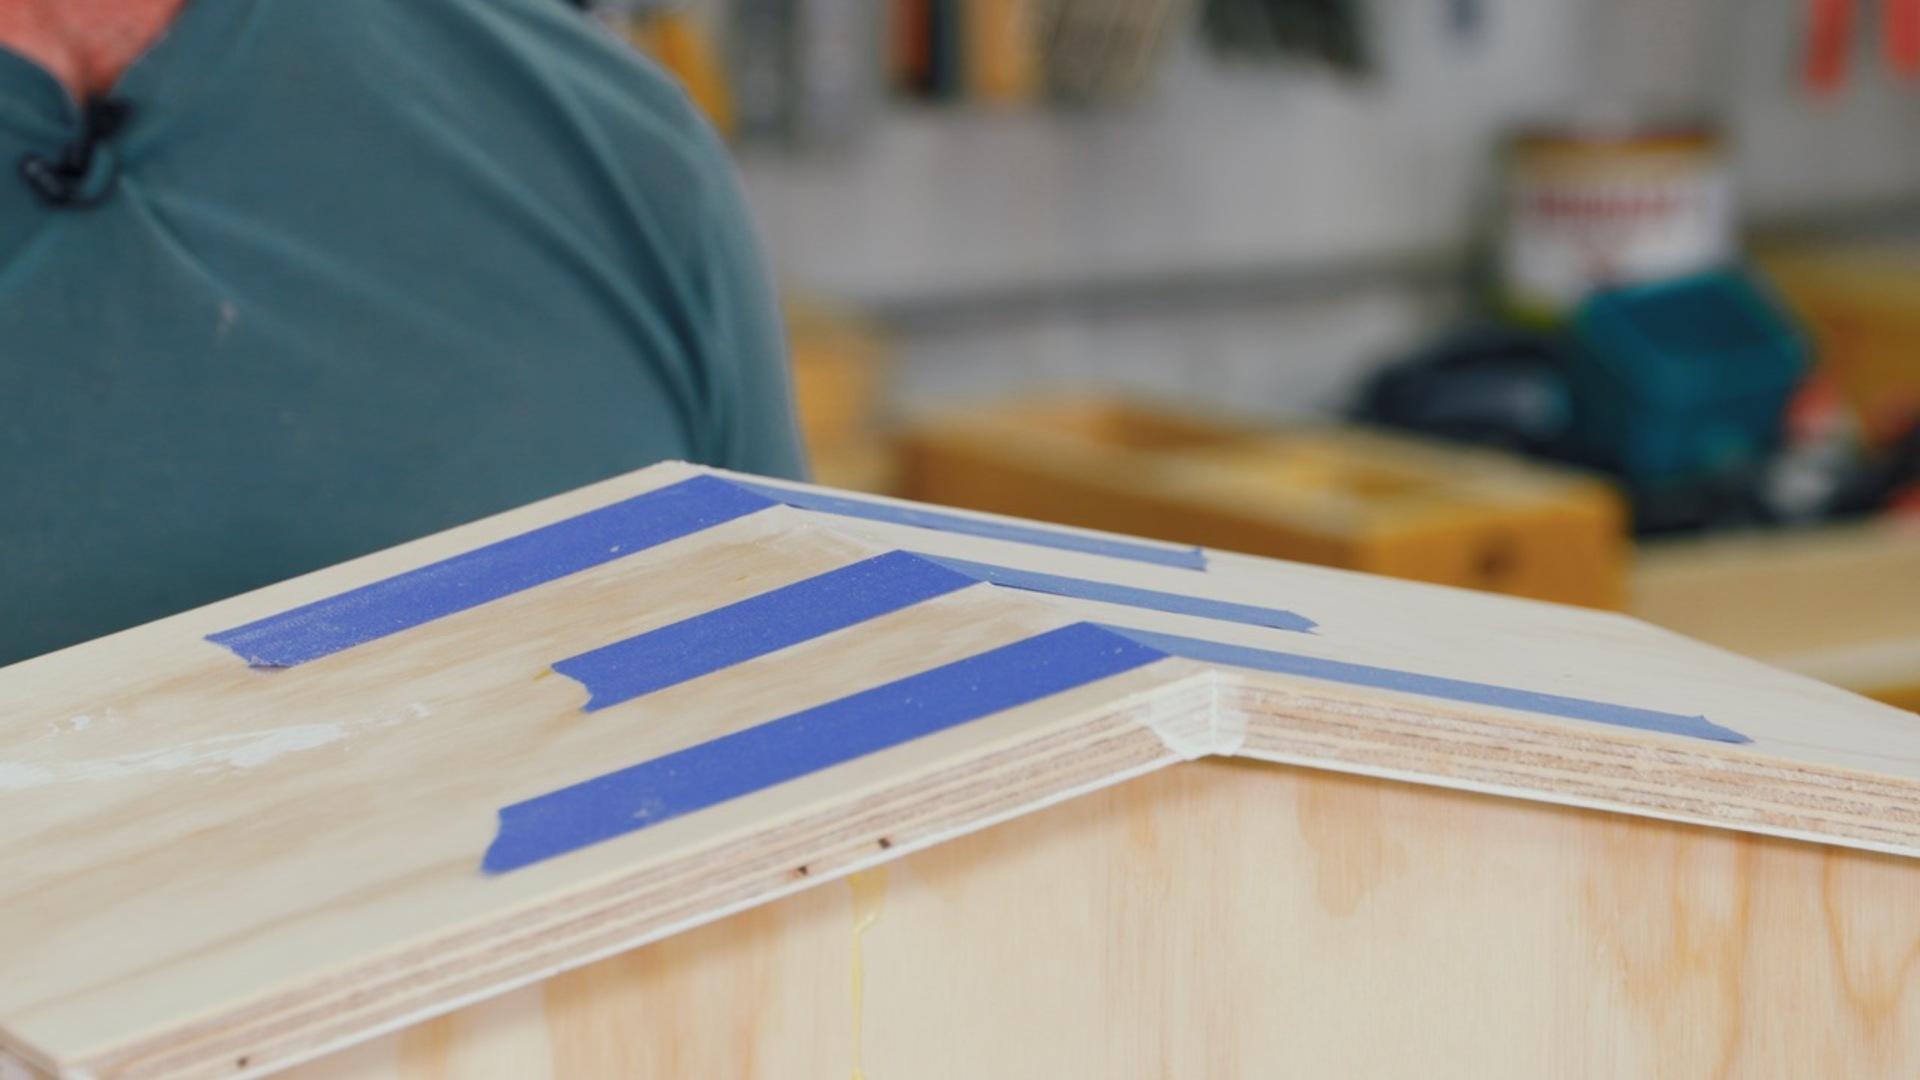
Session 11: Trim
12:25
The devil’s in the details on the trim, but there are some great tricks to help you make sure it goes well. The trim does a great job of dressing up the library and also provides accent opportunities when you paint the exterior.
Session 12: Wrap Up the Door
7:42
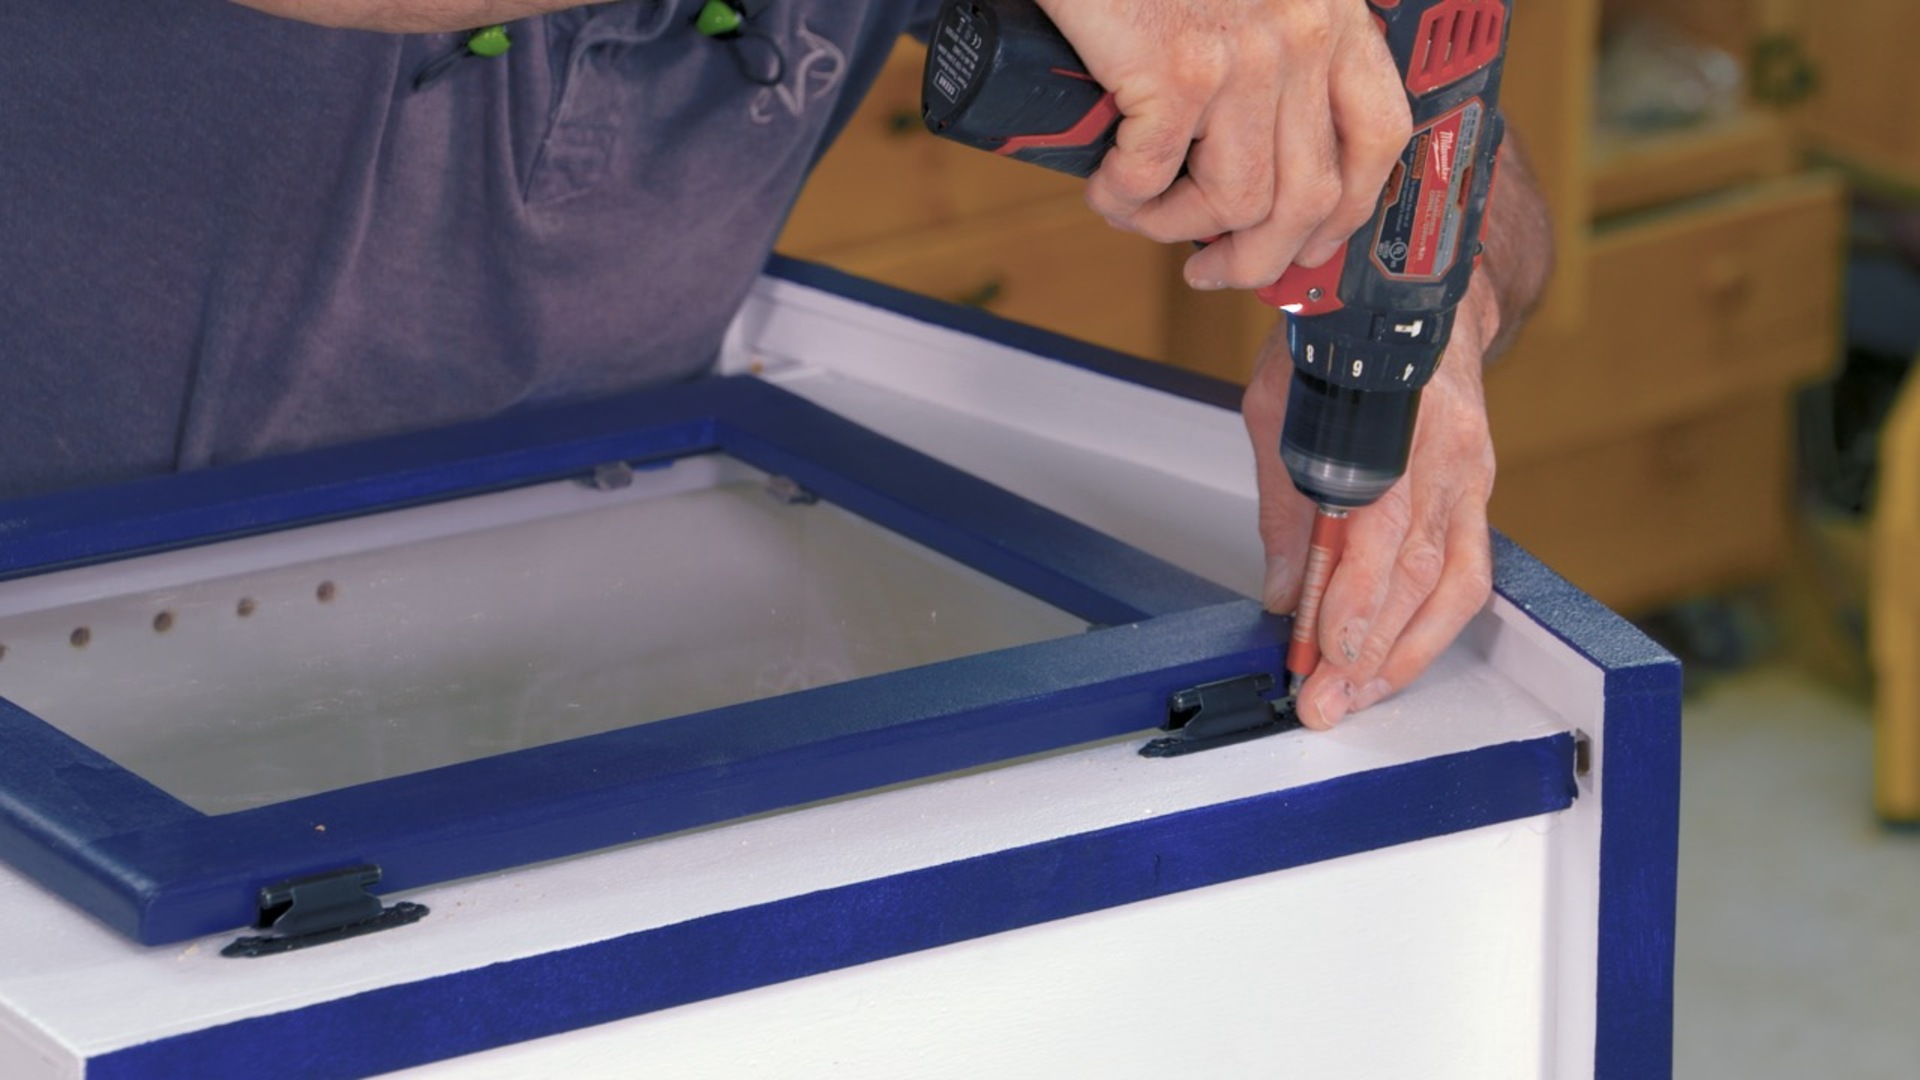
Once you’ve applied a coat of paint on the door, it’s ready for hinges and plexiglass. Retainers hold the plexiglass in place, and self-closing hinges will help keep the elements out of your library. Hanging the door on the library is a little tricky thanks to those self-closing hinges, but we’ve got some tips for you.
Session 13: Make the Post Mount
7:06
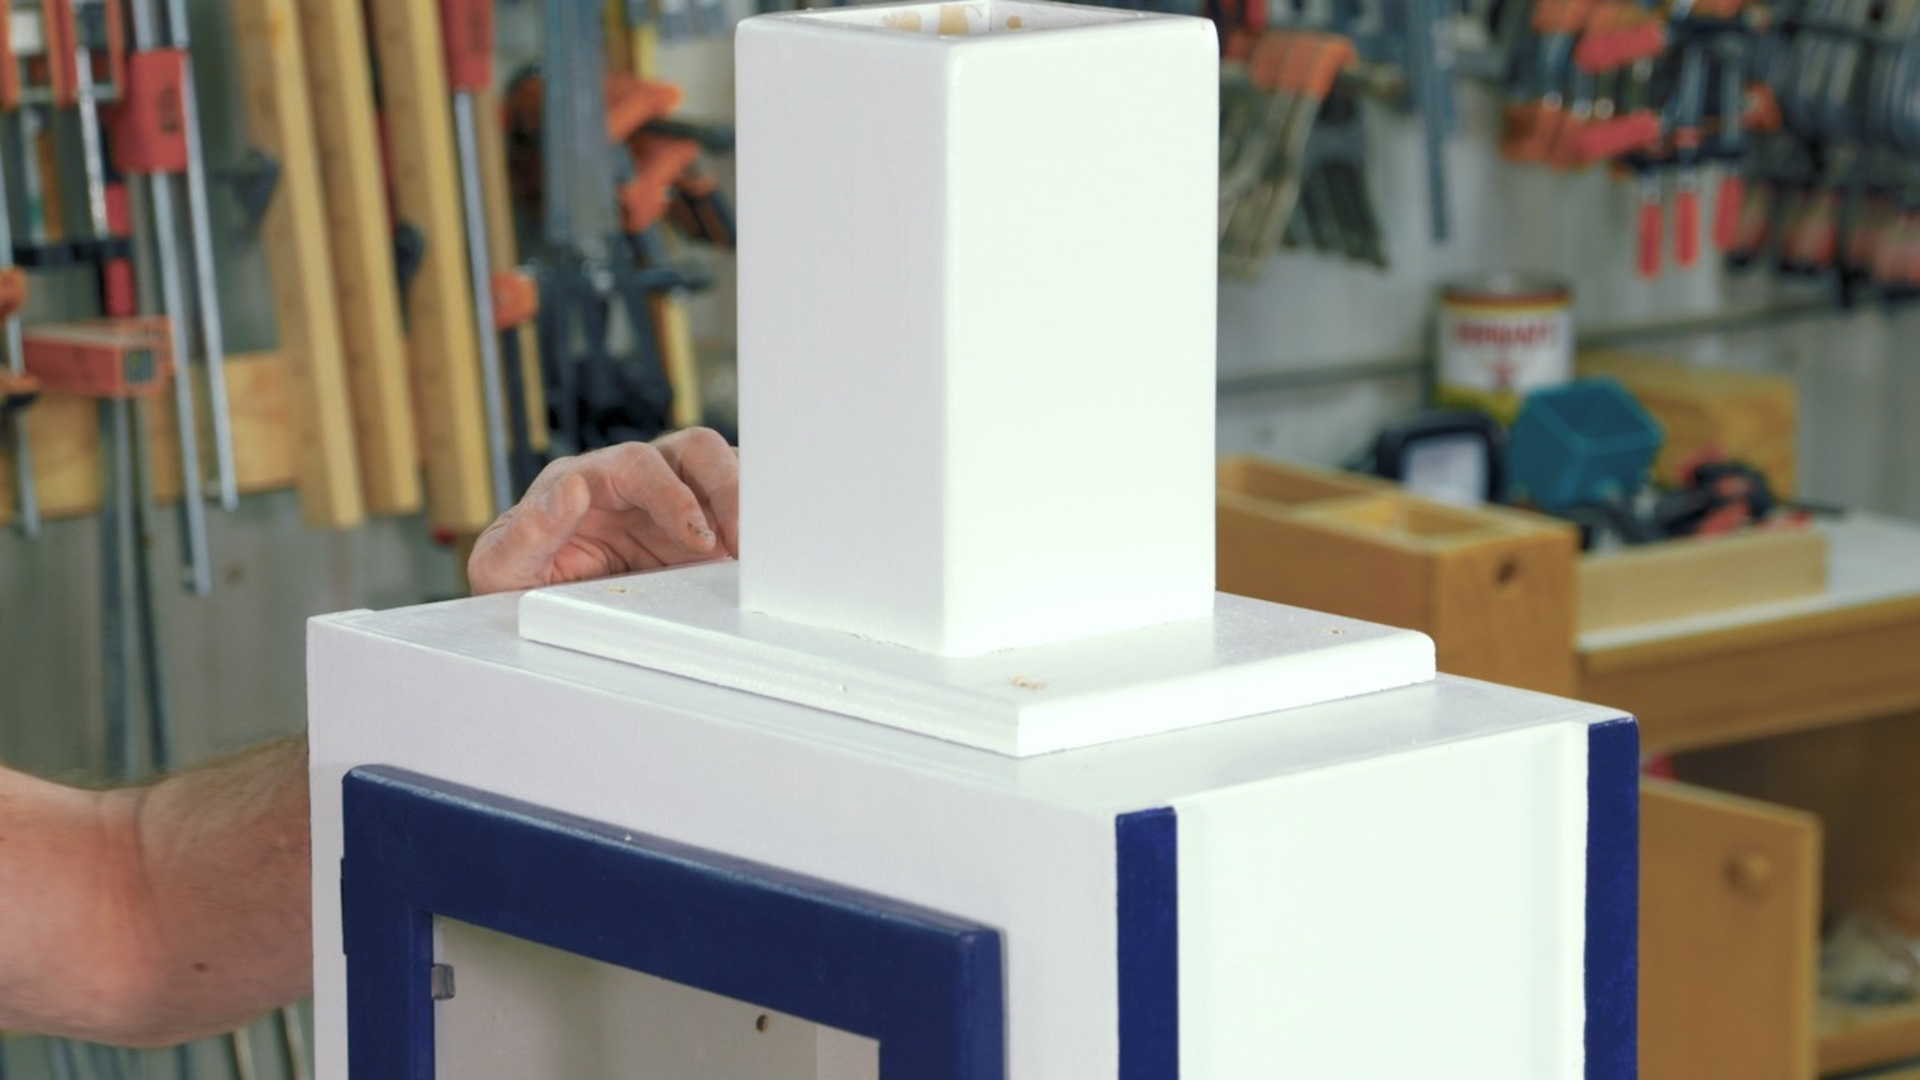
The easiest way to set up your library is to mount it on top of a 4x4 post. The post mount makes that very simple, but be sure to check the dimensions we provide to ensure they’re compatible with the post you’re using.
Session 14: Install the Library
0:55
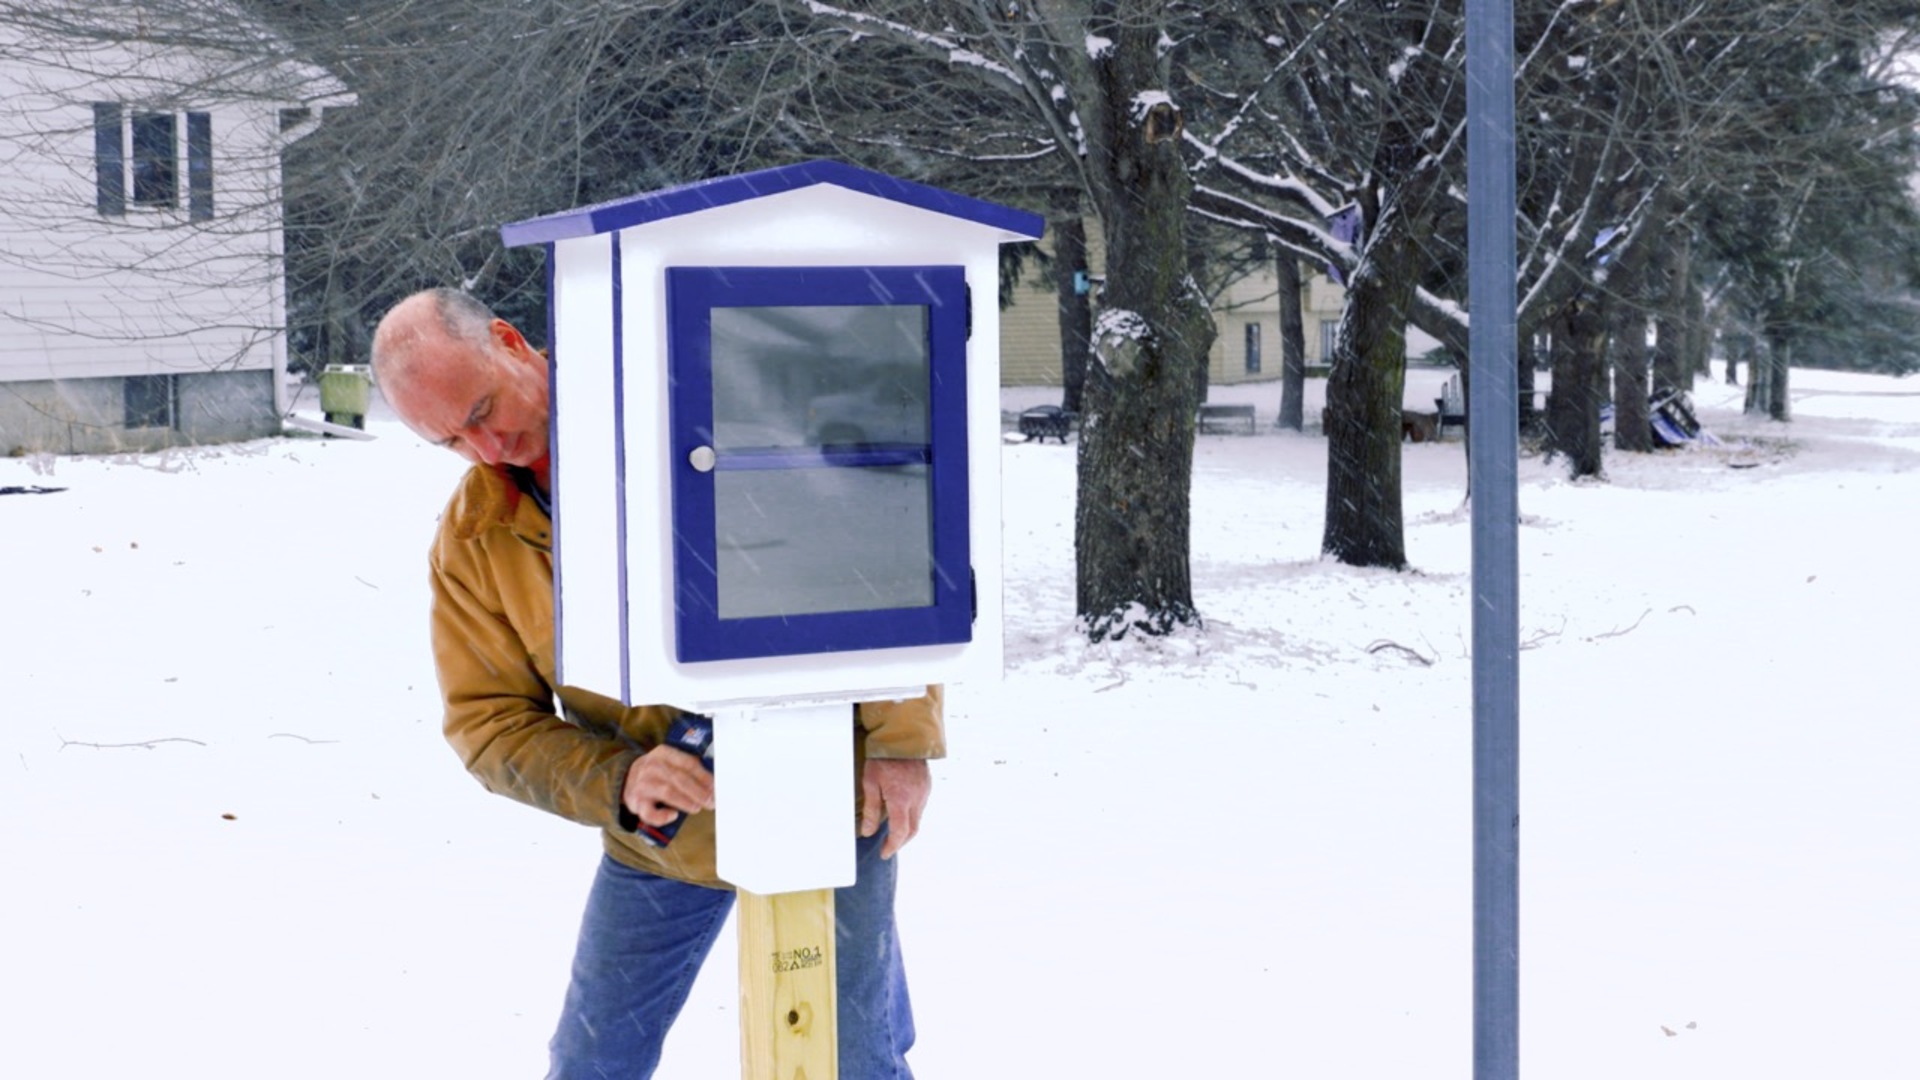
Your library is ready to be open for business! Slip the post mount column over the post, drive a couple screws, and stock it full of your spare books! What a great addition to the community.
General
Little Free Library is a nonprofit organization started in 2009 to encourage book sharing via public bookcases called Little Free Libraries. These bookcases are located in neighborhoods around the world! Add a little library to your community by building one yourself with the help of this class.
Materials
The library is made primarily from ¾”plywood, and the entire library will come from one 4’ x 8’ sheet. A small amount of solid wood is used to make the door and trim. It isn’t imperative that you use exterior plywood, as long as you do a good job of painting your library.
How It’s built
Your library comes together with dado and rabbet joinery. A router table is used in the instructional video, but the joinery can also be done on table saw. This project lends itself to applying finish before assembly, so you’ll do a little painting on the interior faces. Once you make adjustable shelf holes, your library is ready to come together with exterior glue.
More Joinery
In addition to learning about dadoes and rabbets, you’ll see how to make rabbeted half lap joints. This is the joinery used on the door. It’s very robust, which makes it great for this application, and you automatically end up with a rabbet for the plexiglass.
Getting It in Your Yard
Our approach to installing the library is to simply put a post in the ground and fasten the library to the post. The video shows you how to make the post mounting column for the library.
George Vondriska
Formally trained in technology education, George Vondriska has been teaching woodworking since 1986. He has been the managing editor of Woodworkers Guild of America since 2007. In addition to classes at his own Vondriska Woodworks School, George teaches at woodworking shows across the country and has taught woodworking for the Peace Corps, Andersen Window, Northwest Airlines and the Pentagon.
Bonus materials available after purchase
