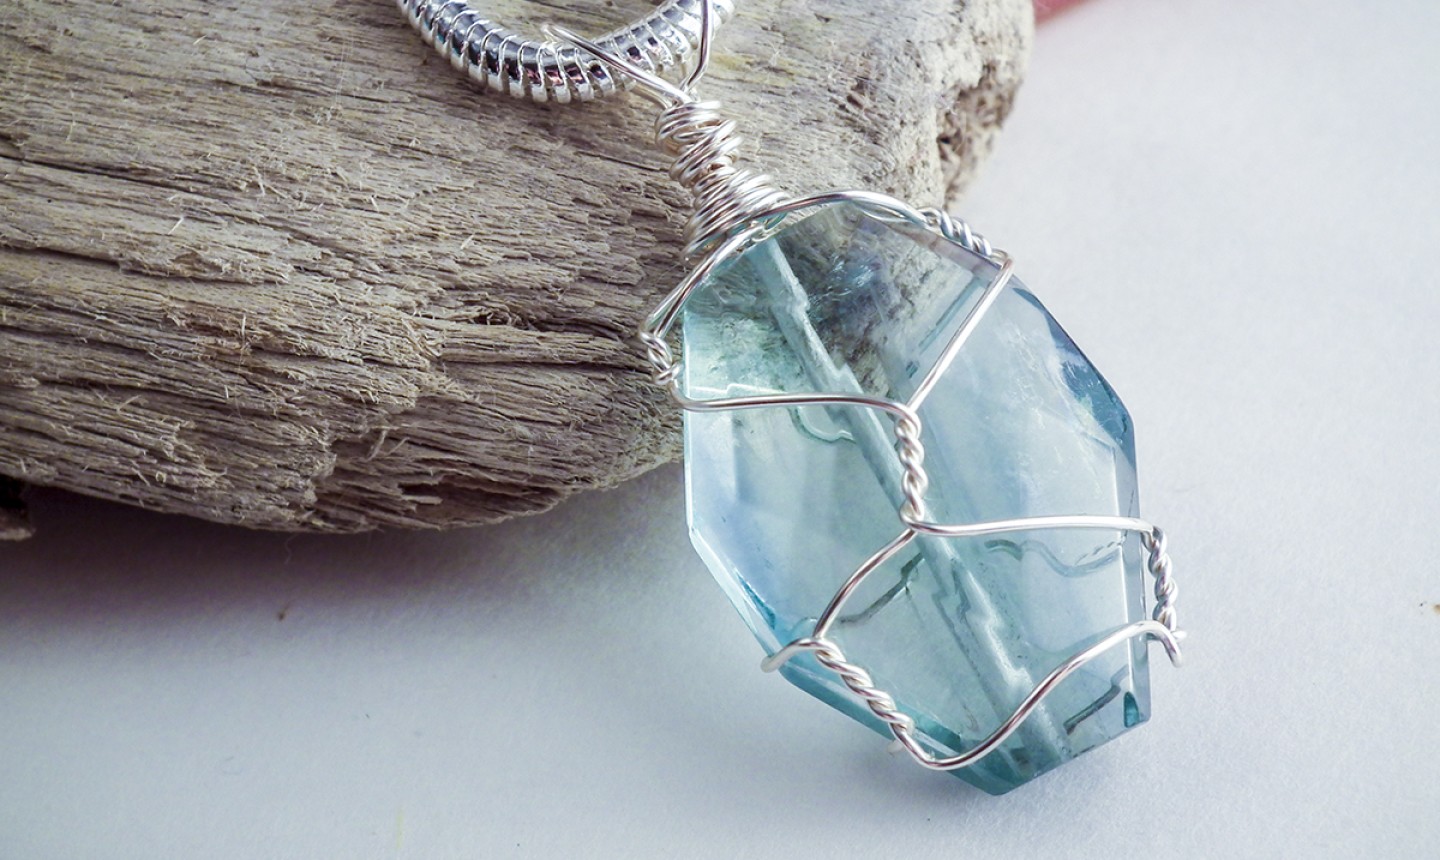
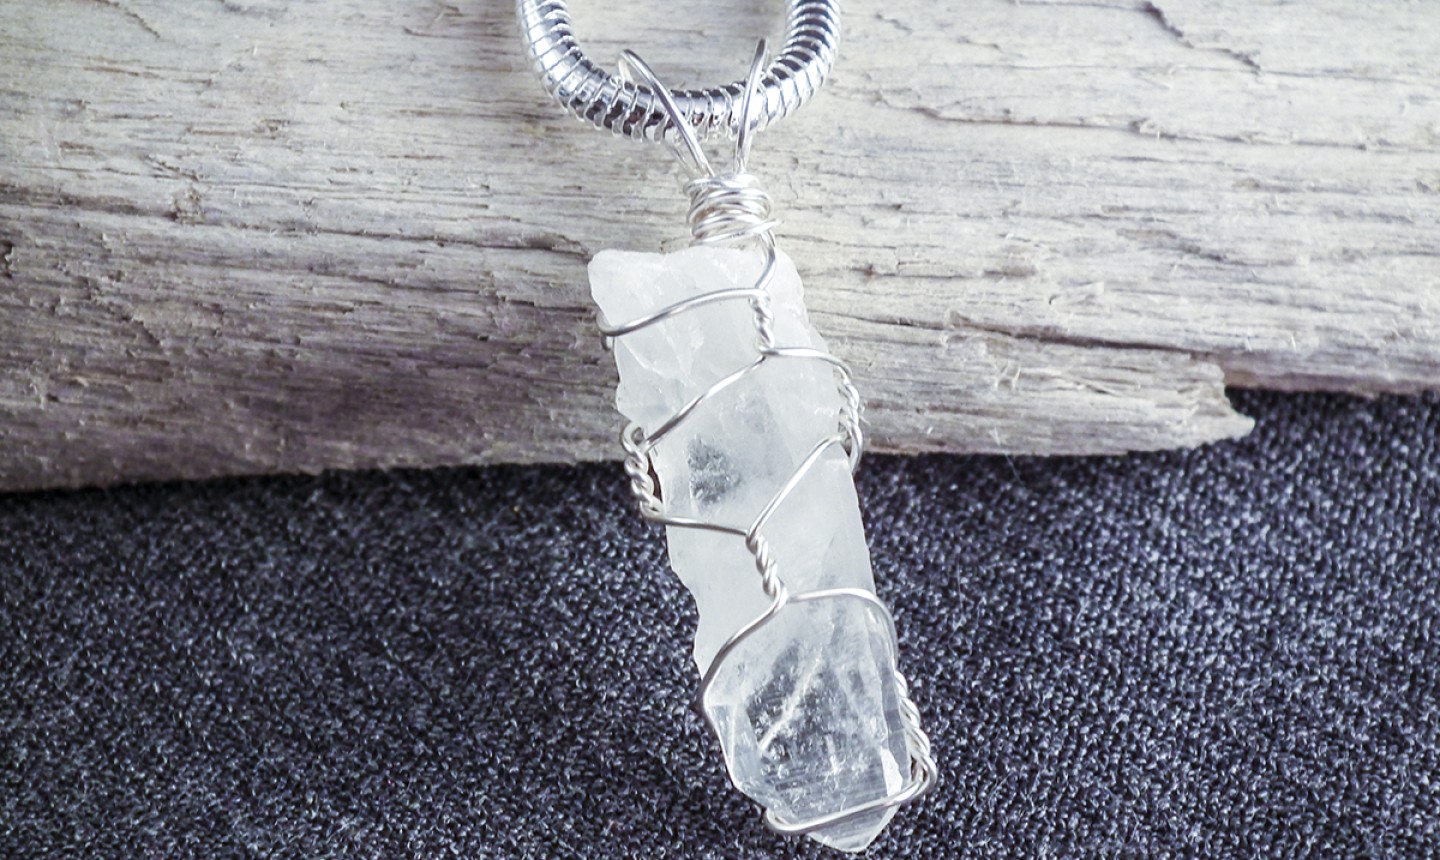
 You know when you see a crystal pendant in a jewelry store and think, "Wait, I can probably make that"? You're right. You totally can. Making your own wire-wrapped stone pendant is pretty simple, and you can apply these techniques to almost any stone.
If it's your first time wire-wrapping, choose a stone that's large and long — like a slab or a good-sized pointed crystal. That will make the technique a little easier to learn.
You know when you see a crystal pendant in a jewelry store and think, "Wait, I can probably make that"? You're right. You totally can. Making your own wire-wrapped stone pendant is pretty simple, and you can apply these techniques to almost any stone.
If it's your first time wire-wrapping, choose a stone that's large and long — like a slab or a good-sized pointed crystal. That will make the technique a little easier to learn.
Wire-Wrapped Stone Pendant
Level: EasyWhat You Need
- Two wires of equal length (about 12" will work for the average stone)
- A simple crystal or stone
Instructions
1. Twist the Wires
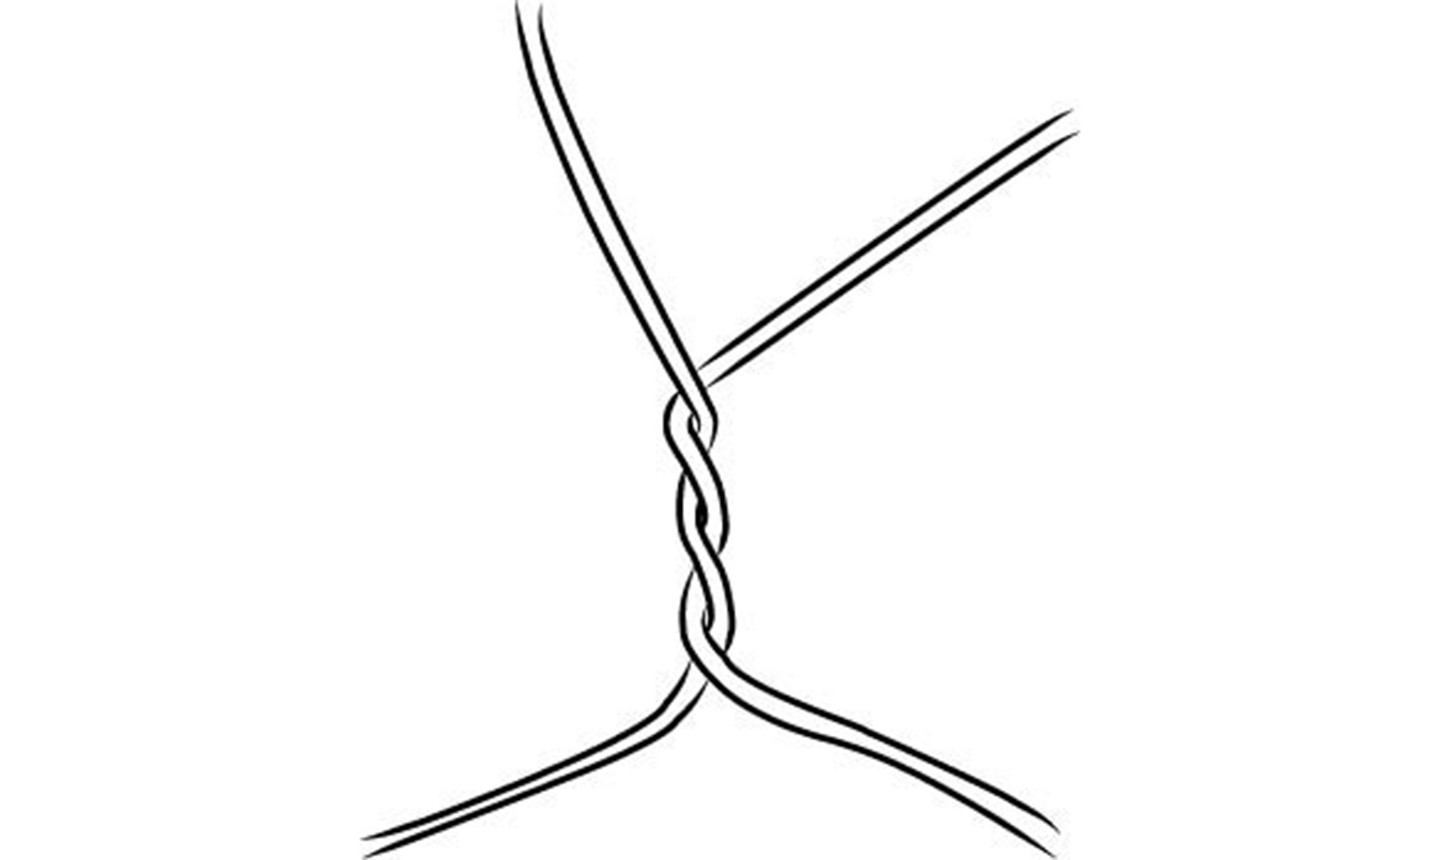 Hold the two wires together, find the middle and twist them around each other. You'll need to make at least three twists, but this doesn't have to be precise — you can choose to twist more than three times, especially for larger stones.
2. Place Your Stone
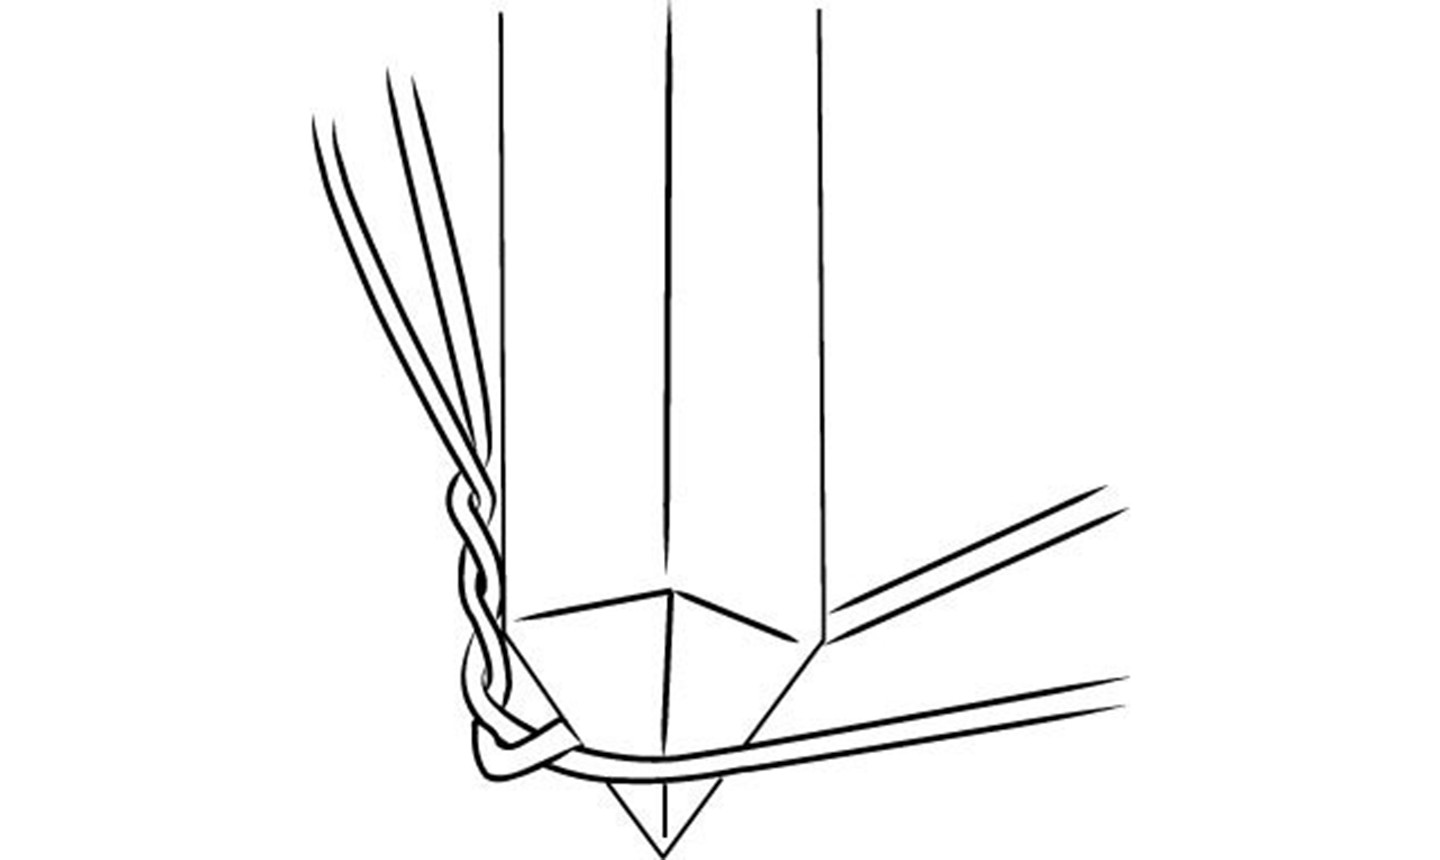 Shape the two wires at the bottom of the twist to create a V. Nestle the bottom of your stone in this opening. Now hold the wire V and the stone in place and bend the twisted wire up, so the twist lies against the stone.
3. Wrap and Twist Some More
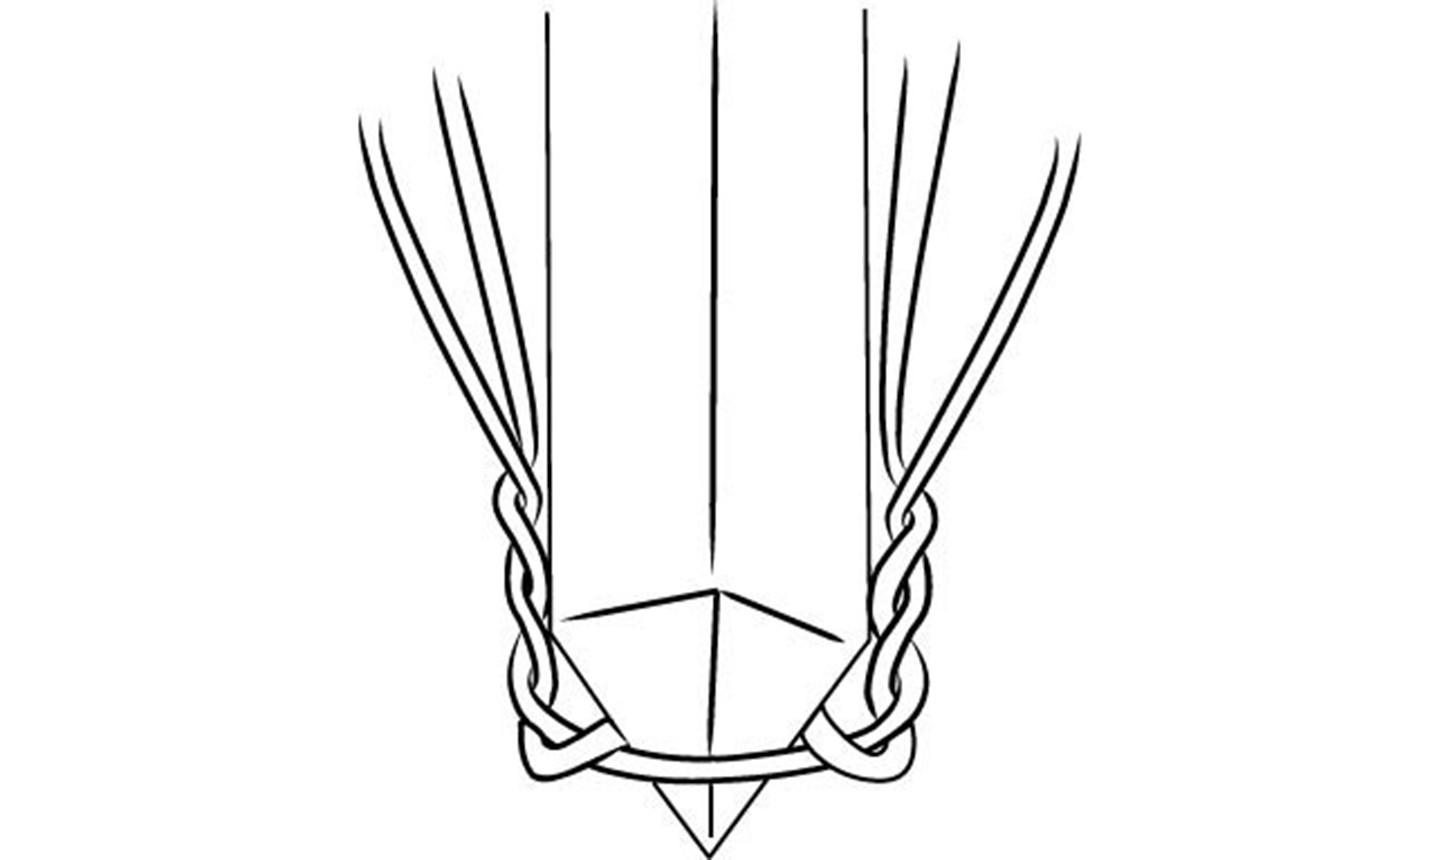 Twist the wires together on the other side of the stone so the base of the stone is held snug. Continue twisting the wires and bend them up so they lie against the stone's opposite side, as shown. Your stone now has wire twists on front and back.
4. Cross and Continue
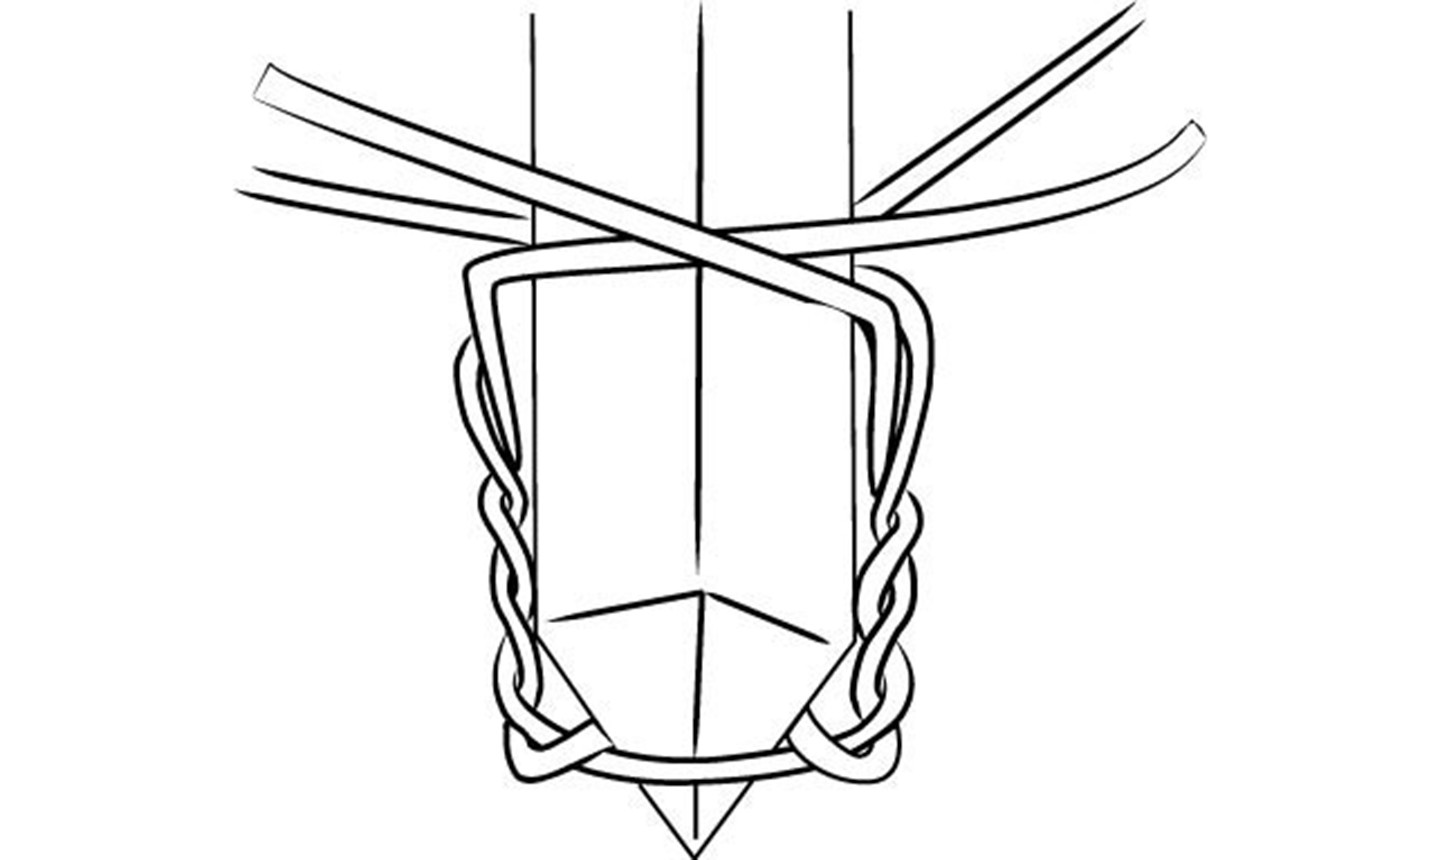 Separate the wires in each twist and pull them to the opposite side as shown.
 Holding the lower, wrapped portion of your stone in place, create new twists on either side, working your way up the stone. As you work, keep pushing the stone down into the bottom of the wire cage so it's nice and secure. Your stone now has twisted wire holding it in place on all sides.
Continue pulling the wires to the opposite side and twisting until you reach the top of your stone. Keep the wires as tight to the stone as you can to make the pendant more secure.
Holding the lower, wrapped portion of your stone in place, create new twists on either side, working your way up the stone. As you work, keep pushing the stone down into the bottom of the wire cage so it's nice and secure. Your stone now has twisted wire holding it in place on all sides.
Continue pulling the wires to the opposite side and twisting until you reach the top of your stone. Keep the wires as tight to the stone as you can to make the pendant more secure.
5. Create a Bail
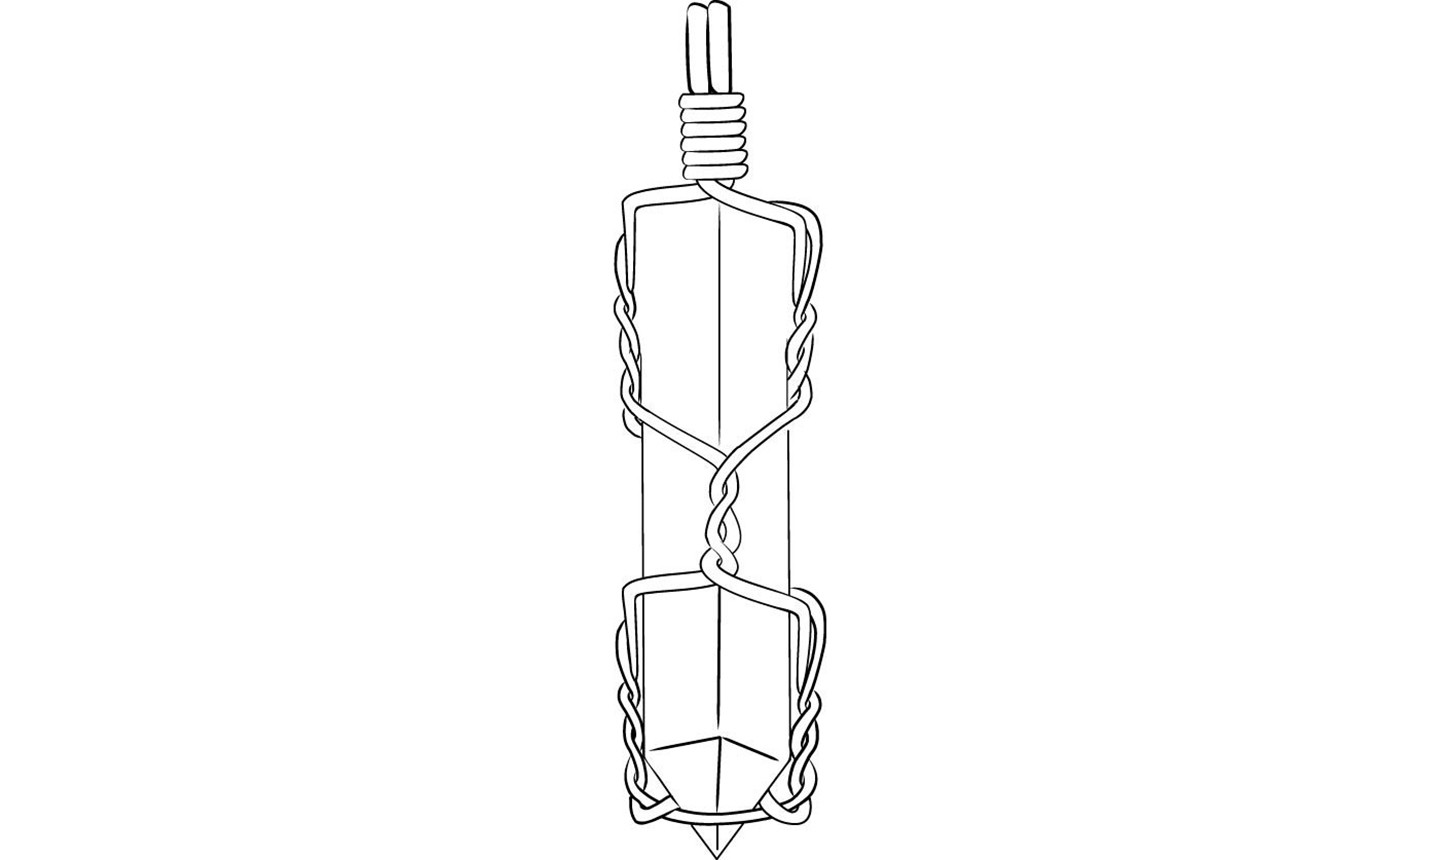 Create a bail by making a double-wrapped loop and tweaking the extra wire to the back of the loop’s neck. Cut the wire tight and tamp it down in the back.
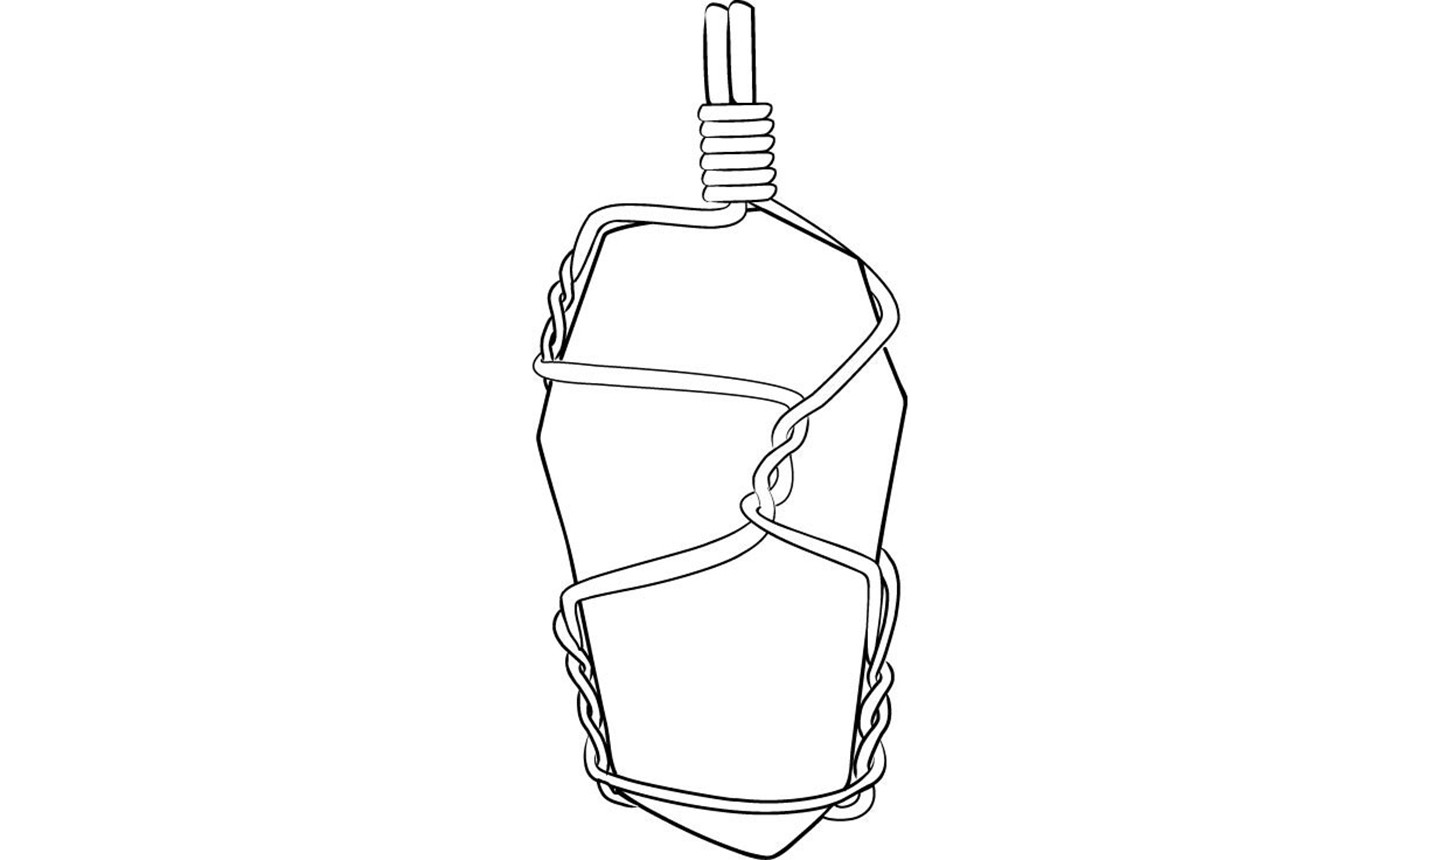 There's your wire-wrapped stone! The technique works especially well on large, flat slabs or crystal points, but you can adapt it to just about any stone.
 When you're ready, experiment with adding beads to your wires, creating decorative loops or even building sculptural elements into the wire between twists!
Photos by Gayle Bird


You made it so simple......thanks!
I am a college instructor I teach jewelry making with wire. I’m always looking for tips and tricks. I have a creative Facebook page. I’d love if you’d follow so you can give us some tips. It’s. Creative Bubble https://www.facebook.com/profile.php?id=61580210581237&mibextid=wwXIfr&mibextid=wwXIfr i’d loved if you would share some tips on this page for all of my students. Thank you so much.
Believe in cobra never believe ghogar
That is a very simple technique. Thank you
That was so easy! Thank you!!!
Make a wired-wrapped stone
Beginner class
Thanks so very much. I wrapped stones years ago. I’ve acquired many hydro quartz and petroleum quartz and want to make a little money in my old age. I needed a refresher to get started. Thanks again, Gracie
It all makes sense now, thank you.
Excellent tips