
No paint required for whites!
Nothing, even white watercolor paint, can ever be as white as our paper. But if we simply leave a space white we run into some problems:- How do we define the edge of a white object on white paper?
- How do we achieve any sense of depth or shadow and still main the illusion of white?
For this project, you’ll need:
- A white cold-pressed watercolor paper
- A No. 8 pointed round watercolor brush
- A No. 2 pencil
- A ruler
- A glass of clean water and a kitchen towel for cleaning your brush
- Watercolor paints: Ultramarine blue, burnt sienna, new gamboge and quinacridone rose
- A mixing plate or palette
- A kneaded eraser or white plastic eraser
Step 1: Sketch the scene
To begin, I used my ruler to create a 5″ x 7″ rectangle on my larger sheet of paper.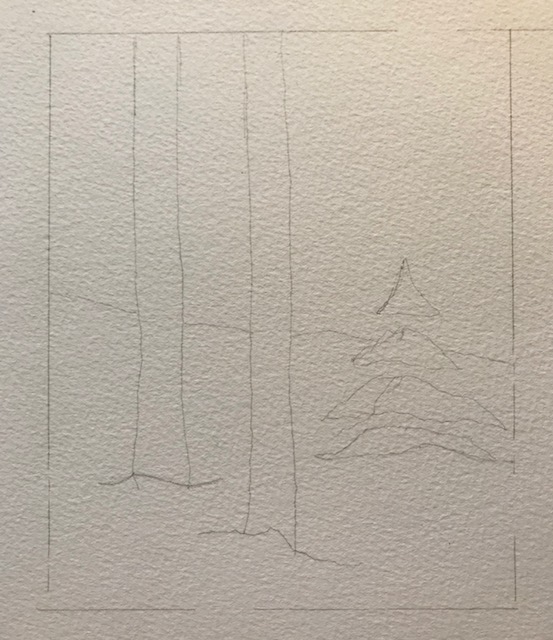 Then I sketched in a simple winter scene with a slope for the horizon line, two birch-like tree trunks on the left, and a small evergreen tree on the right. Notice the lines at the base of the tree trunks to indicate where snow is piled against the trees. Please use my sketch to help you create your own!
Step 2: Paint the sky
For this exercise, we’ll create a sunny day when there are strong, cool shadows. Let’s start by adding our sky. Mix ultramarine blue with just a touch of burnt sienna. Use only enough burnt sienna to take the brightness out the blue. I like to slightly mute ultramarine when painting skies, as it seems more appealing to me. If you want a really bright sky, just don’t add the burnt sienna!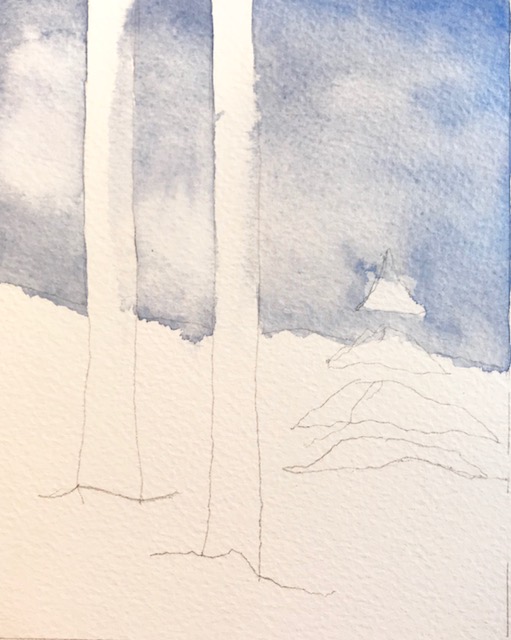 Use your round brush to add a bit of clean water randomly through the center of the sky area. Next paint a loose wash avoiding the tree trunks and the pine tree and letting the paint bleed into the water glaze area you already have in place. Follow my example in the photo above. Note how where the sky meets the snowy horizon I have let it be a bit random and not completely smooth. This gives the illusion of uneven snow. Don’t worry if you get a bit in the tree trunk areas; you can use a clean damp brush to soften any place you have gone over the trunk. You can paint one section at a time if this is easier.
Step 3: Paint the birch tree trunks
Next, mix a bit more of the burnt sienna into the ultramarine to create a medium gray.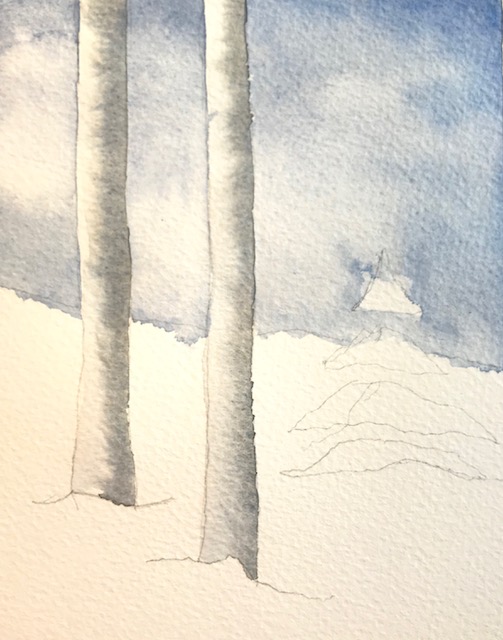 With a clean damp brush, cover each tree trunk with a water glaze — not too wet, but a nice even coat of water. With the tip of your brush, pick up the gray paint and drop it on the water glaze along the right side of each tree trunk.
This creates the illusion of a shadow on the birch trees, and gives them a sense of roundness, while still keeping the “whiteness” of those birch trees.
With a clean damp brush, cover each tree trunk with a water glaze — not too wet, but a nice even coat of water. With the tip of your brush, pick up the gray paint and drop it on the water glaze along the right side of each tree trunk.
This creates the illusion of a shadow on the birch trees, and gives them a sense of roundness, while still keeping the “whiteness” of those birch trees.
Step 4: Paint the evergreen trees
Next, mix up two greens: one a bit lighter (for where the sun is hitting the branches) and one a bit darker (for where they are in shadow).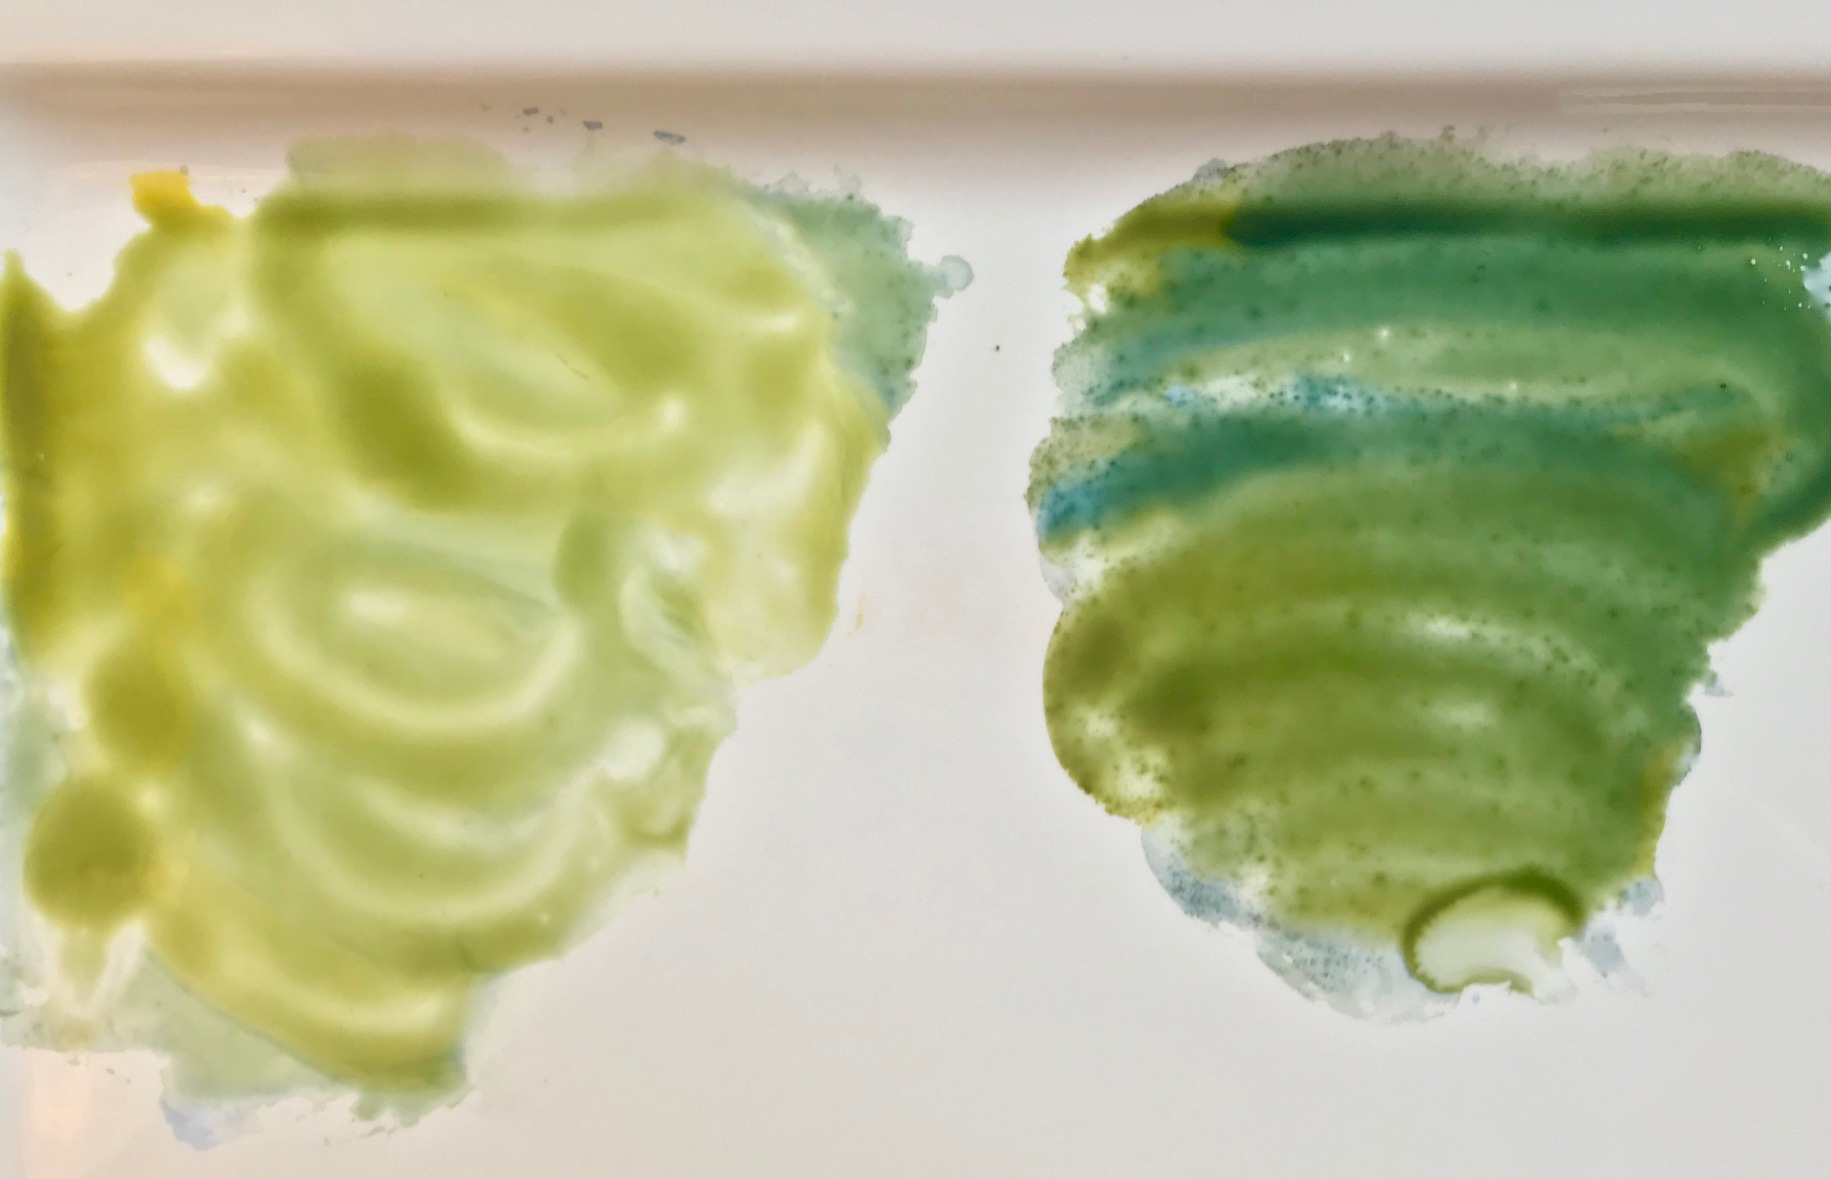 Make two puddles of ultramarine blue on your mixing tray. To one, add a bit of new gamboge until you get a nice, lighter green. In the next puddle, add a touch of burnt siena to deepen the blue, then add new gamboge to create a deep green. Your palette should look something like mine above.
To paint the pine boughs on our tree, use a light tough with the tip of your brush, using dancing, random strokes to give the spiky pine appearance. Practice first on a piece of scrap paper. Random is best!
Make two puddles of ultramarine blue on your mixing tray. To one, add a bit of new gamboge until you get a nice, lighter green. In the next puddle, add a touch of burnt siena to deepen the blue, then add new gamboge to create a deep green. Your palette should look something like mine above.
To paint the pine boughs on our tree, use a light tough with the tip of your brush, using dancing, random strokes to give the spiky pine appearance. Practice first on a piece of scrap paper. Random is best!
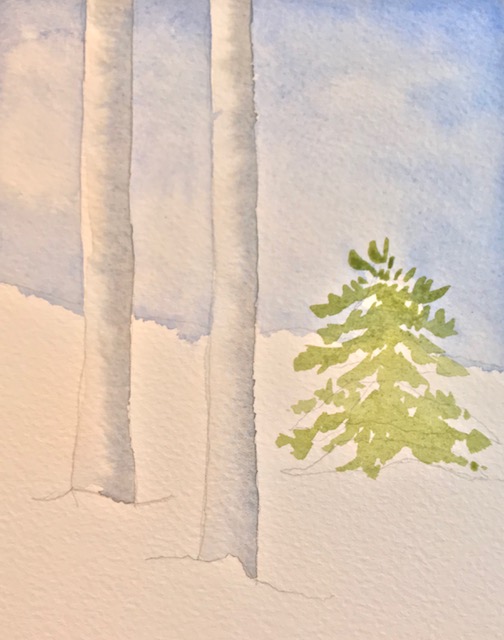 To begin, I created the spiky tips with the lighter green on the left side of the tree where the sunlight would be hitting it (as you can see above).
 Immediately, while this paint is still wet, I began adding the darker green, following the lines made in the sketch.
Notice how I left some white space here and there. The trick is to really let your brush dance randomly, creating light, feathery strokes in the direction that the boughs would grow.
Immediately, while this paint is still wet, I began adding the darker green, following the lines made in the sketch.
Notice how I left some white space here and there. The trick is to really let your brush dance randomly, creating light, feathery strokes in the direction that the boughs would grow.
Step 5: Add detail to the trees
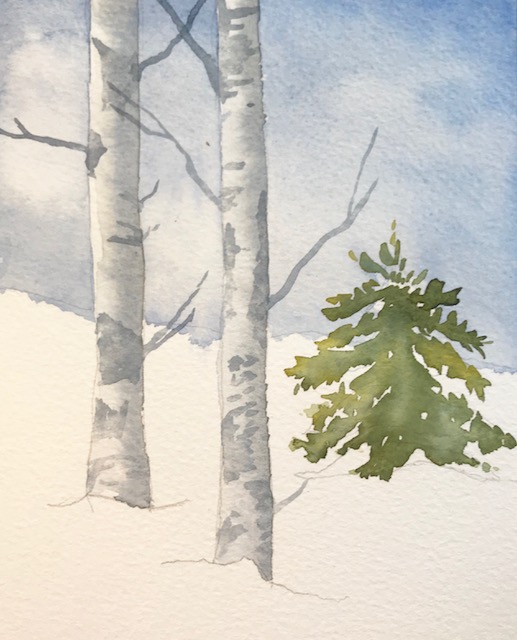 Use ultramarine and burnt sienna to mix up amore of a darker gray. Then, using the tip of your brush, paint on the markings on the birch tree trunks like in the photo above, bringing the tip of your brush out beyond the trunk to suggest a few bare branches here and there. If your marks are too dark, simply blot them with a clean paper towel for a more subtle and natural look.
Step 6: Paint the shadows
Now that our trees are painted, it’s time to focus on making that snowy ground appear more realistic. Leaving it white doesn’t give us a sense of depth or atmosphere. The sun will cast strong, cool shadows with a bit of lavender in them. First, prepare the colors for the shadows by mixing up a blue-gray with ultramarine and burnt sienna, as well as a lavender-gray by adding a bit of quinacridone rose to another puddle of the blue-gray ultramarine mix. Using clean water, paint in a water glaze in the shape of the shadow for the birch trees, following the pencil lines from your drawing, and my example below. Then, drop in the lavender-gray so it spreads across the water glaze. Immediately drop in the blue-gray toward the base of the shadow, where it meets the tree.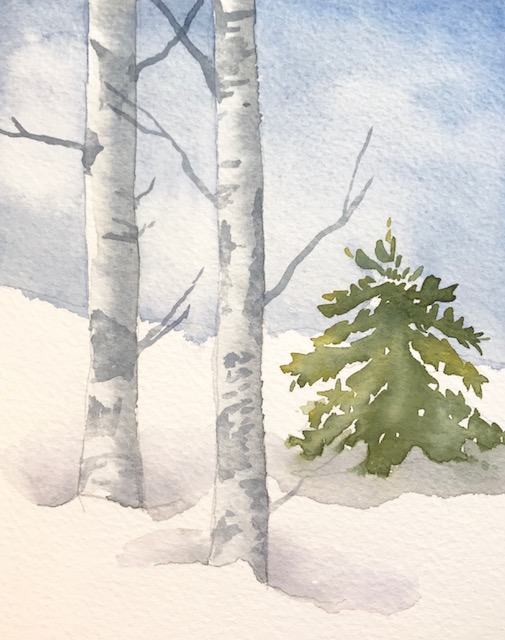 Do the same for the other two trees. Before continuing, let these shadows completely dry. They will get quite a bit lighter. Before you move on to the next step, when completely dry, use your eraser to remove any visible pencil lines from your original drawing.
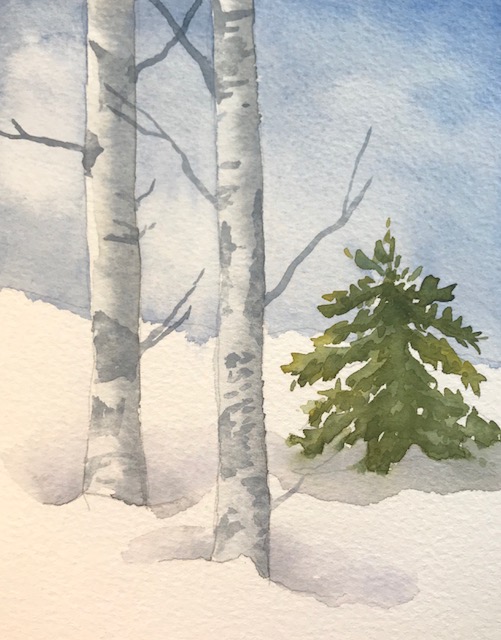 In the meantime, I decided that the shadows on my pine tree were not dark enough. I mixed up more dark green to add more shadows on my pine boughs, as seen in the photo above.
Step 7: Add detail to the snowy ground.
Finally, I needed to add more overall shadow to the snowy slope. Starting with the same blue-gray mixture, add quite a bit of water to the mix to get a much paler version. Then add in pale strokes of this light hue to suggest the slope of the hill, using quick strokes and leaving plenty of white space where the sun might be lighting it up. The key is to suggest the cool shadows where the snow might be undulating, but leaving many spaces of the bright white paper gleaming through.
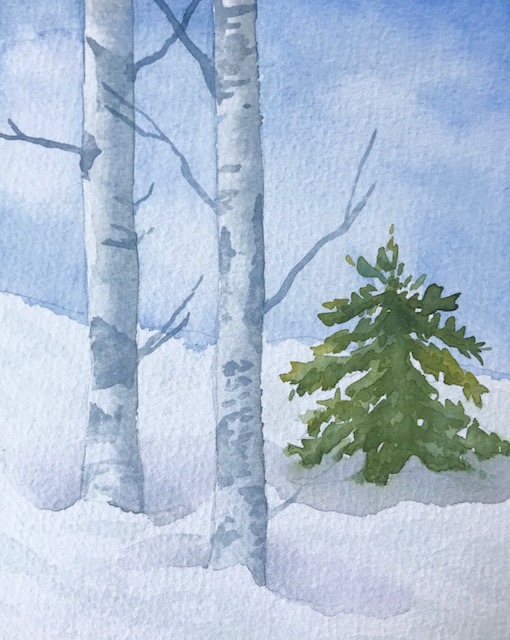
The takeaway tip for shades of wintery white is to create shadows with shades of blue and lavender gray, leaving just hints of that white paper shining through to create the illusion of white.
Next time you see a snowy landscape, really look at the colors you actually see: lots of blue-gray and lavender shadows glinting with bits of bright white where the sun hits the snow the strongest. White is not always white.
Share tips, start a discussion or ask one of our experts or other students a question.
No Responses to “Achieving Whites in Winter Watercolors”