
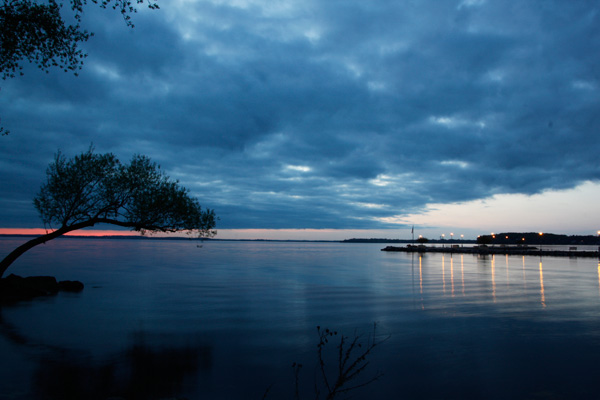
Twilight is a magical time for photography. Rather than packing up and heading home when the sun sets, you might be surprised by what you can capture if you just stick around a little later. Twilight light often gives the sky a lovely blue glow, so this time of night or morning is often referred to as the “blue hour” by photographers.
Here are some tips for shooting successful twilight photographs:
Photography equipment
A tripod is an essential piece of equipment for twilight photography. A tripod allows you to take rock-solid photographs, regardless of shutter speed. The low light common to twilight often requires a longer shutter speed, up to those measured in full seconds.
It may not seem like much, but pushing the shutter button yourself when your camera is on a tripod can make your camera shake.A remote shutter release is useful, but if you do not have a remote, you can use the 2-second or 10-second timer to trigger your camera. Using a timer allows your camera to settle before shooting.
Focus and settings
Twilight photography is the time to get comfortable with manual shooting and manual focus. Your camera may have a difficult time focusing during twilight, as the reduced light makes it harder for it to find your subject.
If you are shooting something fairly close, you can help your camera by shining a bright flashlight on your subject. Then press your shutter button down halfway to set focus. Switch your lens to manual focus and it will keep that focusing distance. Or, you can use the focus ring on your lens to set the focus yourself.
The appropriate settings for twilight photography will vary, depending on your scene, your vision, and the ambient brightness. I often start in either aperture or shutter priority mode, depending on my goals, and then switch to manual shooting to adjust the exposure if needed.
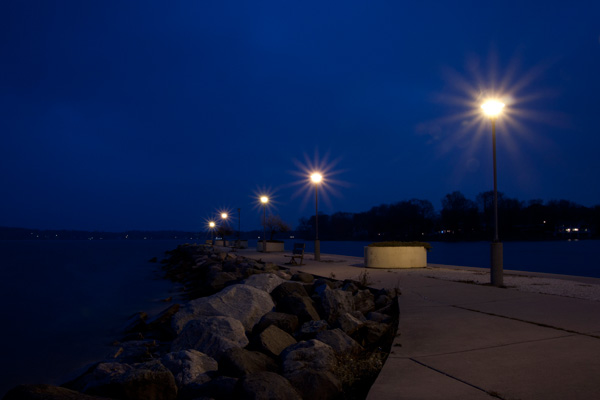
For example, when I was shooting these lamps, I knew that I wanted the starburst effect, so I did a trial shot in aperture priority mode at f/22. The camera chose a shutter speed of 30 seconds (its maximum), but the image turned out too bright for the twilight look I wanted. So I switched into manual shooting mode, dialed in f/22, and tried a slightly faster shutter speed of 20 seconds, which resulted in the photograph above.
Note: You can keep your ISO at 100 if you are shooting with a tripod.
Examples of subjects
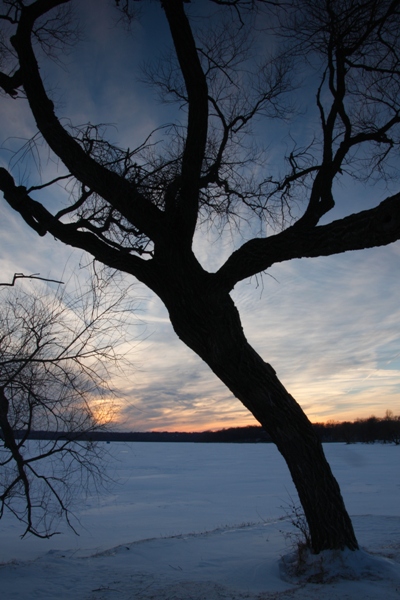
Silhouettes are a great subject to seek out during twilight. The low lighting makes it easier to turn your subject into a black outline. Look for subjects with interesting and recognizable shapes – think trees, people, bridges, etc. If you have a willing person for a subject, have them try different poses: keeping arms or legs out and apart from the body makes them more interesting and adds to the impact of your silhouette.
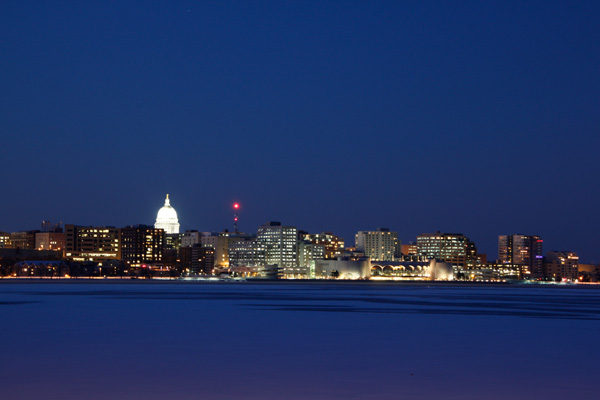
Cities and buildings really shine during twilight. If you shoot on the earlier side of twilight, just after sunset, you will maintain more of that blue glow in the sky. Shooting later in the evening means that more buildings are likely to be lit and will contrast strongly with the deepening blues or black of the sky.
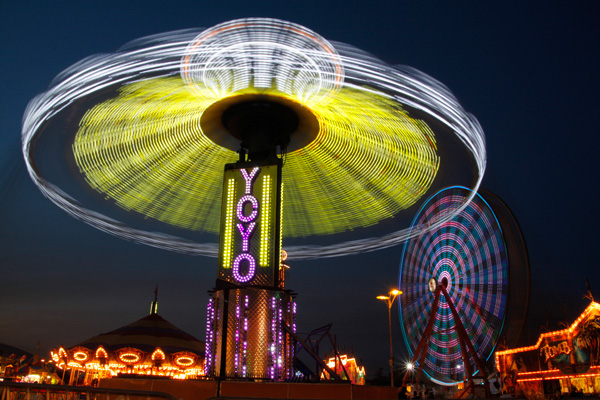
Longer shutter speeds at twilight make it possible to play with light. Light painting is when you add light to a scene in a creative way, such as using a flashlight to selectively light portions of your subject. Or you can use an LED light to draw shapes or patterns during an exposure of a few to many seconds. Moving carnival rides are another excellent subject for twilight photography. (Four seconds was long enough for the rides above to blur completely.)
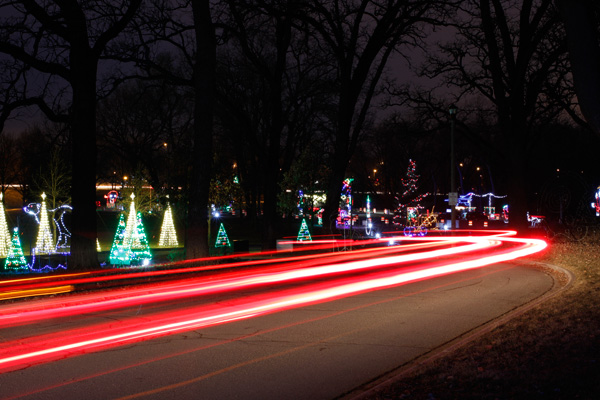
You can also use moving cars to do the light painting for you. A shutter speed of 10-30 seconds will make excellent long traffic trails. You want cars that are moving while you are taking the image. As the car moves through the scene, it will be too dark to be recorded, and only its incredibly bright taillights will register in your final photograph.
Share tips, start a discussion or ask one of our experts or other students a question.
No Responses to “Twilight Photography Tips: Get the Most Out of the Blue Hour”