
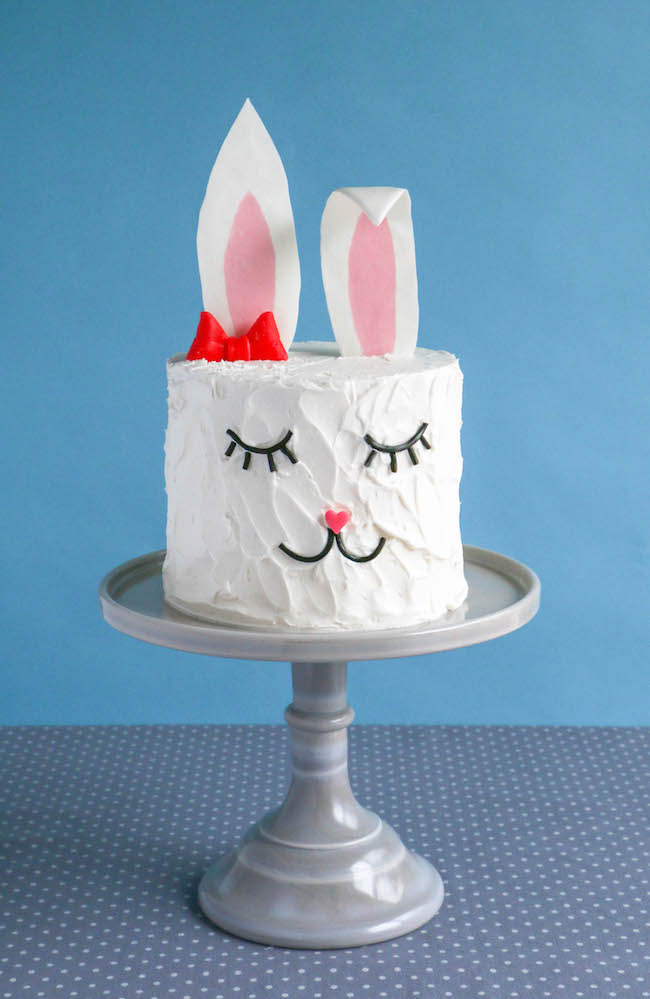
Give your Easter dessert spread an update with a trendy bunny cake! Blinky eyed unicorn cakes are all the rage in cake design right now, and bunnies want in on the action.
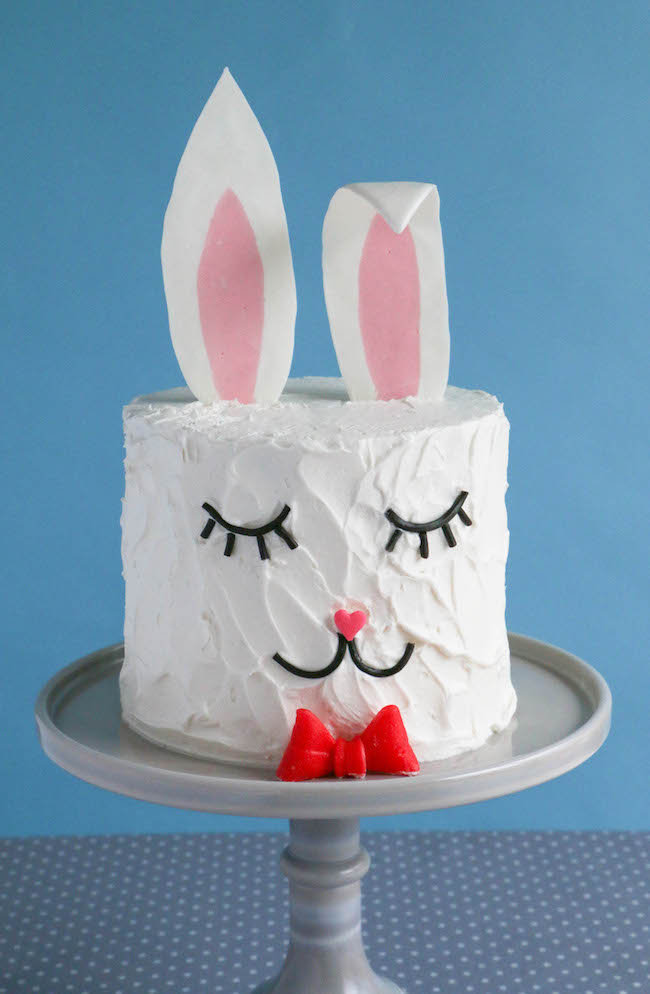
Use the taffy bow as a bow tie for a boy bunny cake or set it by one of the ears for a girl bunny cake. All images via Erin Bakes
In keeping with the Easter spirit, all of the bunny’s features are made using candy. The taffy candy bow comes together in a flash and the floppy chocolate ears look impressive, but are a breeze to make.
How to Make a Trendy Bunny Cake
Supplies:
- Round layer cake iced with fluffy white buttercream
- Pink and white coating chocolate
- Parchment paper
- Scissors
- Piping bags or paper cones
- Lollipop sticks (optional)
- Black licorice ropes
- Small knife
- Large pink heart sprinkle or candy heart
- Pink taffy stick (like Airheads or Laffy Taffy)
Step 1: Make the bunny ear template
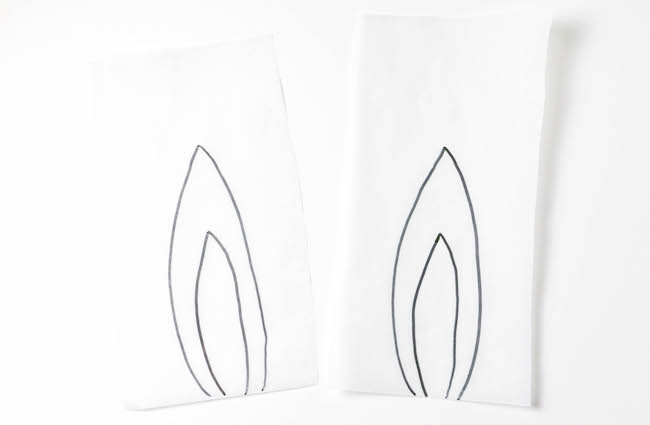
On parchment paper, draw two bunny ears with spaces for the inner ears. Cut the paper to separate the two ears.
Step 2: Pipe the chocolate ears
Melt the pink and white coating chocolate in separate heatproof bowls (here are some instructions on melting Candy Melts).
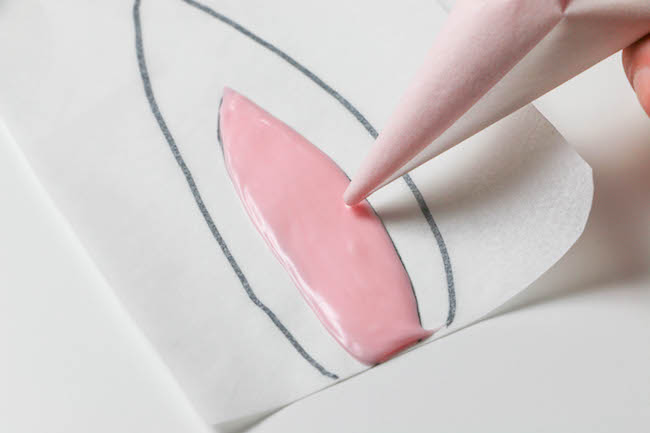
Fill a piping bag or paper cone with the pink chocolate. Flip the bunny ear templates over, so that you’re not piping directly onto the marker. Fill in the inner ear spaces with the pink coating chocolate. Lift the paper by opposite corners and gently give it a few taps against your work surface to smooth the chocolate out.
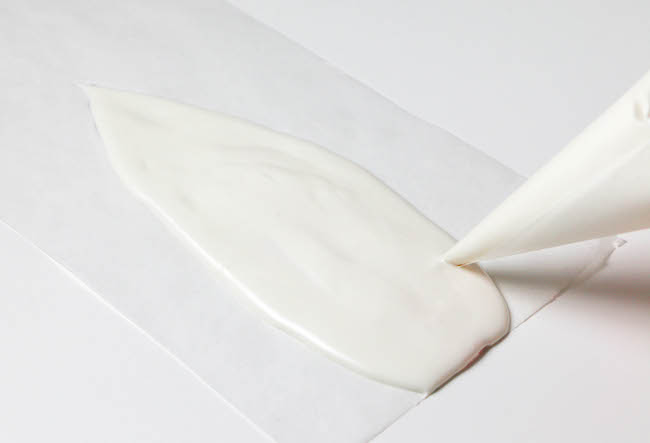
Fill a piping bag or paper cone with white chocolate. Fill in the ear outlines, covering the pink areas over with white chocolate. Lift and tap the paper again to smooth out the chocolate.
Step 3: Shape the bunny ears
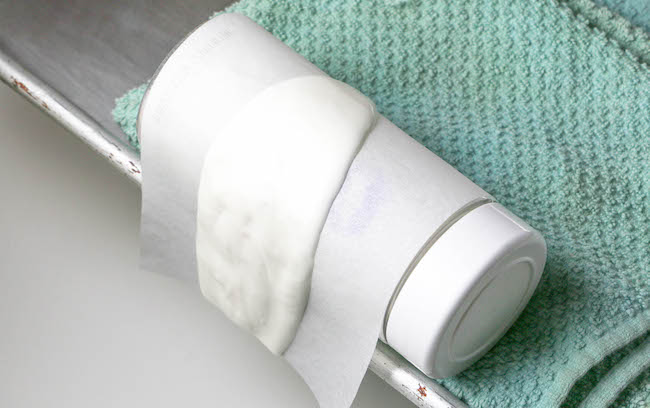
Use your finger to sharpen the points of your ears if they’ve rounded out. Drape the tip of one of the ears over a small, round container; a rolling pin or even a drinking glass. Tape the edge of the paper to the container to hold in in place. Leave both ears to harden, about 1o minutes.
Step 4: Make the bunny’s facial features
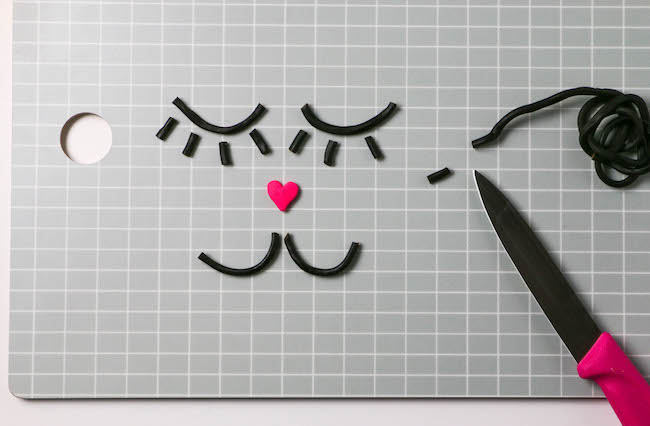
Use a small knife to cut pieces of black licorice rope to form the eyes, eye lashes and mouth of your bunny, as shown above. If you prefer, you can always pipe or draw these details, but I wanted to use all candy.
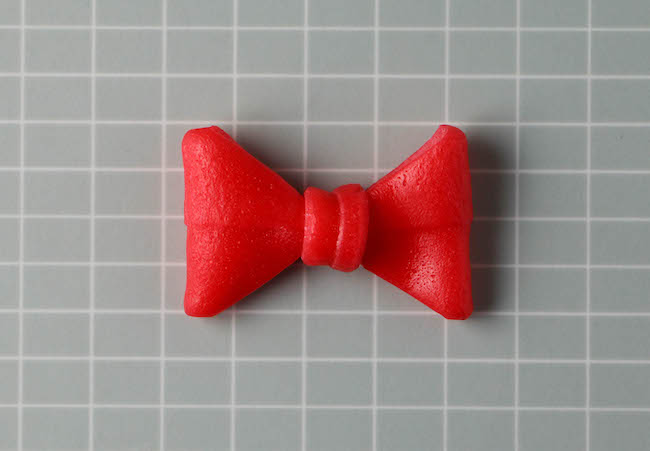
Step 5: Make the bunny’s bow
Cut a piece of taffy in half, then fold each half in half again to form the bow loops. Trim the loops into triangles with the points facing each other. Cut another piece of taffy into to a long, thin strip to use as the center of the bow. Wrap the strip over where the bow loop points meet. Trim away any excess.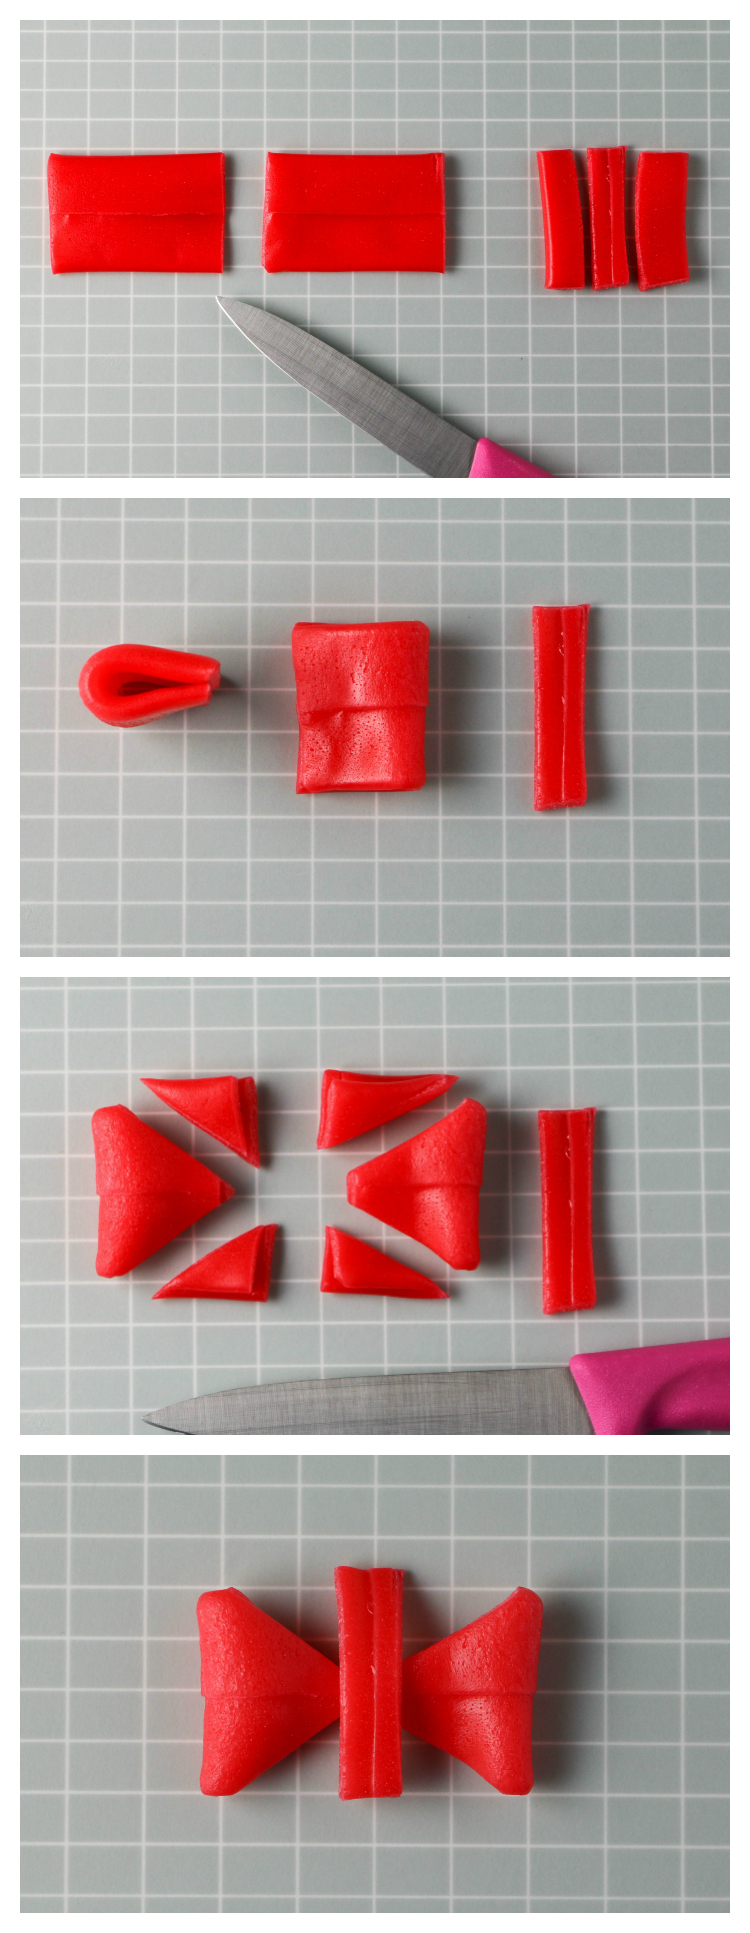
Step 6: Assemble your bunny!
First, place the licorice eyes and mouth on the side of the cake. Top the mouth with a sprinkle heart nose.
Peel the parchment paper off of the chocolate ears and push them into the top of the cake. If they feel a bit flimsy, dip two lollipop sticks in white chocolate and slide each into the cake behind the ears for added stability.
Use the taffy bow as a bow tie for a boy bunny cake or place it by one of the ears for a girl bunny cake.
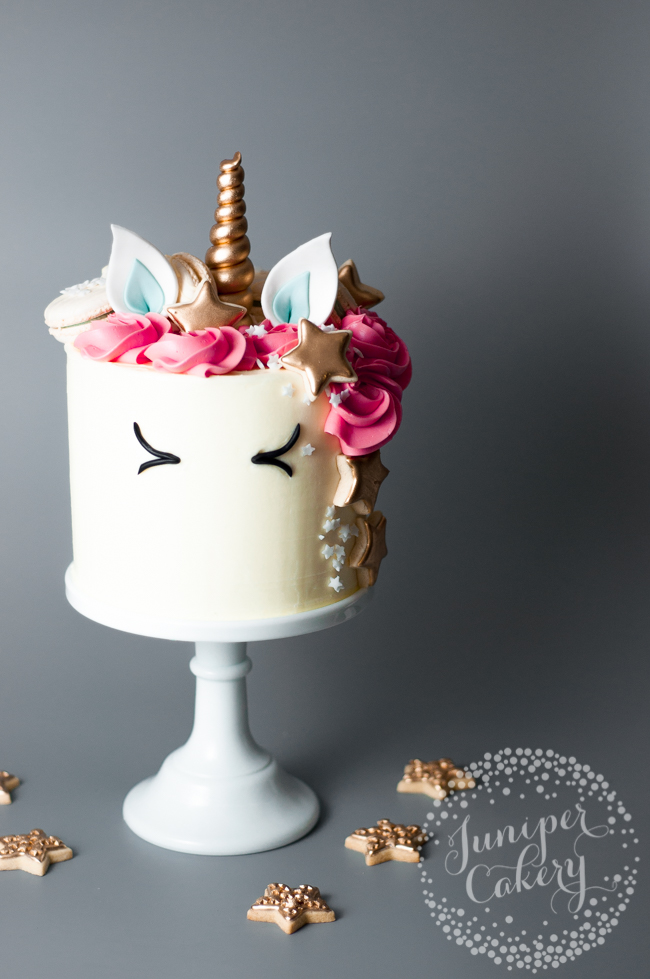
Learn to Make a Trendy Unicorn Cake!
Follow our easy step-by-step tutorial to make your own unicorn cake at home.
Share tips, start a discussion or ask one of our experts or other students a question.
No Responses to “How Cute Is This Bunny Cake?! (It's Simple to Make, Too)”