
Editing your photos can open up a whole new array of possibilities for the photographer. From blending and layering your photos to more advanced, innovative photo editing techniques, a few essential editing skills and tips for Photoshop can help take your photography to the next level.
In part two, we’re going to continue to focus on Photoshop.
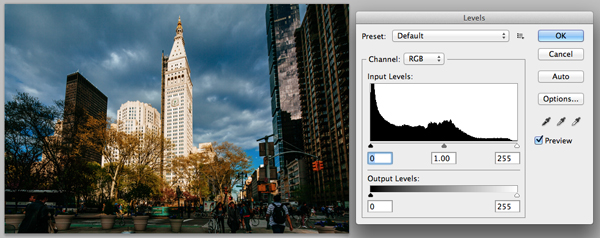
Original image
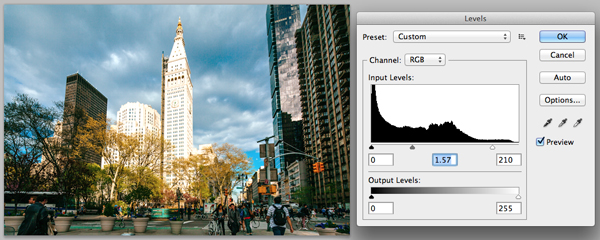
After adjusting levels
Levels & curves
Levels are a histogram of the image and show you the value of all the pixels you have in your image on a convenient graph, in 256 steps. The number of dark pixels is on the left and the number of light pixels is on the right, with 50% gray right in the middle. You can also adjust each channel — red, green and blue — separately within the “Levels” dialogue box.
Slide the black arrow to the right, and you’ll see the dark pixels get darker. Slide the white arrow to the left, and you’ll see the light pixels get lighter. Slide the gray arrow in either direction and notice your midtones either get lighter or darker. Levels are a quick way to increase contrast in your whites and blacks or to bring some more detail into midtones that are too dark or light.
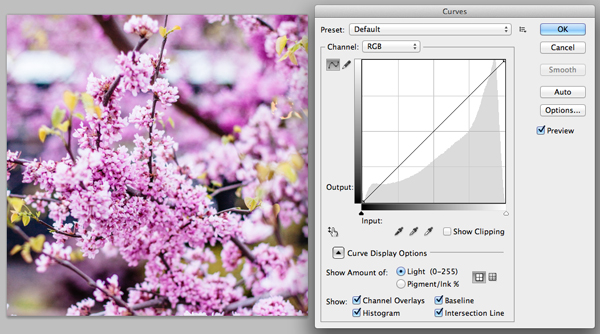
Original image
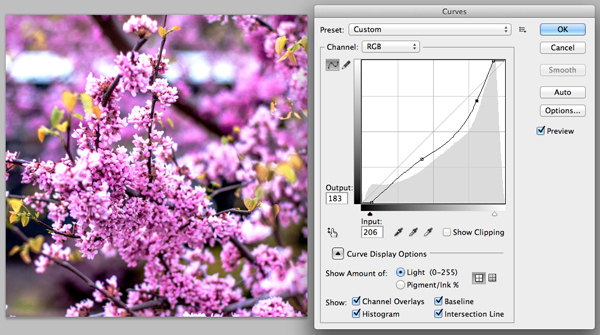
After adjusting curves
Curves are a more advanced version of levels and give you more options in your adjustments. When you open the “Curves” dialogue box, you see a grid with a diagonal line running across it. Clicking on either end of the line and dragging it produces a similar effect as the arrows did on the Levels dialogue. You are changing the point at which dark pixels become black and light pixels become white.
You can also change the midtones like we did with levels. For this, you click toward the middle of the line and drag it up or down, to create a curve in your graph. The advantage of using a curve instead of a level is that you can manipulate the curve in many different ways by adding more control points. You can create a “S” curve or choose to only manipulate part of the tonal range.
Cloning
Stamp cloning is a quick way to make improvements to your photograph. Other similar powerful tools include the healing rush, spot healing brush, and pattern Stamp. But, we will focus on stamp cloning.
This tool allows you to take an area of your image and clone it to another area. This particular tool is very helpful in retouching skin because you can take a part of skin that is clear and clone it over a part that has a blemish. However, there are many other applications. Anytime you want to remove something from your photo or repeat an element, the stamp clone tool can help. Simply select the area you want to clone by option clicking, let go of the option key and click where you want to clone over.

Unsharpened image

Sharpened image
Sharpening
Depending on the final use of your image, sharpening can make a big difference in the appearance. On the web, a sharpened image can really pop, and in print it can do the same with relatively less sharpening. The easiest tool to use is the “Smart Sharpen” command. You will have to play with the sharpness and percentage controls to see what looks best for your image at different resolution. For photographs, you can have it set to “Remove Lens Blur.” This will give you a quick and easy sharpness to your photographs.
If you missed the first installment of our editing series, you can check out “Essential Editing I: The Basics of Using Photoshop” here.
Looking for something a little more advanced? Join the Craftsy photography class 25 Innovative Photoshop Techniques for Photo & Video to discover editing skills that will unlock your creativity and transform your photography!
Share tips, start a discussion or ask one of our experts or other students a question.
No Responses to “Essential Editing II: More Must-Know Tips for Photoshop”