
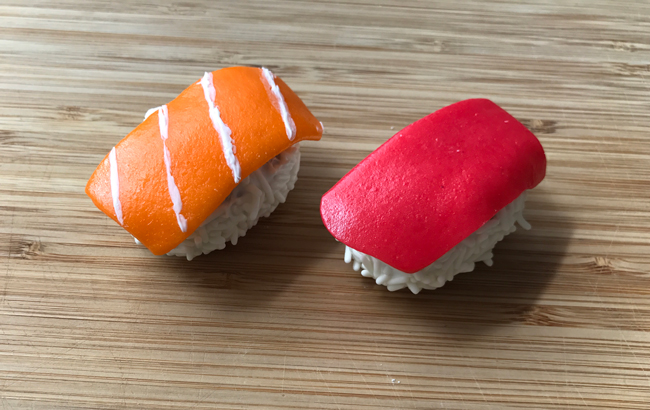
These sushi cake pops will make you do a double-take!
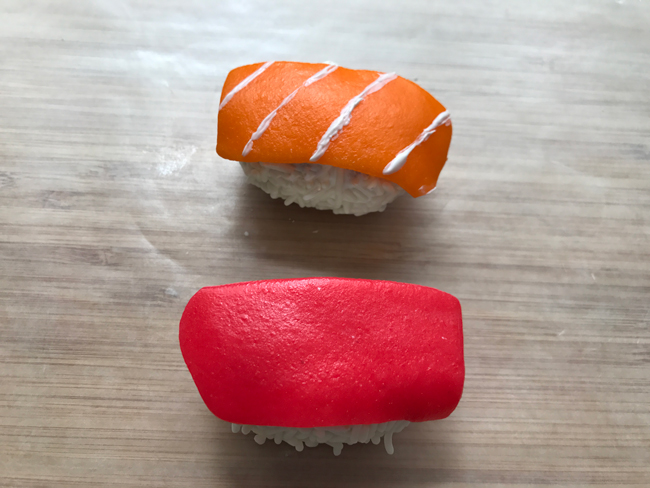
The anatomy of sweet sushi
For the sweet rendition of this meal, a cake pop dough body is coated with white candy coating, then covered in white jimmies, which creates the rice-like appearance. The maguro (tuna) and sake (salmon) on top of the sushi is made of Airheads candy, which is a vibrant, chewy taffy. Another bonus? There’s no need to balance the cake balls on sticks for this project!Sushi cake pops tutorial
You’ll need:
- Cake pop dough ready for shaping
- Cookie scoop
- White candy coating
- White jimmies
- Red and orange Airheads candy
- Paramount crystals, EZ Thin or virgin coconut oil (solid)
- Plastic disposable fork
- Waxed paper
Step 1:
Portion your cake pop dough using a cookie scoop so all pieces are uniform in size.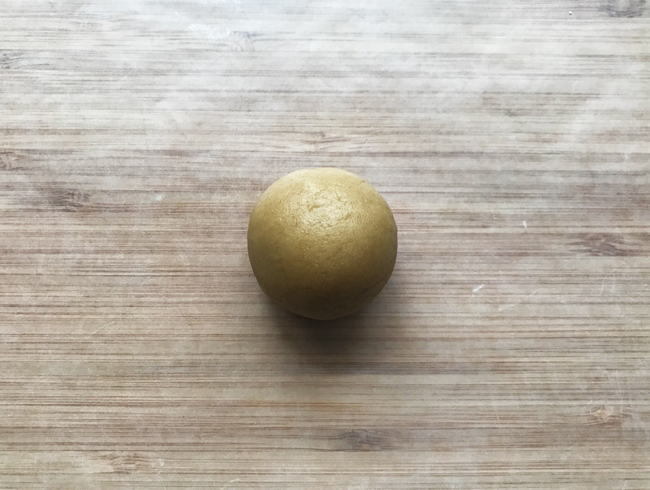 Roll each portion into a ball, then roll into a log. Flatten short ends by tapping the ends onto your work surface.
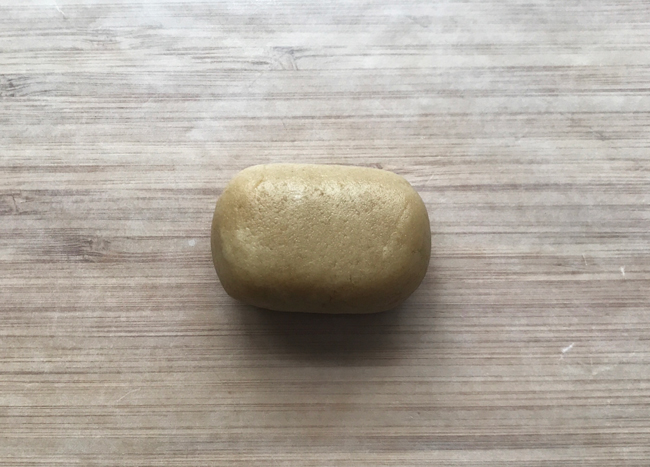 Next, tap the long sides onto the work surface to make the shape more rectangular with curved edges (it should look like a mini burrito). For tips on getting perfect cake pop dough, please refer to this shaping tutorial. Place all pieces on a waxed paper–lined cookie sheet or pan and refrigerate for at least 15 minutes.
Step 2:
Next, we prepare the candy pieces.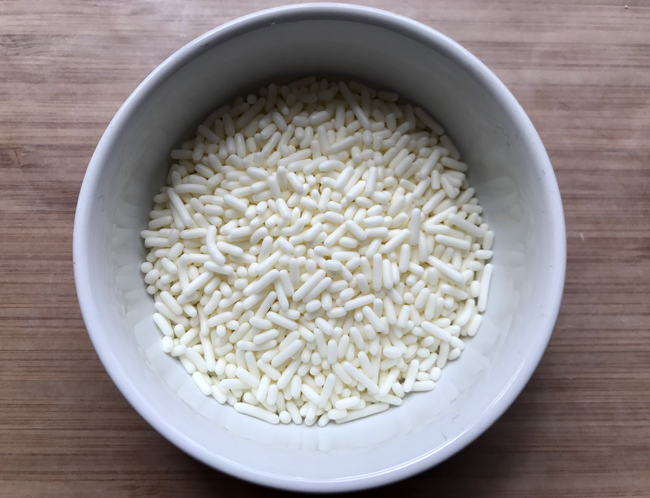 Pour the white jimmies into a bowl and set aside for now.
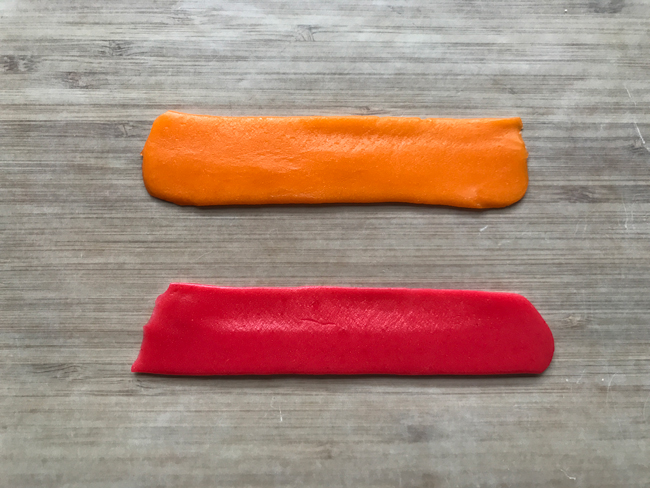 I used Airheads taffy-like candy in red and orange. Alternatively, you can use fondant in place of the candy.
Use a rolling pin to flatten and elongate the candy to about 8″ in length. Cut each piece into thirds and press the corners and sharp edges with your fingers to round it out.
When it’s time to place these onto your cake pop, if you feel that the size is inadequate to cover the top of your cake pop, you can stretch out the already-cut pieces to your liking.
I used Airheads taffy-like candy in red and orange. Alternatively, you can use fondant in place of the candy.
Use a rolling pin to flatten and elongate the candy to about 8″ in length. Cut each piece into thirds and press the corners and sharp edges with your fingers to round it out.
When it’s time to place these onto your cake pop, if you feel that the size is inadequate to cover the top of your cake pop, you can stretch out the already-cut pieces to your liking.
Step 3:
Let’s melt the coating! Place the white candy coating in a microwave-safe plastic bowl or cup. Microwave for 1 minute at 50 percent power. Give it a stir, though it will still be solid. Continue to heat in 30-second bursts at 50 percent power until the coating is melted and smooth. Don’t forget to stir between each interval. Once it’s smooth and melted, add paramount crystals, EZ-Thin or virgin coconut oil (solid) to thin the candy coating to a consistency similar to wet paint. Let sit at room temperature for a few minutes to let the heat dissipate. If the coating starts to harden as you work, you can alway reheated it for 15-20 seconds at 50 percent power. For more tips on melting and dipping, refer to this dipping tutorial.Step 4:
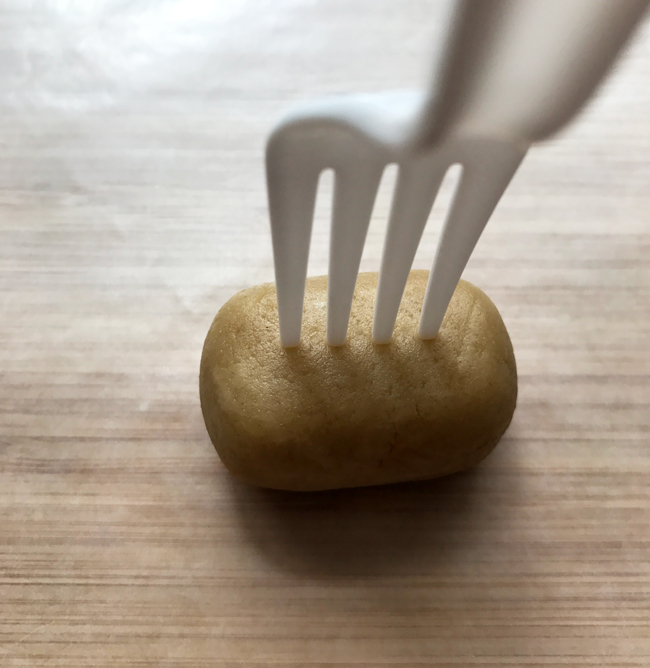 Stick a plastic fork into one side of the cake pop dough. Using a plastic fork is important so it will slide out clean and easily.
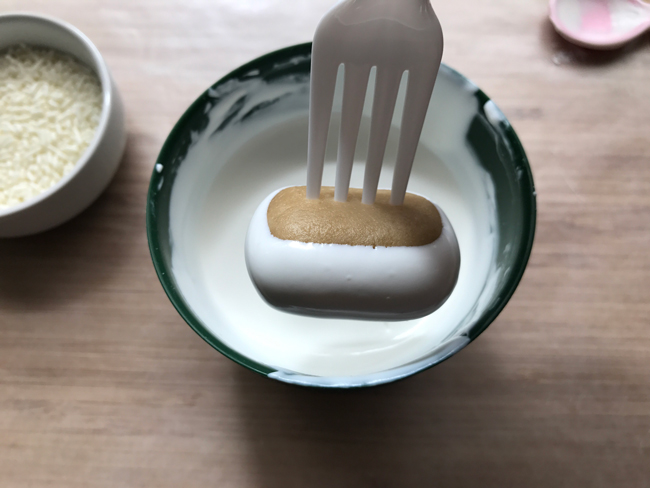 Dunk the cake form only until the sides and bottom are covered; don’t dip the area around the fork. Turn to the side and gently shake the excess off.
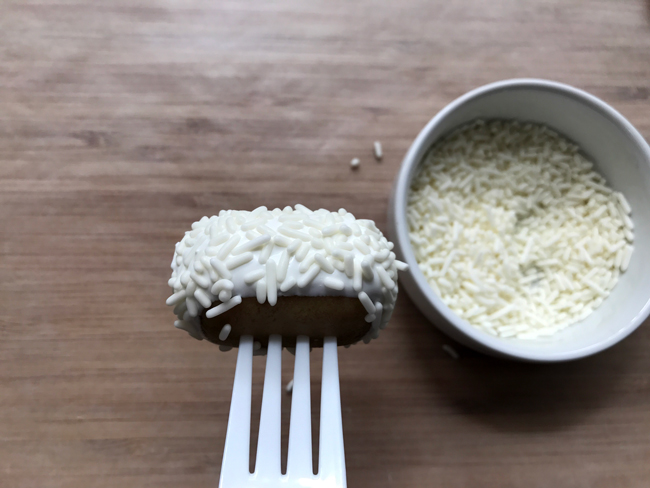 Sprinkle with the white jimmies until the entire dipped area is covered. Using your fingers, lift it up and off the fork and place on waxed paper, sprinkle-side-up, to let dry and set completely.
Step 5:
 Once the candy coating is dry, it’s time to turn them over to place our “sashimi” pieces over the top. Like I mentioned in Step 2, make sure the candy piece sizes are to your liking before adhering them onto the “rice.”
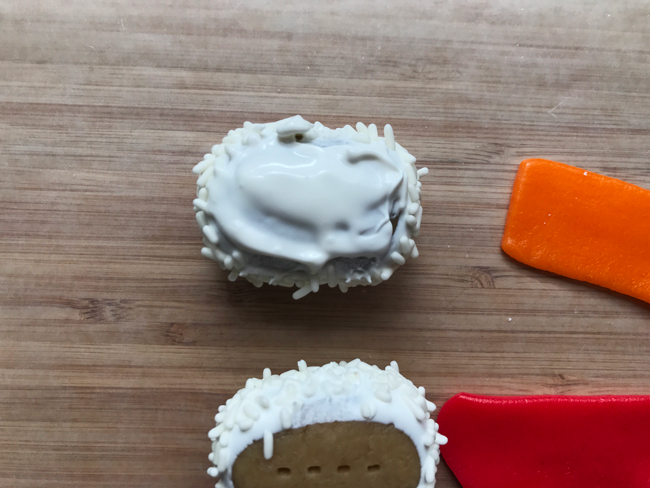 Dunk the uncovered surface into the candy coating, or spoon it and spread it over the top. Place the candy “sashimi” over the top and let dry completely. I love using Airheads because it droops down over the shape so perfectly.
Step 6:
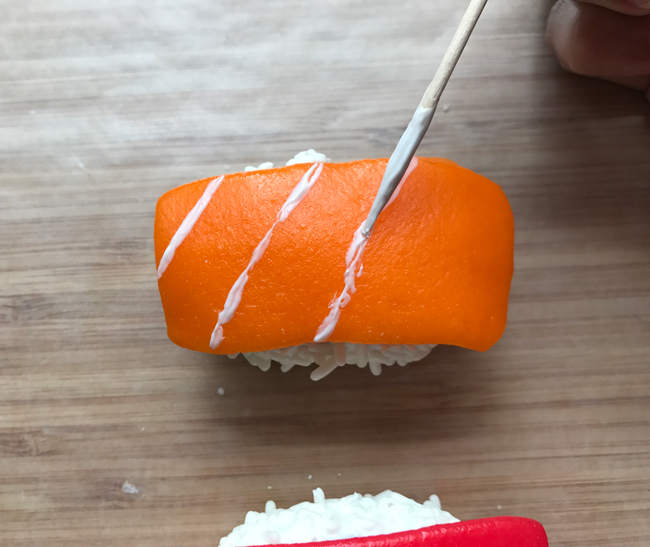 Use a toothpick dunked in coating to create white diagonal lines across the body of the orange “salmon”.
Kanpai! Cheers! Enjoy these sushi cake pops!
Use a toothpick dunked in coating to create white diagonal lines across the body of the orange “salmon”.
Kanpai! Cheers! Enjoy these sushi cake pops!
Share tips, start a discussion or ask one of our experts or other students a question.
No Responses to “These Sushi Cake Pops Made Us Do a Double-Take!”