Stitch and flip quilting is a quick and easy technique for making quilt blocks. You might sometimes hear it called the “flip and sew” method. This technique can create blocks ranging from log cabins to string blocks and even improvisational piecing. In the simplest form, stitch and flip quilt blocks are foundation-pieced blocks, meaning the top fabric is sewn onto a base fabric. The “flip” comes in when you peel the top fabric back and press the seam.
You can make plenty of quilt blocks using the stitch and flip method. Here are some helpful links that will help you perfect your stitch and flip quilting.
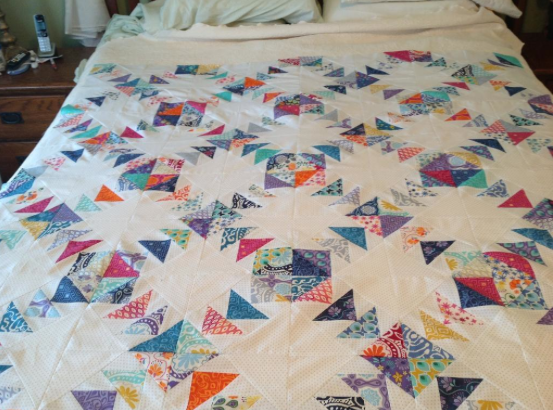
Flying geese blocks, like this quilt from Craftsy member Purplequilt, are one common example of stitch and flip quilting. A square is sewn diagonally to the corner of a rectangle, and that corner is trimmed to 1/4” and flipped back. Quiltmaker gives an explanation of how to stitch and flip flying geese. Snowball blocks and square-on-point blocks are two other designs that can be made with the stitch and flip method.
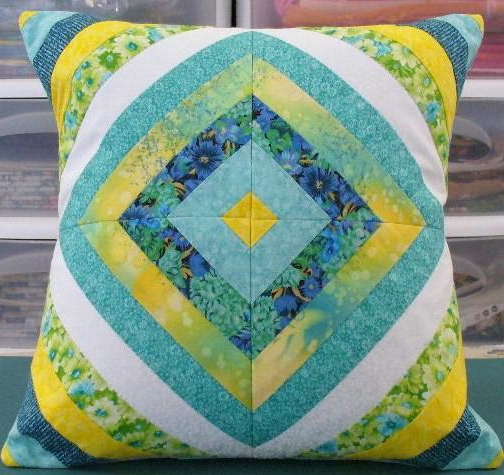
String blocks are popular stitch and flip quilt design, as seen in this pillow from ThursdayJune. Working from foundation fabric or paper, you can sew the right side of a strip onto the right side of the base fabric. The top strip is flipped back and pressed the opposite way, and this method repeats until the base fabric is covered in stitch-and-flip strips. Improv-pieced stitch and flip designs can also create some fun patterns, like a free-pieced chevron block from Jacquie Gering and this Crazy Quilt from Craftsy member jmn111.
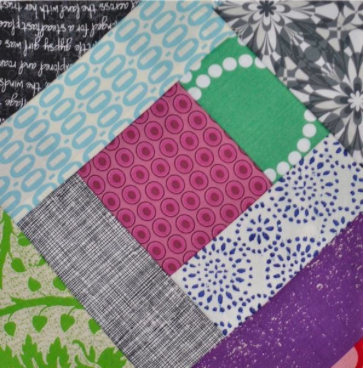
When you stitch and flip with batting underneath, it’s called “quilt as you go.” I’ve put together a simple stitch and flip quilt block tutorial using batting, which could be a great way to make a hot pad or mug rug. You can use this same method on a larger scale to piece and quilt an entire baby quilt in one step!
Quilt As You Go: Stitch and Flip Tutorial
Fabric Requirements:
– 9” square of thermal batting
– 9” square of backing fabric
– (1) 4” square for fabric center
– (4) 2 1/2” x 10” fabric strips
– (4) 5” x 5” fabric square or large scraps for corners
– 1 strip 2 1/2” x WOF for binding
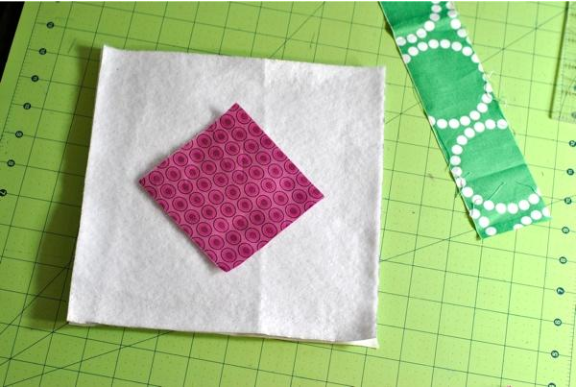
Step 1: Cut a 4” square of fabric for the center and arrange it on point, as pictured.
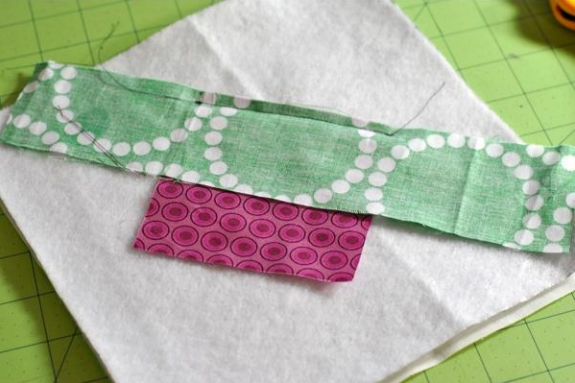
Step 2: Add a 2 1/2” strip of fabric to one edge of the center square, with right sides facing. Pin and stitch 1/4” from the edge of both fabrics.
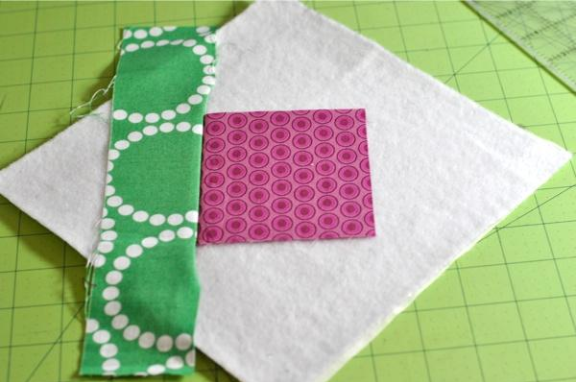
Step 3: Flip the fabric strip back and press.
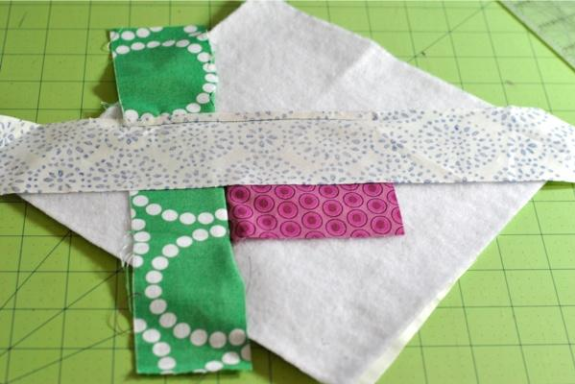
Step 4: Add a new strip to the next side of the center square. With right sides facing, stitch the strip to the other two fabrics. Flip back and press.
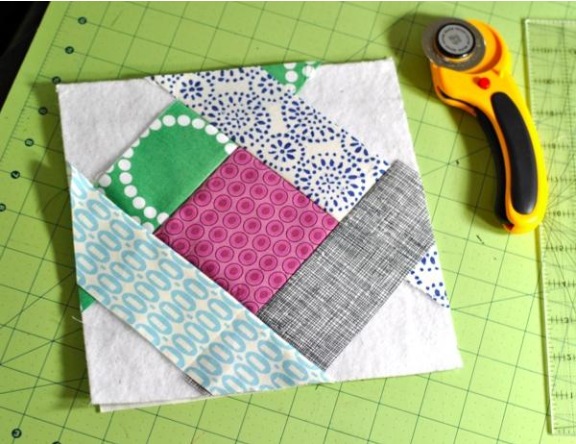
Step 5: Continue to stitch and flip fabrics around the block until the center square is completely framed. Square up the block with your rotary cutter and ruler.
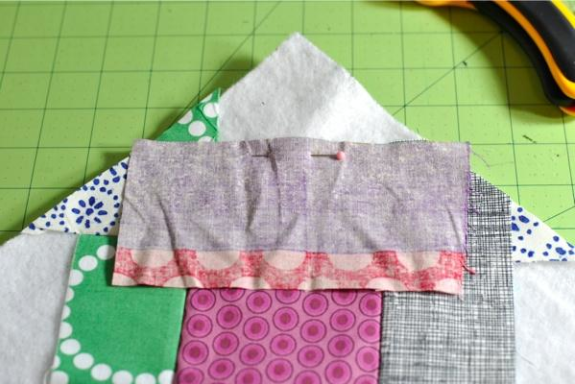
Step 6: Add fabric to each corner using the stitch and flip method. Pin the fabric strip to the block, stitch and flip back. Press the triangles and trim the entire block.
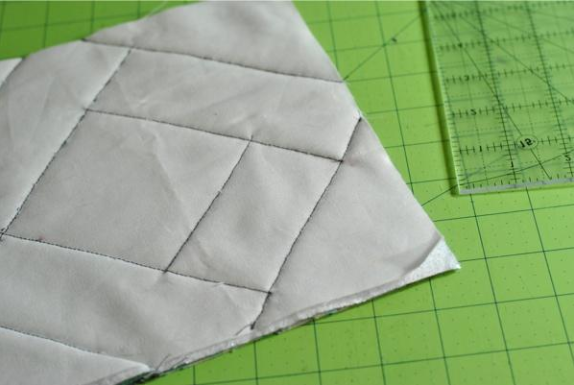
Step 7: The back of your block will show the quilting lines, so make sure to use a matching thread instead of the contrasting thread used here.
Just add binding and your stitch and flip quilt block is ready to be turned into a pot holder, mini quilt or mug rug! No thread will be visible on the front of the block (only the back), but you may add quilting designs if you’d like a more textured look and feel.
Have you used stitch and flip quilting in any of your projects?
In case you missed it explore string quilts. Then come back to the Craftsy blog tomorrow to learn how to handle curved piecing.

Share tips, start a discussion or ask one of our experts or other students a question.
No Responses to “Stitch and Flip Tutorial: Easy Potholder”