
By definition, to stipple is to draw, engrave, or paint in short strokes. When transferred into sewing, stippling is a way of quilting that uses long lines of stitching to create a design on a quilt. This is a free form way of quilting. The stitches are very closely and evenly spaced at approximately ¼” – ½” apart, and the lines do not cross.
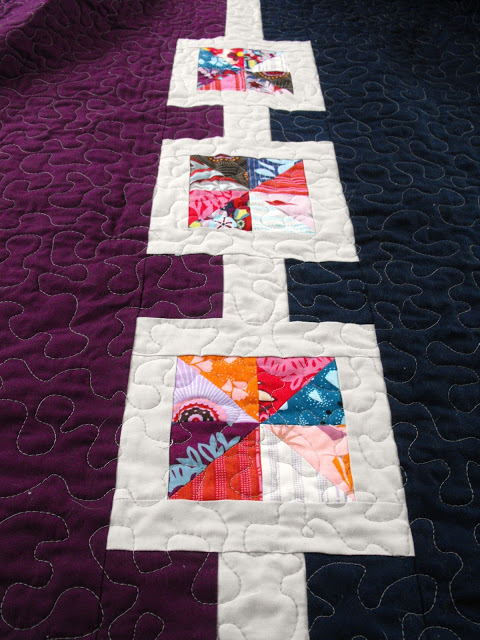
Photo via Fussy Cut
The most common way to use stippling is to highlight certain parts of the quilt. When used in background areas or around designs and motifs, stippling flattens the quilt. This allows the areas that aren’t quilted to pop! This works well in blank squares and borders too.
Today you might also see stippling used in another way, as an allover quilting design. This kind of quilting is called meandering. This is actually a larger version of stippling; the space between the quilted lines is quite a bit bigger. Unlike the flat and dense areas formed by a tighter stipple quilting, meandering’s wider spacing forms a soft texture that many quilters adore.
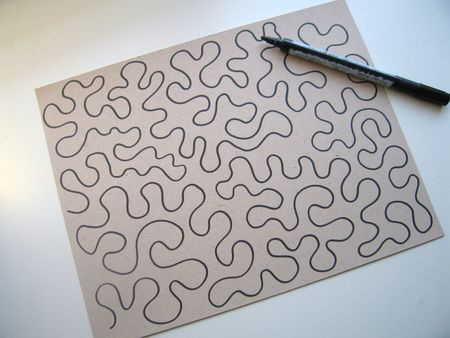
Photo via Oh, Fransson!
The lines in stippling are usually curvy or wavy, very fluid and puzzle like. Many consider other shapes in quilting to be stippling as well, as long as they are formed by a continuous line of freeform stitches. This stitching can come in all sorts of designs and shapes like swirls, loops, zigzags, stars, flowers, and more! Swirls and loops can seem easier because you don’t have to worry about not crossing your quilting lines.
So, how do you stipple quilt? Begin by preparing your machine for quilting.
- The feed dogs on your sewing machine need to be lowered. This is free motion quilting, which means that you are in charge of moving the quilt underneath the needle, not the feed dogs. Once they are dropped, the quilt can be moved easily in all directions under the needle.
- Set the stitch length to 0. Since you are doing the guiding, you will also be determining the stitch length by how quickly you move your quilt. Smooth, equal stitches are the goal.
- Attach a darning foot to your machine.

Photo via Fussy Cut
Once your quilt is basted and your machine has been prepped, it is time to start stipple quilting! There are many different ways to approach this. My preference is a curvy design starting in the bottom right corner of the quilt. Always begin and end your quilting by stitching in place a few times to lock the stitch and prevent unraveling.
Are you interested in learning to stipple, but think it is too hard? Take the time to practice! Make mini
quilt sandwiches out of your scrap fabrics and batting, and get quilting. Yes, you will make mistakes at first, and it may take several tries to get your quilting right. Figuring out the perfect speed for stippling can be tricky, but practice makes perfect.
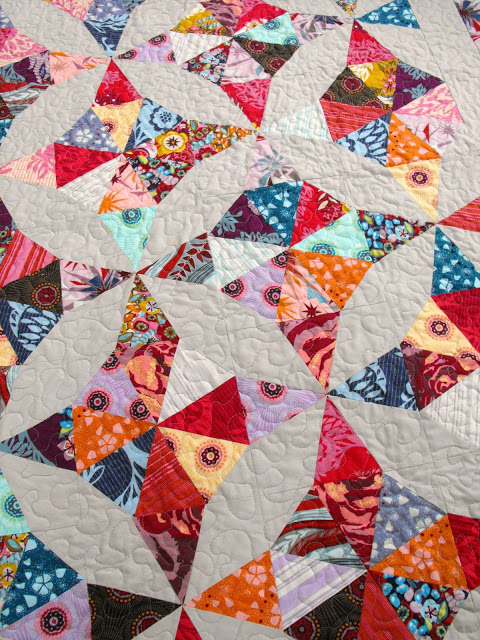
Photo via Fussy Cut
Be sure to check out Craftsy instructor Elizabeth Hartman’s tutorial on free motion quilting. She has plenty of tips and pointers to help you master this skill. Then check out her Craftsy class Creative Quilt Backs to make your quilt backs as pretty and interesting as the front.
want to learn how to quilt a quilt by stippling or meandering.
I have never made a stipple quilt or meandering. I want to learn this technique.