
The stem stitch is one of my favorite stitches for outlining and lettering in hand embroidery because it works great with curved designs.
About the embroidery stem stitch
Initially used in crewel embroidery as a surface stitch with wool thread, the stem stitch is considered a form of freestyle embroidery. When used with six-strand embroidery floss, the stem stitch can look like a plait or twisted rope, but when used with thinner ply, can make for a delicate line. It is often used to stitch the stem of plants or flowers, which gave this stitch its name.
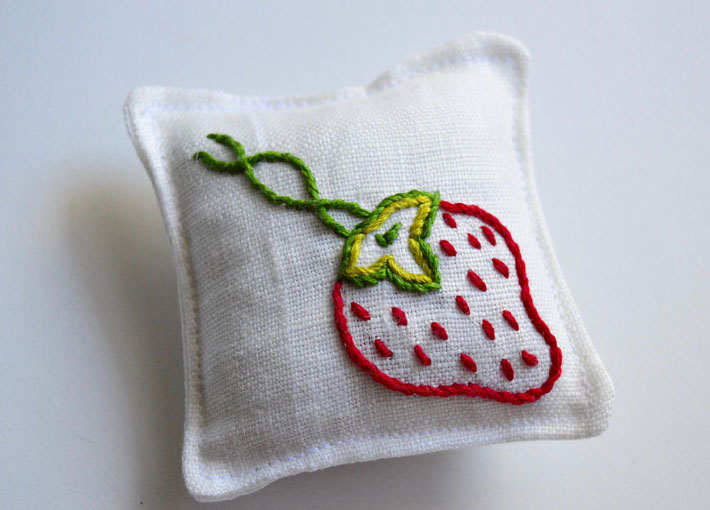
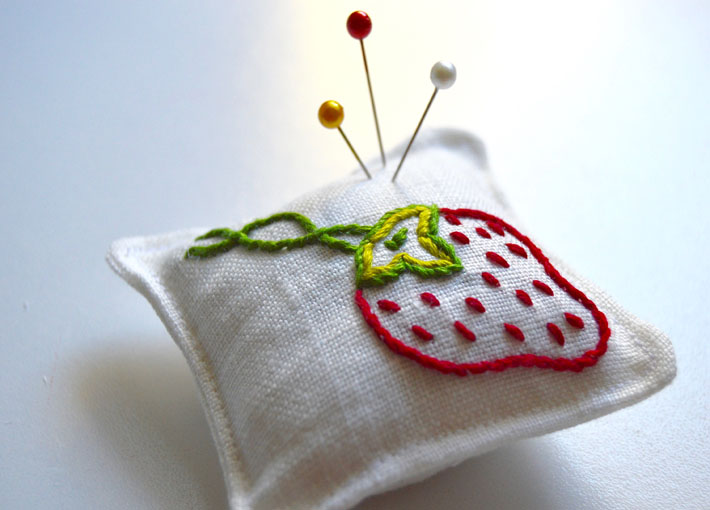
I consider the stem stitch to be one of the essential stitches every embroiderer should know. To practice the stem stitch, I found a great freebie pattern in the Craftsy pattern marketplace. It showcases the stem stitch well while providing a super cute pincushion for embroidery needles and pins.
Practice the stem stitch with this cute, quick embroidery project!
The Strawberry Stitches Pincushion by Craftsy member Samelias Mum is a perfect project that turns a finished embroidery piece into a functional embroidery or sewing accessory. You can download it for free in the Craftsy Pattern Shop here.
The freebie pattern calls for a backstitch, but it is just as easy to swap it out for the stem stitch, which I shared in the following steps and photos.
Let’s get started and work through this project together.
Stem stitch embroidery tutorial
You’ll need:
- Linen
- Embroidery hoop
- Embroidery floss and needles
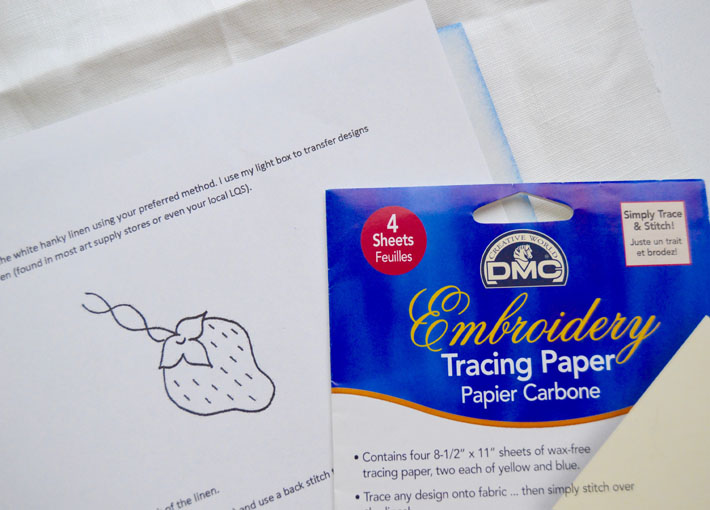
- Embroidery transfer paper (or your transfer method of choice)
- Sewing machine and basic sewing supplies
Step 1:
I decided to use embroidery transfer paper in order to transfer the pattern to the white linen, but you can use any transfer method you prefer.
Place the transfer paper with the color side down on the fabric, and keep the fabric right-side up. Then place the pattern right-side up on top of the transfer paper. Using a ballpoint pen, trace the design onto the fabric. You will be left with a transfer of the design. I have found that as I stitch, the transfer fades away.
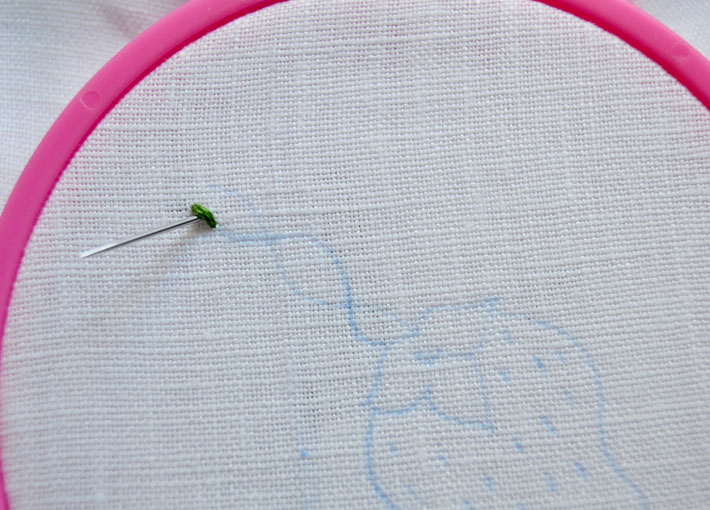
Step 2:
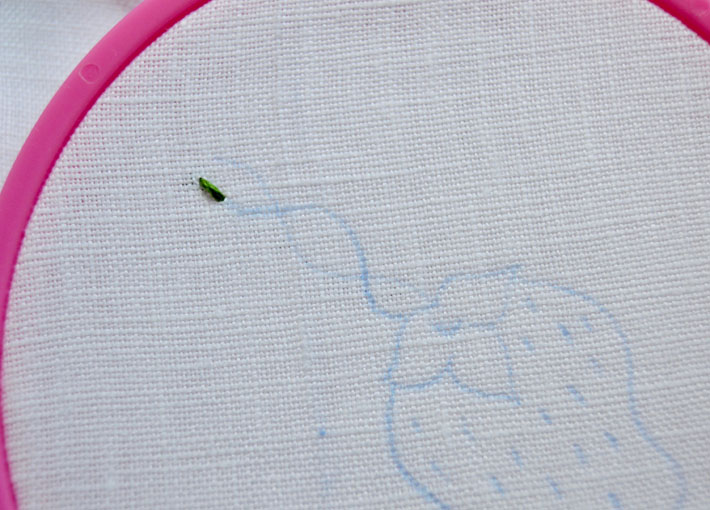
Begin the stem stitch at the end of one of the strawberry’s stems. Make one stitch, usually the length of a grain of rice, then bring the needle up at the center of this stitch, but just off to the side. Bring the floss through the fabric and move forward with the stitch.

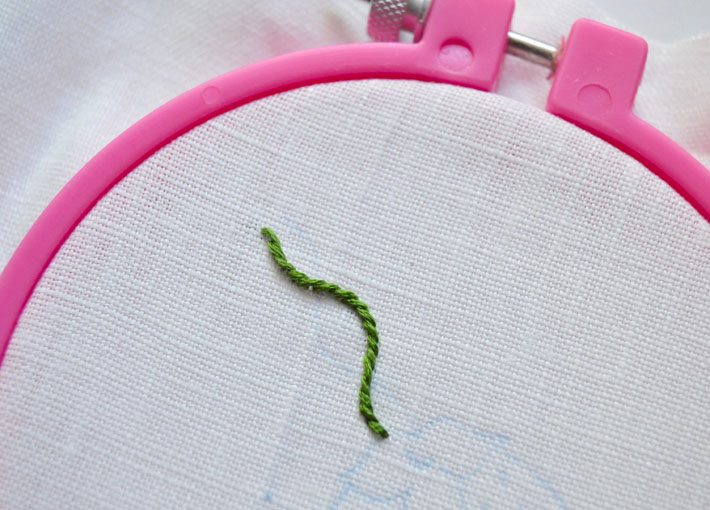
Step 3:
Repeat this process to complete the line, taking one stitch forward and coming up at the center and just off to the side of the previous stitch line. Once you complete this, continue on with the next stem line.
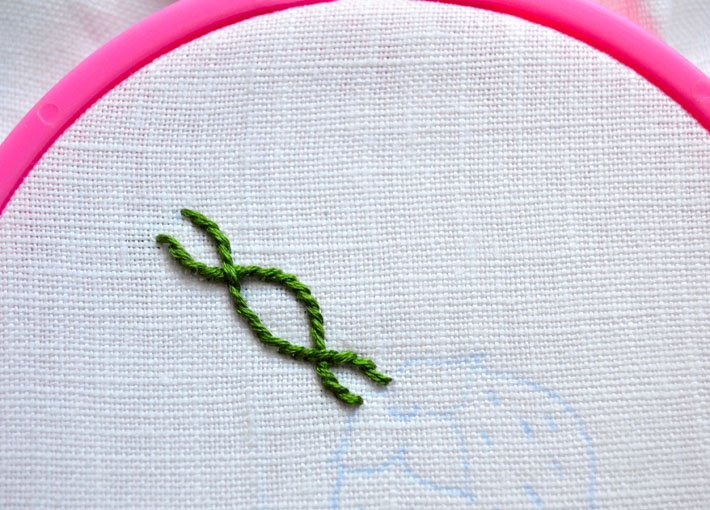
Step 4:
Now it’s time to stem stitch the leaves. Work this stitch the same as the lines and when you get to the end of the point, stitch just off to the side of the exit of the previous stitch. I decided to add an accent stem stitch within the outline stitch in order to create more dimension and texture in the leaves.
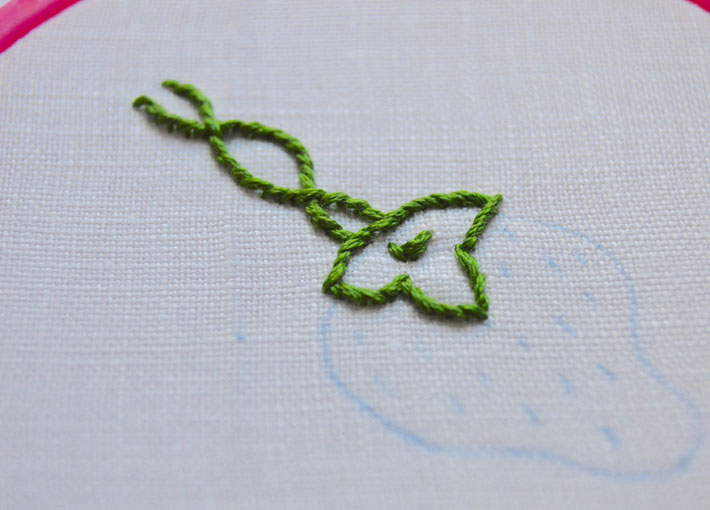
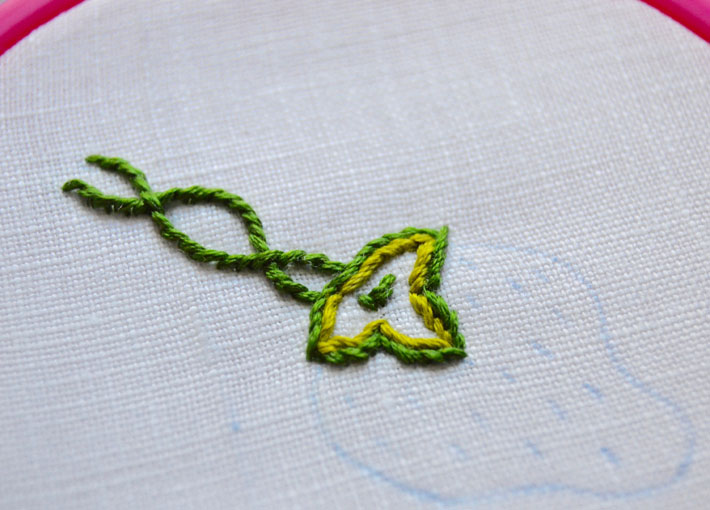
Step 5:
Stem stitch the strawberry in the same way as the stem and leaves. Take one stitch length forward and coming up underneath in the center and just off to the side of the stitch.
Step 6:
For the strawberry seeds, I used a random seed stitch or detached stitch just to fill those lines in.
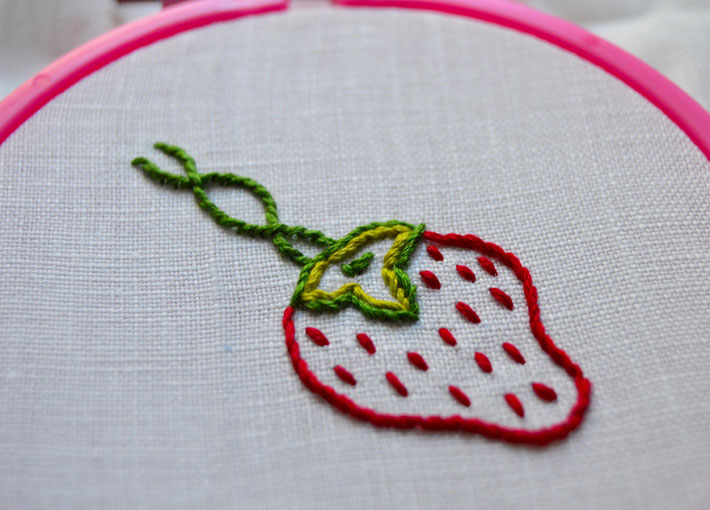
I finished off this project by following the rest of the steps that come with the pattern. I adore projects that are functional while also showcasing embroidery. In this case, the stem stitch as the majority of this project really highlights the plaited look of the stitch.
I am hoping you can see the texture that the stem stitch adds to the embroidery.
Share tips, start a discussion or ask one of our experts or other students a question.
No Responses to “FREE Step-by-Step Stem Stitch Embroidery Tutorial”