
Making small mistakes in paper crafting and stamping isn’t always a problem — in fact, sometimes little snafus can create really inspiring projects! But other times, you can’t afford a mistake. Everything needs to be in the right place.
That’s where stamp positioners come to save the day. Stamp positioners are used to align, center, layer, create patterns and more. Any time you need an element stamped into an exact location, a stamp positioner is the tool to grab.
Stamp positioners are used to perfectly align, center and layer images, create backgrounds and more!
There are several varieties of stamp positioners available, but which one is the best? Which one is right for you? I have three, and there are times when one is better than another. I honestly couldn’t pick a favorite.
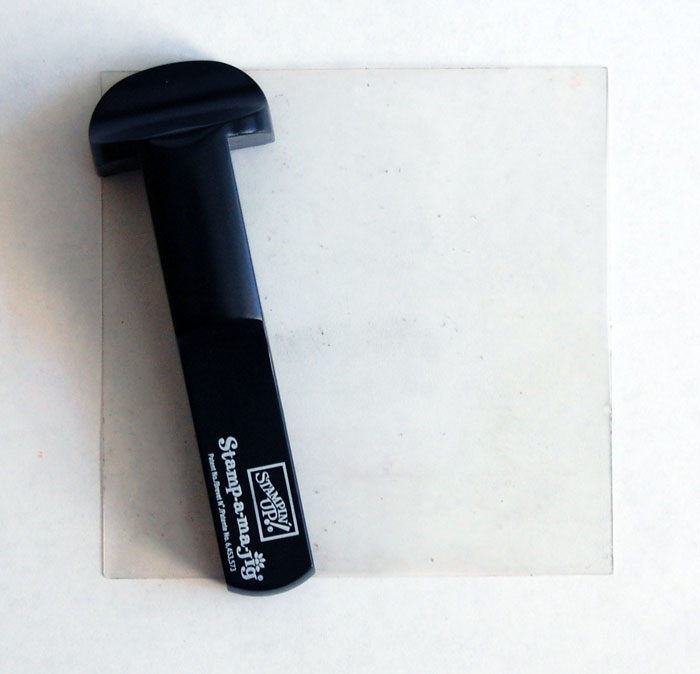
Stamp-a-ma-jig
The stamp-a-ma-jig (SAMJ) is the most basic and least expensive positioning tool. It consists of a handle with a right angle on each side as well as a reusable imaging sheet. I find the SAMJ to be especially helpful when working with rubber stamps, as seeing exactly where an image will stamp can be difficult.
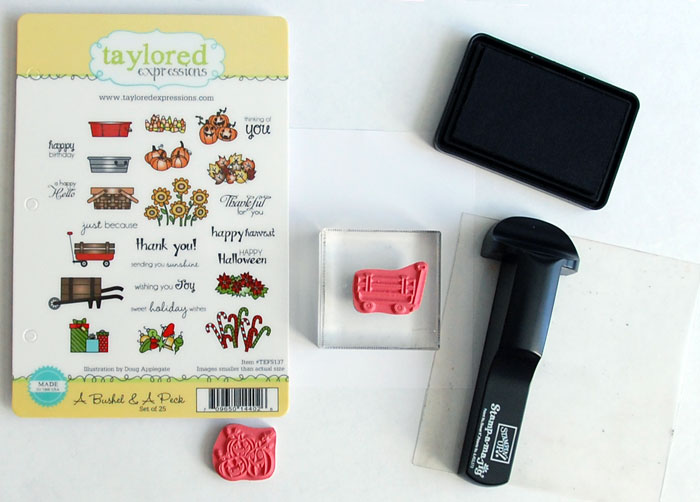
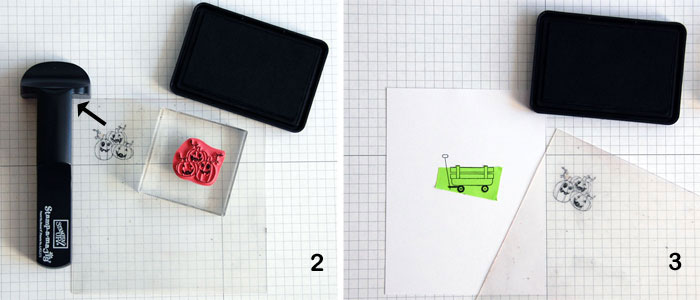
In this example, I’ll show you how to use the SAMJ to position one stamp in relation to another — in this case, I’m putting the pumpkins in the wagon.
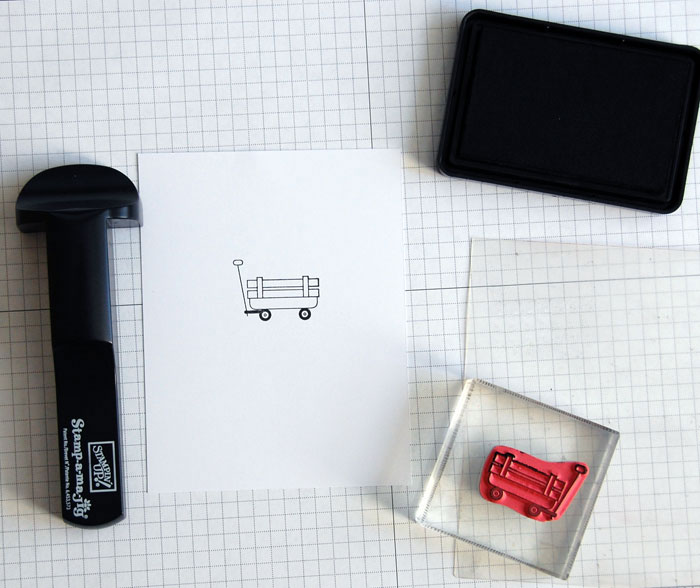
Step 1:
Stamp the wagon onto card stock where you want it.
Step 2:
Place the imaging sheet snug against the inner corner of the SAMJ handle. Ink the pumpkin stamp, then place the top corner of the acrylic block into the corner of the SAMJ handle. Stamp onto imaging sheet.
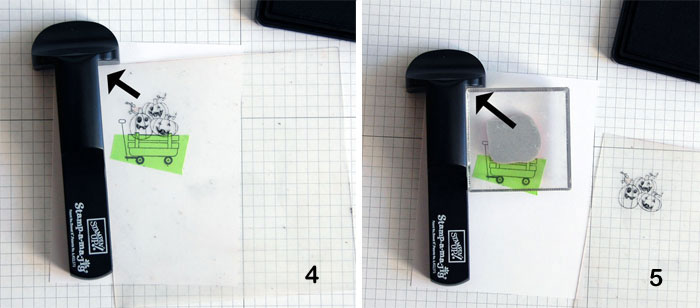
Step 3:
Create a small mask for the wagon by stamping the image onto removable tape, then cut around the top portion of the wagon. Adhere mask over stamped image.
Step 4:
Position the pumpkin stamp over wagon where you want it. Holding the imaging sheet in place, position the SAMJ handle with the corner of imaging sheet snug against the handle.
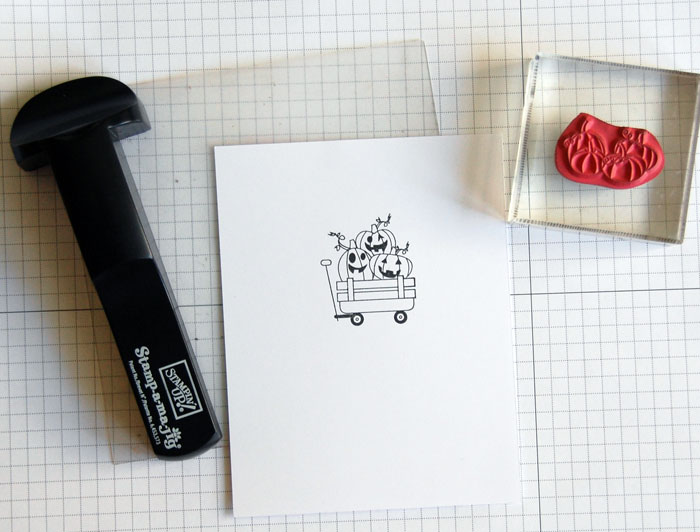
Step 5:
Now, holding the handle in place, remove the imaging sheet. Ink the pumpkin stamp, place the upper corner of the acrylic block into the corner of handle and stamp onto card stock.
The pumpkins now appear to be sitting in the wagon with perfect placement!
Wipe imaging sheet clean with a damp cloth or baby wipe so you can use it again.
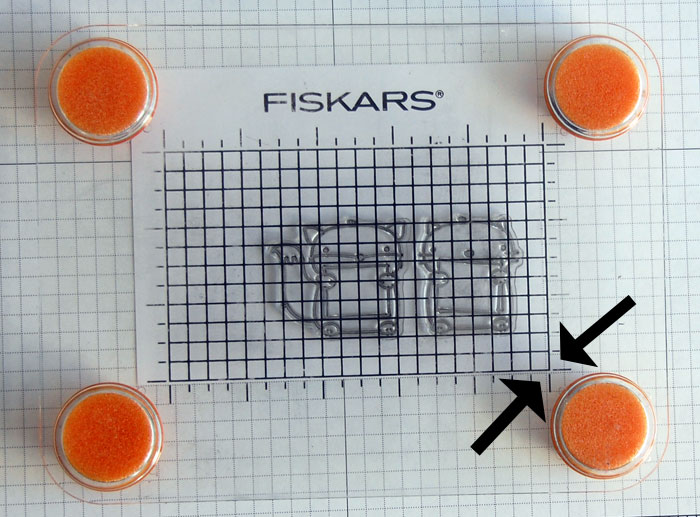
Stamp press
The stamp press is an acrylic grid raised on four sponge “feet,” and it acts almost like a traditional printing press.
The sponge feet hold the stamps above the paper while you’re preparing. Then, when you push down, the feet “give” and bring the stamps to your paper.
Step 1:
There are two approaches for positioning stamps with a stamp press. First, the clear stamps can be placed directly onto the stamp press using the grid for alignment.
Or, you can lay your stamp onto your paper in the desired location. Then, align the right and bottom edges of the card stock with the right and bottom edges of the stamp press grid. Press down to pick up the stamps. This way, you’ll be sure the images will stamp in this same exact location.
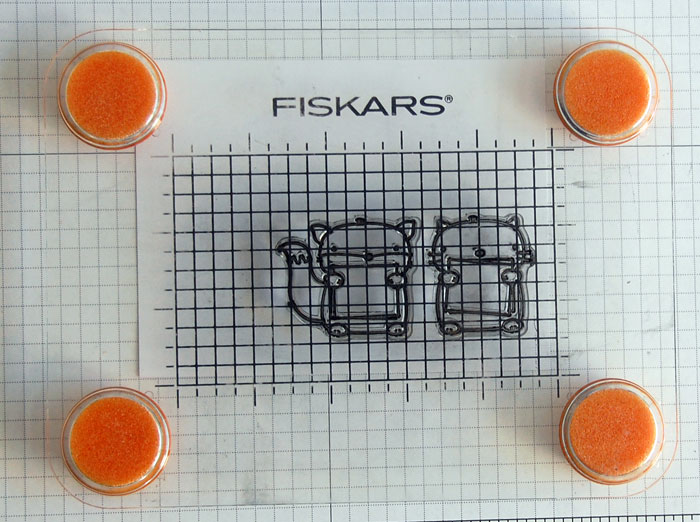
Step 2:
Once the stamps are on the press, ink them. Then, use the grid to realign the stamps over your paper. Press down firmly on stamp press to transfer the image onto card stock.
Step 3:
Stamp the small details like sentiments one at a time. You can easily see through the press, using the flexibility of the sponge feet for perfect alignment of each.
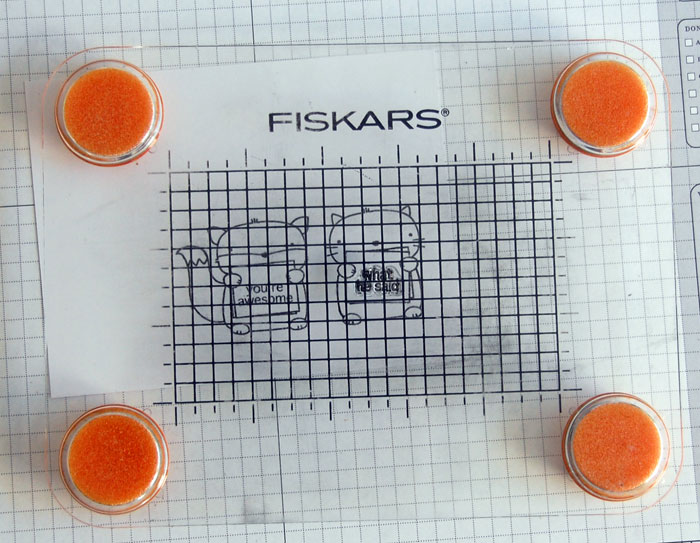
The critters stamped just where I wanted them, and the sentiments are perfectly aligned within each small area.

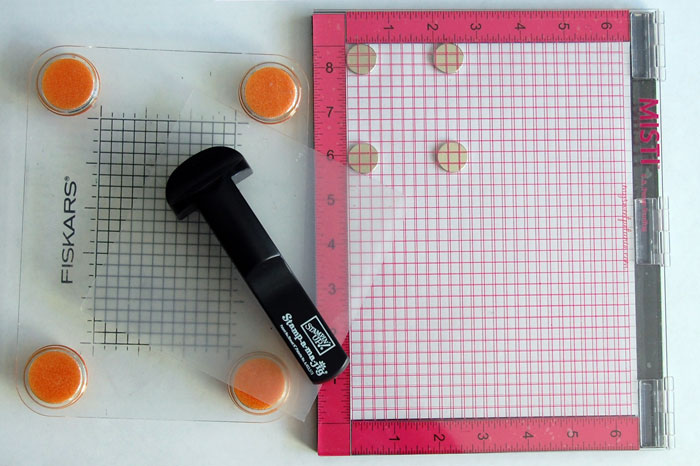
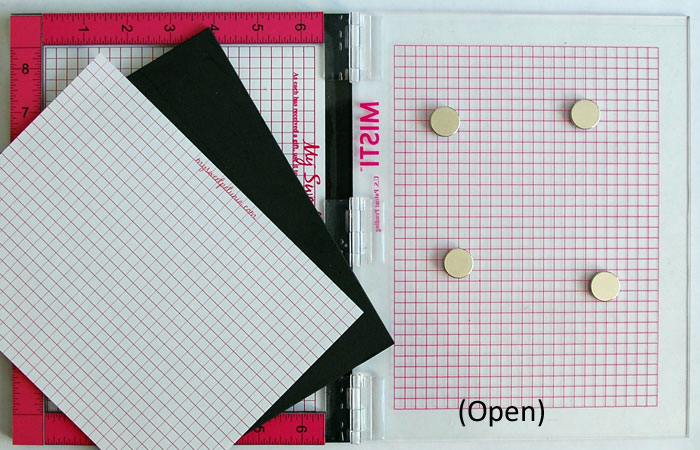
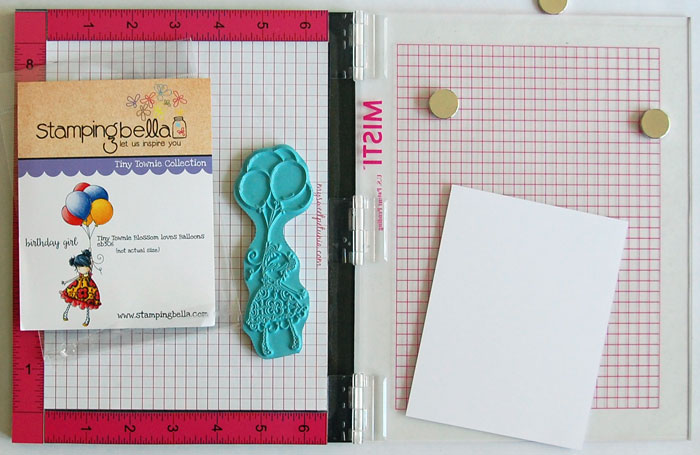
MISTI
The Most Incredible Stamp Tool Invented (or MISTI for short) is a more expensive stamp positioner, but it’s worth the cost. Any stamp can be used multiple times in the exact location over and over again. Whether mass producing a project or perfecting a not-so-solid impression, it is an incredibly handy tool. I most often use it for stamping solid images, larger images and multiple colors within one sentiment stamp.
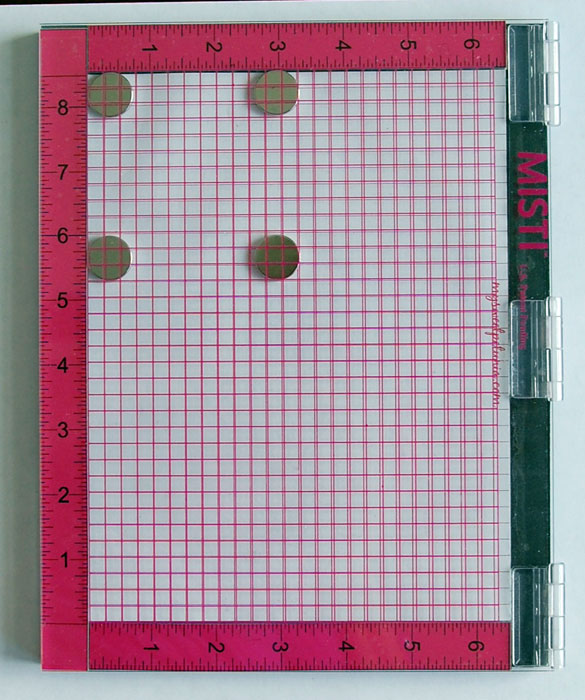
The MISTI is a hinged positioner which can be used for both rubber and clear stamps. The clear front panel has a grid for aligning your stamp. On the inside, you’ll find ruler guides and another grid for aligning, a strong magnetic backing and four strong magnets to hold your paper in place, and a black foam pad to elevate your paper when needed. A pad of grid papers that fit perfectly into the MISTI are available, too. Once placed inside, the paper grid perfectly aligns with the grid on the cover.
How to stamp a solid image with a MISTI
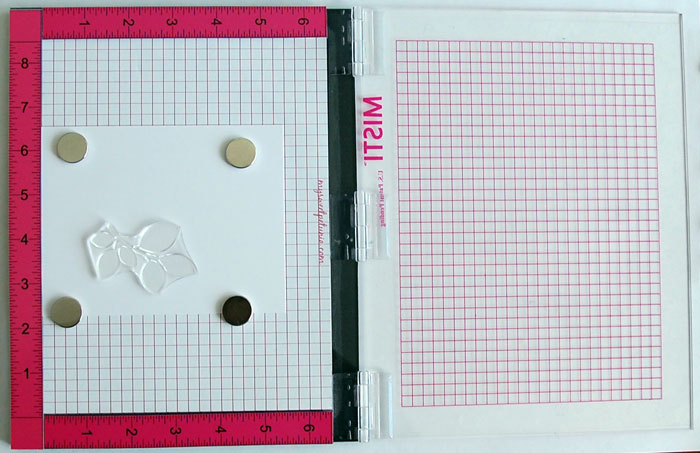
Step 1:
Place your paper and stamp in the desired location on the base of the positioner. Hold the paper in place with magnets, placing each relatively close to the stamp. (Note: The magnets in this photo should actually be closer to the stamp. With the magnets further away, there is a risk that the paper will move as the stamp is pulled away from the paper.)
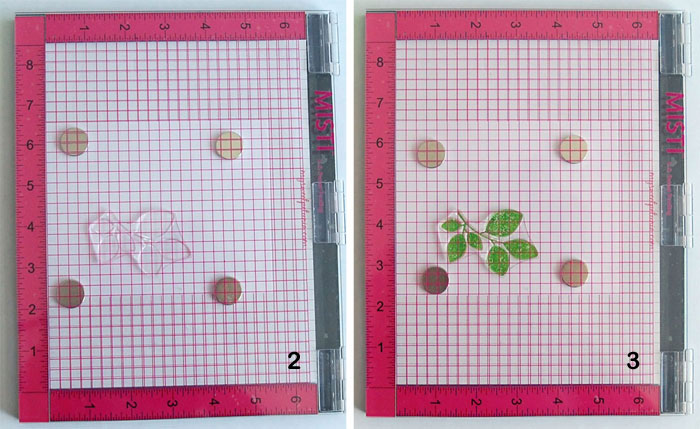
Step 2:
Close the MISTI cover and press lightly on the cover to transfer the stamp to the acrylic cover.
Step 3:
Ink the stamp and close the cover, applying pressure over the stamp to transfer ink to card stock.
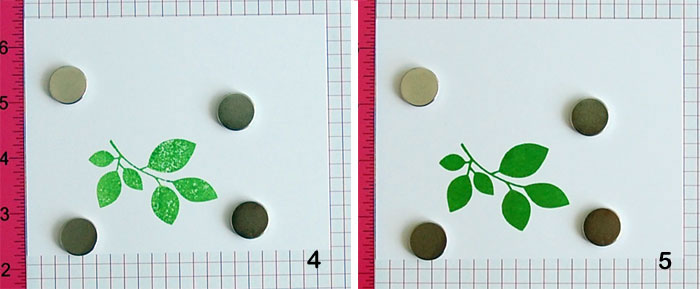
Step 4:
Open the cover to reveal your stamped image. You can see below that the ink did not fully cover the image. The wonderful thing about the MISTI is that you can stamp again and again with perfect alignment.
Step 5:
After stamping a second time, the image is now fully and perfectly inked.
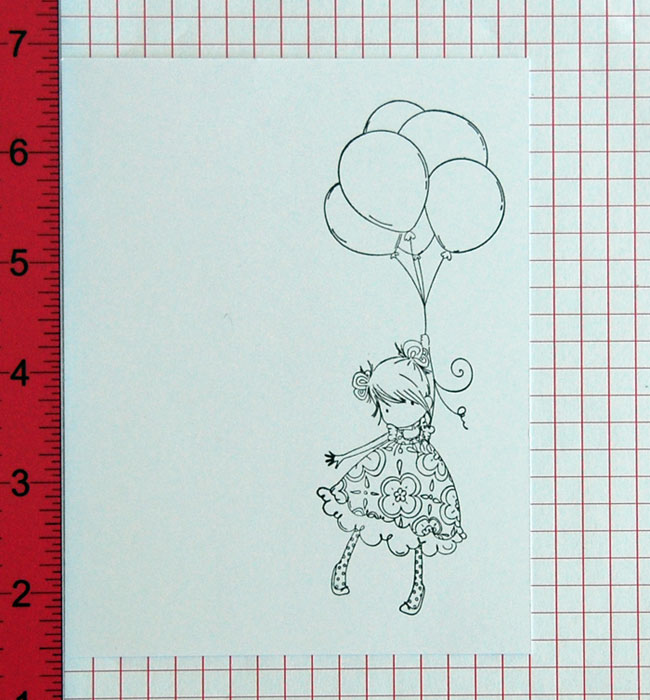
Stamping larger or rubber images
The MISTI works well for stamping larger images — I find it easier than holding a large acrylic block.
To use a rubber stamp, remove the black foam pad so the stamp has enough space to do its thing.
Follow Steps 1 through 3 above: position the paper and stamp, close the lid to transfer the stamp, ink and close the cover. As with solid images, if the entire line art doesn’t fully stamp, simply re-ink stamp and press to paper again.
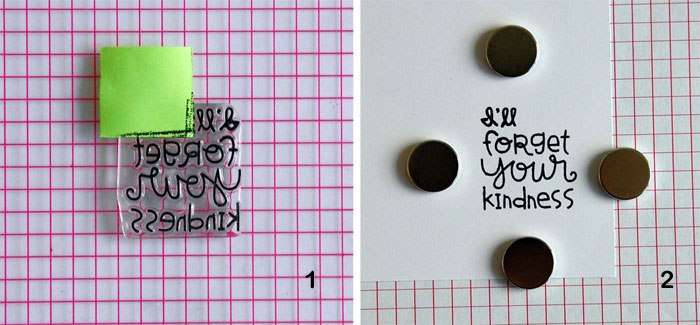
Stamping multi-color sentiments
Step 1:
After positioning your paper and sentiment and transferring the stamp to cover, as above, mask off the part of the stamp you want in a different color and ink the remainder.
Step 2:
Remove the mask, then close the cover. Apply pressure over stamp to transfer ink to card stock. Repeat Steps 1 and 2 if necessary.
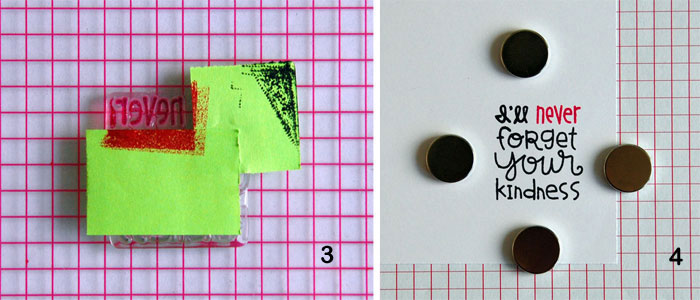
Step 3:
Mask previously inked area and apply ink to the remainder of the sentiment.
Step 4:
Remove the mask, then close the cover. Apply pressure over stamp to transfer ink to card stock. Repeat Steps 3 and 4 if necessary.
Share tips, start a discussion or ask one of our experts or other students a question.
No Responses to “How to Prevent Crooked Stamps With 3 Stamp Positioner Styles”