If you find that some patterns are a tad too snug in the sleeves, don’t blame your arms — they’re just fine! The problem is the pattern. Commercial patterns are designed to fit average proportions. And not everyone is average, or wants to be. Fortunately, reworking the upper arm of a pattern to fit your dimensions is a quick and easy fix.
How to Adjust a Pattern's Upper Arm
Level: Beginner
What You Need
Instructions

1. Measure
If possible, recruit a helper for this. With your arm relaxed at your side, measure around your bicep at its fullest point, usually right at your underarm. Add 1½"–2" for ease of movement if you’re working with a woven fabric; about 1" is fine for a knit. If you’re making a winter coat or jacket, you may want to add a bit more ease so you can wear it over a sweater.
Now take a look at your sleeve-cap pattern. Some patterns have the finished bicep circumference measurement printed on the pattern. If yours doesn’t, no problem. Just measure horizontally from seam allowance to seam allowance at the underarm.
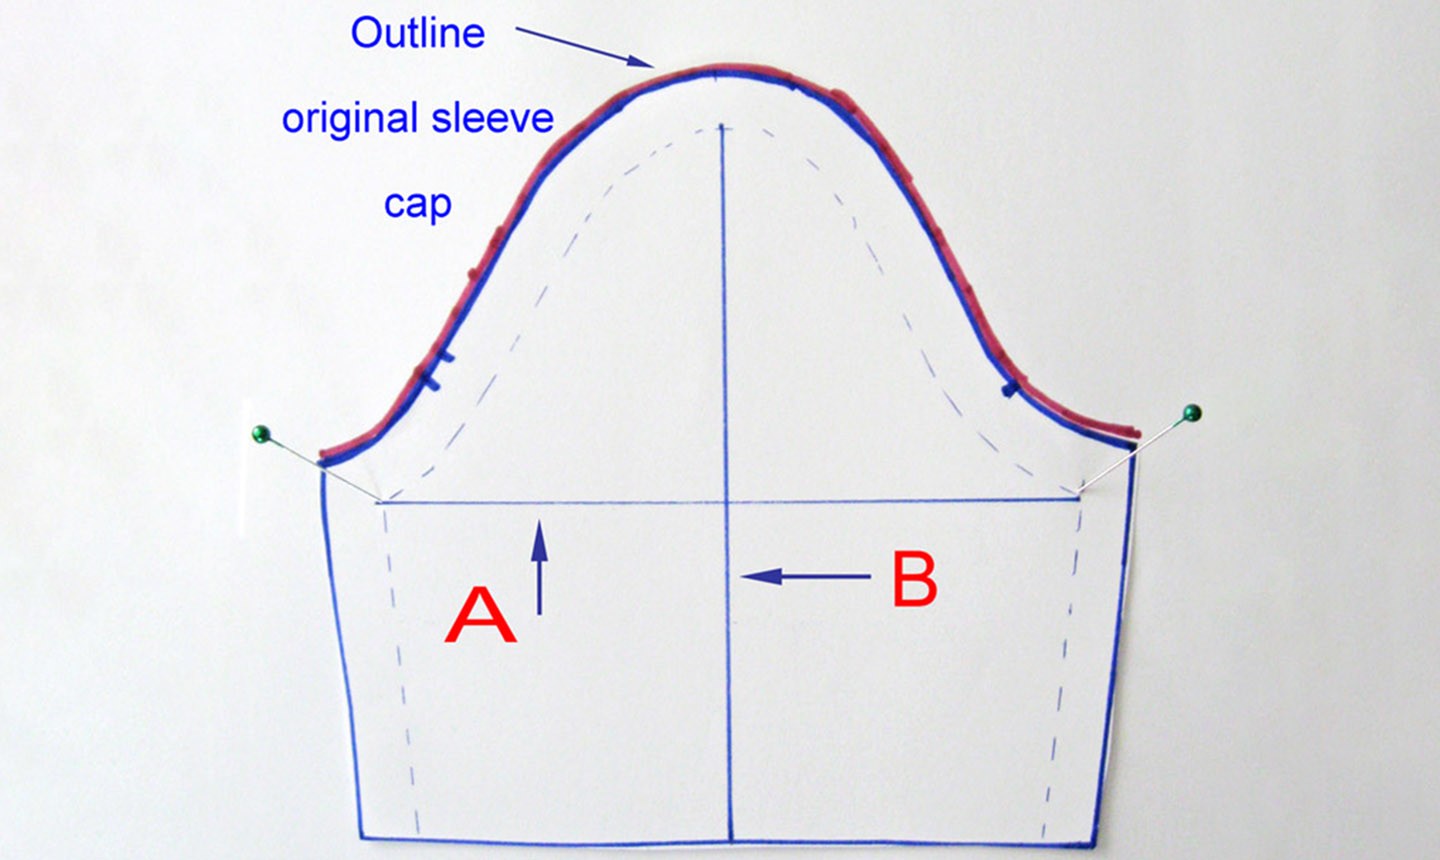
2. Trace the Original Sleeve Cap
To make the sleeve adjustment, you’ll need to alter your pattern piece. If you’d rather not cut the original, trace it and do the adjustments on the copy.
Draw two lines on your pattern piece: one (line A above) going horizontally from seam allowance to seam allowance at the underarm, another (line B above) perpendicular to the first that goes right down the middle of the pattern from the center shoulder to the bottom. Then pin your sleeve to a piece of paper and trace the entire sleeve cap as shown.
3. Spread the Sleeve

To adjust the sleeve width at the bicep, cut through the vertical and horizontal lines you just made up to — but not over! — the seam allowance. Now spread the sleeve pattern apart the amount you want to add (if you need an extra inch around the bicep, for example, you’ll want to expand it a ½" on each side). To make the pattern easier to pivot, you may also want to cut a little snip into the seam allowance on each side — just don’t cut all the way through.
Good to Know: When you spread the pattern apart, the sleeve cap gets pulled down. Don’t worry about this! Since you traced the original sleeve cap in Step 2, that shape remains intact and the sleeve will still match the original armhole on the pattern.
4. Adjust the Bodice Front and Back
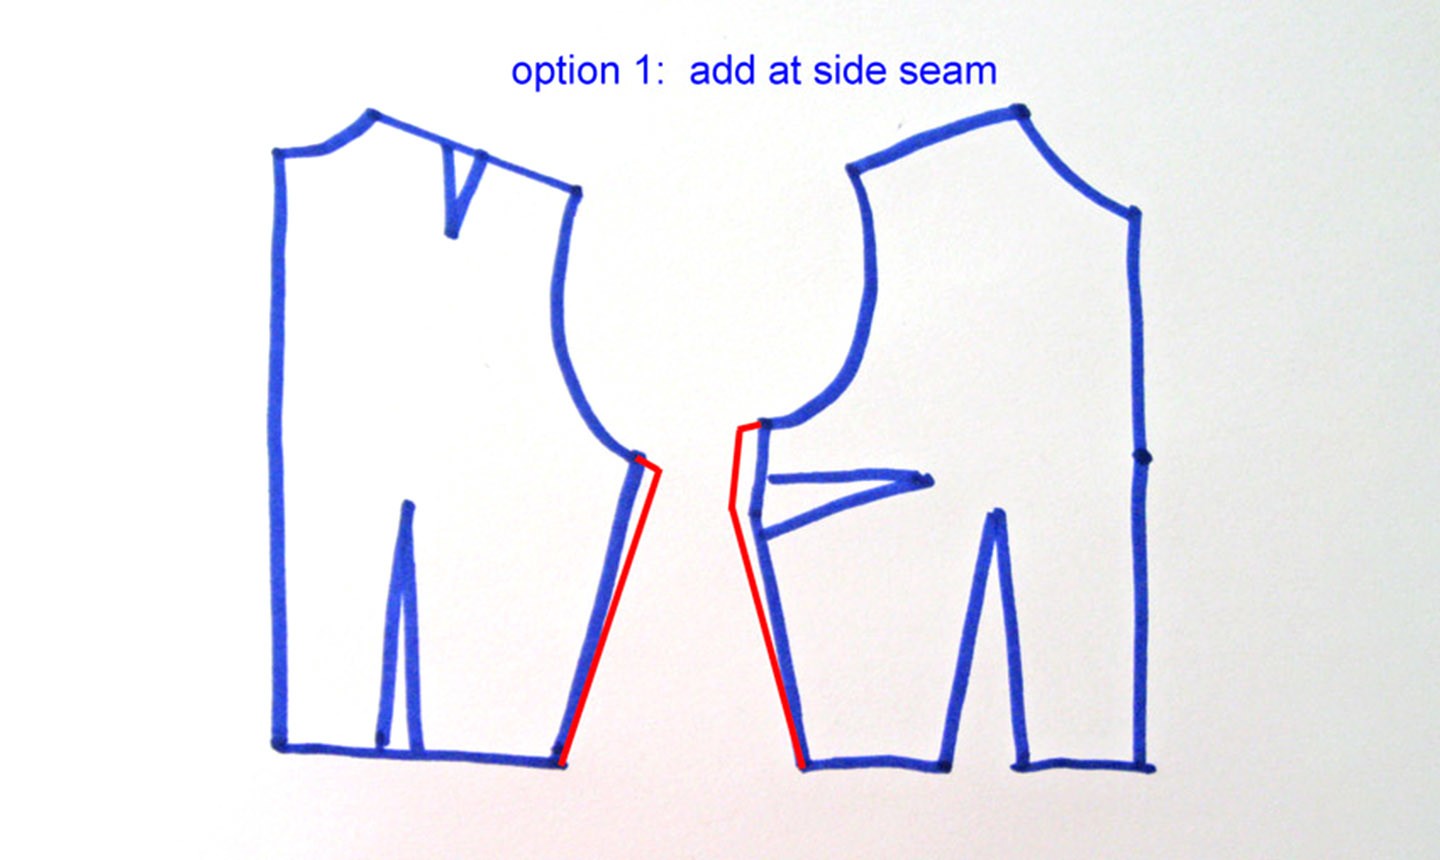
By spreading the sleeve apart to make more room, you also add to the seamline on each side of the sleeve cap. If the increase totals more than 1", you’ll need to add some width to the front and back bodice in order to fit the new sleeve into the armhole.
There are two ways to do this. One is to add at the underarm and gradually taper to nothing at the waist (as above).
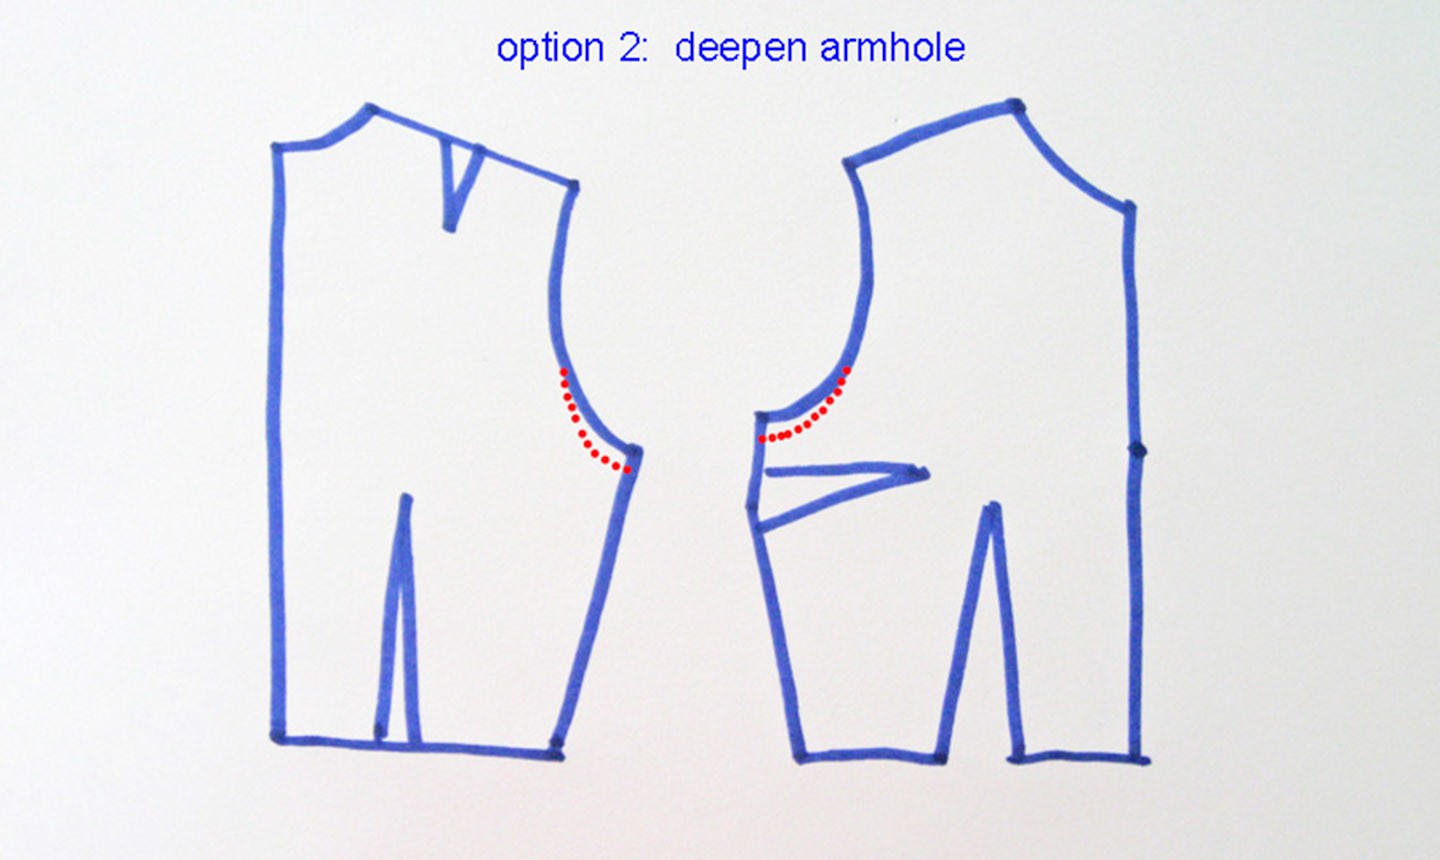
The other option is to deepen your armhole slightly at the underarm (as above); this will make the armhole seam line a bit longer to match the new sleeve-cap seam line.
A final tweak: Since you’ve added some width to the upper portion of your sleeve, you may want to taper the sleeve seam a bit so it blends with the width on the lower part of the arm.
And that’s it! Now sew up your garment and show off those gorgeous arms!

I am altering a jacket from a 2x to a large. How to I alter the 2 piece sleeve to look seamless?
I found a pattern that I really like except that it has raglan sleeves. Having a larger bust and sloping, forward shoulders, raglan sleeves are neither flattering nor comfortable. How would I convert them to set-in sleeves?
how do I alter a sleeve from a smaller size pattern to a larger size?
I'd like to know how to open up the angle of a set in sleeve patterns. With a lot of blouse patterns, the angle is really tight, so that the blouse may look really smooth when you're standing in repose, but as soon as you raise your arms, the seams get pulled really tight (and can rip if you're doing something strenuous!) and the whole blouse raises up, so that if you're wearing a short blouse, all of a sudden your midriff is exposed (if you have a sexy, young midriff, then you probably wouldn't care, but I don't, and so...). So I want to be able to re-draft my sleeve patterns so that the angle is higher, more like on a men's shirt. At the same time, I want to open the arm scye somewhat, on many of these patterns, because I don't like having sweaty pits almost immediately I put my shirt on. thanks!
Sleeve caps always seem to be too big to fit into the armhole, even with basting and easing. I need to know how much I can trim the top of the sleeve to fit more easily into the armhole.
I use a variation on this for adjusting all my sleeves for a larger bicep than the original draft, but only for set-in sleeves. I'm now trying to work out how to make an adjustment on a grown-on sleeve, that has a seam down the shoulder and over the arm. please help!
Can someone p l e a s e explain how to enlarge the cap of the sleeve when you lower the cut of the armhole? I don't like fabric too close to the underarm but after searching dozens of leads online, this is the first one that gives a partial answer, but I'm not sure if I got it right. Thanks so much!
Thank you, I have to adjust for bigger biceps so thank you.
Thank u I was strogeling to try to the sleeve for the dress it help me a lot