As soon as you learn how to paint skies, you will be able to set any mood of your landscape or seascape painting through a clear, sunny sky or a stormy night. The sky can play a supporting role or be the major star of a composition. Changing continuously, it has endless variety in appearances.
Follow along and learn how to paint the sky with clouds.
Tips for painting the sky
- Vary the color of the sky. Use red and yellow along with blue, balancing warm and cool colors.
- When painting the sky with clouds wet-in-wet, remember that colors will lighten up as the paper dries.
- Note that the sky appears warmer and lighter as it approaches the horizon.
- Clouds, like any other 3-D objects, comply with the rules of perspective and have lighter and darker areas, depending on the sunlight.
- Clouds will look more lively and luminous if you balance hard and soft edges.
- I recommend that you hold your paper at about 30-degree angle.
Materials
For this painting, I used a medium-sized round brush and three colors: cobalt blue, Naples yellow and cadmium red.
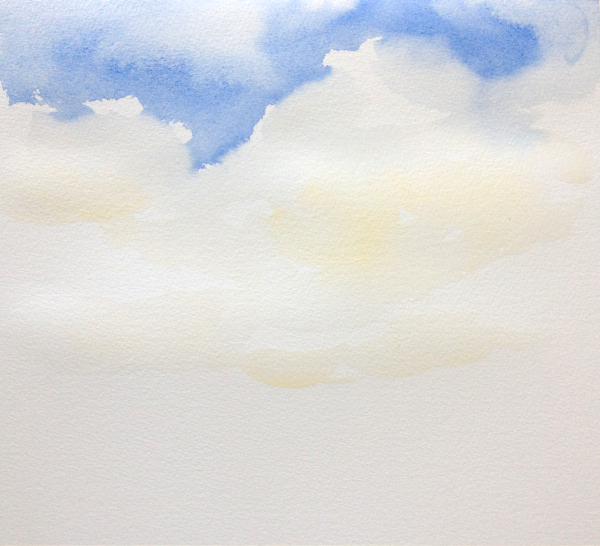
Step 1:

Wet the paper and wait until the water is absorbed a little bit. When the surface is still damp but no longer glossy, you'll have more control over the painting process.
Apply a few big, watery brushstrokes of Naples yellow, defining the position of the clouds. It might be easier to do a preliminary contour drawing, but I felt like improvising. If you want to sketch the clouds first, make sure to keep the lines very light.
Tip: Use a watercolor pencil to make a subtle preliminary sketch of the clouds, so the lines disappear as you paint.
Step 2:
Load the brush with a large amount of liquid cobalt blue and start painting the top edge of the clouds. In order to keep the brushstrokes effortless and spontaneous, use the flat side of the brush rather than the tip.
By this time, my paper was almost dry on top, so the edges came out sharp. I gently softened some of them with a damp brush, leaving some hard edges here and there.
Step 3:
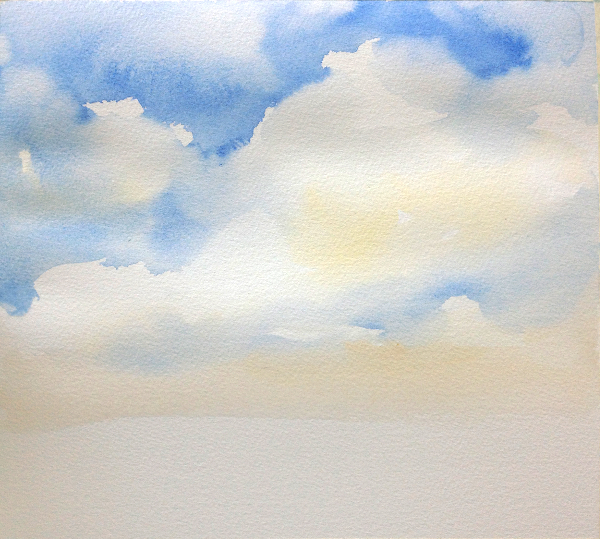
Continue to paint the blue sky, defining the undersides of the clouds, along with some distant clouds and the horizon line.
Step 4:
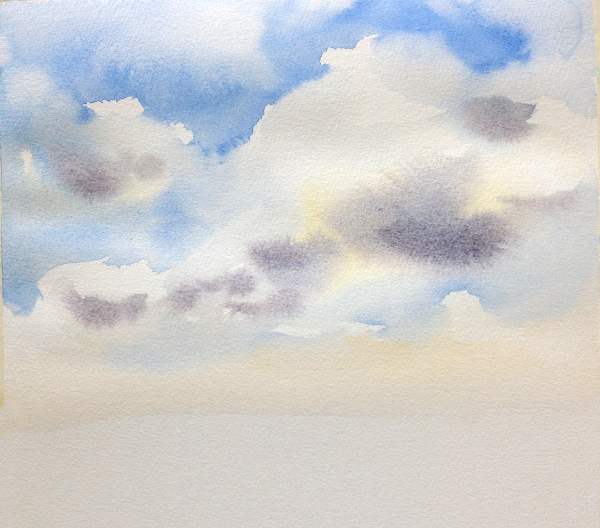
Now that the paper is still wet in the clouds area, it's time to paint some shadows. Add a few light brushstrokes, using a mixture of cobalt blue and cadmium red.
Step 5:
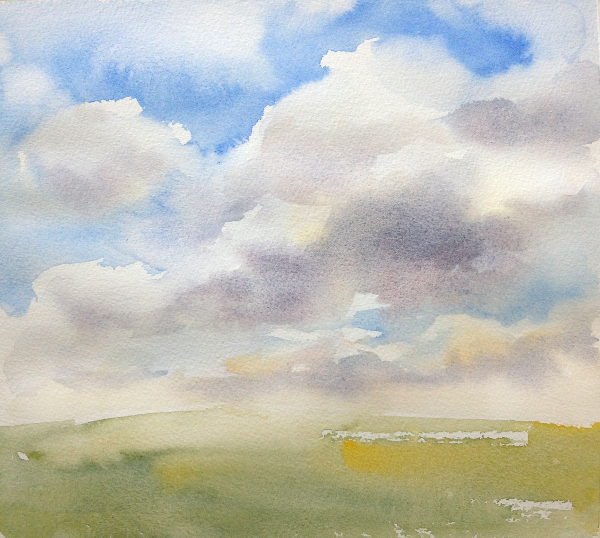
Keep on adding shadows and softening edges with the flat side of your brush. I also painted the ground with quick, large brushstrokes, using the mixture of cobalt blue and Naples yellow.
Step 6:

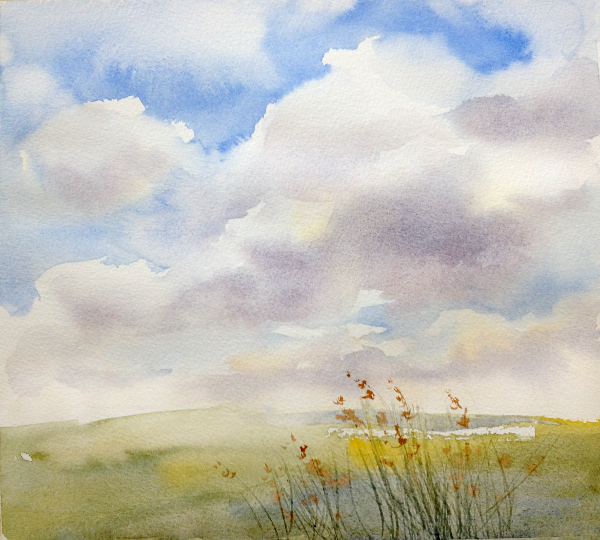
When the sky was done, I added some details on the foreground to give the painting a finished look.
More watercolor sky examples
Here's another example of clouds I painted using the same approach — except this time, I used ultramarine blue, alizarin crimson and Naples yellow for the sky.
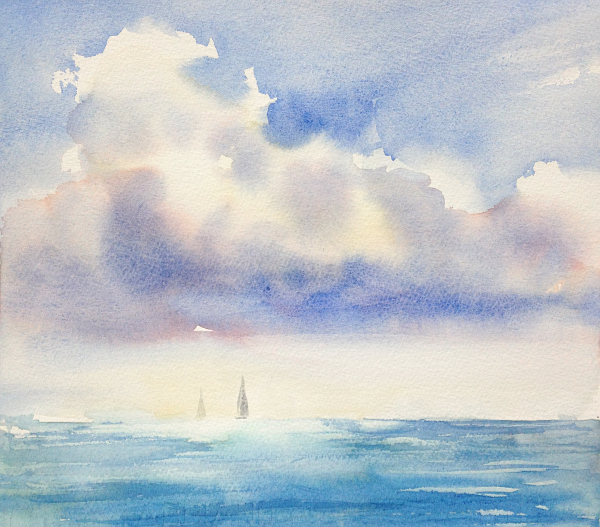
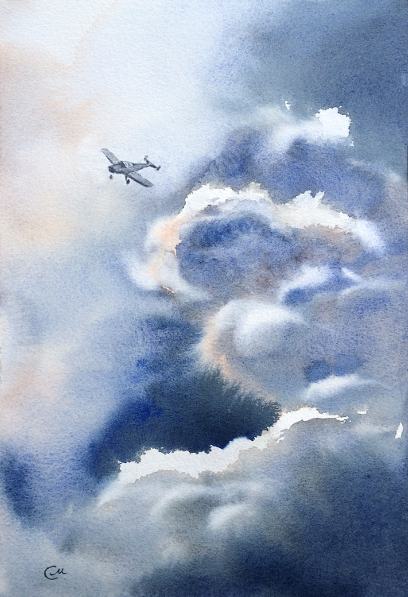
While the above two paintings express calm and peaceful moods, the following illustrates a completely different atmosphere. Turning away from blue skies and puffy clouds, I came up with with an image of turbulent and stormy sky. Combining rich, intense darks with strong value contrasts adds greatly to the drama in this watercolor.

Very nice tutorial !
Dank je wel voor de fantastische uitleg.
This is perfect for what I want to start achieving. Skies are a favorite subject of mine. Thanks.
Like your step by step painting. Will try myself.
What size paper and brush(es)? Lovely technique.
I have your beautiful painting, "Madchen mit Lutscher" in Sydney, please advise email, I will send photo
thank you on your explaining it's makeme with insparation to try this now