When you're beginning to learn to draw, picking up a pencil is generally the first thing you do. But, that's where many of us stop; we learn how to doodle, but don't go beyond the basics. If you're unfamiliar with drawing with a pencil—beyond stick figures or scribbles—there are sketch techniques that you need to know. I'll go over nine of them that'll get you well on your way to more advanced drawing.
Choosing the right materials
1. Before you start, learn about graphite.
Graphite comes in a variety of scales. Did you ever notice that your standard pencil says HB? That's not arbitrary — it refers to the density of the lead. A pencil that says "H" is going to be harder and will therefore make lighter, crisper lines. Alternatively, a "B" indicates that the graphite is soft, and it's perfect for drawing deep, rich darks. So, HB is right in the middle. I like it for sketching.
For sketching, it's important to have a range of pencils. Try getting one from each family, including HB.
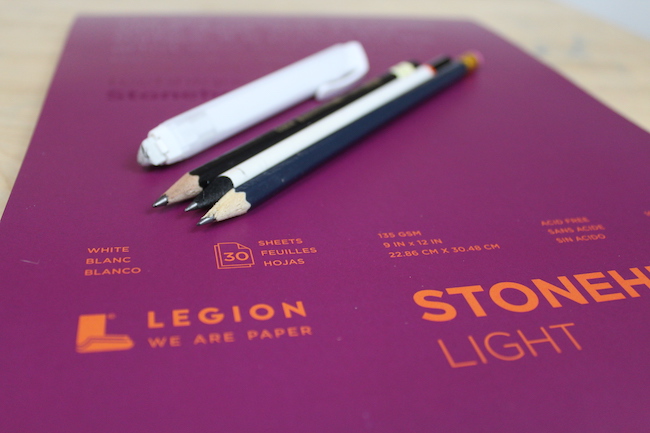
2. Paper is important.
Like graphite, your paper choices are seemingly endless. It can vary in tone (looking "warm" or "cool") and texture — with a smooth finish or "toothiness." When trying to select sketching paper, look for something that is optimized for graphite. I enjoy the Legion brand and found their Stonehenge Light paper to be great for it.
Composition and form
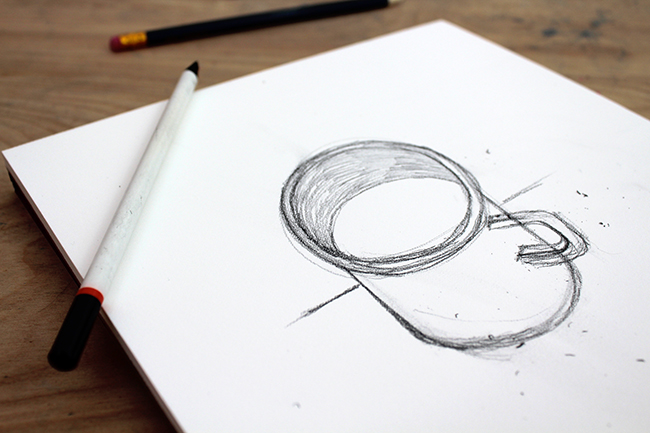
3. To make something less daunting, start with simple shapes.
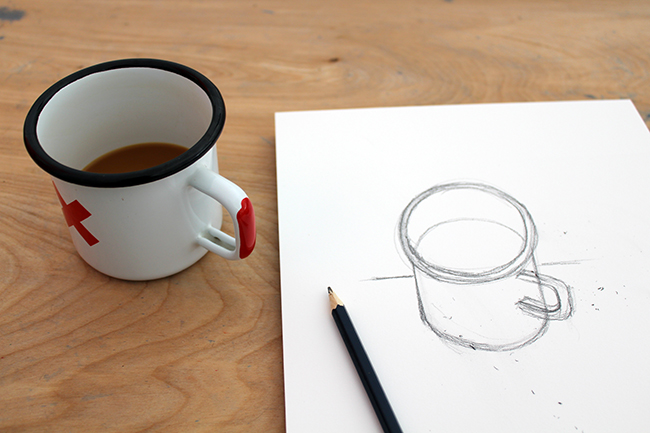
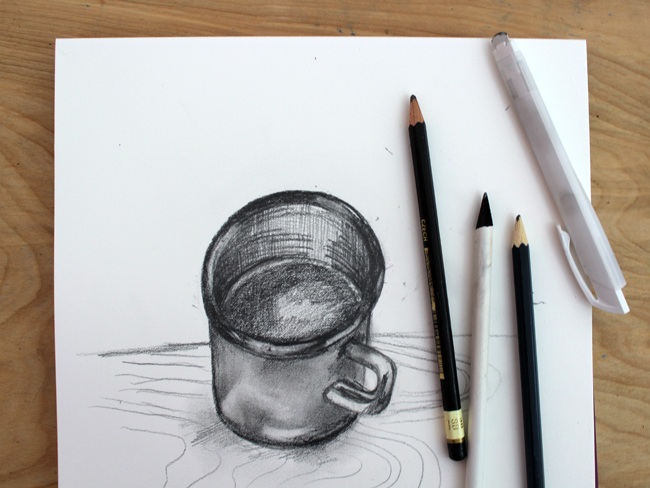
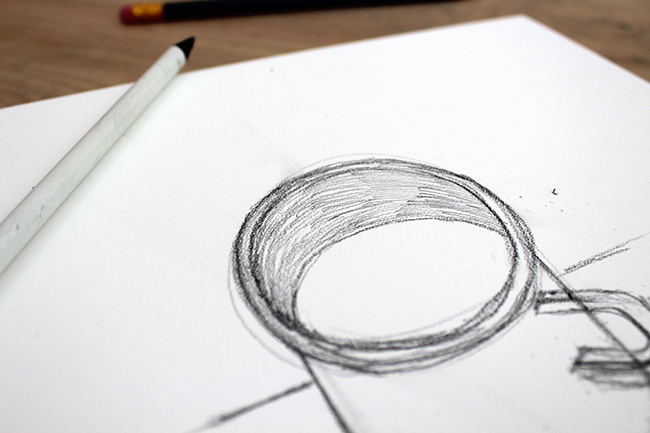
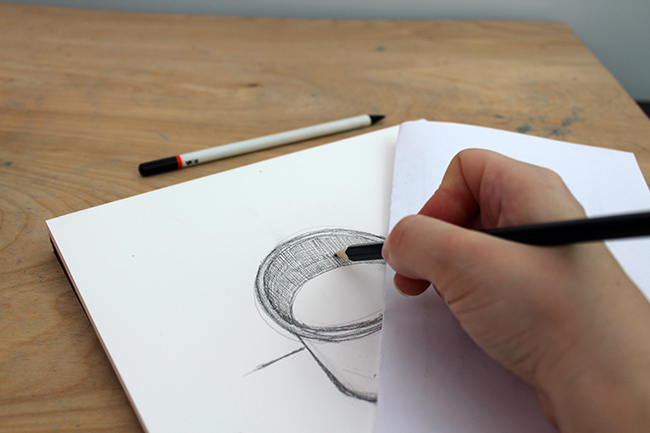
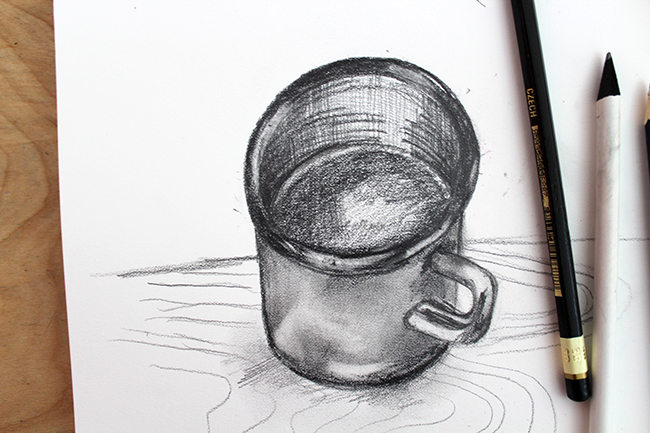
I picked a coffee mug to try out my favorite sketch techniques. It's relatively easy to draw because it can be easily broken down into basic shapes. Try the same thing — pick something and study it for a couple of minutes. Ask yourself: What are the defining shapes? Where do they overlap? With the coffee mug, a circle makes up the lip of the cup, and an oval makes up the body. Overlap the lines/areas in which the shapes meet.
4. When drawing, check your angles with this simple trick.
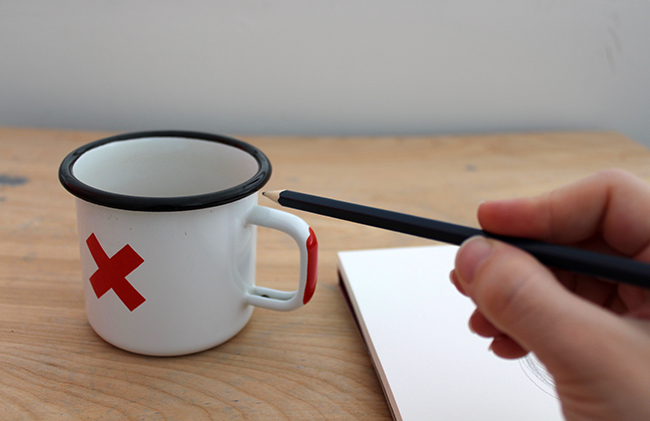
While I was drawing the handle of my coffee mug, I noticed that it was foreshortened, meaning that part of it is facing closer to me and looks distorted. To get the angle of the handle correct, I used this trick: Hold your pencil and line it up to the angle that you're trying to replicate. Then, bring your pencil directly to the paper, without moving it. That will ensure you have the right (pun intended) angle!
Sketching approaches
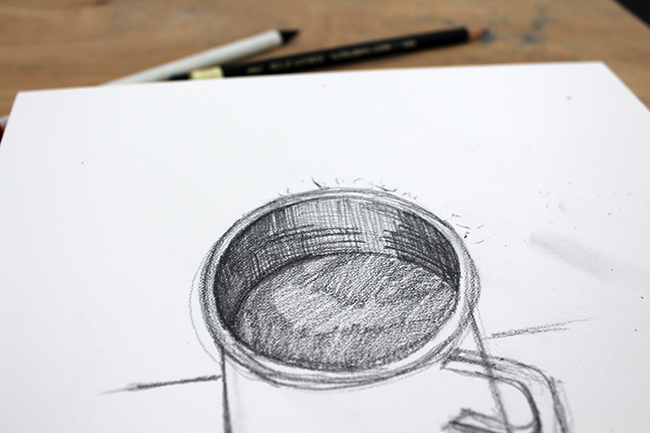
5. Hatching and cross hatching
Hatching is one of the most basic drawing techniques. To create volume and shading, draw lines that follow the curve of a line. These lines do not touch. Cross hatching is layered hatching, where the lines intersect. The distance between the lines and intersections will determine how dark an area is.
6. Tonal sketching
Unlike hatching and cross hatching, the tonal approach has no visible lines. To do this, sweep your pencil back and forth across the page in a fluid motion. With this technique, pressure and graphite scale is important. The harder you press, the darker the tone will appear.
7. Blending
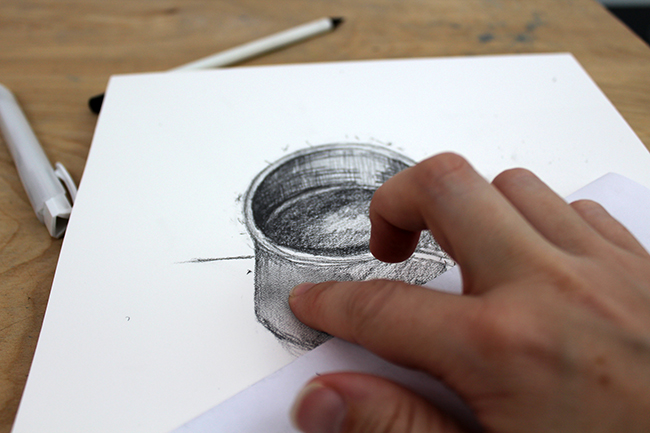
Build on the tonal technique with blending. Simply use your finger or blending stick to create a smooth, even surface. (Wash your hands afterward!)
8. Accent lines
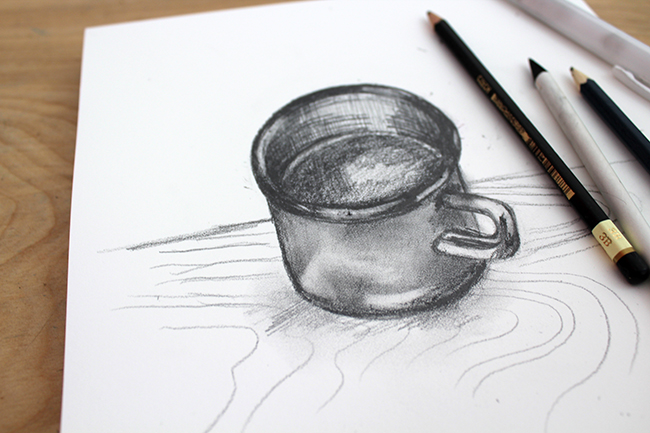
Accent lines don't necessarily build form, but they add style to your drawing. Wood grain, for instance, is a great example of decorative accent lines you can incorporate.
9. Use your eraser to define form

Highlights are a great way to define and build form. Bright, crisp shapes will make something look extra shiny, but this can get muddled the way more you draw. Once you're done drawing, use a clean eraser to bring the white of the paper bag. Use this technique sparingly, however—you don't want your drawing to look fake!
10. Keep your paper smudge free with another sheet of paper
It seems counter intuitive, but this really works. To avoid smudging your artwork as you draw, place of piece of paper on top of your drawing. Rest your hand on it while you sketch.

nice, thank you!
Thank you
Your Comment here...I like this procedures
Very interested. I love it.
Thank you for a great article
Thank you for sharing, it’s really helpful for me.
Many thanks for such a important . Excellent information 🙂
Hatching is one of the most basic drawing techniques. To create volume and shading, draw lines that follow the curve of a line. These lines do not touch. Cross hatching is layered hatching, where the lines intersect. The distance between the lines and intersections will determine how dark an area is.
Thanks it really helped
Getting back to drawing after many years suspension.