
Stripes are always popular but if you are ready to give your striped garments a new twist – or should I say angle — how about stripes on the bias?
Placing stripes on the bias creates interesting design elements and gives a sense of movement in your sewn garment. A bias stripe can provide a fun challenge for all sewing levels ranging from a simple skirt with four seams to a very complex draped gown.
Here are some tips to help you prepare before you start sewing:
Start with a skirt.
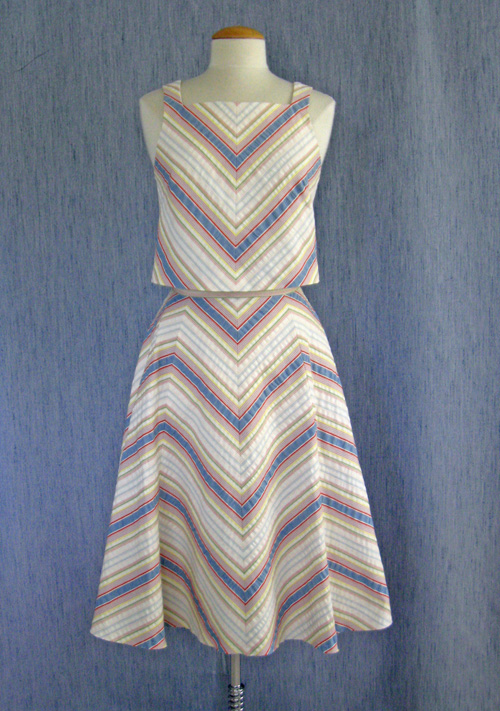
Photo via SunnyGal Studio, skirt made using Vogue 1397
A striped skirt cut on the bias is a great way to develop your confidence with sewing bias stripes. If the pattern does not have one, you can alter your pattern to include a center front seam, which will result in the chevron effect in front and back.
Use stripes as an accent.

Craftsy member Aizome made this V-striped skirtin the Craftsy class Sewing With Knits: 5 Wardrobe Essentials
Bias stripes can be used to accent sections on a garment where the rest of the pattern is cut on the straight of grain.
Don’t forget even vs. uneven stripes.
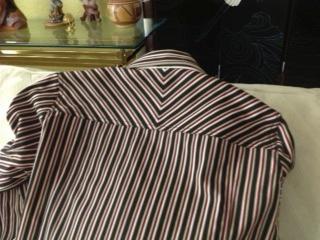
Craftsy member SadieSews made her striped jacket in the Craftsy class Sew Better Sew Faster: Garment Industry Secrets
Remember when sewing with stripes, that stripes are categorized as even and uneven. For a bias stripe, I recommend using an even stripe.
Cutting and sewing on the bias are a bit more complex, but with some planning you can tackle this sewing challenge.
Here’s tricks for creating garments and accessories with bias stripes!
Create your bias grainlines.
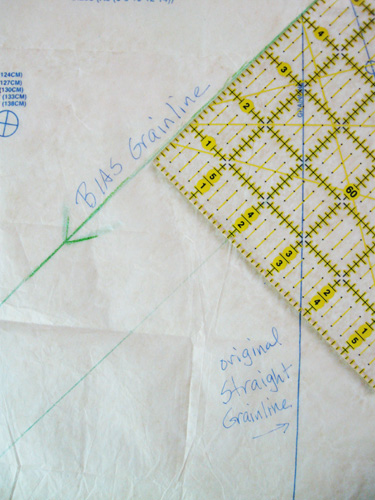
Use a gridded ruler to create the bias grainlines on all the pattern pieces. Bias grainlines are at a 90 degree angle to the straight grainline. Line up the ruler on the straight grainline with the line passing through the corners of a square. In this example, the straight grainline is passing through the 4″ mark on both sides of the ruler. The sides of the ruler then are on the bias grainline, which you can mark on your pattern.
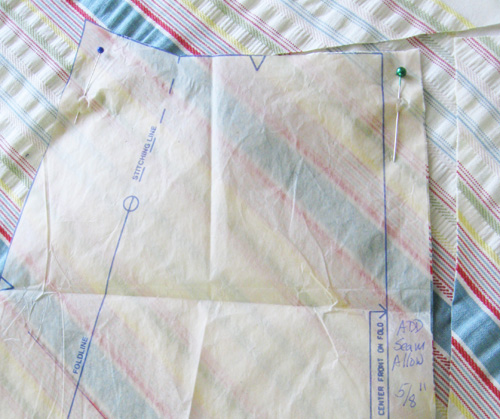
Add needed seam allowances
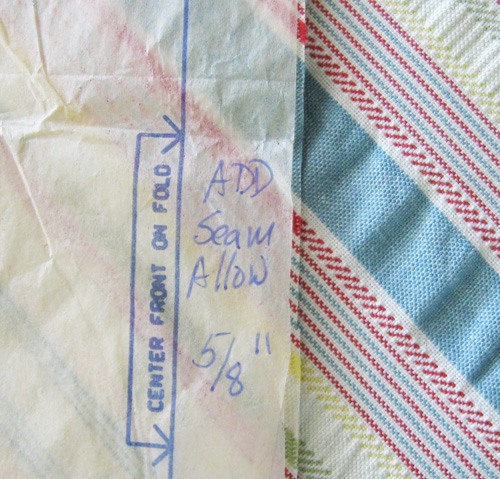
To make an all-around chevron effect with your bias stripes, the center front of the pattern may be designed to cut on the fold. But, you will need to change that to a seam, so you will add your seam allowance all along that marked fold line.
Decide on directionality.
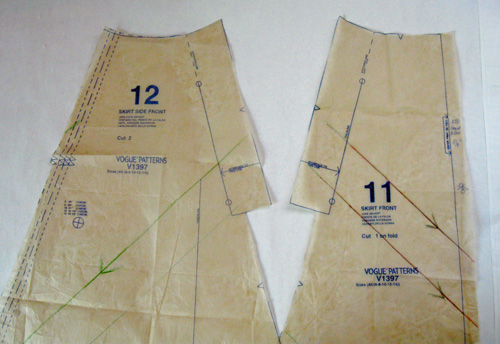
Play around with your pattern pieces on the fabric and decide which way you want the stripes to run. For this example, I used the pattern provided in the Craftsy class Inside Vogue Patterns: Tracy Reese 1397 and decided to make the chevron point down at the center front. Once you decide on the center front, then continue from front to back reversing the directionality of the stripes. It is really important to mark the directionality on your pattern pieces with arrows to avoid cutting a piece the wrong way.
Cut in a single layer.
This is one of the trickiest parts in working with stripes on the bias. When cutting out, two layers can shift even with the most careful pinning — then it is almost impossible to sew the matched stripes! Instead pin the pattern pieces to only the top layer of the fabric, carefully cut just one layer, then reposition your pattern piece on the fabric matching all stripes, pin and cut the second layer. Viola! Two perfectly matched pattern pieces. This technique also works well with plaid fabrics.
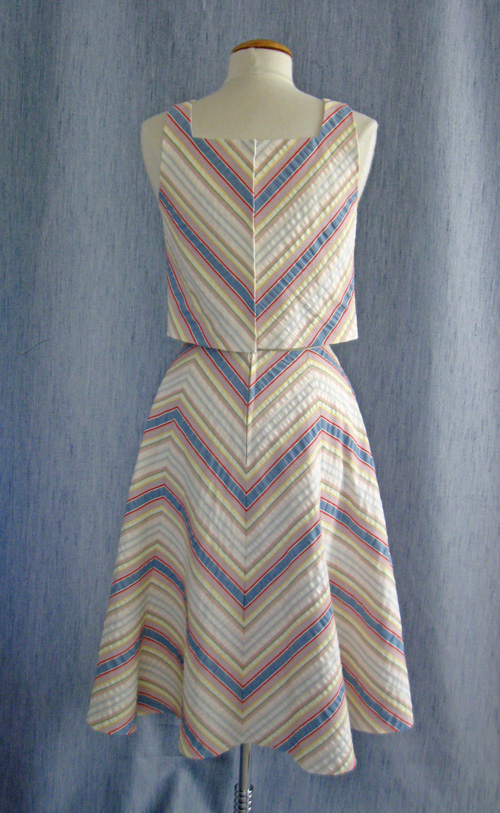
Image via SunnyGal Studio
Using the pattern included with the Craftsy class Inside Vogue Patterns: Tracy Reese V1397, I followed instructor Sara Alm’s method of creating a chevron effect on the skirt. But, as you can see, my version is a 2-piece outfit. I decided to change the pattern into a skirt by adding a waistband and now I can wear it with different color tops. For fun I made the bias-stripe crop top, which I have to say matched in design better than I expected! That’s part of the reward with a challenge like bias stripes.
Share tips, start a discussion or ask one of our experts or other students a question.
No Responses to “A New Angle: From Prep to Creation, Tips + Tricks for Sewing Stripes on the Bias”