
It’s time to put our knowledge of hand embroidery threads and other materials used to add texture and dimension to good use!
Previously, we looked at thread fiber, weight and twist and how these can be used to enhance the tactile nature of an embroidery project. We followed that up with a little discussion on using special fabrics, beads, specialty threads and ribbons to add to the visual interest of an embroidered work.
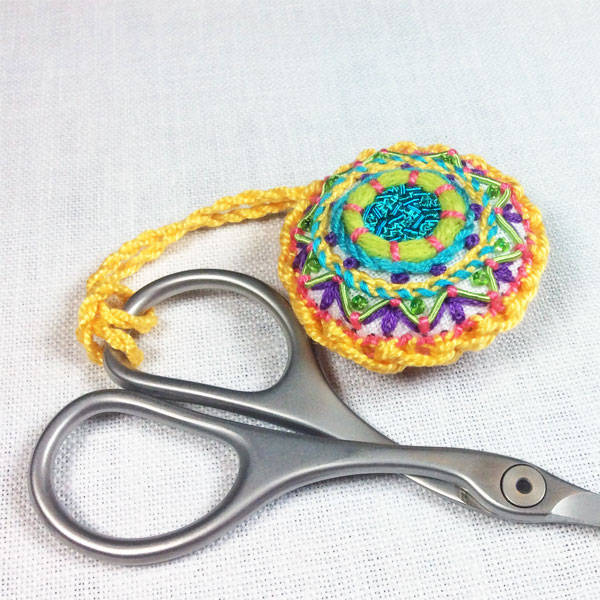
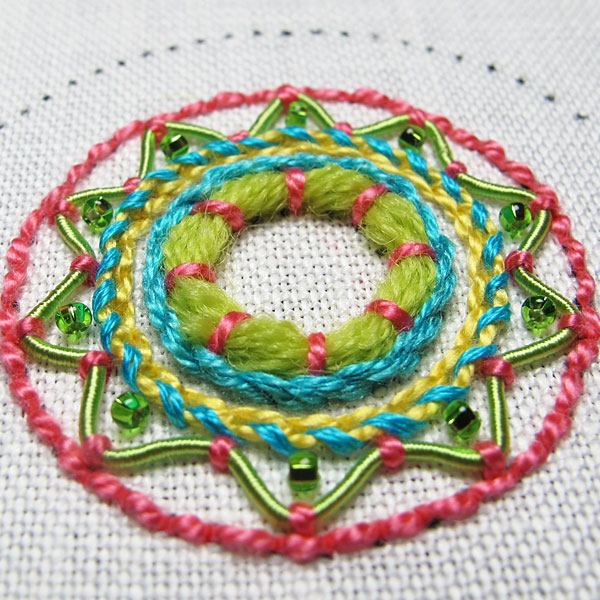
Today, we’re going to put what we’ve learned together into a little embroidery project — the Fiesta Fob! A scissor fob is an ornament hung from the handle of scissors to make them easier to find and just to dress them up a bit. I’m going to show you step-by-step how to embroider both sides of the fob and then how to assemble it.
In part one of this scissor fob tutorial, we’ll set up the project and stitch one side of the fob. Later on in part 2, we’ll embroider the second side of the fob and assemble it.
 Bring your hand embroidery to life with incredible, textural stitches!
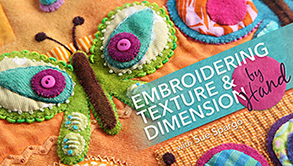
Join Sue Spargo in her popular online class Embroidering Texture & Dimension by Hand, where she shares 20+ stitches to create a beautiful butterfly sampler
Fiesta Scissor Fob Tutorial
Materials:
The best news about the Fiesta Fob? It can be made from any threads and other materials you have in your stash! You pick the colors, you pick the thread combinations! I’m going to walk you through how I made my fob, but feel free to make any substitutions you want, or to go all-out crazy and pick your own colors, threads, stitches and embellishments!
For my fob, I used the following materials:
- Ground fabric: a high count, firmly woven white linen called Alba Maxima, which is available through local needlework shops
- Regular threads: crewel wool, perle cotton #5, cotton floche, buttonhole silk, stranded silk
- Other materials and specialty threads: seed beads, DMC Memory Thread, assorted real metal threads
Other supplies:
Besides the materials listed above, I had the following tools on hand:
- FREE Fiesta Fob Circle Pattern
- 4″ embroidery hoop (or stretcher bar frame)
- Sharp scissors
- Various needles — crewel, tapestry and chenille — in various sizes
- Beeswax (if using real metal threads)
- Small piece of wool felt
- Fine-tipped (.20 mm) micron art pen
Step 1: Setting up the project
After hooping or framing up your ground fabric and adjusting the tension so that it’s drum tight, you’ll need to transfer the circle guidelines. You can use this PDF for the pattern:
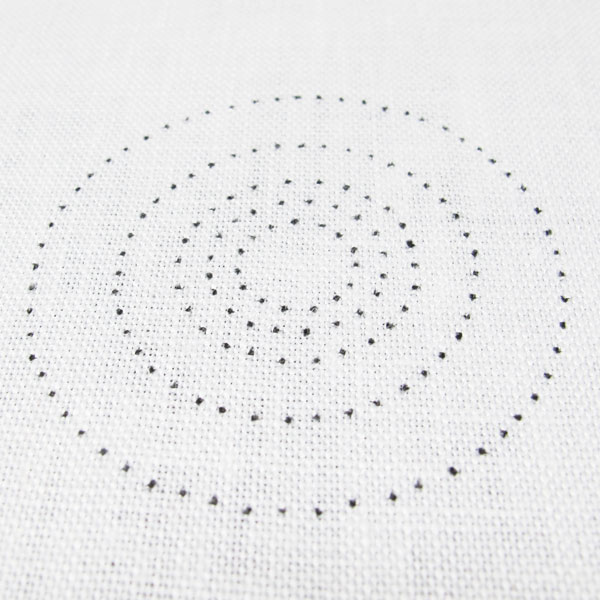
To transfer the pattern, I first printed it on vellum (you can use regular paper) and then pierced small holes evenly on all the circles. On the second circle in, I pierced each dot. On the other circles, I just pricked holes evenly around the circles.
To pierce the holes, you can use a sewing pin or a needle, and if you need something larger to hold onto, you can always push the eye of the needle into a cork.
Once the holes were pierced, I pinned the paper to the middle of my taut fabric. Then, I used a very fine micron pen and touched the fabric through each hole with the tip of the pen, to leave a fine dot on the fabric.
You can use any type of fine-tipped pen, pencil or marker that will leave a visible dot, but you want to make sure that you don’t have to wash the markings out. Don’t use a water-soluble pen, for example, because you won’t be able to soak this in water after finishing it. I like using permanent micron art pens for this type of job. It would be better if I had used a brown or sepia pen, but I only had black, so I went with that.
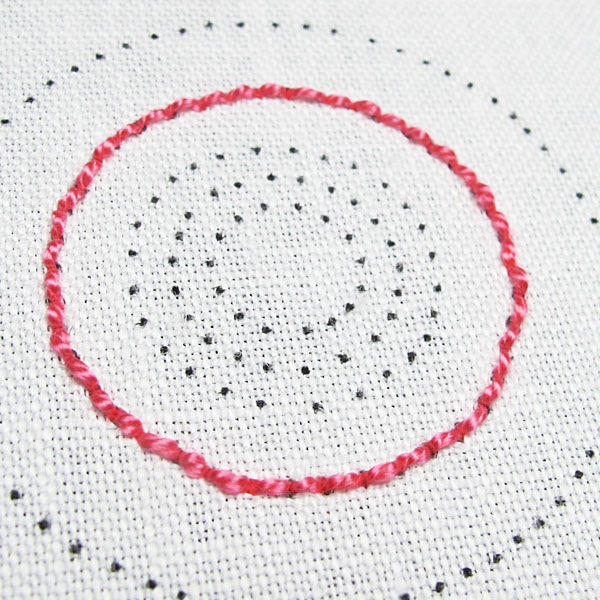
The outermost circle in the pattern is the cutting line, and the next circle in is the outline of the fob. The whole fob is only 1.5″ round when finished.
Backstitch the outline of the fob on the second circle in, using the dots as a guideline for the stitch length. Use a good, strong embroidery thread here, like a perle cotton. I used perle cotton #5, and the stitch length following the dots was perfect.
Following the dots for the backstitches ensures that the backstitch outlines on both the front and back of the scissor fob are evenly stitched.
That’s the set-up, and now you’re ready to stitch the fun parts!
Step 2: Stitching the front of the Fiesta Fob
Inner ring
I outlined the inner circle of the fob with a bunch of crewel wool, couched at even intervals with perle cotton #5.
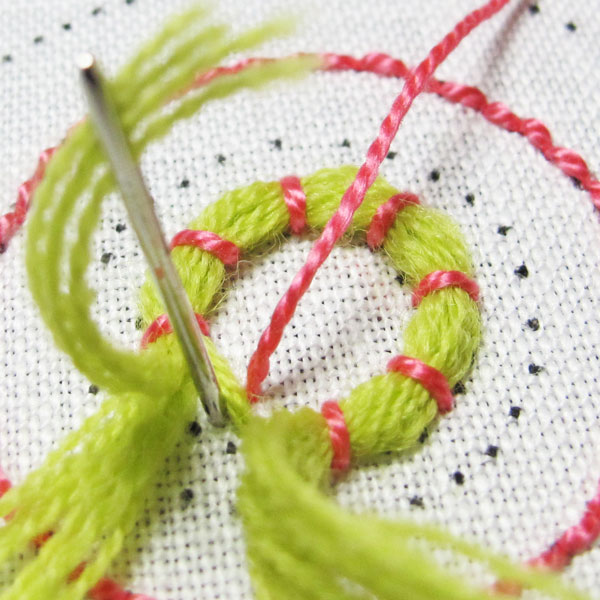
I used 12 strands of crewel wool for the bunch.
When I arrived at the place where the circle meets, I used a large chenille needle (size 20), and threaded in four tails of crewel wool. I pulled the threads through the back of the work, and proceeded to plunge the other tails on one side of the circle the same way, four at a time.
Then, I plunged the tails from the other end of the circle the same way, overlapping into the already plunged threads on the other side, to create an invisible join.
Once all the tails were plunged, I took the last couching stitch over the area where the tails overlap into each other.
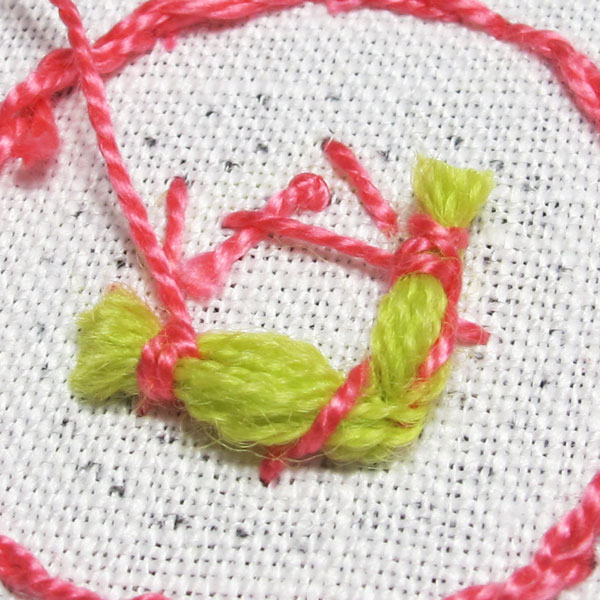
Then, I turned the work over and sewed down the ends of the crewel wool with the perle cotton, whipping through the backs of the stitches on the back of the fabric to hold everything in place. Finally, I trimmed the ends of the wool and ended off the perle cotton.
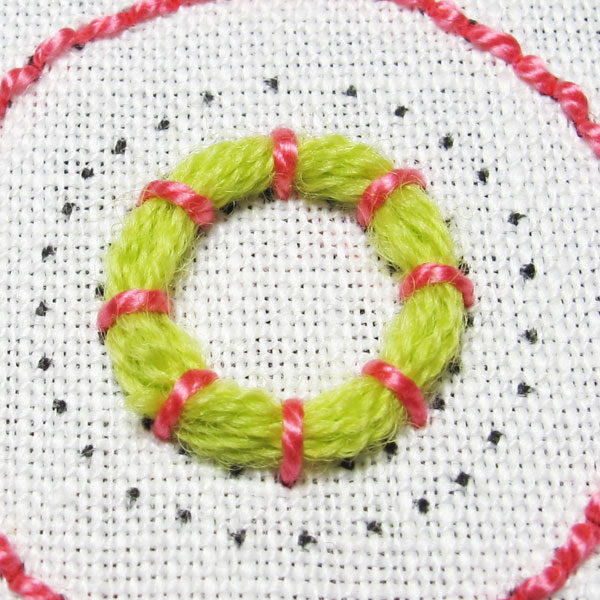
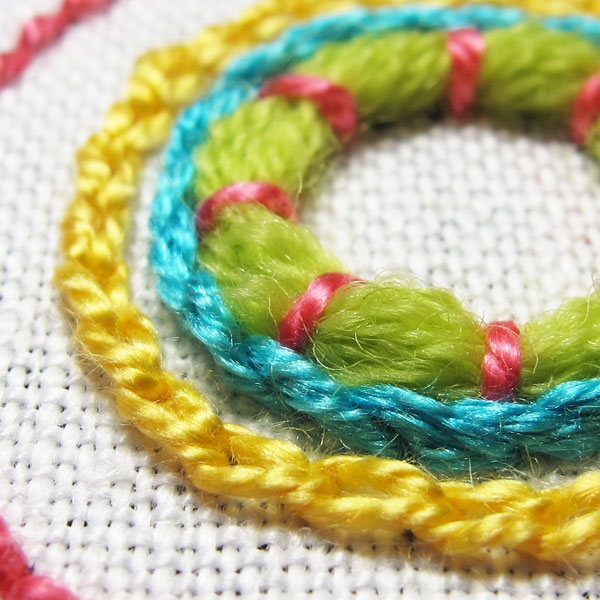
This is the finished ring of couched wool.
Stem stitch outline around wool ring
Using a full six strands of stranded silk, I worked an outline of stem stitch around the wool ring.
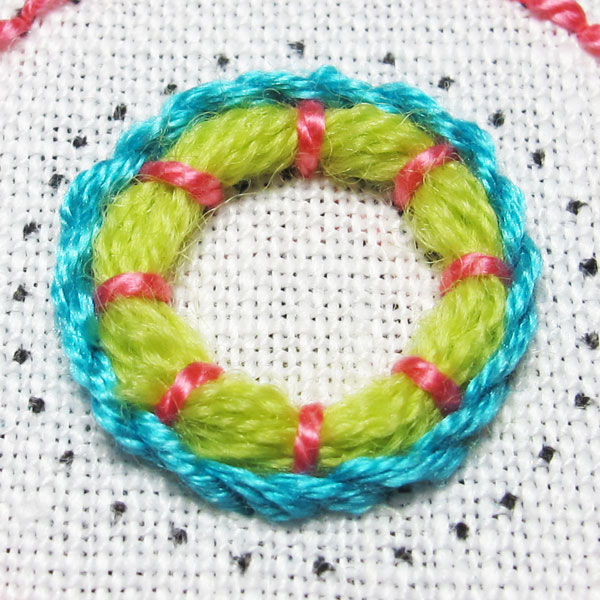
Stem stitching a circle is easy, but make sure the last stitch is placed correctly so that you have an invisible join!
Step 3: Next ring outward in whipped chain stitch
On the next ring out on the circle, I worked a chain stitch with perle cotton #5.
Just as with the stem stitch, it’s important to close the chain stitch circle invisibly.
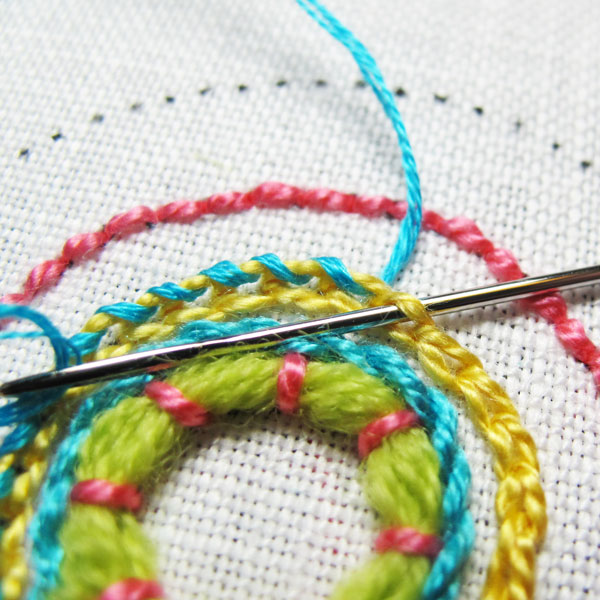
With the chain stitch complete, I switched to a tapestry needle (with a long eye and blunt tip) and whipped the outer loops on the chain stitch only, using two strands of cotton floss.
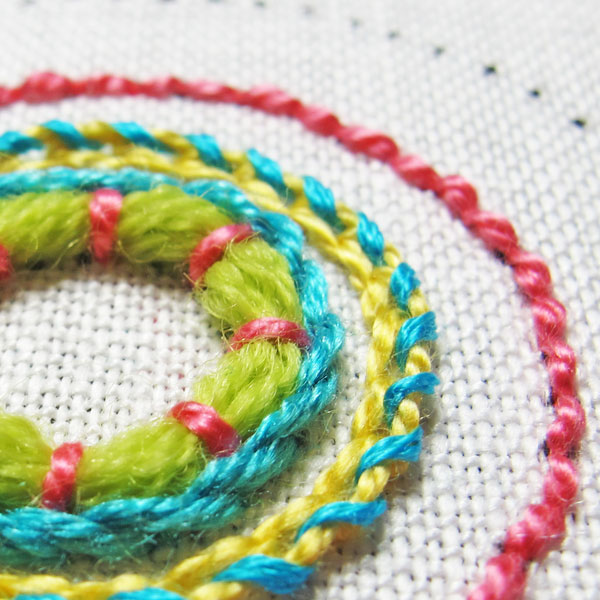
This is the completed whipped chain stitch, with only the outer loops of the chain stitch whipped.
Zigzags with DMC Memory Thread
Outside the whipped chain stitch, and inside the backstitch outline, I couched DMC Memory Thread in an evenly-spaced zigzag pattern, using a #5 perle cotton for couching.
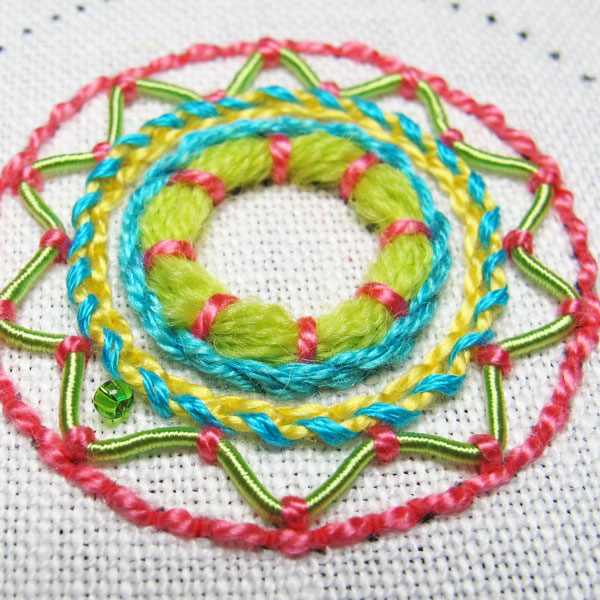
I started the zigzag on the inside, near the whipped chain stitch line, so that I could better hide the area where the circle joins.
When the circle was complete, I plunged both ends of the Memory Thread to the back of the work and sewed over them, in the same way that the crewel wool above was plunged. I used a very large chenille needle (#18) to fit the Memory Thread and make a large enough hole to plunge the threads.
Finally, over the area where the Memory Thread meets, I worked the last couching stitch to hide the join.
Step 4: Adding beads
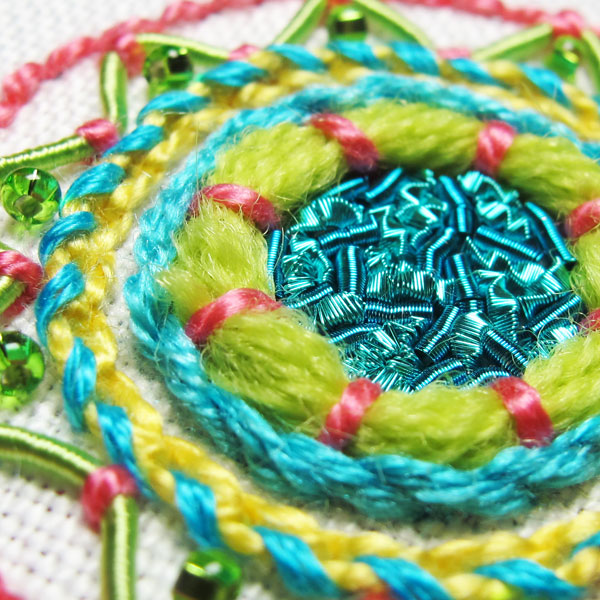
Inside the zigzags of the Memory Thread, I added small seed beads.
I used a fine silk thread that matched the color of the beads to sew them down. The beads are on their sides, so that they’re standing up, rather than lying down with the hole facing upwards.
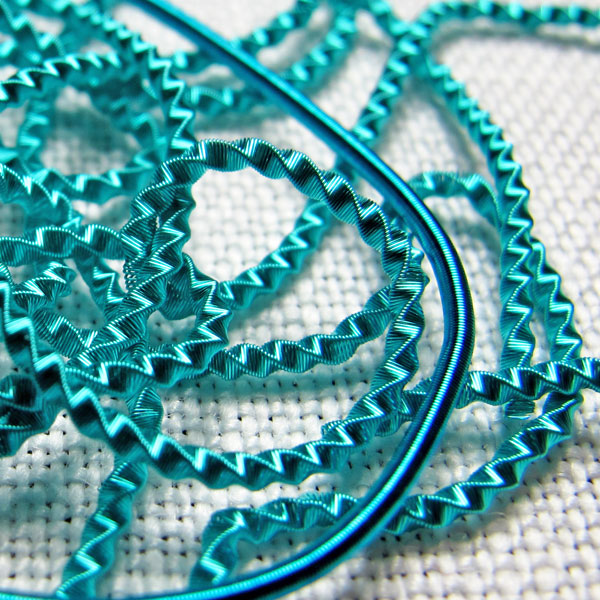
To fill the center of the fob (inside the wool circle), I used real metal threads in turquoise and peacock. The smooth tube in the photo above is called smooth purl, and the faceted tube is called check purl.
These metal threads are like very fine springs made out of wire. The tubes are hollow in the middle. If the threads are stretched, they will retain their stretch, and if they are pinched, they will flatten. It’s important to be careful with them.
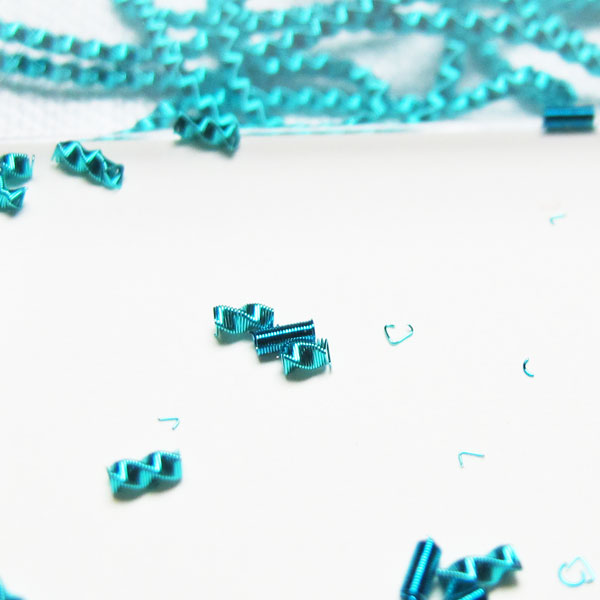
First, snip the metal threads into small chips or pieces. I cut mine about 1/8″ long.
Then, cut a piece of fine silk or polyester thread in a color that matches the metal threads. Run this thread through a cake of beeswax several times, and then through your fingers, to strengthen the thread.
The chips are then sewn into place, the same way a bead is sewn onto fabric.
Be random in the placement of the chips, so that the smooth purls and the check purls are mixed in among each other.
Step 5: French knot, daisy stitch and straight stitch accents
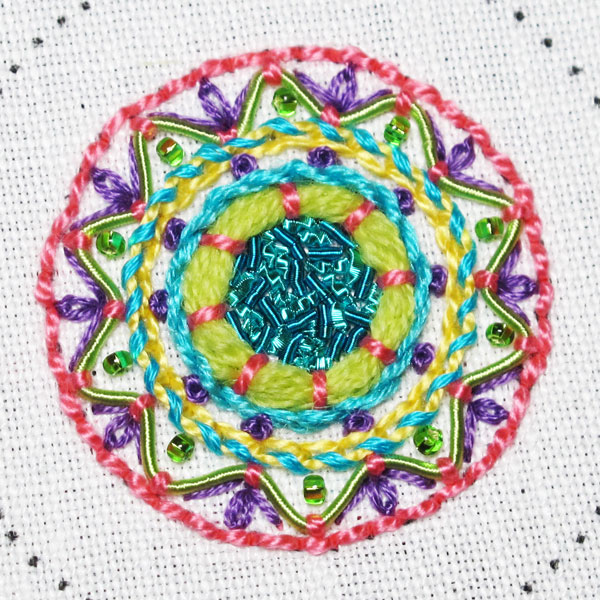
Finally, using three strands of dark purple stranded cotton, I added evenly spaced French knots between the stem stitch and the chain stitch in the middle of the piece, and daisy stitches and straight stitches in the outside zigzags created by the Memory Thread.
And that completes the front of the Fiesta Fob!
In part 2, we’ll embroider the back of the fob and put it together! See you then!
where is part 2 ???