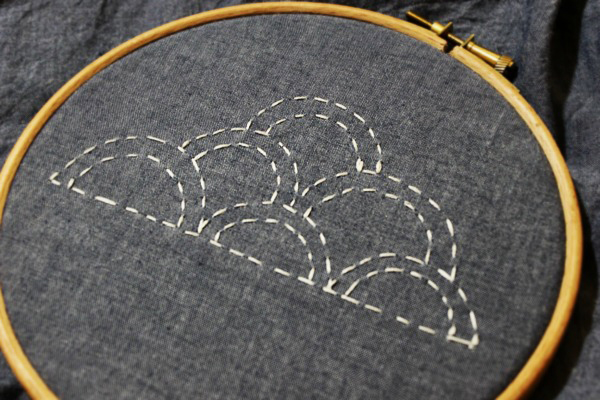
A traditional Japanese needlework technique, sashiko was originally used for repairs and reinforcements. But today it's getting lots of love for its decorative purposes. The patterns are always graphic and repetitive, and they use only a basic running stitch (yes, beginners, you should try this!).
Traditional sashiko patterns feature Japanese folk motifs like bamboo, fishing nets, arrows, leaves and fish scales. They're usually stitched with white floss onto indigo dyed fabric. Some artists sprinkle in a little red floss too for extra oomph.
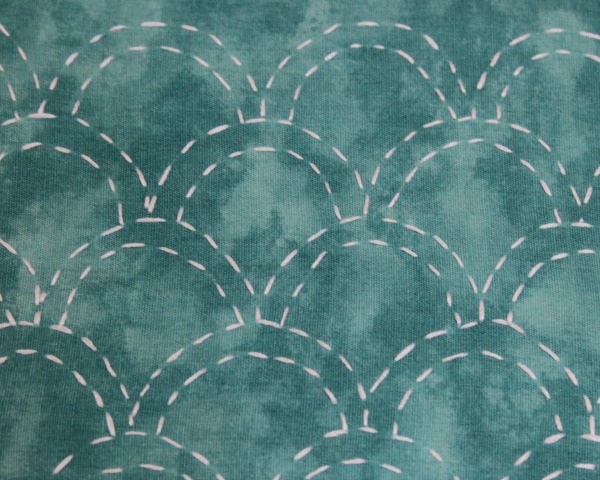
For my simple cloud pattern, I started with a traditional motif, but gave it a twist: see how the clouds are actually very similar to fish scales?
How to make the Sashiko clouds pattern:
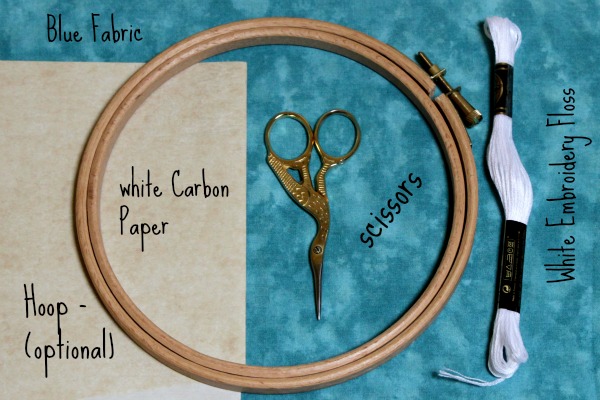
Start by printing out the pattern, then collect your supplies. I used a hoop, but that's totally optional here. Traditional sashiko stitching doesn't actually require one. Try it for yourself and see what works best for you!
Supplies
- Sashiko cloud pattern
- White carbon paper to transfer
- White embroidery floss
- Embroidery needles
- Blue cotton to stitch on (darker shades work best but feel free to experiment)
- Embroidery hoop (optional)
Using White Carbon Paper
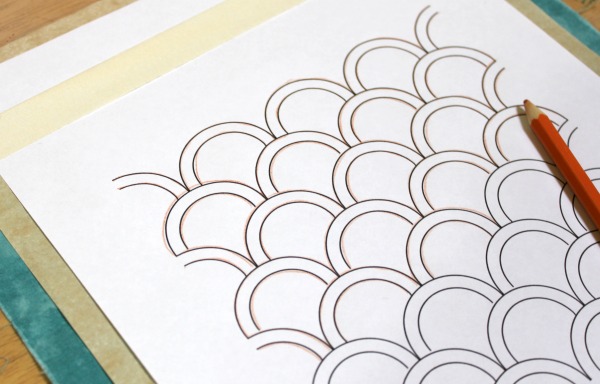
Working on a clean, hard surface, put your carbon paper face down onto the area you want to transfer the design. Then place the pattern right side up on top of the carbon paper. Use masking tape to stop your design from shifting while you trace (or pin it into place).
Lean heavily with a colored pencil to trace over the design. (Colored pencil makes it easy to see which parts you've been over already.) When you're done tracing, remove the pattern and white carbon paper, and be careful not to smudge.
I used a white fabric pencil to fill in any gaps in the design that didn't come through in the tracing. Now it's time to stitch!
Embroidery note: White carbon tracings will show better on darker blue fabrics; they'll be very pale on a lighter blue. Make sure to work where you've got plenty of light to go easy on the eyes!
Tips for the sashiko technique
I used three-stranded floss so the stitches would stand out. Then I knotted the thread and worked a double back stitch for security to begin, finishing off the floss end with a double stitch too.
The only stitch you need throughout is a running stitch, and the aim is to keep your stitches as regular as possible. Some professional sashiko stitchers will recommend that you make the gap between each stitch half the size of the stitch itself, but really it's up to you. Consistency is the goal.
Try to be mindful of where the pattern lines meet, and maintain regular gaps where your stitches intersect with other lines. Even though we're only using the running stitch, this can be surprisingly tricky! Practice a bit and you'll get it.

Sashiko doesn't use a hoop though. Part of the technique of sashiko is hand-tensioning the fabric.
Traditional sashiko does not use an embroidery hoop. I’d like to see a course in traditional sashiko.
Seems like the pattern would have to be transferred as dashed lines. Otherwise the carbon tracing would show thru in between the sashimi stitches....🧐
Beautiful. Thank you for the tips. Looks lovely. I love all things Japanese and this wave pattern always tugs at my heart. 🙏🏼♥️ 🌊
The pattern is terrible, some of the sections are bigger than others. 🙄
Where do I find the pattern?
This lesson is fairly useless without the pattern; where is the download to print the pattern?
Where is the cloud pattern?
Love to learn.