
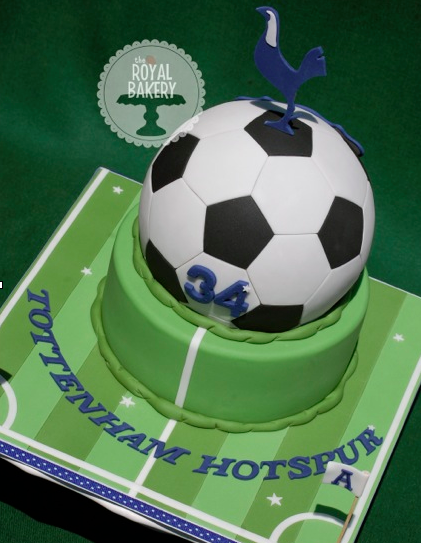
The nemesis of even the most accomplished cake decorators, the spherical cake takes a bit of work. But with the right baking pan, a few tips and the right tools, you’ll soon be totally on the ball! This tutorial shows you how to create a small spherical cake using the Wilton 6” ball pan.
Step 1: Begin by baking your cakes in the ball pan. I find an oil-based chocolate cake recipe like The Hershey’s “Perfectly Chocolate” Chocolate Cake works well. The oil in the cake keeps the cake moist during the prolonged baking period.
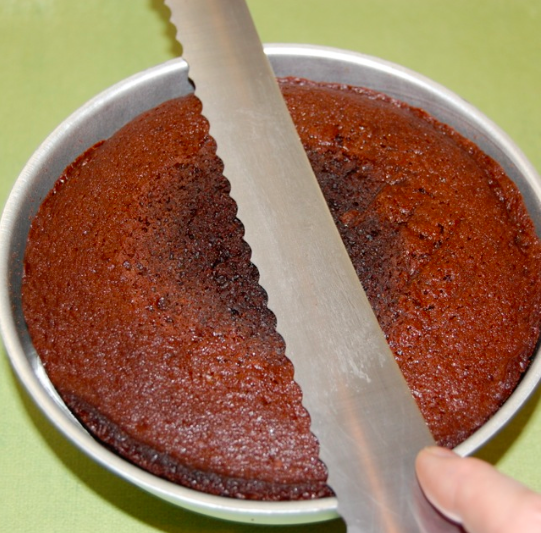
Step 2: When the cakes are baked and cooled slightly, use a serrated knife to slice off any cake that has risen above the edge of the pan. Keep the blade of the knife flat on the edge of the ball pan to ensure a perfectly even cut. You need at least a small amount of flat surface on top so that you can turn the cakes out of the pan to cool, round side upwards.
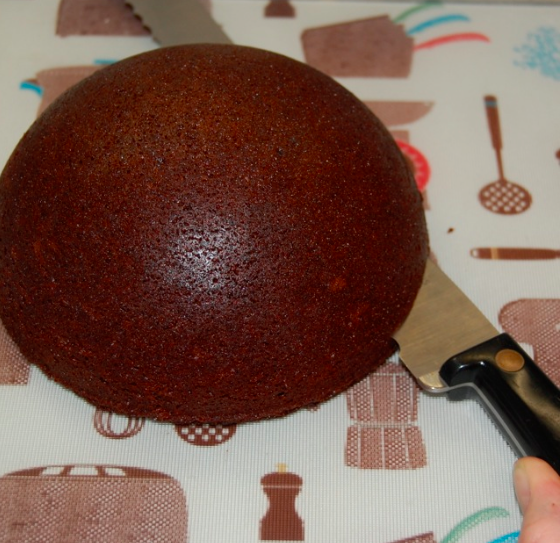
Step 3: When the cakes have completely cooled, cut an additional slice off the bottom flat side of each one to allow for your filling. To do this you will need a serrated knife with a flat handle that is not too wide. Rest the handle of the knife on your cutting surface and keep it level and flat as you cut an even slice.
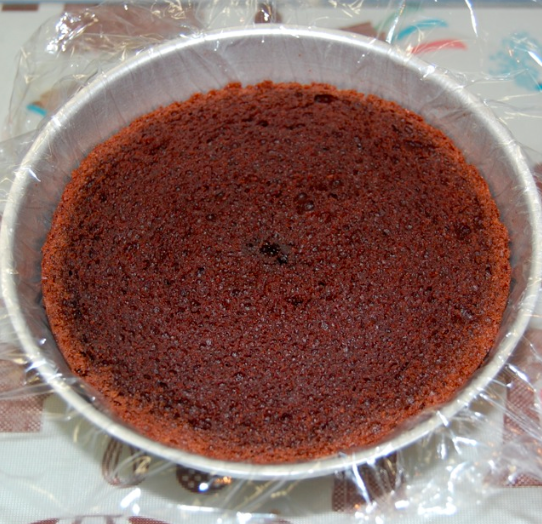
Step 4: Wrap each half of the cake loosely in plastic wrap and place them back in the two halves of the ball pan. Make sure that the top of each cake is level with the top of the pan. Unwrap the top of the plastic wrap so that the cake surface is exposed.
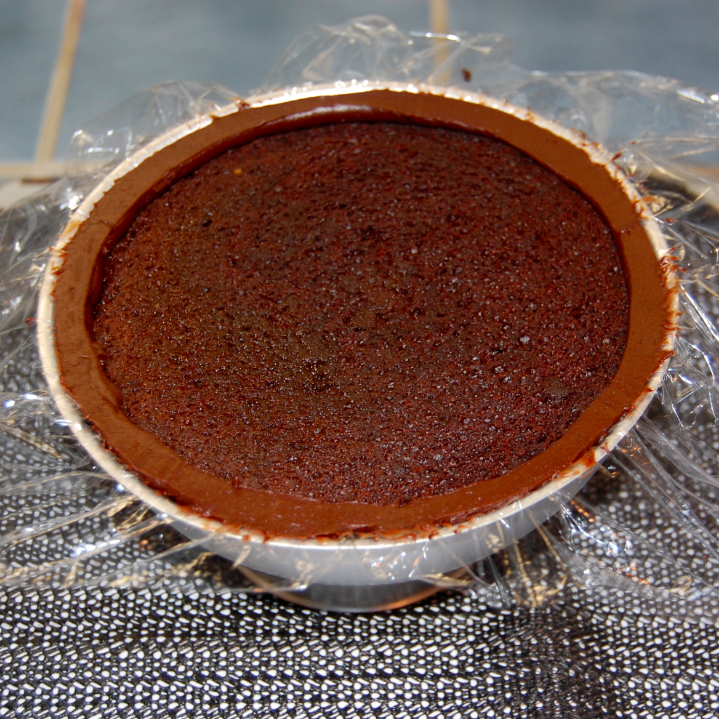
Step 5: Pipe a dam of chocolate ganache around the edge of each cake, building up layers of ganache until your dam is level with the top of the pan. I use a Wilton #10 tip. Flatten off the top of the ganache with a spatula so that it is perfectly level with the top of the pan.
Step 6: Leaving the cakes unwrapped, place the pans in the freezer for two minutes, or in the fridge for around five, until the ganache has firmly set.
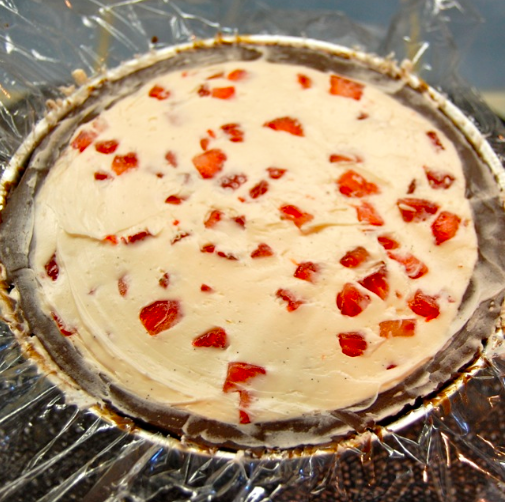
Fill the space at the top of each cake with your chosen filling. Here I used freshly chopped strawberry Swiss meringue buttercream. Use a large spatula or another straight edge (the back of your serrated knife will probably work) to smooth the buttercream level with the top of the pan. Don’t worry about any mess on the plastic wrap at this point.
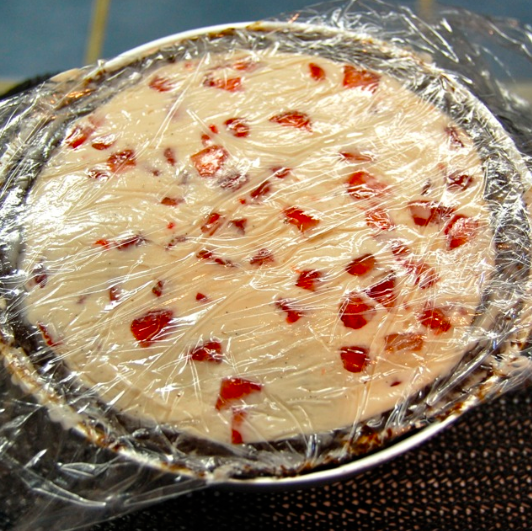
Step 7: Now wrap each cake back up in the excess plastic wrap. I like to add an extra layer of plastic wrap or aluminum foil to keep the cake fresh and moist. Place both halves back in the freezer for about an hour until they are very firm, but not completely frozen through.
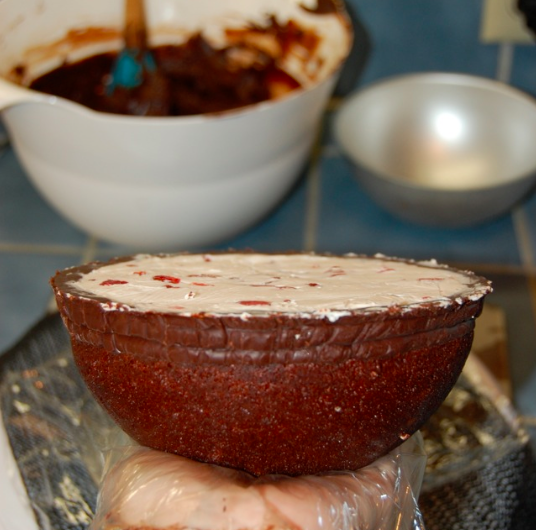
Step 8: After an hour, remove the cakes from the freezer and unwrap the top. Hold the plastic wrap and use it to lift the cakes out of the pan. Because you used the edge of the pan as a guide for leveling your filling, you now have two perfect hemispheres of cake and filling!
Step 9: Place a new small piece of plastic wrap on the surface of the buttercream and place a cake circle or similar over that. Flip the cake over so that the rounded surface is uppermost.
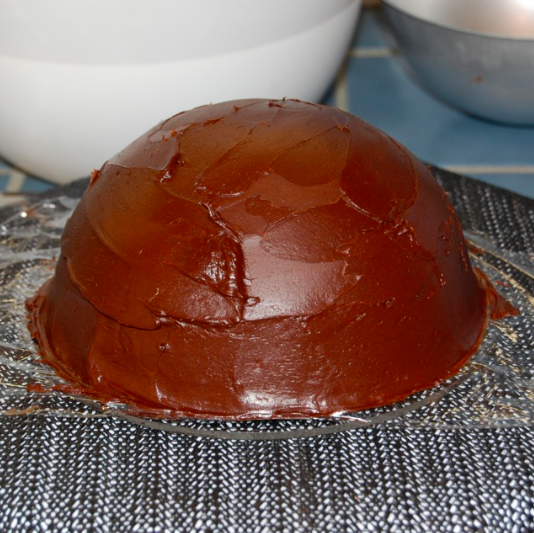
Step 10: Spread a layer of chocolate ganache all over the cake. Try to apply a layer of an even thickness if possible, but you will work on smoothing the shape later so don’t worry too much.
Step 11: Because you are applying ganache to a very cold cake, the chocolate will set fairly quickly. Do a rough smooth with a small offset spatula.
Step 12: As the ganache starts to set and become dull-looking, switch to a piece of acetate or plastic cut from the side of a large soda bottle or milk carton. Bend it in your hands a little as you continue to scrape away excess ganache so that it molds to the contours of the hemisphere.
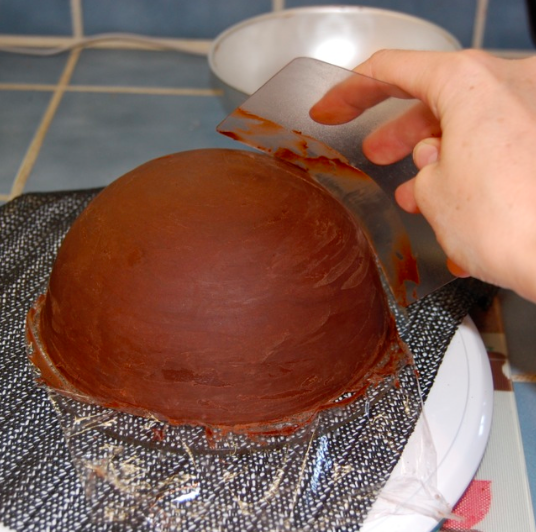
Step 13: Use a toothpick to test the thickness of the ganache around the cake. Think of it like using a dipstick to test the oil level in your car’s engine. If you find any much thicker areas of chocolate, scrape a little off with your piece of plastic.
Step 14: When you have smoothed both halves of your sphere you are ready to assemble it. The ganache should have set because of the lower temperature of the cake, and be dry and firm to the touch. If this is not the case, wrap the cake back up in plastic wrap and place it in the fridge until its ready to handle.
I place one half of the cake on the support ring that comes with the ball pan. However, you can rest your cake on a foam pad, or inside a bowl with a rounded bottom to keep it upright and not damage your smooth ganache. Use a fork to fluff up the surface of the buttercream a little on both halves. This will help them to form a bond and stick together. Smooth a very thin layer of soft ganache at the edges of the cake and quickly press the two halves together.
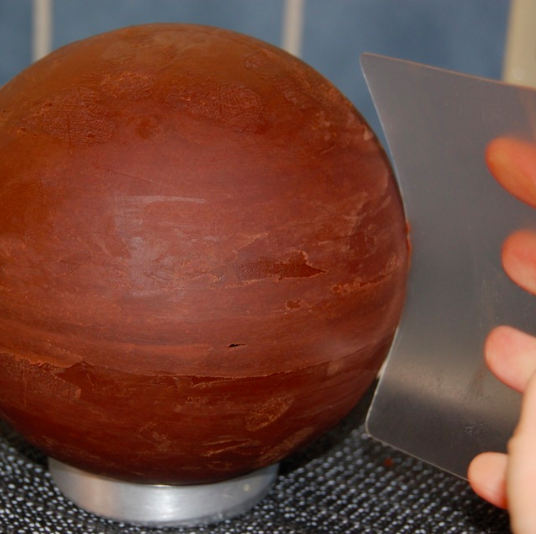
Step 15: There will be a ridge where the two halves of the sphere join. Use your piece of plastic to scrape away the excess ganache to give a smooth finish. The ganache should be strong enough to support the top half of the cake so that the bottom half doesn’t get misshapen and squashed under the weight. Allow the ganache to fully dry out before starting to decorate.
I decorated the soccer cake above with perfectly-proportioned hexagon and pentagon cutters from Not Just Cakes by Annie. Alternatively, you can create a template using the instructions supplied with the Wilton ball pan.
To assemble the cake, I hammered a pre-measured wooden dowel right through the ball, into the cake layer below and into the cake drum beneath.
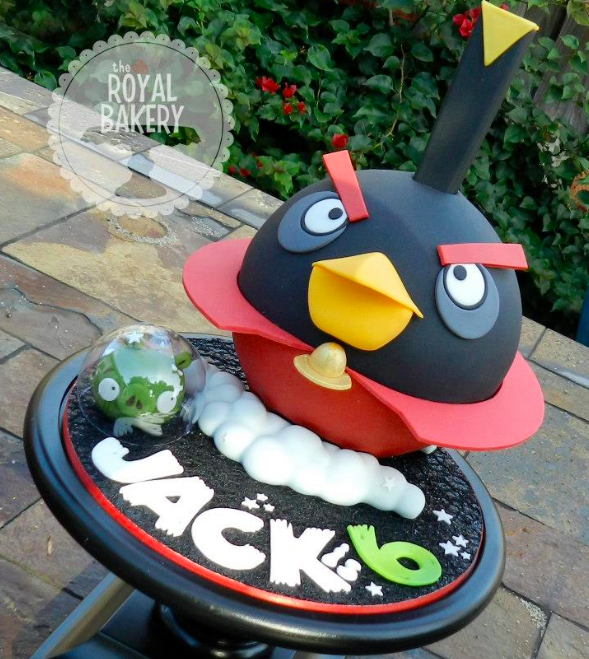
For this Angry Birds cake I drilled a hole in a wooden base, and glued a pre-measured wooden dowel into the hole. I then covered the board with textured fondant. I piped a blob of royal icing at the base of the dowel, then pushed the decorated cake down onto it. Fondant clouds at the front and back helped add a bit more stability during transportation.
Summer’s almost here and I feel a beach ball cake coming on!
[box type=”shadow”]
 To learn more about making sculpted cakes, check out Mike McCarey’s online Bluprint class Advanced Cake Sculpting. Mastering a spherical cake opens up all sorts of possibilities – teapots, princess carriages, pumpkins, globes and planets, and sports balls galore! What will you make?
[/box]
Share tips, start a discussion or ask one of our experts or other students a question.
No Responses to “Have a Ball Creating a Perfectly Spherical Cake!”