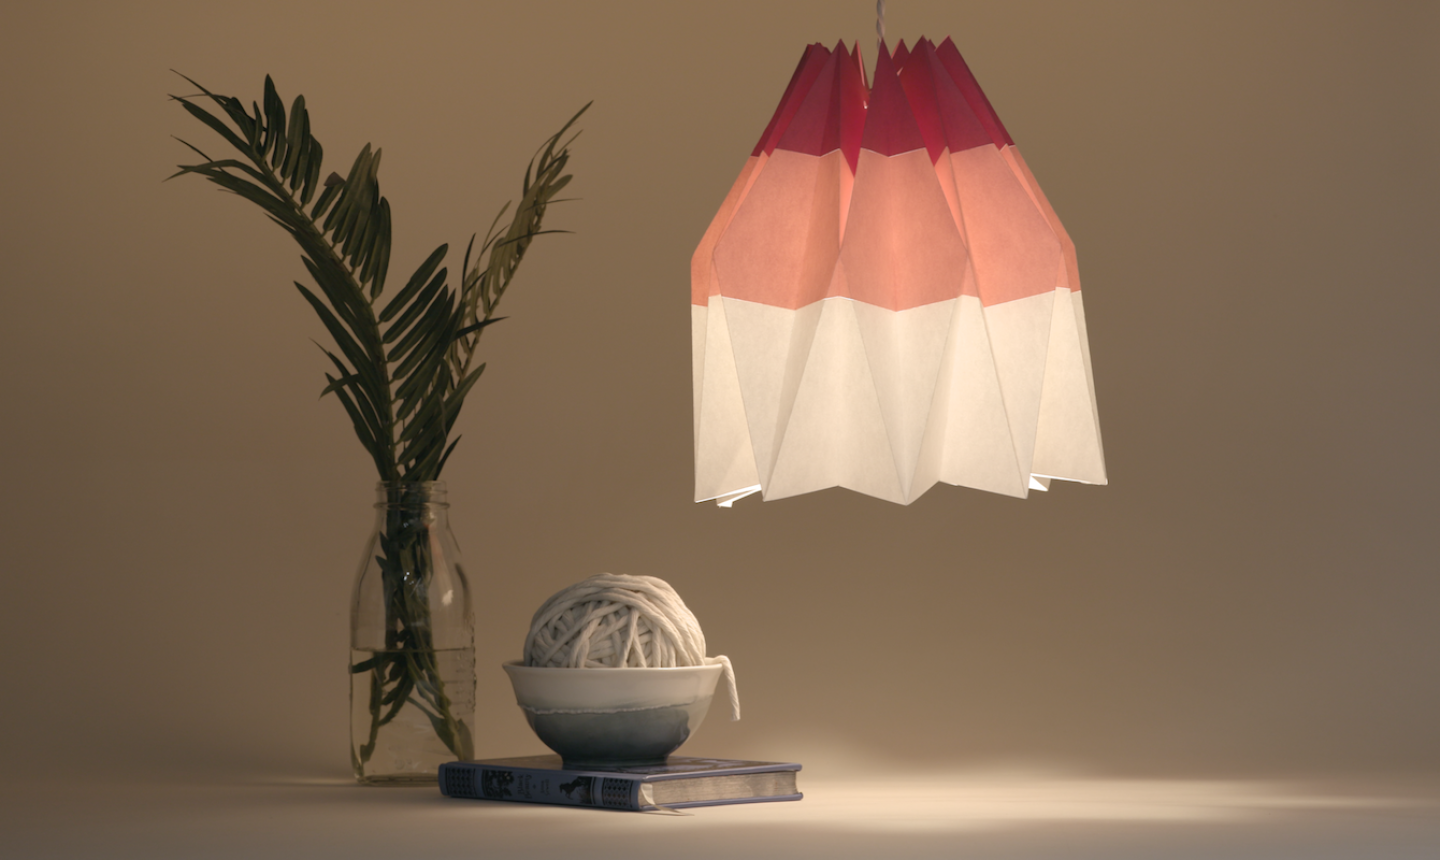
With just a few folds, you can make the coolest lamp for your craft room — no stitching required. Just pick your three fave colors (we went for an ombré vibe) and get started!
Origami Lamp
Level: Easy
What You Need
Instructions
1. Cut and Tape
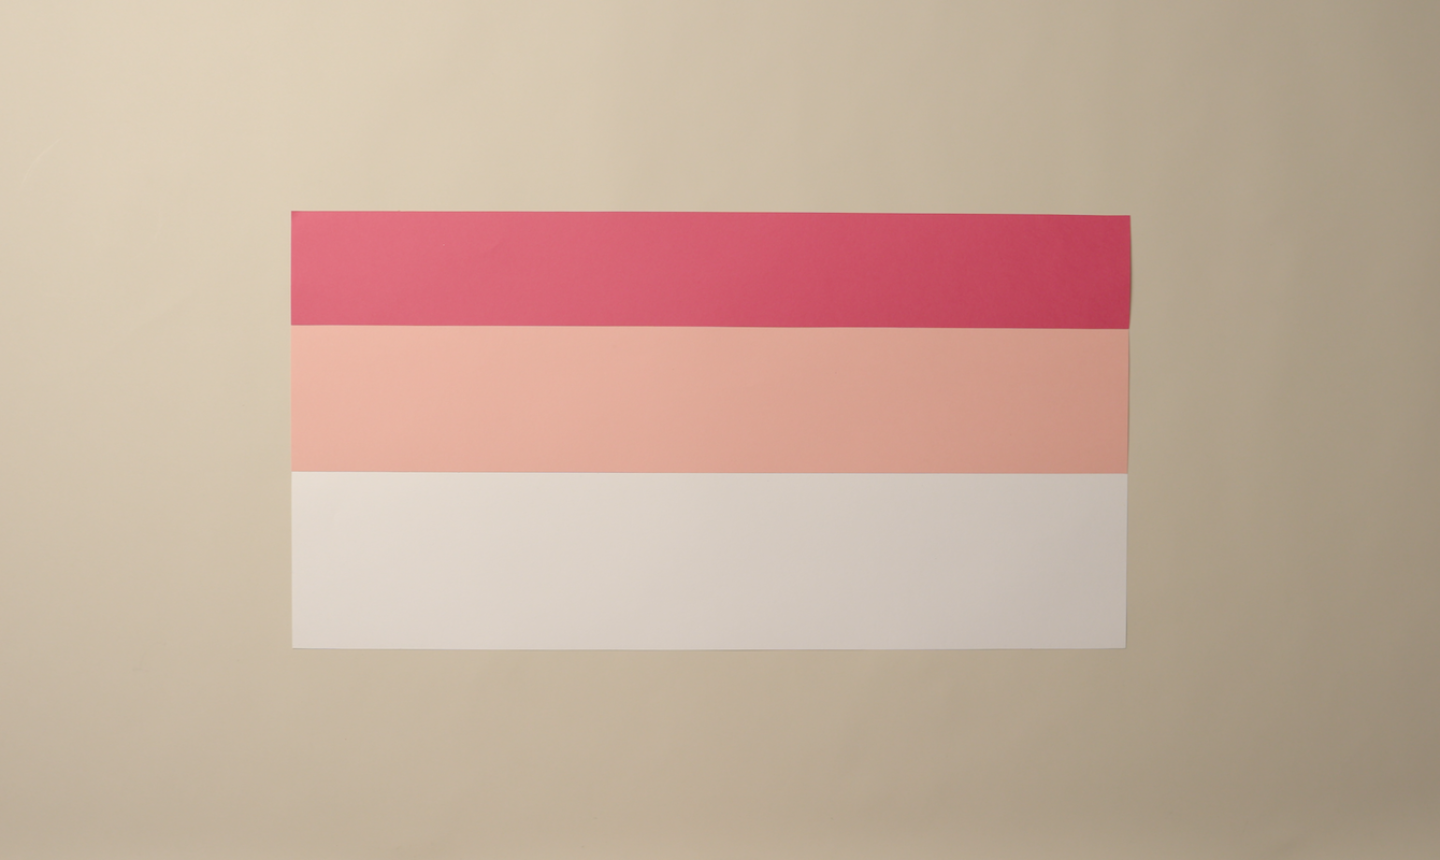
Cut your three pieces of paper so they measure 3" x 25", 4" x 25" and 5" x 25". Line them up, 25" sides together, and tape each edge to keep the paper from slipping.
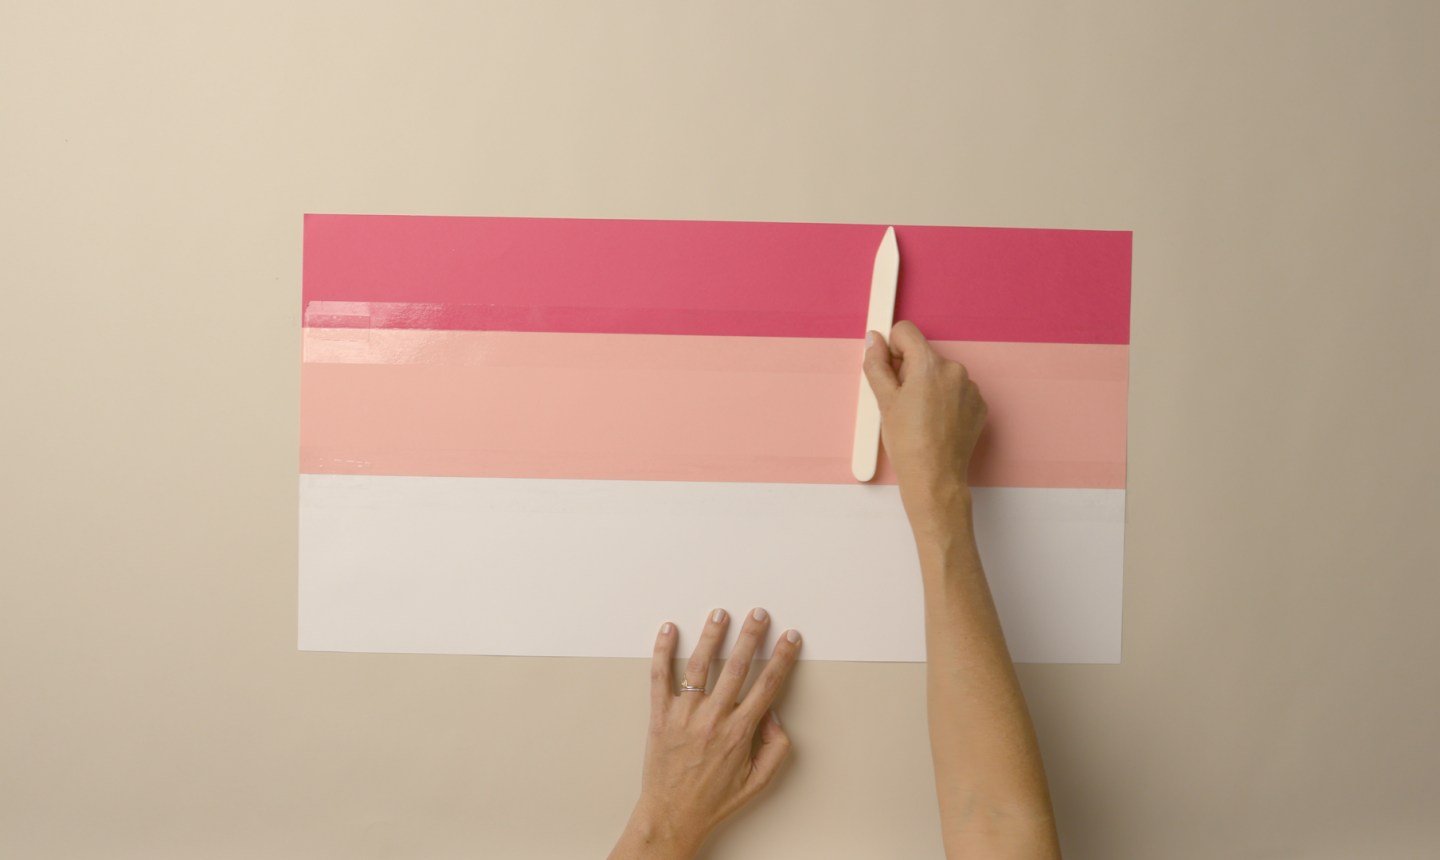
Cut three 25" strips of packing tape and place them where the 25" paper edges meet. Press the tape with a bone folder to smooth and seam the paper together.
2. Repeat and Join
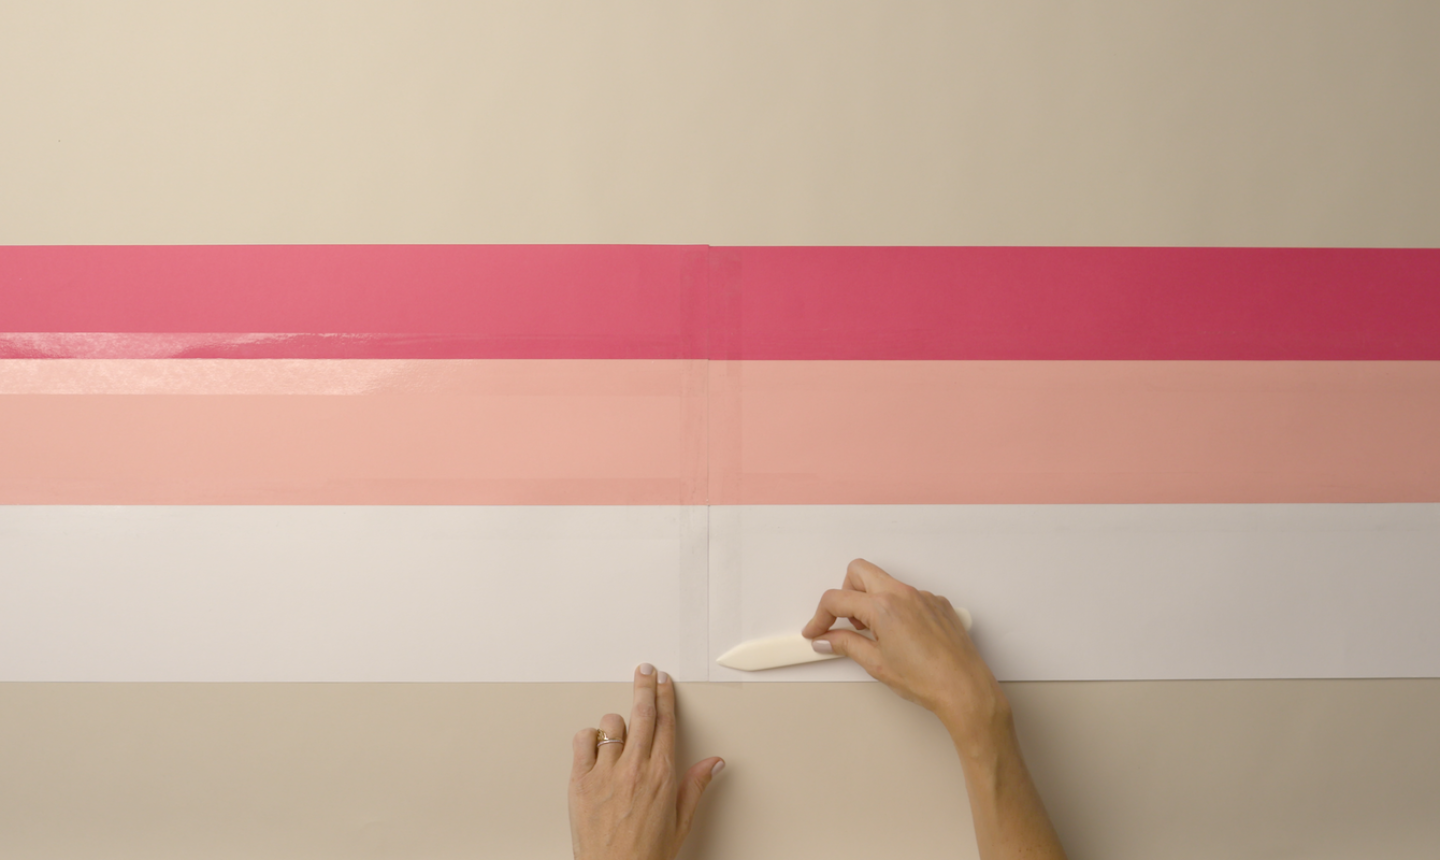
Repeat step 1 to make an identical block of paper strips. Line up the short ends, place packing tape along the edges and press with the bone folder. Your paper will now be 50" long.
Pro Tip: Only tape one side of your paper. This will be the inside of the lamp, so it's not visible on your final project.
3. Measure and Mark
Place the paper on a cutting mat. Use the guidelines to measure and mark a small tick 2¼" apart, starting ½" from the first edge. Make your last mark ½" from the opposite end.
4. Score

Place a ruler vertically across the paper where the first ½" mark is and score with your bone folder. Do this at every 2¼" marker.
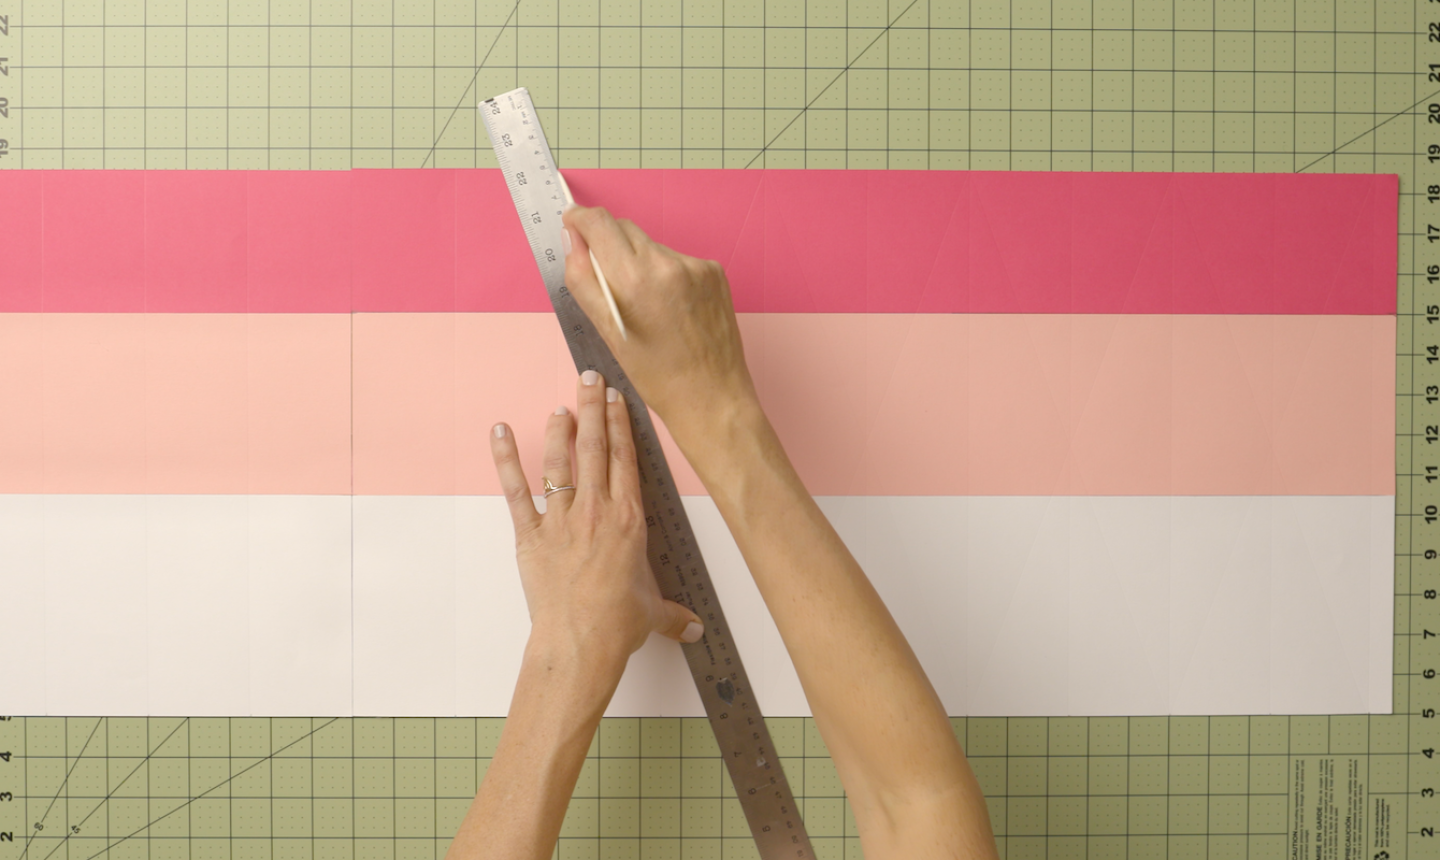
Line up your ruler from the top of one score mark to the bottom of its neighbor and score a diagonal line. Then score diagonally the opposite way between the same two vertical score marks. (Basically, you're scoring Xs between each vertical line.)
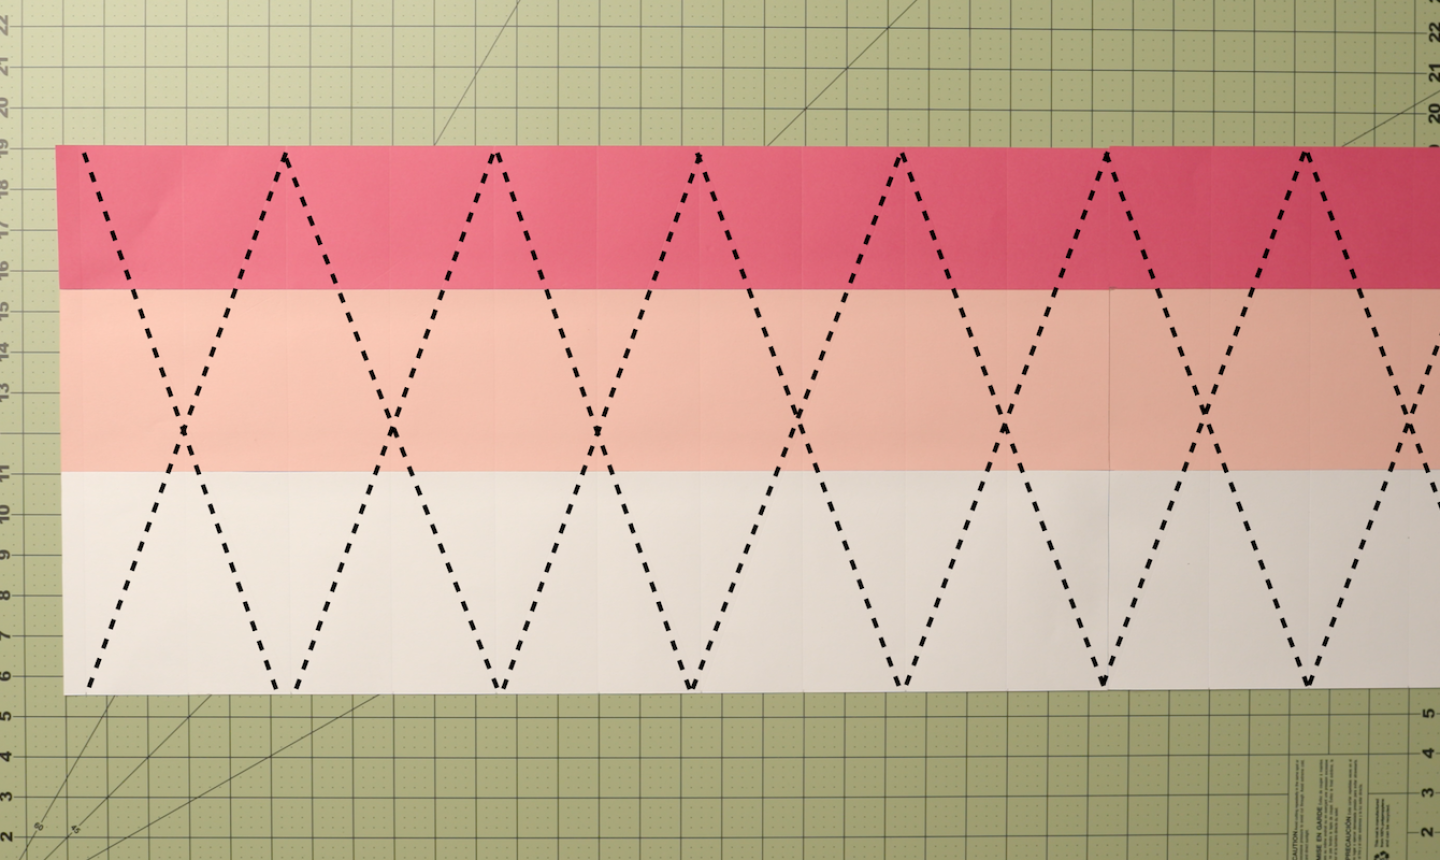
Work across the paper, following the guideline above.
5. Accordion Fold
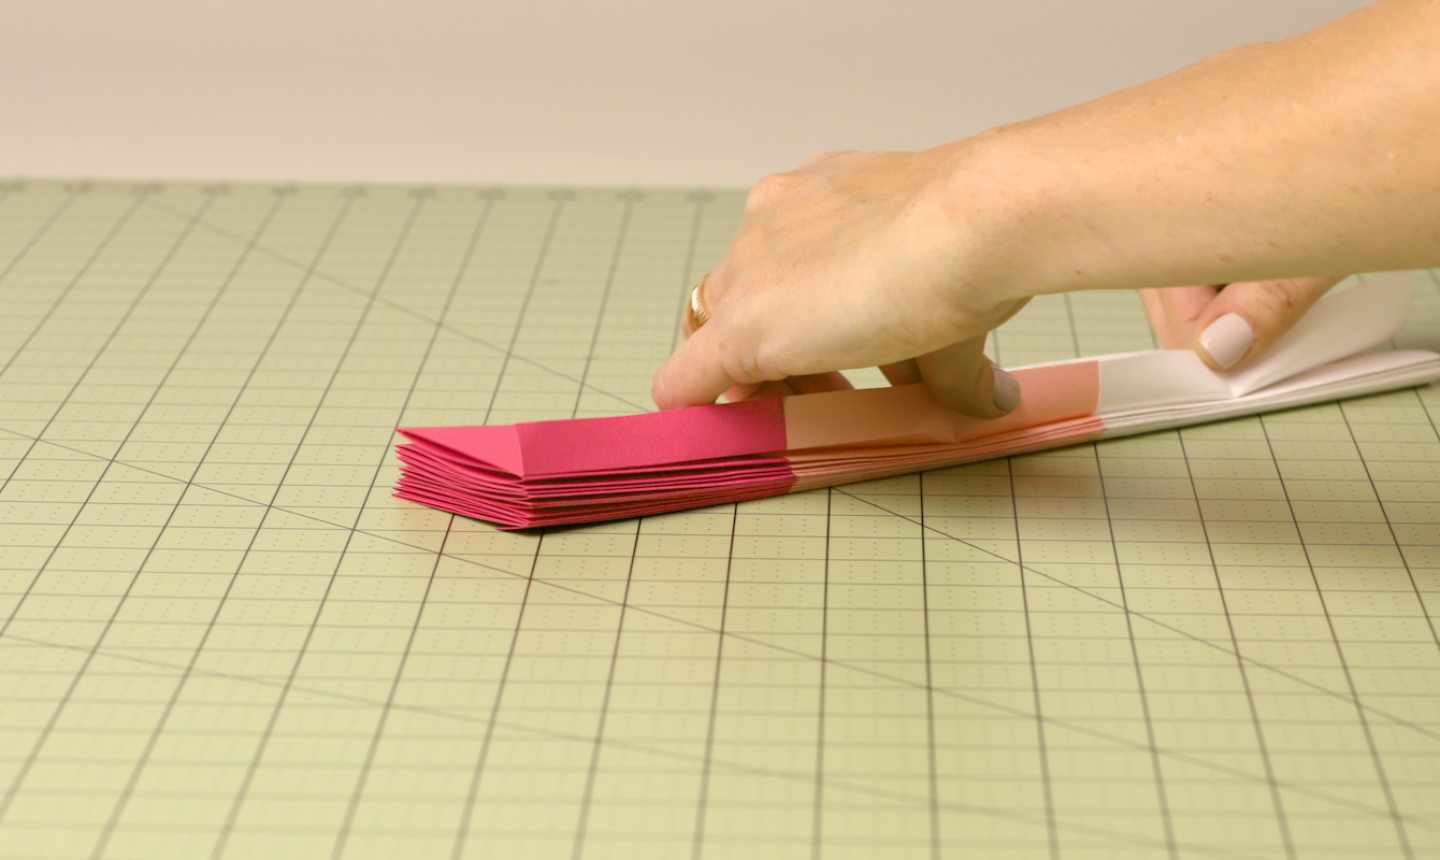
Fold the paper along each vertical scored line. Fold the first ½" mark behind, the first 2¼" mark in front and the second 2¼" mark behind. Continue this alternating pattern to make an accordion fold.
Pro Tip: To make your lines crisp, score each fold with the bone tool before moving on to the next fold.
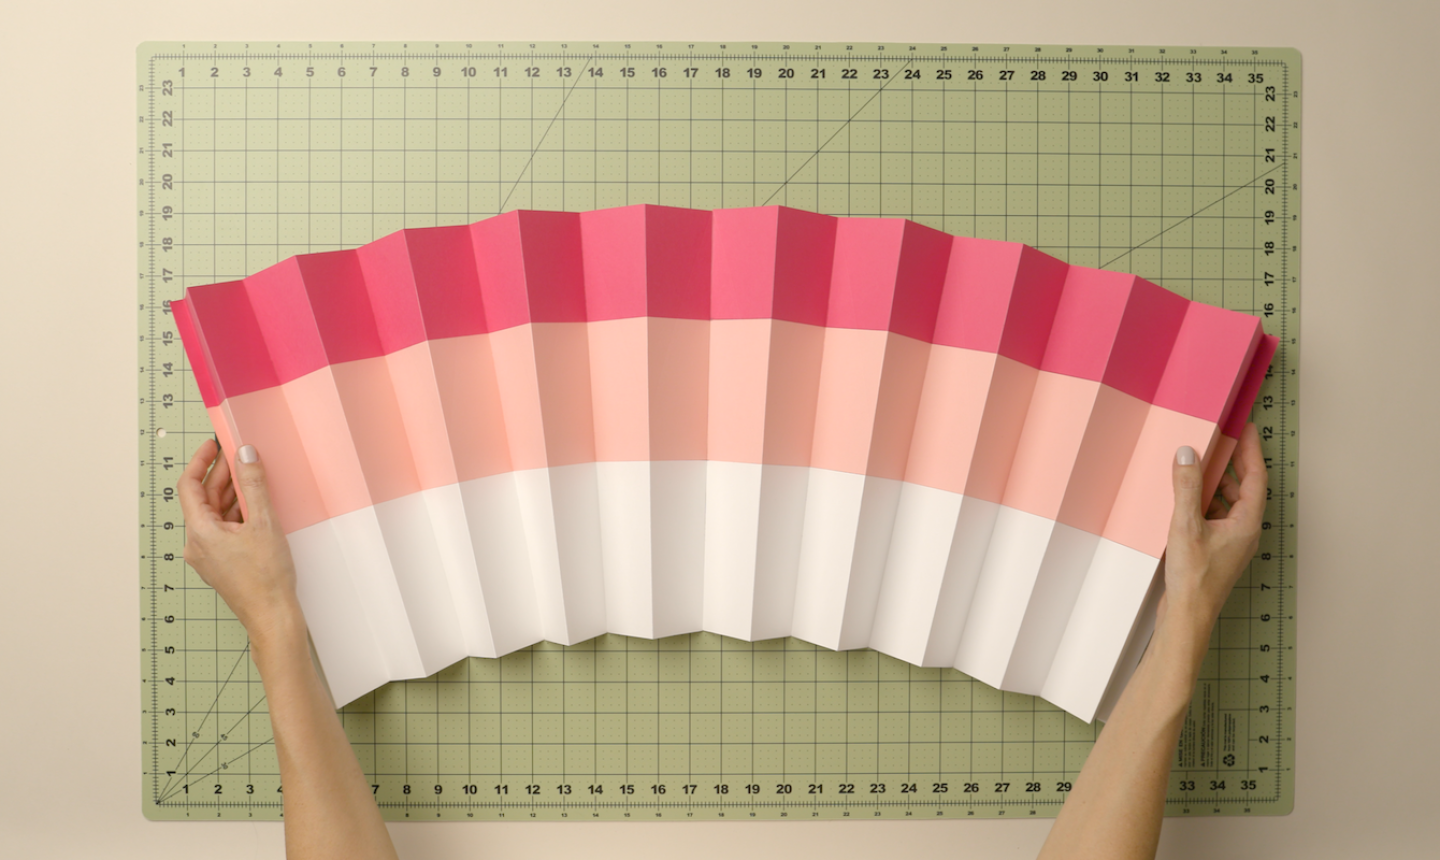
When you reach the end, open the paper back up.
6. Fold the Diagonals
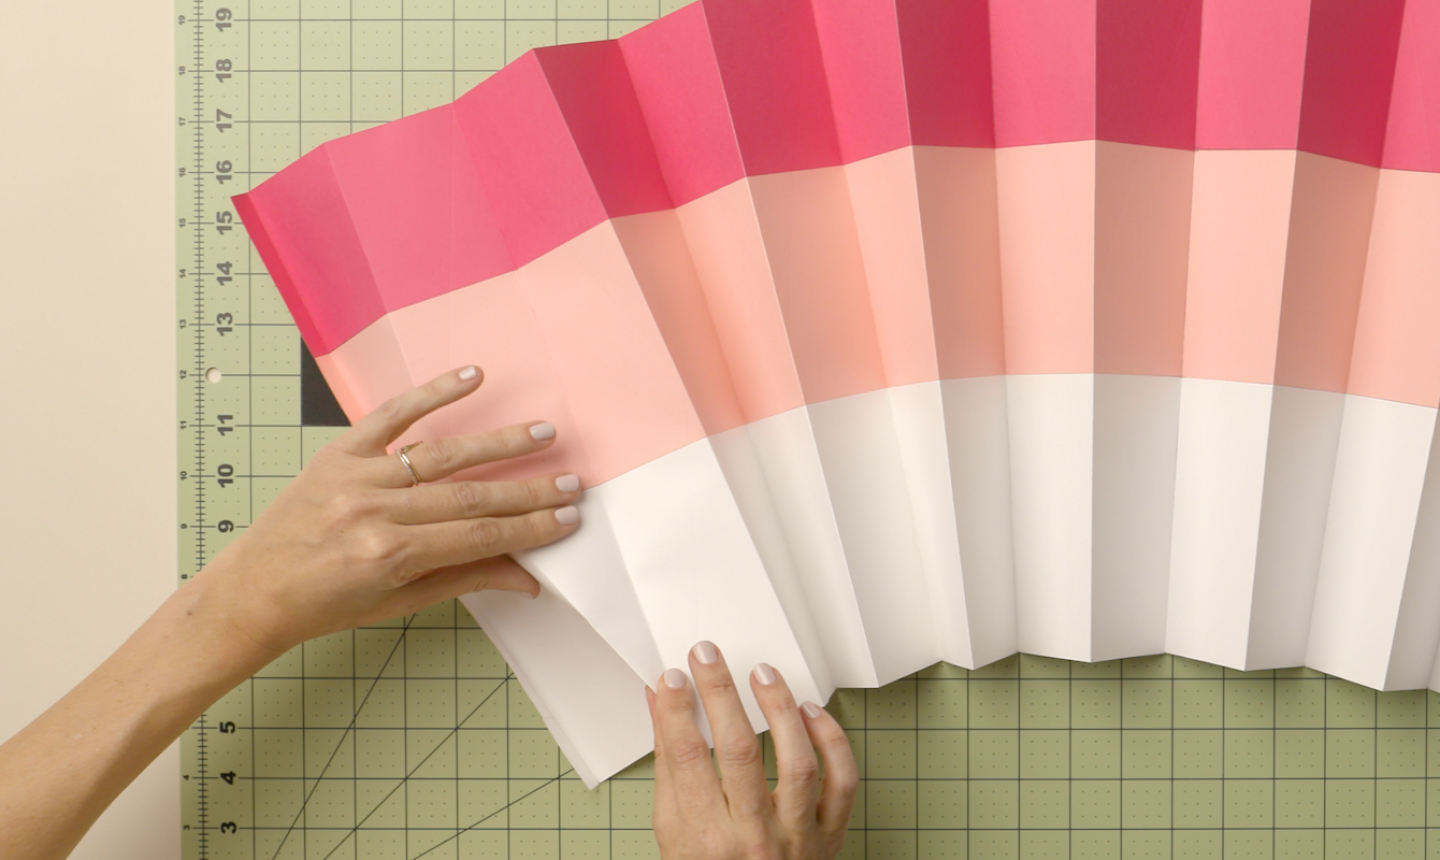
Find the first diagonal scored line and fold along it.
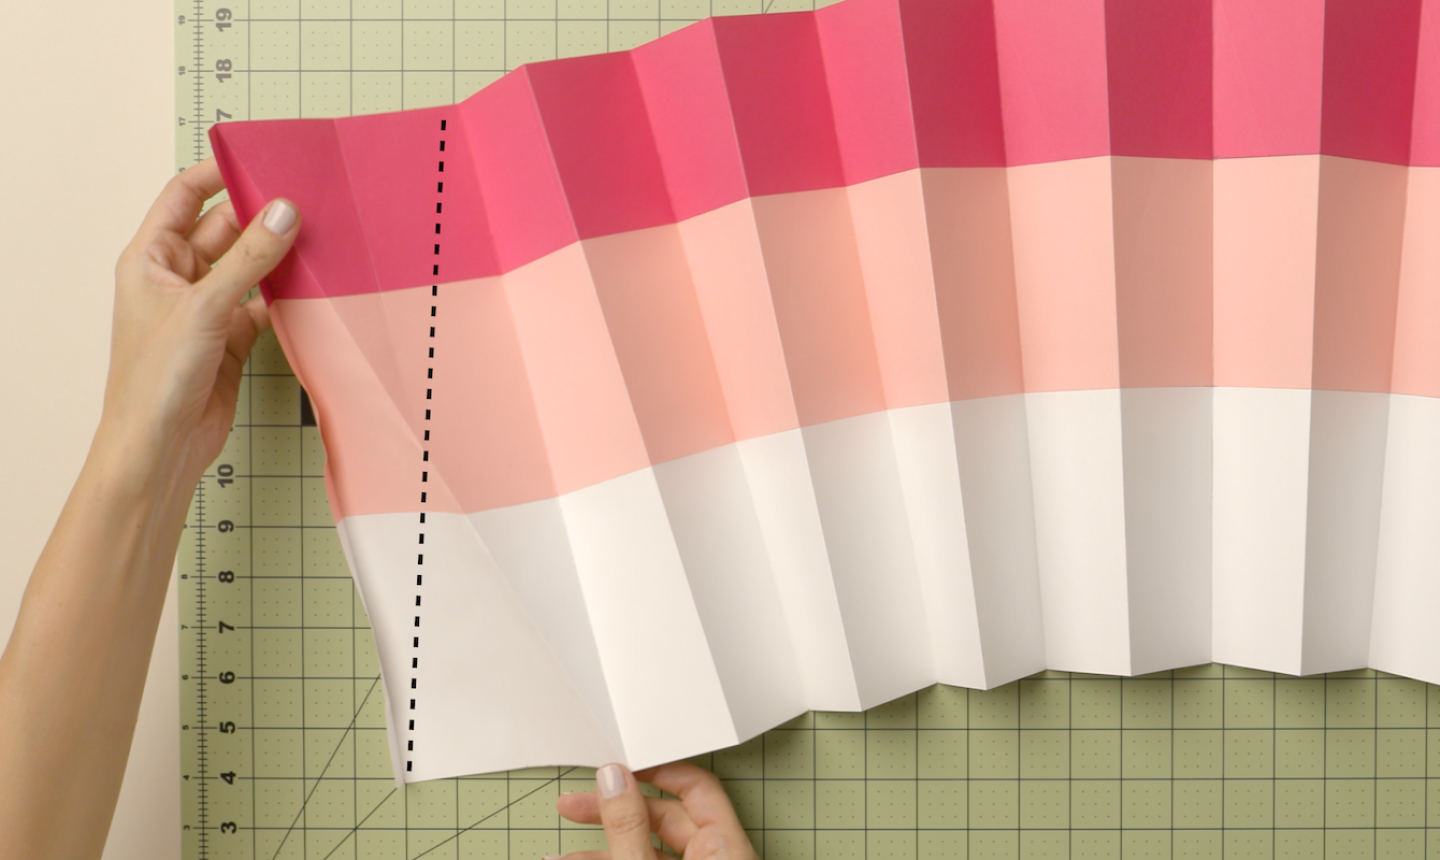
Then fold the diagonal line that crosses the one you just folded.

Work across the 50" strips, folding along all diagonals.
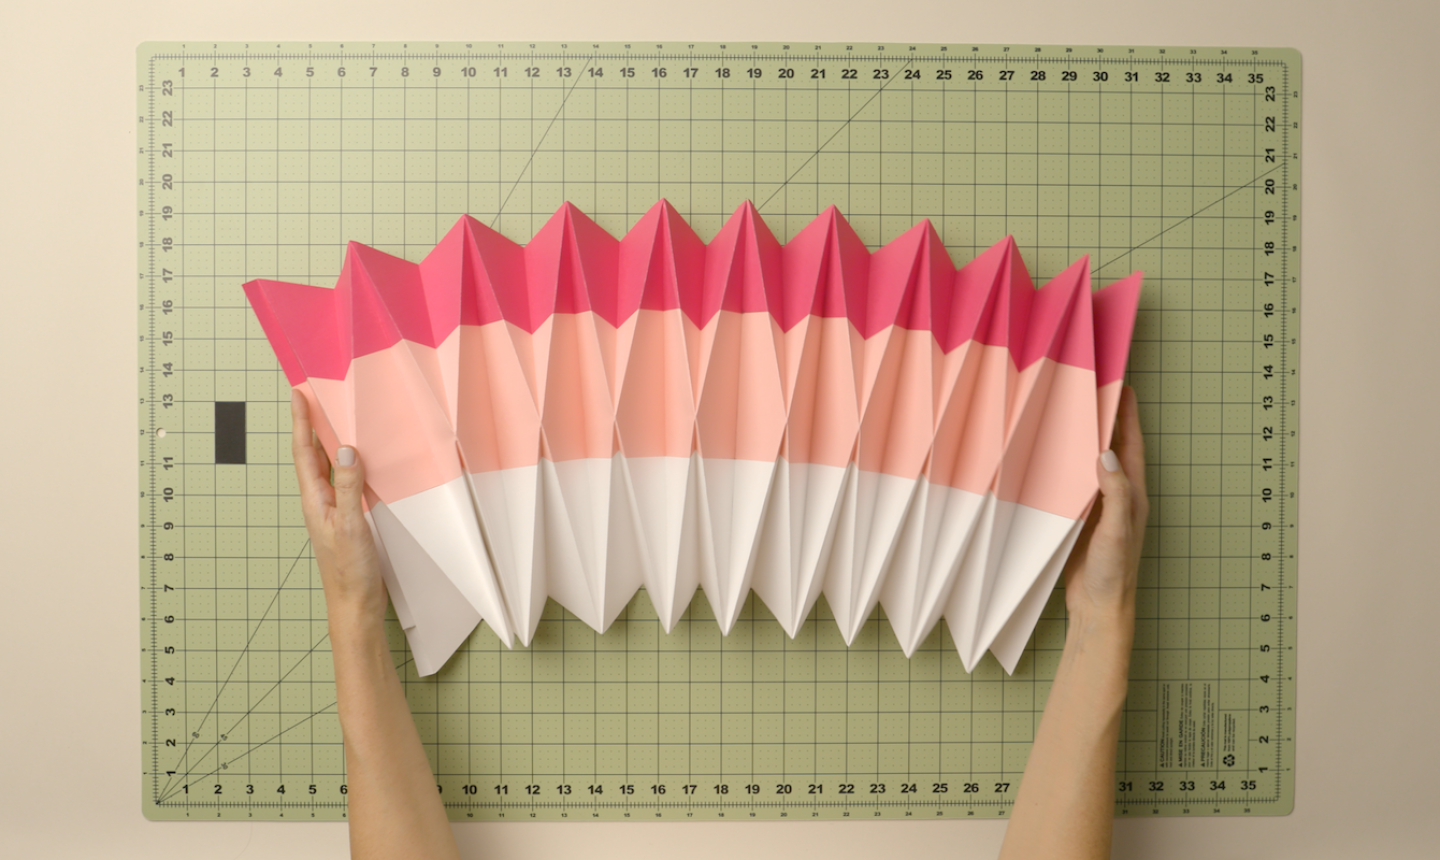
When you reach the end, open the paper back up.
7. Punch Holes
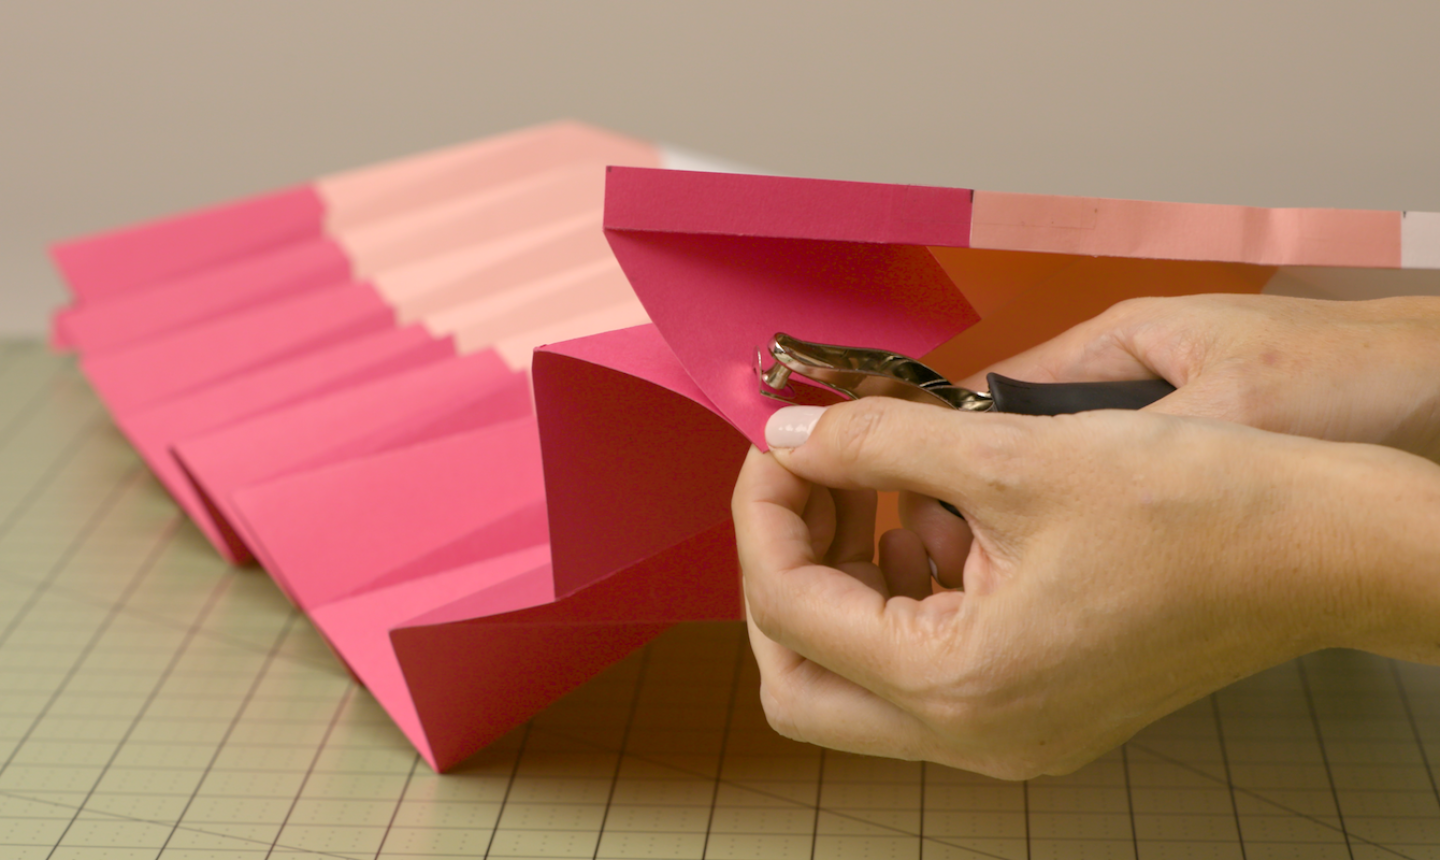
Fold the first two 2¼" vertical folds together and punch a hole through the paper.
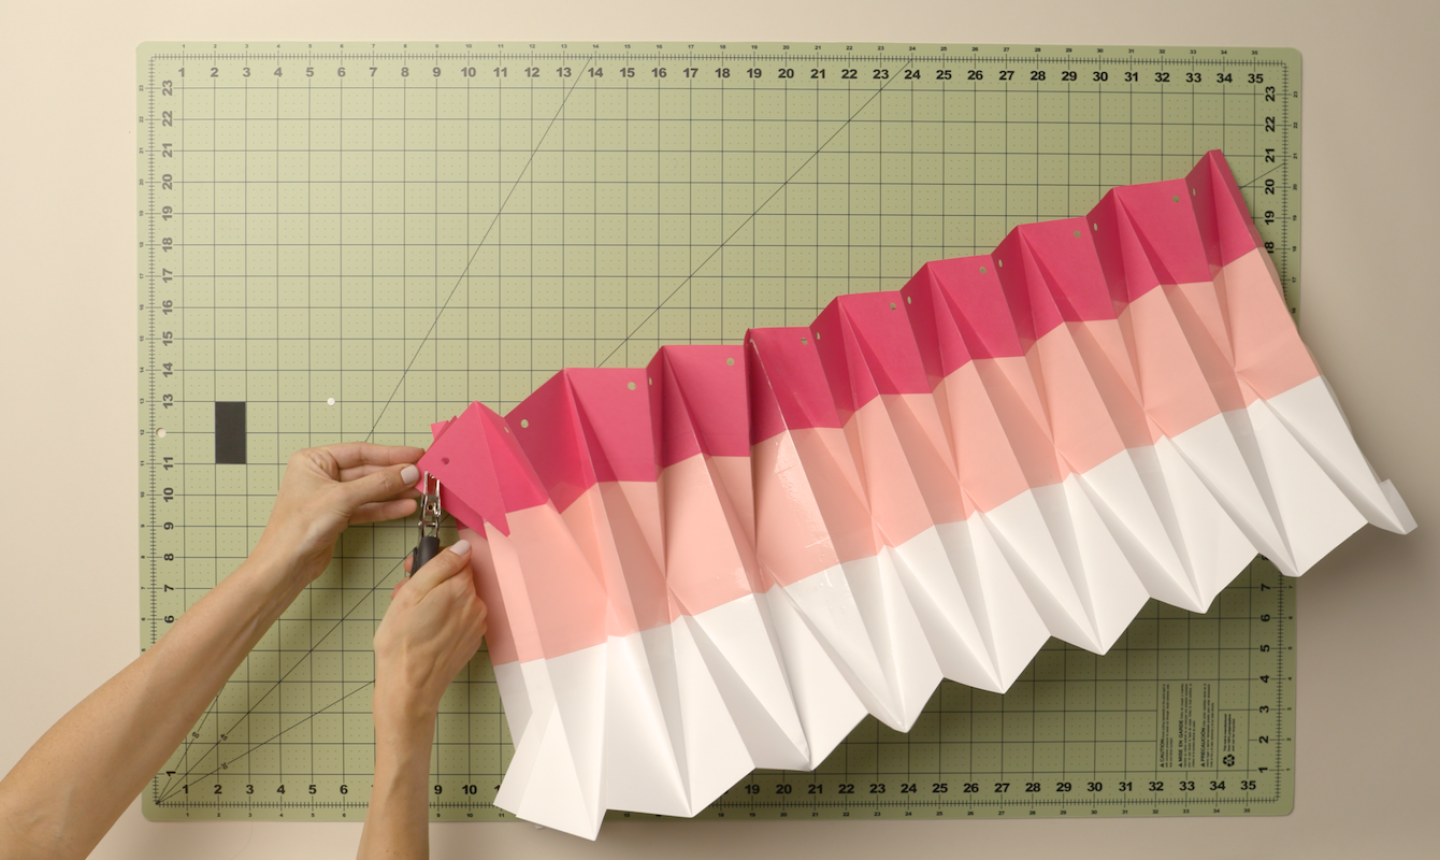
Do this on each crease, using a pencil to mark the hole placement so they align.
8. Finish It Off
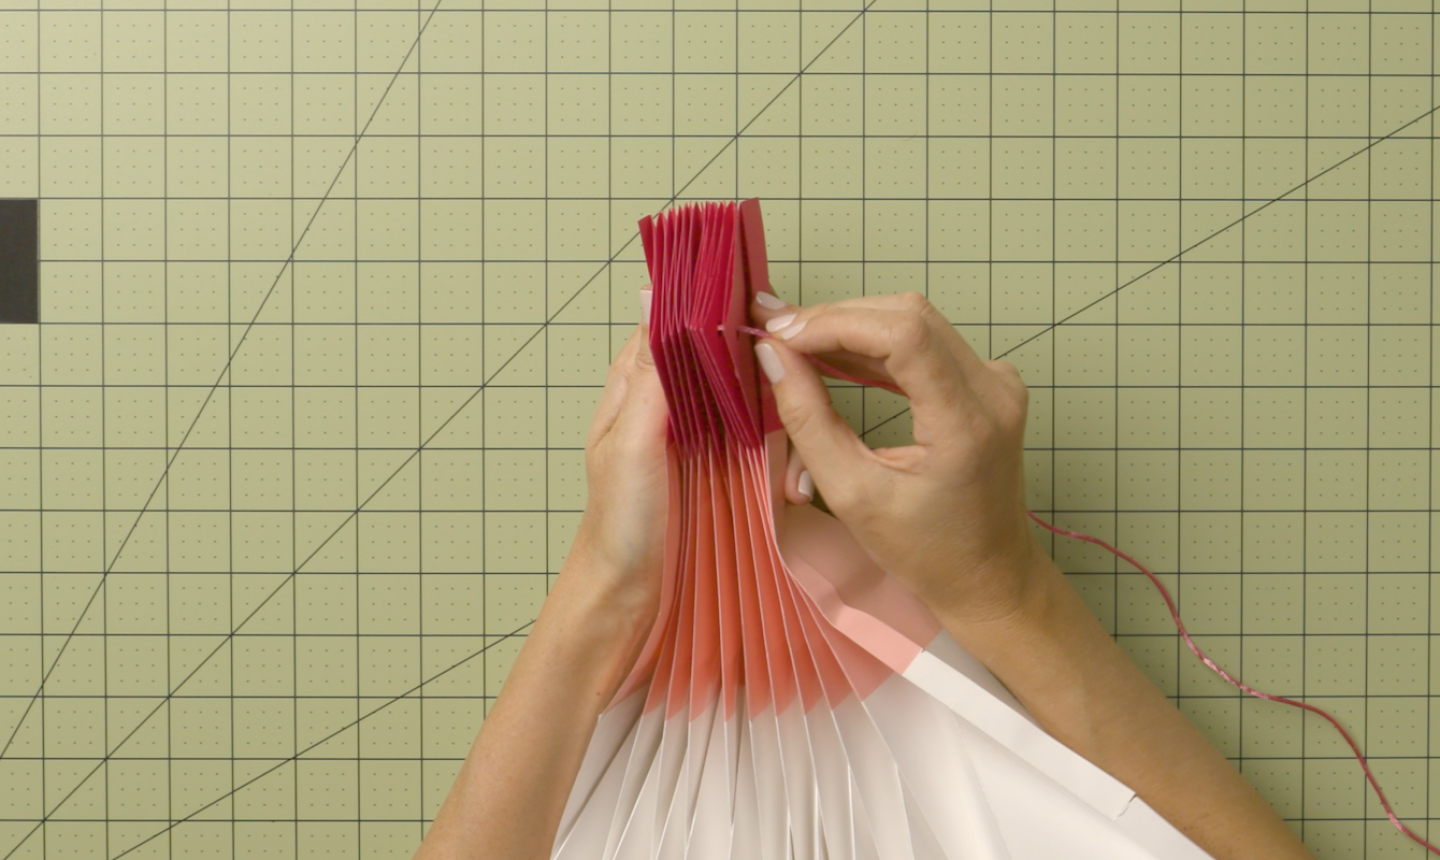
Fold the paper so the holes align and insert string through.
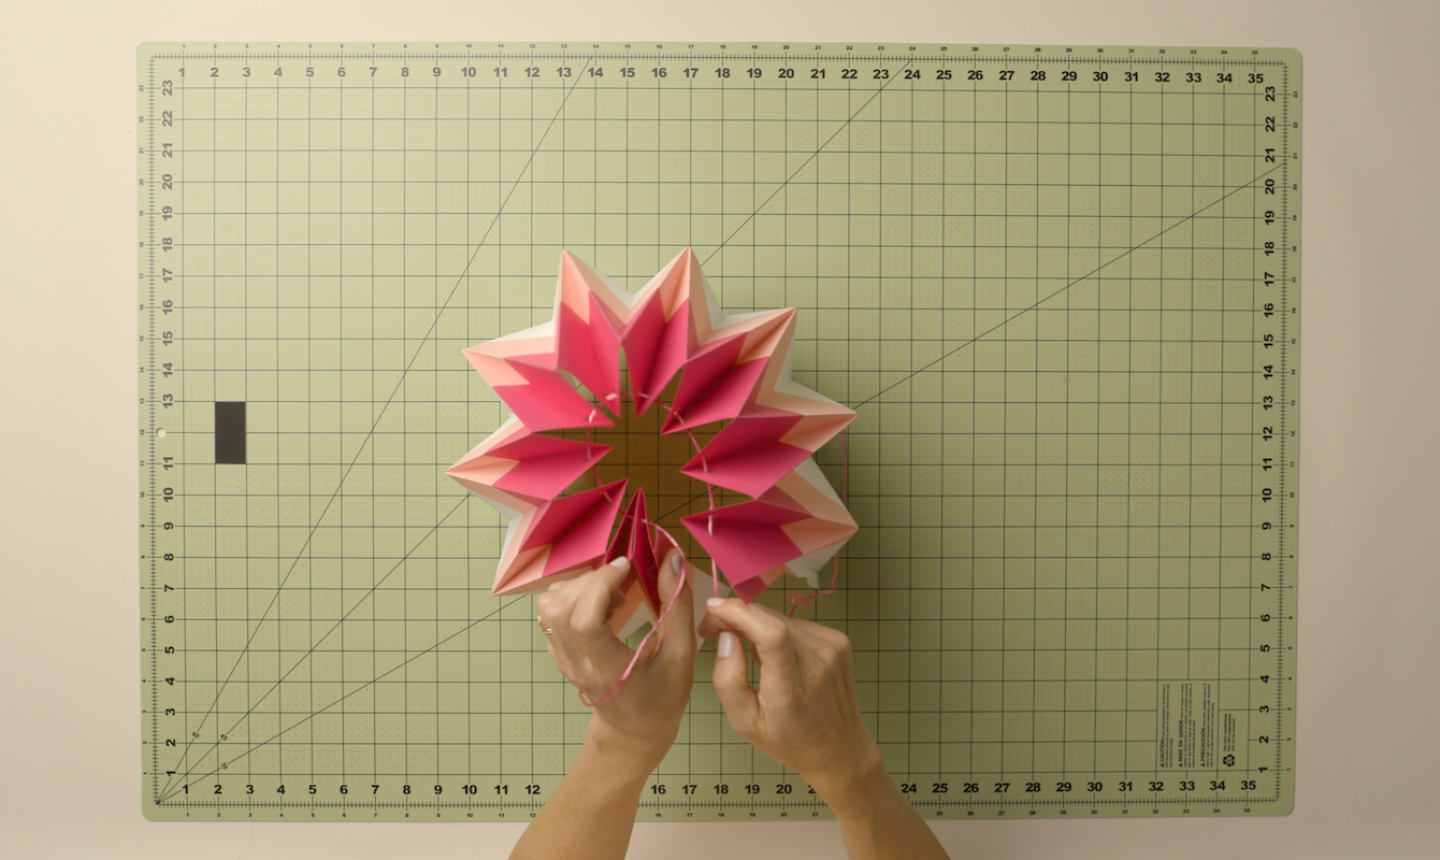
Allow the paper to open and knot the ends of your string together. Cut off any excess.

Glue the two ½" folded ends together, place the shade over a pendant light and you've got the coolest lighting for you creative space!

Share tips, start a discussion or ask other students a question. If you have a question for an expert, please click here.
Already a member?
No Responses to “Brighten Your Space With an Ombré Origami Lamp Shade”