
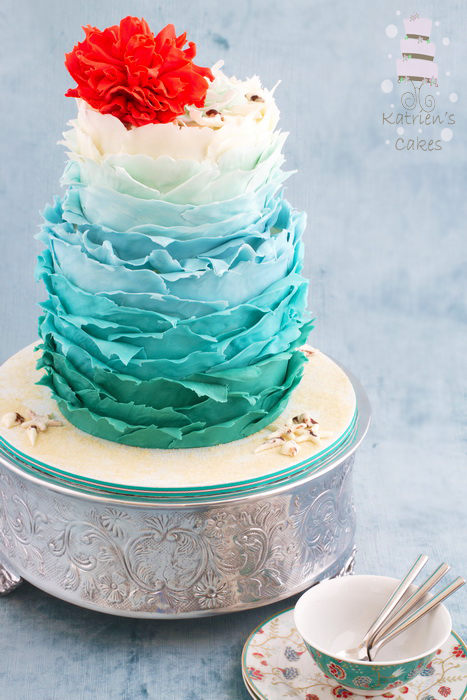
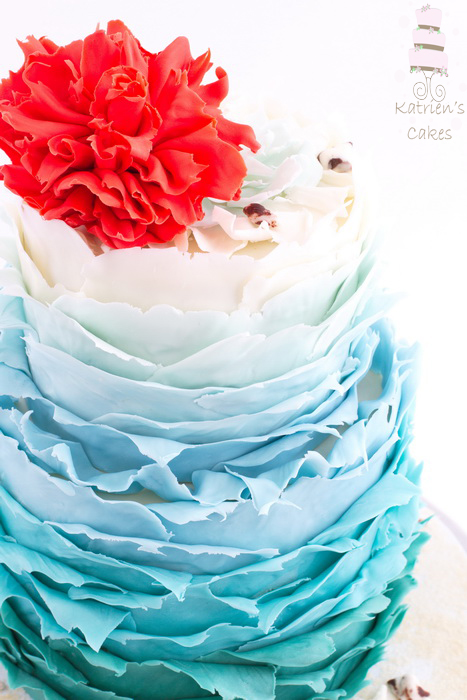
In this tutorial, I’ll show you how to transform shavings into waves!
 Photos via Katrien’s Cakes
Materials:
- Three cake layers of 8″ (20 cm) in diameter and each 2″ (5 cm) high
- Two cake layers of 6″ (15 cm) in diameter and each 2″ (5 cm) high
- A 12″ (30 cm) diameter round cake board
- A 6″ (15 cm) diameter round cake board
- Approximately 5 cups (1,25 L / 45 fl oz) buttercream icing for the filling
- Approximately 5 cups (1,25 L / 45 fl oz) buttercream icing or ganache for the coating
- Dowels or bubble tea straws
- Smooth apricot jam, sugar syrup or piping gel
- 2 pounds (900g) white modeling chocolate or 1 pound 7 ounces (650g) modeling chocolate mixed with 9 ounces (250g) sugar paste (fondant) for the cake
- 7 ounces (200g) white modeling chocolate or 4 1/2 ounces (125g) modeling chocolate mixed with 2 2/3 ounces (75g) sugar paste (fondant) for the flower
- Light blue, dark green, pink and orange food coloring, preferably gel coloring
- Granite workbench or cutting board, a tile or glass cutting board
- Corn starch (corn flour)
- Palette knife
- Non-stick rolling pin
- Knife
- Scissors
Instructions: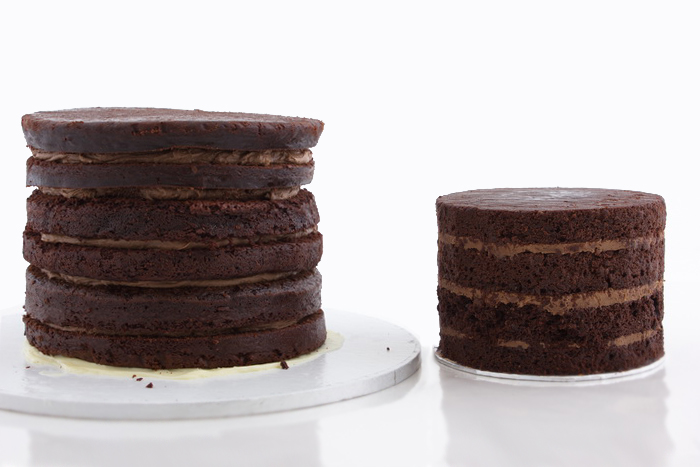 Step 1:
Divide each of the 8″ (20 cm) cake layers so that you have six layers in total. Stack the layers on the 12″ (30 cm) cake board with buttercream filling in between.
Divide each of the 6″ (15 cm) cake layers so that you have four layers in total. Stack the layers on the 6″ (15 cm) cake board with buttercream filling in between.
 Step 2:
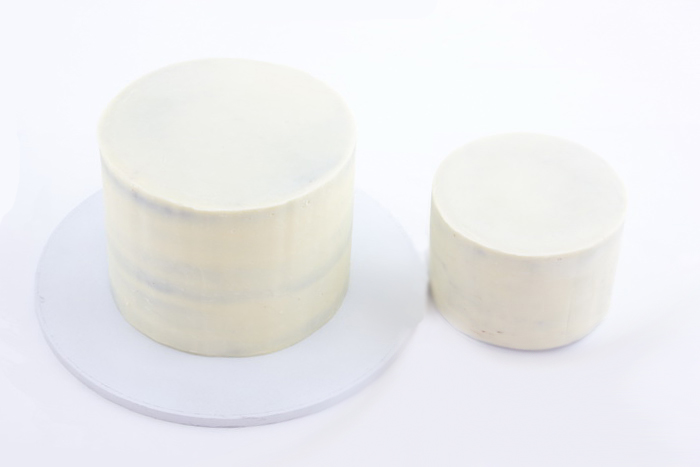
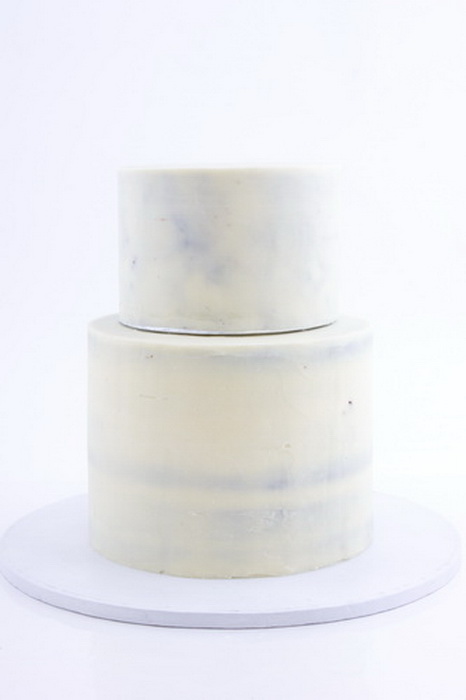
Coat the cake tiers with ganache or buttercream using a palette knife. Dip the palette knife into hot water and wipe it off with a clean cloth. Smooth the ganache or buttercream with the hot palette knife.
The coating does not have to be too thick or perfect, as it will be covered with ombré shavings. Place the cakes in the refrigerator for 15-20 minutes for the coating to set.
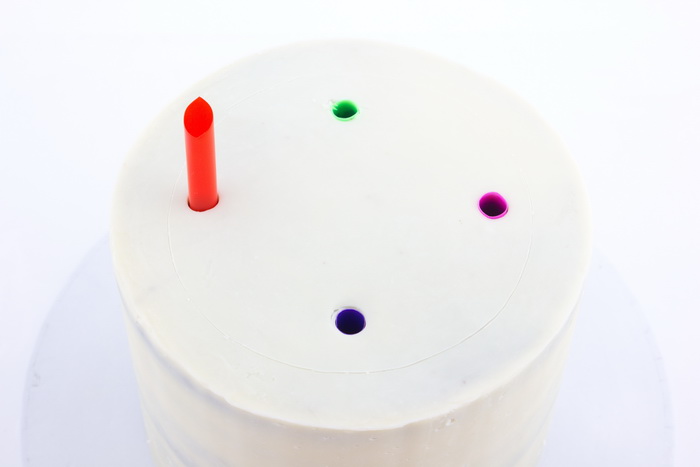 Step 3:
Place dowels or bubble tea straws into the large bottom tier and cut them off flush with the top of the cake.
Step 4:
Spread a small amount of leftover ganache or buttercream on top of the dowels or straws and place the smaller cake on top of the larger cake tier. Brush smooth apricot jam, sugar syrup or piping gel over the surface of the cake for the modeling chocolate to adhere to the cake surface.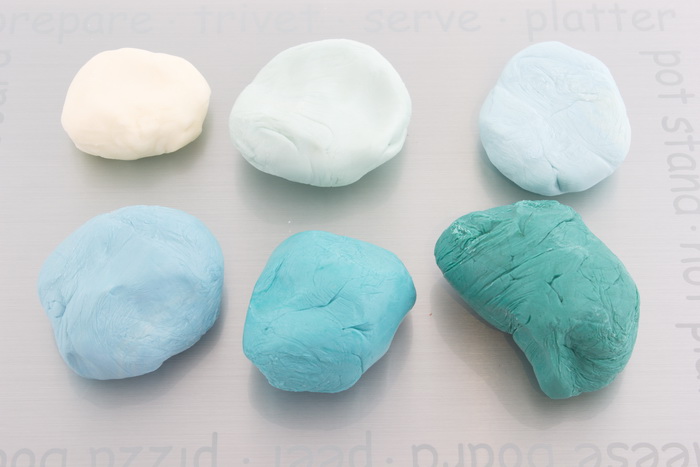 Step 5:
Divide the 2 pounds (900g) white modeling chocolate or 1 pound 7 ounces (650g) modeling chocolate mixed with 9 ounces (250g) sugar paste (fondant) into six pieces. They do not have to be equal in weight.
Keep one piece white and color the other five portions with blue food coloring. Color them progressively darker and add a small amount of green food coloring to one piece and a bigger amount of green coloring to another piece.
 Step 6:
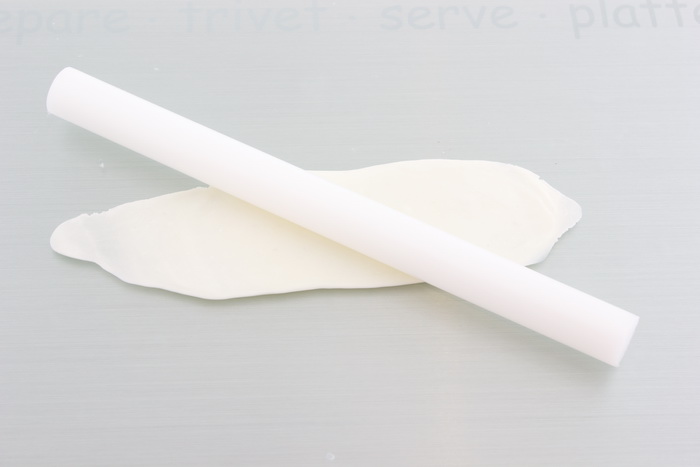
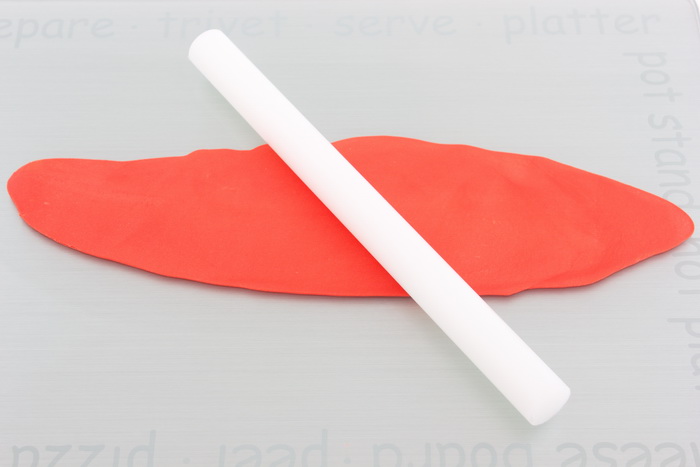
Break off a small piece of white modeling chocolate. Warm it in your hands and then roll it out to almost paper thin on a granite workbench, a granite cutting board, a tile or a glass cutting board.
If your roller sticks to the modeling chocolate, you can dust it with a small amount of cornstarch (corn flour).
The bottom of the modeling chocolate must stick to the bench or board for this cutting technique to work, so do not put cornstarch (corn flour) underneath the modeling chocolate.
Repeat to make more shavings until you have used all the white modeling chocolate.
 Step 7:
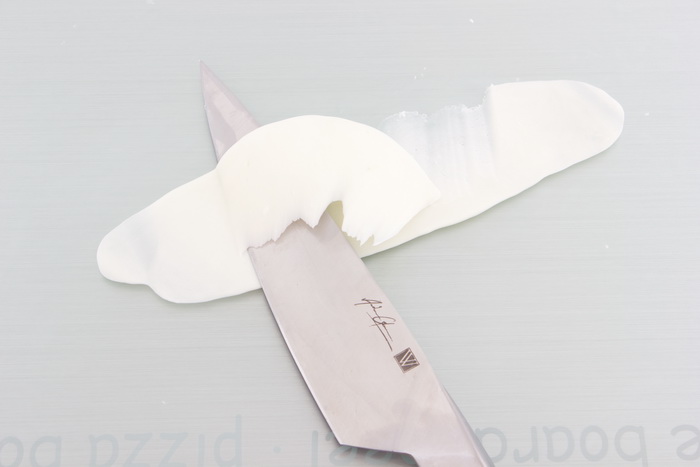
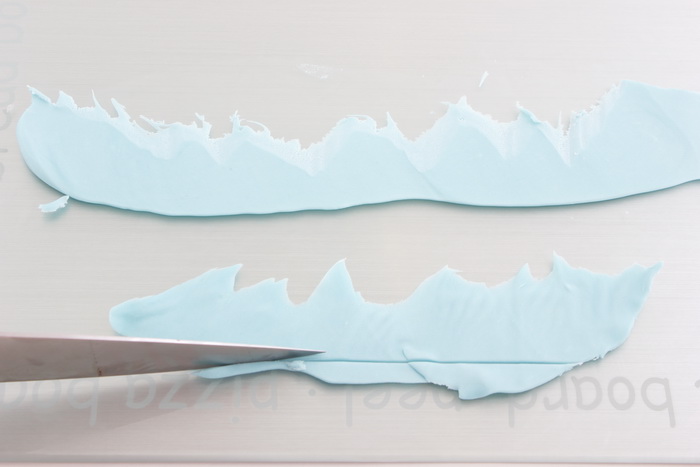
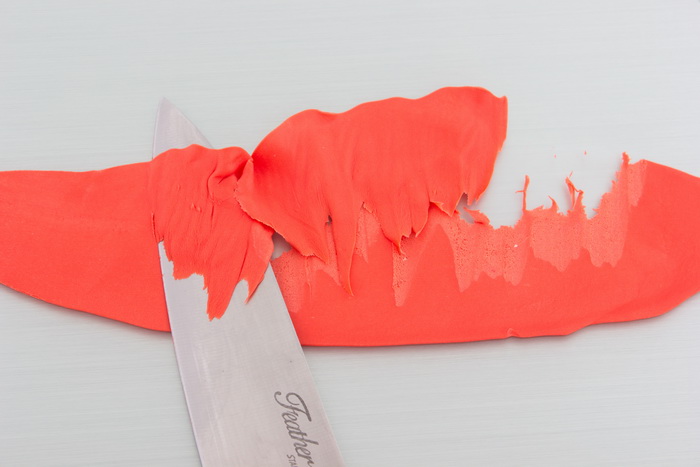
Using a sharp, non-serrated knife cut a piece of the modeling chocolate off the bench or board with a sawing motion to make a large shaving with a thin, delicate, uneven edge.
The longer the piece of modeling chocolate that you rolled out the longer your shaving will be.
You should be able to cut one to two shavings from one piece of rolled modeling chocolate. You could also cut smaller shavings from the leftover pieces on the bench or board.
 Step 8:
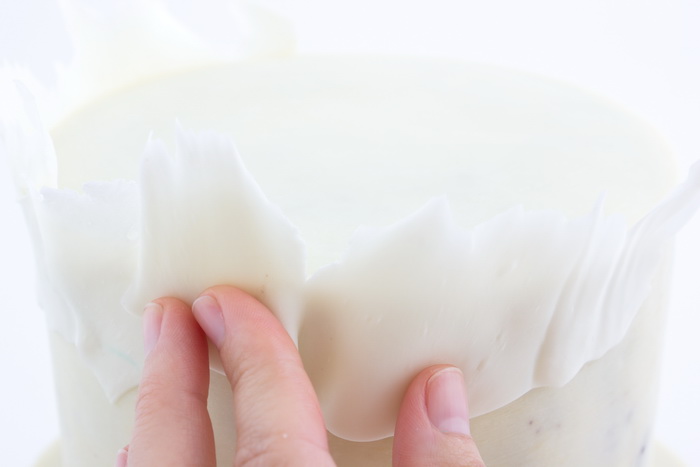
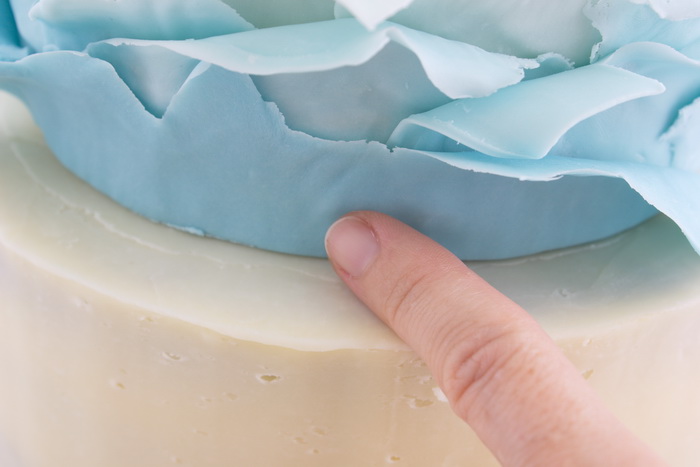
Lift the modeling chocolate shaving and place it onto the top edge of the smallest cake. Place it so that there is a piece of about 1/2″ (1 cm) protruding over the edge of the cake. Press it against the cake with your fingers it should stick easily to the surface of the cake. Place more shavings next to the first shaving, overlapping each piece with the previous one.
When you have finished the first row of shavings, start with the next row. Overlap the top of the shavings from the second over the bottom of the shavings on the first row. Keep on making more shavings with white modeling chocolate until you have placed two rows on the cake or until the white piece is finished.
Press the shavings against each other, as the modeling chocolate is a sticky medium they will adhere to each other readily.
 Step 9:
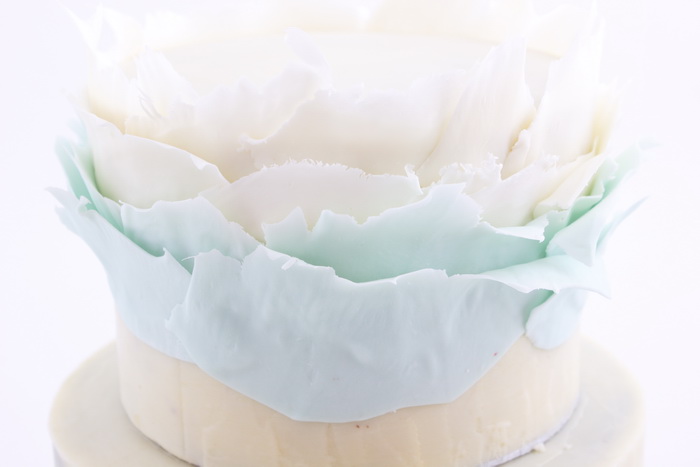
When you have used up the white piece, start rolling out small portions of the lightest piece of blue modeling chocolate. Make shavings as described above and move on to the next piece of blue modeling chocolate when you have made two rows of light blue shavings, or when that piece of modeling chocolate is finished.
 Step 10:
When you get to the bottom row of shavings on the top tier of the cake, cut the bottom edge of all the shavings so that they have a straight edge. This will ensure that it will sit flush on the top of the bottom tier.
 Step 11:
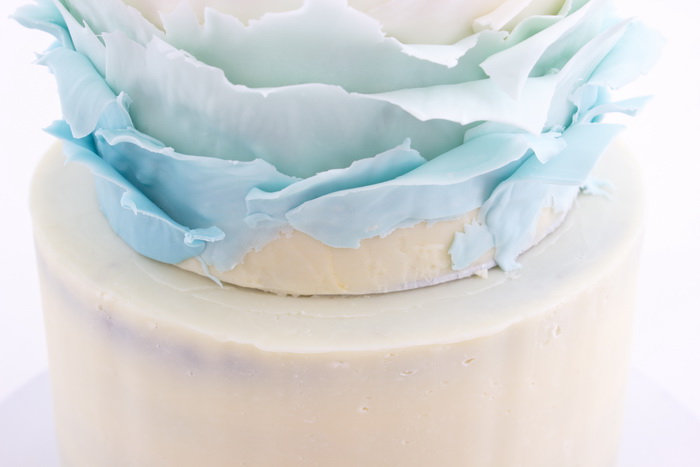
Place a row of shavings on the top edge of the bottom tier. Place them so that there is a piece of about 1/2″ (1 cm) protruding over the edge of the cake and overlapping each other.
If you do not like the open space created by the top of the bottom tier, make small shavings and place them into the open gap between the top and bottom cake layers.
Step 12:
Make shavings from the lighter piece of blue-green modeling chocolate and press them against the cake as before until you have used all of that particular color.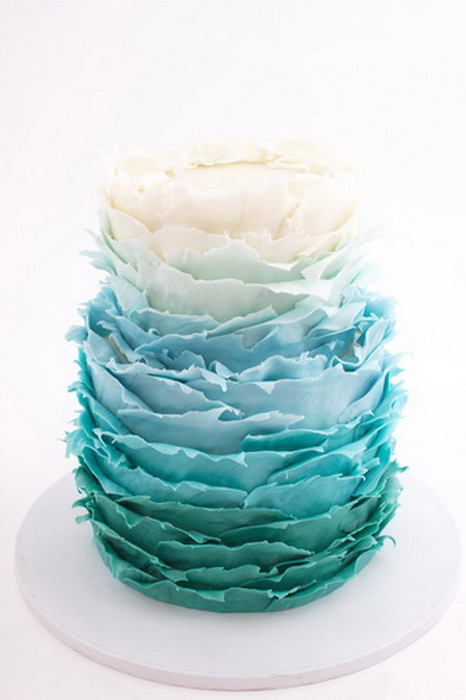
Step 13:
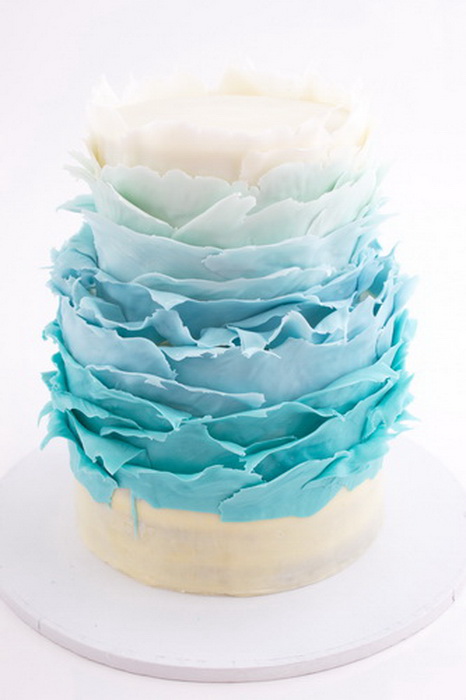
Make shavings from the darkest blue-green color and cover the rest of the cake tier. Cut the edges of the last row of shavings straight as described above. Stand back, and delight in the ombré waves created on this cake. Want to learn another innovative technique to make an undersea cake, look no further than to the Craftsy class White Chocolate Wrap Undersea Adventure with Paul Bradford where you will learn to wrap your cake as well as make realistic embellishments.Making the flower:
 Step 1:
Color the 7 ounces (200g) white modeling chocolate or 4 1/2 ounces (125g) modeling chocolate mixed with 2 2/3 ounces (75g) sugar paste (fondant) with pink and orange food coloring to make a coral-colored flower.
Break off a small piece of modeling chocolate at a time. Warm it in your hands and then roll it out to almost paper thin on a granite workbench, a granite cutting board, a tile or a glass cutting board.
If your roller sticks to the modeling chocolate, you can dust it with a small amount of cornstarch (corn flour).
The bottom of the modeling chocolate must stick to the bench or board for this cutting technique to work, so do not put cornstarch (corn flour) underneath the modeling chocolate.
 Step 2:
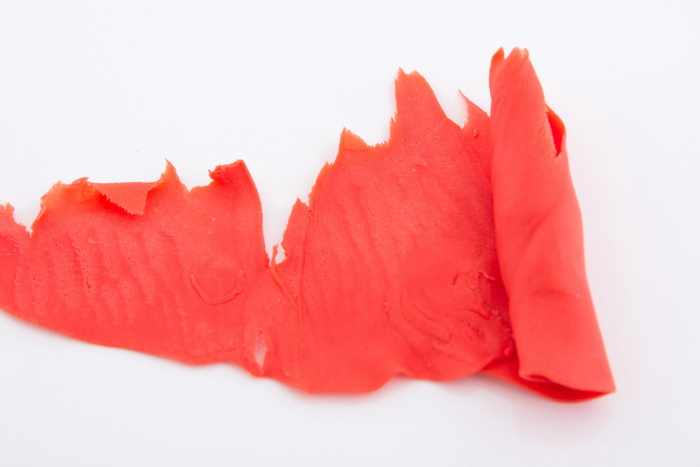
Using a sharp, non-serrated knife cut a piece of the modeling chocolate off the bench or board with a sawing motion to make a large shaving with a thin, delicate, uneven edge.
The longer the piece of modeling chocolate that you rolled out the longer your shaving will be.
 Step 3:
Roll up the shaving to form the center of the flower.
 Step 4:
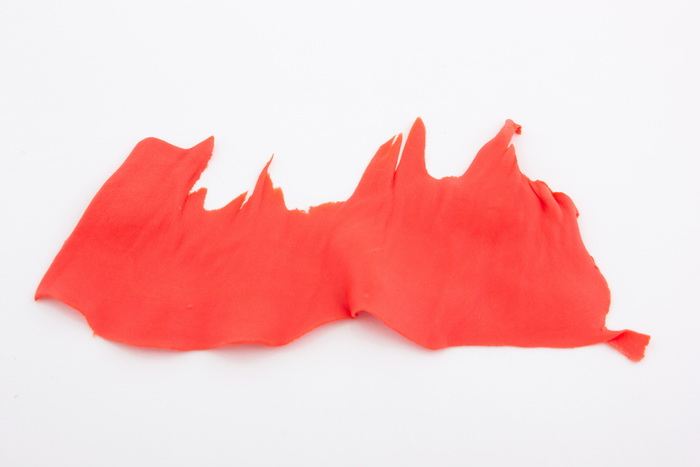
Cut another shaving and lay it flat with the uneven edge at the top.
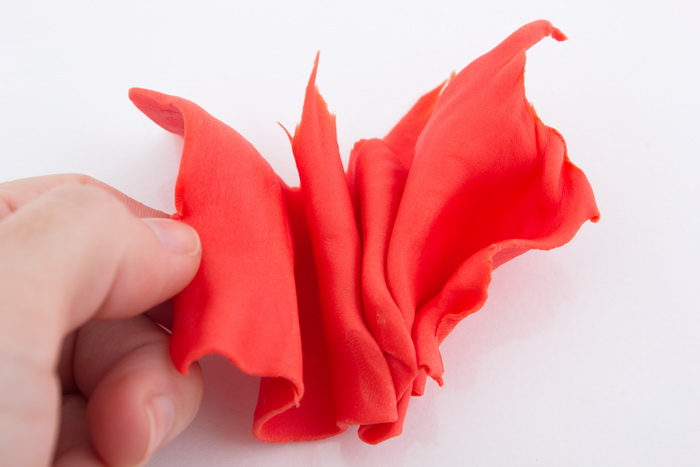
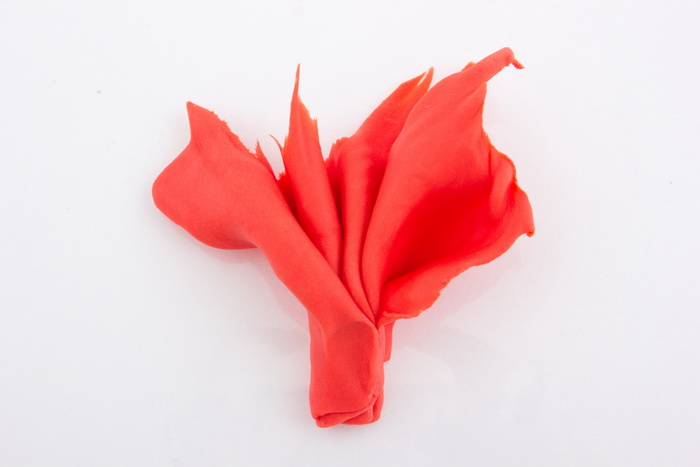 Step 5:
Pleat the shaving from one side to the other and pinch the bottom to form a fan.
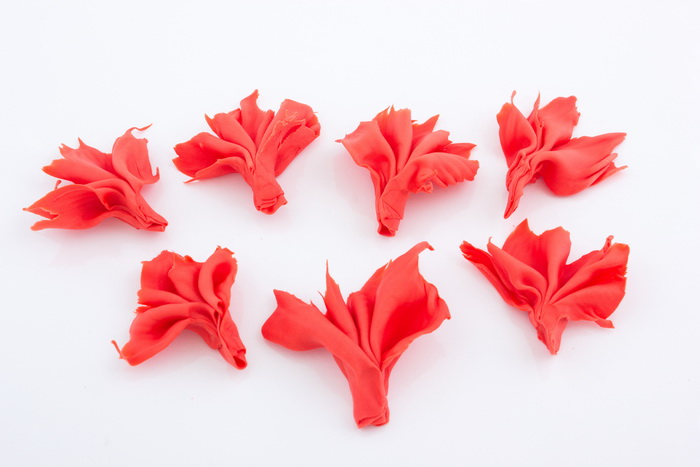 Step 6:
Make seven or more fan petals to form your flower.
 Step 7:
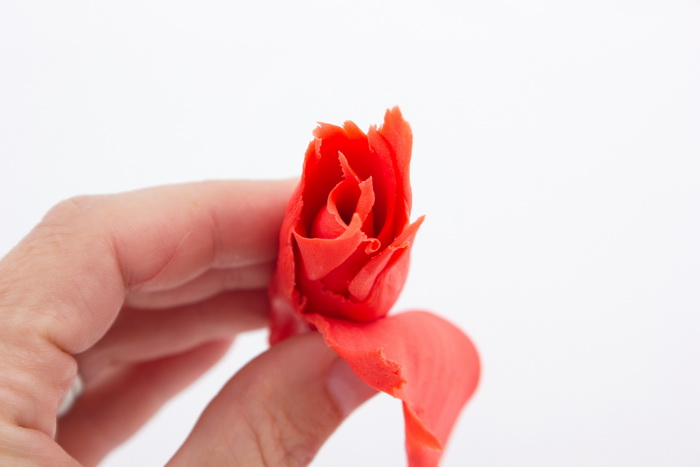
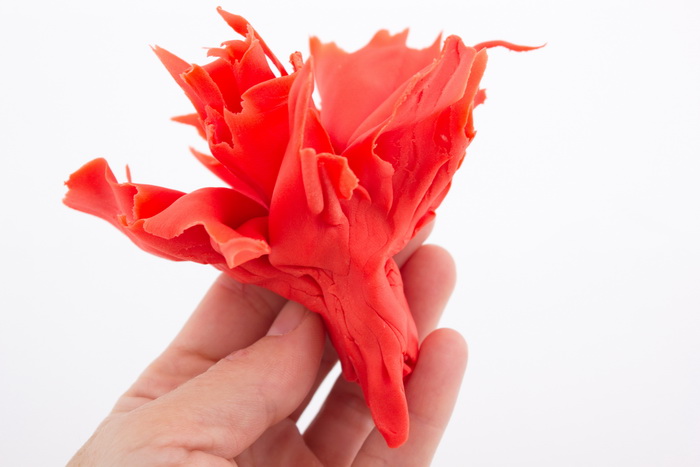
Press the bottom of a fan petal against the bottom of the center of the flower and pinch it together so that it adheres to each other.
 Step 8:
Add two more fan petals to create the first row of petals on the flower, pinching the bottom of the flower so that all the petals attaches to each other.
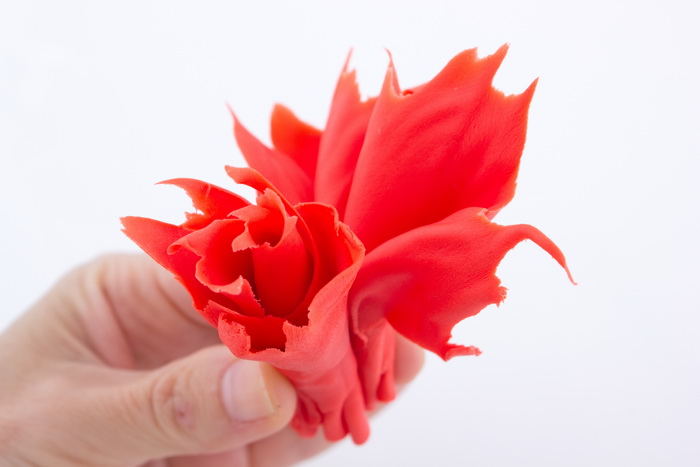
 Step 9:
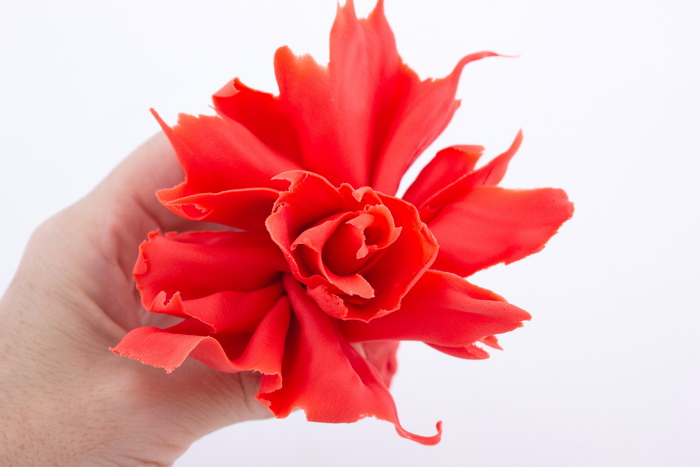
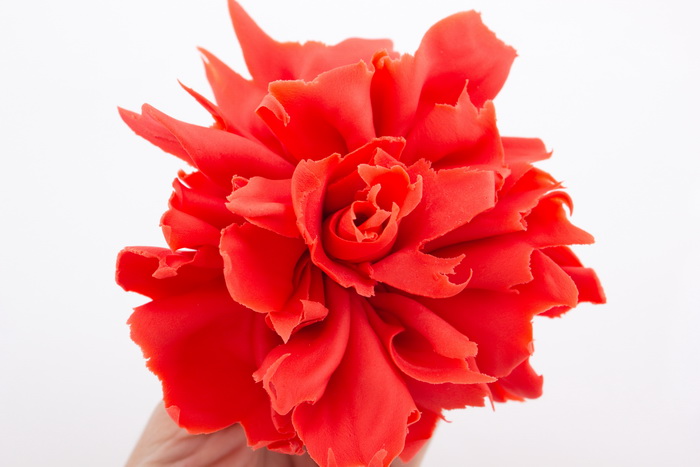
Add four more fan petals to the bottom of the first row, pressing the petals into each other and pinching them together at the bottom.
Add more fan petals if you prefer.
 Step 10:
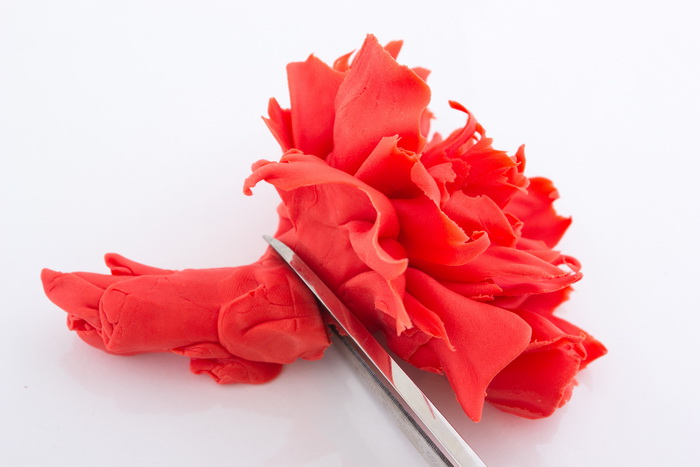
Cut off the bottom of the flower with scissors.
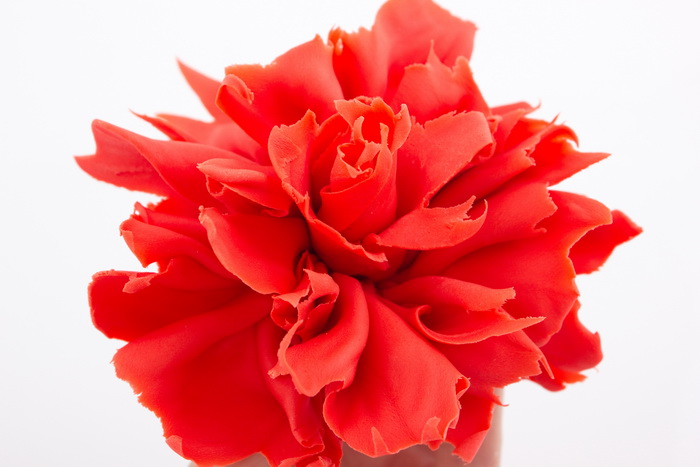 Place the flower on top of the cake. If you feel it’s necessary, you can attach the flower with melted chocolate.
Share tips, start a discussion or ask one of our experts or other students a question.
No Responses to “Make Waves With This Super Easy Ombré Cake You Have to "Sea" to Believe”