
If you have spent time in the New York-metro area, these New York rainbow cookies (also called Italian flag cookies) will certainly be a familiar sight. They are a standard item in Italian bakeries, where they are commonly sold by the pound alongside other Italian desserts, such as biscotti, baci di dama and anginetti. But you don’t have to travel all the way to the Big Apple to savor these colorful confections.
Keep reading to discover the secret to enjoying NYC rainbow cookies.
Photos and illustrations via CakeSpy
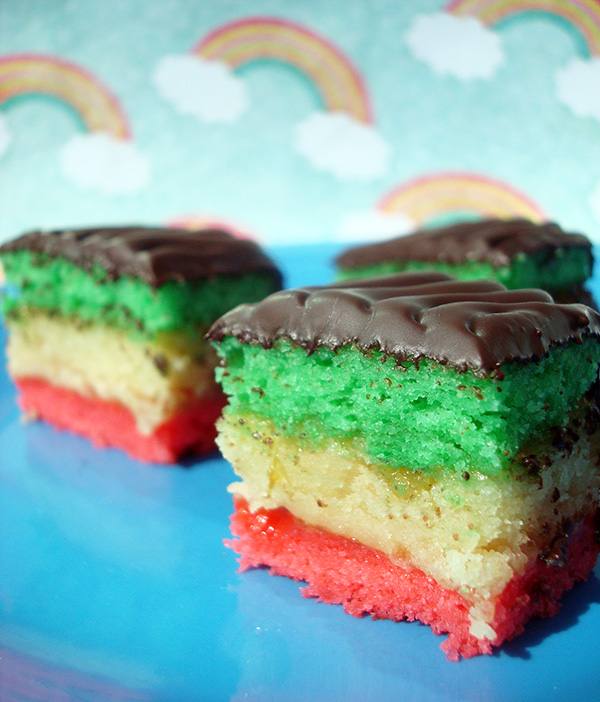
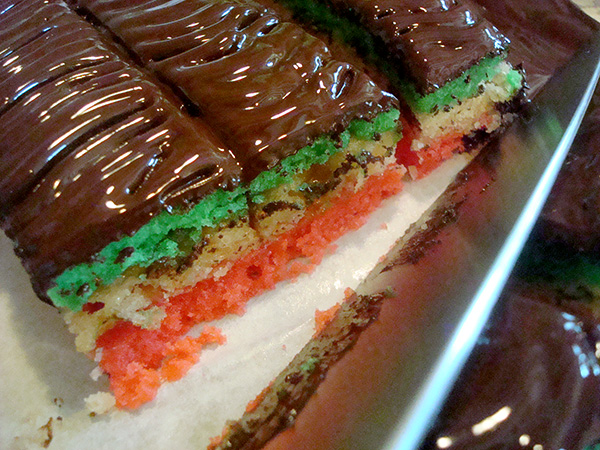
Although they are typically sold alongside cookies, however, these pretty morsels are actually tiny layer cakes.
An almond-rich batter is baked in three separate, colored batches and then sandwiched together with preserves. The precious layers are covered with chocolate before being sliced into tricolor squares or bars. Once cut into small portions, they have a cookie’s delicate size, but very much retain the taste and identity of cake.
While they may be harder to find outside of the tri-state area, it’s easy to bake homemade rainbow cookies. They’re eye-catching little treats that are as delightful to eat as they are to look at! Here’s how to these delectable Italian treats!
How to make Italian rainbow cookies
Ingredients
- 8 ounces almond paste
- 1 cup (2 sticks) unsalted butter, softened
- 1 cup sugar
- 4 eggs, separated
- 2 cups all-purpose flour
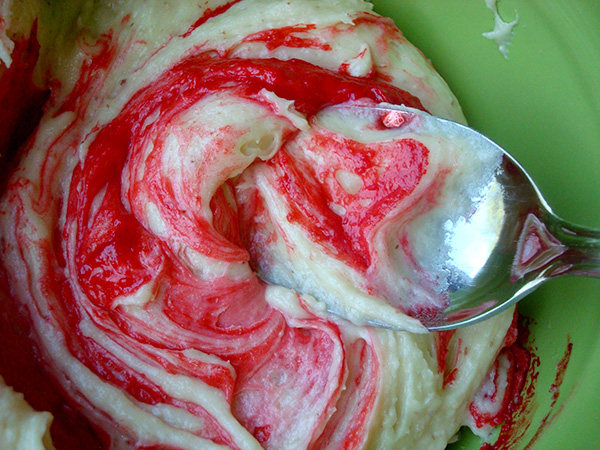
- 1 cup seedless apricot marmalade or raspberry preserves
- 6 ounces semisweet chocolate (or 1 cup semisweet chocolate chips)
- Red and green food coloring
International readers may enjoy our handy Metric Conversion Guide.
Step 1:
Grease and line with parchment paper the bottoms of three matching 13 x 9-inch baking pans. Set to the side.
Baker’s note: If you don’t have three pans, you can re-use one three times)
Step 2:
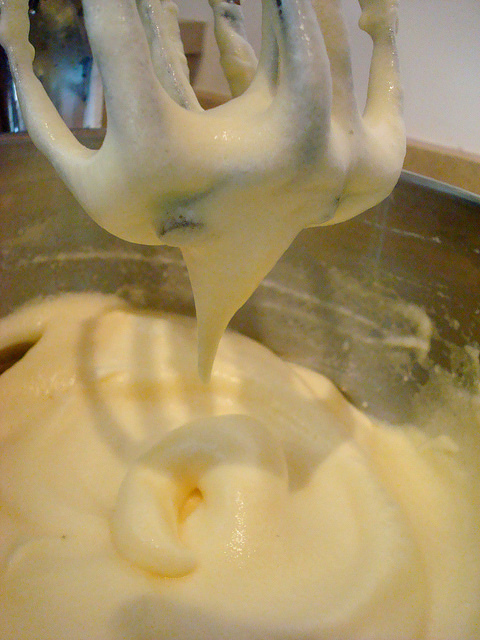
Place the almond paste in a large bowl, and break it up with a fork. Cream the broken-up almond paste with butter, sugar and egg yolks until light, fluffy and smooth. Stir in flour.
Step 3:
Now, in a separate mixing bowl, beat the egg whites until soft peaks form. Fold them to the dough, mixing gently until blended.
Step 4:
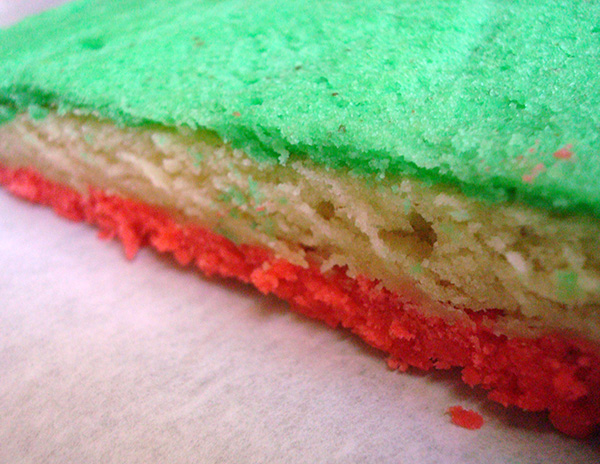
Divide the dough into three even parts. Tint one portion green, and another red but leave the third un-tinted. Spread the dough into the prepared pans as evenly as possible.
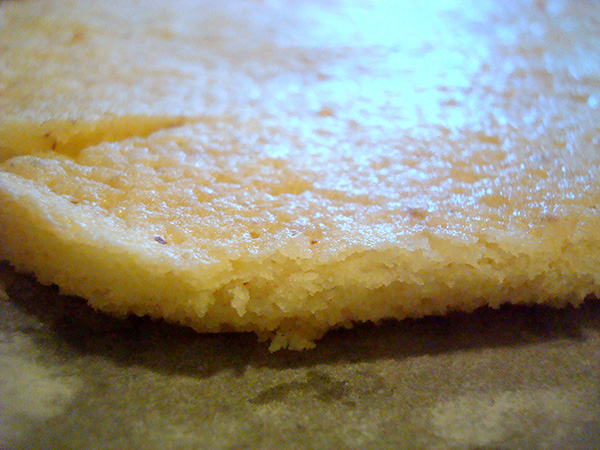
Step 5:
Bake at 350 F for 10-15 minutes or until edges are light golden brown. You don’t want the tops to be completely golden, just matte in color.
Step 6:
Invert onto wire racks, and remove the parchment paper. If the edges are a bit raggedy, don’t worry — you’ll trim them later. Let the thin cakes cool completely.
Step 7:
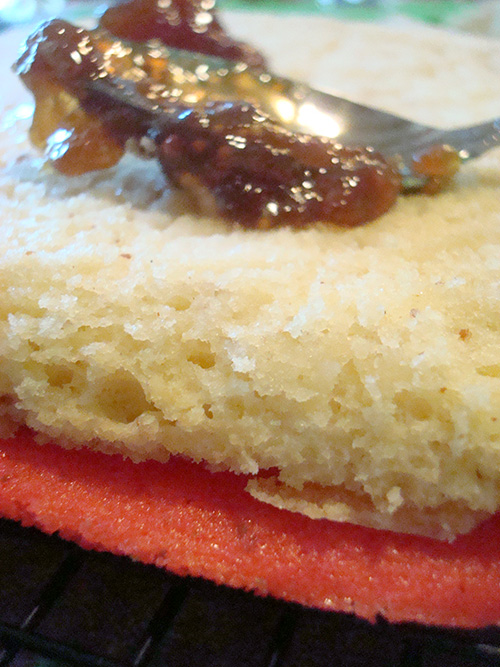
Place the red layer of cake on top of a sheet of parchment paper on a baking sheet. Spread evenly with a very thin layer of preserves. Top with the white layer, and spread the remaining preserves over the entire layer. Layer the green cake on top, forming a three-layer stack of cake. Do not spread preserves on top of this layer.
Step 8:
Place a piece of plastic wrap on top of the cake, putting a baking sheet or heavy pan on top. Gently press to compress the layers and to give yourself a flat working surface for the next steps. Remove the plastic wrap. You should have a nice, flat surface on your cake.
Step 9:
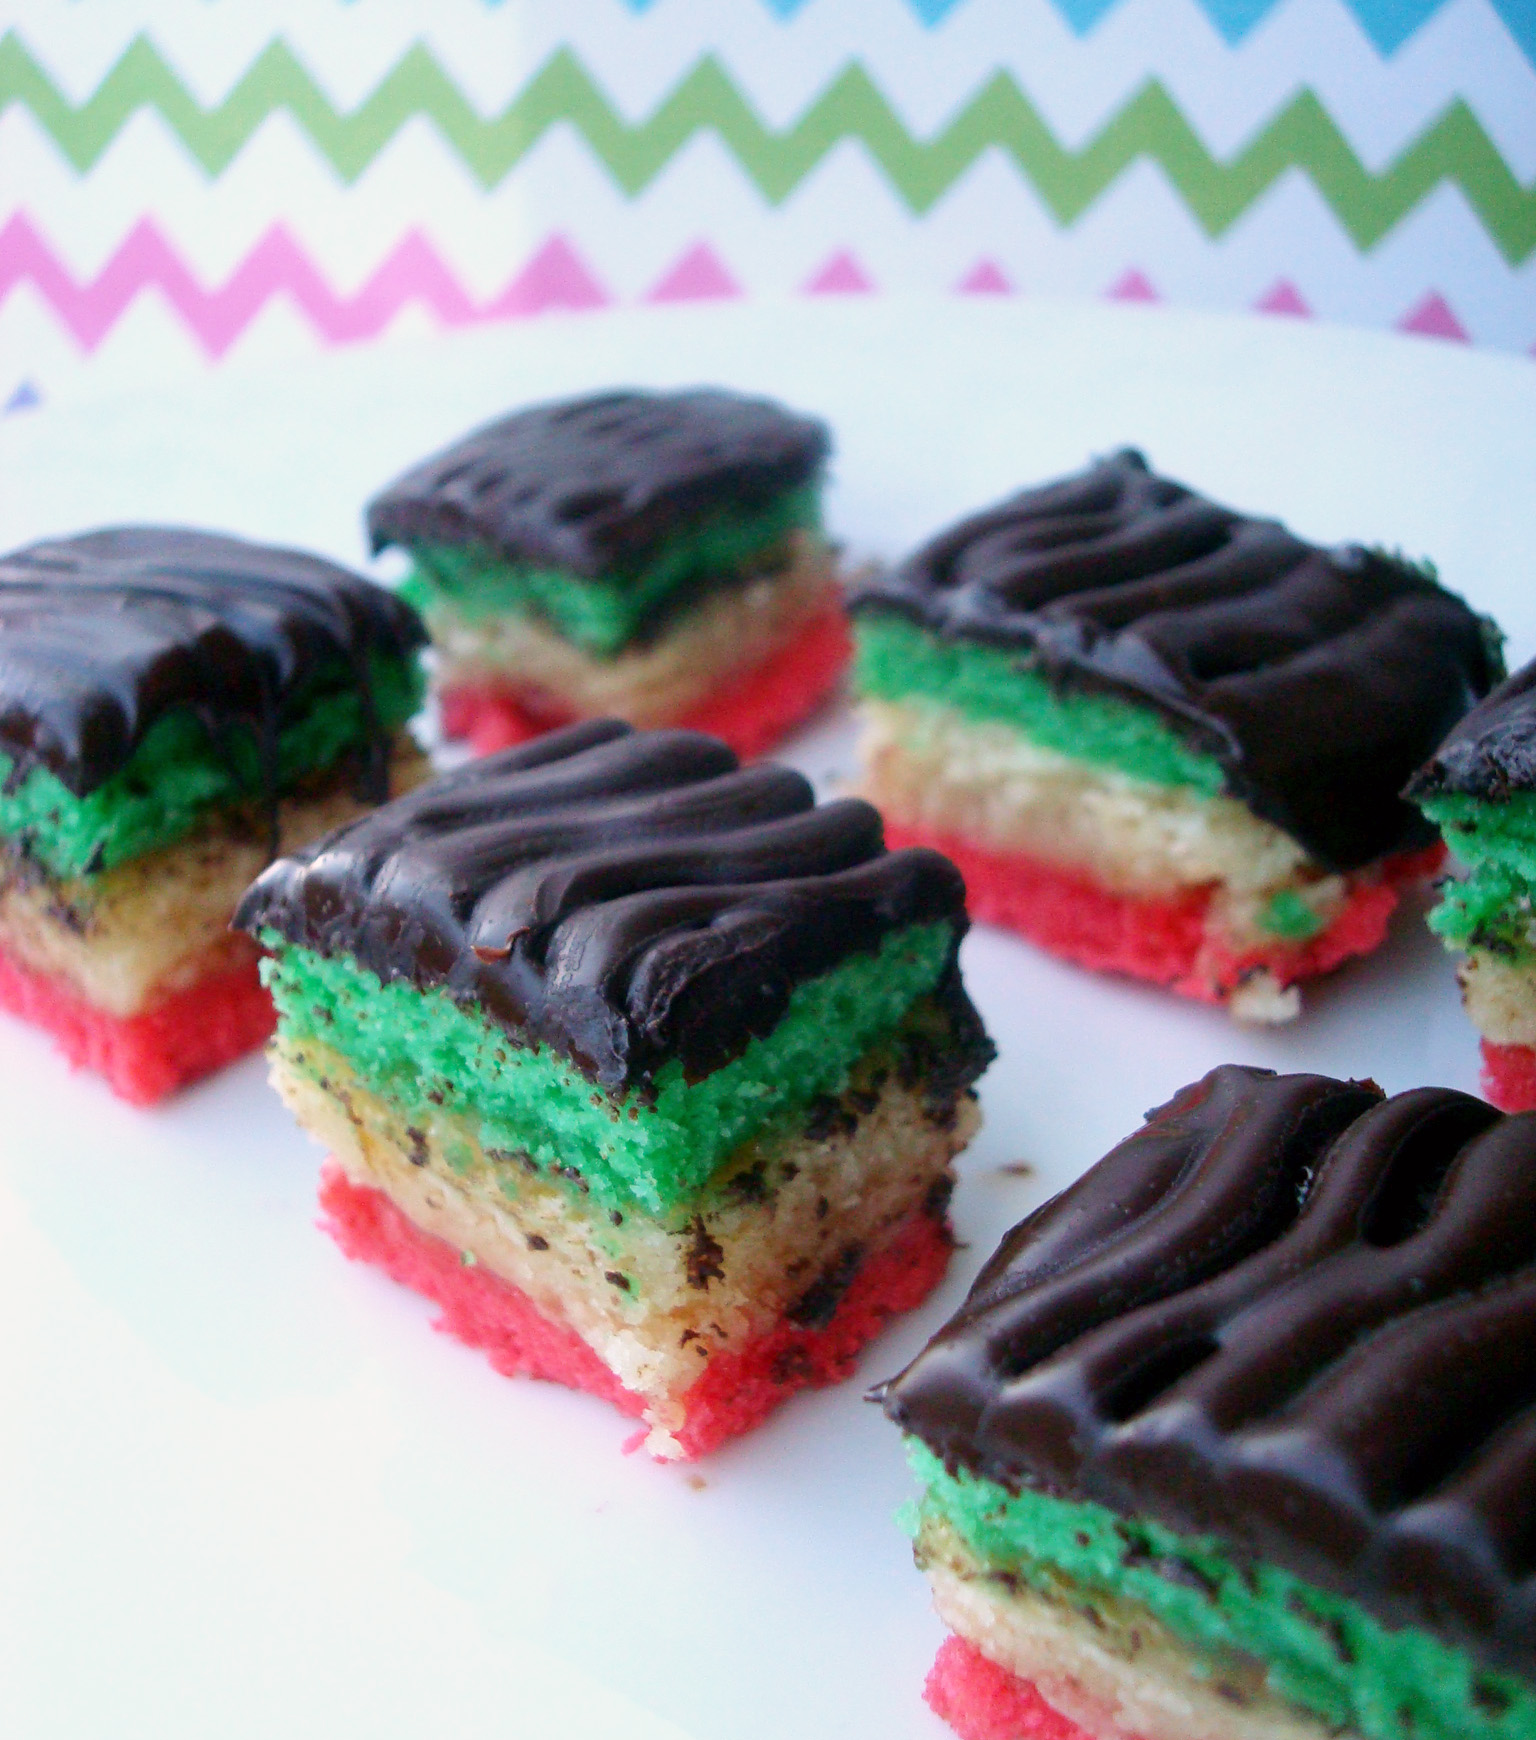
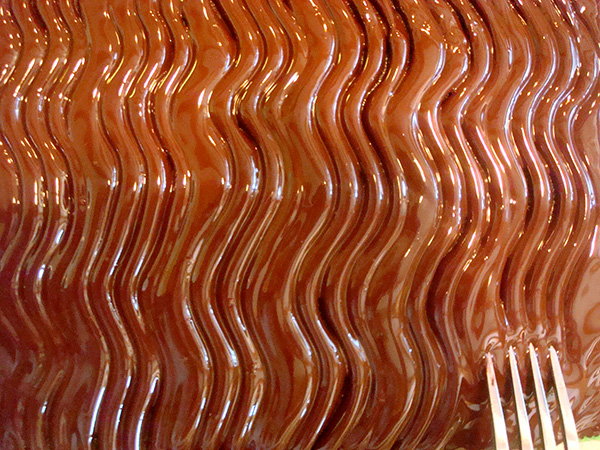
Melt the chocolate in a double boiler. Spread over top layer. After it has set somewhat, so that it is not dripping but remains soft and moldable, gently draw the tines of a fork along the surface in a waving pattern. If the chocolate does not hold the pattern, don’t panic: Simply re-spread the chocolate and wait for a while longer.
Step 10:
Let the chocolate set. Once it is set completely, trim the edges with a sharp knife. Cut into 1/2-inch strips across the width. Then cut each strip into 4-5 pieces. Store in airtight containers.
Interested in learning more delicious Italian recipes, without the NYC flair? Then check out the Craftsy collection of international cooking classes, featuring amazing classes in classic Italian cuisine, like Homemade Italian Pasta, Authentic Italian Soups and How to Make Gnocchi Like a Pro.
Share tips, start a discussion or ask one of our experts or other students a question.
No Responses to “NYC-Style Treats: Making Italian Rainbow Cookies”