
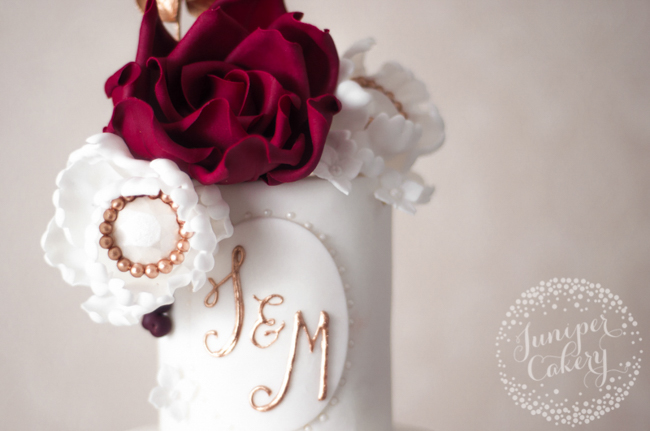
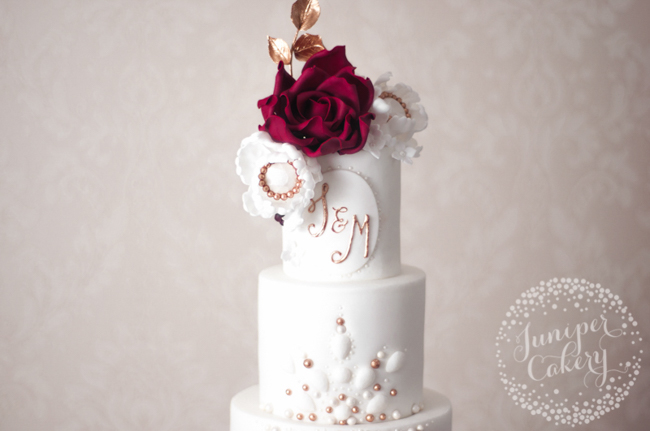
Monograms never go out of style for weddings, which means monogram cakes are always a great choice! Adding an elegant, personal touch to any cake with a monogram plaque is a lot easier than you might think.
Forget stressing out about how to add that finishing touch and check out this easy-to-follow tutorial. One of the best things about this how-to is that you can prepare it in advance and you don’t need to pipe vertically onto the cake itself.
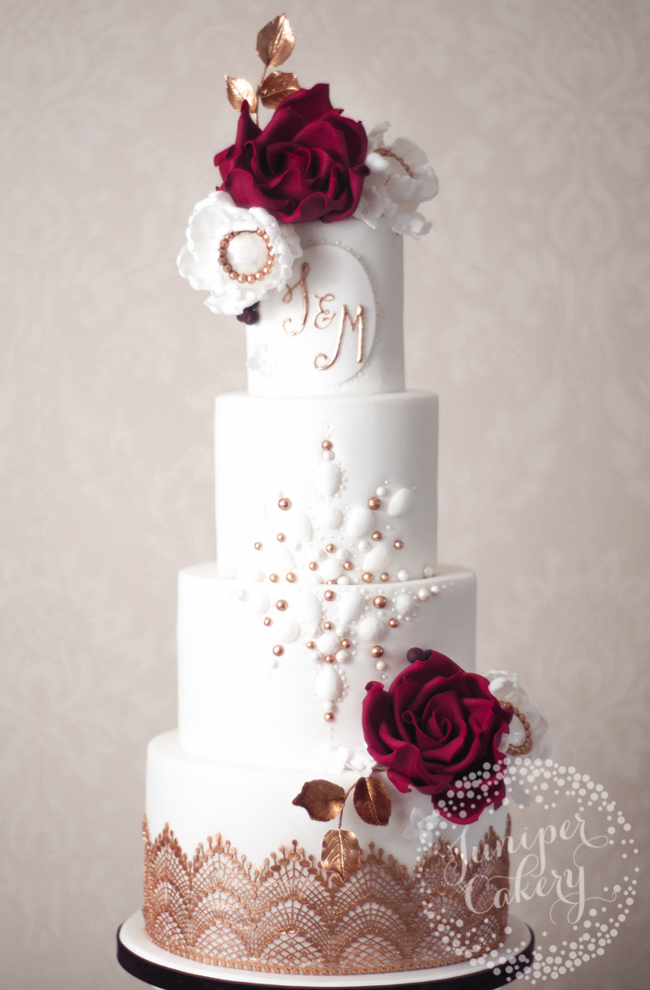
The easy way to make a monogrammed cake
What you need:
- Small fondant rolling pin
- Gum paste or fondant
- Large oval cutter
- Piping-consistency royal icing
- Decorating bags
- Round piping tips (we used a PME Supatube in No. 1)
- Edible metallic paint (optional)
- Melted white chocolate
- Edible markers
- Edible sugar pearls
- Food-safe paintbrush with small, synthetic bristles
- Small ball tool
- Edible glue
- Cake pan or cake dummy the same size the cake
- Parchment paper
Step 1:
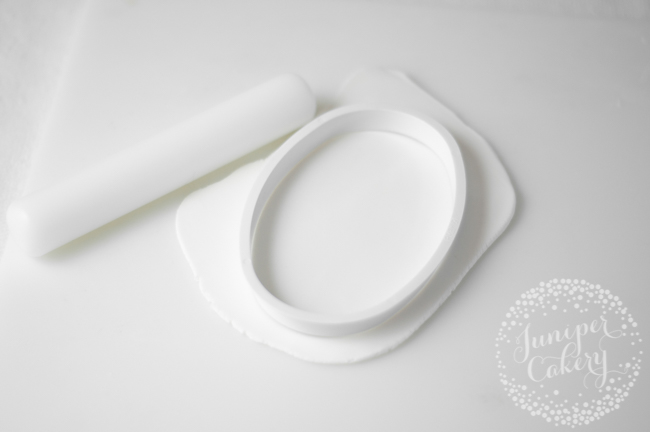
Roll out your gum paste or fondant (we used white, but you could choose a different color). Using your oval cutter, cut out your plaque.
When choosing your cutter, make sure it’s a good size for your tier or cake. A good rule of thumb is to use a cutter that’s no more than 1 cm (3/8″) shorter than your cake from the top and bottom. That means the height of the plaque should be about 2 cm shorter than the height of the cake.
Tip! If you want a little extra practice, cut out a few ovals.
Step 2:

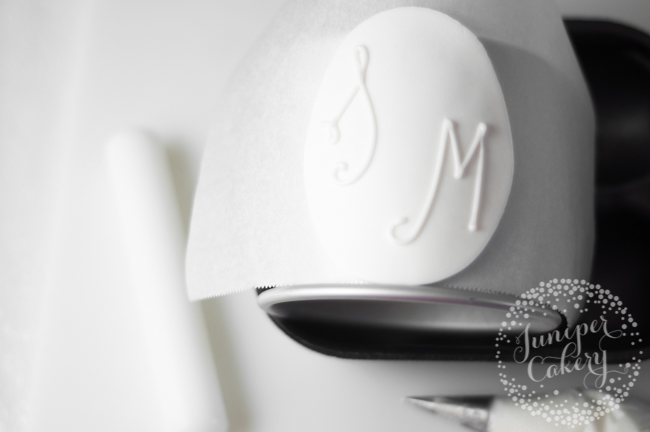
Next, you’ll need to set up your plaque so that it dries in a curved shape that can easily stick to the side of your cake.
Lay your plaque on a sheet of parchment paper that’s a little larger than the plaque. Then, lay the parchment paper onto the side of a cake pan or cake dummy to dry. Your cake pan or dummy should be the same size as the tier you need the plaque for.
Step 3:
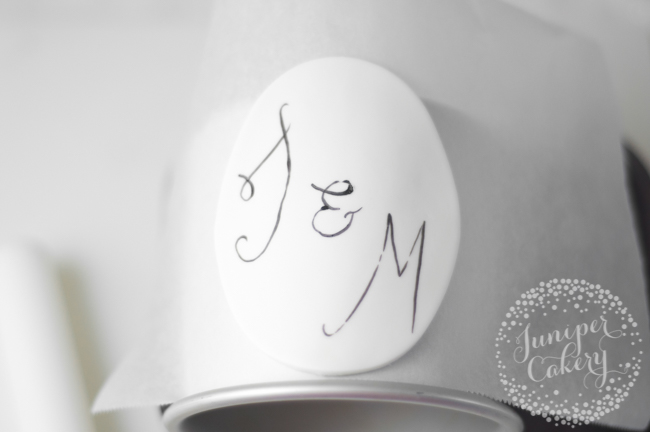
Time to write out the monogram! If you like, you can use a font on your computer as a guide — there are lots of cool font sites you can use for inspiration, too.
Before committing the monogram design to the gum paste or fondant, do a few practice monograms using a pen and parchment paper. When you’re ready, use an edible marker to lightly draw the letters onto your gum paste or fondant oval.
Here are a few tips for this step:
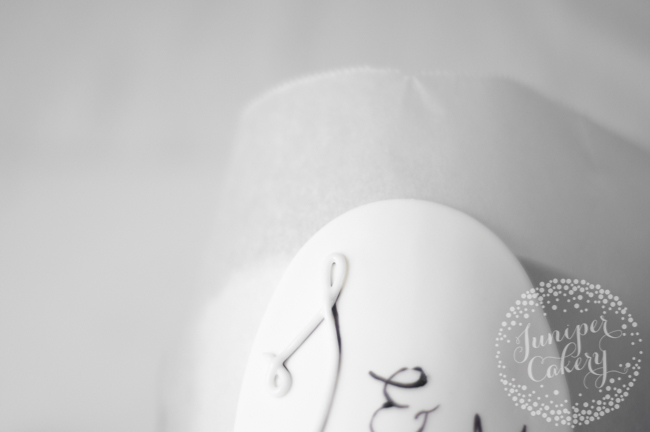
- Always write with your edible pens gently. You don’t want to create dark lines that show through your piping work (as in the example above)! If you’re feeling brave, skip the edible marker and practicing freehand piping those letters!
- Consider the thickness of your piping when it comes to pre-sketching out your initials. If you want slim piping, it’s best to freehand this.
Step 4:
Slowly yet smoothly pipe the royal icing over your sketched letters, just like you’d outline a cookie before flooding. If you’re free-handing it, take a deep breath and just go for it!
Once done, leave the royal icing to dry. Drying time depends on how humid it is where you live. We get humidity levels of 77 – 88 percent normally, and our royal icing is ready after 2-3 hours.
Step 5:
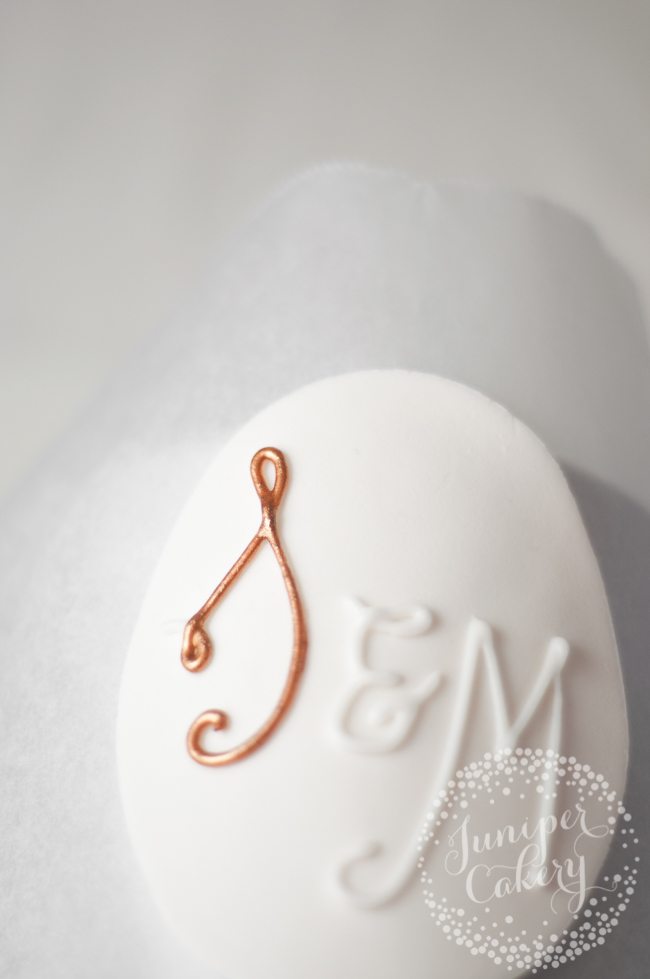
When your royal icing is dry, you can paint the letters with a little edible paint.
Step 6:
Finally, it’s time to add the plaque on your cake. Ovals are easier to get center on a tier, so this step should be a breeze.
If you don’t feel too confident about this, you can easily plan out where to attach your plaque. Carefully hold up your plaque to the cake. Once you’ve found the center mark it lightly with a wooden skewer just under where your plaque will sit. You can also mark the bottom of the plaque too.
Use melted white chocolate as “glue” on the back of your oval and lightly hold in place until firm.
Tip! Stay away from using melted milk or dark chocolate as they can get messy. The dark color can also be visible underneath fondant or gum paste. Not a good look!
Step 7:
Finally, add a decorative trim around your monogram plaque. We indented around ours with a small ball tool and attached sugar pearls in place using edible glue. You can also edge yours with fancy molds!
Share tips, start a discussion or ask one of our experts or other students a question.
No Responses to “The Easiest Way to Add Monograms to Cakes”