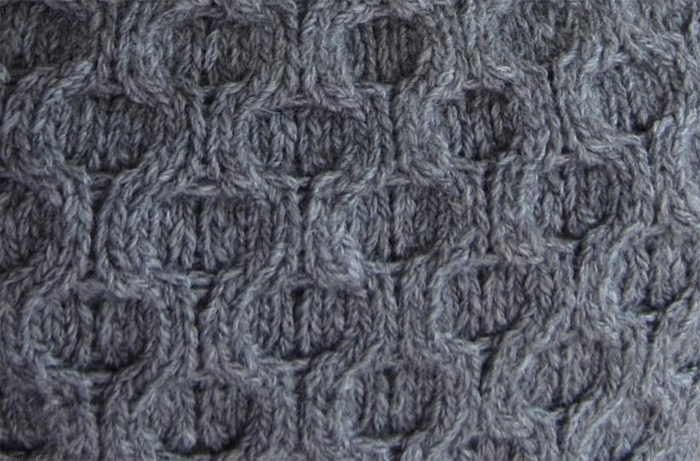
Honeycomb Stitch
Level: Intermediate
Abbreviations
Good to Know: C4F is the cable stitch that produces the left-slanting branch of the honeycomb cable, while C4B produces the right. The only difference between the two: with C4B, you move the cable needle to the back of your work instead of the front. The 4 in these stitches indicates there will be two stitches knit from the cable needle and two stitches knit from the left needle to make up the cable stitch.
Instructions
1. Slip two stitches from the left needle onto a cable needle or double-pointed needle . Move your slipped stitches to the middle of the needle to make sure they don't slip off again.
2. Move your cable needle to the front of your work.
3. Knit the next two stitches from left needle.
4. Knit the two stitches off the cable needle. Make sure you move the slipped stitches to the end of the cable needle opposite the end where you slipped them on. Don't twist the needle!
5. Move immediately to C4B: slip two stitches from the left needle onto a cable needle or double-pointed needle. Move the cable needle to the back of your work.
6. Knit the next two stitches from left needle.
7. Then knit the two stitches off the cable needle. Make sure you move the slipped stitches to the end of the cable needle opposite the end where you slipped them on. Don't twist the needle!
8. Go back to C4F.
The Honeycomb Pattern
Different honeycomb patterns may vary the row on which the pattern begins, or add extra knit and purl rows , but the sequence of rows will be the same.
For Flat Knitting
Row 1: *C4F, C4B, rep from * to end.
Row 2: Purl.
Row 3: Knit.
Row 4: Purl.
Rows 5: *C4B, C4F, rep from * to end.
Row 6: Purl.
Row 7: Knit.
Row 8: Purl.
For Knitting in the Round
Round 1: *C4F, C4B, rep from * to end.
Rounds 2, 3, 4: Knit.
Round 5: *C4B, C4F, rep from * to end.
Rounds 6, 7, 8: Knit.
Pro Tip: Notice the reversal of the front and back cable directions in these patterns. This closes off the honeycomb cell.
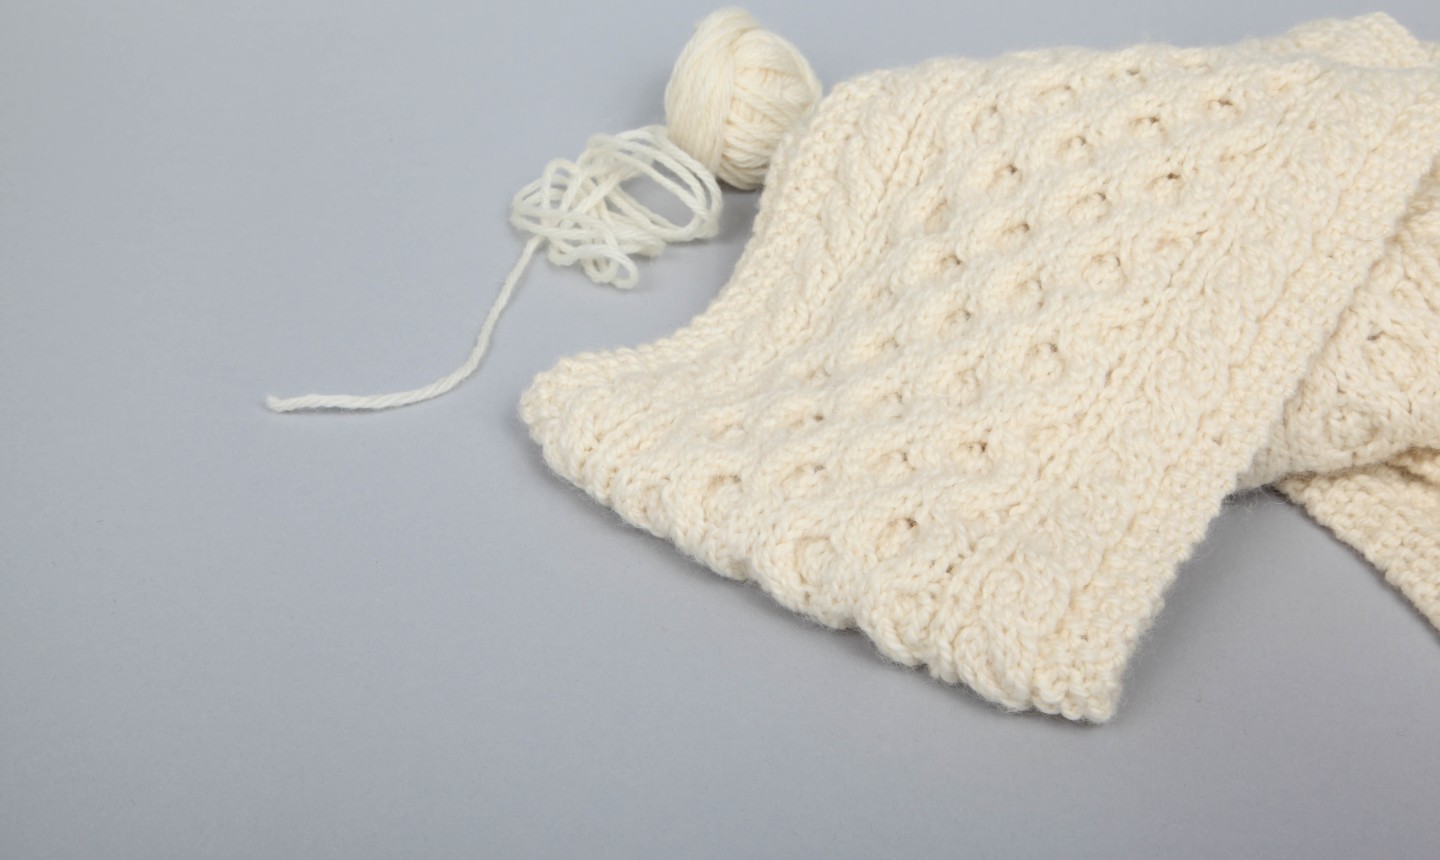
Honeycomb stitch is great because it's so versatile — you can do an all-over design, or add it as a textured centerpiece in your pattern (like in the scarf above). If you're knitting a project with an all-over honeycomb, take note that this stitch causes a slightly ruffled edge. You can leave the ruffle, or add a few rows of ribbing.
Also, it's important to make a swatch before you start stitching. The all-over cable stitch causes the knitted fabric to contract like ribbing. So if you don't swatch, you may cast on the number of stitches you usually need for an adult hat ... and wind up with a baby bonnet.

I love cables, and this pattern; would the honeycomb look okay with a variegated yarn?
Would love pattern for white scarf above
Is there a pattern available for the white knitted scarf shown in the Terry Matz Honeycombe stitch tutorial?
Is there a video teaching for this