Triangles pop up in knitting more than you think. They're in kerchiefs, triangle shawls, blankets — they can appear anywhere, and they're a great way to add eye-catching interest to your designs.
But if you're designing your own pattern, it can be tricky to figure out how to knit a triangle. How you knit the triangle depends on a couple of things, like whether you need shaping in your project or whether you want a decorative edge.

If you’re not sure how to knit a triangle, check one of these out.
These three triangles are all worked in different ways, and they're a great starting point for any design.
KFB increase triangle
Try this triangle if you... want shape without any frills
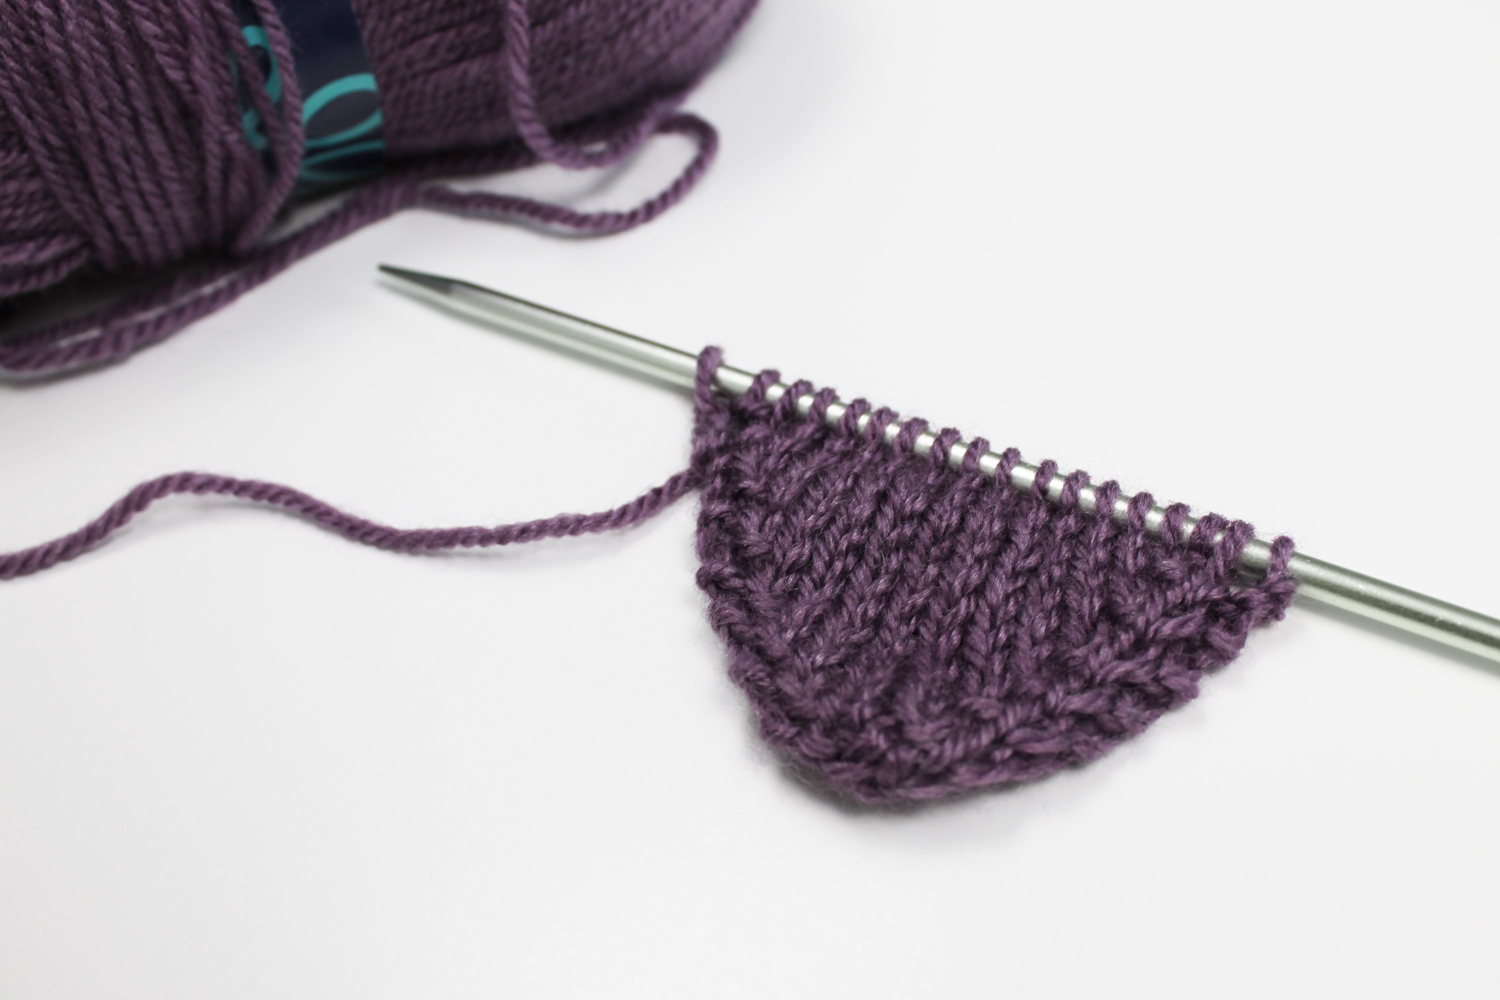
Yarn used: Sprightly Acrylic Wool Worsted in Misty Purple
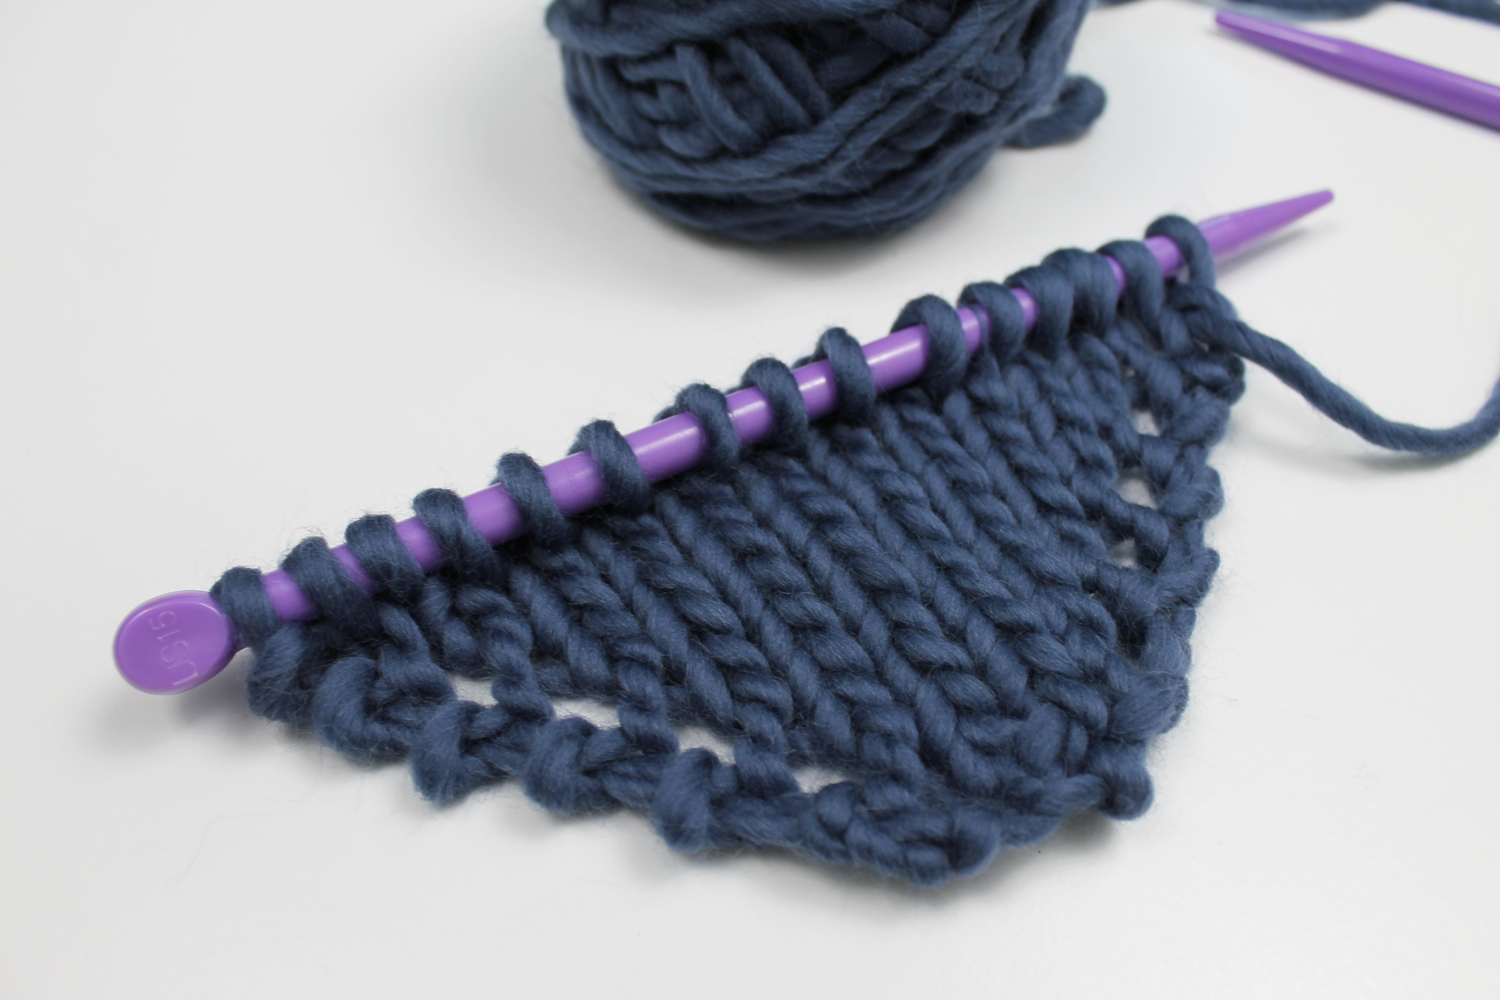
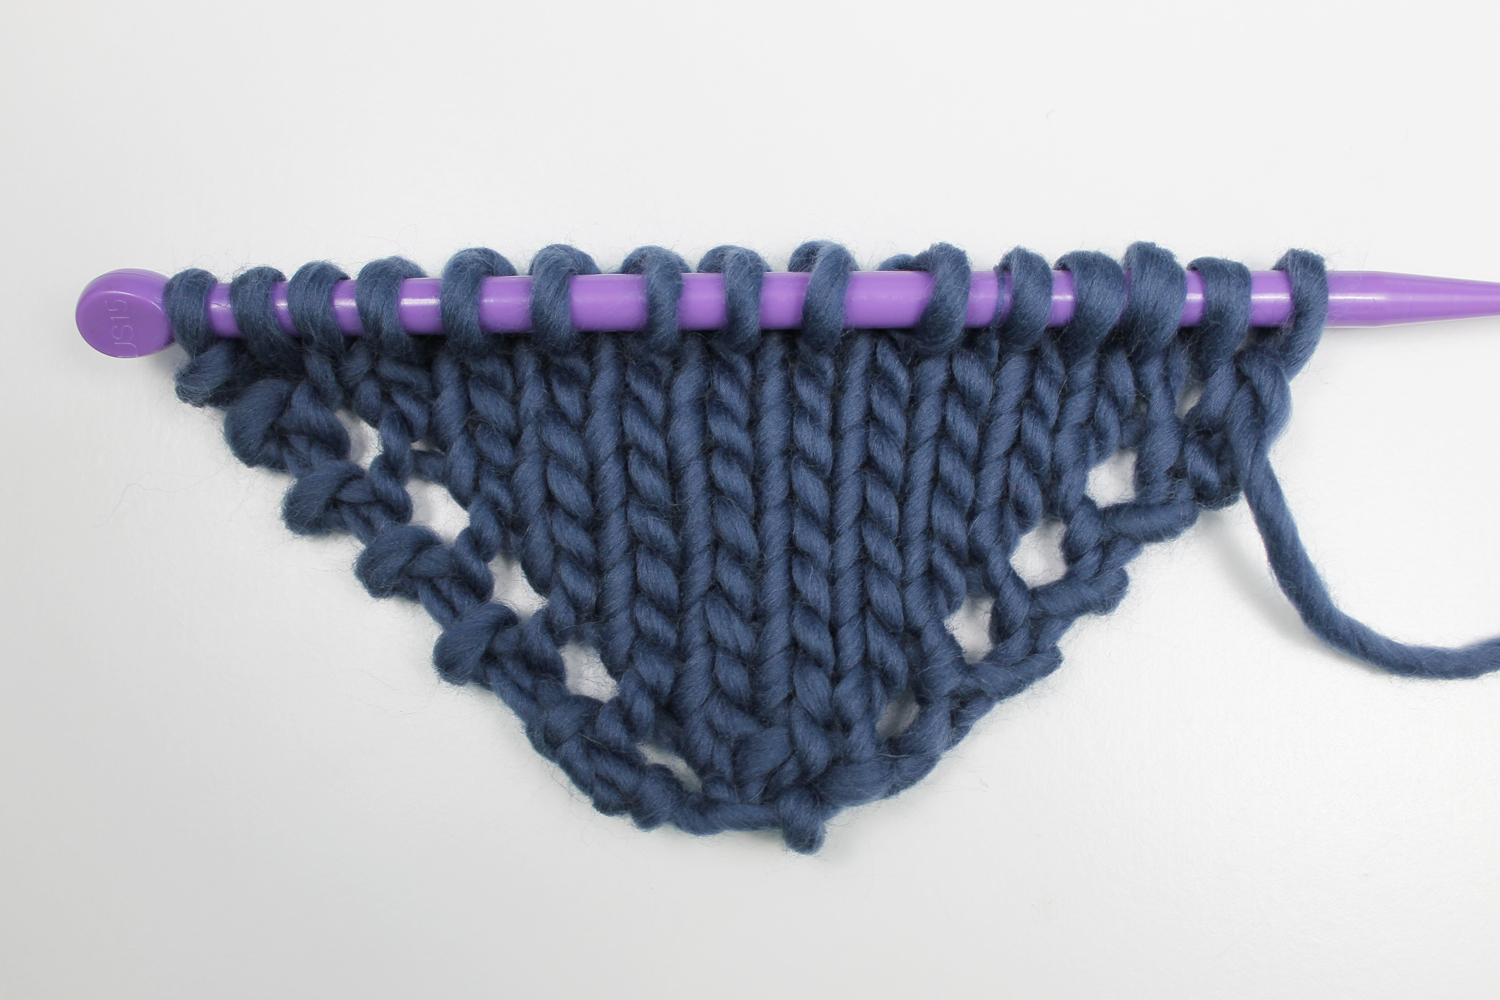
This triangle starts at the point and works its way to the top using the KFB (knit front back) increase. The advantage of starting from the point and working your way up is that if you're not sure how tall you want your triangle to be, you can just keep increasing until you get to that point (or until you run out of yarn, in some cases!).
You can substitute any increase you'd like here, such as a M1. Just remember that the key is to increase after the first stitch and before the last stitch. This will help you keep a super neat edge.
The K1 on each end and on both the right side and wrong side also help form a neat edge that stops the triangle from curling.
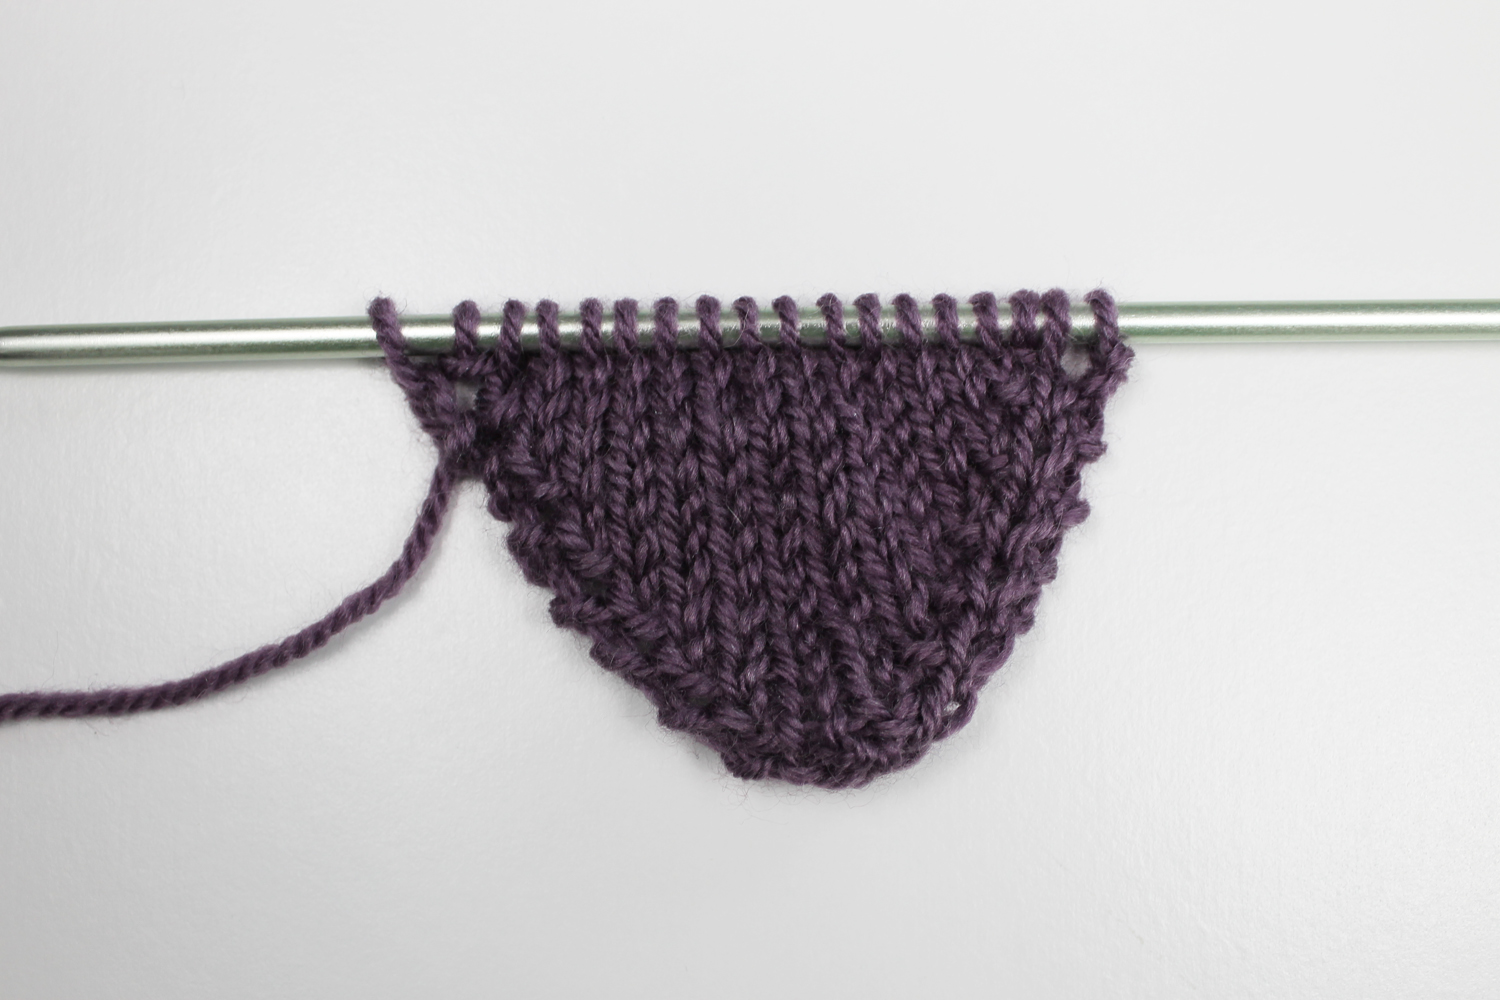
KFB triangle pattern
- Cast on 3 stitches.
- Row 1: K1, KFB, K1 (4 stitches).
- Row 2: K1, purl to last stitch, K1.
- Row 3: K1, KFB, knit to last 2 stitches, KFB, K1 (6 stitches).
- Repeat Rows 2-3 until you've reached the desired height of your triangle.
Let's take a closer look at the KFB increase. KFB means knitting into the front and back of the same stitch. Here's how:
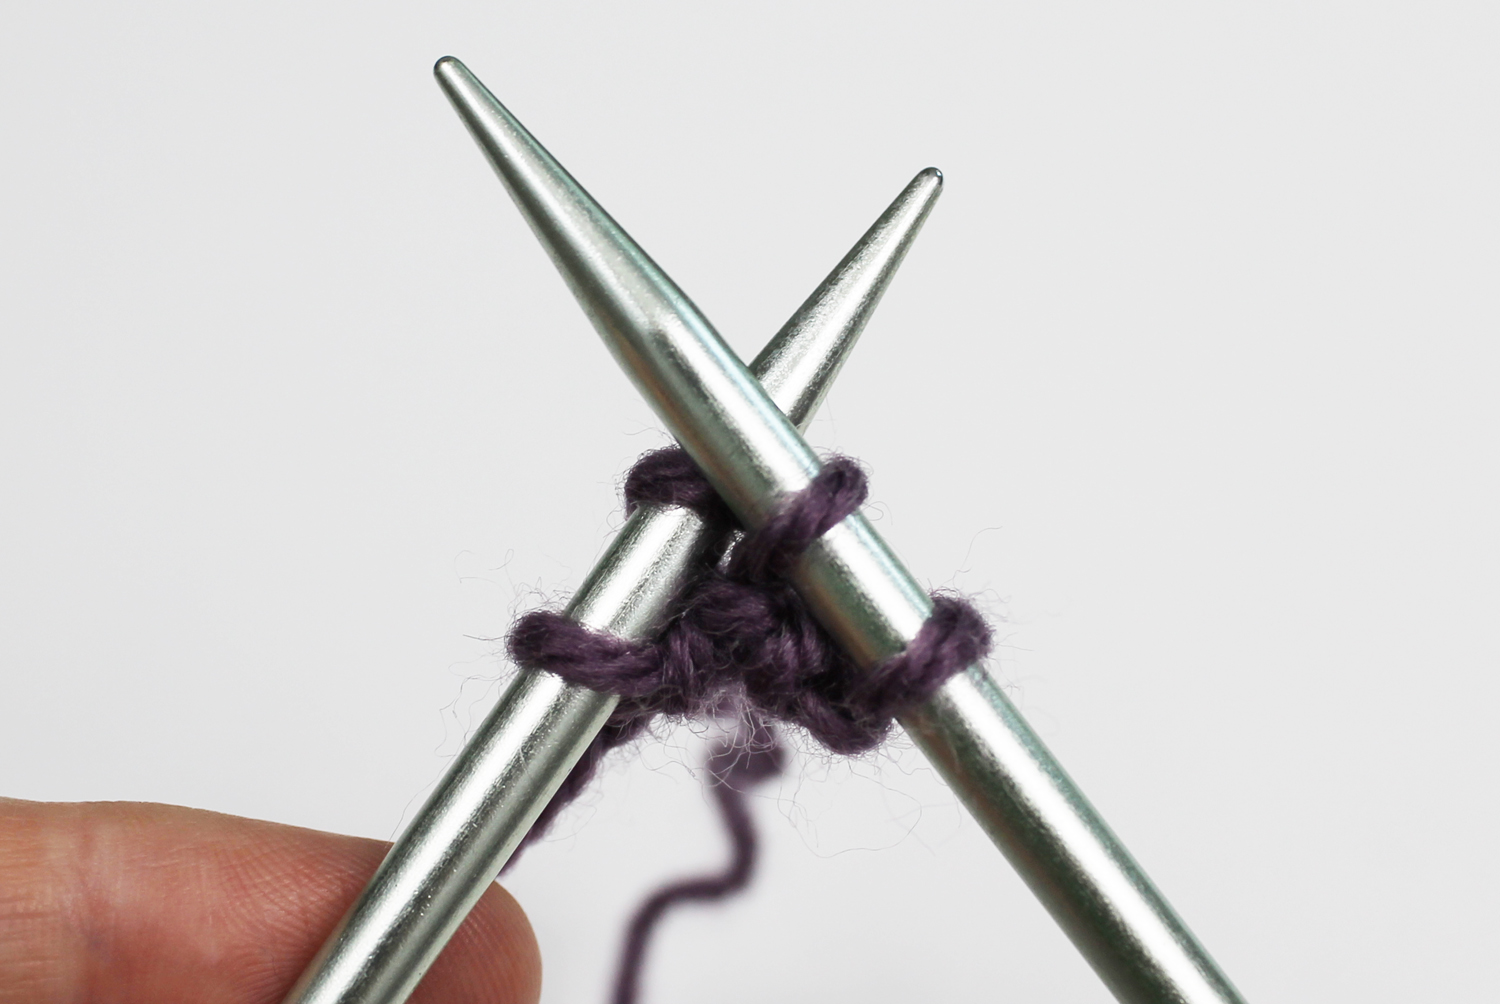
Knit the stitch as usual, but don't drop the stitch from the needle.

Insert your needle into that same stitch again, but his time go through the back loop.
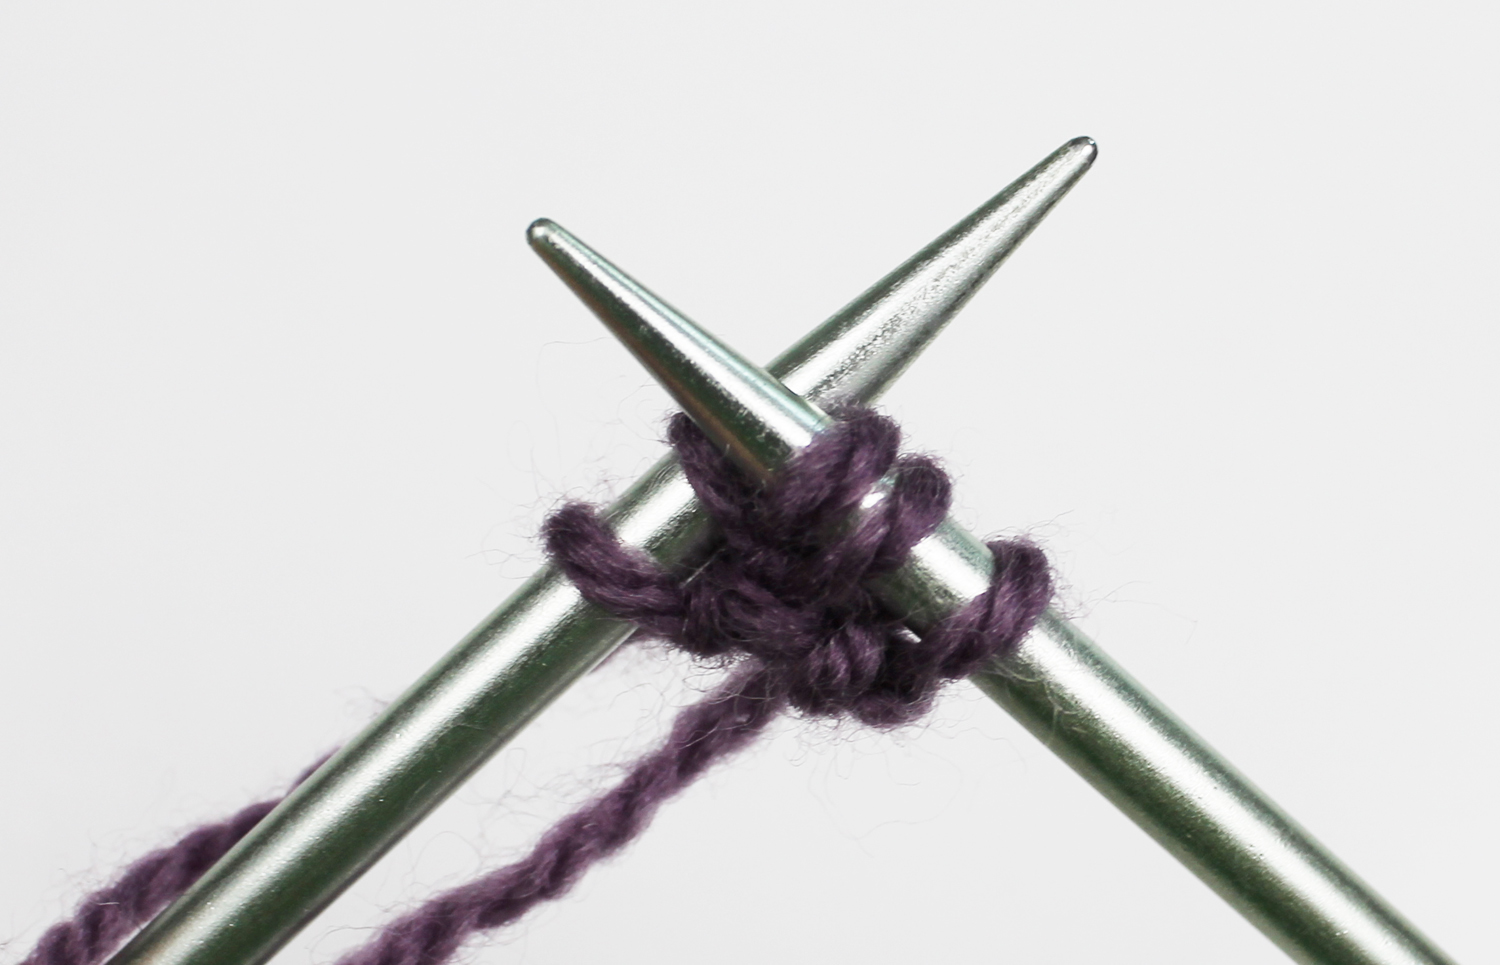
Knit that stitch through the back loop, and you'll see that you've increased 1 stitch.
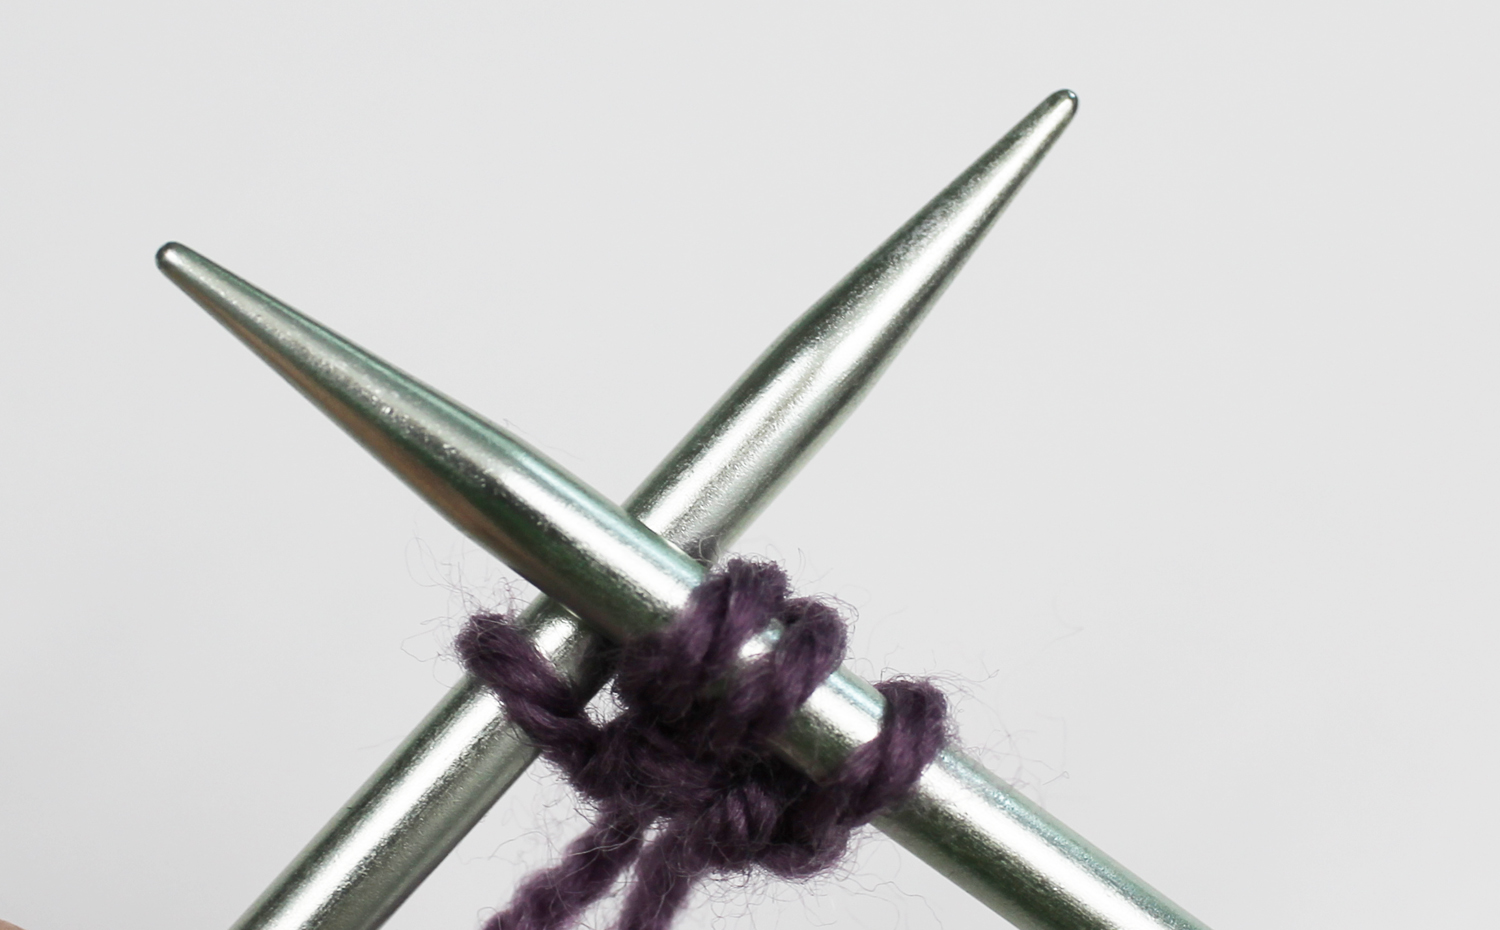
Now you can drop the stitch from the left needle.
Yarn-over increase triangle
Try this triangle if you... want shape with a decorative edge
Yarn used: Cloudborn Highland Roving in Stormy Skies
This triangle is exactly the same as the KFB increase triangle except that it uses yarn overs to increase the number of stitches. Increasing the number of stitches using yarn overs instead of the usual increase like m1 or KFB results in a decorative edging.
This is often the technique used for triangle shawls.
Yarn-over triangle pattern
- Cast on 3 stitches.
- Row 1: [K1, YO] twice, K1 -- 5 stitches.
- Row 2: K1, purl to last stitch, K1.
- Repeat Rows 1-2 until you've reached the desired height of your triangle.
Let's take a closer look at the yarn over increase.
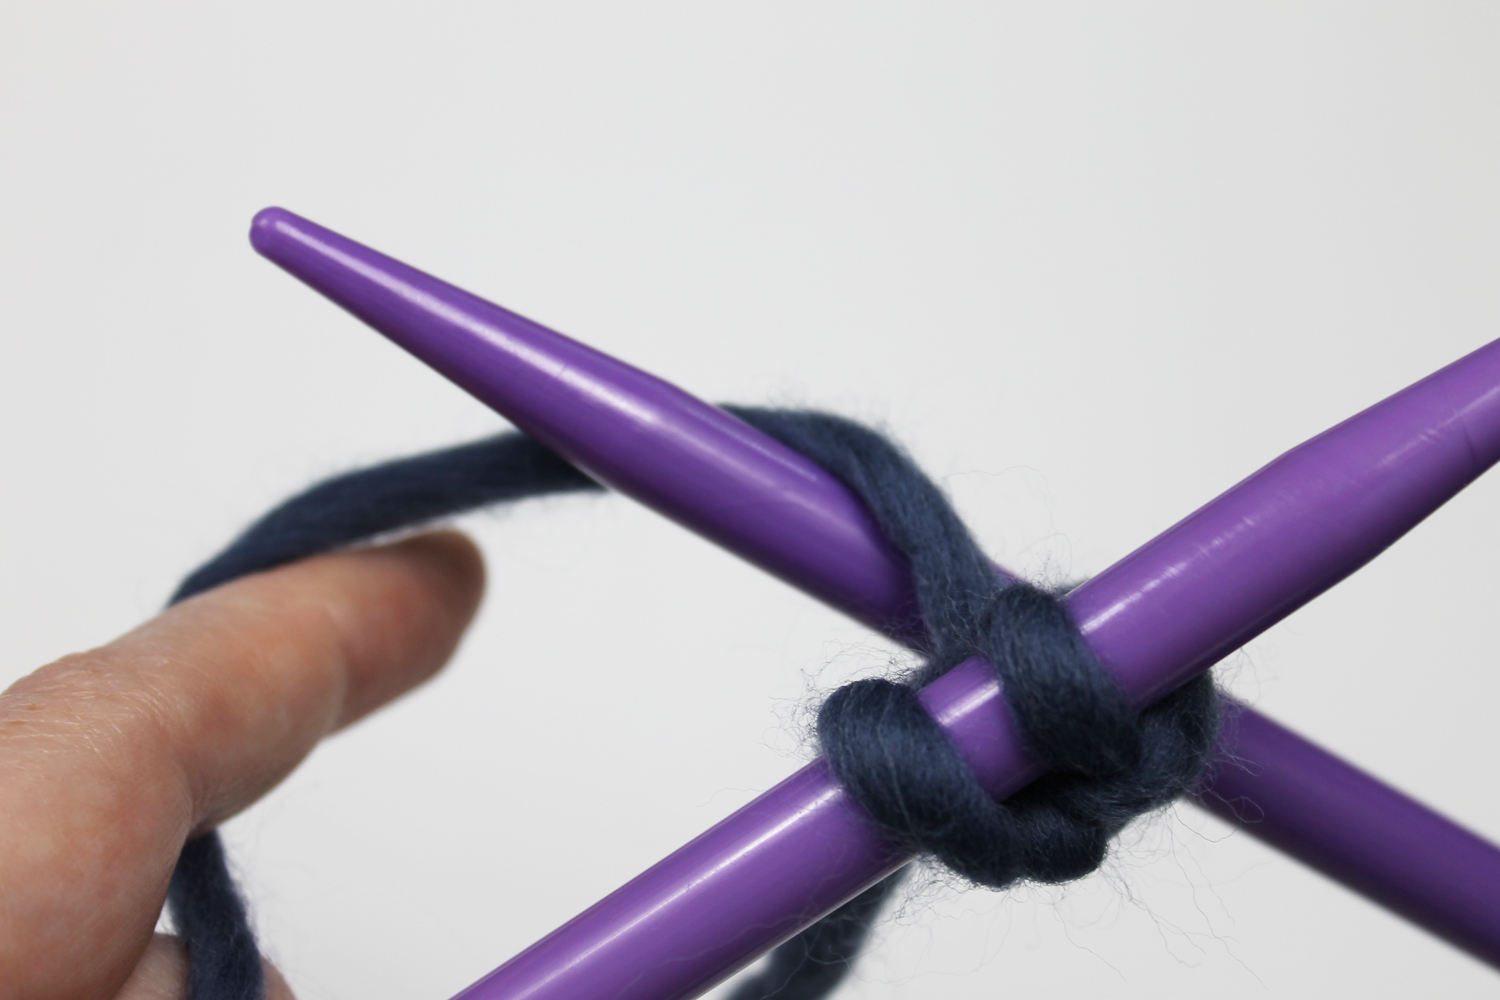
To increase, simply wrap the yarn around your needle counter clockwise.
Then knit the next stitch. That's it! The yarn over will leave a little hole, but don't worry. That's exactly what we want to happen.
Textured triangles
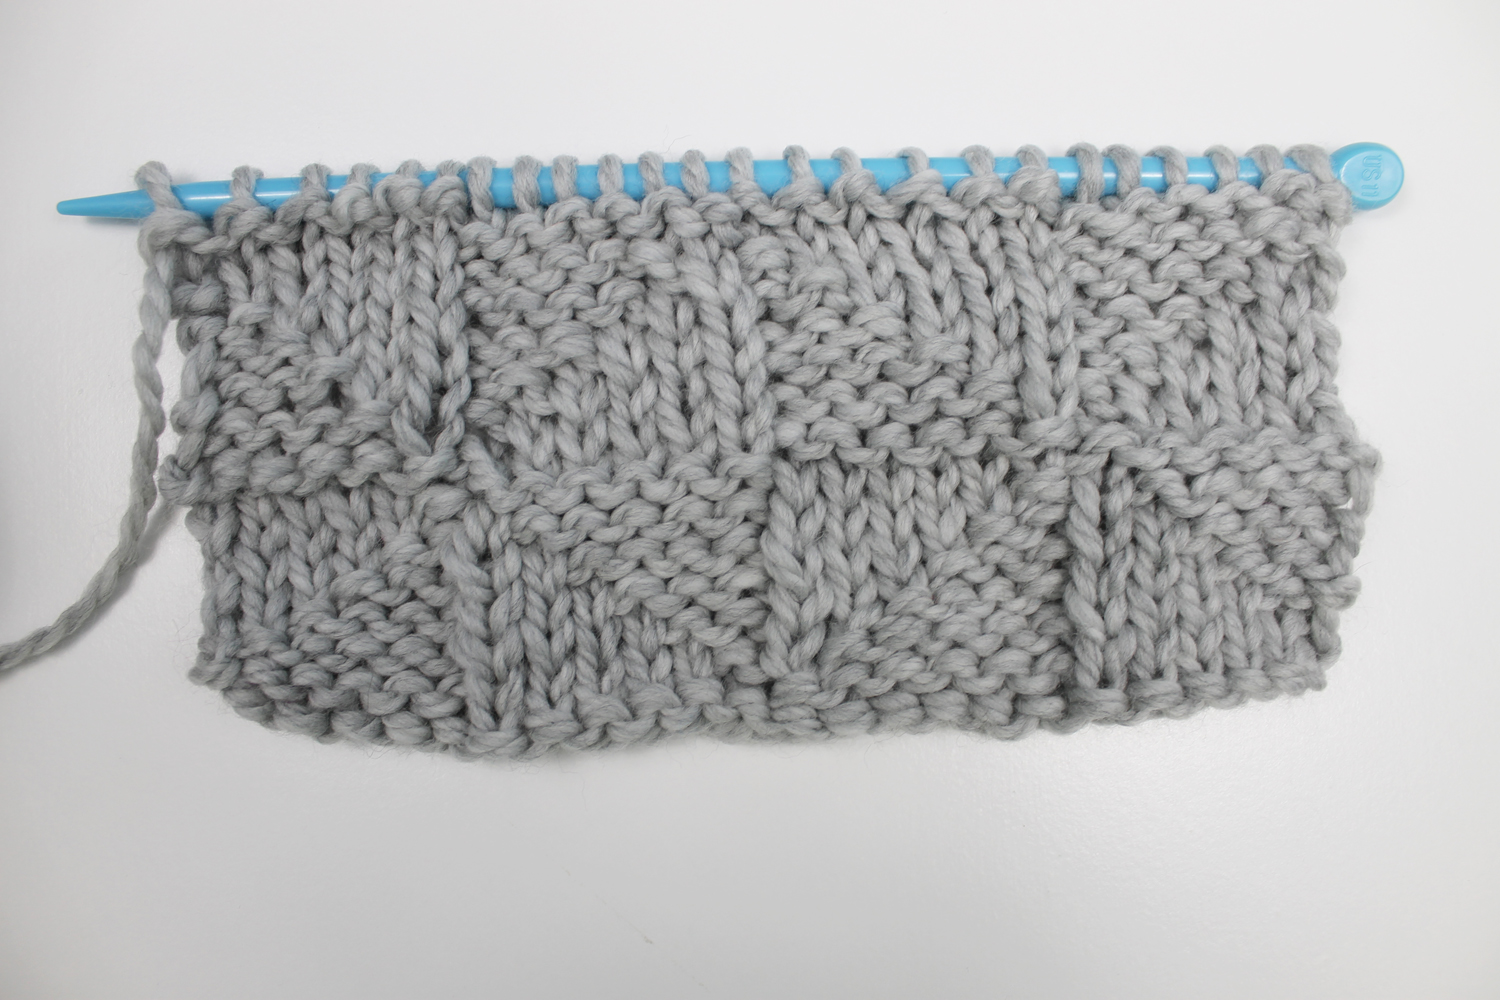
Try this triangle if you... want texture rather than shape
Yarn used: Cloudborn Superwash Merino Bulky in Grey Heather
If you don't want to shape at all — in other words, you don't want to increase or decrease — then a textured triangle is a great option. This works well for rectangular and square projects like blankets.
Yarns with great stitch definition, like the Cloudborn Superwash Merino Bulky I used, are a great choice for this stitch since it helps define the shape of the triangles.
This stitch is worked over a multiple of 12 stitches, so cast on any multiple of 12 to begin.
- Row 1: *K6, p6; repeat from * to end.
- Row 2: *P1, k5, p5, k1; repeat from * to end.
- Row 3: *P2, k4, p4, k2; repeat from * to end.
- Row 4: *P3, k3; repeat from * to end.
- Row 5: *P4, k2, p2, k4; repeat from * to end.
- Row 6: *P5, k1, p1, k5; repeat from * to end.
- Row 7: *P6, k6; repeat from * to end.
- Row 8: *K6, p6; repeat from * to end.
- Row 9: *K5, p1, k1, p5; repeat from * to end.
- Row 10: *K4, p2, k2, p4; repeat from * to end.
- Row 11: *K3, p3; repeat from * to end.
- Row 12: *K2, p4, k4, p2; repeat from * to end.
- Row 13: *K1, p5, k5, p1; repeat from * to end.
- Row 14: *P6, k6; repeat from * to end.
- Repeat Rows 1 - 14.

Very good explanation!…Thank you
Do I K1, YO 2 times? Is that what you mean in order to get 5 stitches?
Shouldn't there be a row 3 that you would repeat? K1, yo, knit to last st, yo, k1. Then you would repeat rows 2 and 3 instead of 1 and 2. This is for the KFB triangle
want to knit for grandchildren
how would much would I increase the yarn over triangle for a tea towel topper?