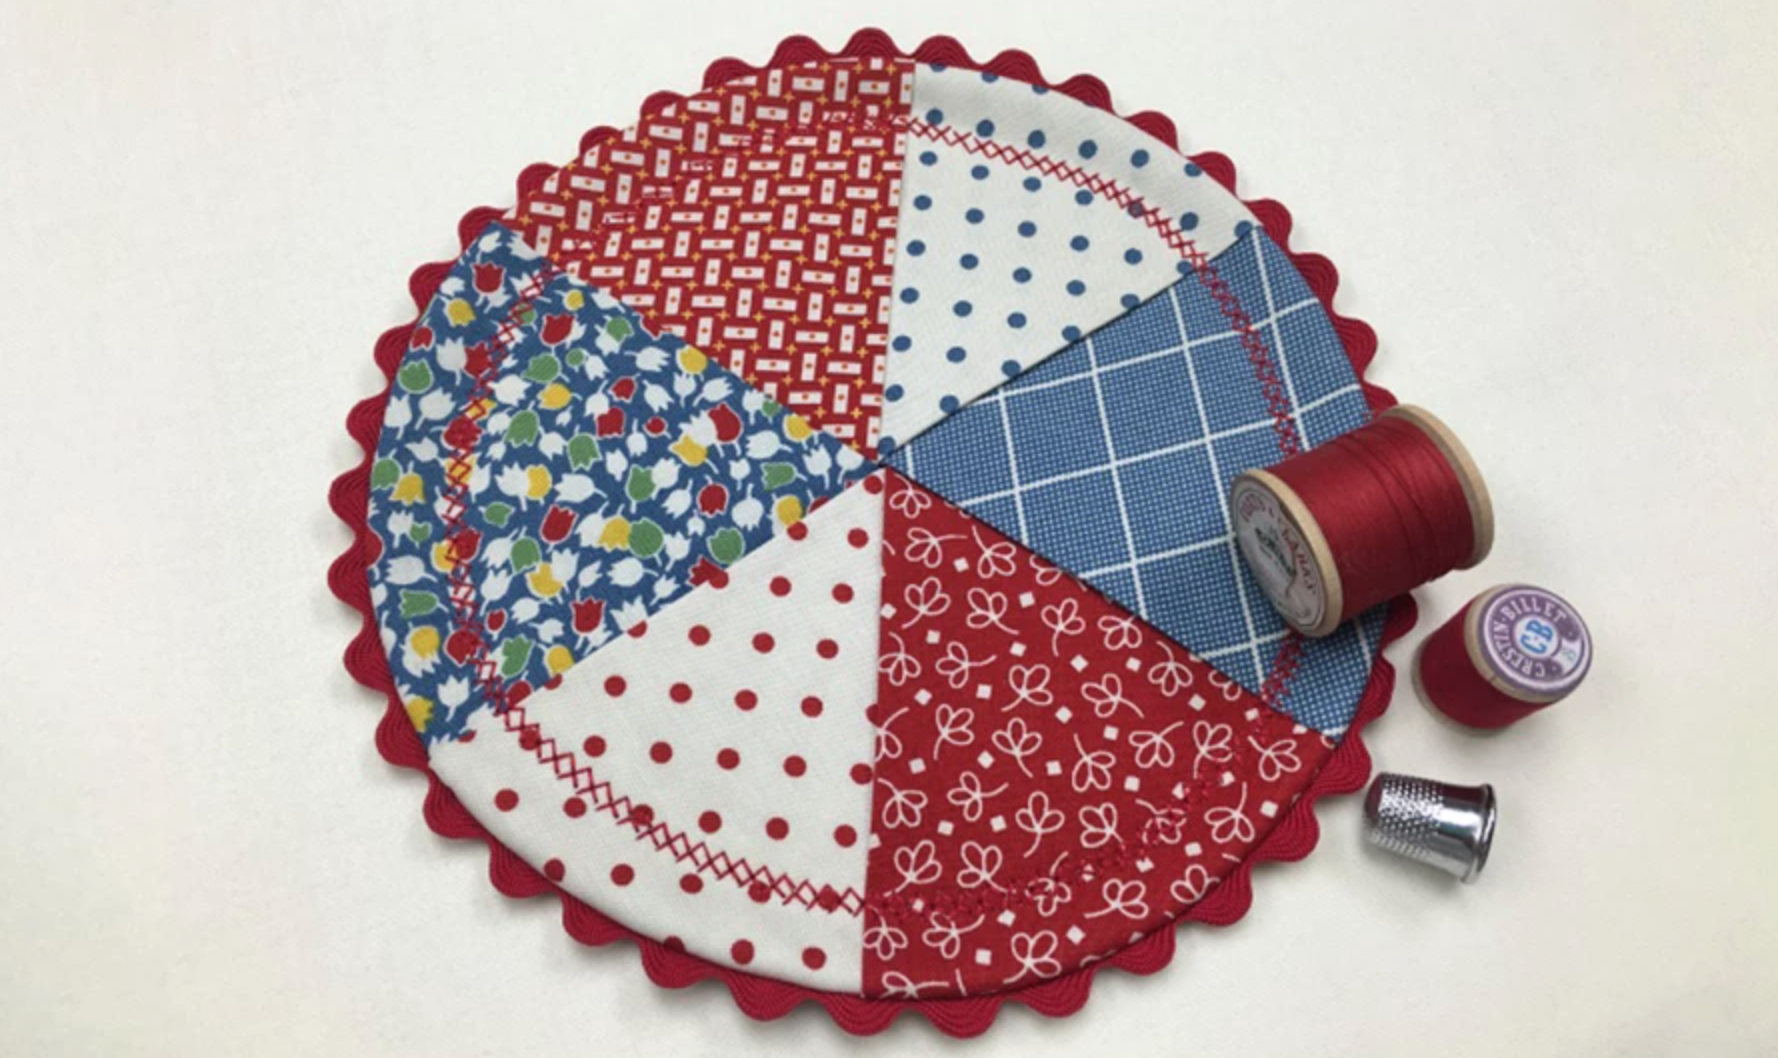
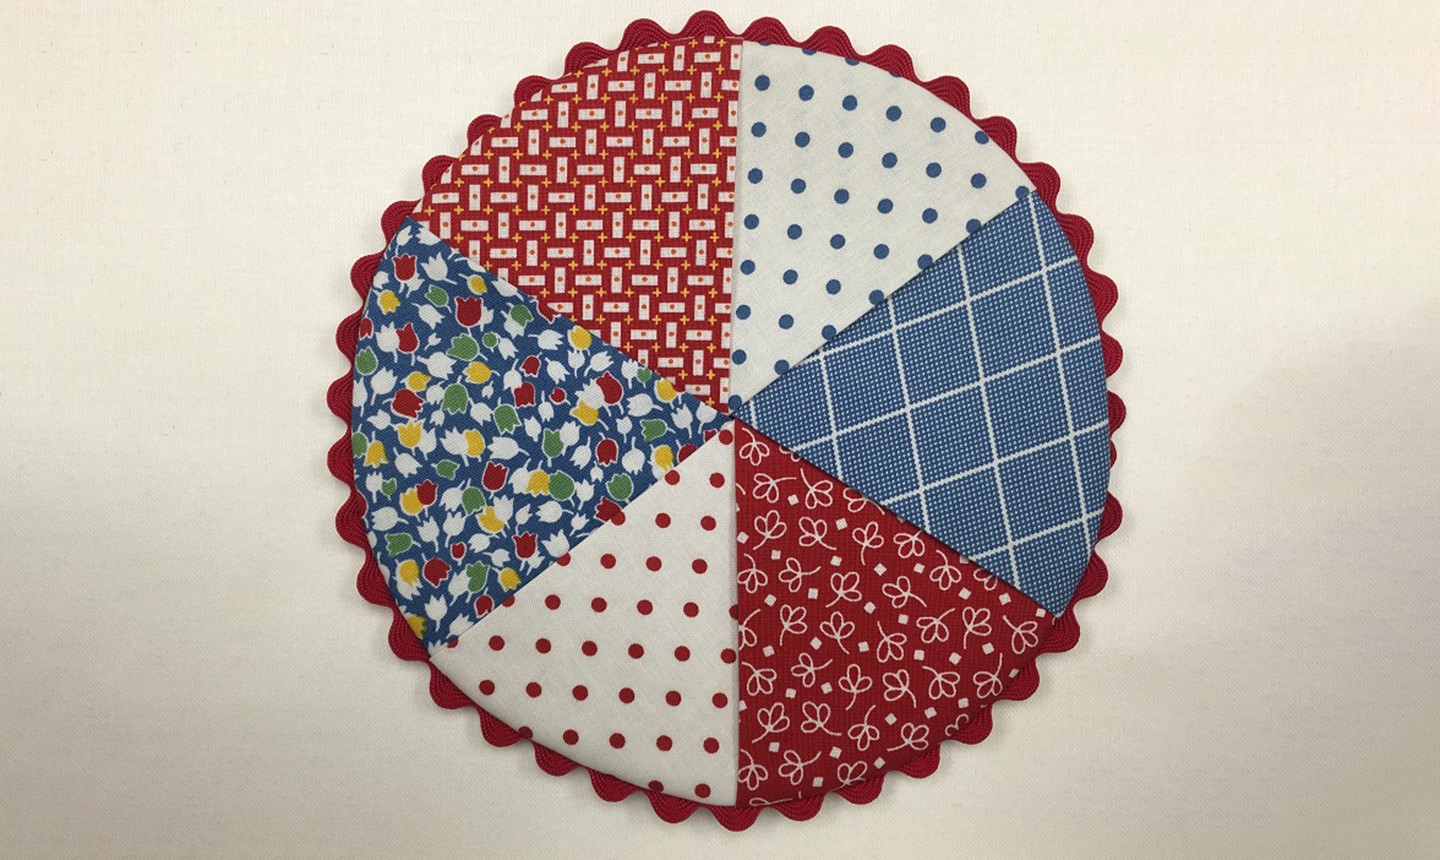
 Red, white and blue has never looked so cute. Make a batch of mug rugs to use during your Fourth of July picnic — they can double as hot plates for your cookout, too!
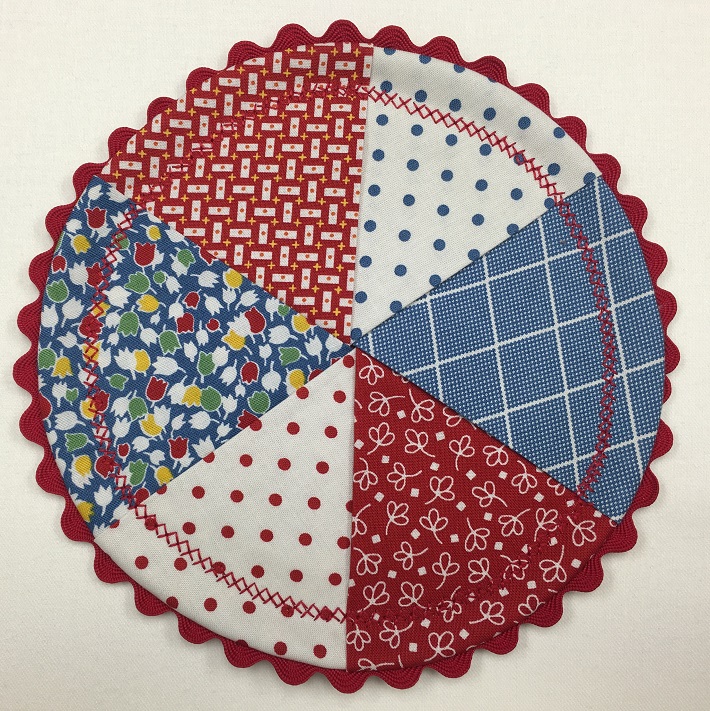
Red, White and Blue Mug Rug
Level: EasyWhat You Need
- 9" squares of 7 assorted fabrics
- 28" of ½"-wide rickrack
- Thread
- Pencil
- Freezer paper
- Iron
- Round plate, lid or quarter circle ruler
- Scissors or a rotary cutter
Instructions
1. Make the Template
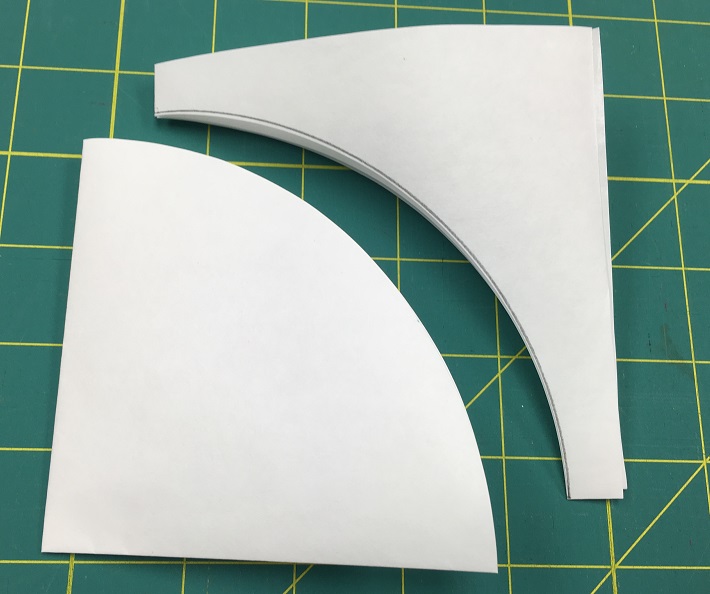 Use a quarter circle ruler, plate or lid to trace an 8" circle onto a piece of freezer paper. Trim the paper with scissors or a rotary cutter.
Pro Tip: If you're using a ruler, fold the paper in half, then in half again. Trace the quarter circle onto the paper.
Use a quarter circle ruler, plate or lid to trace an 8" circle onto a piece of freezer paper. Trim the paper with scissors or a rotary cutter.
Pro Tip: If you're using a ruler, fold the paper in half, then in half again. Trace the quarter circle onto the paper.
2. Cut the Circles
 With your freezer paper template unfolded, use a hot, dry iron to press it to a fabric square. Cut around the paper. Repeat until all seven fabrics have been cut into circles.
Pro Tip: To speed up the cutting process, layer three or four fabric squares and cut them all at once.
With your freezer paper template unfolded, use a hot, dry iron to press it to a fabric square. Cut around the paper. Repeat until all seven fabrics have been cut into circles.
Pro Tip: To speed up the cutting process, layer three or four fabric squares and cut them all at once.
3. Press
 Set aside one of your fabrics to use as the backing. Fold and press the other six circles in half, wrong sides together.
4. Add the Rickrack
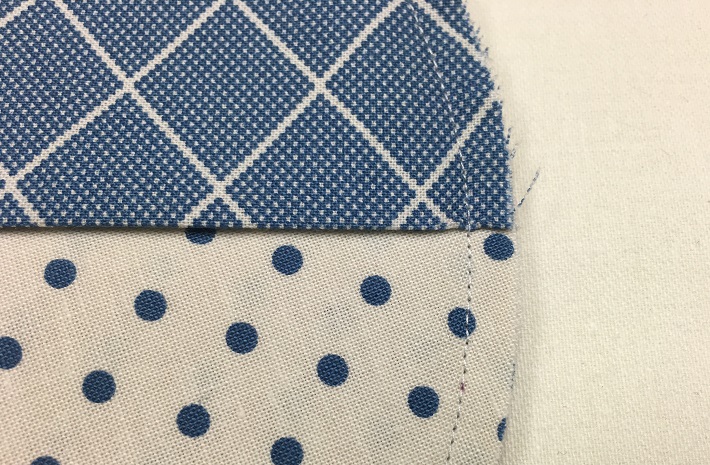
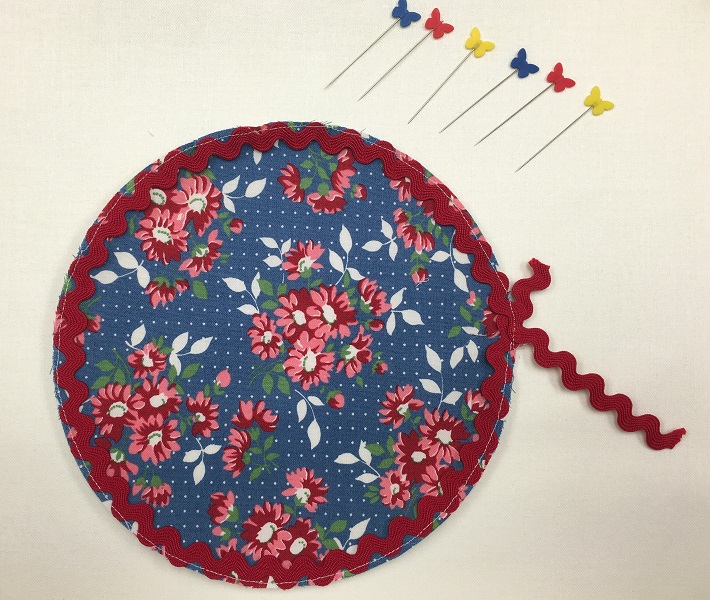 Cut a length of rickrack so it fits around the perimeter of your backing fabric (on the right side). Pin in place. Stitch ⅛" (or less) around the edge of the backing circle to secure the rickrack in place. Overlap the ends and trim them after the border is stitched into place.
Good to Know: The stitching line should be so close to the edge that it'll be inside the seam allowance and invisible when the mug rug is finished.
Cut a length of rickrack so it fits around the perimeter of your backing fabric (on the right side). Pin in place. Stitch ⅛" (or less) around the edge of the backing circle to secure the rickrack in place. Overlap the ends and trim them after the border is stitched into place.
Good to Know: The stitching line should be so close to the edge that it'll be inside the seam allowance and invisible when the mug rug is finished.
5. Layer the Circles
 Place the first pressed circle (still folded in half) on top of the background circle. The background piece should be right-side up, with the rickrack facing up. The pressed circle will have right sides facing out. The raw edges should be lined up exactly on top of one another.
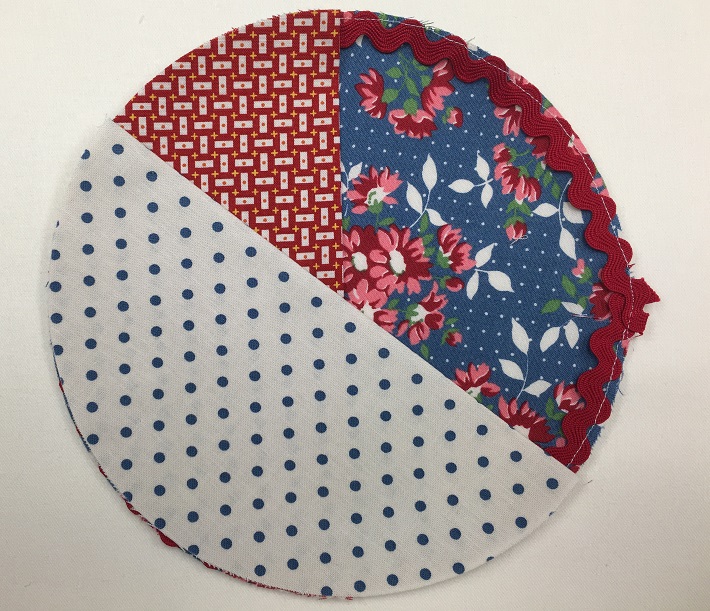 Add the second folded circle in the same manner. Rotate this fabric so it's about ⅓ of the way down on the first fabric, revealing a pie-shaped wedge of the first fabric. This doesn't need to be precise — you can always adjust later. But make sure your raw edges remain aligned.
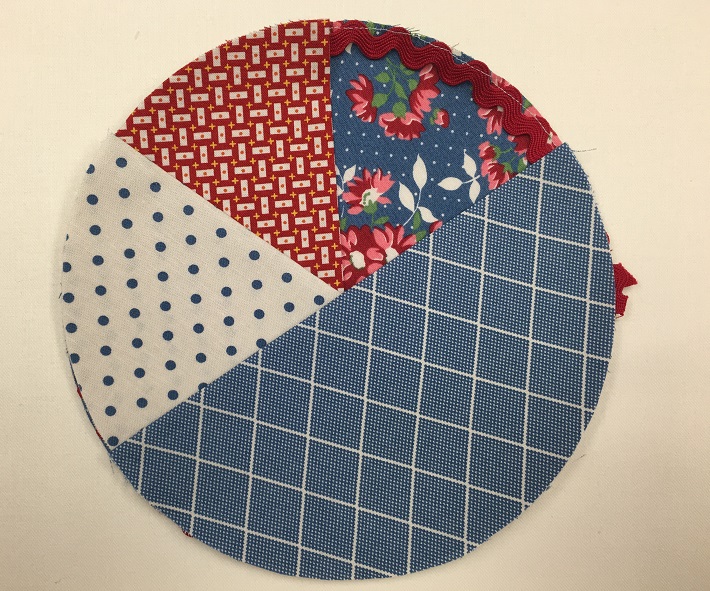 Add the third folded circle just as you added the second. Place it so the wedges of the first and second fabrics are about the same size.
 Layer the fourth folded circle on top of the others. This will cover your background fabric from view.
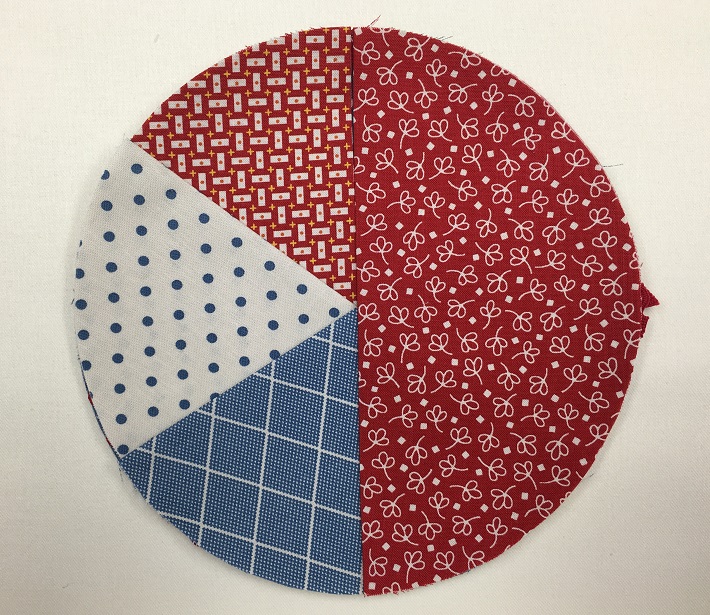
 Layer the next folded circle on top, then lift up the first wedge to tuck the fourth folded circle underneath.
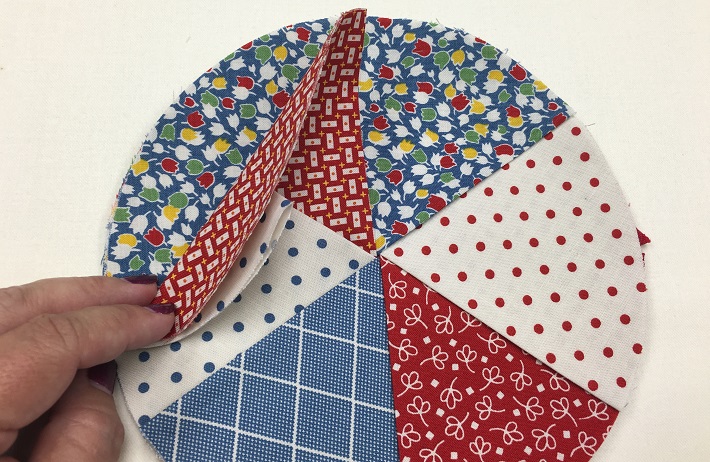 Add the last folded circle the same way, lifting the first two folded circles to tuck it underneath. As always, make sure the raw edges are perfectly aligned and that all wedges are about the same size. Make any necessary adjustments.
 When everything looks good, pin around the mug rug to secure the edges and layers.
6. Sew
 Using a ¼" seam allowance, sew around the entire outside of the circle. Make sure the layers don't shift while you sew.
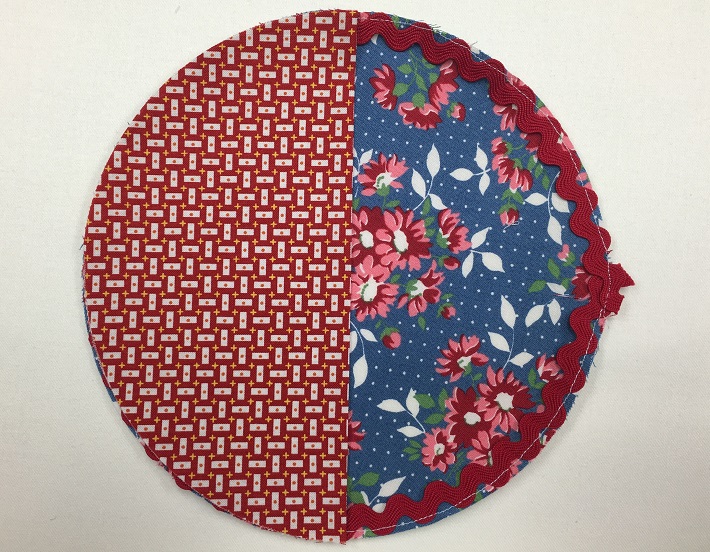
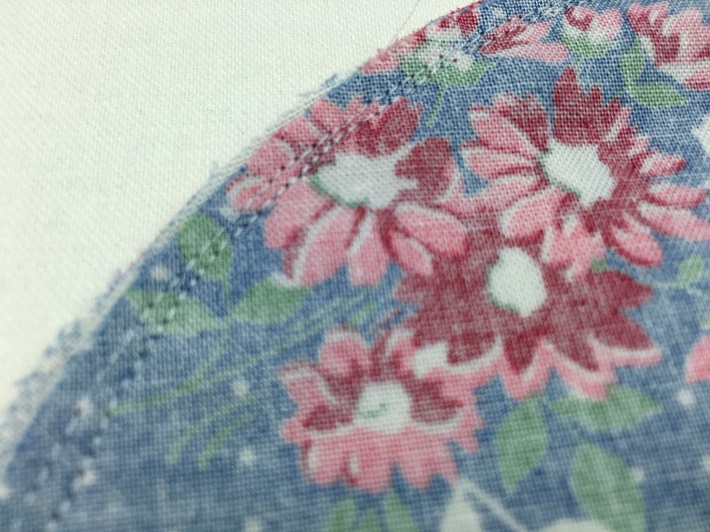 When you flip the mug rug over, the back will look like the image above. Notice the basting seam from the rickrack is closer to the edge than the sewing seam. This means the basting seam is hidden in the seam allowance.
7. Finish
 Once the edges are sewn, push the backing through the center where all the folded circles meet. This will turn the mug rug right-side out. Press it flat.
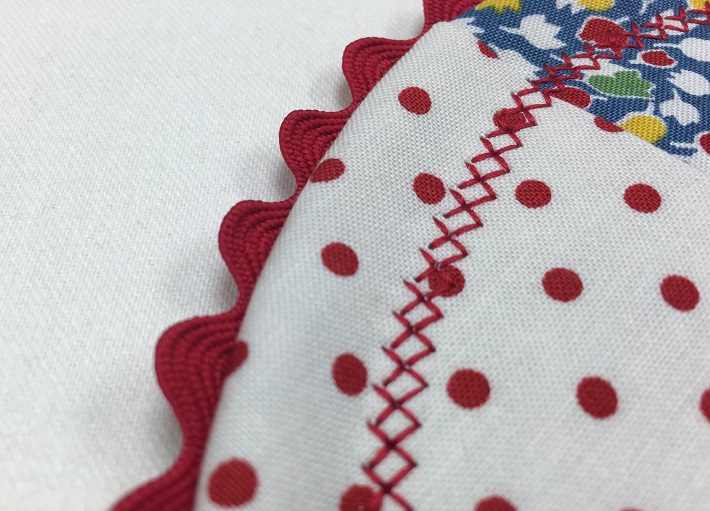 Choose a decorative stitch, like a cross-stitch, and add it about ½" away from the finished rickrack edge. This will reduce bulk and keep the mug rug flat and secure.

Wish you would make all your patterns as pdfs. I like to print out the patterns and make instead of looking at computer all the time or laptop.
Thank you, great pattern
Am going to make a few of these!!!
thanks
These are just adorable..! Pattern can be used for every season.!
Thanks
Thank you! That seems like I can do it - your pictures with directions will be so helpful.
Hope I can make this
Thnks
thank you for cute 4th july meg rug pattern