
Looking to give a plain tank a little life? Give some pizazz to your favorite summer shirt with this fun sewing tutorial on how to add a ruffle to a tank top. Whether sprucing up a plain pattern or upcycling an old piece, you can breath new life into this classic warm-weather top!

One of the simplest garments to make is a tank top – with just a couple of side and shoulder seams and then a finish around the neckline and armholes, it’s done. This super versatile top can appear in some may ways in a woman’s closet: When done in sequins, it can be a fancy top for evening wear, or when sewn with regular jersey knits, it becomes a casual daytime piece. Most often, it plays alone as a cool and comfortable cover on a hot day or as an undergarment to a sheer top. Now that the summer season has commenced, tanks become a wardrobe staple for any day of the week.
But, let’s face it, a plain tank top can sometimes be a bit boring. As easy as it is to make one, upcycling one can be just as easy. How about a pretty ruffle at the shoulder to punch up the style while adding the look of a cap sleeve? Ruffles can sometimes be a bear to make, but here is a technique that is simple and fast. The ruffle demonstrated here was added to a newly constructed tank top, but the method would work equally well as a way to upcycle a store-bought or thrift shop buy.
Follow these steps to draft and apply a ruffle to a simple tank top!
Step 1:
Construct the top in the usual manner by sewing the shoulder seams together. Or, if you are upcycling an old top, remove the existing neckline finish.
Step 2:
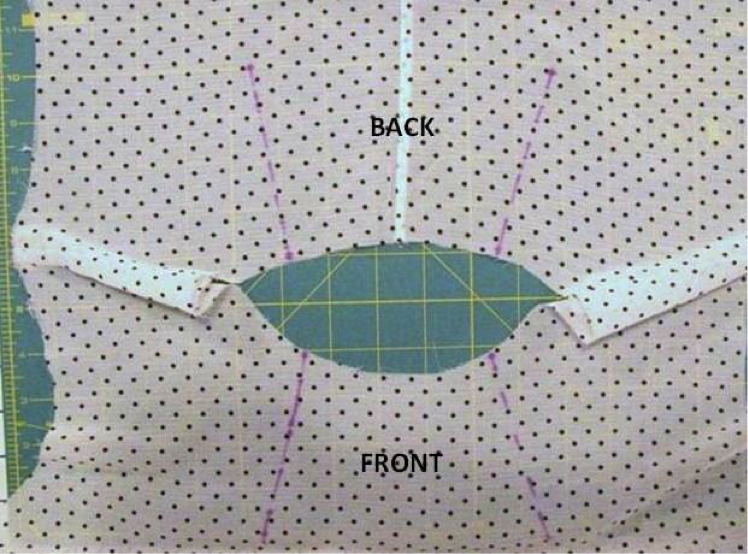
Determine where the ruffle is to be applied, marking the placement on both the front and back.
Step 3:
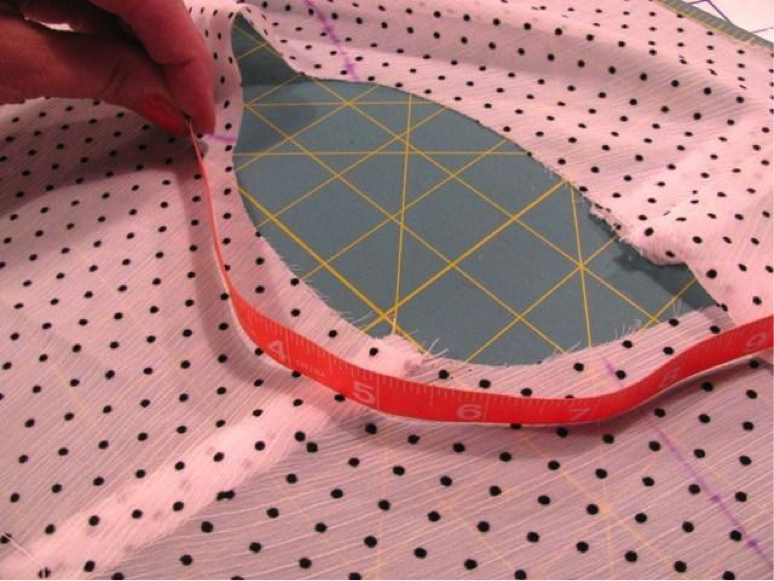
To determine the dimensions of the ruffle, measure the distance from the placement point on the front to the placement mark on the back using a measuring tape. Multiply that number by 2 for the gathered fullness.
In this example, the measurement from front to back is 8 ½” so the ruffle length to be cut is 17”.
Step 4:
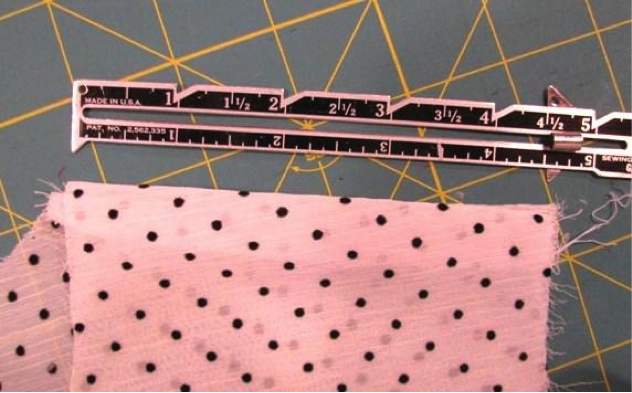
To determine the width of the ruffle, first measure the length of the shoulder seam. In my example the width is 4 ½” but that includes seam allowances, so without them it is 3 1/2”.
Add a 1” overhang to create the effect of a sleeve cap. This brings it back to 4 ½”. Add a ⅝” seam allowance at the neckline for a total of 5 ⅛ ”. Now multiply that number by 2 as the ruffle will be two layers, for a width of 10 ¼”. The final dimensions for each ruffle are 10 ¼” by 17”.
Step 5:
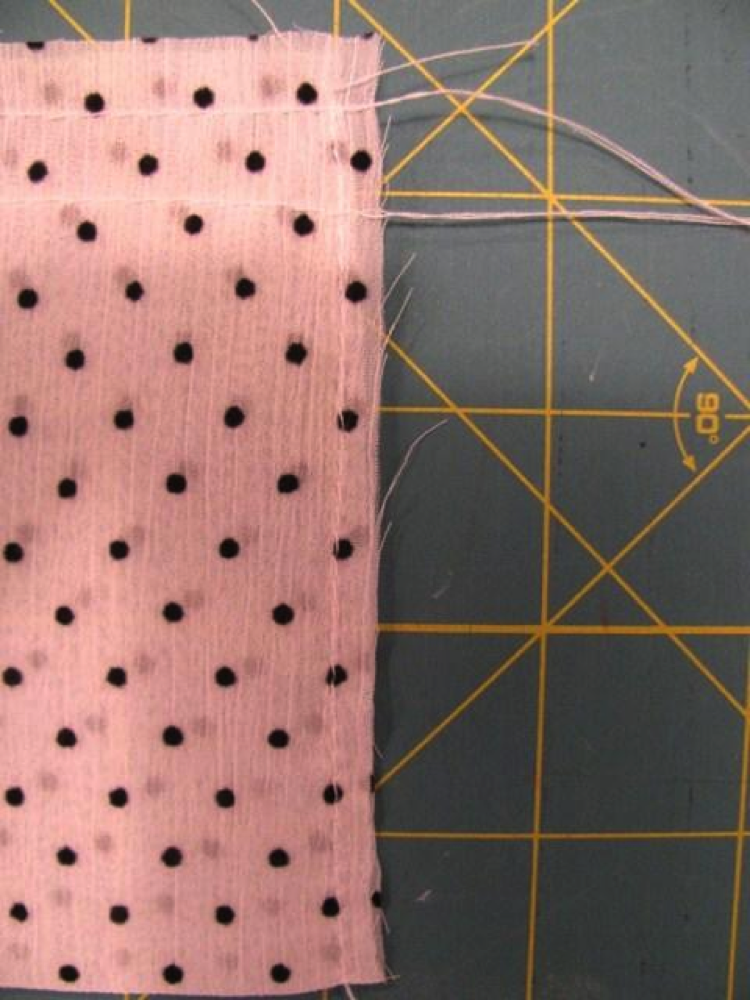
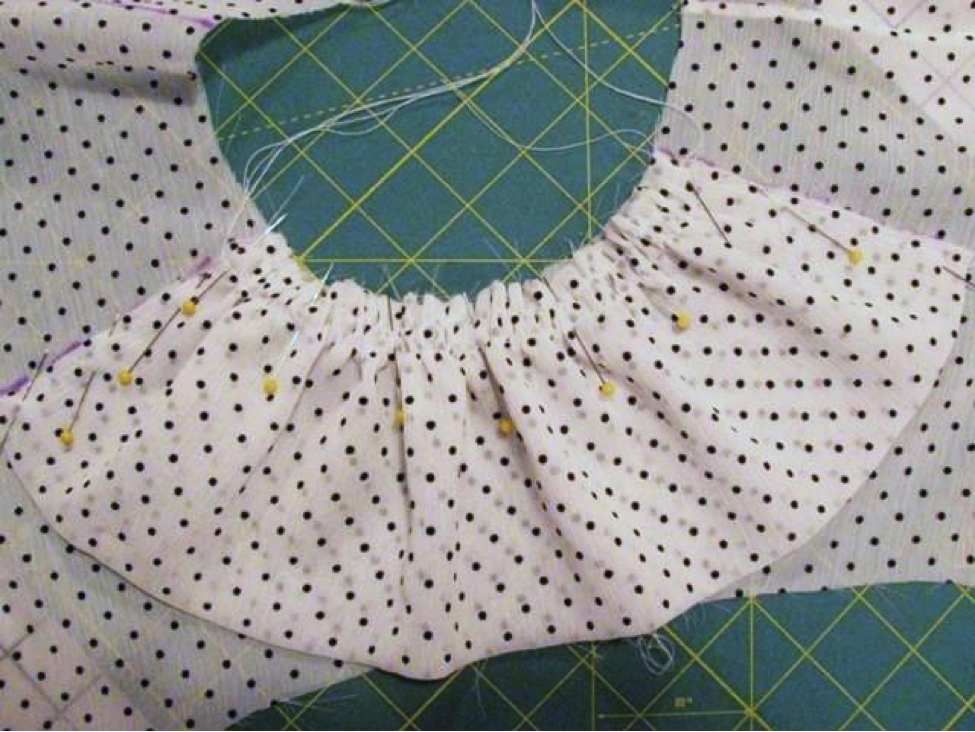
Cut out the ruffle pieces. Fold each in half lengthwise, wrong sides together, and stitch the short sides closed using a ⅛” seam allowance. Sew in two rows of gathering stitches along the length of the ruffle, securing both layers.
Step 6:
Pin the ruffle to each shoulder lining up the short ends to the placement marks and gathering the ruffle to fit the neckline.
Step 7:
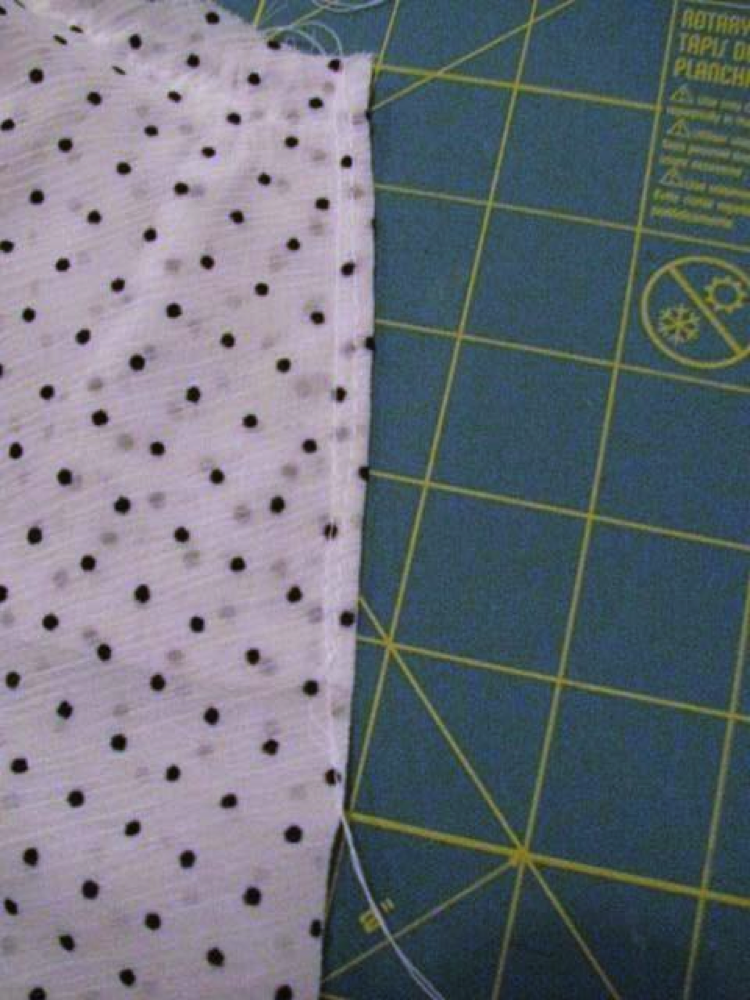
Stitch the ruffle in place at the neckline using a ⅝” seam allowance. Stitch the short sides ⅛” from the edge to secure the ruffle in place.
Step 8:
To conceal the exposed raw edges of the ruffle short ends, fold the tank top over the edge along the placement line, right sides together, and then stitch in place as if sewing a dart. This totally encloses the raw edge to produce a clean style line.
Step 9:
Complete the construction of the tank top in the usual manner, finishing the neckline either with bias tape, lining or facing.
In the example, the top was fully lined, so after stitching, the neckline was clipped, trimmed, understitched and then topstitched at the front and back between the ruffle placement.
[box type=”shadow”]
Learn thrifty ways for using basic sewing skills to transform plain, old & cast-off clothing into amazing clothes and accessories in the Bluprint class Project Upcycle: Thrifty Sewing Projects.
[/box]
Share tips, start a discussion or ask one of our experts or other students a question.
No Responses to “Ruffle Up a Classic: How to Upcycle a Plain Tank Top”