Looking for some instant summer wardrobe gratification? Grab those old jeans out of the dresser and transform them into fun, stylish shorts! With these three quickie tutorials, you'll soon be ready for all the warm-weather adventures.
DIY Jean Shorts
Level: Easy
What You Need
Prep Work
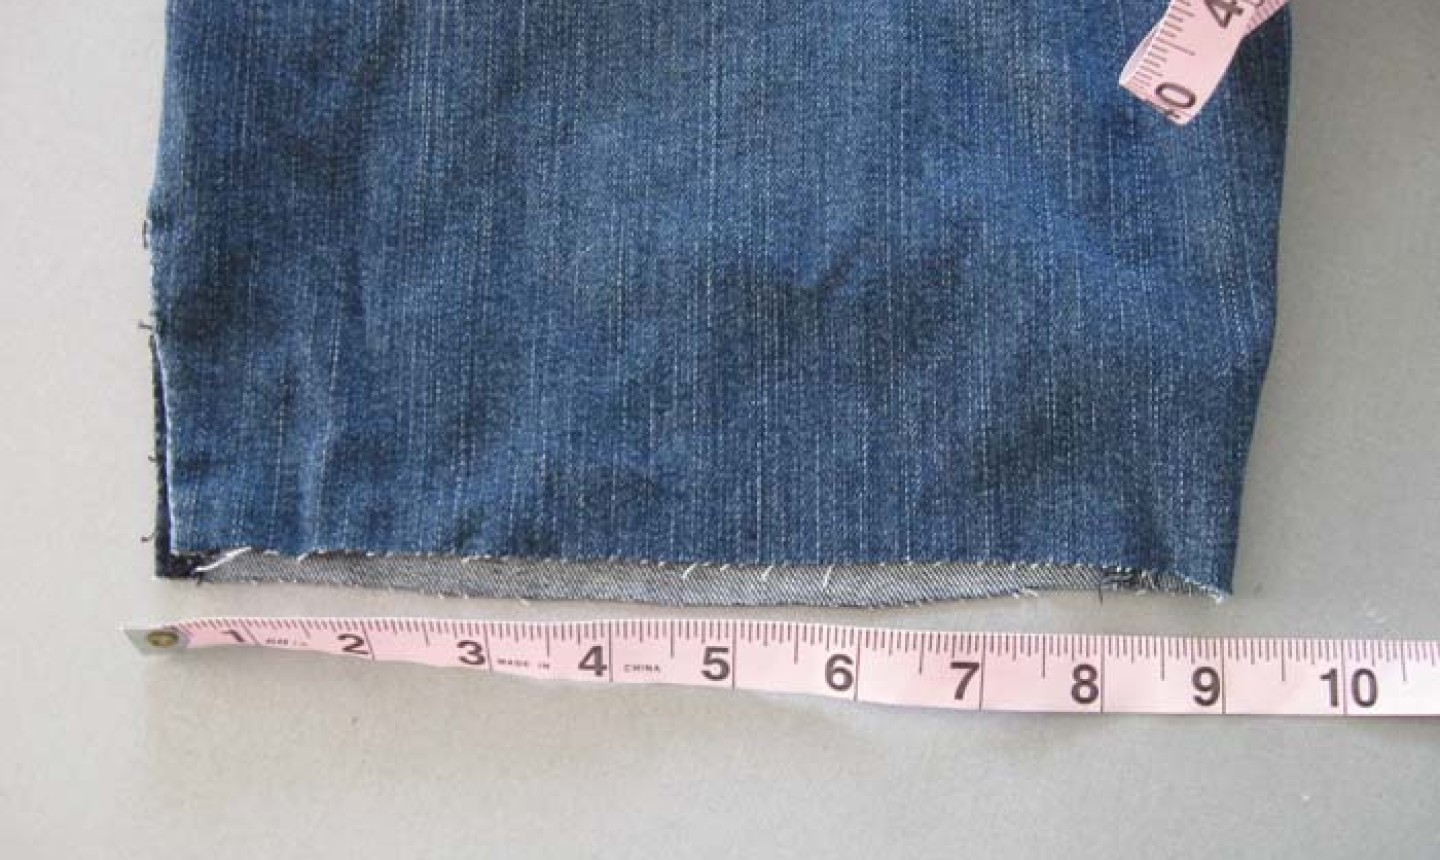
Determine the Length
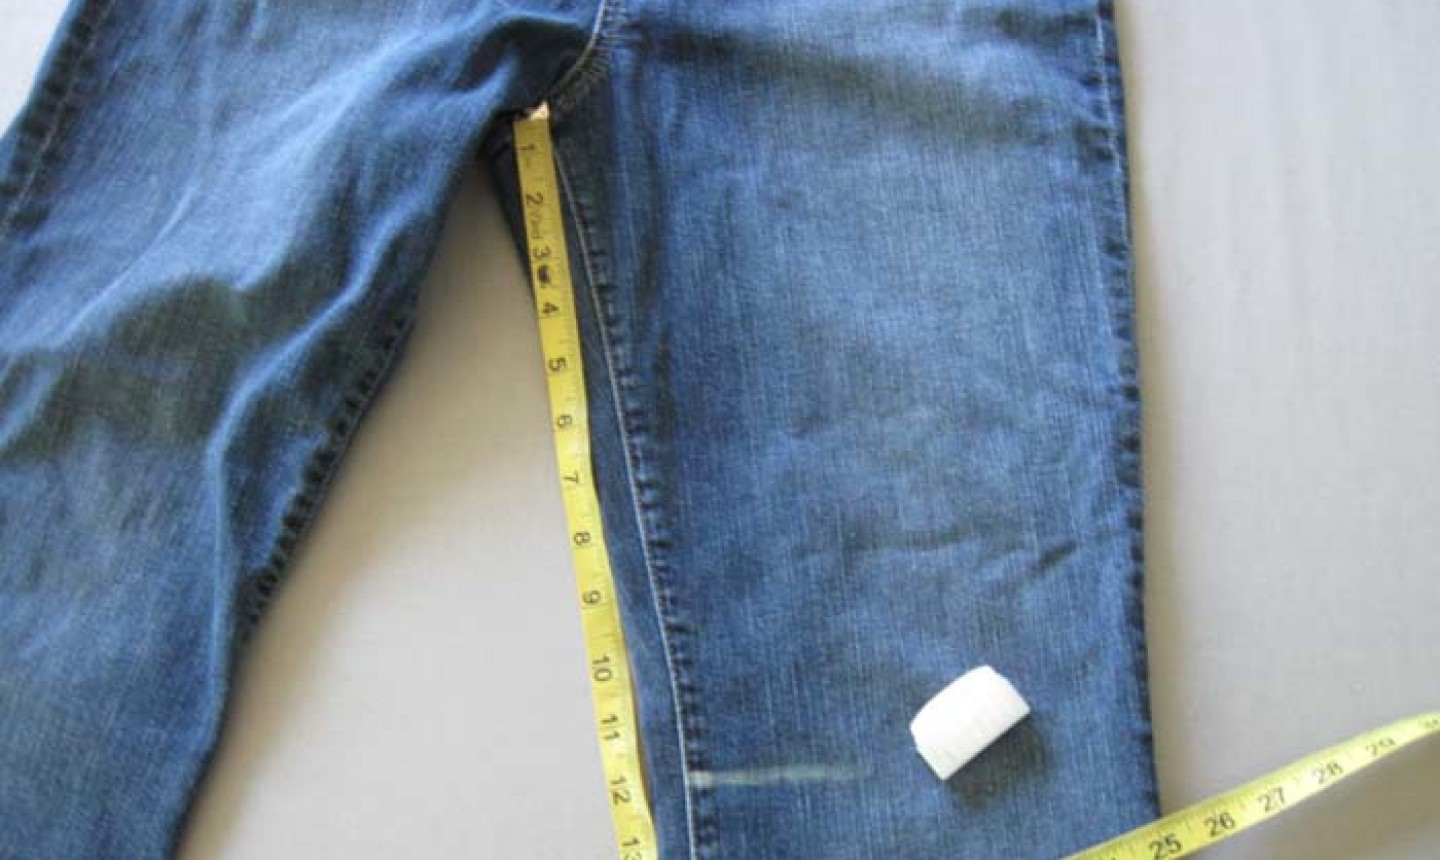
Put your jeans on and consider how long you want your finished shorts to be. Knee-length? Short-short? Somewhere in the middle? Whatever you decide, measure the length you want, then add about 1 to 2" for finishing your edges (more on that below).
Use a fabric marker or tailor's chalk to note where you want your length to hit on each leg. Take off your shorts.
Cut your jeans at the mark you made.
Pro Tip: You can also grab an existing pair of shorts that hit at a length you like. Measure the inseam, then use that as a guideline to cut off the jean legs. Remember, you still want to add extra length to your measurement for hemming.
Now comes decision time: Do you want your edges to be rolled, frayed, or have contrasting fabric? Let your answer guide you through the following tutorials for the edges of your shorts.
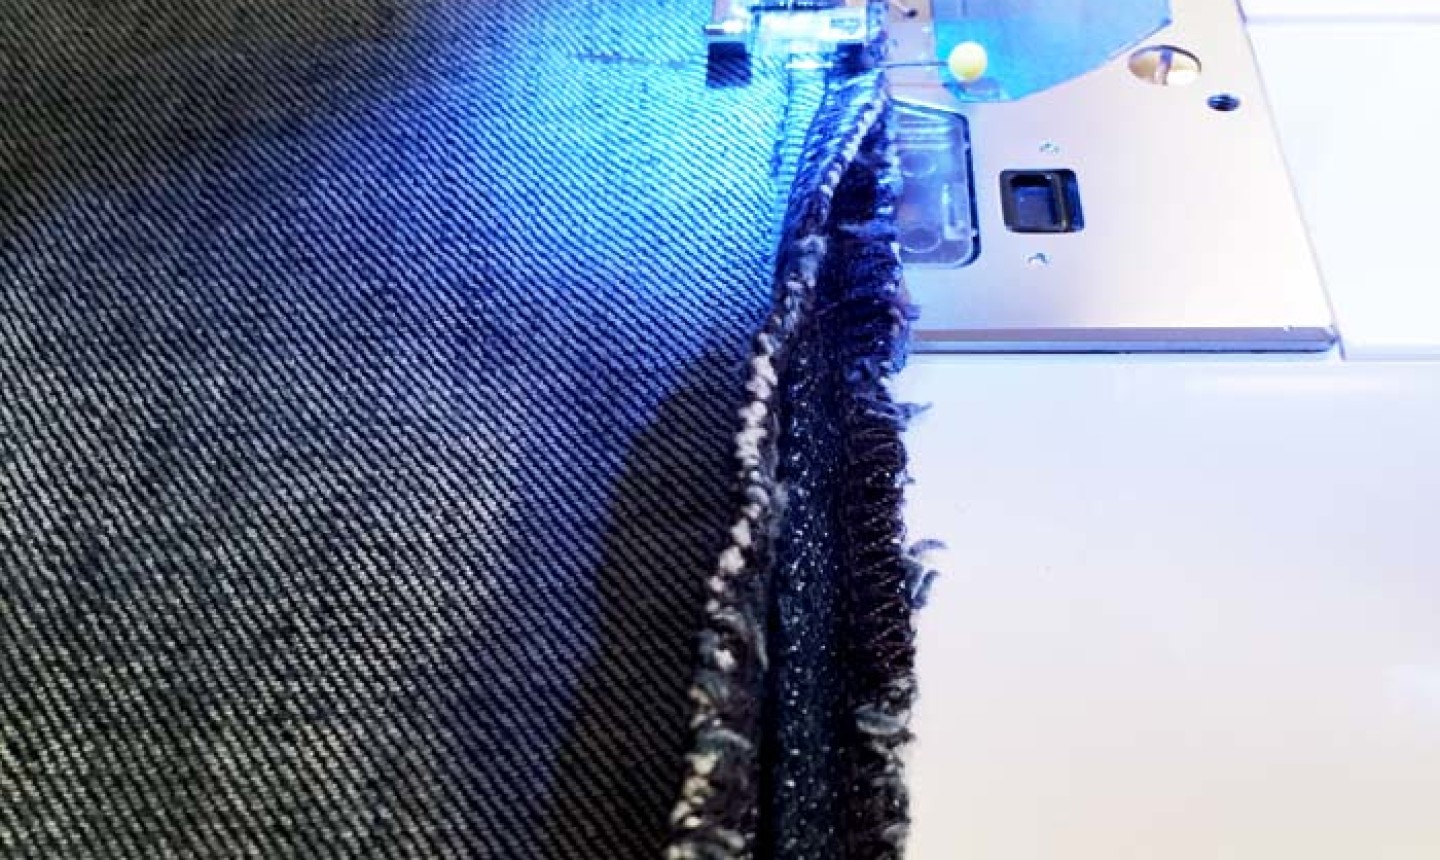
Rolled Shorts
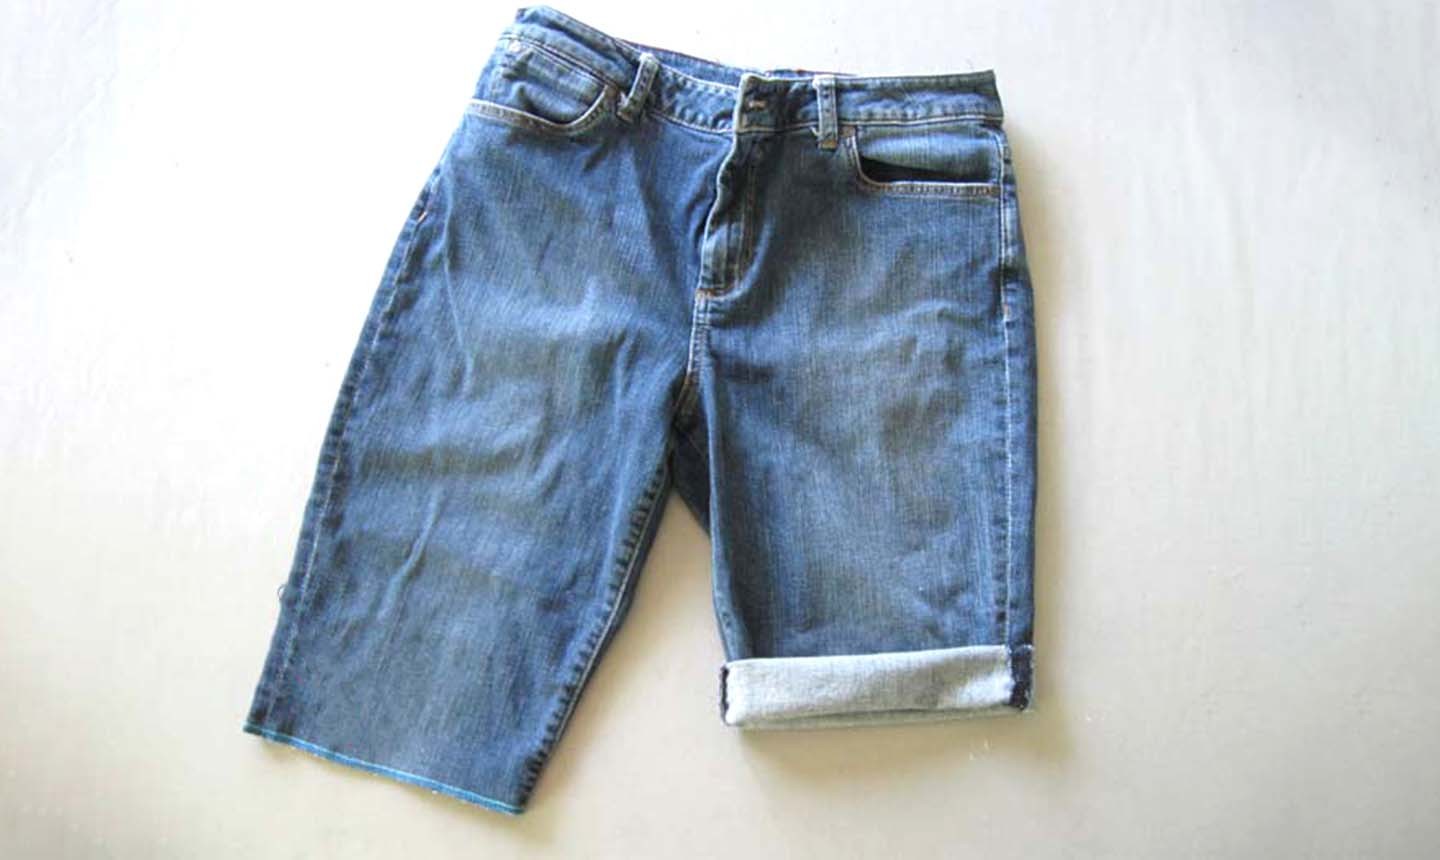
Finish the cut edge of your shorts with a serger to keep it from fraying.
Roll up the edge to the length you want (typically the 1 to 2" you added when you first cut the shorts). Stitch the rolls down at the side seam so they stay in place.
Frayed Shorts
When you want a frayed look without sacrificing length, run a couple rows of machine stitches about 1" from the cut edge. That way, when the fabric frays it will stop at that point. Use a matching thread so the stitching won't show on the outside.
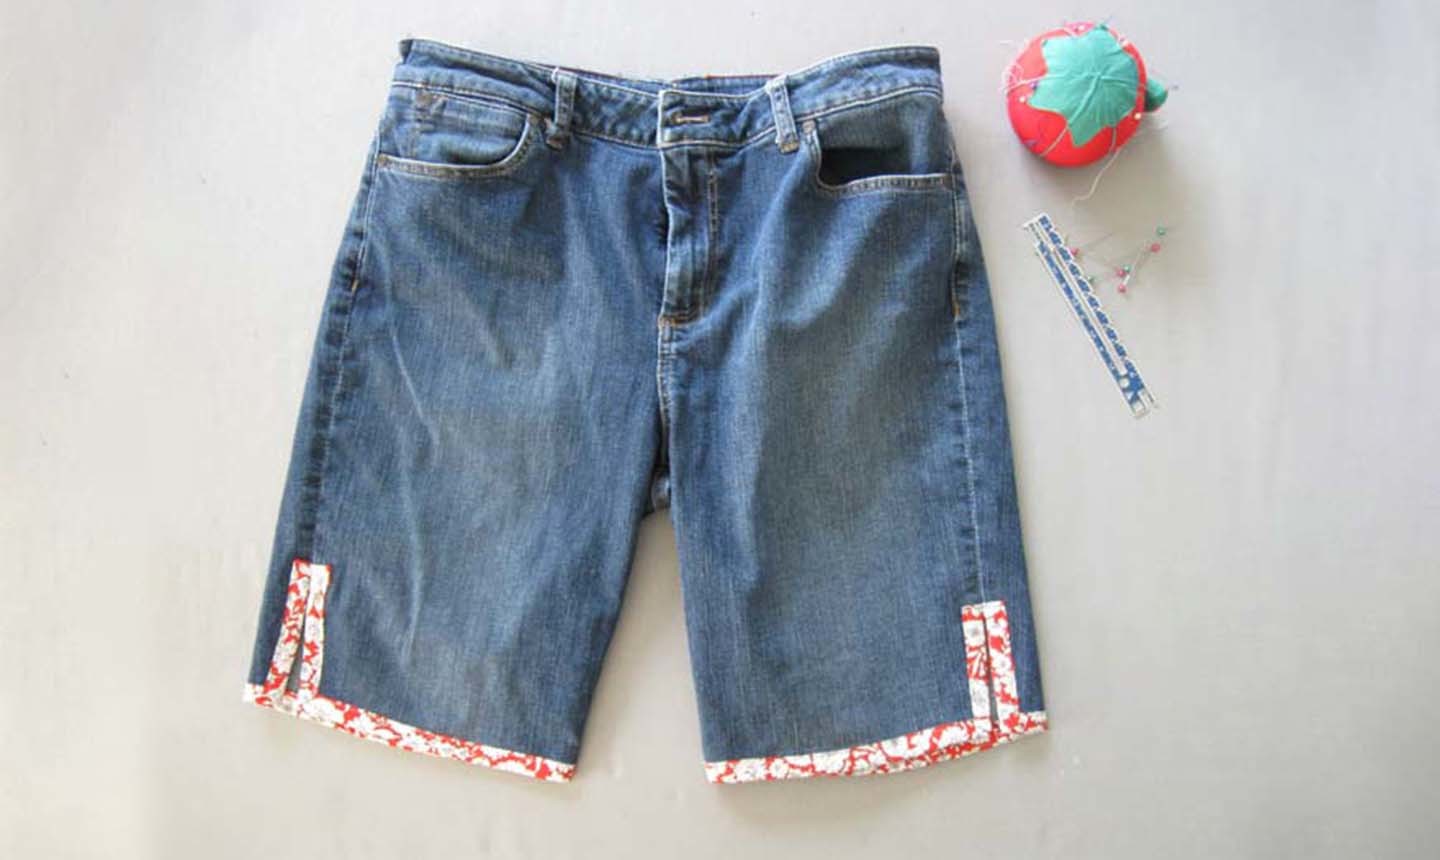
Contrasting Edge Shorts
Grab cute, leftover fabric strips from your stash and add an eye-catching edge to your new shorts.
1. Measure the Leg Opening
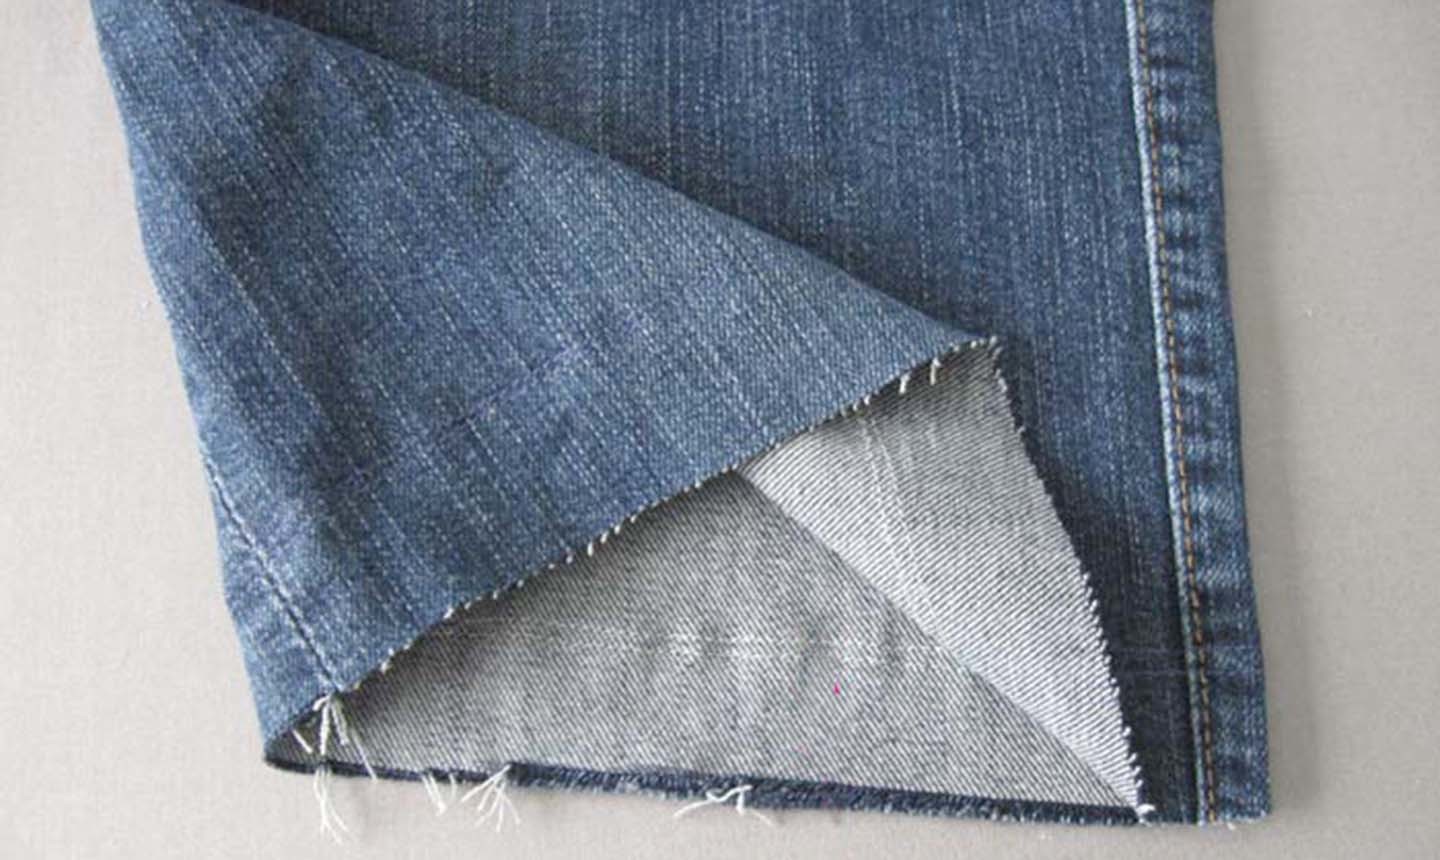
Start by measuring the leg opening. Since jeans are often very form-fitting, we recommend adding some extra wiggle room. Create space by opening up the outside side seam into a slit. We made ours about 3" long.
2. Reinforce the Side Seam Slit
Stitch the side seam slit you just created, so it doesn't pull open with wearing and washing.
3. Make Bias Binding
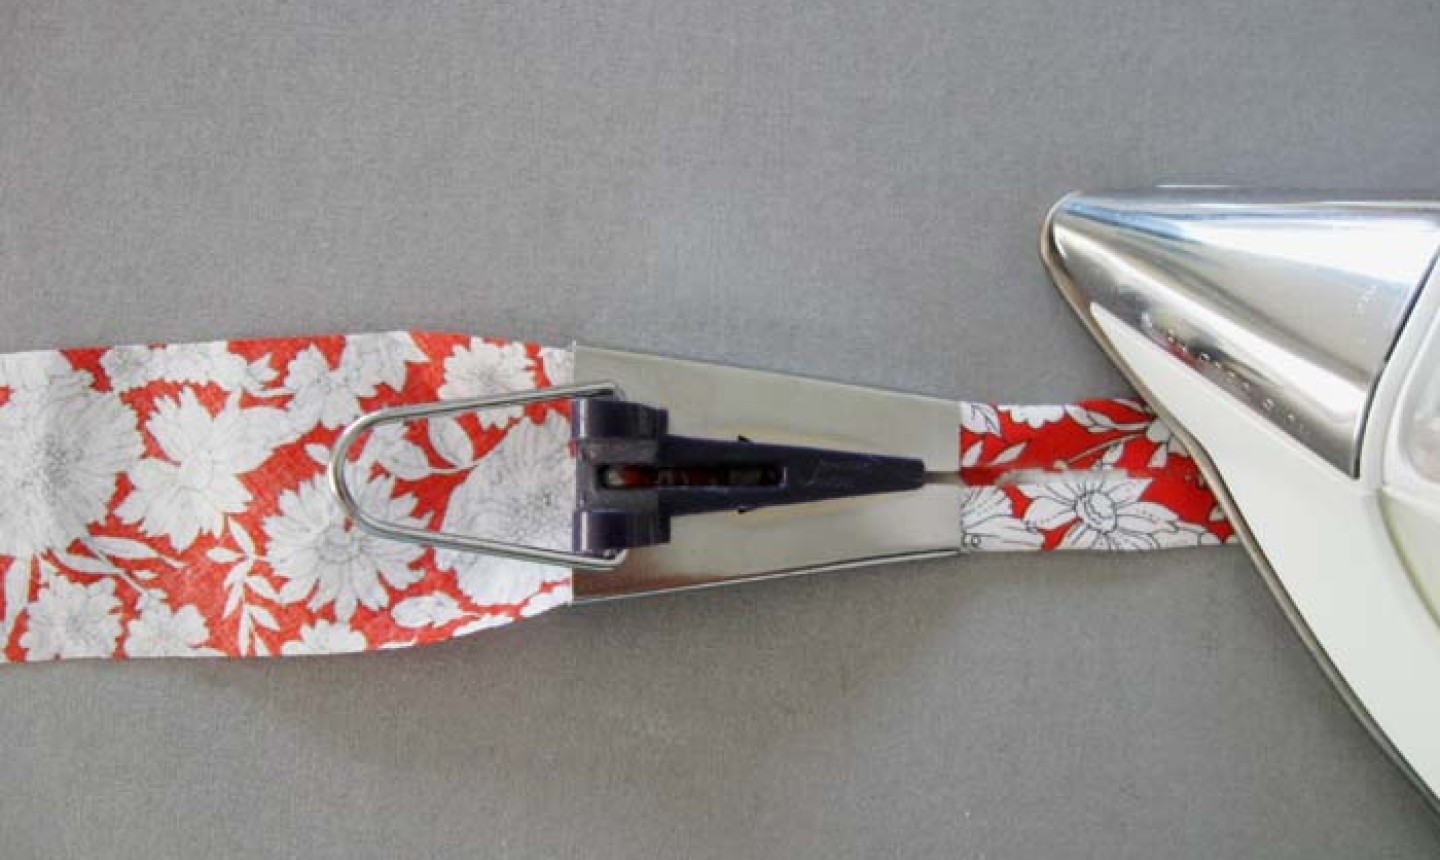
Grab your scrap fabric and use a bias tape maker to turn it into bias binding. You'll need enough to cover the leg opening, the side seam slits, and a little extra to turn under the edges. For example, our leg openings are 18", plus 3" each for the side seam slits, plus 2" extra — add 'em all together and we need about 26" of bias binding per leg.
Good to Know: If you don't have a bias tape maker, check out our tutorial on how to make bias tape without one.
For the width, we started with 2", then pressed into double fold binding.
4. Attach the Bias Binding
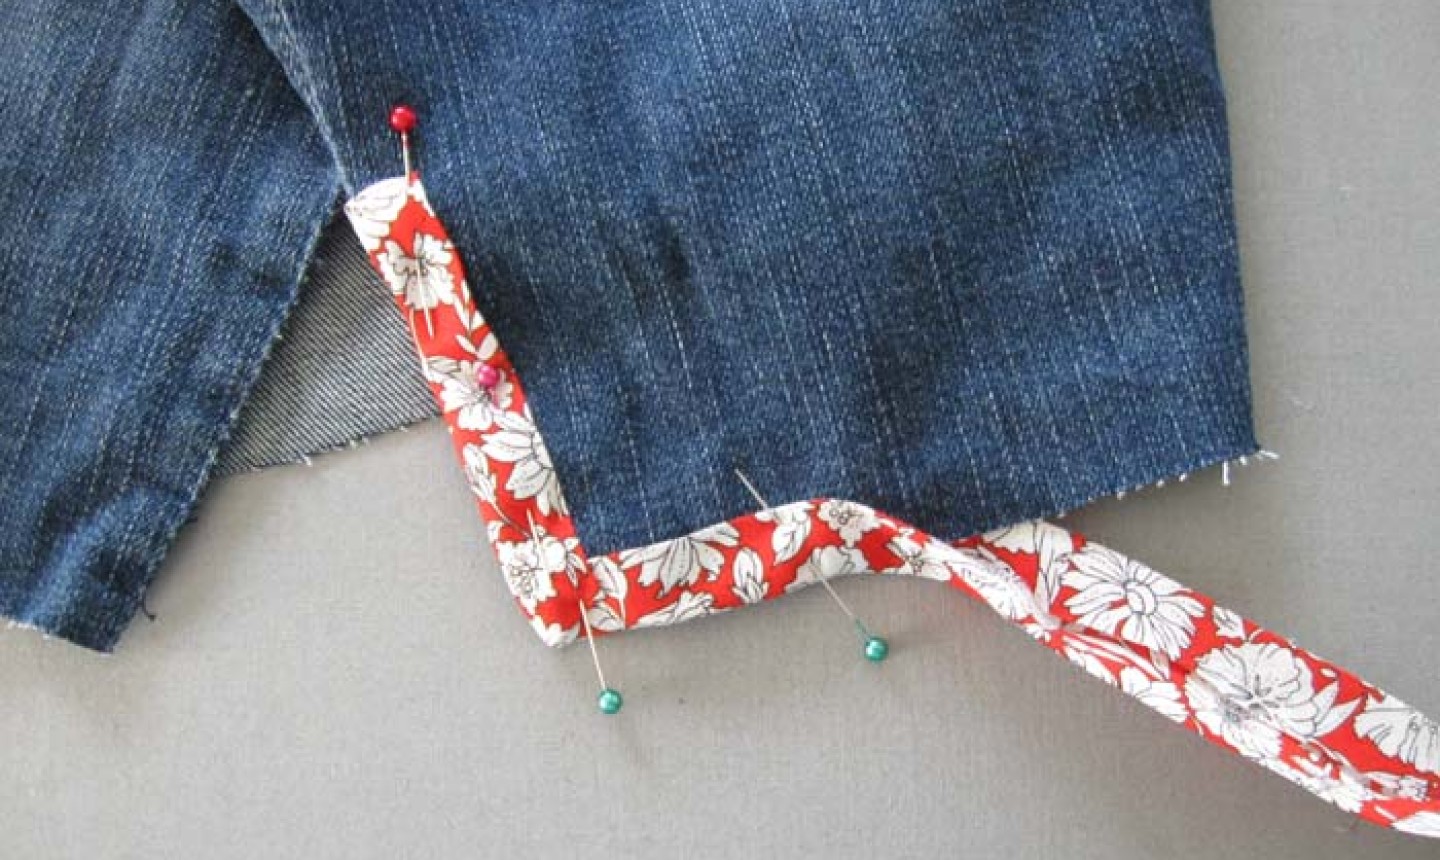
Starting at the top of one side slit, fold the edge of the bias to make a clean finish. Sandwich the jeans edge in the fold of the bias binding. Pin all around.
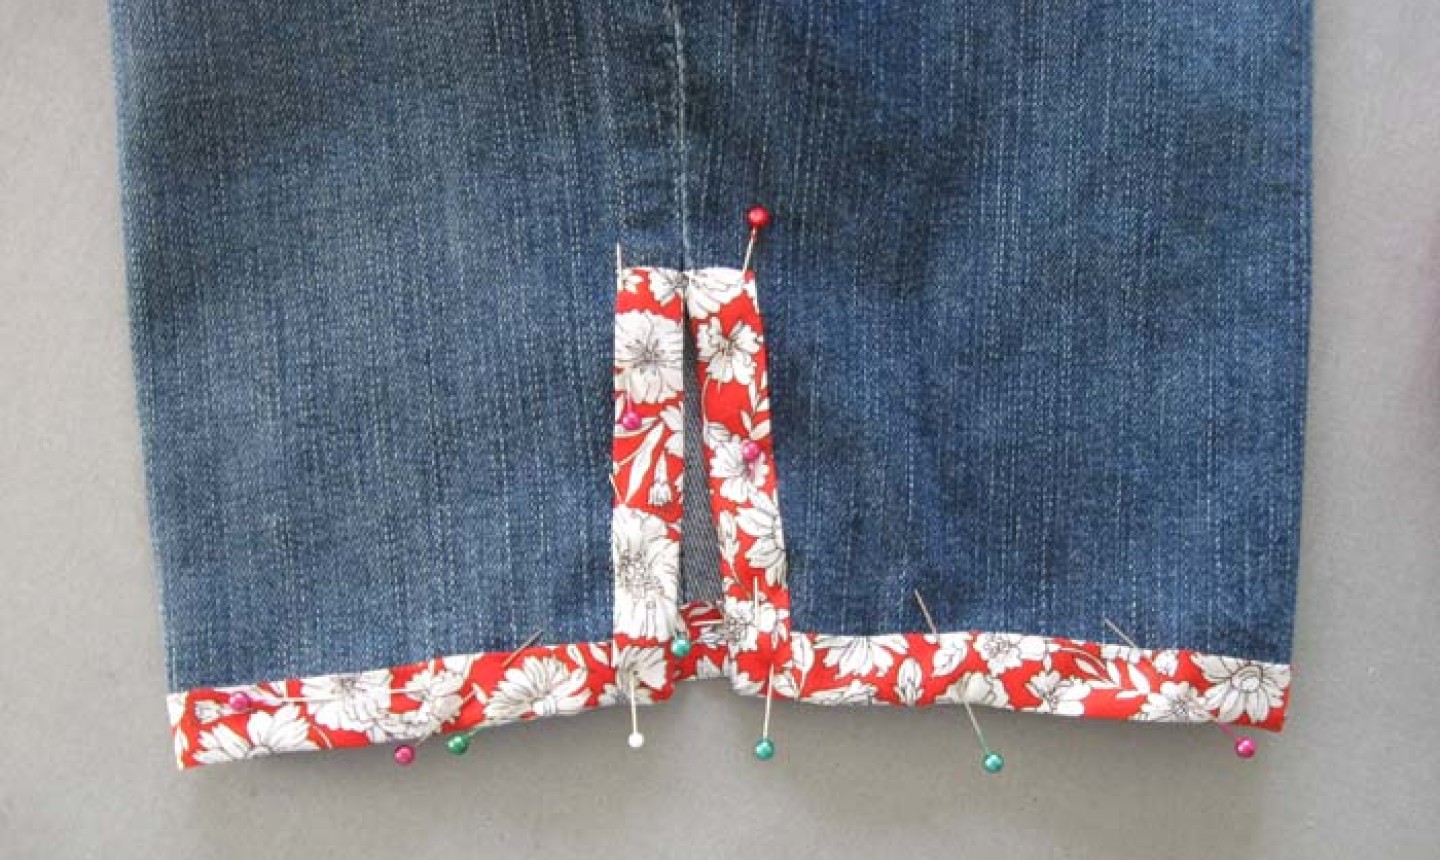
Machine stitch the binding onto the shorts, making sure to catch both sides of the binding to encase the denim.

Thanks for the info
I like this .will try.
love this 😀 given me an idea for my old jeans. thanks ❤️
already did this with some pants I could no longer wear.
Can't wait to try this. It looks so easy which is what I need.
Love the shorts with the bias trim. I already have lots of cute bias. Hope it's wide enough!
Repurpose those old jeans into a skirt. Easy to wear and cooler than shorts in summer heat!
Any ideas on what to do with jeans that have worn out being the legs at the crotch and turn them into shorts? Maybe a way to patch the wear spots and decorate them, so the patch doesn't really show?
I like to learn new styles
I'm wondering about the other 2 also.