Want to know an instant way to level up any garment and look like a sewing superstar? Add a double welt pocket — or two! Whether you’re going for a dressy or more casual vibe, the double welt adds polish and a cool-factor you simply can’t get from any other pocket.
Yes, adding a double welt pocket levels up the complexity of your project, as it requires precise marking and stitching. But this tutorial takes the intimidation factor down by using just one piece of fabric to create the welts, making it easier to get even welts that meet perfectly at the middle of the opening. Give it a go and the double welt will soon be your fave pocket for blazers, coats, vests, pants, skirts, purses — you name it, you can welt it!
Double Welt Pocket
Level: Intermediate
What You Need
Instructions
1. Cut Your Pocket Pieces
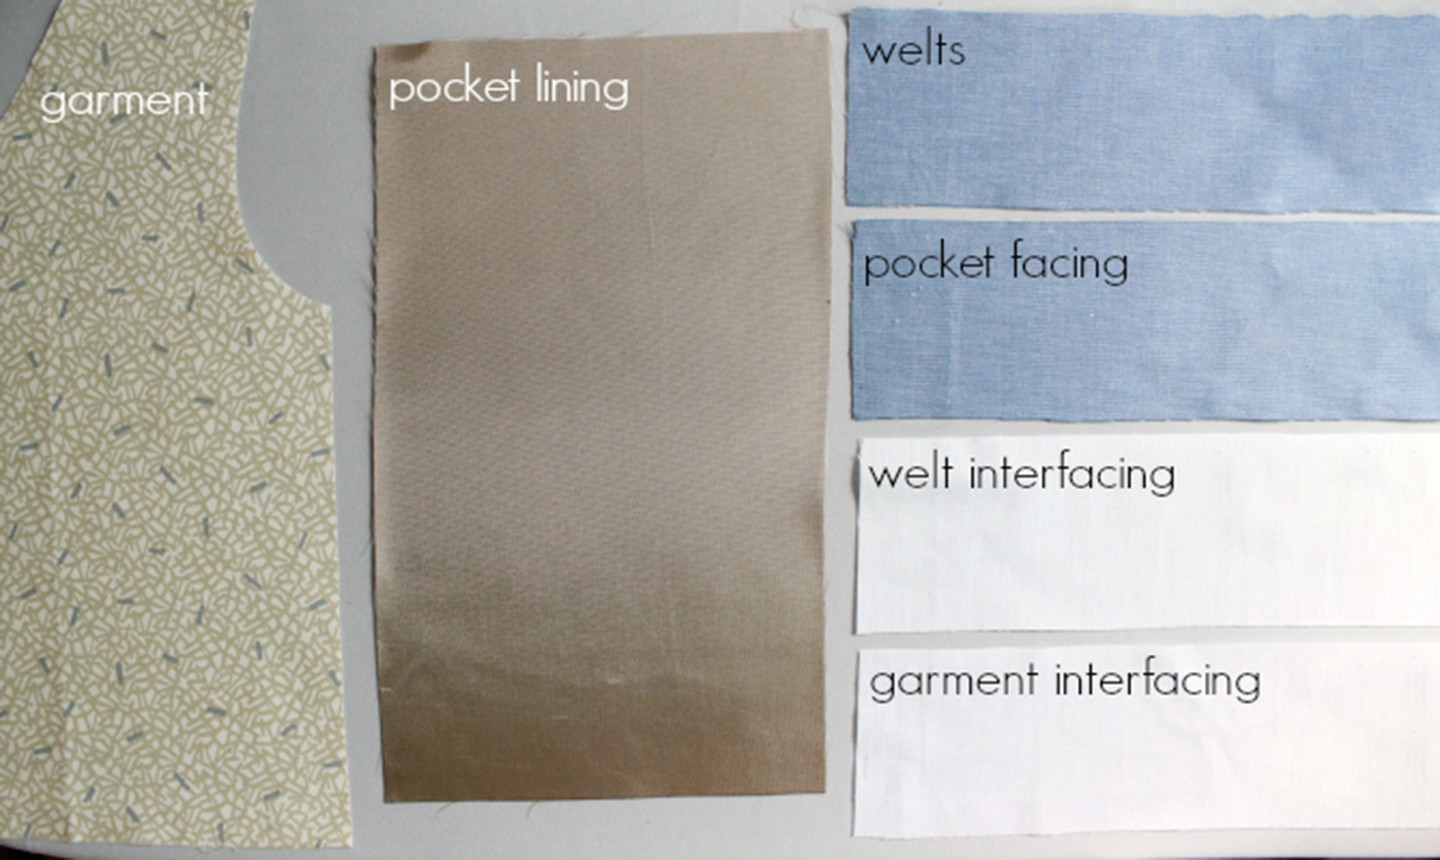
This tutorial creates one pocket with a standard 5" wide opening. If you're sewing two pockets, cut each of these pieces twice. The pieces are cut 7" wide, to provide a 1" allowance on either side of the pocket opening. (If you want a wider or narrower pocket, adjust your measurements accordingly.
2. Fuse
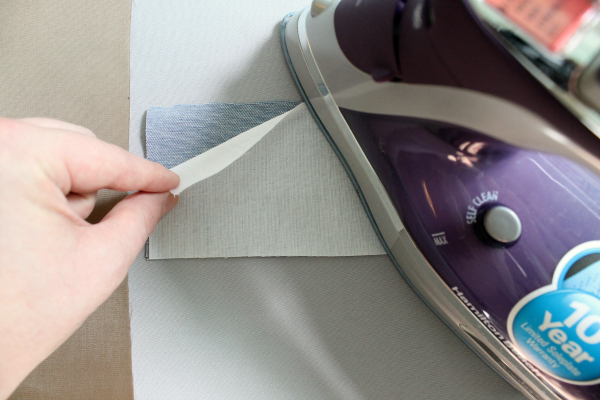
Fuse one of the interfacing pieces to the wrong side of the welt fabric.
3. Finish and Pin
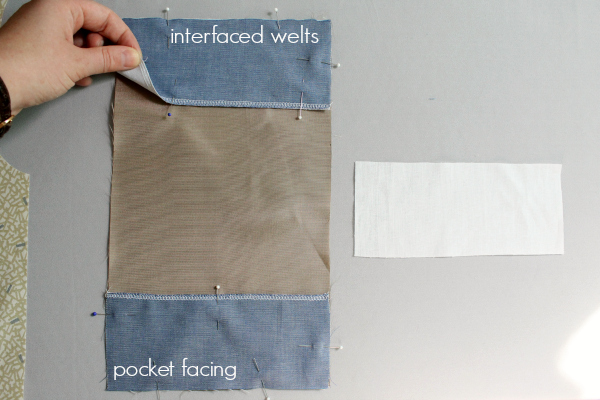
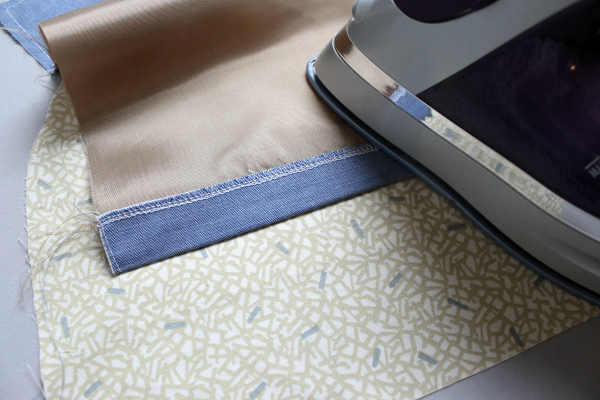
Finish one long edge of the interfaced welt piece using a serger or zigzag stitch. Finish one edge of the un-interfaced pocket facing piece in the same manner.
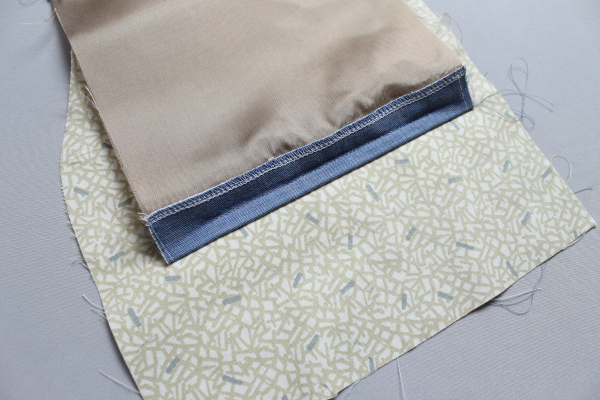
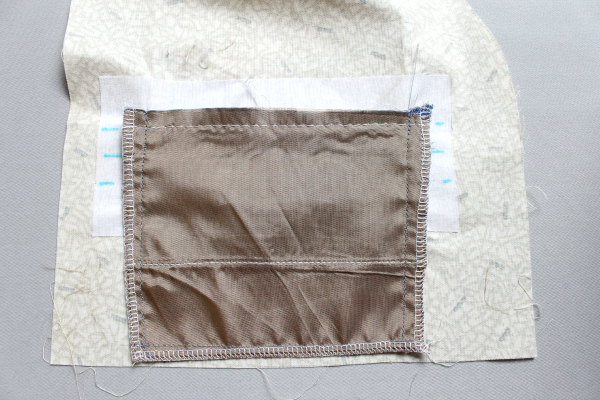
Pin the interfaced welt piece to the top of the pocket lining, matching raw edges on three sides (the finished edge will be the bottom edge). Pin the pocket facing piece to the bottom of the pocket lining in the same manner, but with the finished edge facing up.
4. Stitch
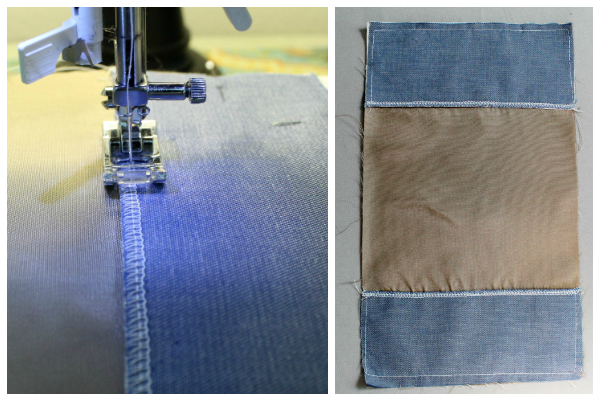
Sew along the finished edges to secure them to the pocket lining. Baste around the raw edges to keep the pieces in place.
5. Mark
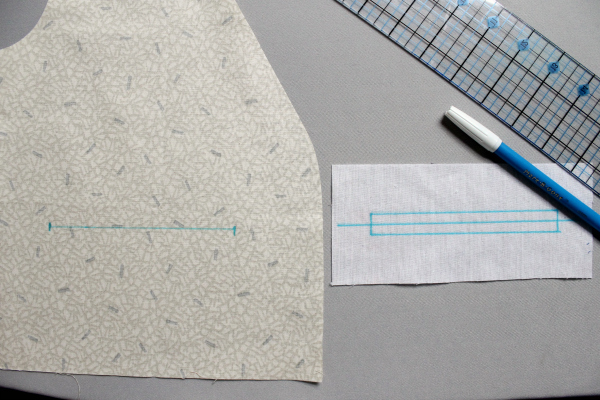
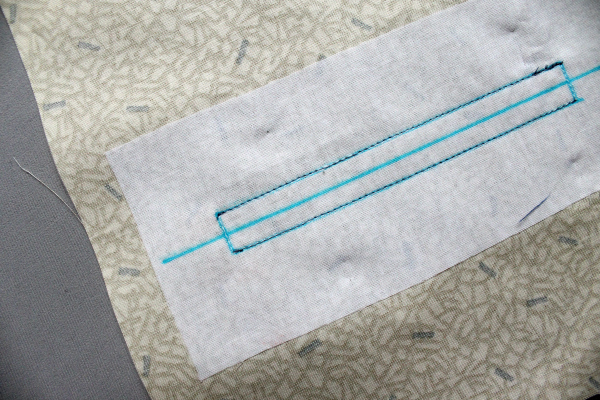
Using a fabric marker, mark the pocket opening on the wrong side of the garment. On the smooth, non-fusible side of the remaining interfacing piece, draw a horizontal line to mark its center. Draw the pocket box around this center line. (Use a clear ruler to make sure your lines are perfectly parallel).
The box should be 5" long (the short edges of the box will stop 1" from each end of the interfacing piece) and ½" tall. This will make the two finished welts ¼" each; if you want narrower welts, draw a flatter box.
6. Sew Around the Box
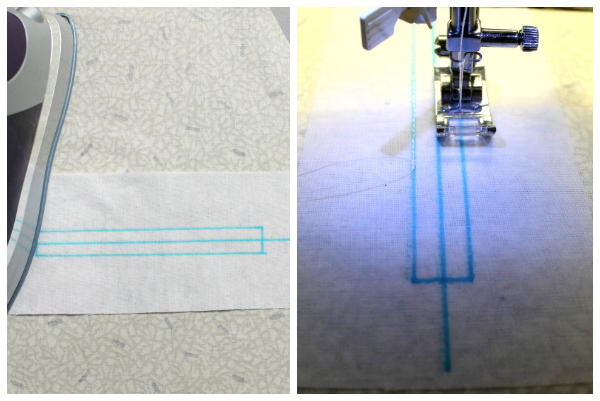
Align the center line of the interfacing piece on top of the pocket opening line you just drew on the garment. (Remember, your garment's wrong side is facing up.) Fuse the interfacing. Now sew all the way around this box, which marks both sides of the garment with stitches.
7. Center and Pin
Center the right side of the interfaced welt pocket piece on top of the pocket opening on the right side of the garment. Pin in place with the right sides together. (Otherwise, your pockets will be sewn inside out!)
8. Stitch the Wrong Side
Turn the garment over again so the wrong side is up. Stitch along the top and bottom edges of the box. Use a very short stitch length at the beginning and ends of these lines to ensure you start and stop exactly at the edges. Backstitch to secure. If you notice the lines are not perfectly even in length, stitch on top of your existing stitches until they are.
Good to Know: Everything is pinned on the right side of the garment, but you’re stitching on the wrong side because that’s where the box lines are marked. If you’re uncomfortable having your pins underneath what you’re sewing, simply move them to the wrong side, making sure the welt piece does not shift.
9. Mark Around the Box

Now, mark and baste two (new!) lines that are exactly ¼" from the top and bottom edges of the box. These will be your folding guides to create the two welt "lips." (If you chose to make narrower welt lips, baste at that distance instead.)
10. Turn and Press
Turn the garment over so the right side is facing up. Then fold the top of the pocket lining piece down directly along the basting stitches. Press crisply in place.
11. Turn and Stitch
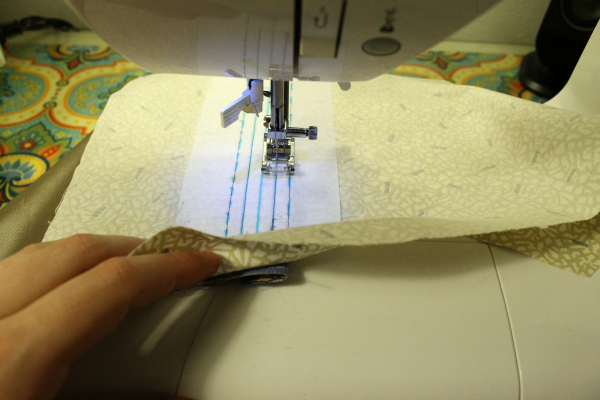
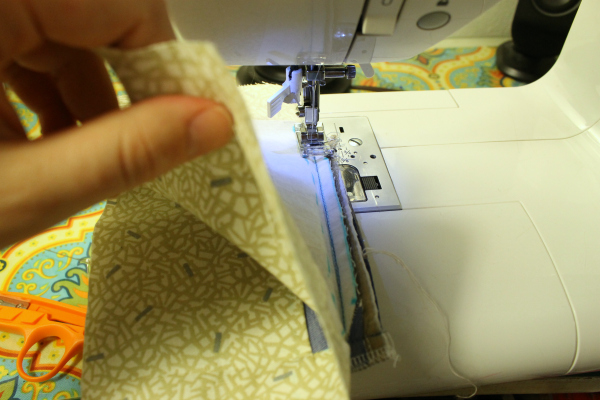
Turn the garment over again to the wrong side and stitch along the top line of the box only, starting and stopping directly on the edges as before. This secures that folded edge in place on the right side.
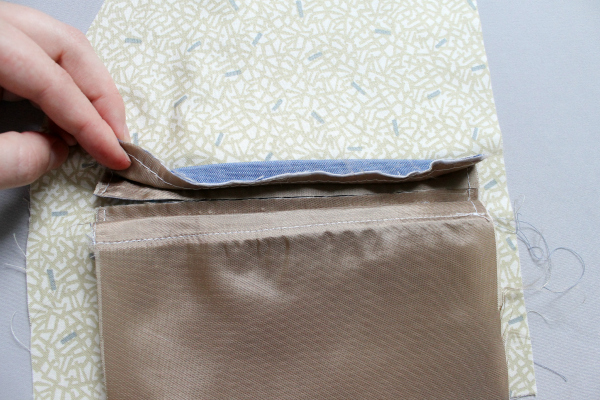
12. Press
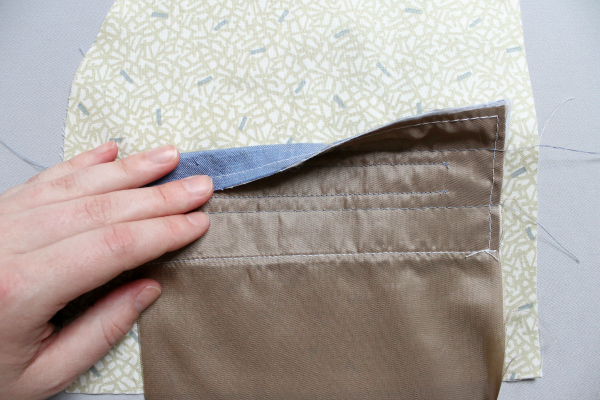
Repeat this process for the bottom welt. Then, on the right side of the garment, press up the bottom of the pocket bag lining along the basted lower edge.
Secure it by sewing along the bottom line of the box from the wrong side. The image above is how it will look on the right side after being sewn.
13. Cut
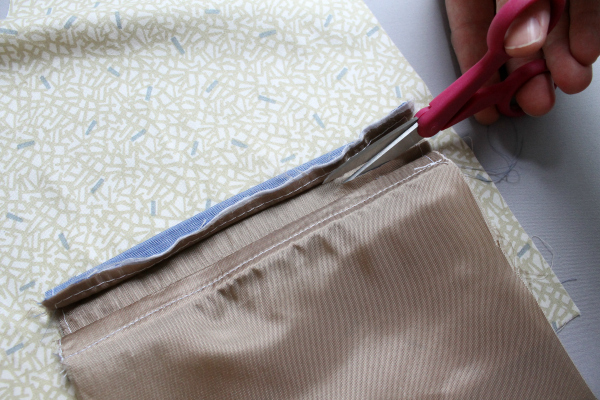
Fold the pocket bag lining back down and out of the way. With the right side of the garment still up, cut in between the two lines of stitches of the welt piece.
Do not cut through the garment yet; you just want to cut the lining fabric and interfaced welt fabric. Cut all the way across.
14. Cut the Fabric
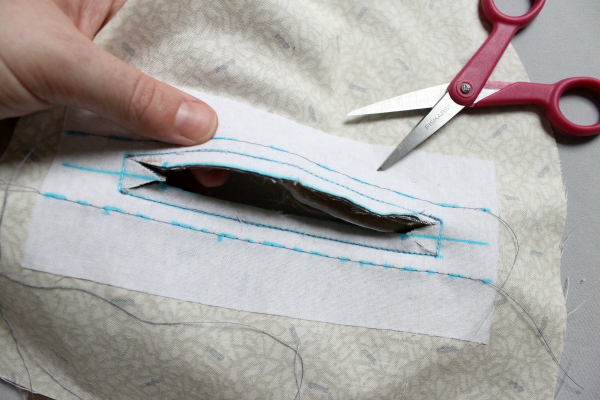
Turn the garment over to the wrong side. Now you can cut the garment fabric within the marked box. Cut along the center line, stopping ⅝" from the edge of the box. Snip in a "Y" shape to the corners, getting as close to the corners as you can without snipping through the stitches.
15. Take Out the Stitches
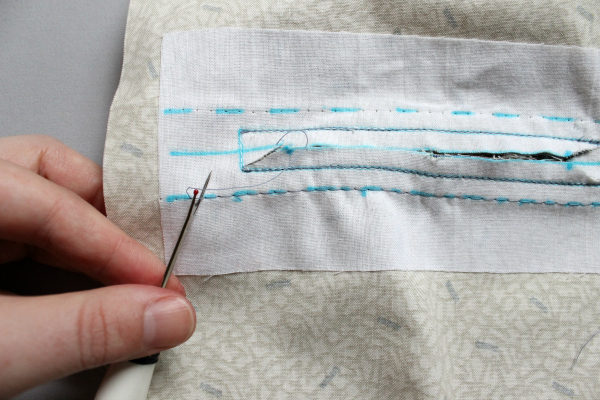
Remove the basting stitches above and below the box.
16. Open and Press
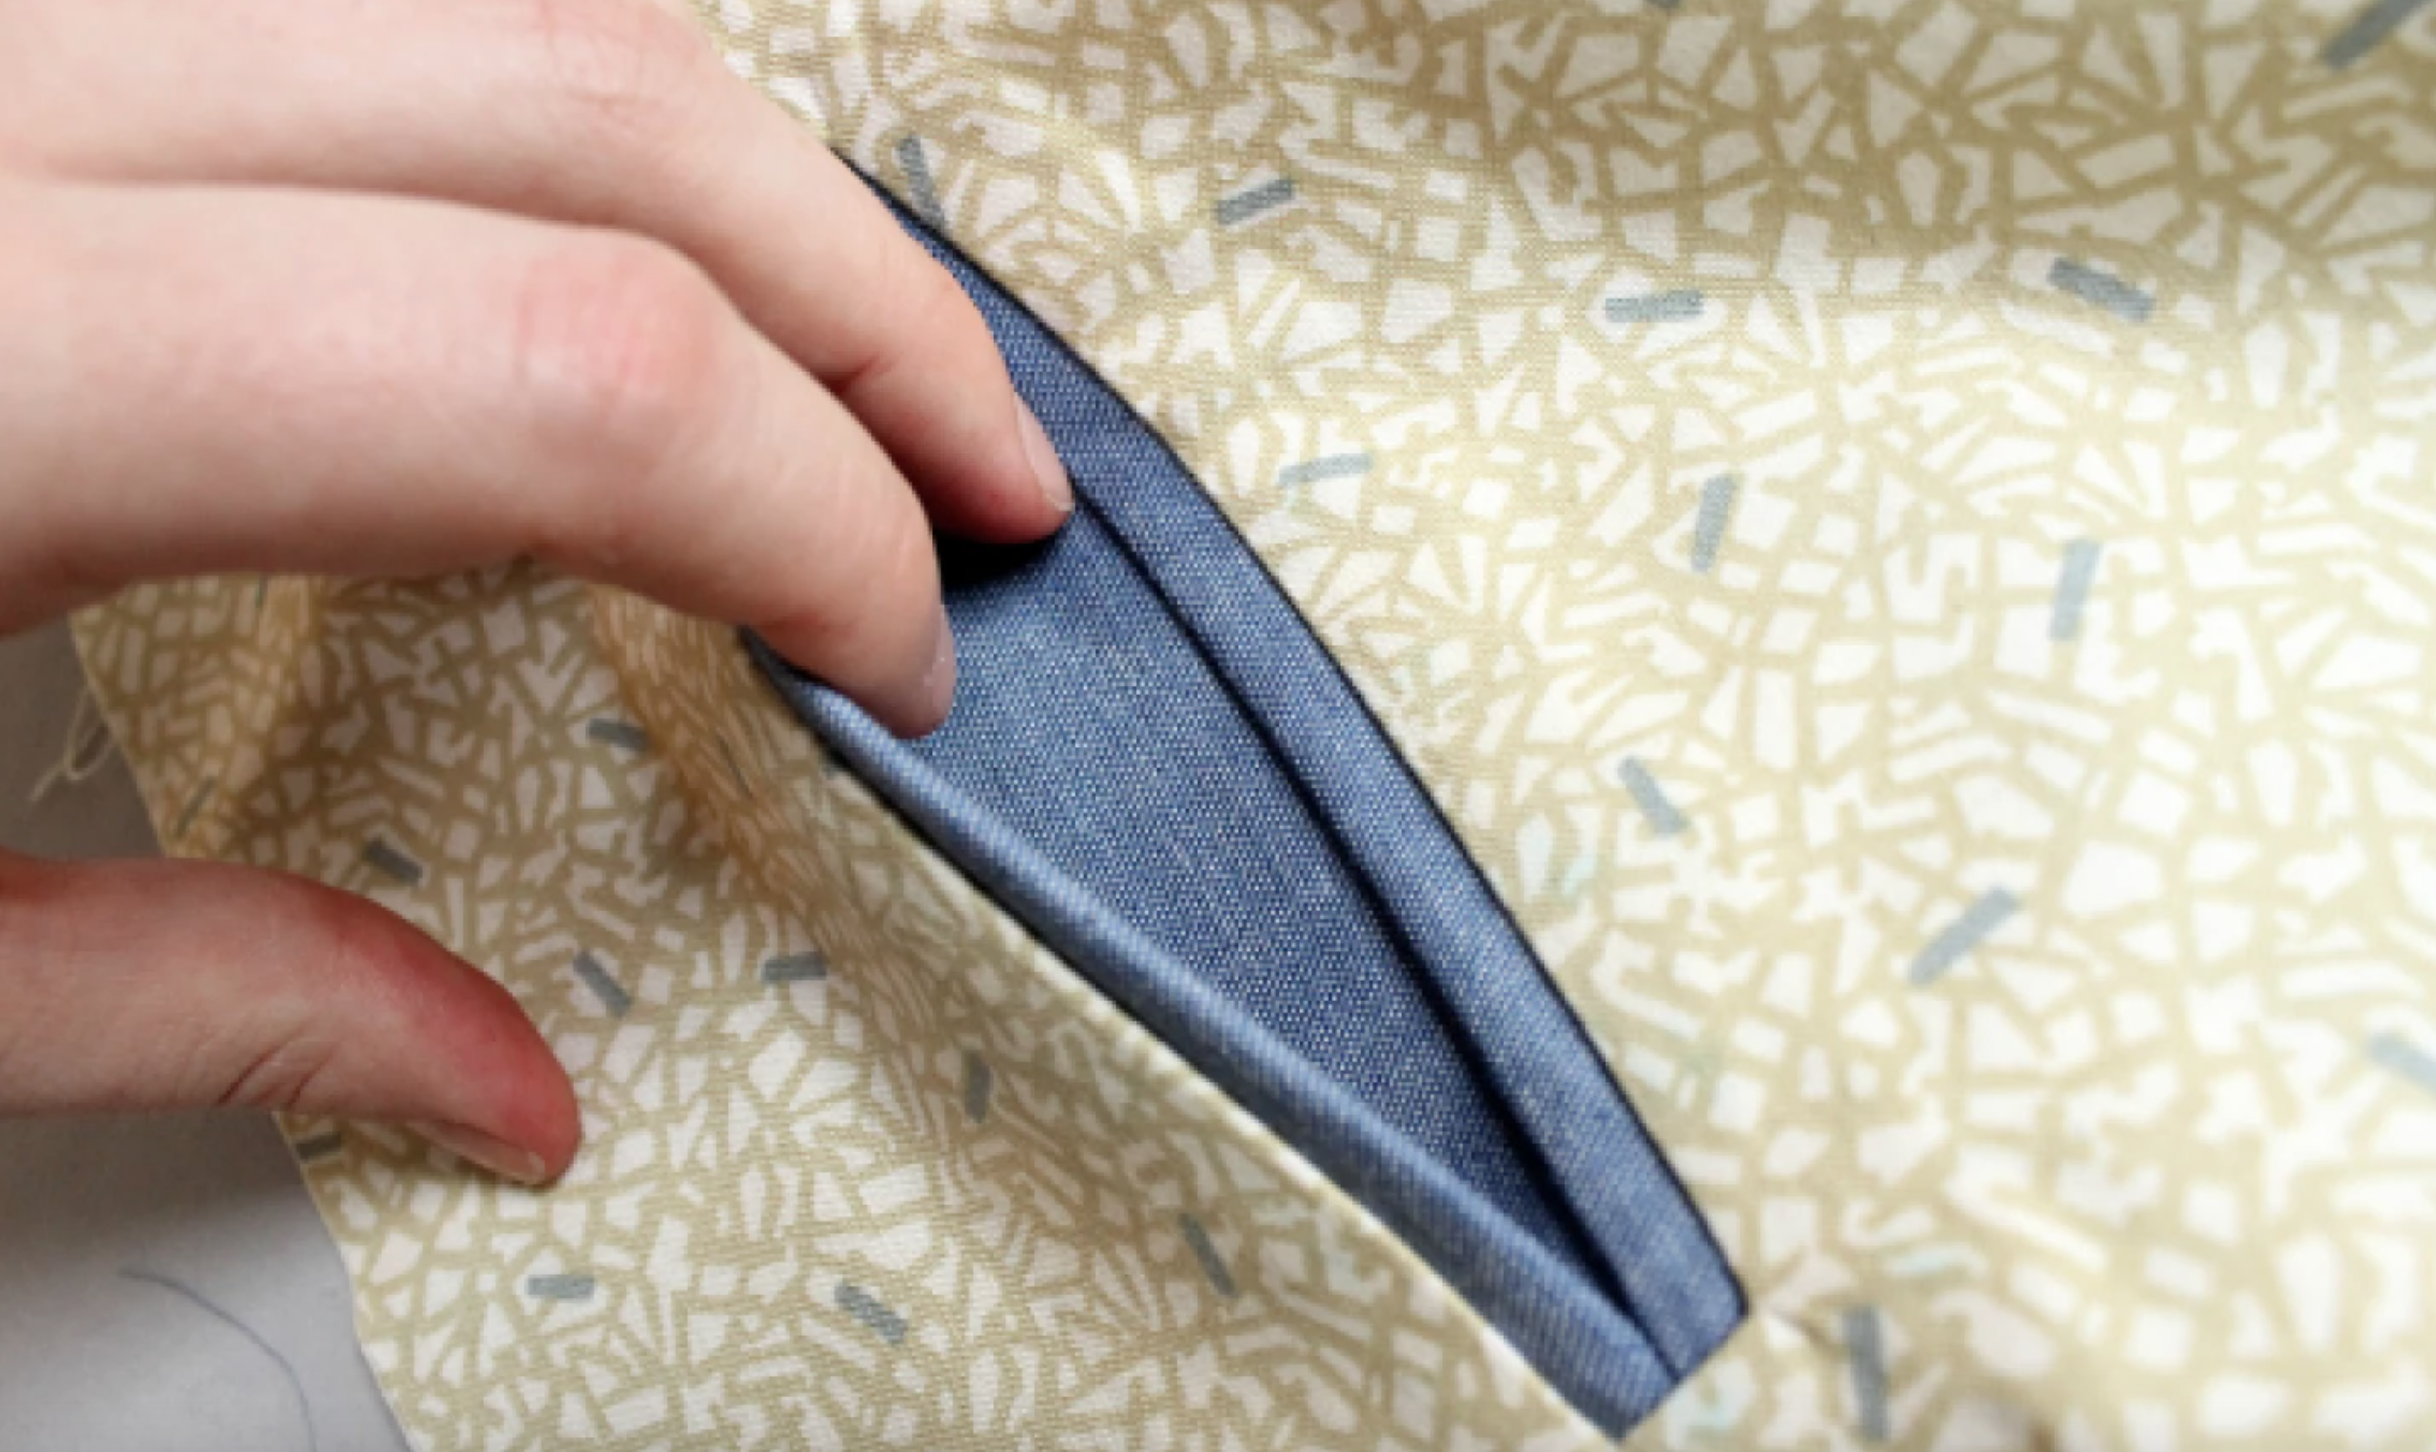
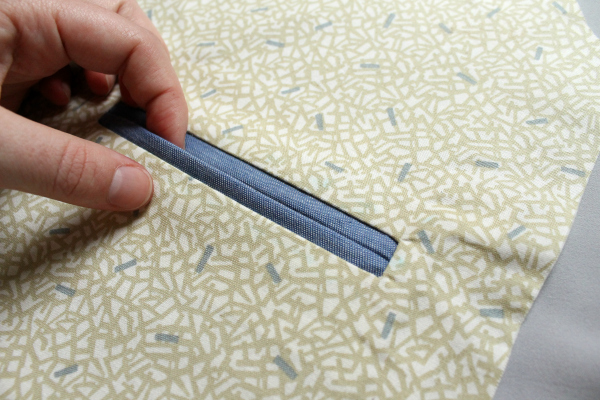
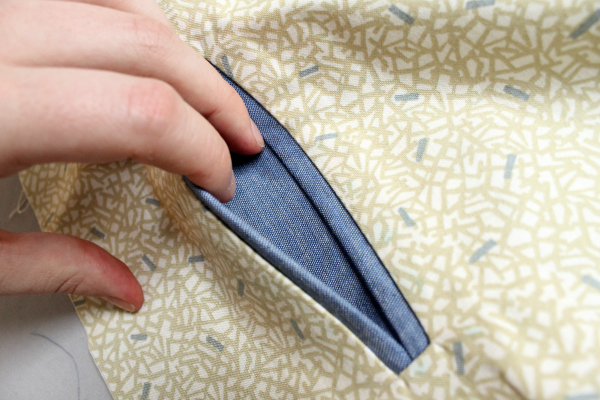
Pull the pocket bag and welts through the opening to the wrong side of the garment. Line up the folded edges of the welts, so they meet directly in the middle. Press everything in place.
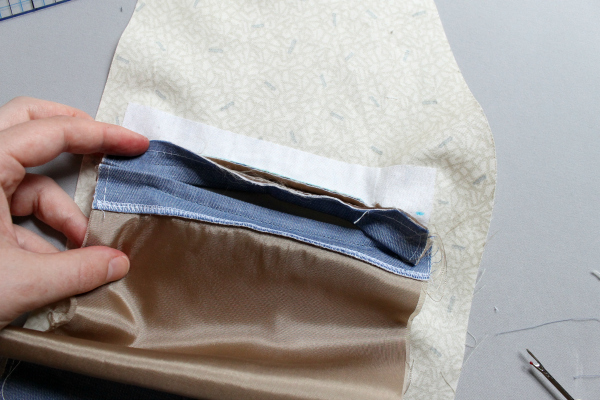
17. Pin into Place
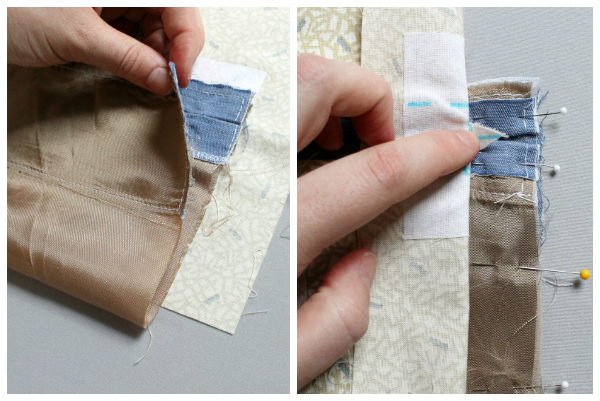
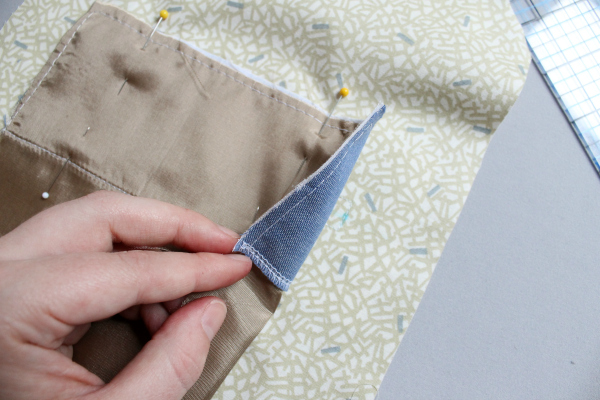
Fold the pocket bag up to match the top and side edges, then press. Hold this in place while you flip the garment over to the right side. Fold back the side of the garment to reveal the pocket box triangle and side seams of the pocket bag. Pin everything in place. Repeat for the other side of the pocket bag.
18. Stitch
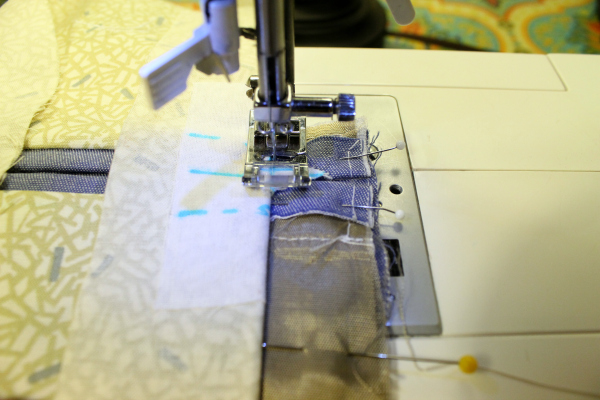
Stitch down the side edge of the pocket bag, sewing directly on the existing line of stitching at the base of the snipped triangle. This secures the sides of the welt pocket opening. Continue sewing to the end of the pocket bag, trying not to catch the garment in your stitching. Repeat for the other side of the pocket bag.
19. Finish the Edges
Finish the pocket edges, if desired. If your pocket ends up being too long for your garment, simply sew a line along the bottom and cut or serge off the excess to shorten it.
20. Finishing Touches
Now all you have to do is secure the top edge of the pocket opening to the garment. From the right side, simply fold down the garment to reveal the top edge of the welt pocke, then sew along the existing line of stitching here.
Give your pocket a final press and — ta-da — you’re done! OK, you still have to wash off all your markings (and repeat all these steps if you’re making a second pocket).
You did it! How awesome are these double welt pockets? (Answer: really awesome.)

<strong>Ticket #45605</strong> I'm lost at step 12 - repeat this process for the bottom welt..........if I do exactly like I did and attach it to the welt and stitch along the bottom of the basting line.....I can do that. I ripped it out because i thought it was wrong. THEN the photo in 12 shows a zigzag in the turned up edge - that zigzag is at the TOP of that lower piece............. The photos are not sinking in - secure the bottom line of thte box - ???? Image not clear enough to determine exactly where I am in this process. Don't want to ruin my husband's favorite pocketless shirt!! Can I get some help to get me over this hump?
<strong>Thank you for a great tutorial! My new pockets look perfect! The only thing I wasn't sure about was the direction of my fabrics (ex)right side up) in step 3.
Good i like it. Send to me