
There are a million and one ways to make a luggage tag, and all are valid designs. But for me, I prefer a tag that keeps my information handy in case it’s needed, but hidden from the general bystander that might glance over. Call me paranoid, but I like to keep my name and address hidden while in airports with millions of other travelers or as I roll my bag down the streets of a busy city.
This hand-sewn design is likely unusual from what you might have seen in the past. However, it’s really quick and easy to do and will not only hold your information, but it will also help you quickly identify your bag on the luggage carousel — no one will have the same beautiful tag as you!
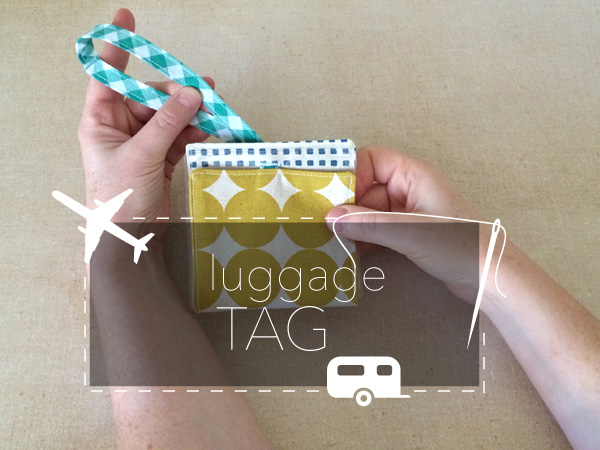
Travel basics: how to sew your own lovely luggage tag
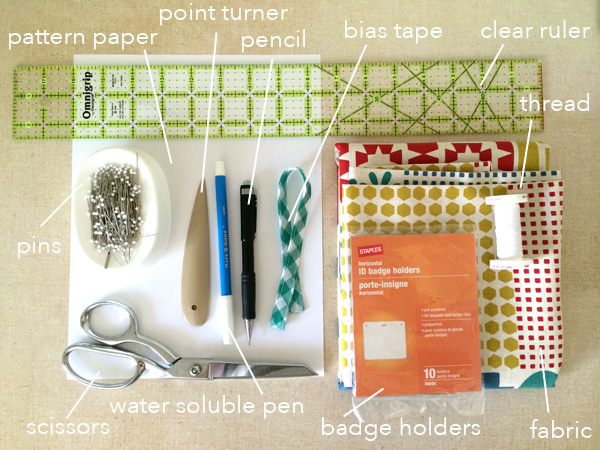
Step 1: Gather your tools.
- Scissors
- Water soluble marking tool
- Plastic ID badge holders
- Medium weight fabric
- Thread
- Clear ruler
- Pins
- Paper for your information
- Point turner
- Bias tape
- Pencil
Step 2: Determine the size
The key item to this luggage tag is a clear plastic ID badge holder that you can find a office supply stores. This is meant to be used for name tags that would hang around your neck or be pinned to your chest at conventions, but it’s also a great blank canvas for a multitude of other craft projects. This can be any size you like, but the one thing it must have in addition to a slot to put your address is the opening hole at the top, so be sure the ones you find have that feature.
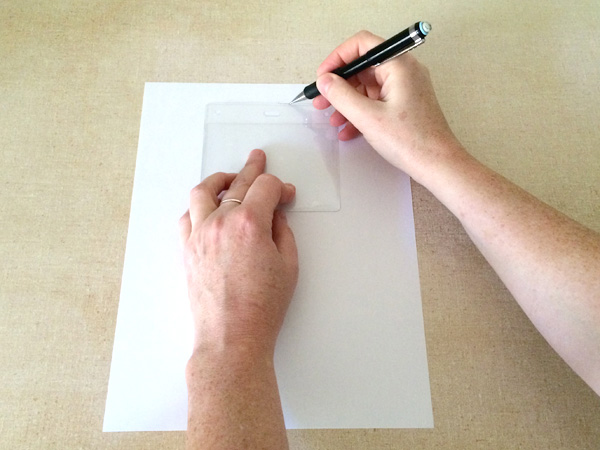
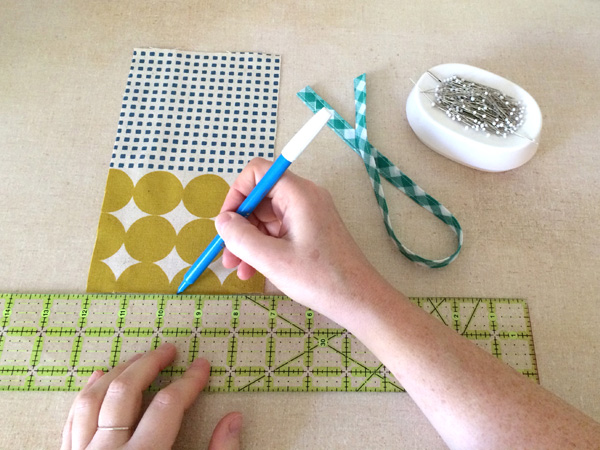
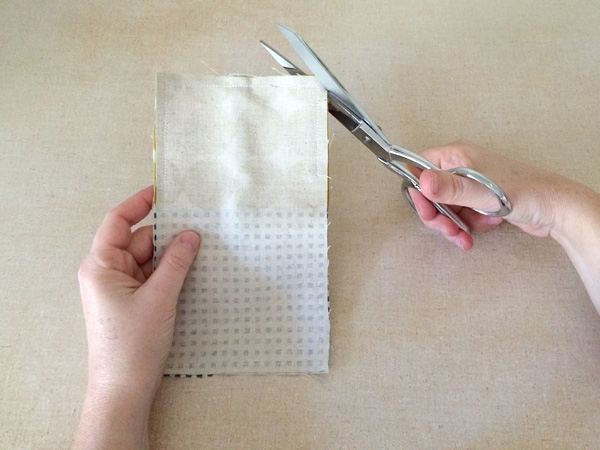
Measure around your ID holder by tracing it onto a piece of paper. I find that sometimes the measurements on packaging isn’t correct because it doesn’t take the entire perimeter into account, so don’t trust those! Trace around the plastic, then add seam allowance on the right and left sides. The height should be the same as the back of the plastic, plus the height of the slot opening on the front, plus seam allowance.
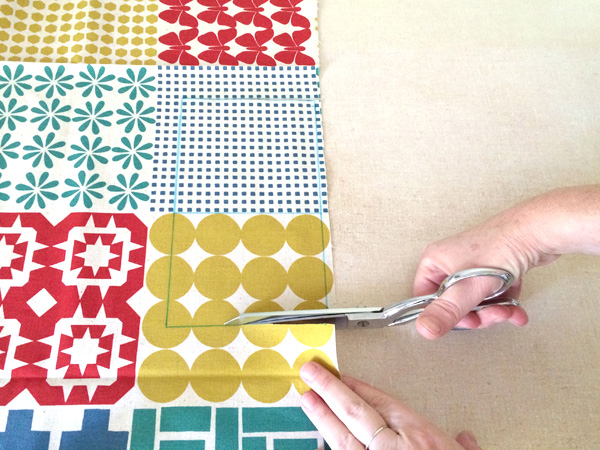
Transfer that size onto the fabric, or use the paper pattern to pin down and cut out. I created mine from this gorgeous cotton and linen canvas with a cheater print and placed the fold at the bottom right at the change in print to it will look patchworked without having to do any piecing! Cut two pieces, one for the front, and one for the back.
Step 3: Prepare bias tape.
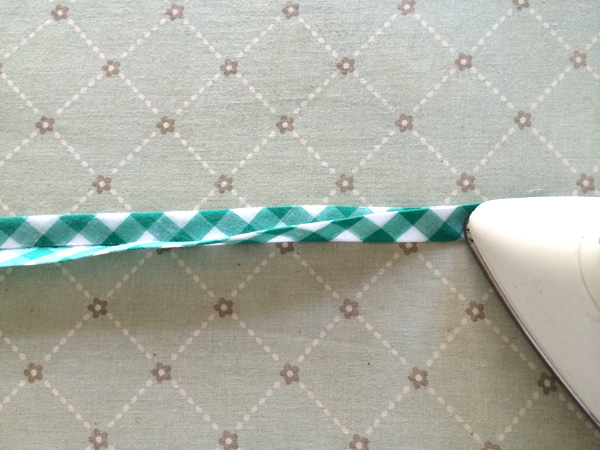
The hanging cord will be made with double fold bias tape. You can use store bought tape or make your own, just remember that the finished tape must fit through the hole on the ID badge, so measure that and confirm that it will work. Since all badges are different, you will have to check the one you find! If making your own, press it until it is all folded up and closed. If using store bought, press out the packaging folds. Cut the bias tape to around 12-14″ in length.
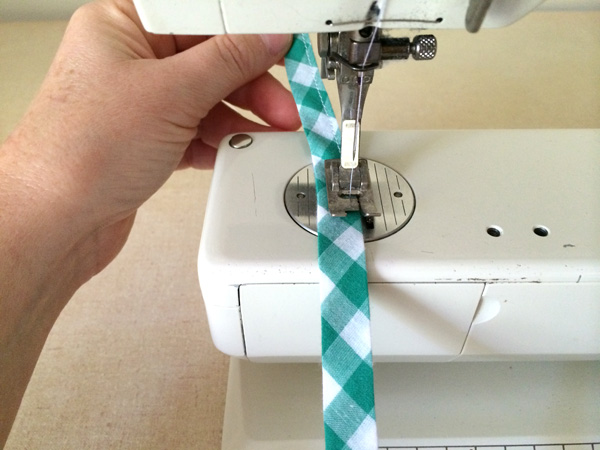
Edge stitch the opening on the bias tape closed by sewing 1/8″ from the open edge.
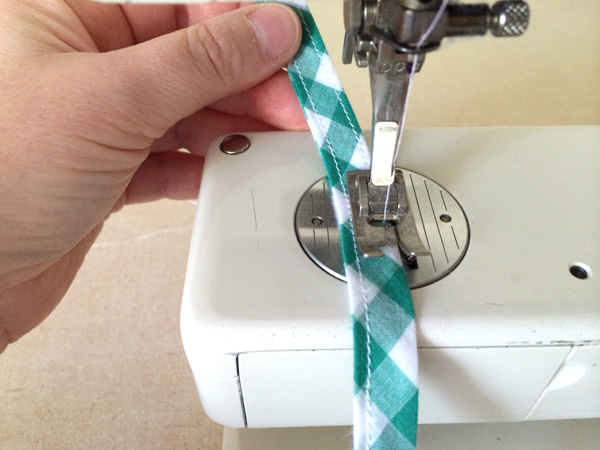
Repeat by edge stitching the folded size at 1/8″ seam allowance as well. Give the bias tape a press after stitching.
Step 4: Assemble the pieces.
The bias tape will be sewn to the bottom of the holder. Find the center of the fabric and mark with a water soluble marking tool.
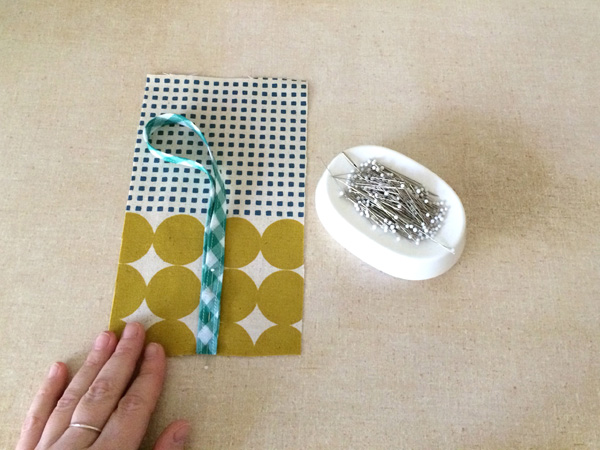
Fold the bias tape in half and overlap the two layers. Be sure to not twist the strip! Pin in place at the half way spot marked in the last step. I also pinned a second pin slightly higher into the tape to keep it from moving around.
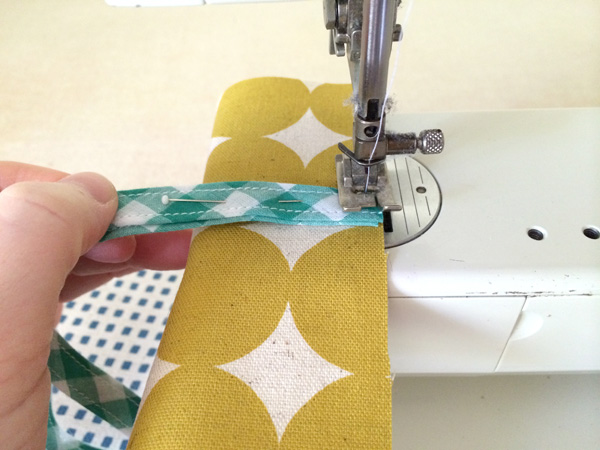
Attach the bias tape to the bottom of the fabric at 1/8″ seam allowance. I used a 1/4″ seam allowance for my project, so just make sure that this step is sewn inside the seam allowance you’ve built into your pattern.
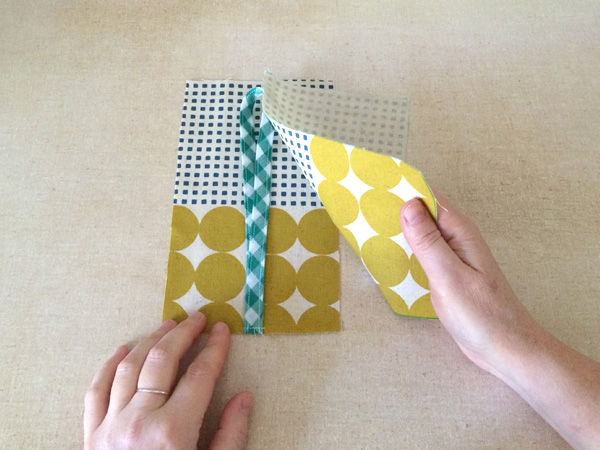
With the bias tape trapped between the layers, place the second piece of fabric on top of the other piece, right sides together. Be sure to keep the bias tape away from the edges, so it doesn’t get caught in the stitching when sewing up the perimeter of the fabric.

Pin all the way around the pieces, leaving a spot on one of the sides marked to be unsewn. The opening should be about 1 1/2 – 2″ long.
Sew around the piece at the seam allowance you included, pivoting at each corner and leaving the section on the side open for turning right side out. When you encounter the bias tape at the bottom, reinforce it by sewing a back stitch over it to help strengthen that intersection.
Trim the corners to reduce bulk to get nice corners when turned right side out. Be careful not to cut too close to your stitching. For my heavier fabric, I not only trimmed the corner at a 45-degree angle, but I also shaved off a little bit on either side as well to achieve nice corners.

Turn the entire piece right side out by pulling it through the opening left in the side seam.
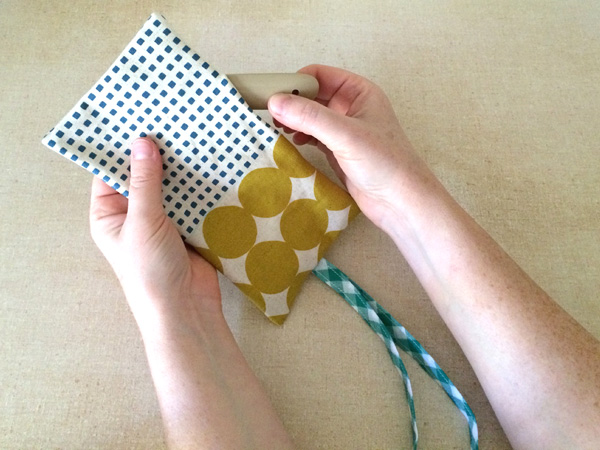
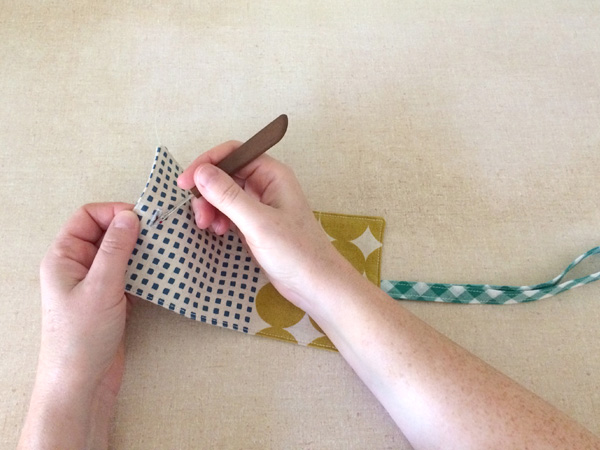
Form good corners by poking them out using your point turner. Take the piece to the iron and give it a good press. Fold the seam allowance in the opening to the inside so the edges line up on the side seam.
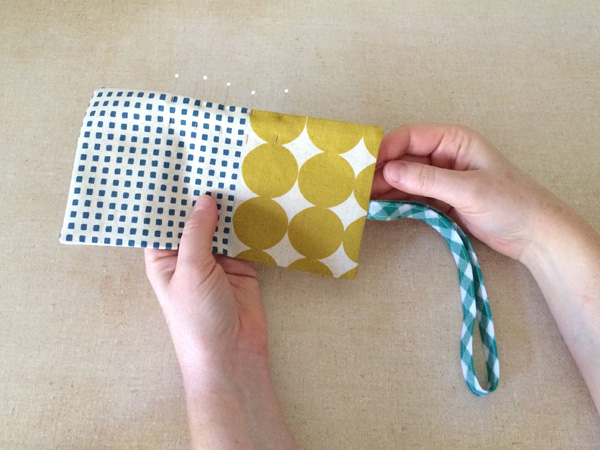
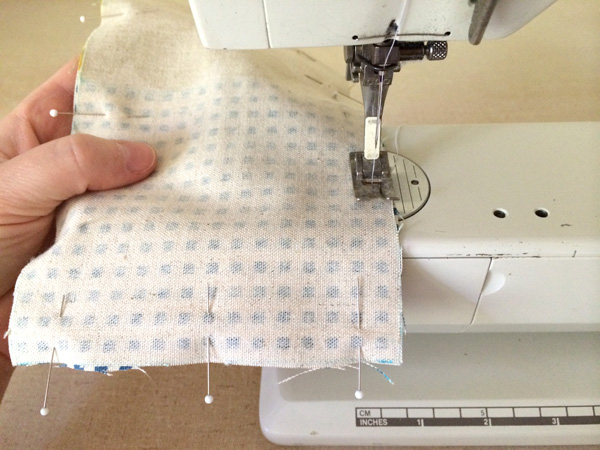
Pin the hole closed making sure to fold the seam allowance into the hole left in the side seam.
Edge stitch around the entire piece, closing up the hole at the same time and pivoting at each corner. I used a 1/8″ seam allowance for my stitching. Also, hand crank the corners if necessary due to bulk. My machine did not love a couple of the corners and left my stitching far from perfect, so take care on those corners!
Step 5: Finishing
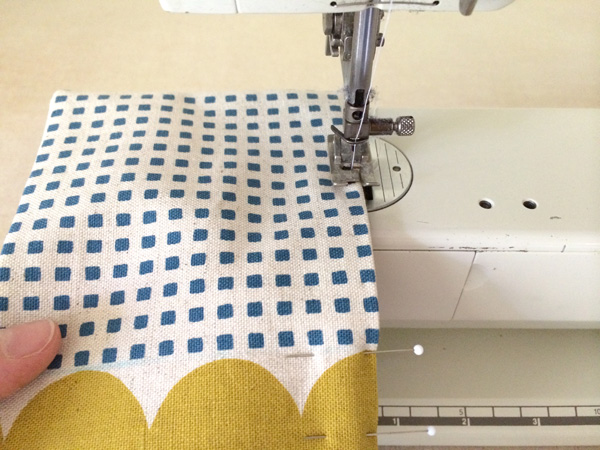
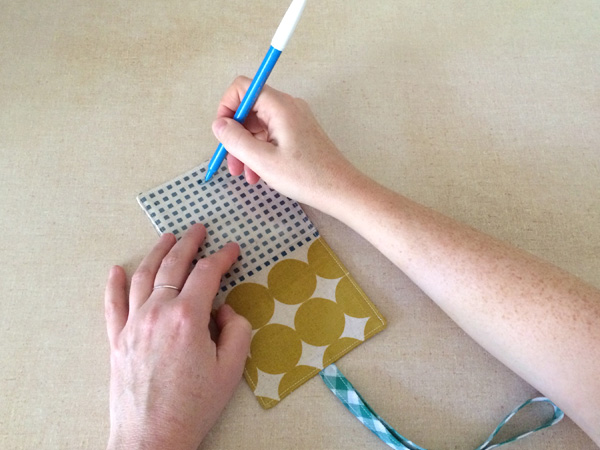
Right now it might not look like much of a luggage tag, though it is darn cute! The key step is in this next part. We need to make a buttonhole at the top of the piece, opposite the bias tape. Lay the plastic ID badge holder on top of your fabric and position it in place. You might want to fold up the bottom part to confirm where everything is going to land. Mark the opening at the top center with a water soluble marking tool.
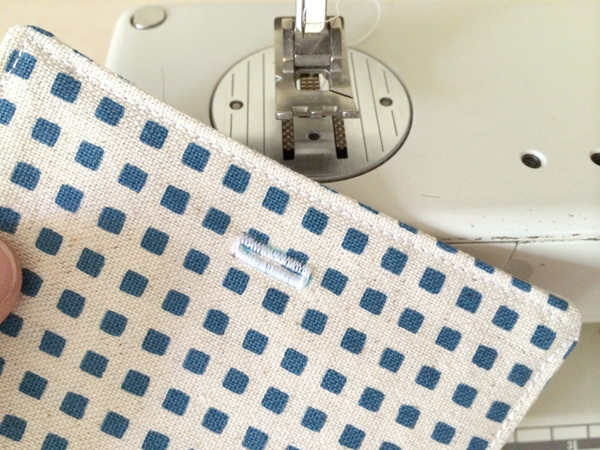
Set your mating to a buttonhole setting and sew a buttonhole directly on top of your markings from the previous step.
Cut the buttonhole open using your seam ripper and as always, making sure not to over cut!
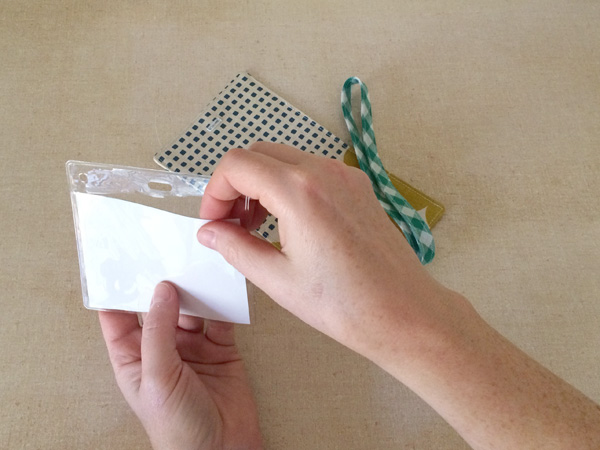
Place your information into the plastic ID holder facing either direction.
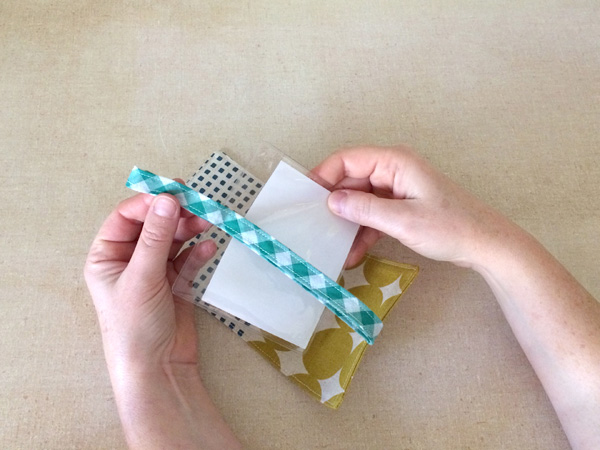
Feed the bias tape through the opening at the top of the ID badge, keeping it from being twisted.
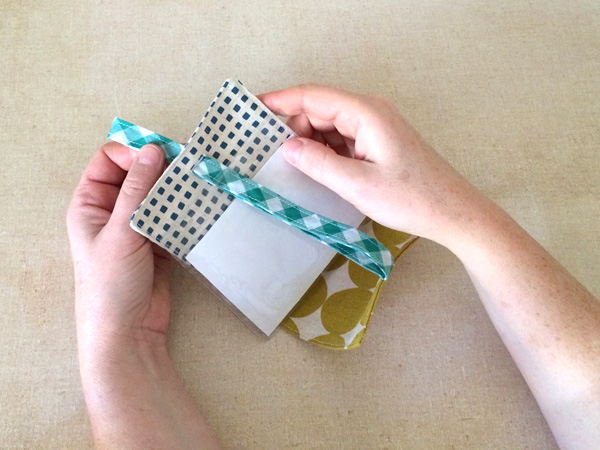
Next, feed the same end of the bias tape through the buttonhole at the top of the fabric.

Pul the bias tape all the way through the buttonhole, and voila! You can easily open it to read the address should your bag be lost, but while traveling, all your personal details are hidden inside this most adorable holder!
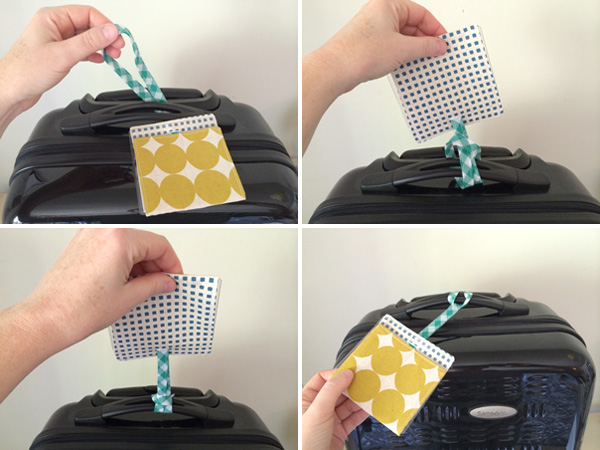
All that’s left to do is attach it to your luggage! Simply feed the bias tape under the handle, feed the luggage tag through the loop of the bias tape, pull snug to close the loop, and you’re all set for your next adventure!
What bag should you add your luggage tag to? How about a pretty duffle bag you made yourself? Create the perfect travel bag with the Shimmer Cargo Duffle Kit (fabric + pattern all included!).
Share tips, start a discussion or ask one of our experts or other students a question.
No Responses to “Home Away from Home: How to Sew a Luggage Tag”