When you’re working with lightweight, sheer fabrics, there’s a sense of airiness and elegance to them. Which means they deserve an equally-as-elegant finished seam that hides all your raw fabric edges. Enter the French seam.
What is a French seam? A French seam is a beautiful and durable seam finish ideal for sheer or lightweight fabrics. It's created by first sewing a narrow seam with wrong sides together, then trimming the seam allowance in half and pressing it open. Next, the fabric is folded with right sides together, encasing the raw edges, and pressed again. A second seam is sewn along the folded edge, completely enclosing the raw edges within the seam. Finally, the finished seam is pressed to one side, resulting in a clean, professional finish with no visible raw edges. Don't worry, we'll go through these steps in depth below! Keep reading!
This particular finish gets a bad reputation for being tough to execute, but it’s easier than you might think. The big thing to remember is that instead of sewing your right sides together (which you do in nearly every sewing project), your first seam is sewn wrong sides together. Once you have that slightly-backward process down though, it’s smooth sailing!
Whether you’re sewing together a breezy blouse or finishing an unlined jacket, here’s how to perfectly sew a French seam.
How to Sew a French Seam
Level: Easy
What You Need
- Fabric
- Sewing pins
- Iron
- Scissors or a rotary cutter
Instructions
1. Determine Your Seam Allowance
Look at your pattern to determine the seam allowances it calls for. Subtract 2/8" (aka ¼") from that number. (So if yours is ⅝”, your number is ⅜”) This will be the seam allowance for your first seam.
Pro Tip: If you don't want to do math, you can also line the left side of your presser foot up with the seam allowance that your pattern calls for. (On most machines, this will be ¼”.)
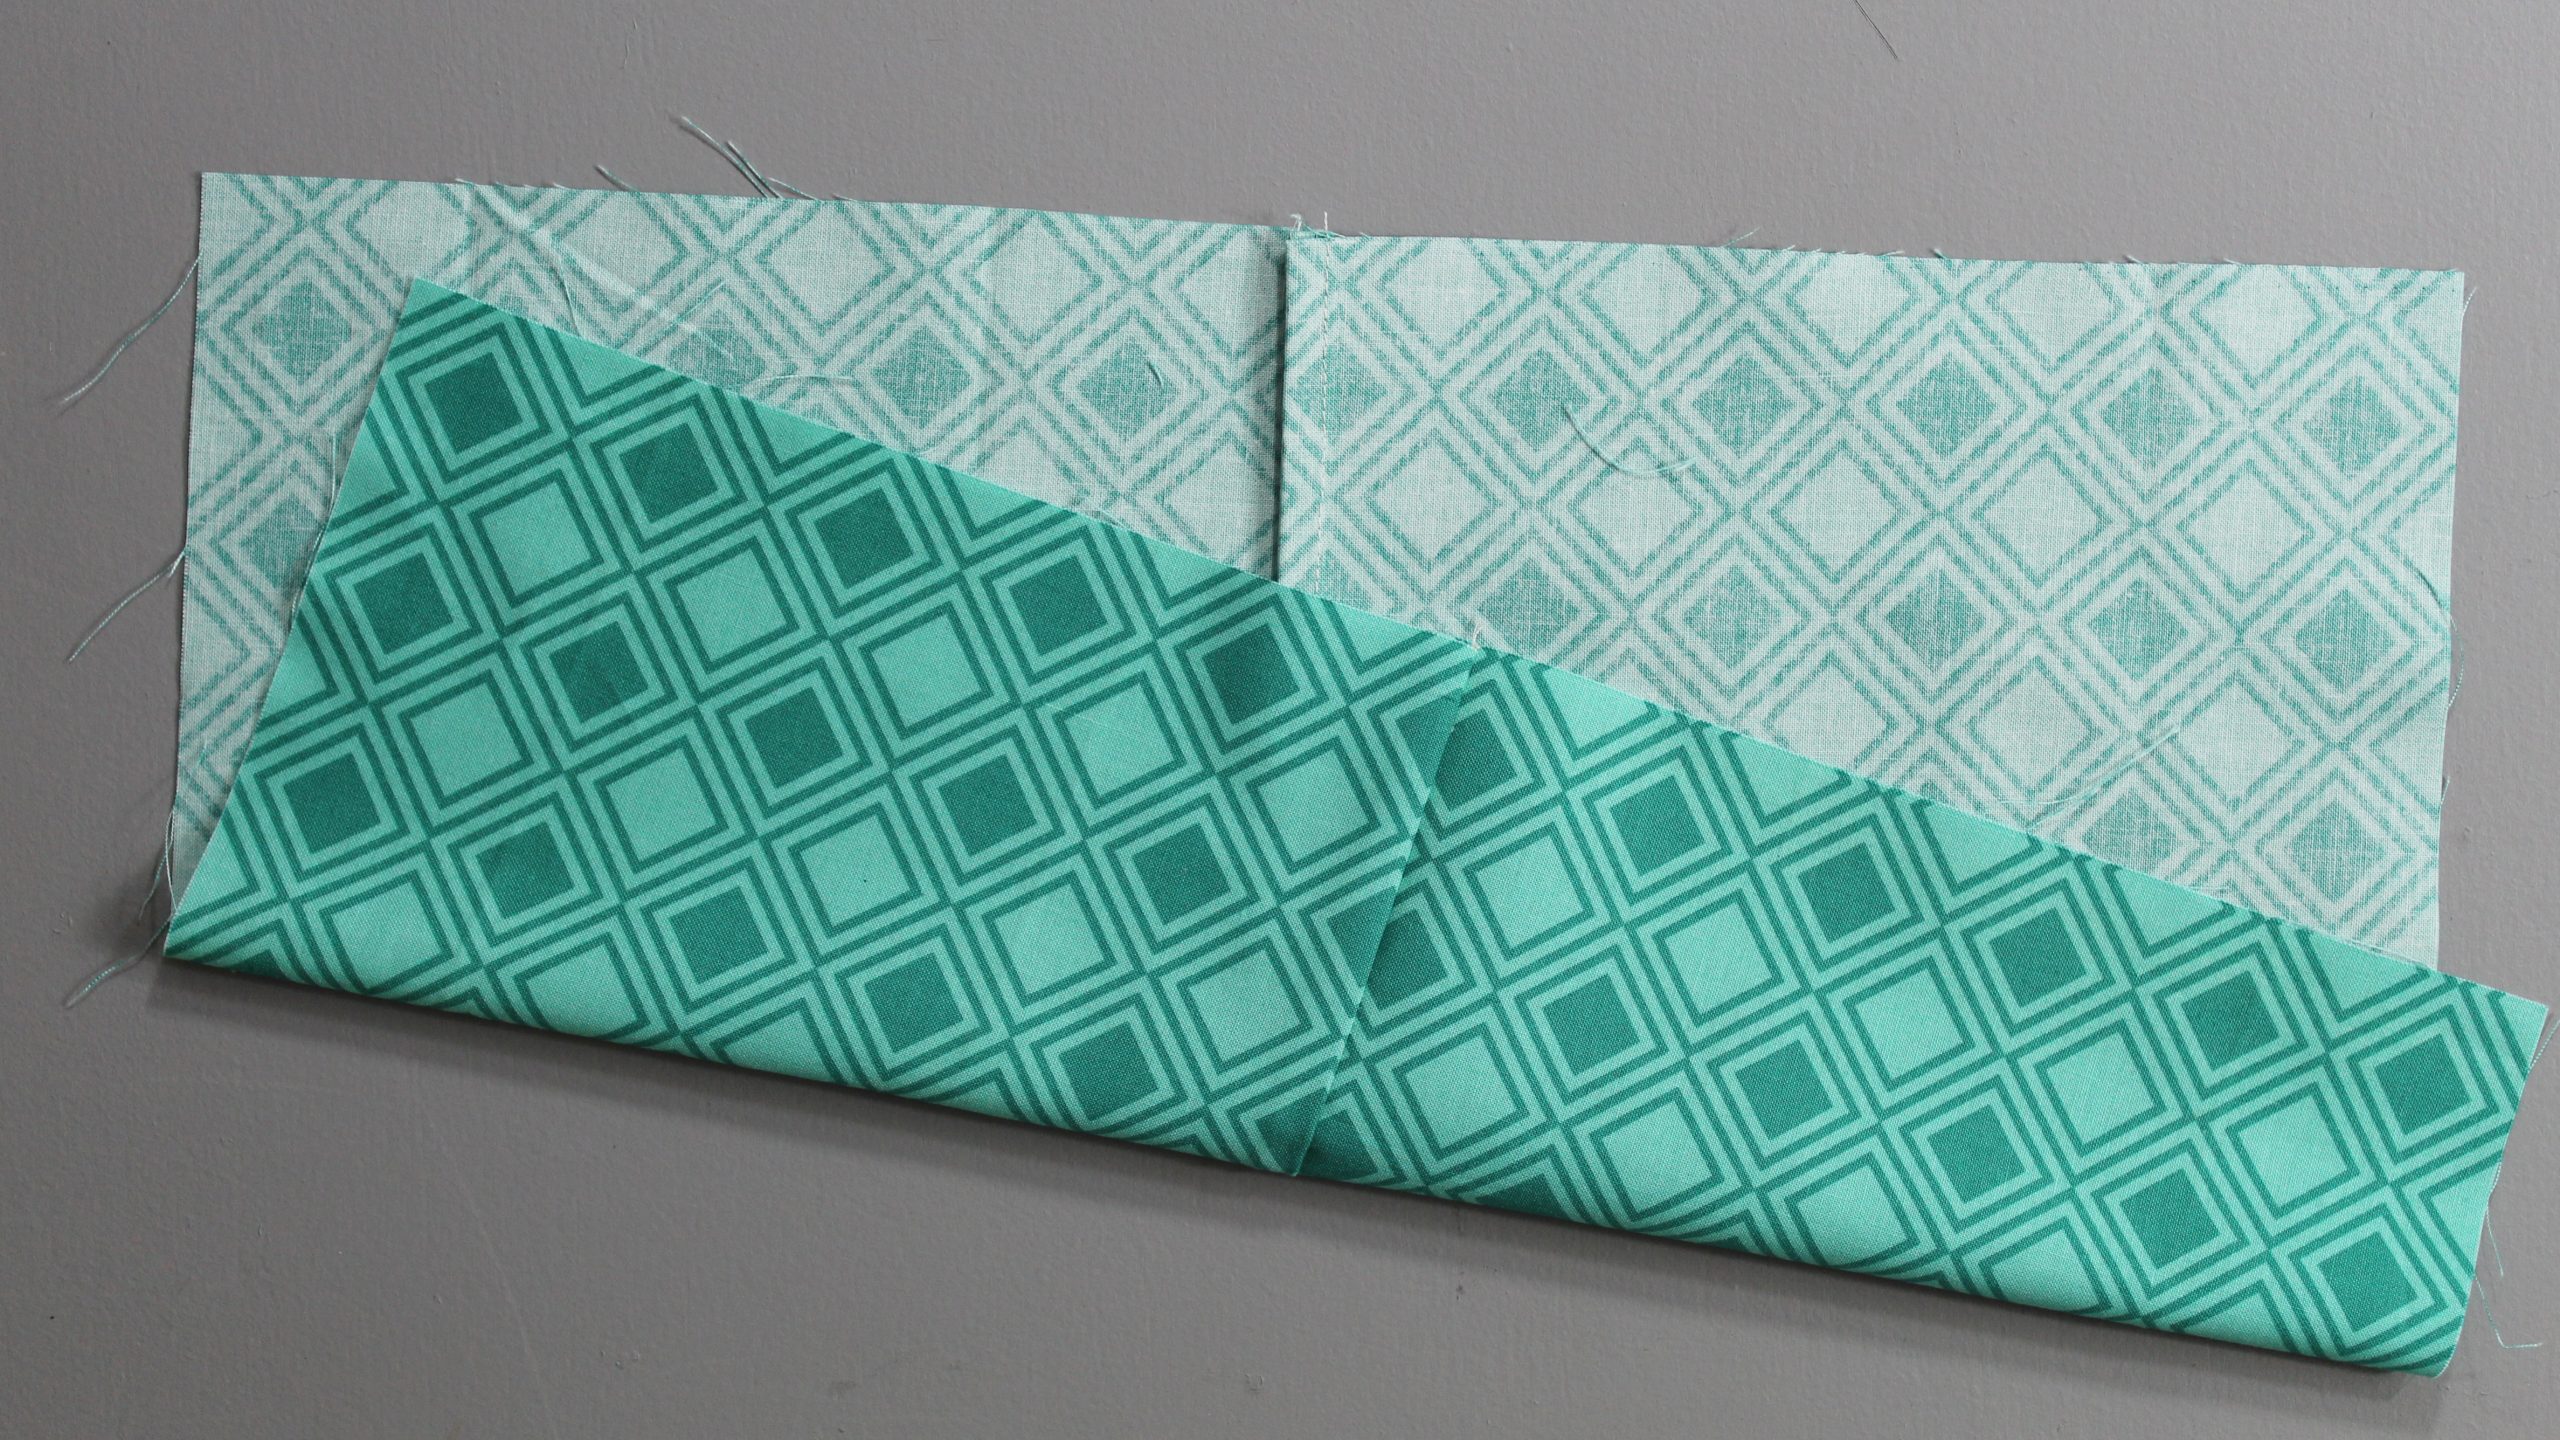
2. Pin and Sew Your Seam
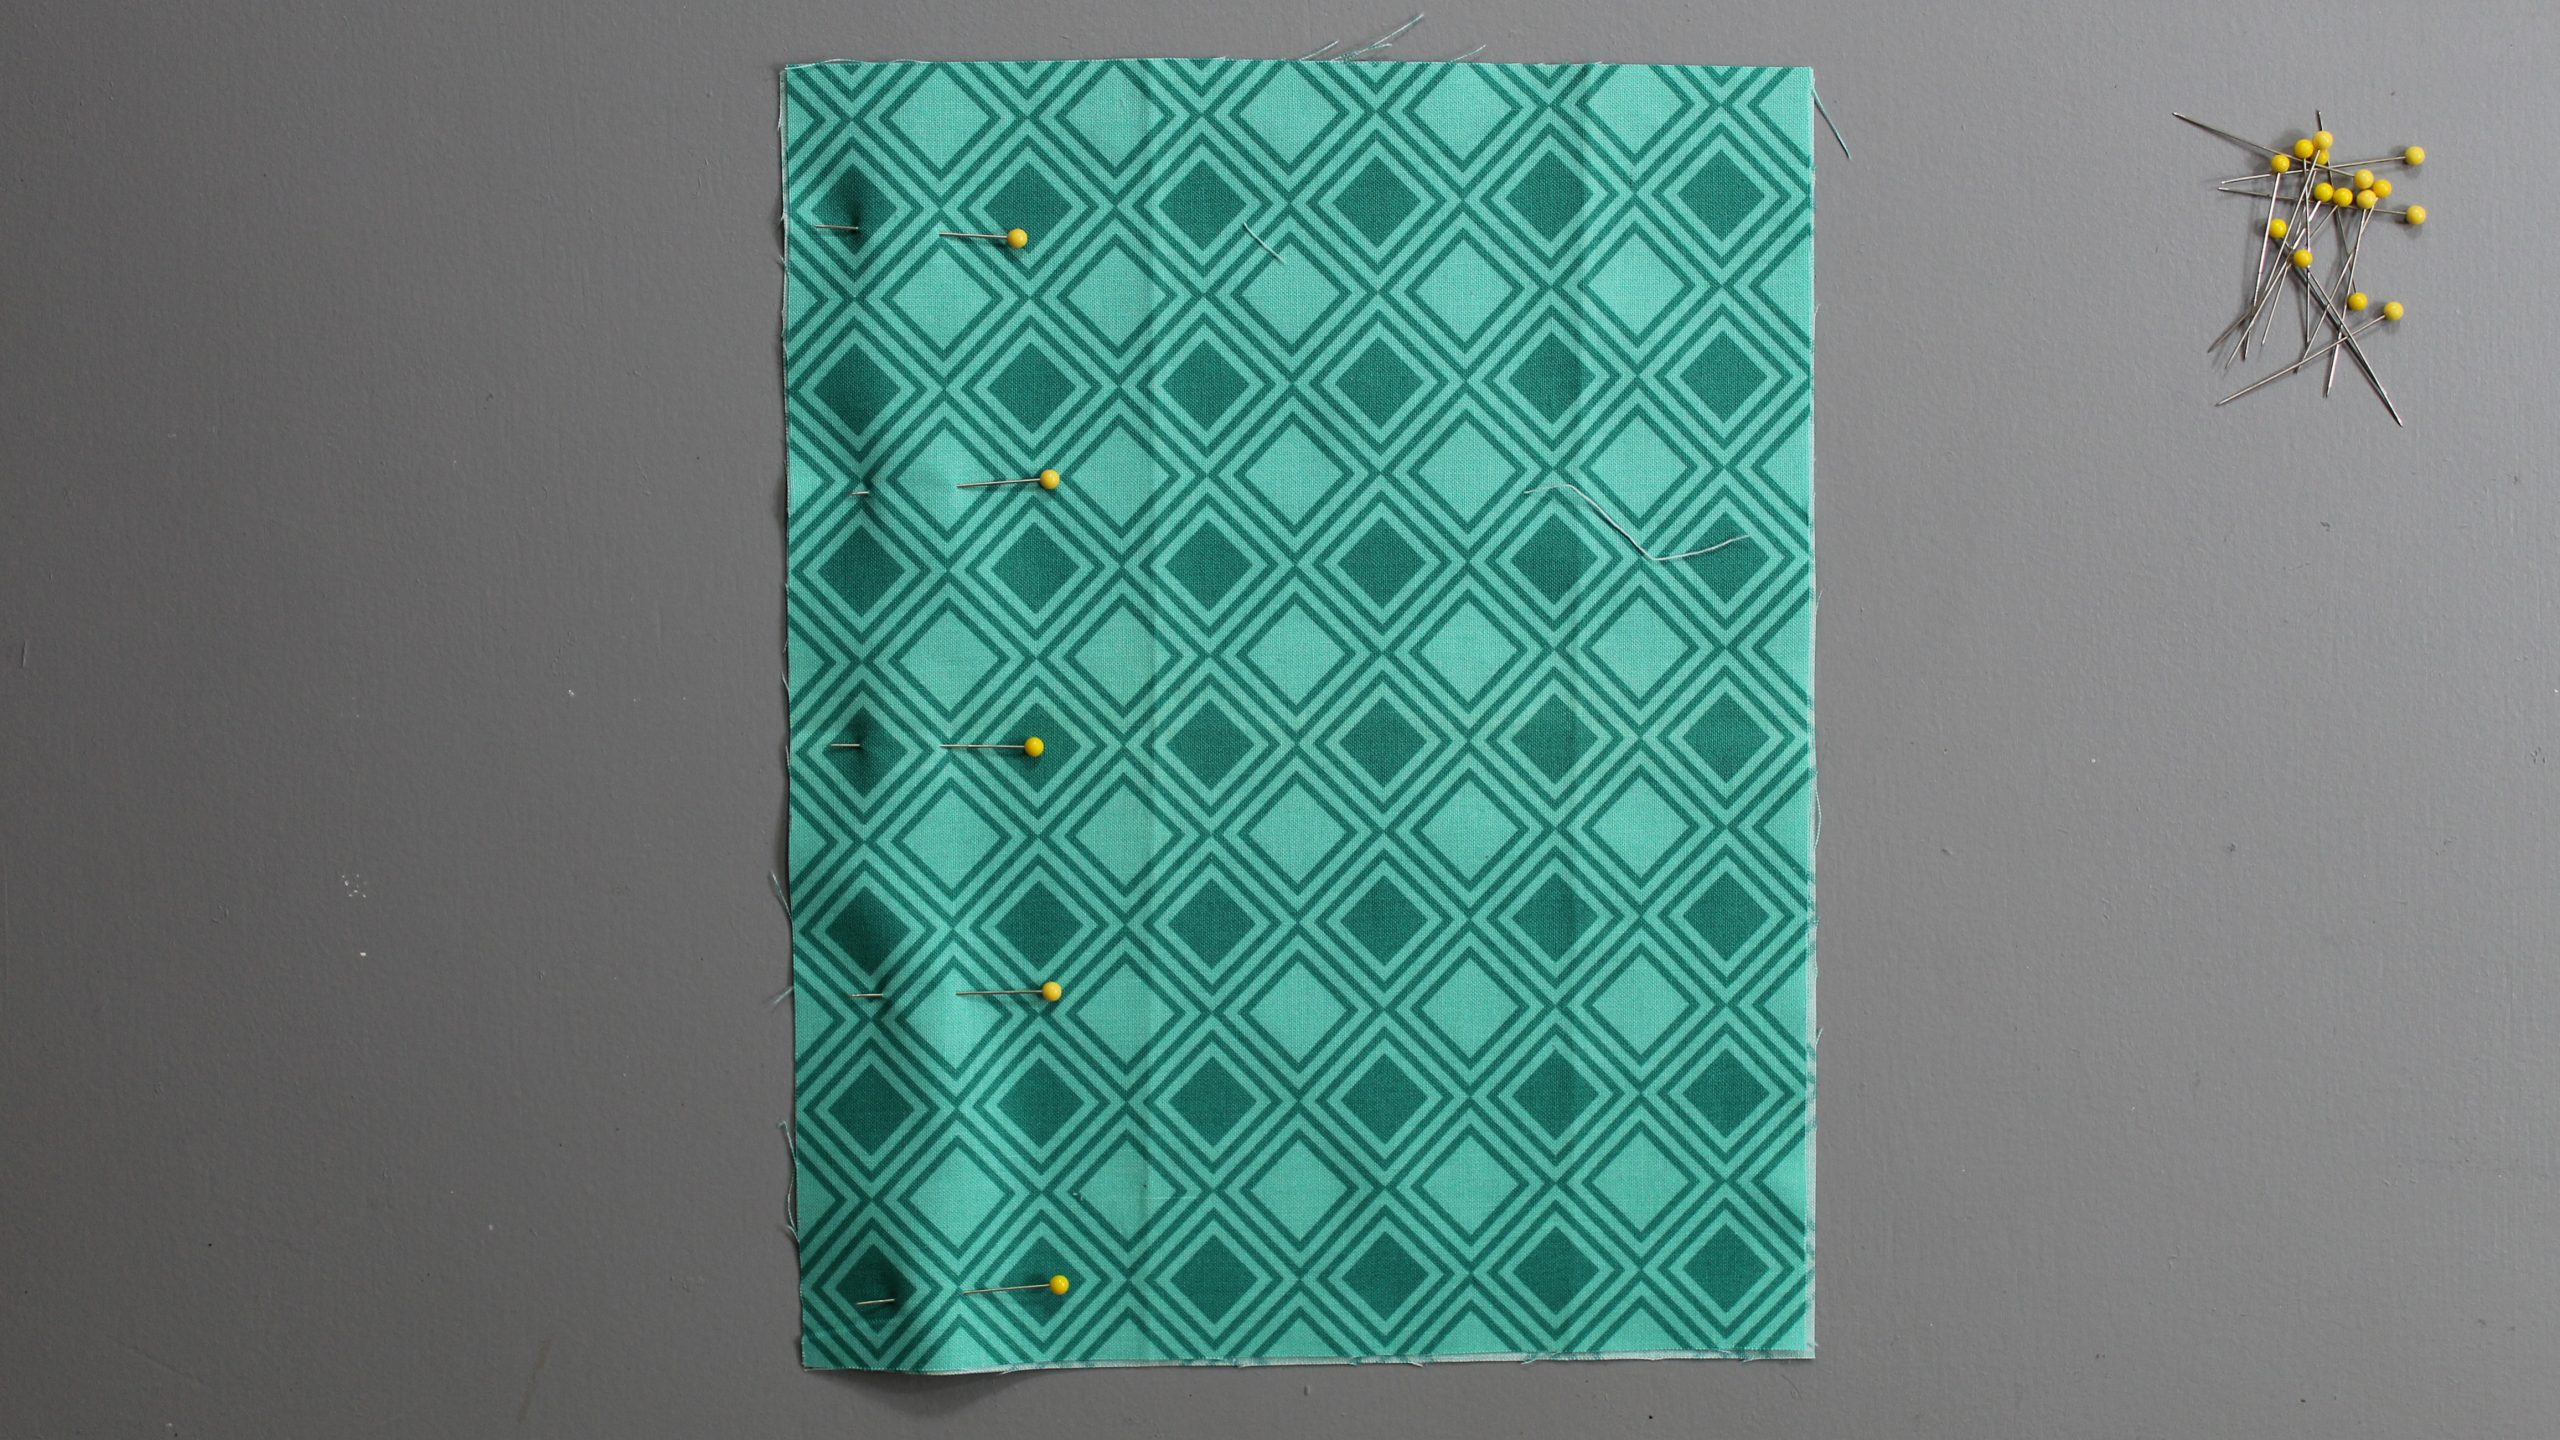
Pin your fabric wrong sides together and place under your presser foot at the ⅜" seam allowance (or whatever number you calculated in step 1). Sew the entire seam.
3. Trim Seam Allowance
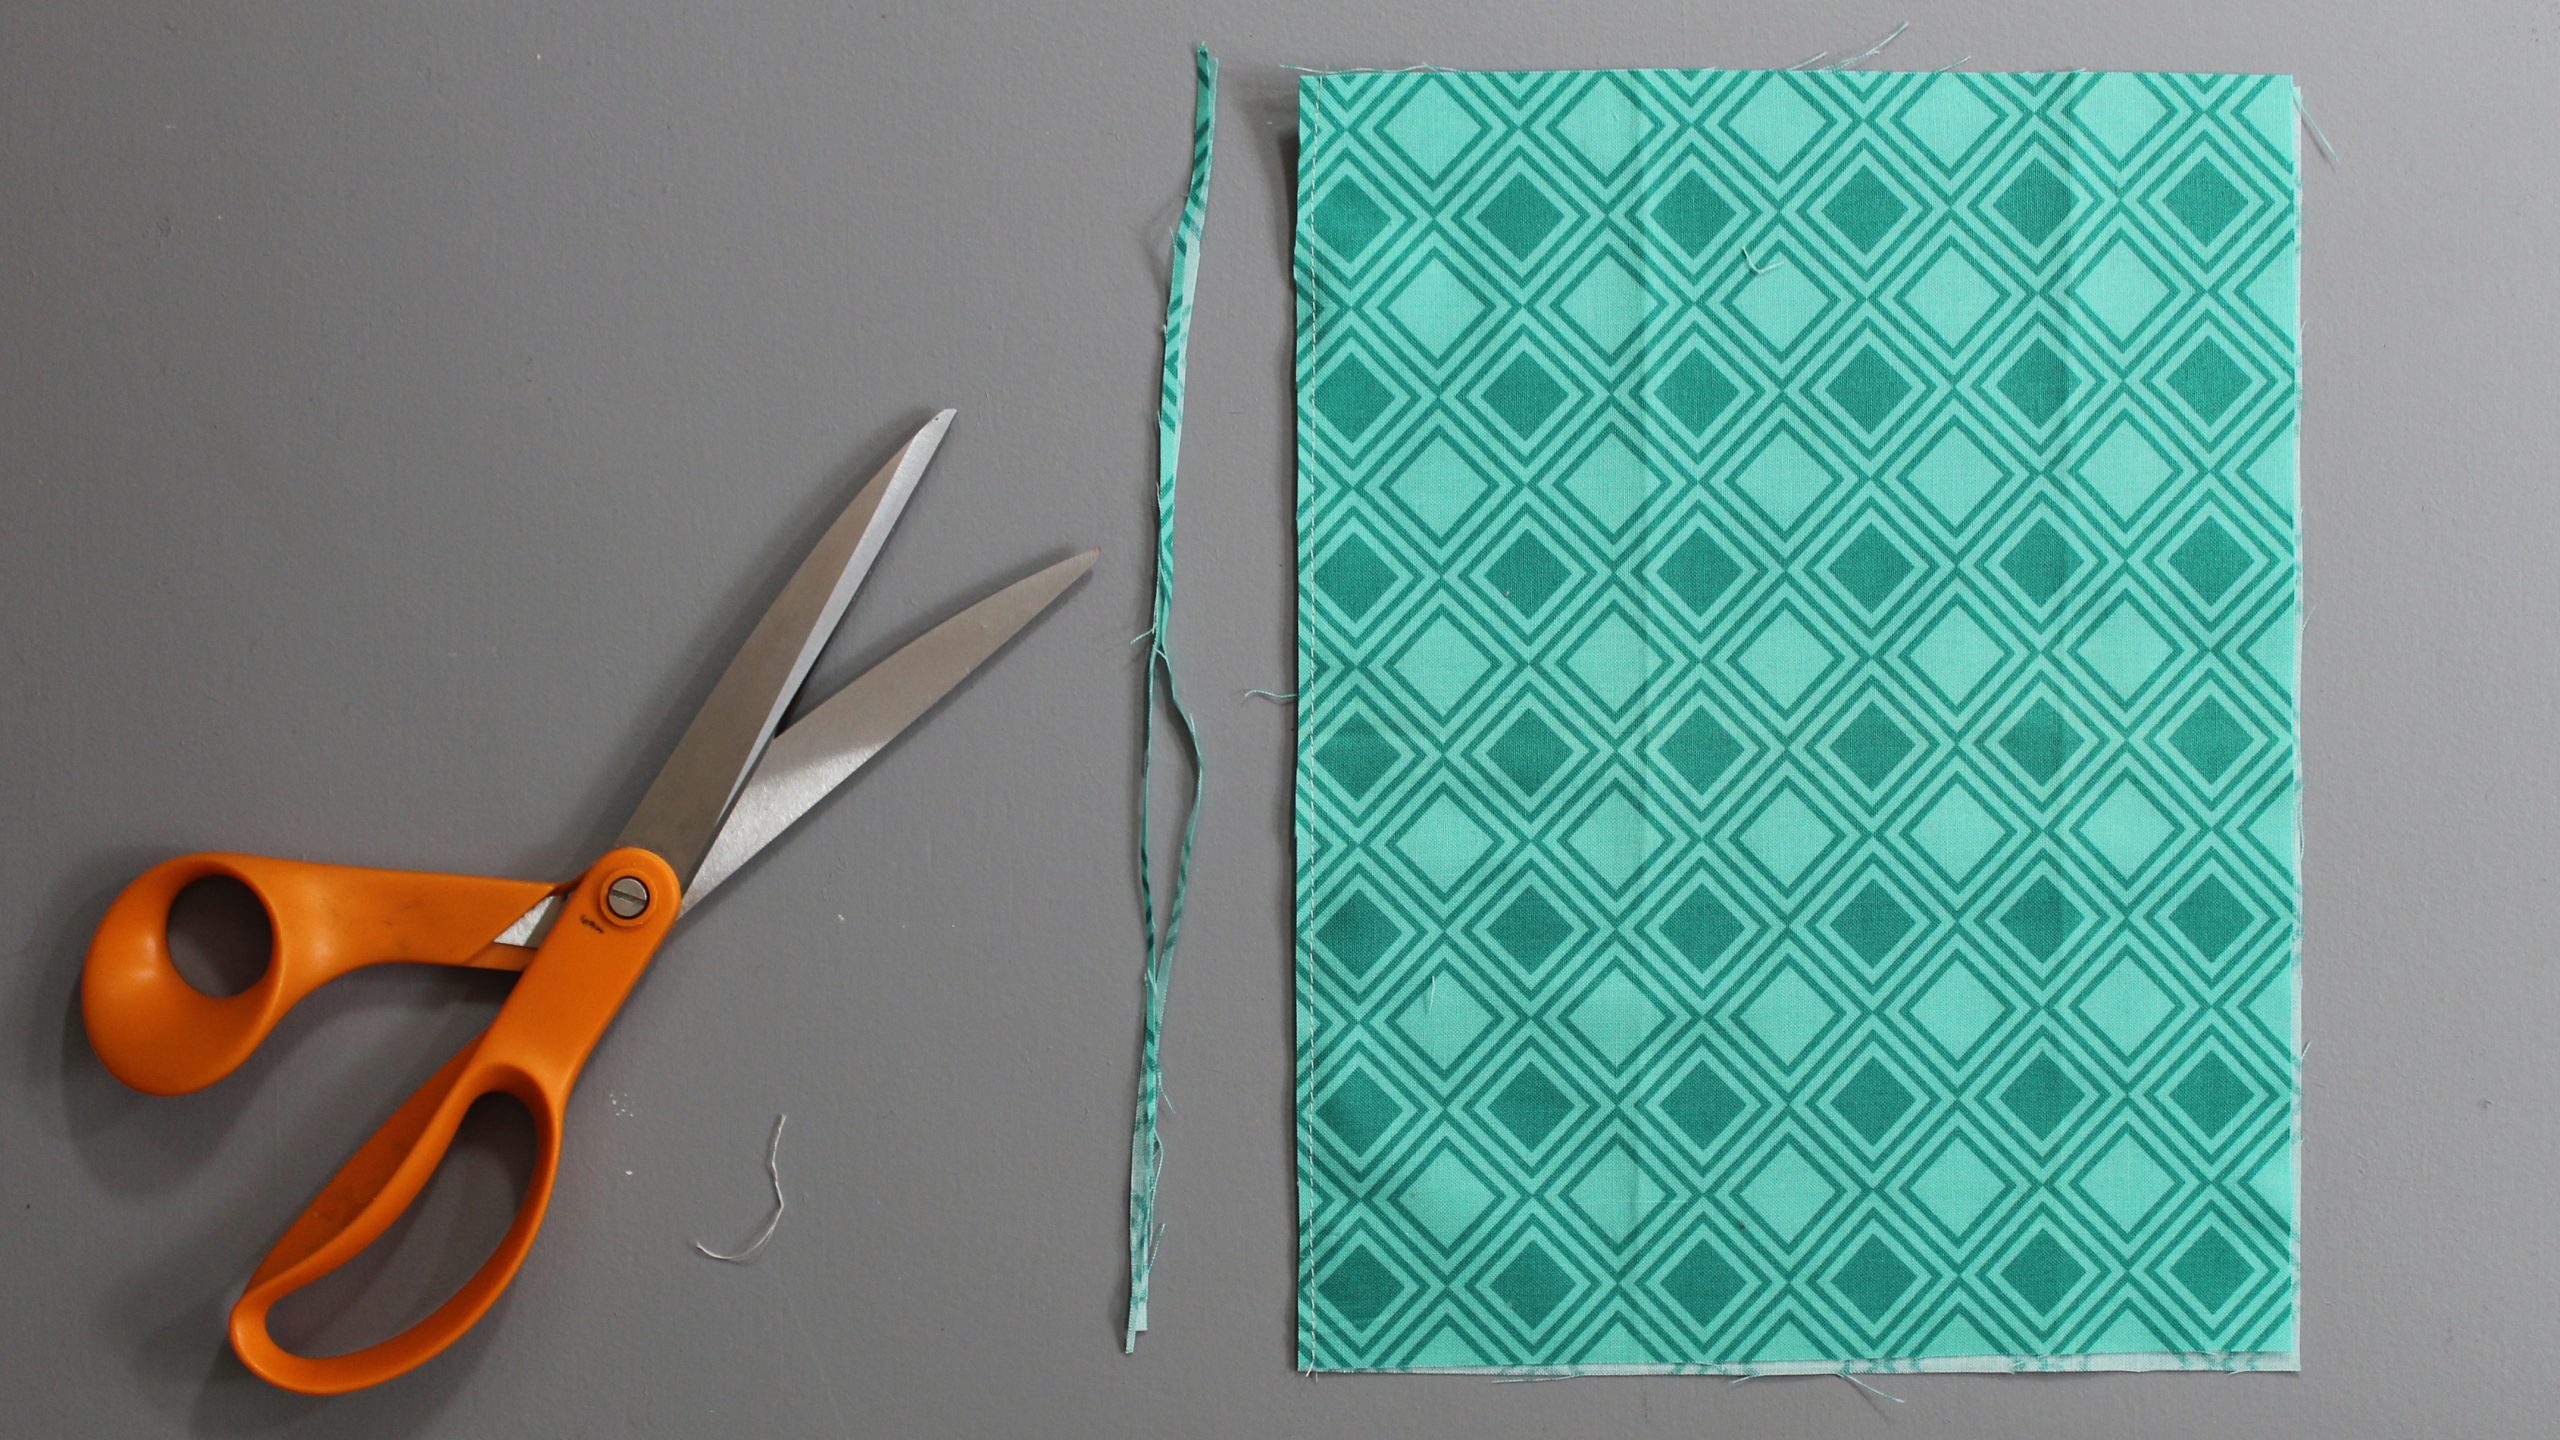
Trim the seam allowance down to ⅛".
Pro Tip: If you’re working with lightweight fabrics that easily shift (hi, chiffon), pin a point on the seam to an ironing board or another pin-able surface. Go directly through the seam line, leaving the pin sticking up like a tack. Pull the whole seam taut. This will make it easier to trim close to your stitches; the closer you get, the more delicate your finished seam will be.
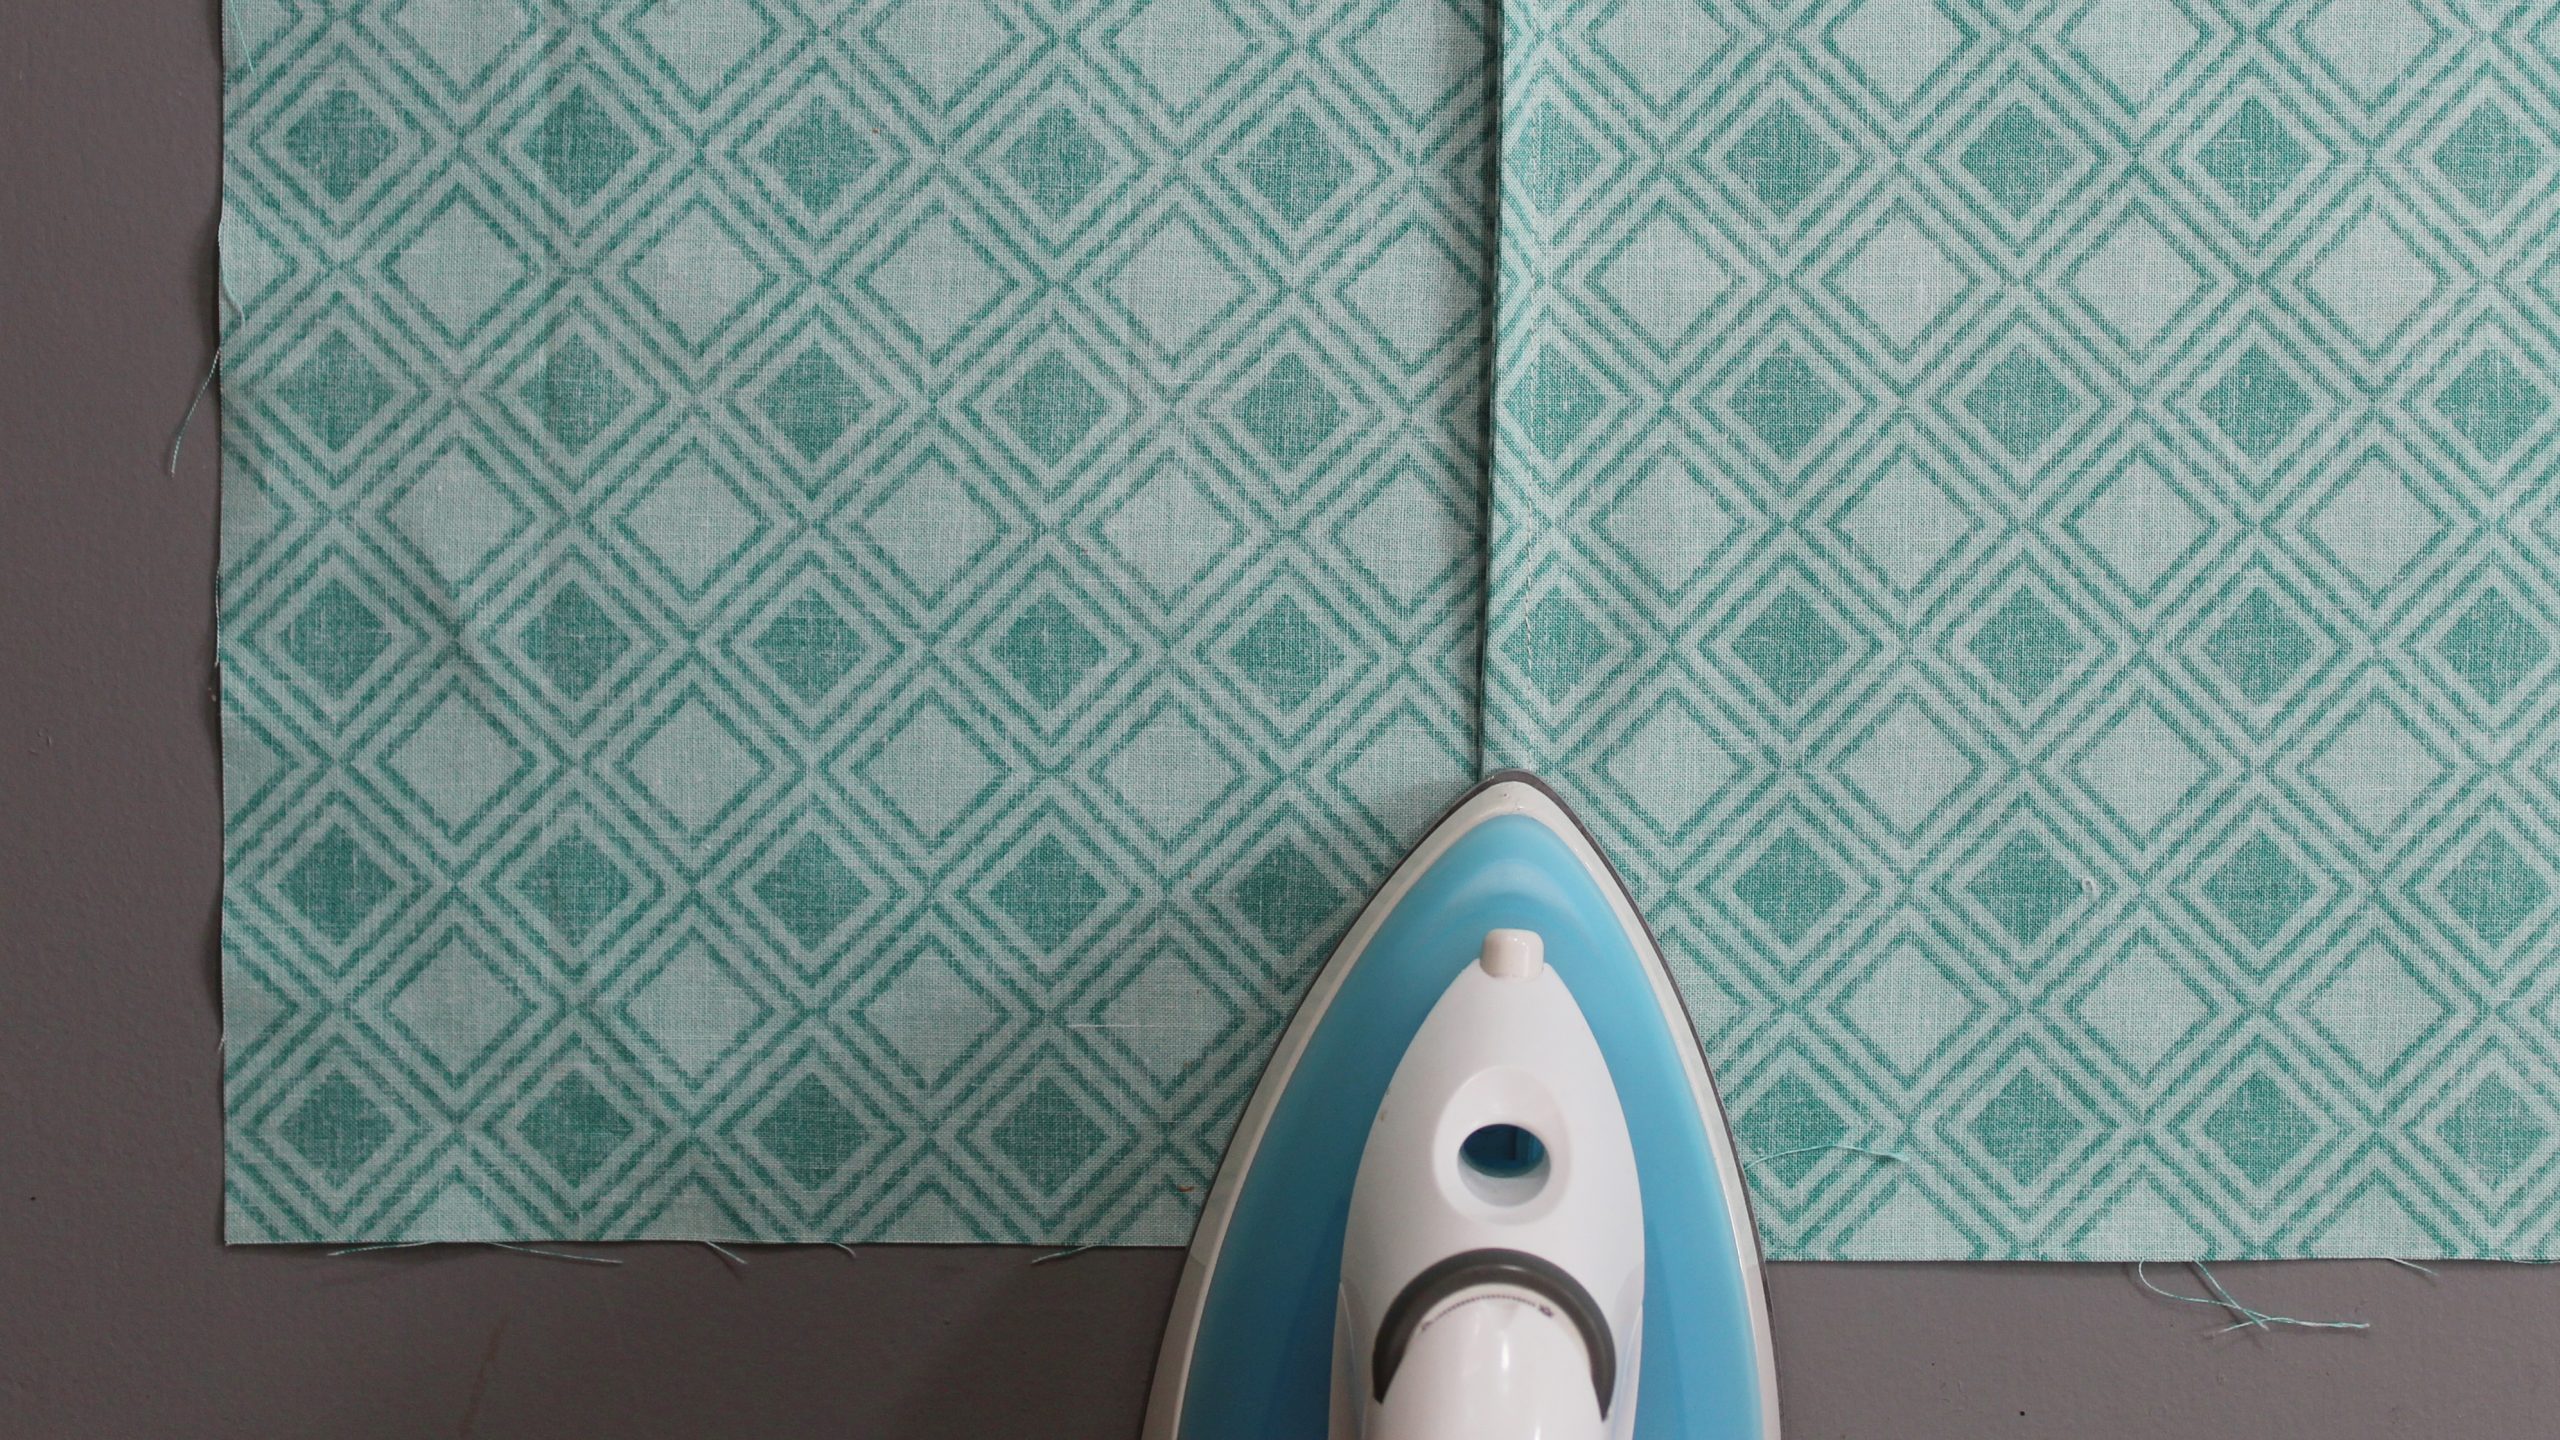
4. Press the Seam
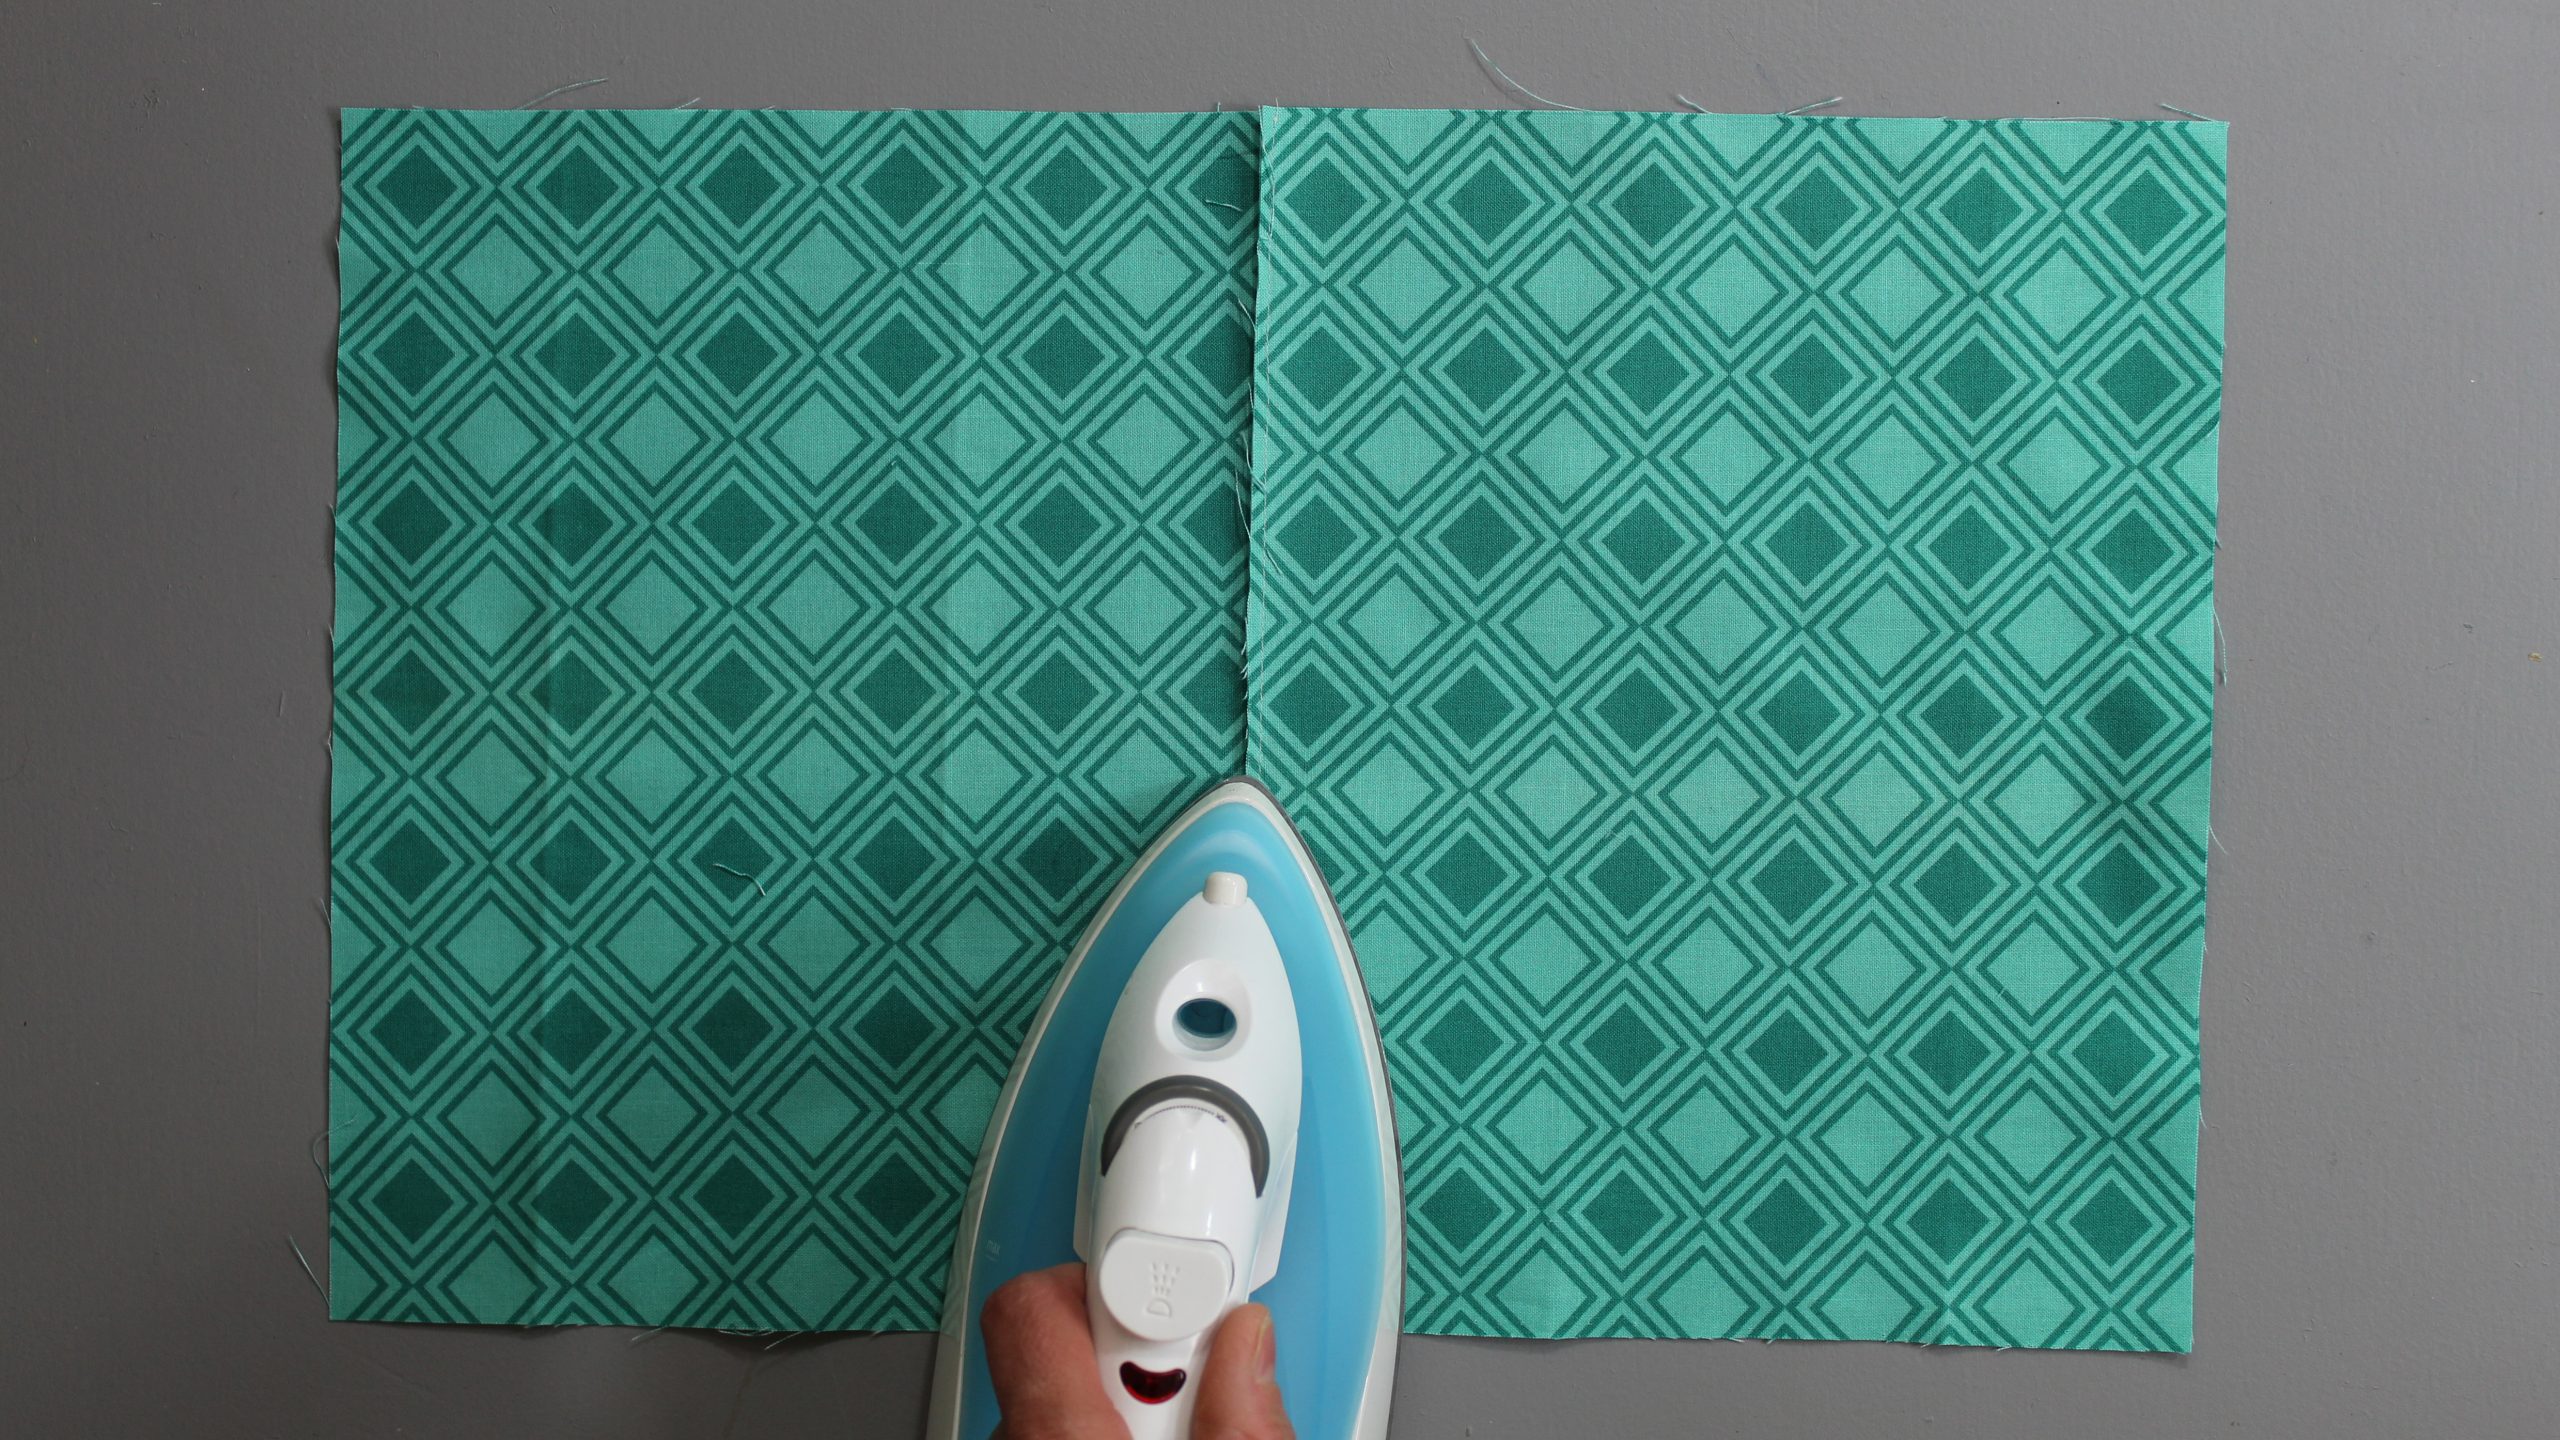
Open the seam with the right side facing up, so the seam allowance is on top. Set the iron to the correct heat for your fabric type. Press to one side.
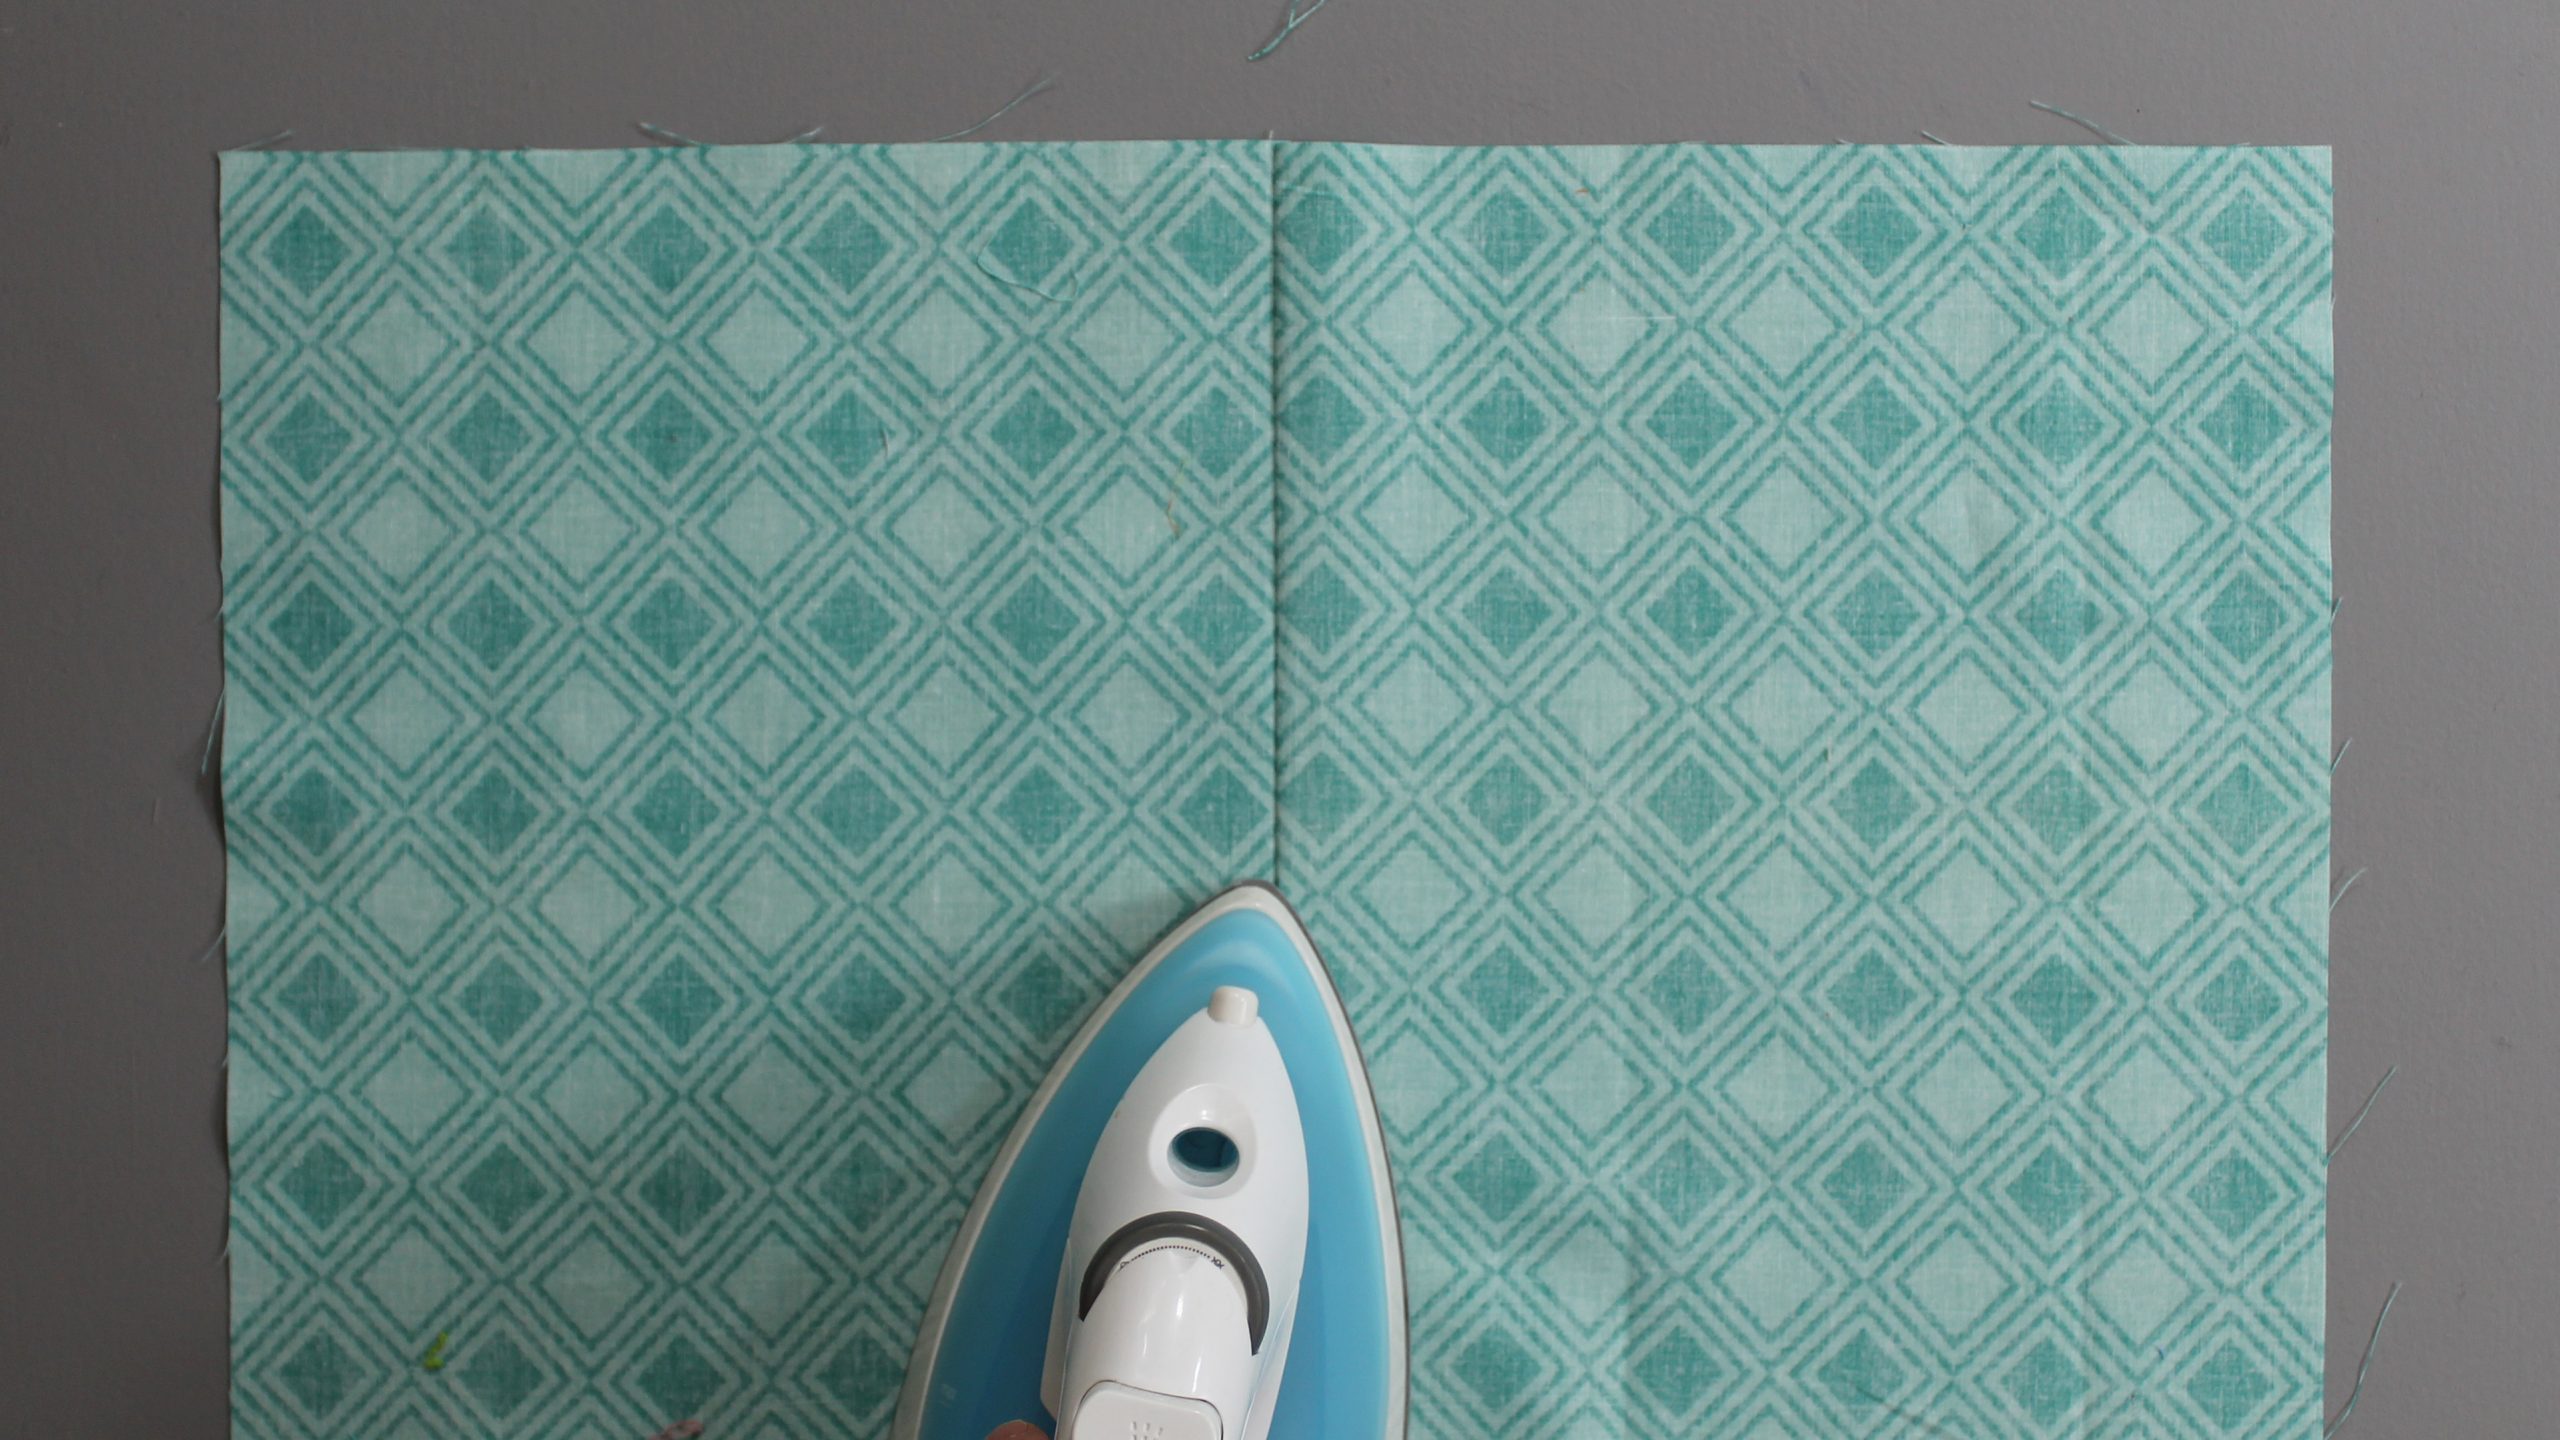
Turn your fabric over and press on the wrong side so the seam lays completely flat.
5. Prepare to Sew the Second Stitch Line
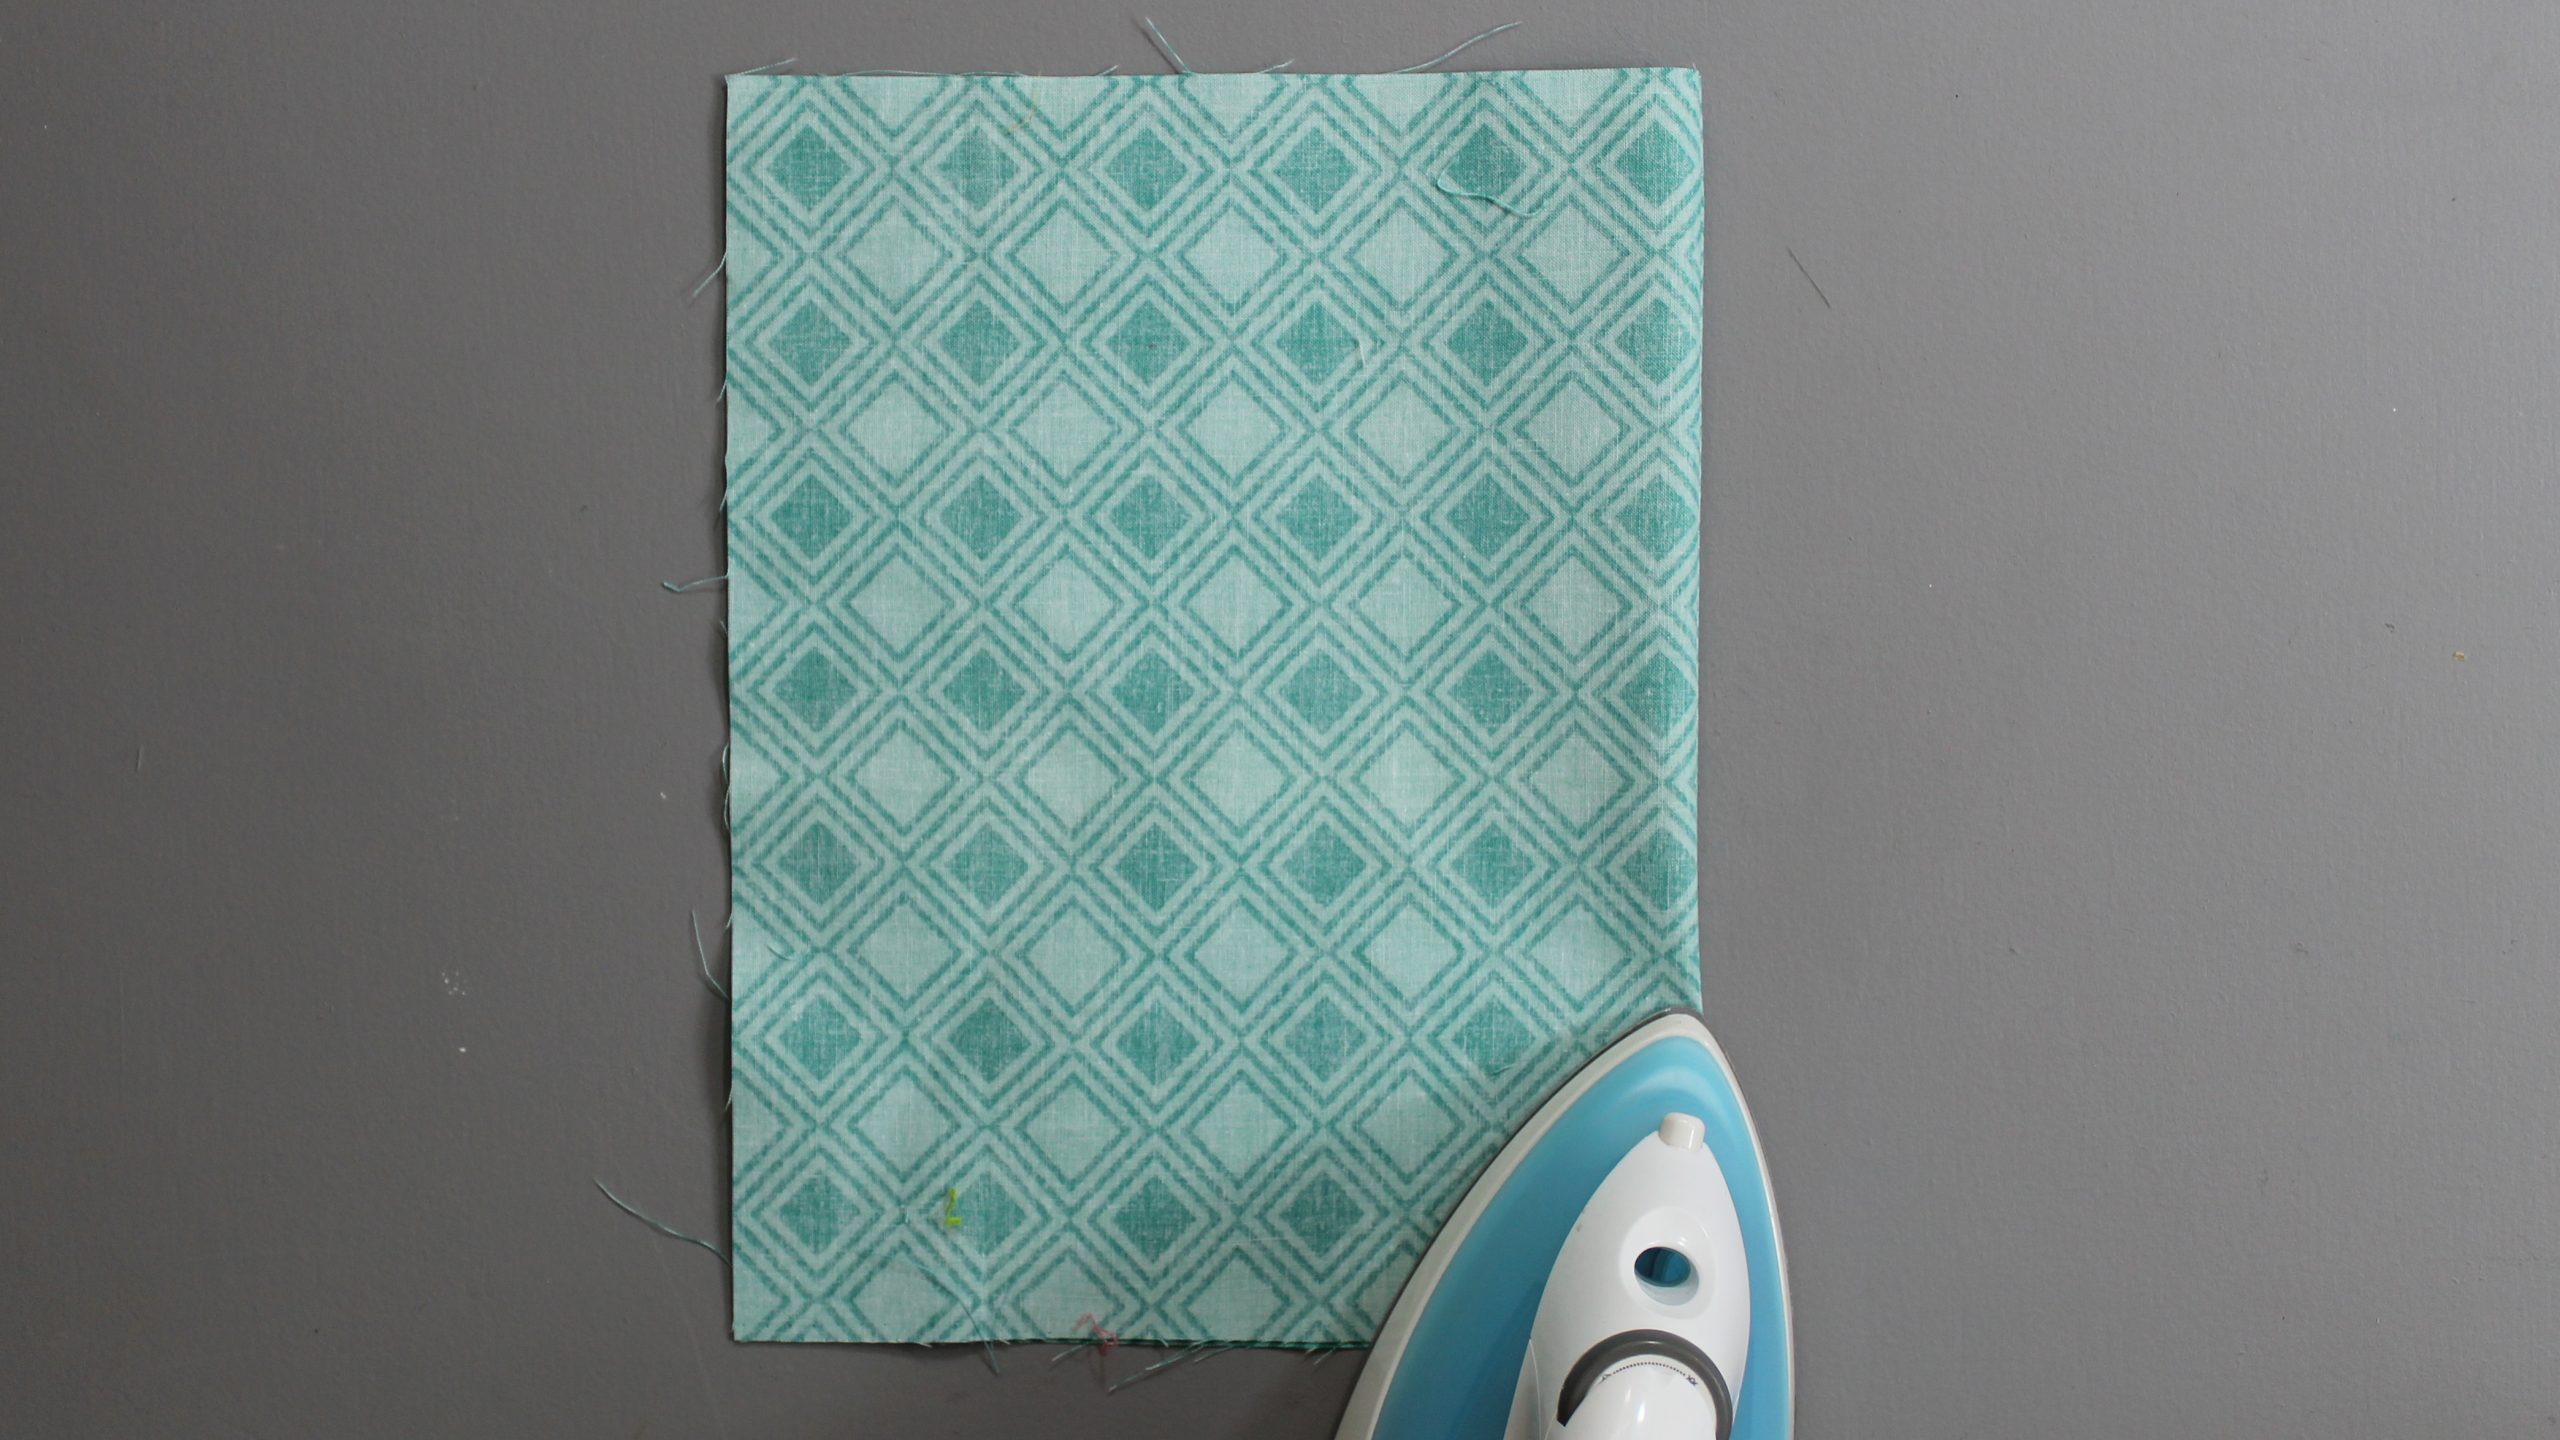
Fold the fabric on the seam, right sides together. Press the seam flat again with the stitching on the edge of the fold.
6. Pin the Second Seam
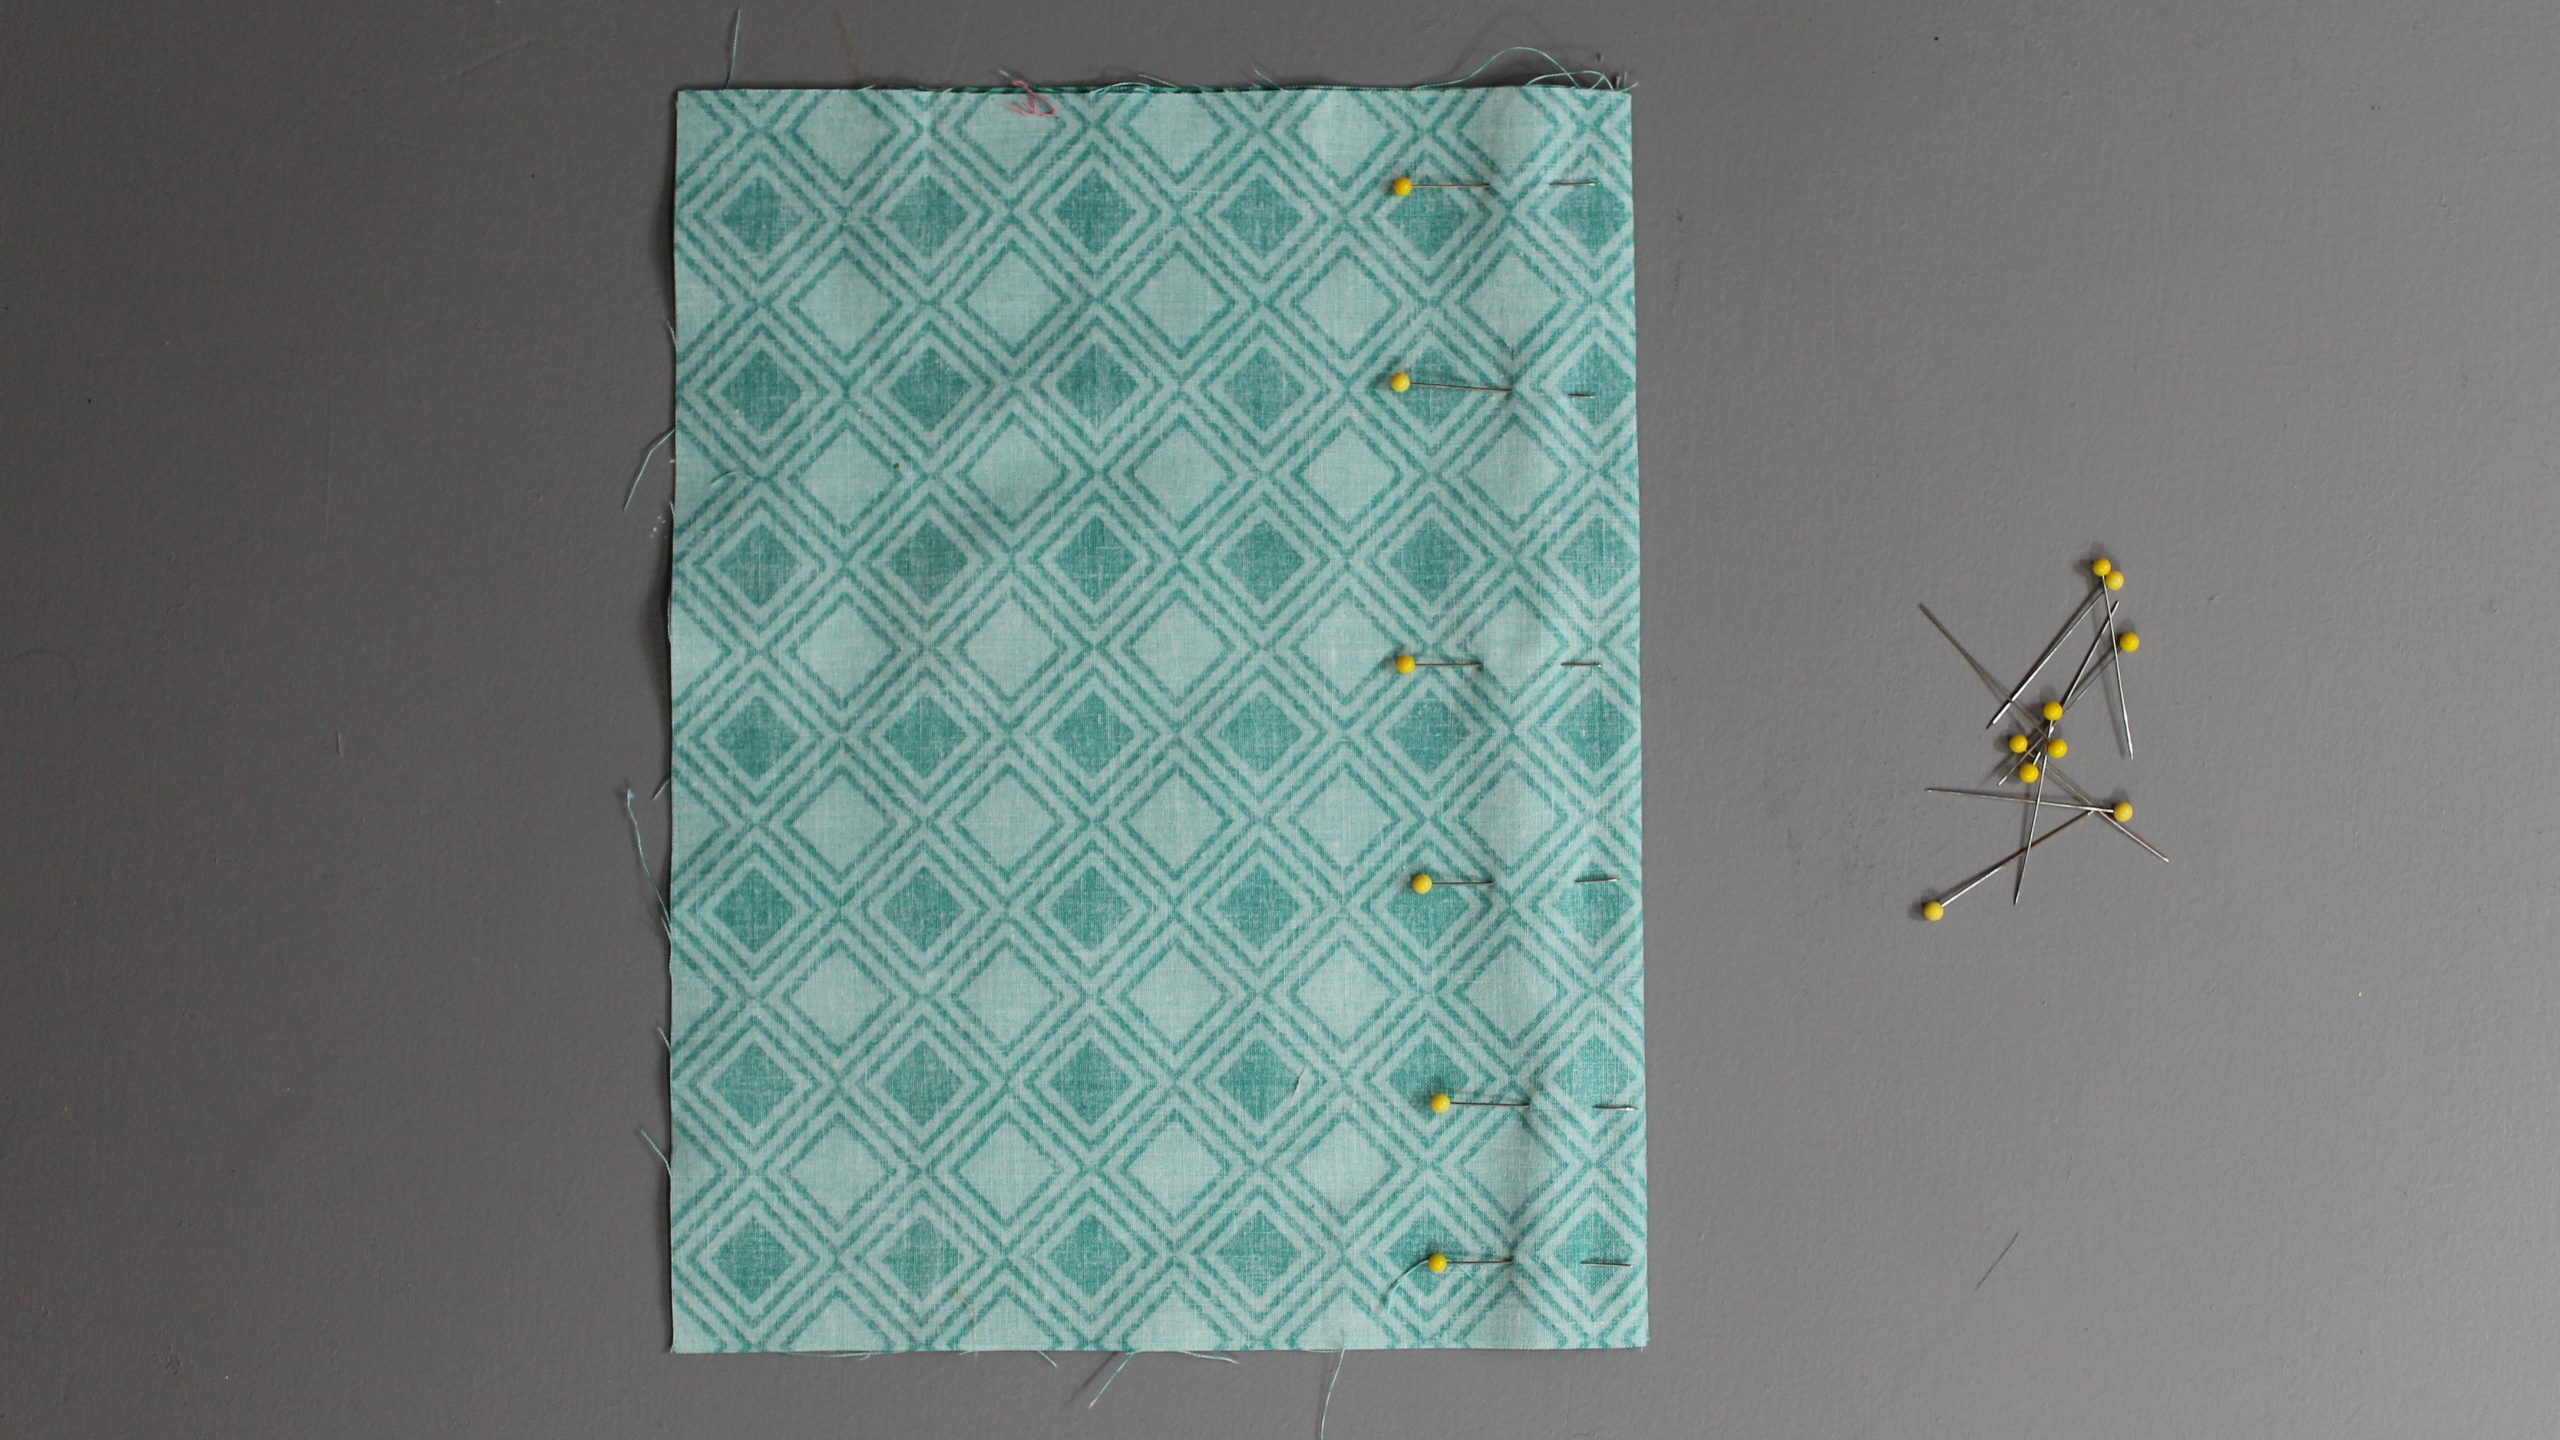
Pin the layers together on the stitching line if needed. As you become more experienced, you may find that you no longer need to do this and can skip this step.
7. Sew Second Seam
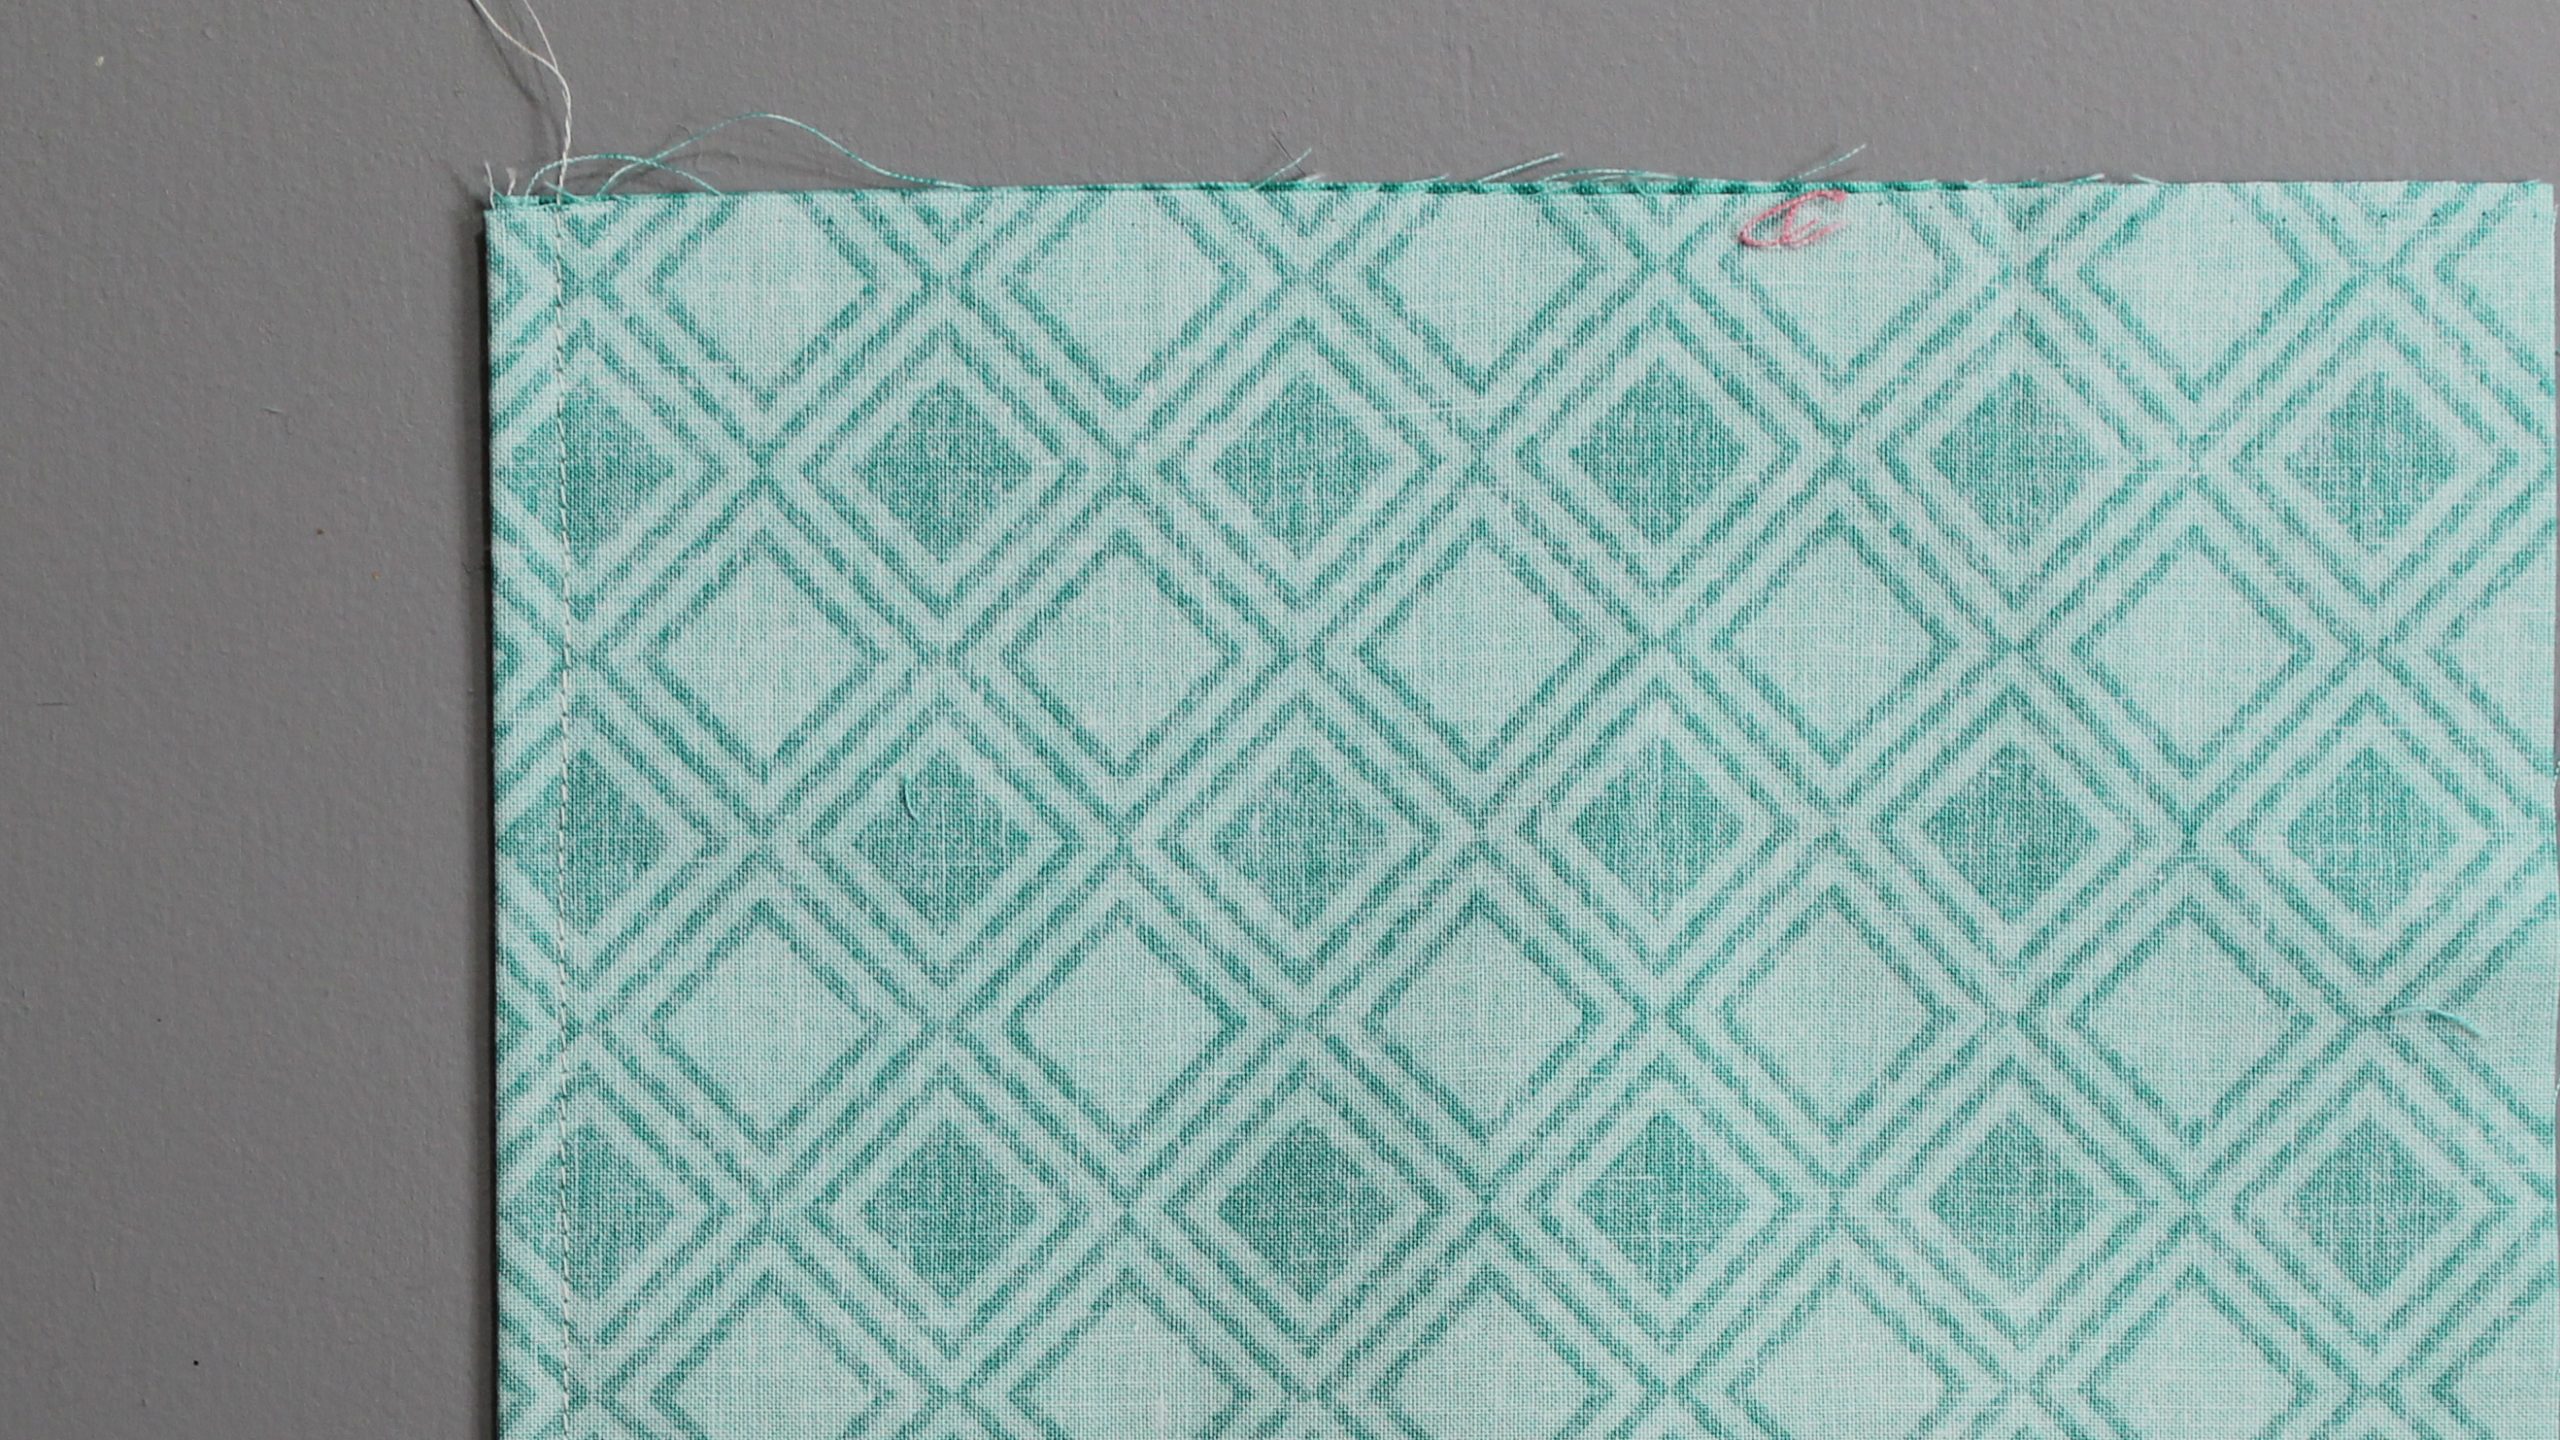
Insert the seam under the presser foot. Sew until your project’s seam allowance equals the number you calculated in step 1. Example: If you sewed at ⅜” and the seam allowance is ⅝” , that means you should sew this step at 2/8” or ¼”.
Good to Know:As you sew, the seam allowance of the first seam will become enclosed within the fold/seam allowance of the second seam.
8. Press Again
On the wrong side of the fabric, press the entire French seam to one side.
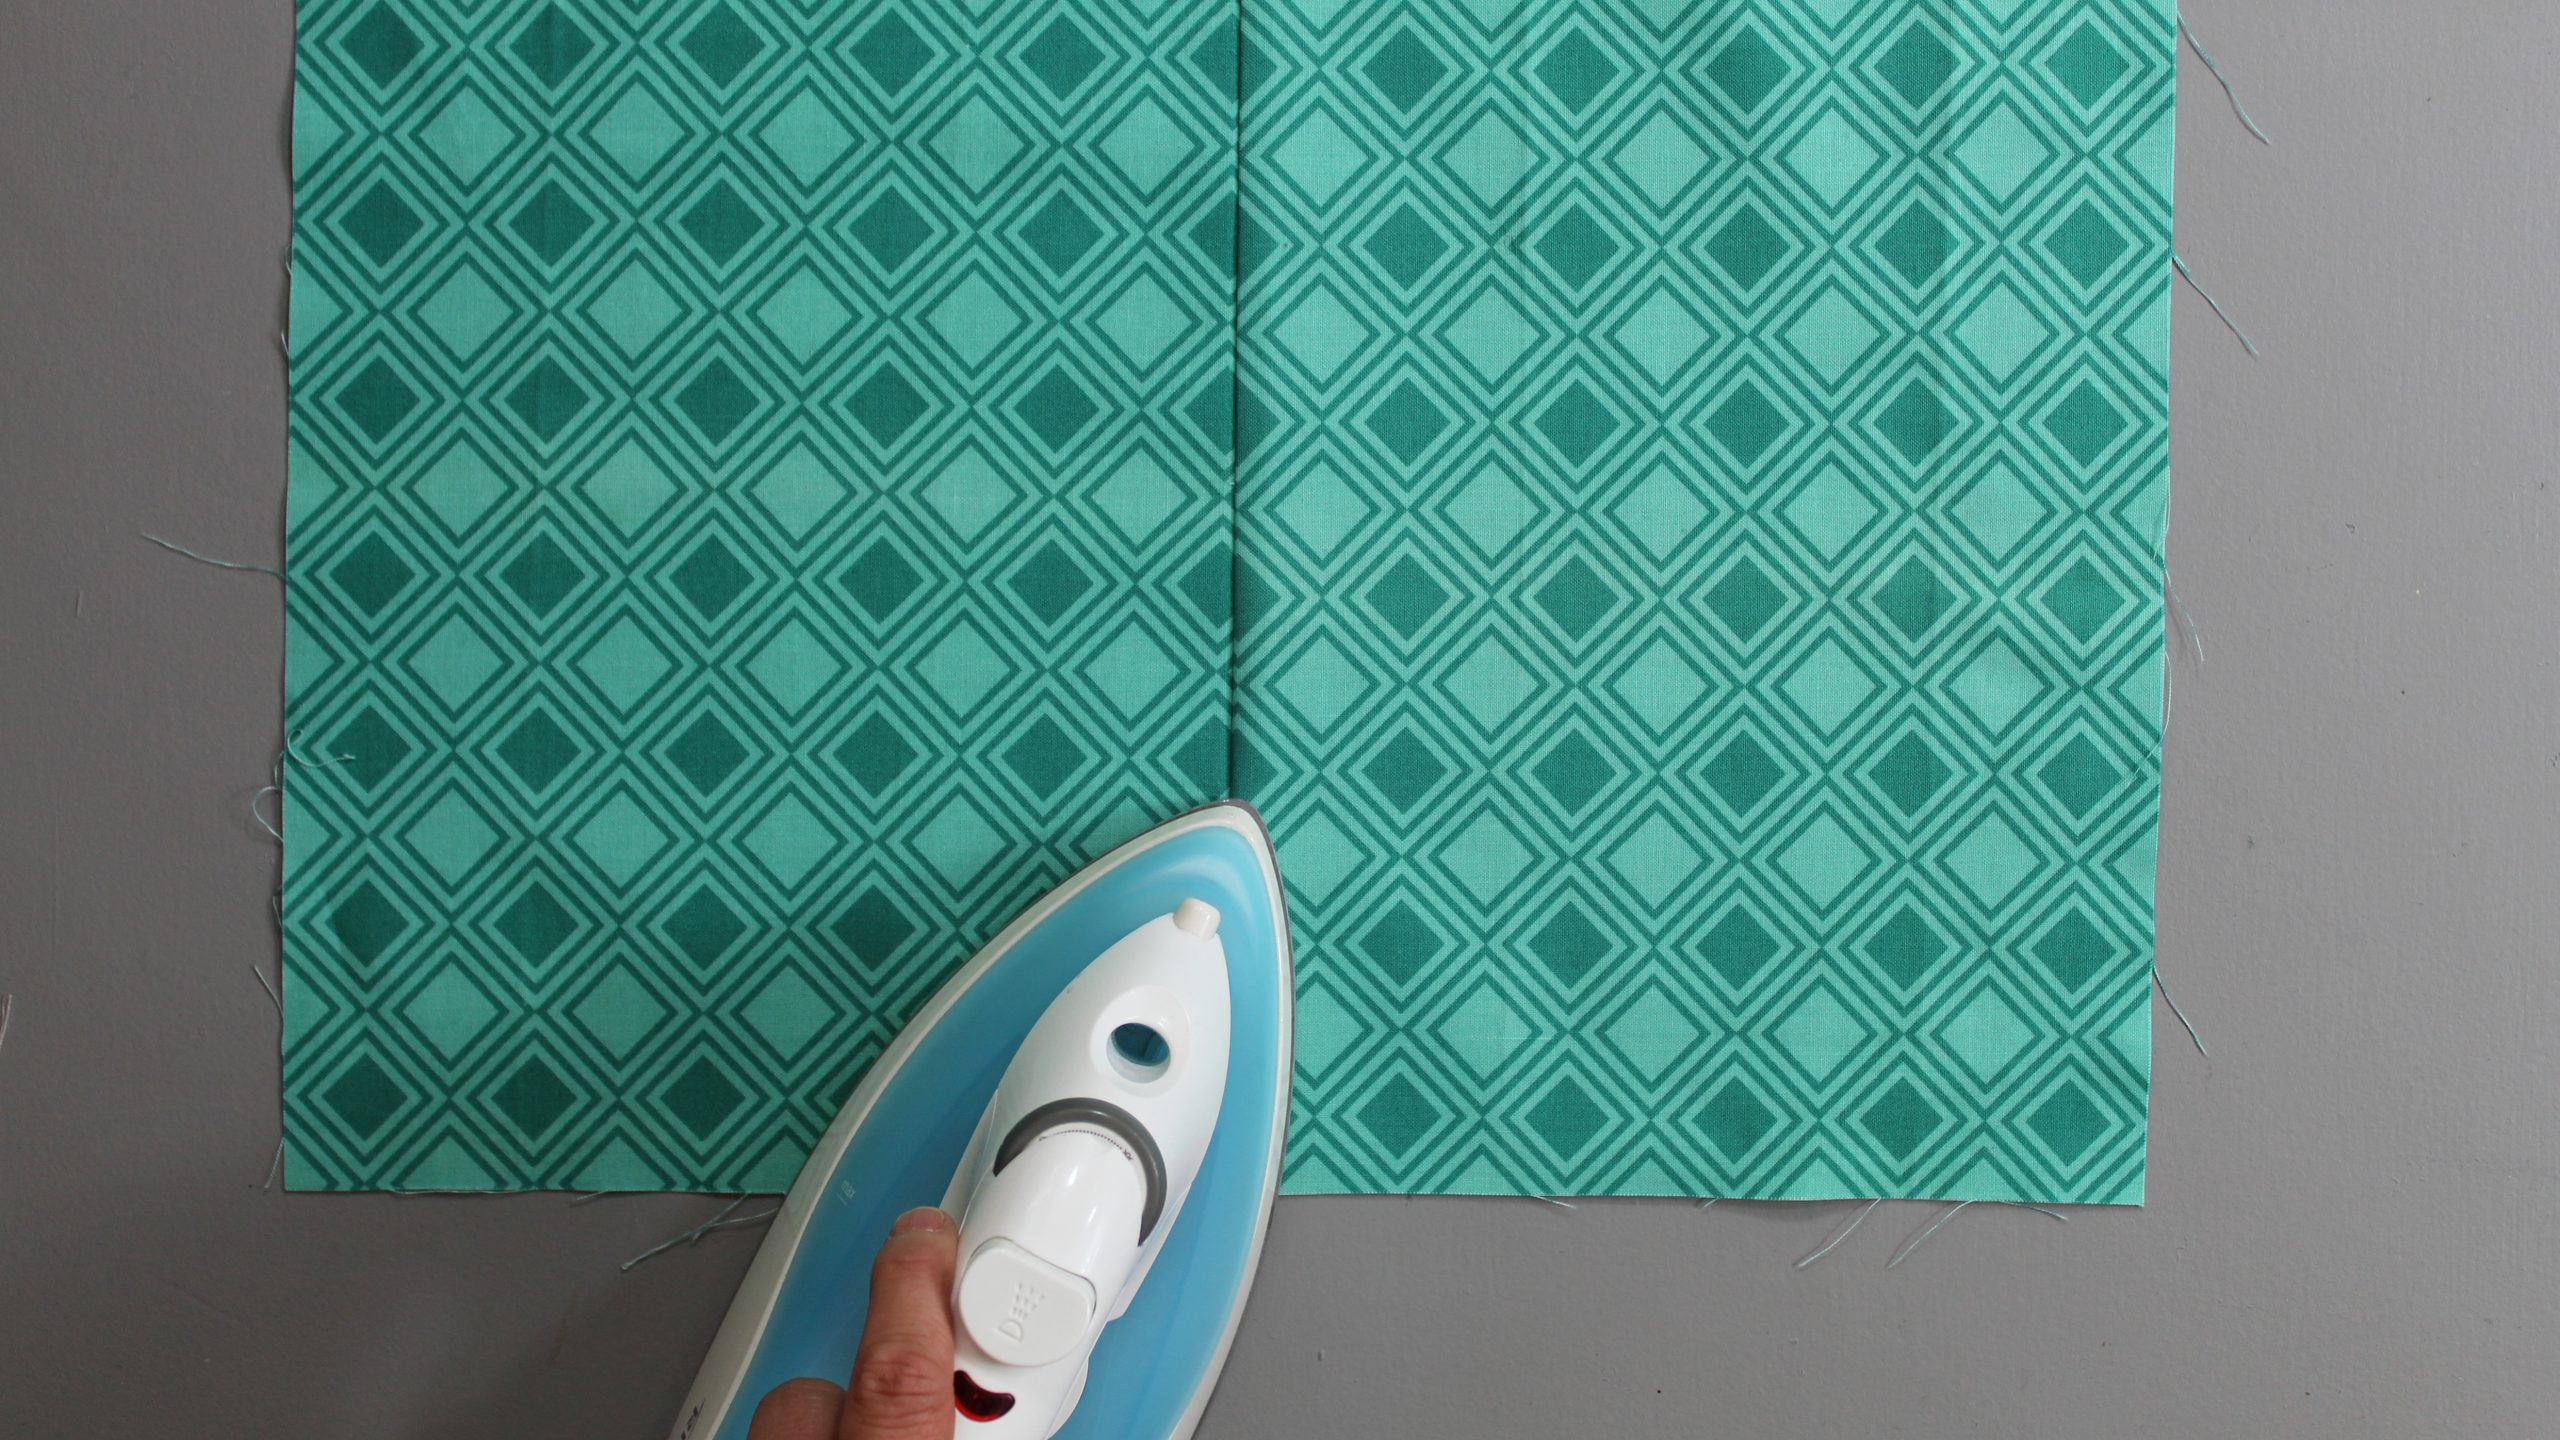
Turn your fabric over and press one more time on the right side.
So, there you have it! The French seam, while seemingly a bit more involved than a standard seam, is well worth the effort for the elegant and professional finish it provides. Whether you're working with delicate silks, breezy linens, or anything in between, mastering the French seam will elevate your sewing projects and give them that extra touch of refinement. Don't be afraid to practice and experiment – you'll be amazed at the difference this technique makes. Happy sewing!
Photos by Marni Weaver.
Looking for more information on flawless seam finishes? Check out these classes!
Tips for Sewing Seam Finishes & Hems
Couture Finishing Techniques
Mastering Seam Finishes
How to Enclose Seams
How to Use a Serger and Serger Techniques
Seaming Beyond the Basics
Our friends at National Sewing Circle also have a quick video on French Seam Sewing Tips for Your Next Project

I used this method on a chiffon/ organza overskirt for Christmas- worked perfectly!!
Ian going to try this it looks easy.
Thank you! Love that your directions are so simple.
Very nice presentation. Thank you.
Wonderfully clear instruction by word and illustration. Thanks, I think I can handle it now!
Would this be soft enough for nicu wraps ( neonatal intensive care unit)
Would this be soft enough for nice wraps?
Thank you CathyE- very detailed instructions. Love the step-by-step explanation. Much appreciated
Take this seam finish one step further. Add Step #9: Top stitch on right side 1/8" from seam on side where seam was pressed over. Now you have a finely finished, flawless seam.
Beginner at sewing here 😊 Thank you for this clear and easy explanation. Much appreciated!