You've decided to dig your sewing machine out of the closet and tackle the really cute project you just found on Craftsy. Good for you! Let's get that machine threaded so you can get on with being creative.
These detailed instructions and photos will make the process simple. Once you've finished, un-thread it and try again. You'll quickly find threading your machine is simpler than it looks — you will quickly memorize how to do it for next time!
The machine used for this tutorial is a Janome 2030QDC. Other machines will be similar, but if you have questions, please refer to your specific machine's manual.
You will need:
- Sewing machine
- Thread
- Empty bobbin (if you have a full bobbin, skip Step 1)
How to re-thread a sewing machine:
Step 1: Fill the bobbin
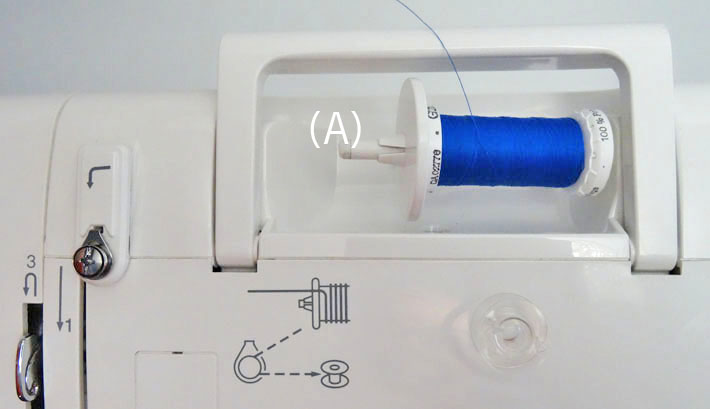
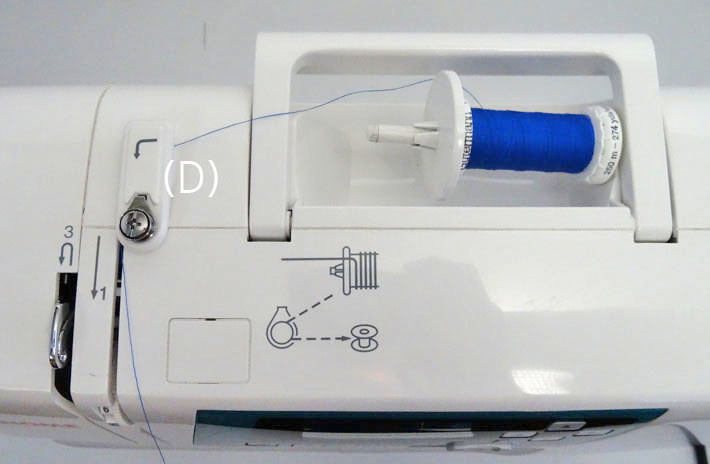
Place the thread on spool pin (A) and cap it with the spool holder (if applicable). The thread should be coming off of the spool towards the back of the machine.
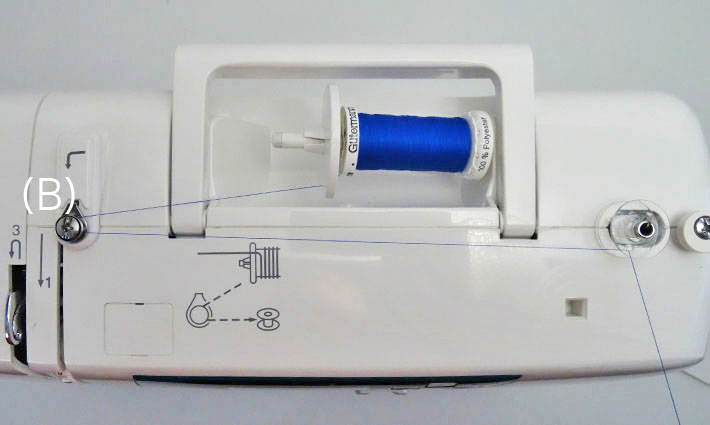
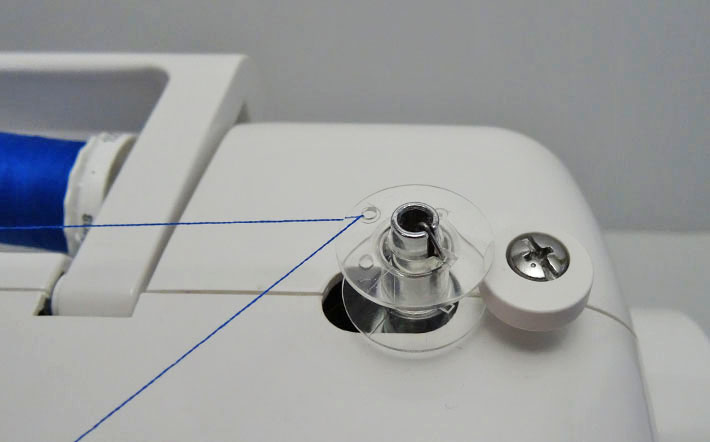
Draw the thread through the bobbin thread guide (B). Place the bobbin on the bobbin winder (C). Feed the thread through a hole on the bobbin to hold it in place.
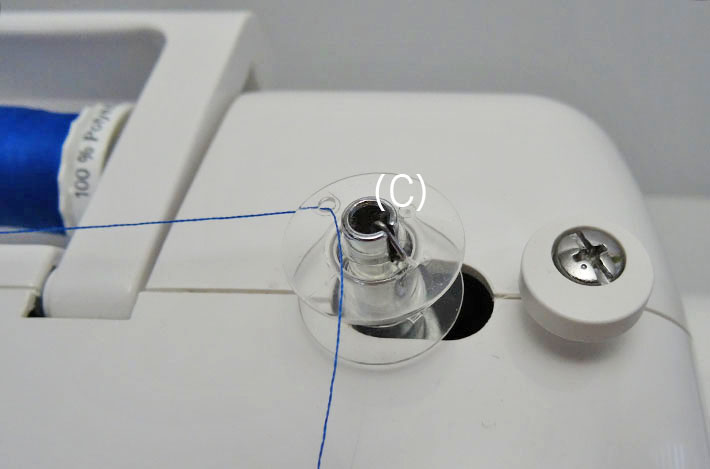
Holding the thread loosely, push the bobbin winder to the right against the stopper. Start winding the bobbin with the foot pedal or start/stop button. Wind a short way while holding the thread. Then stop, clip the thread, and continue. The machine should stop when the bobbin is full.
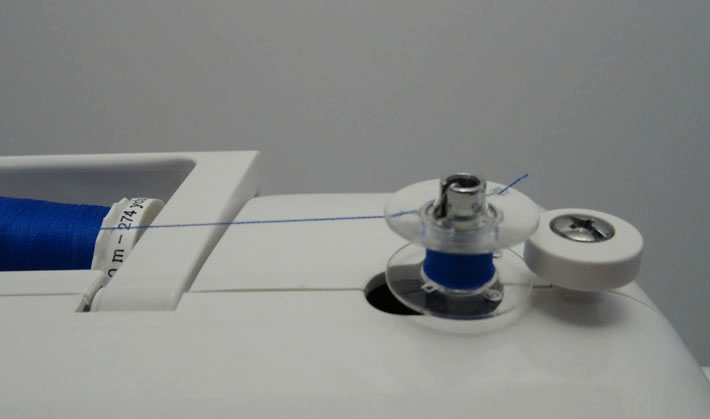
Clip the thread, remove the bobbin and set aside.
Step 2: Thread the machine
Note: It is best to thread the machine while it is turned off.
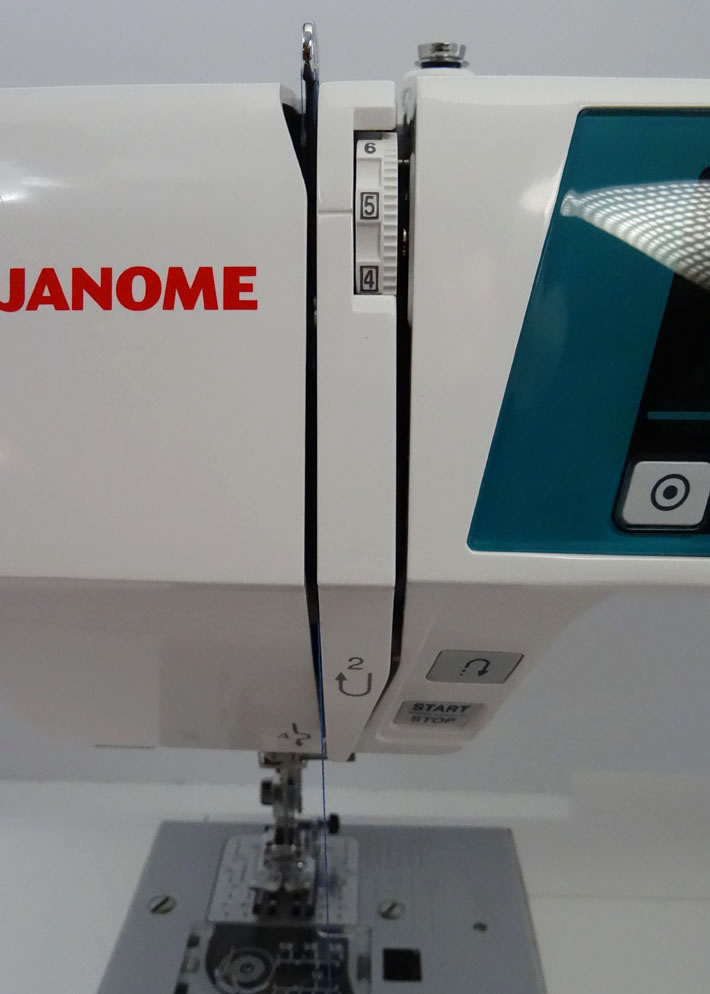
Bring the thread around the upper thread guide (D), then bring it down and around the U-shaped guide (E) in the front of the machine. Hold the thread taut to make sure it engages with the tension discs (F).
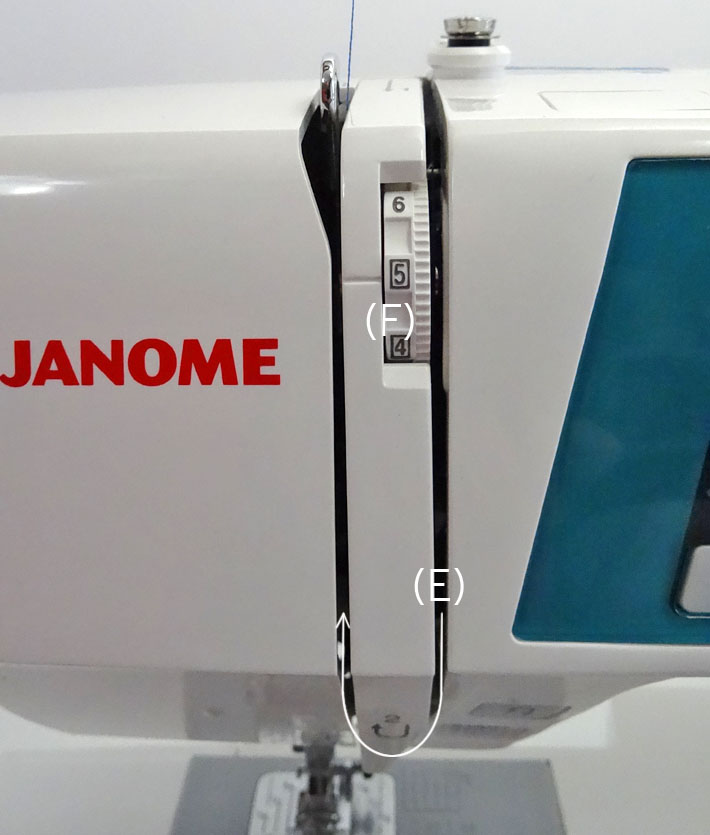
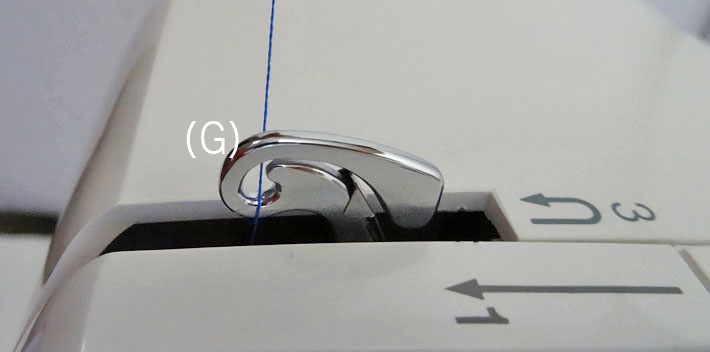
Turn the handwheel on the side of the machine to move the take-up lever (G) to it's highest position. Draw the thread around it (or through it on some machines) to secure it in the eye of the take-up lever.
Bring the thread down the left side of the U-shaped guide to the needle area.
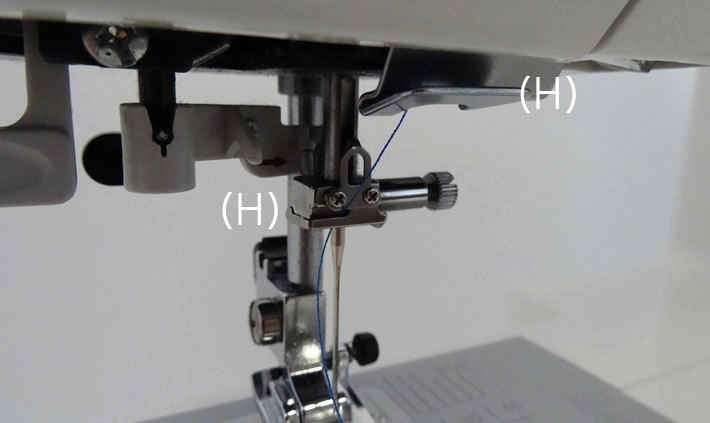
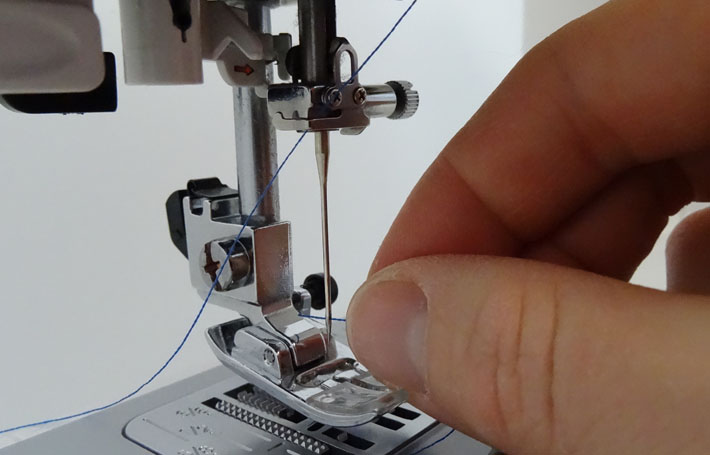
Feed the thread through the last one or two thread guides (H) and thread the needle.
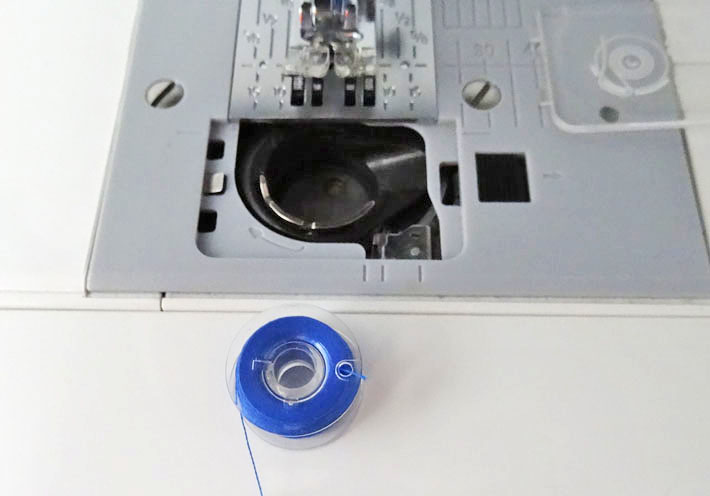
Step 3: Insert the bobbin
This applies to top-loading machines. For any other machine, consult your instruction guide.
Remove the bobbin cover plate. Place the bobbin in the case with the thread running counter-clockwise.
Bring the thread through the first notch (I) and draw the thread to the left until it slips into the second notch.
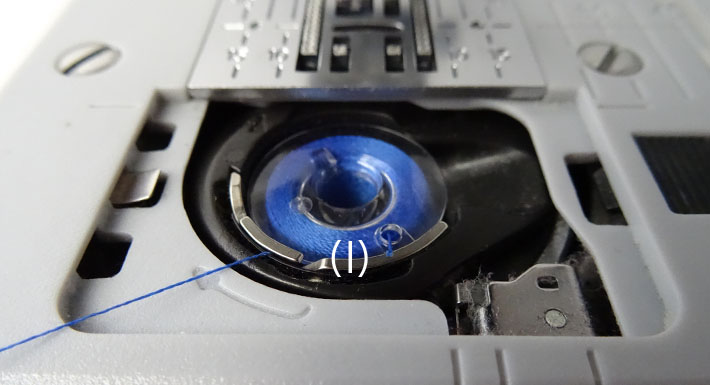
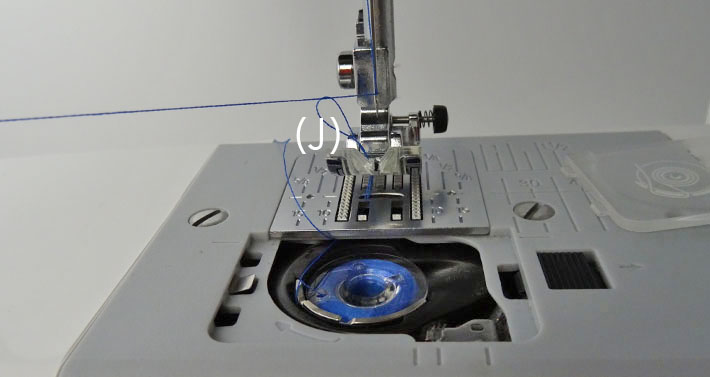
Pull out a 6" – 9" thread tail to use in the next step.Step 4: Draw up the bobbin thread
Hold the machine thread taut and turn the handwheel to raise and lower the needle. This will pick up the bobbin thread (J).
Pull gently to bring up the entire bobbin thread. Pull both threads to the back of the machine, under the presser foot.
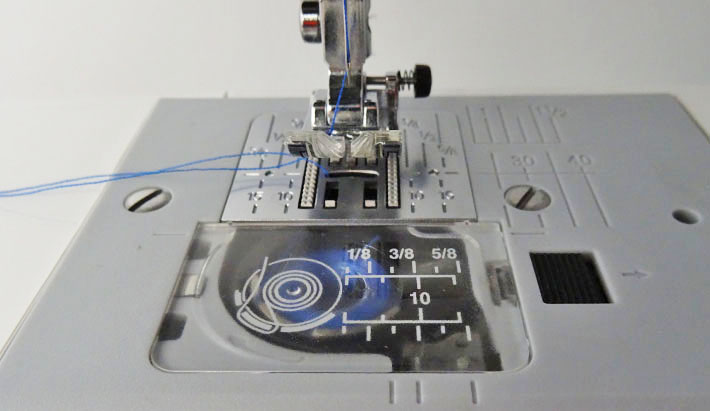
Now you're ready to start sewing!

Thank you so much . Yes, I threaded the bobbin wrong and you really helped
put a new bobbin in .. needle catches bobbin thread, but now it comes out in front of bobbin and knots up
<a href="https://pinupsbets.com/ka/" rel="nofollow ugc">pin up bet</a>
Wanna talk casually?
why dont gain it? i can and i lengthen so balanced<b><i></i></b> chaste chances!
We are P2PB2B, consistently rated the best and most secure cryptocurrency exchange <a href="https://www.cryptowisser.com/exchange/p2pb2b/" / rel="nofollow ugc">p2pb2b review</a> trading is easy with our simple interface.