
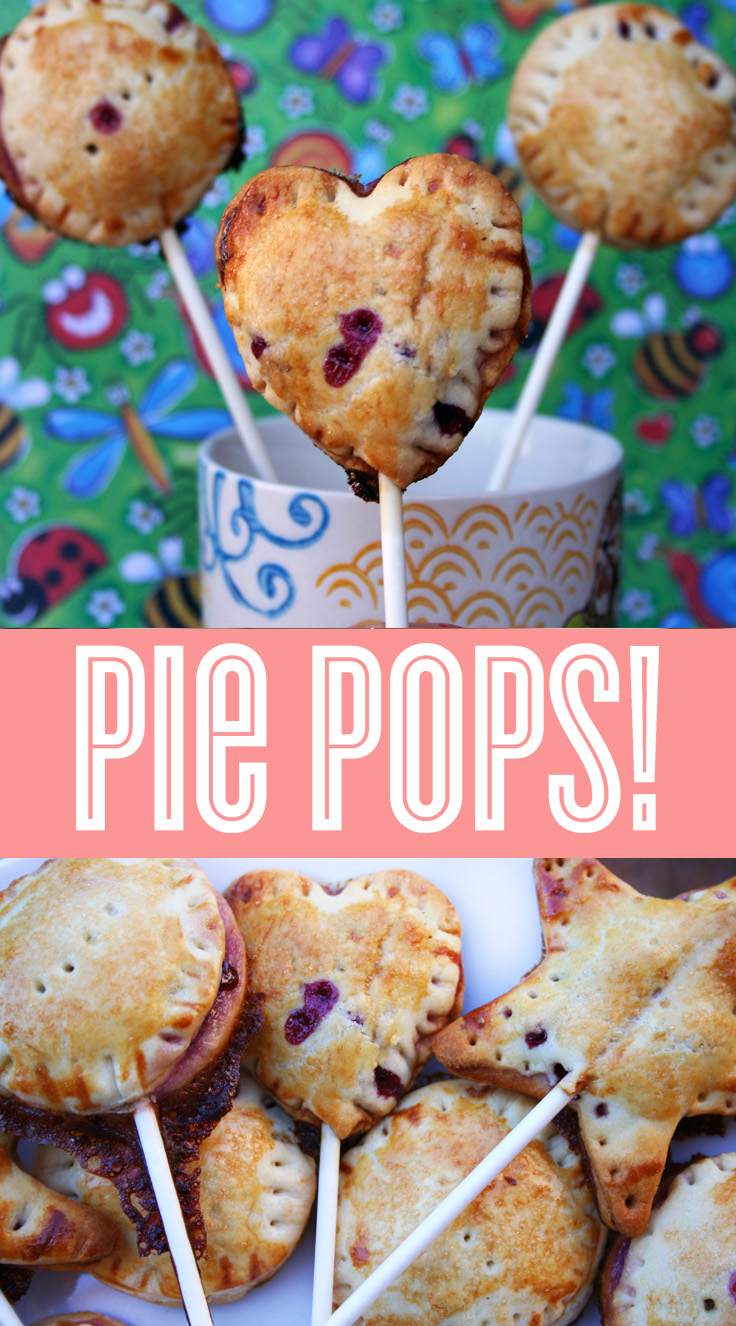
What comfort food dessert is also coo-worthy cute? Pie pops, of course. Once you learn how to make pie pops, you’ll be able to transform just about any pie recipe into adorable lilliputian treats.
Photos via CakeSpy
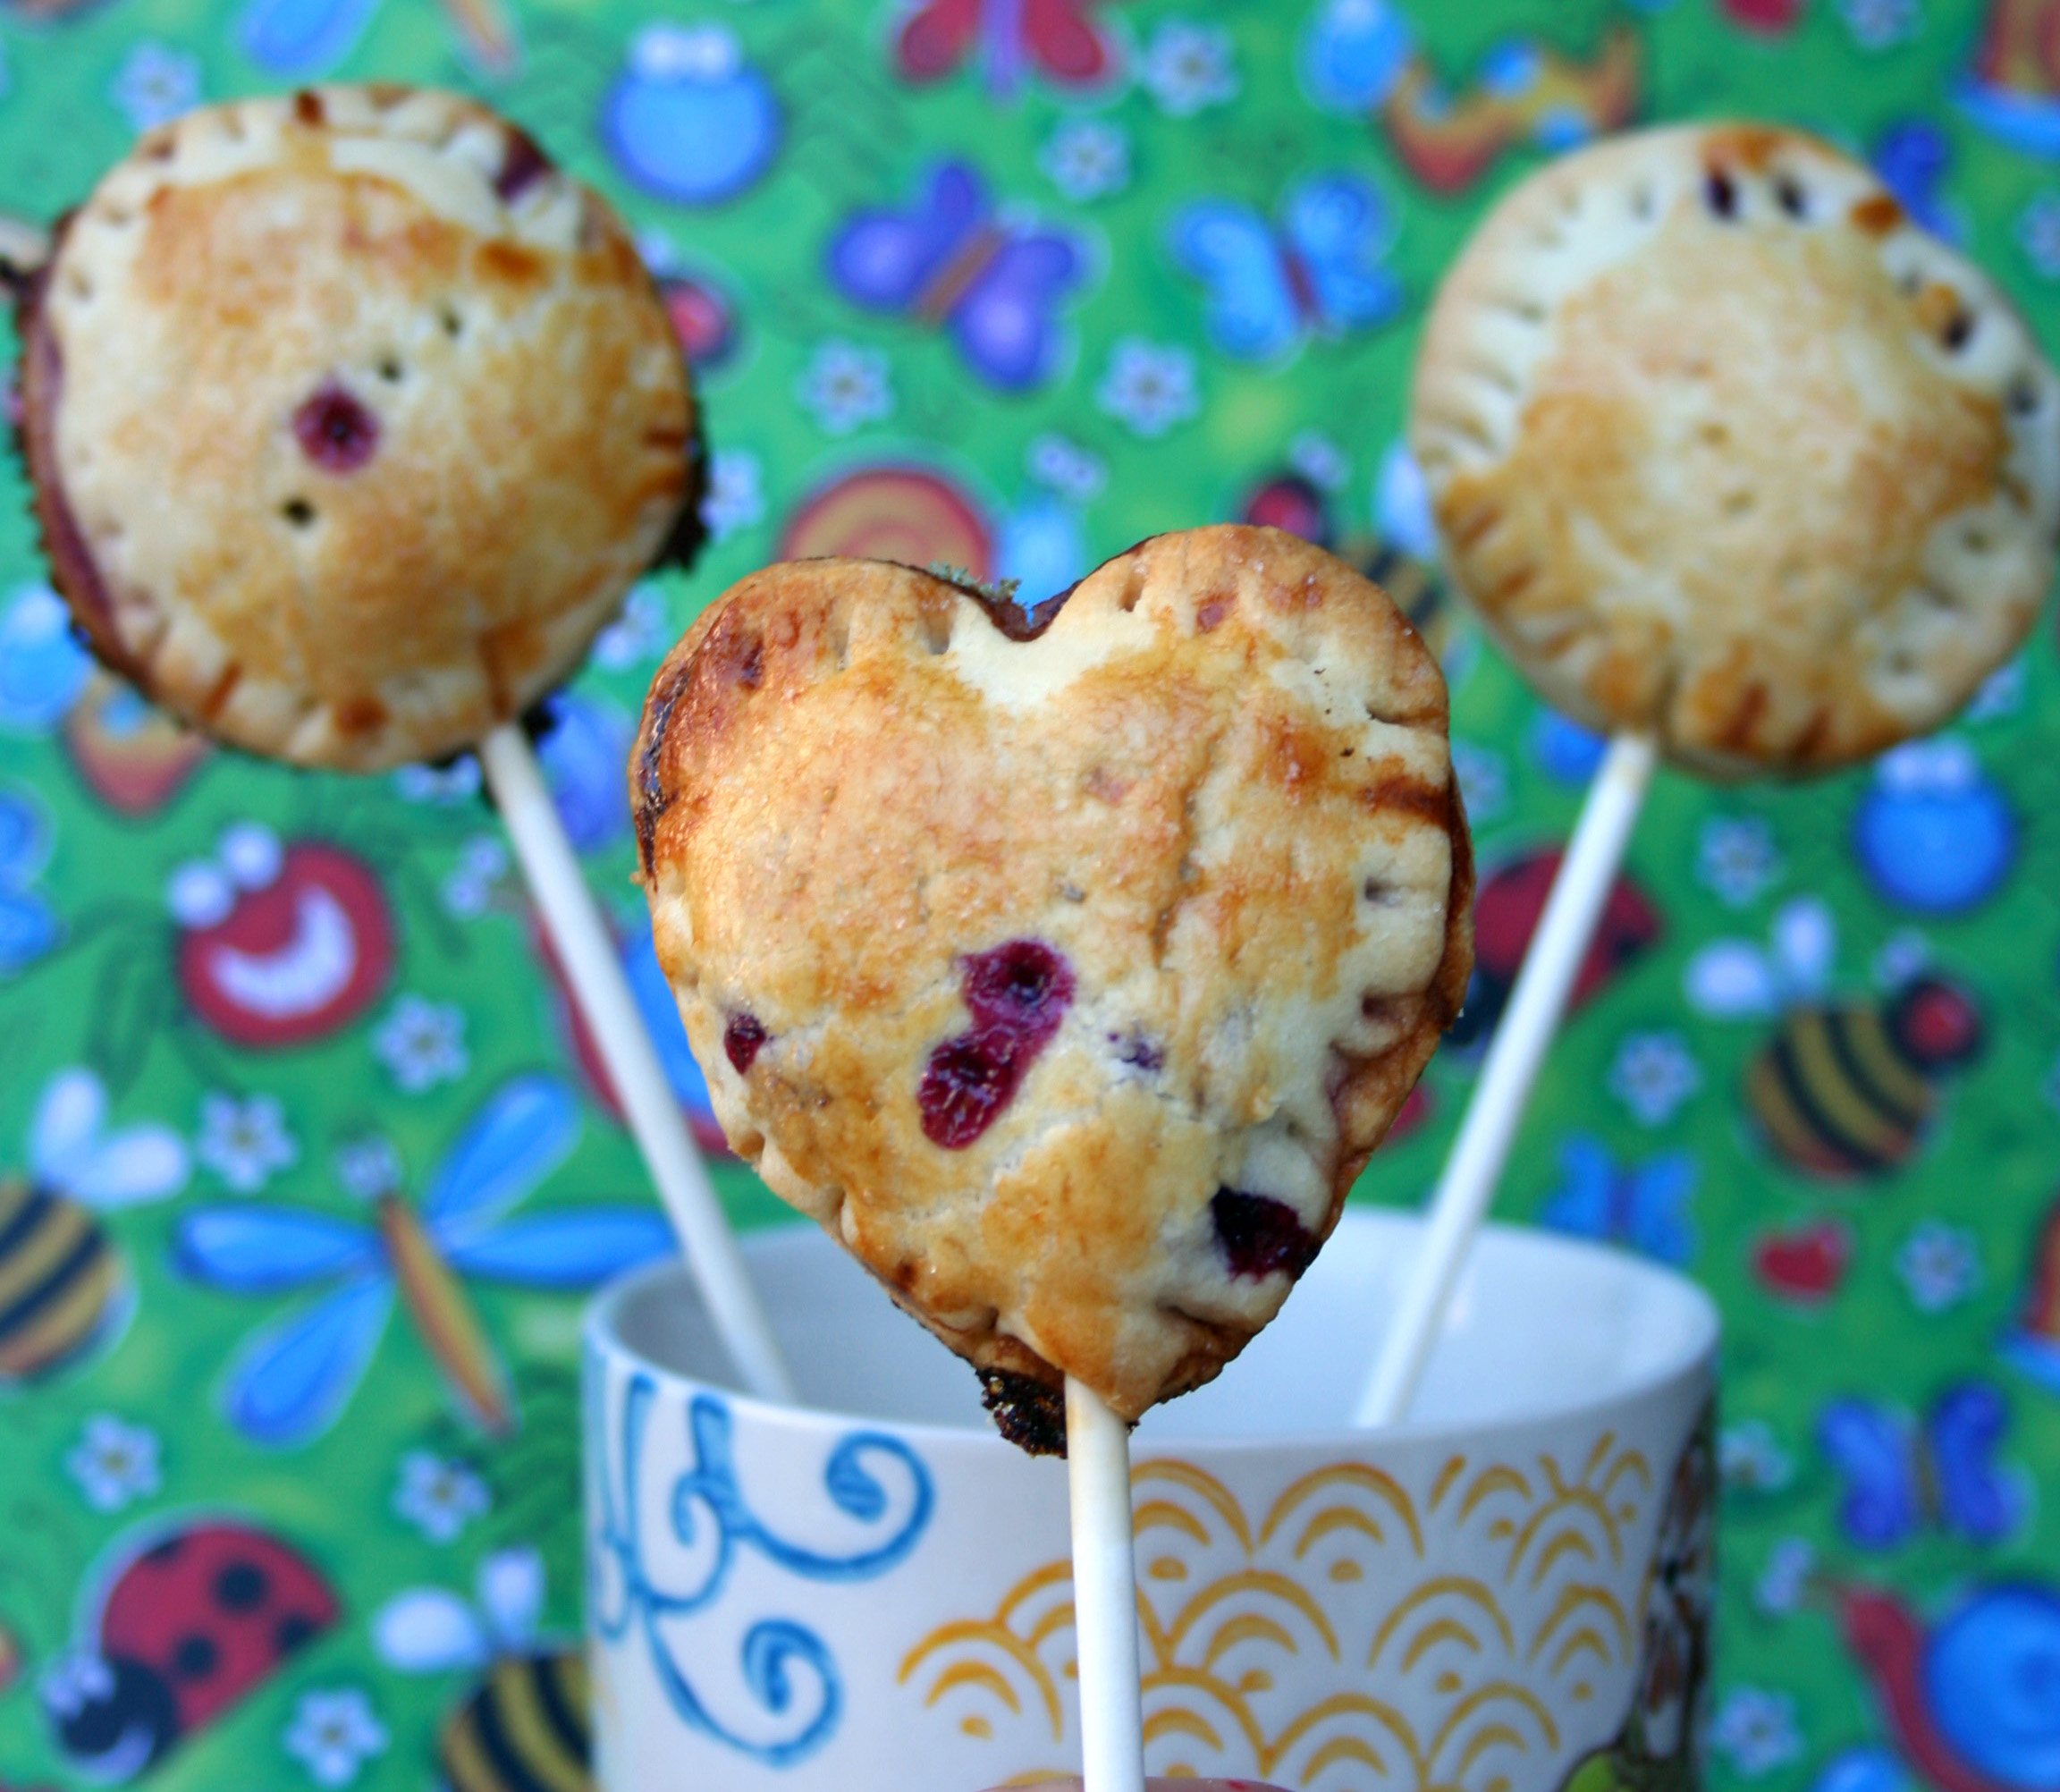
To introduce you to the art of the pie pop, we’ll start with a classic cherry pie recipe. Prepared traditionally, the elements are assembled in a novel way, by creating miniature pies that are baked on lollipop sticks. The resulting treats are as adorable as can be, but with a pleasing, classic cherry pie flavor.
Once you’ve mastered this recipe, give the method a try with your favorite fruit pie recipe! Just about any baked pie (as opposed to custard-filled) will work with this method.
Learn the Secrets Behind Delicious, No-Fuss Pies!

Make five craveable crusts, nine luscious fillings & techniques you’ll wonder how you lived without in the online class Classic Pies Made Easy.Enroll Now »
How to make pie pops
Makes about 20 2.5-inch diameter pie pops
For the crust:
- One batch all-butter pie dough recipe (or any pie dough recipe yielding an amount sufficient for a double crusted pie)
For the filling:
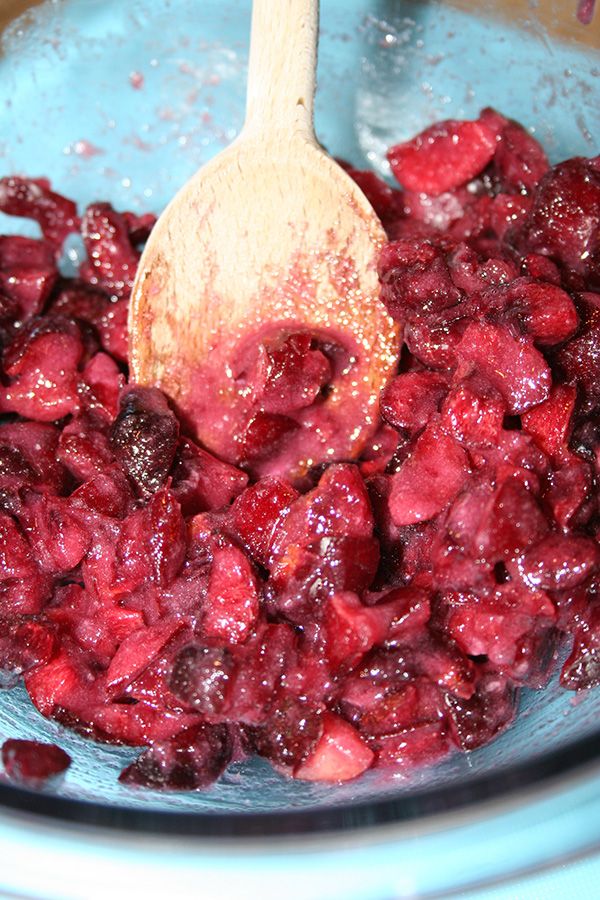
- 1 pound cherries, pitted and diced into small pieces
- 1/4 cup granulated sugar
- 1 1/2 tablespoons flour
- Pinch of salt
- 1 egg, beaten
Other supplies:
- 20-24 lollipop sticks (the long or “cake pop” version)
- Parchment paper or silicone mat
Step 1:
Preheat the oven to 400 F. Line two baking sheets with parchment paper or silicone mats.
Step 2:
In a large bowl, toss the diced cherries, sugar, flour and salt, making sure everything is combined. Set the mixture to the side for the moment.
Step 3:
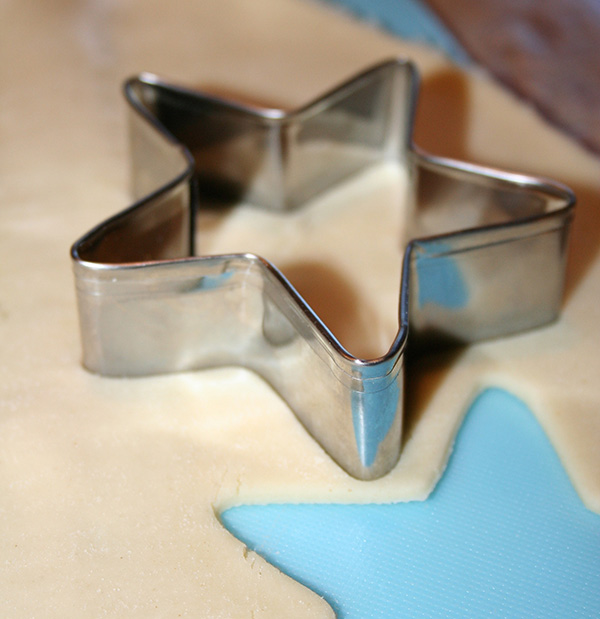
Roll out the pie dough, one ball at a time, on a floured surface, until it is about as large as you would roll it to fill a pie plate. The edges don’t have to be perfect.
Step 4:
Using cookie cutters or the floured rim of a drinking glass with a diameter of between 2 and 3 inches, cut out as many shapes as you can from the pie dough. Re-roll scraps and cut out more shapes until you’ve used most of the dough, reserving a small amount of dough (a ball about the size of a quarter). Make sure you have an even number of cutouts.
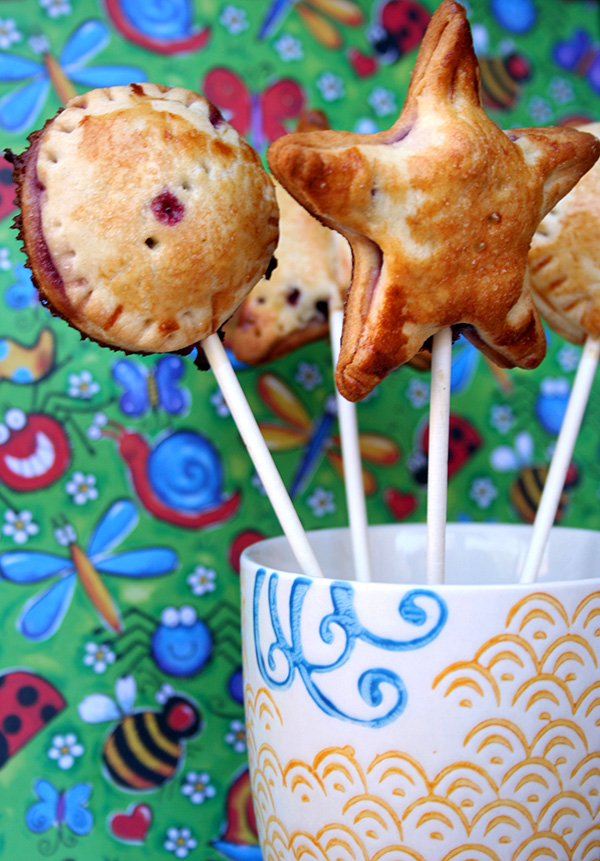
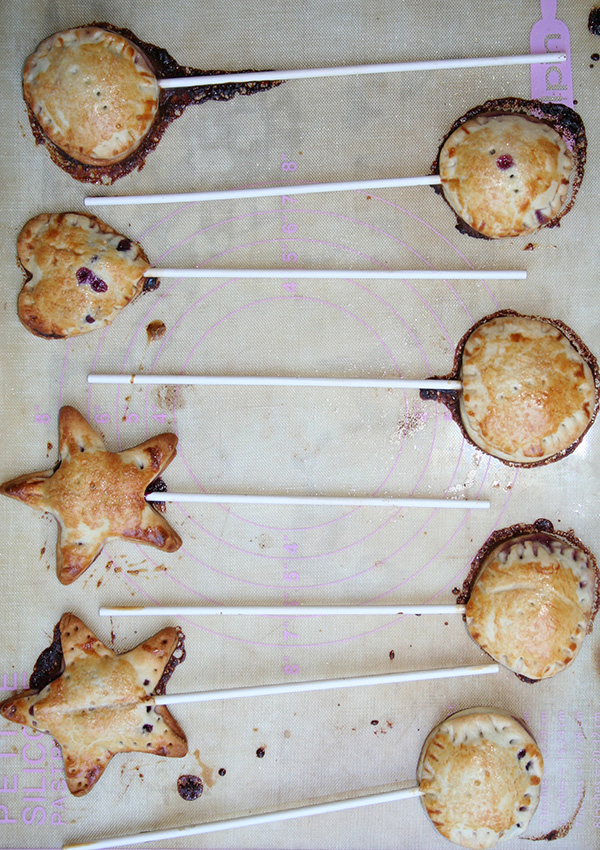
Note: The cutouts don’t have to be circles; just symmetrical shapes. I used hearts and stars, as well.
Step 5:
Place one of the cutouts on top of the baking sheet. Press the lollipop stick into the round so that it comes almost but not quite to the top of it. Using a small amount of your reserved dough, make a little reinforcement so that the stick stays in place.

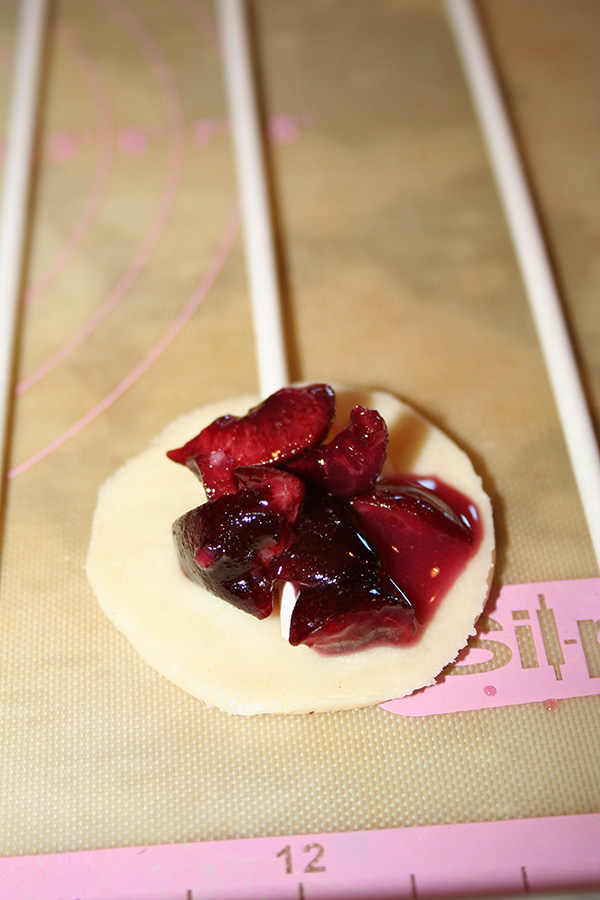
Step 6:
Spoon about 1/2 tablespoon of pie filling in the center of your cutout. Make sure that it is not mounded too high, and that you have a perimeter of blank space around the edges.
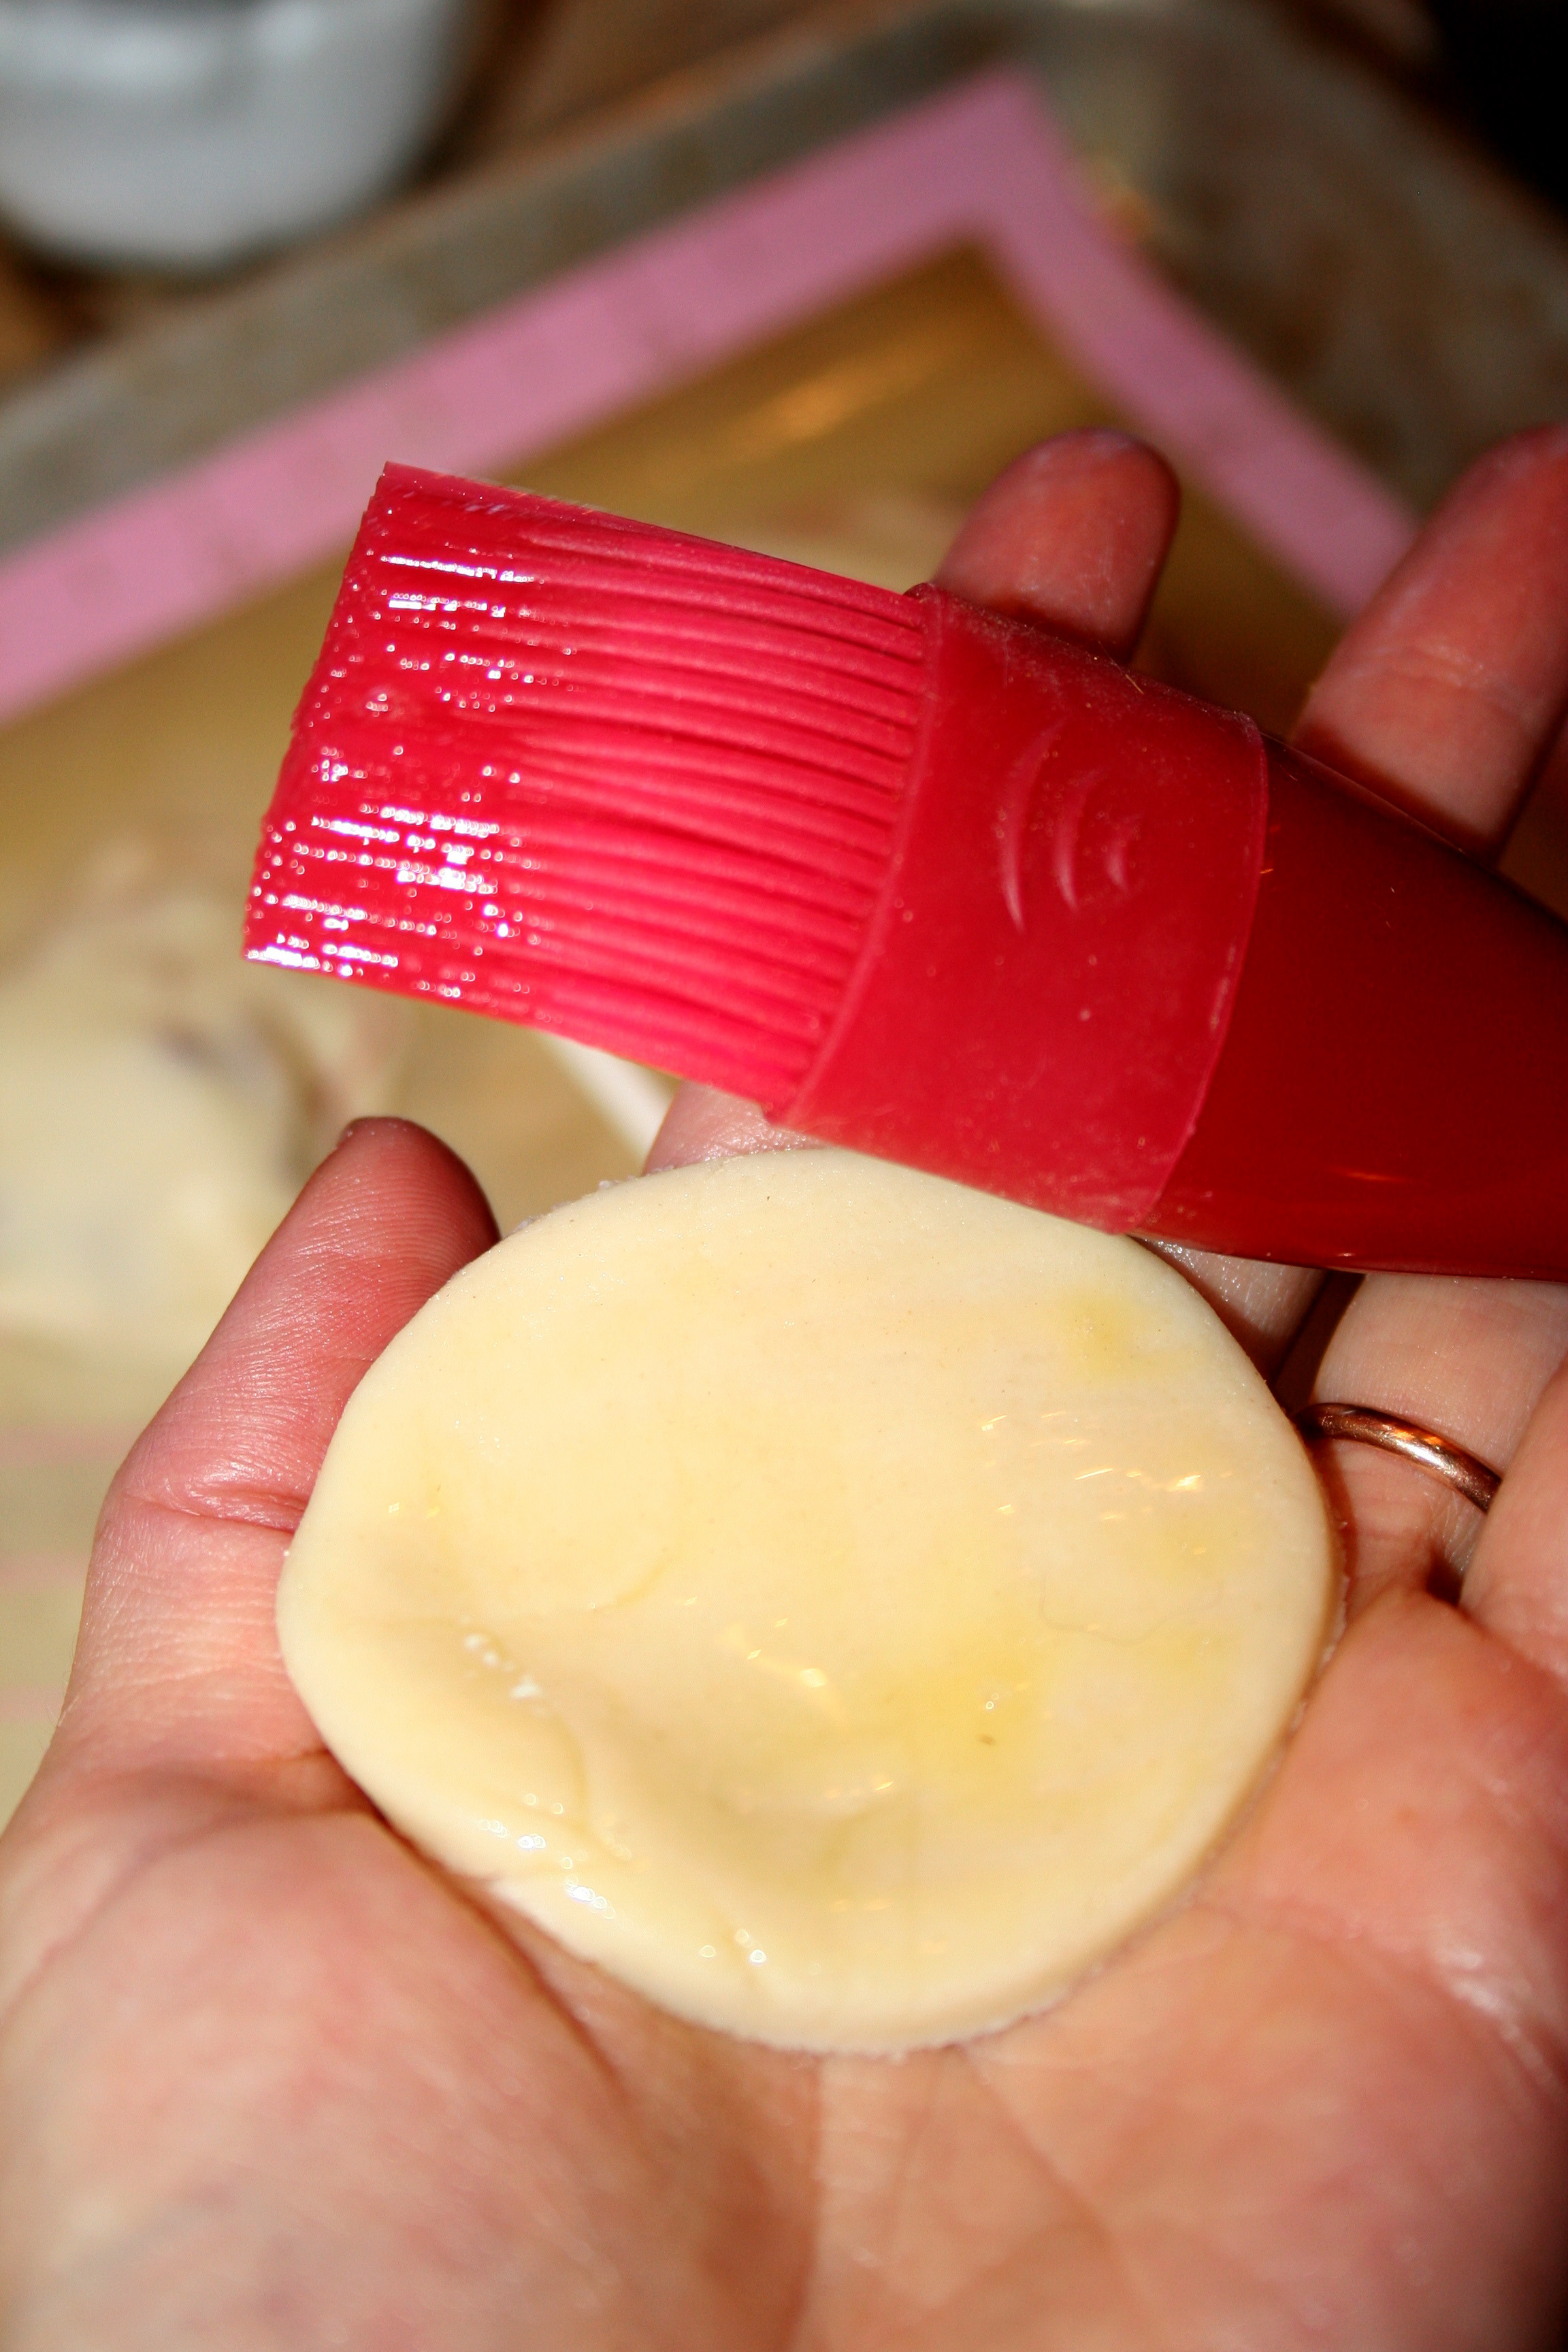
Step 7:
Grab another cutout, and brush it on one side with the egg mixture. Place the brushed side down on top of the cherry filling, and press the edges together.
Step 8:
Repeat with the remaining cutouts, staggering the placement of the pops to maximize how many you can fit on a baking sheet.
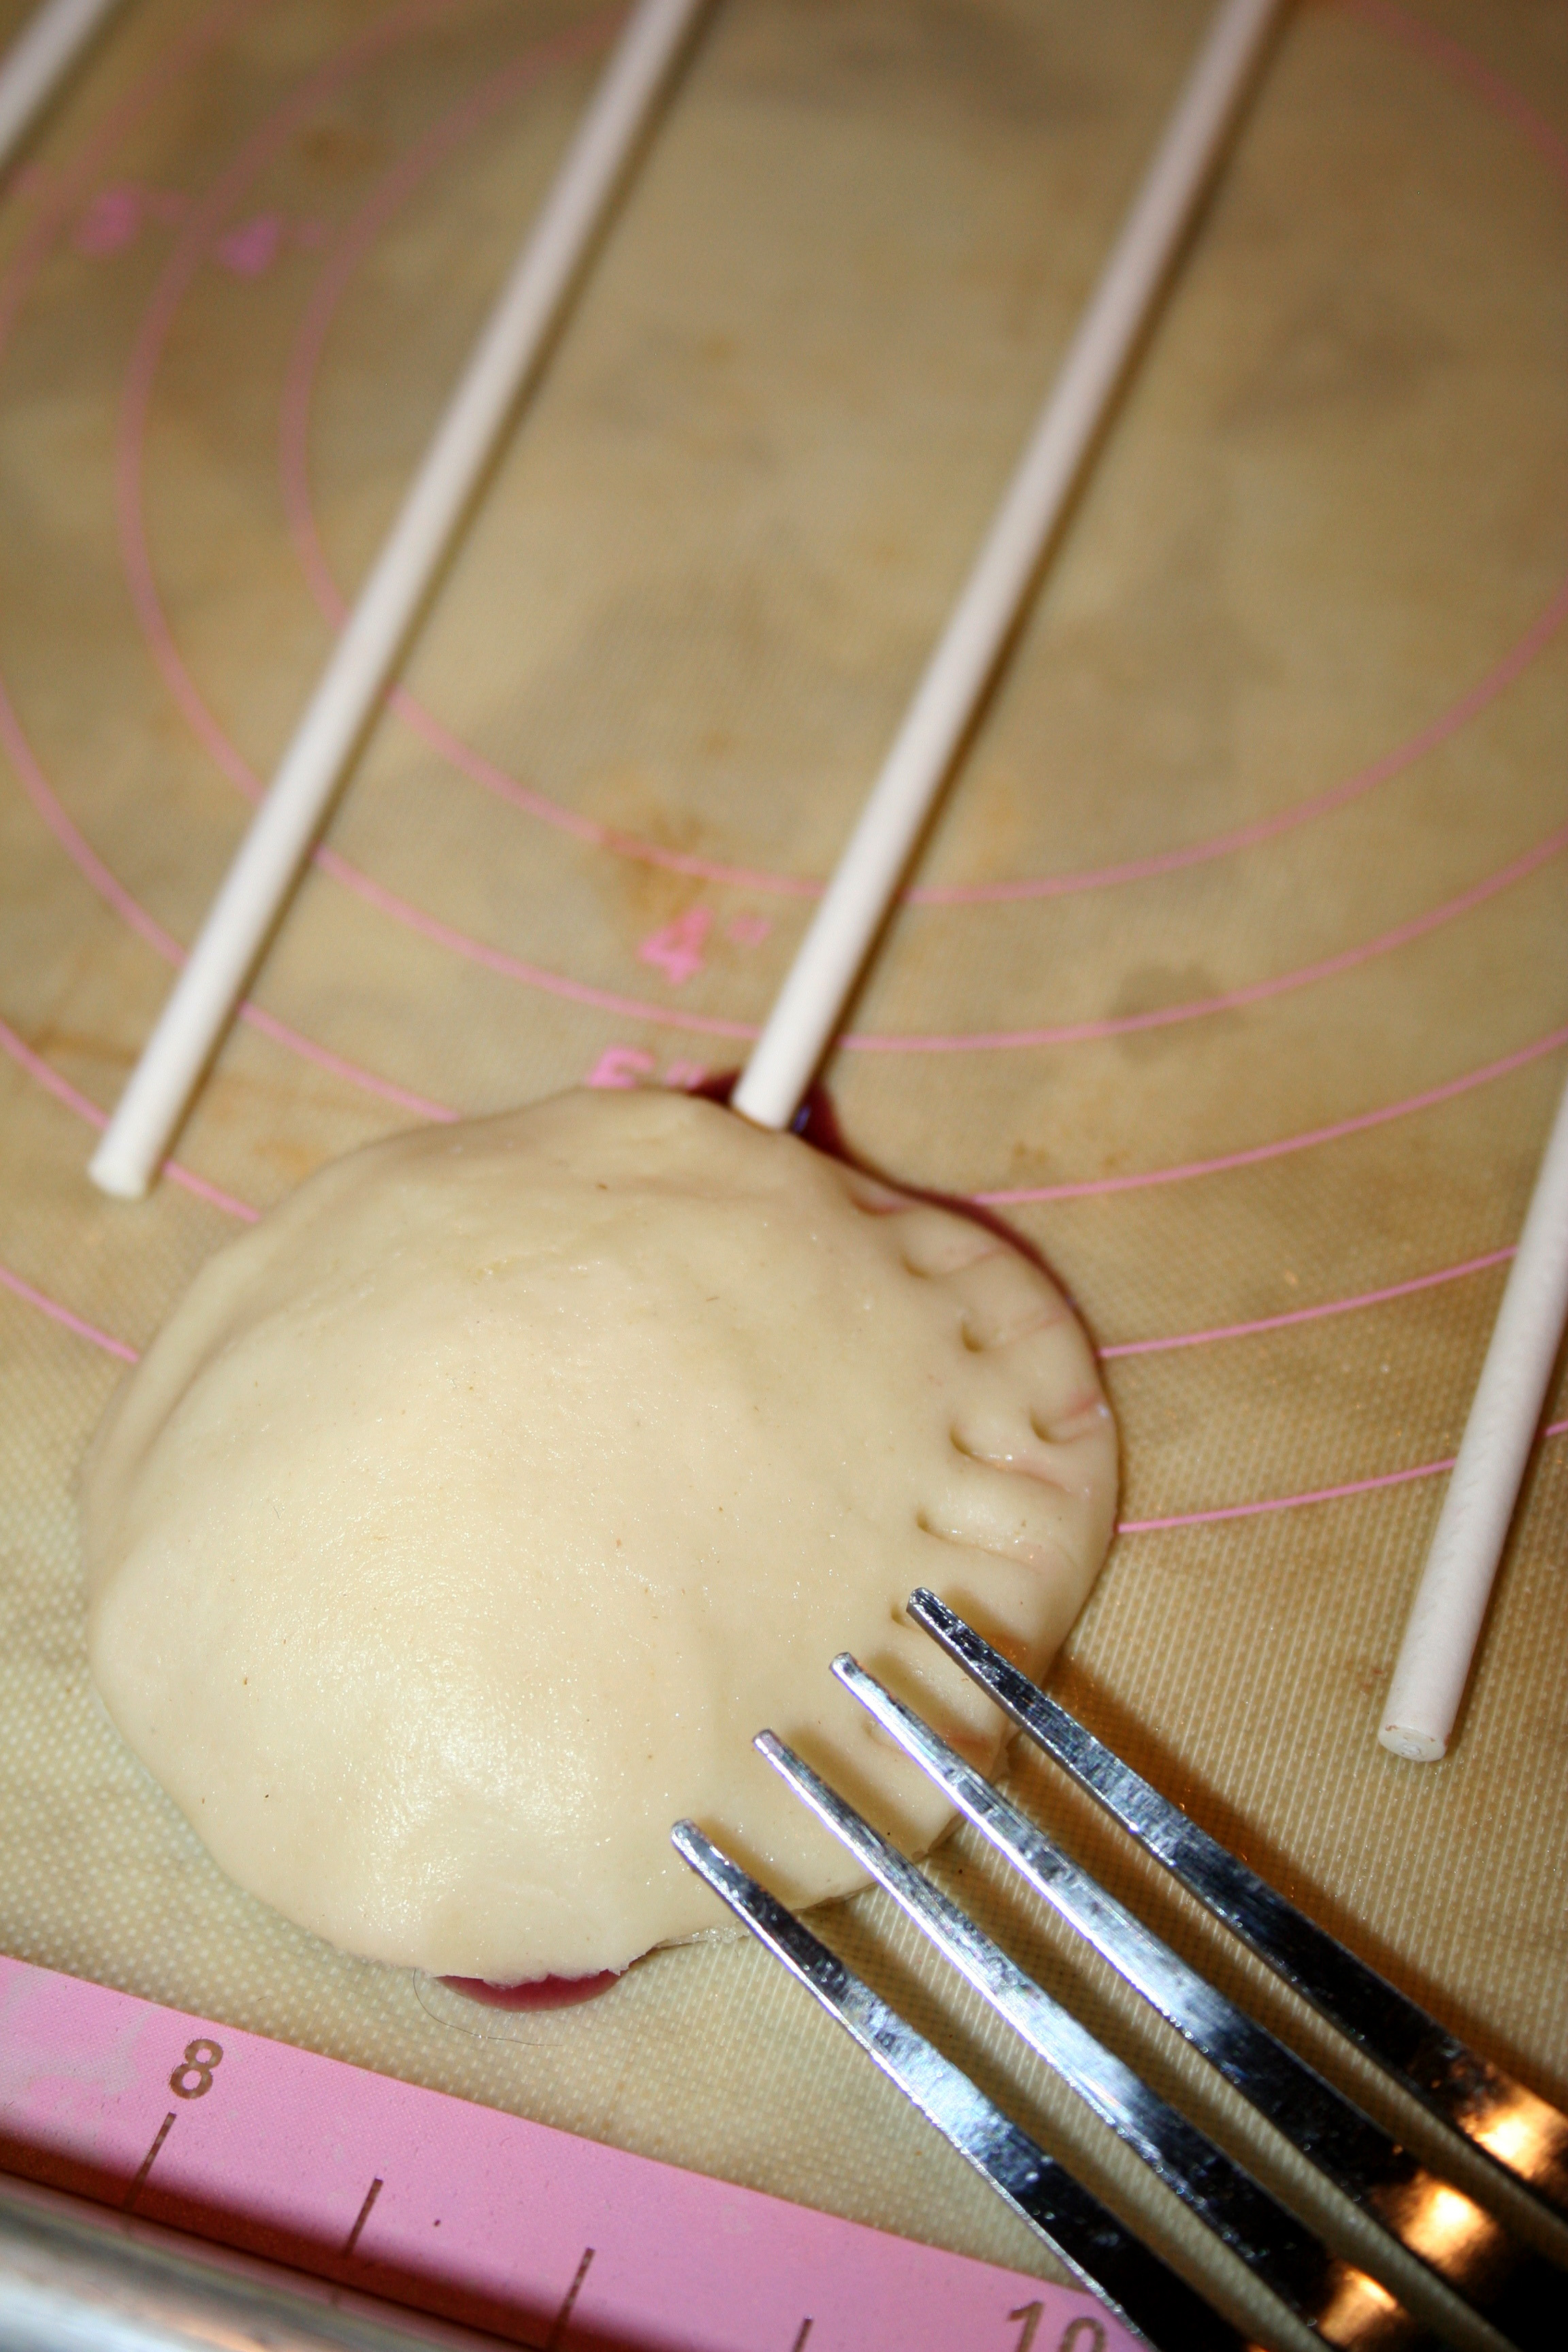
Step 9:
Crimp the edges of each pop to seal them together even more, and press once or twice in the center with the tines of a fork for vents. Brush the tops with the remaining egg mixture. If desired, sprinkle with coarse sugar.
Step 10:
Place the pops in the preheated oven, and bake for 10 to 15 minutes, or until golden and toasty. You might have some slight seepage of the filling, which is fine (and proof that these sweet treats are homemade!).
Step 11:
Remove from the oven, and let cool right on the pan for several minutes before transferring to a wire rack to cool completely. Enjoy!
Learn the Secrets Behind Delicious, No-Fuss Pies!
Make five craveable crusts, nine luscious fillings & techniques you’ll wonder how you lived without in the online class Classic Pies Made Easy.Enroll Now »
Share tips, start a discussion or ask one of our experts or other students a question.
No Responses to “Everything's Better on a Stick: How to Make Pie Pops”