
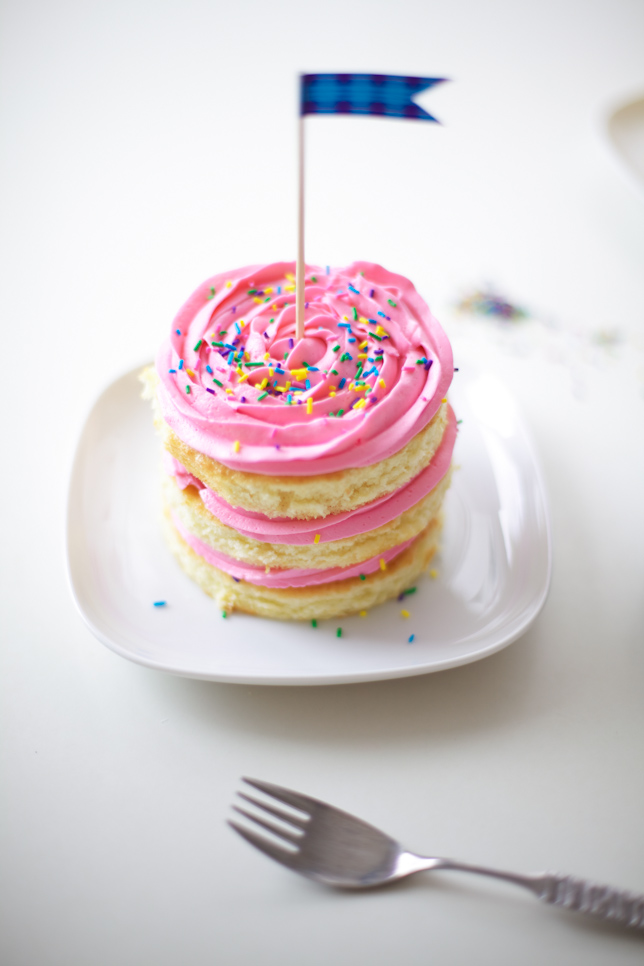
Miniaturize anything and it instantly becomes extra appealing — mini cupcakes, mini doughnuts — and now mini cakes! It’s like a magic wand has shrunken down a perfectly pretty layer cake into the perfect serving size. If you’ve ever wondered how to make mini cakes, these pink rosette mini cakes are so sweet and simple to create.
Photos by Lyndsay Sung of Coco Cake Land
Make a mini-cake that’s small on size but big on presentation with this adorable step-by-step tutorial!
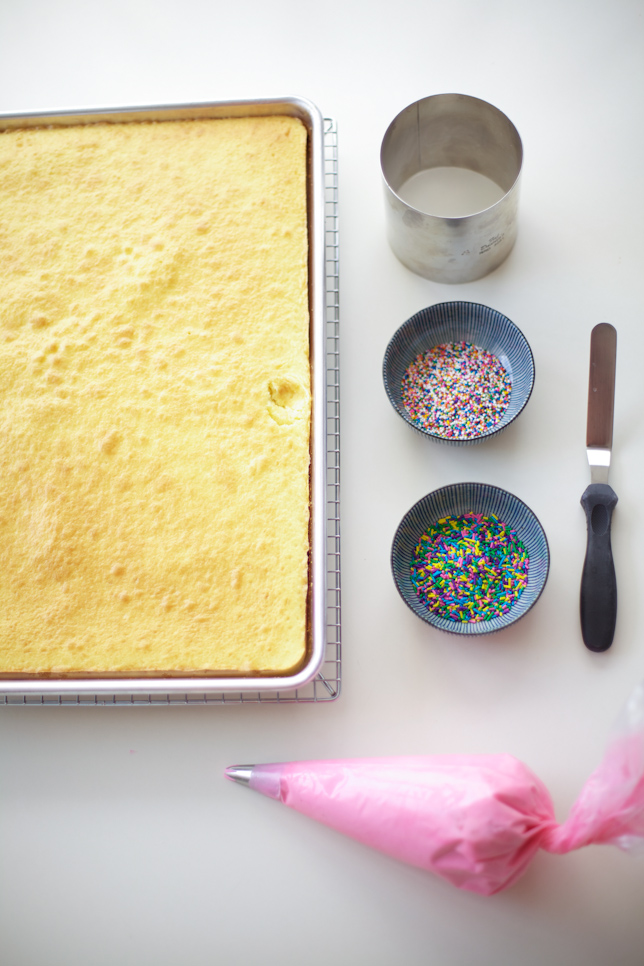
You will need:
- A recipe for buttermilk cake (or cake flavor of your choice)
- 1 baking sheet with raised sides (also known as the jelly roll pan)
- A circle cake ring – I used a 3 inch circle which yielded 4 mini cakes
- 3 cups of vanilla buttercream tinted pink (I used neon pink gel color)
- A piping bag fitted with an open star tip – I used Wilton 1M Sprinkles of your choice
Step one:
Grease and flour your baking sheet. Make cake batter according to recipe instructions; pour onto baking sheet, spreading with an offset spatula to make an even layer of batter. Bake and cool completely.
Step two:
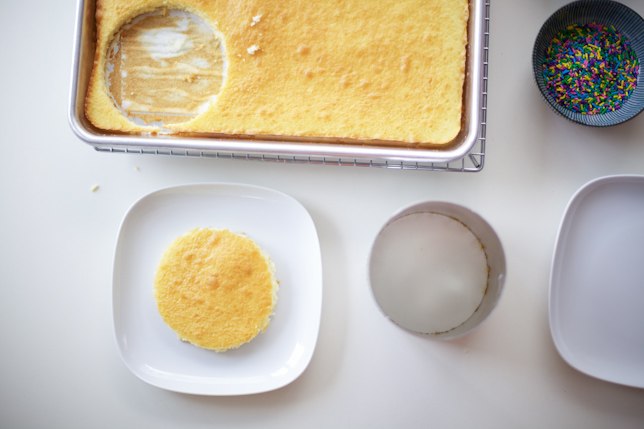
Using the cake ring, cut out the first layer of cake and place it on a small plate or cake board. Alternately, you could make all of the mini cakes side by side on a tray.
Step three:
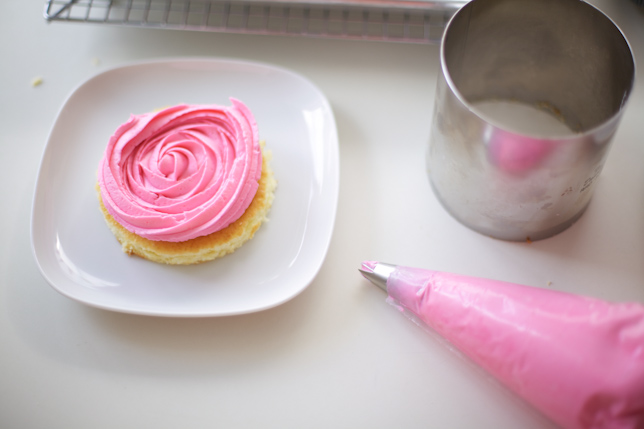
Fill your piping bag fitted with the open star tip with the pink vanilla buttercream. Starting from the center of the cake and going counter-clockwise, pipe a layer of buttercream.
Step four:
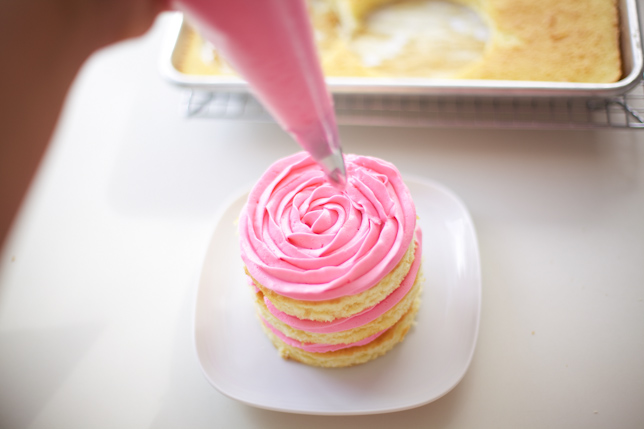
Cut out another round of cake, placing it on top of the first layer. Press down slightly to adhere the layer. Repeat the process: pipe another layer, then place the third cake layer on top. Finally, add a pink rosette to the top layer!

Step five:
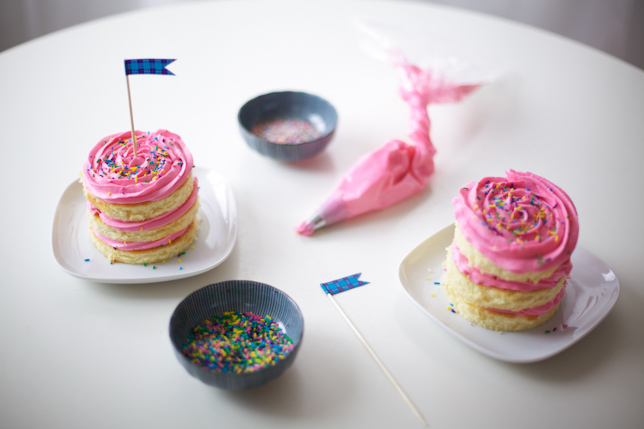
Add a dash of rainbow sprinkles for extra colour and a fun, festive feel!
Step six:
Continue building your mini cakes using the same simple method – cut out the cake round, pipe, stack and pipe some more!
Finish off your mini cake with a washi tape (Japanese masking tape) or simple ribbon cake flag for extra cuteness!

Share tips, start a discussion or ask one of our experts or other students a question.
No Responses to “Miniaturize This: How To Make Adorable Mini Cakes”