
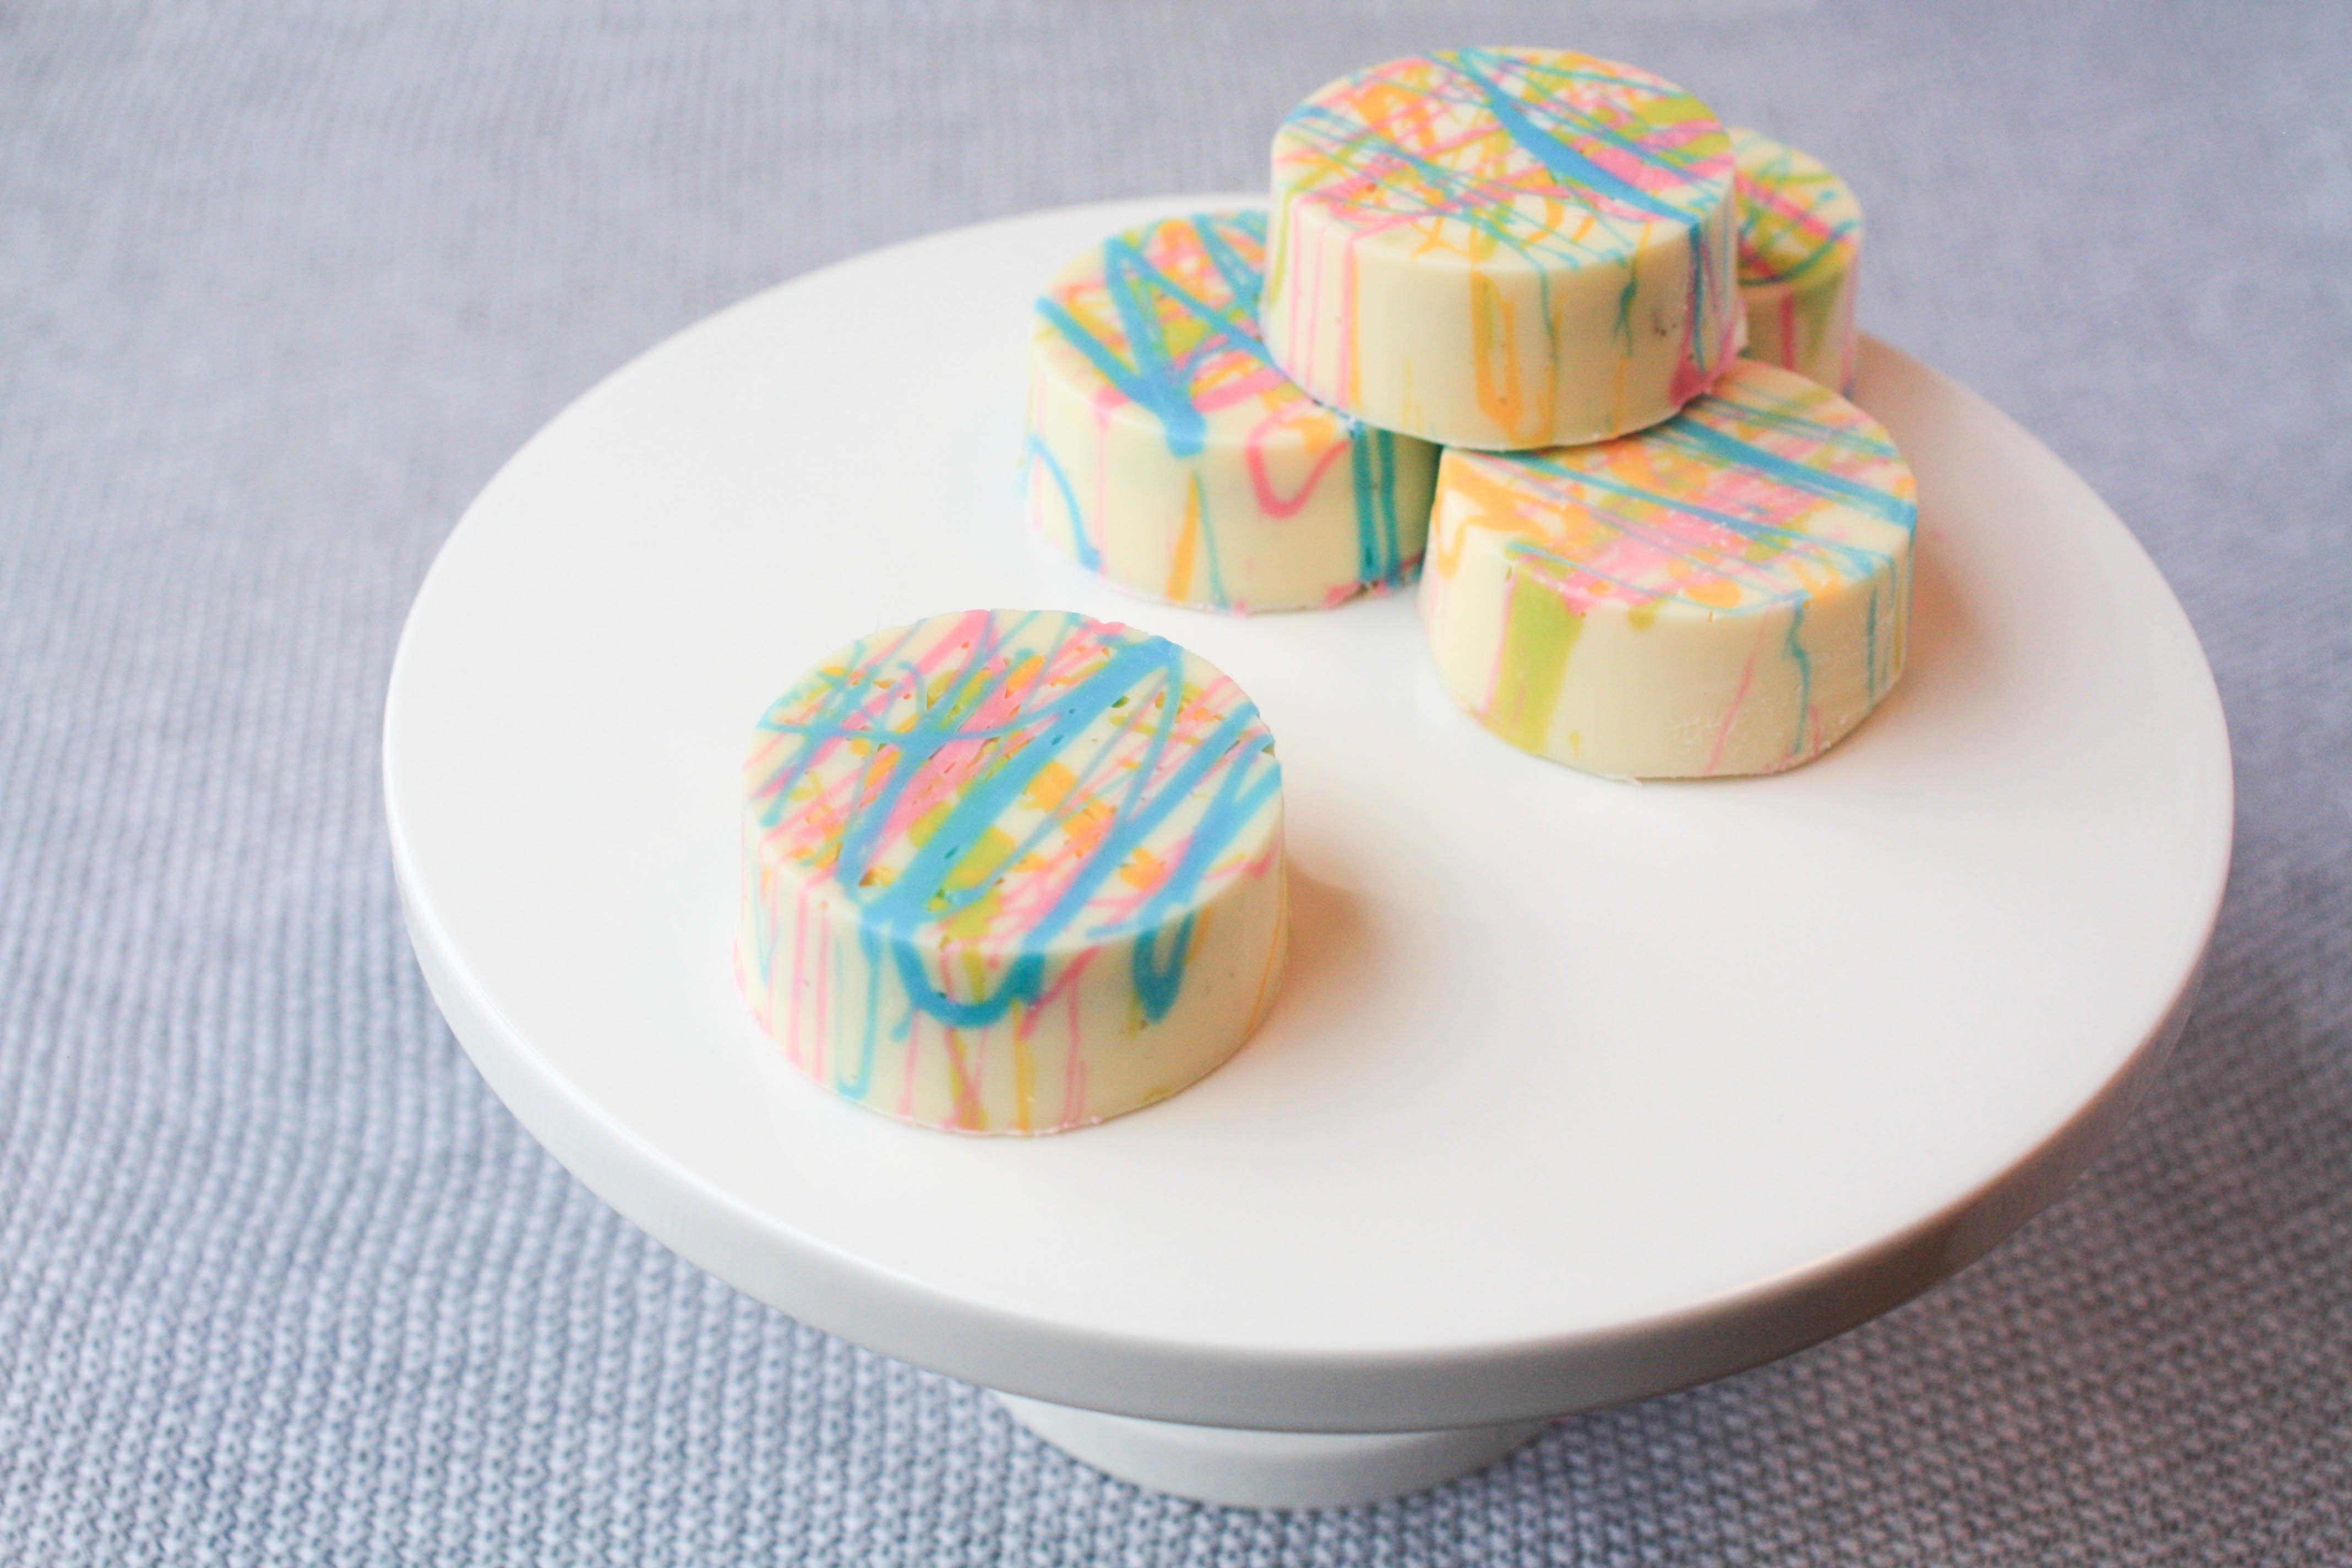
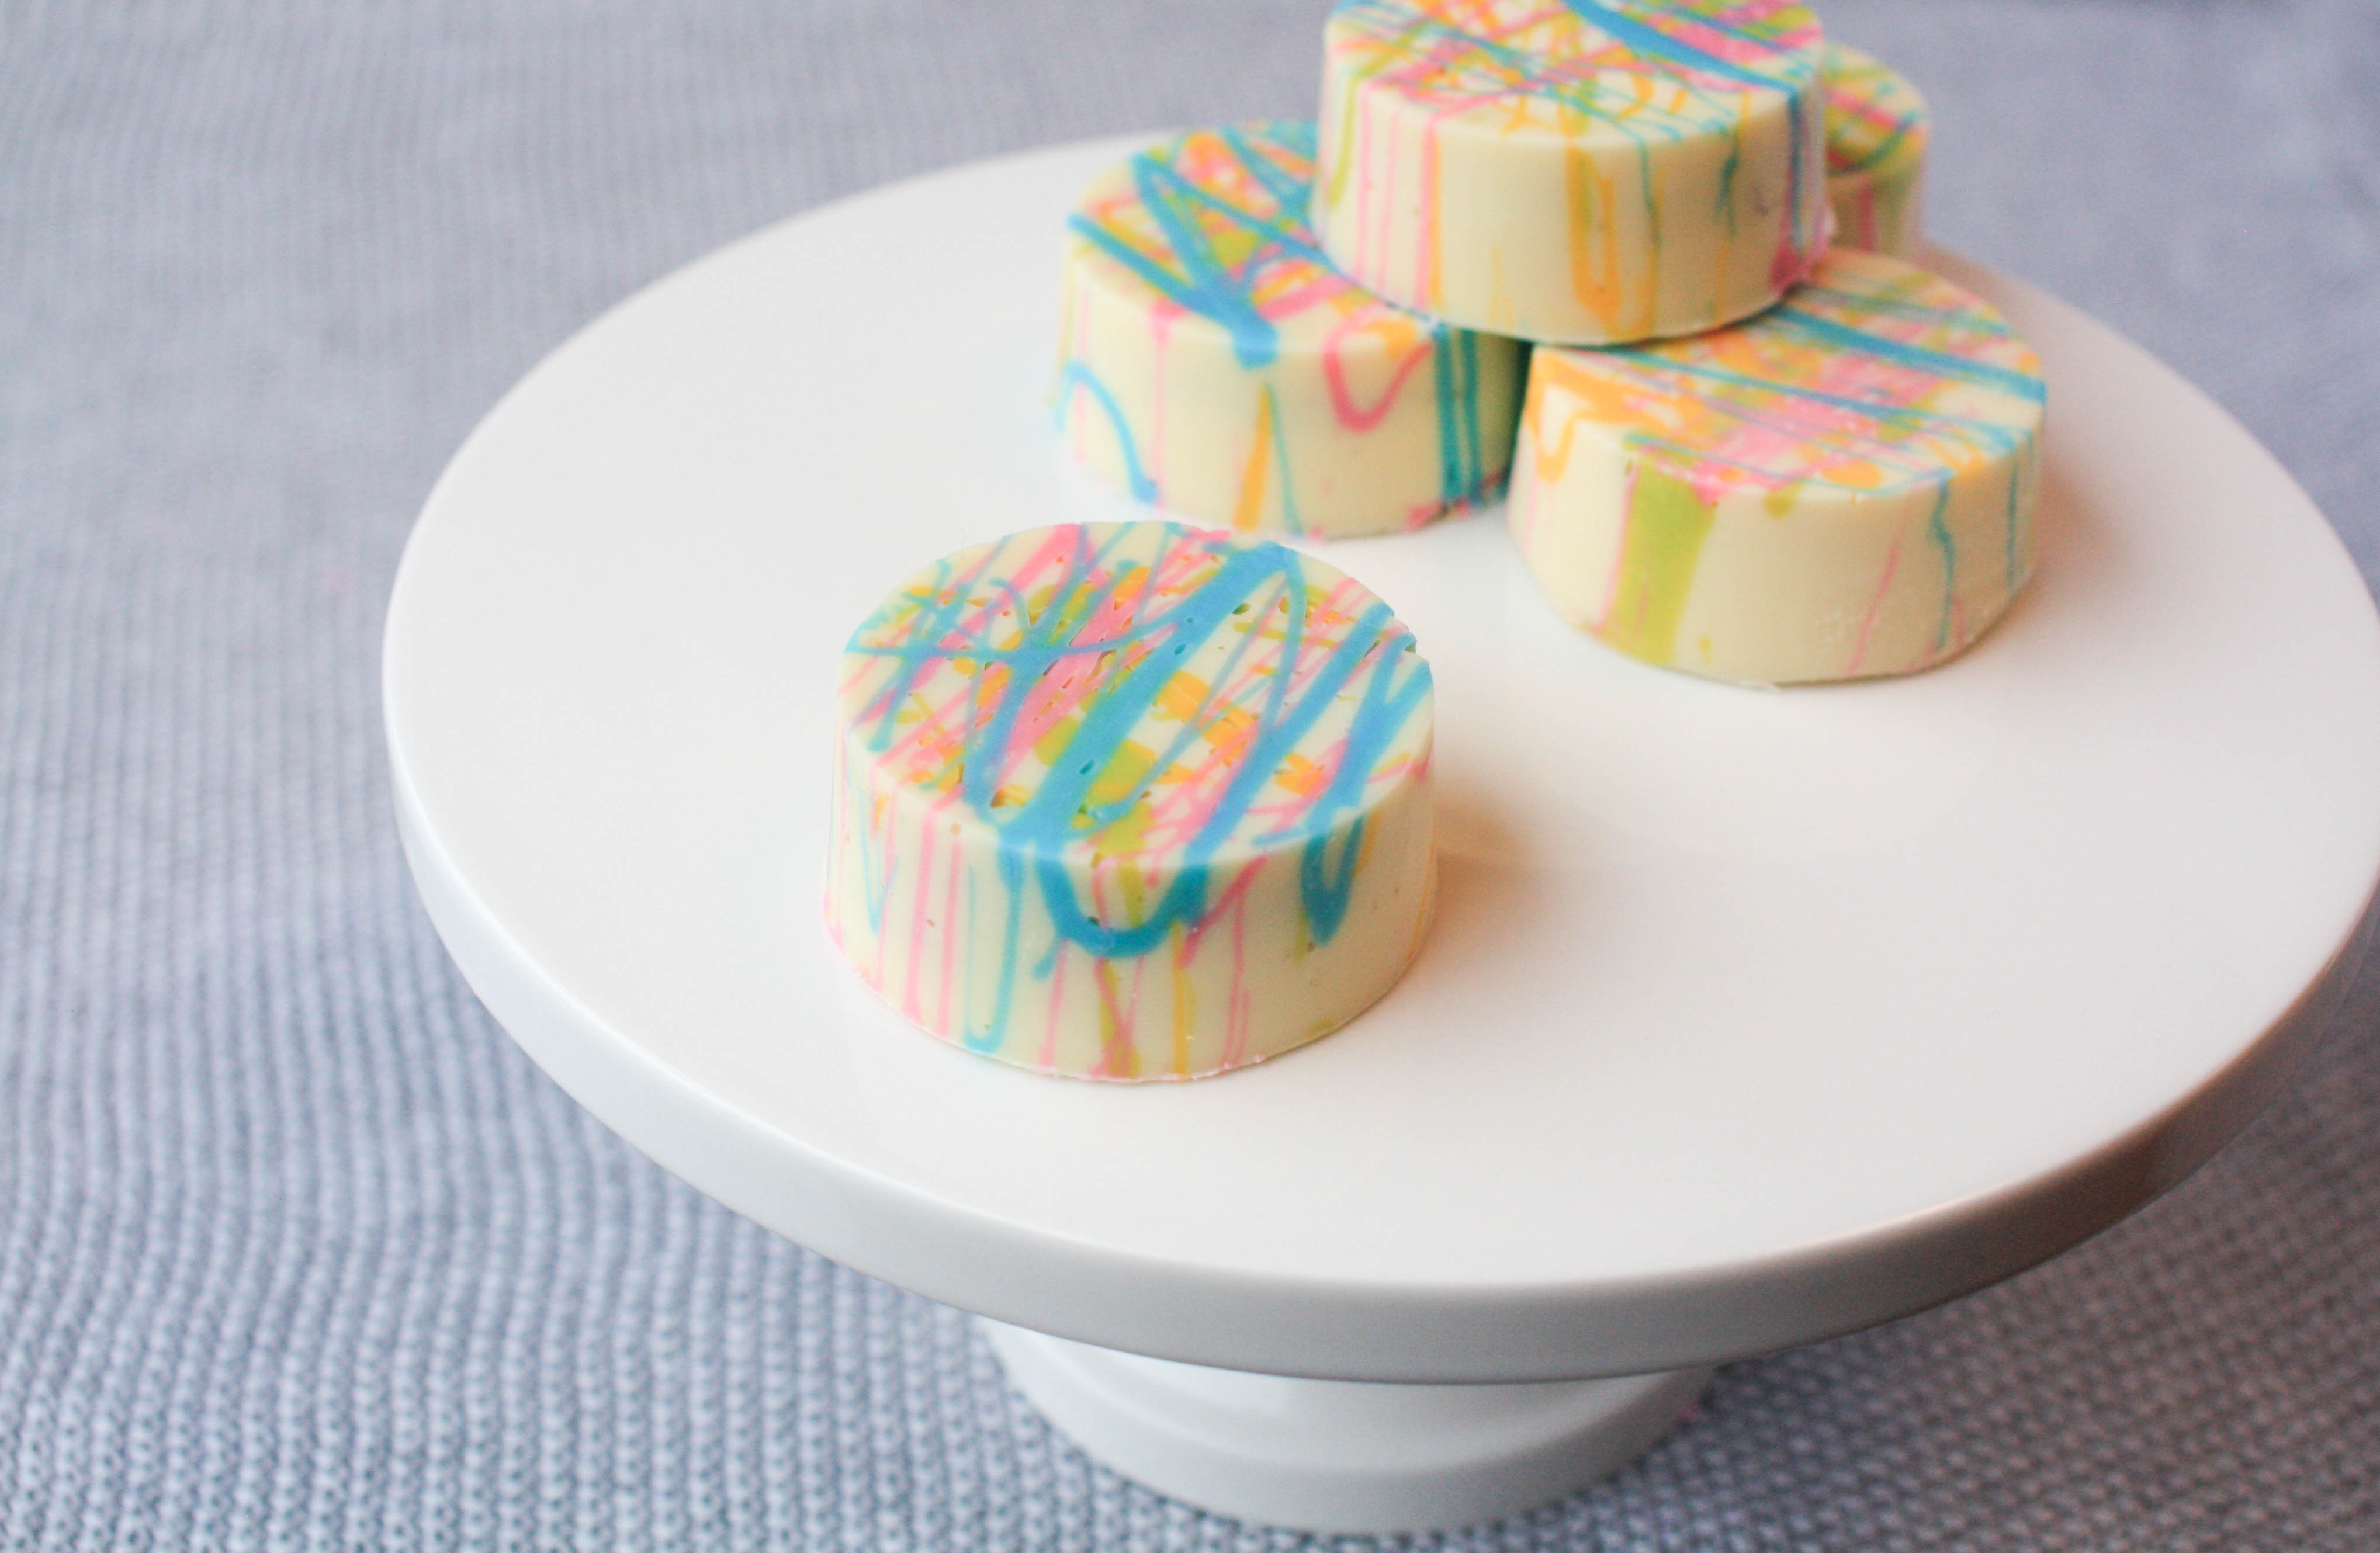
Chocolate covered Oreos are more than just a double dip of awesomeness, they’re also a fun and trendy way to dress up a dessert buffet. Their smooth sleek surface creates the perfect little canvas to add more color and design to your sweet spread.
I used Double Stuf Oreos in this project, but you can use whichever variety is your favorite. While you’re at it, feel free to think beyond the Oreo and use other kinds of cookies entirely. Chocolate chip and sugar cookies, cut to size, would work just as well.
All photos via Erin Bakes
How to make chocolate covered Oreos using a mold
Supplies:
- Chocolate mold
- Piping bag (or squeeze bottle)
- Heatproof bowls
- Small icing spatula
- Offset spatula
- Candy Melts in a variety of colors (or colored cocoa butters)
- White chocolate

Step 1:
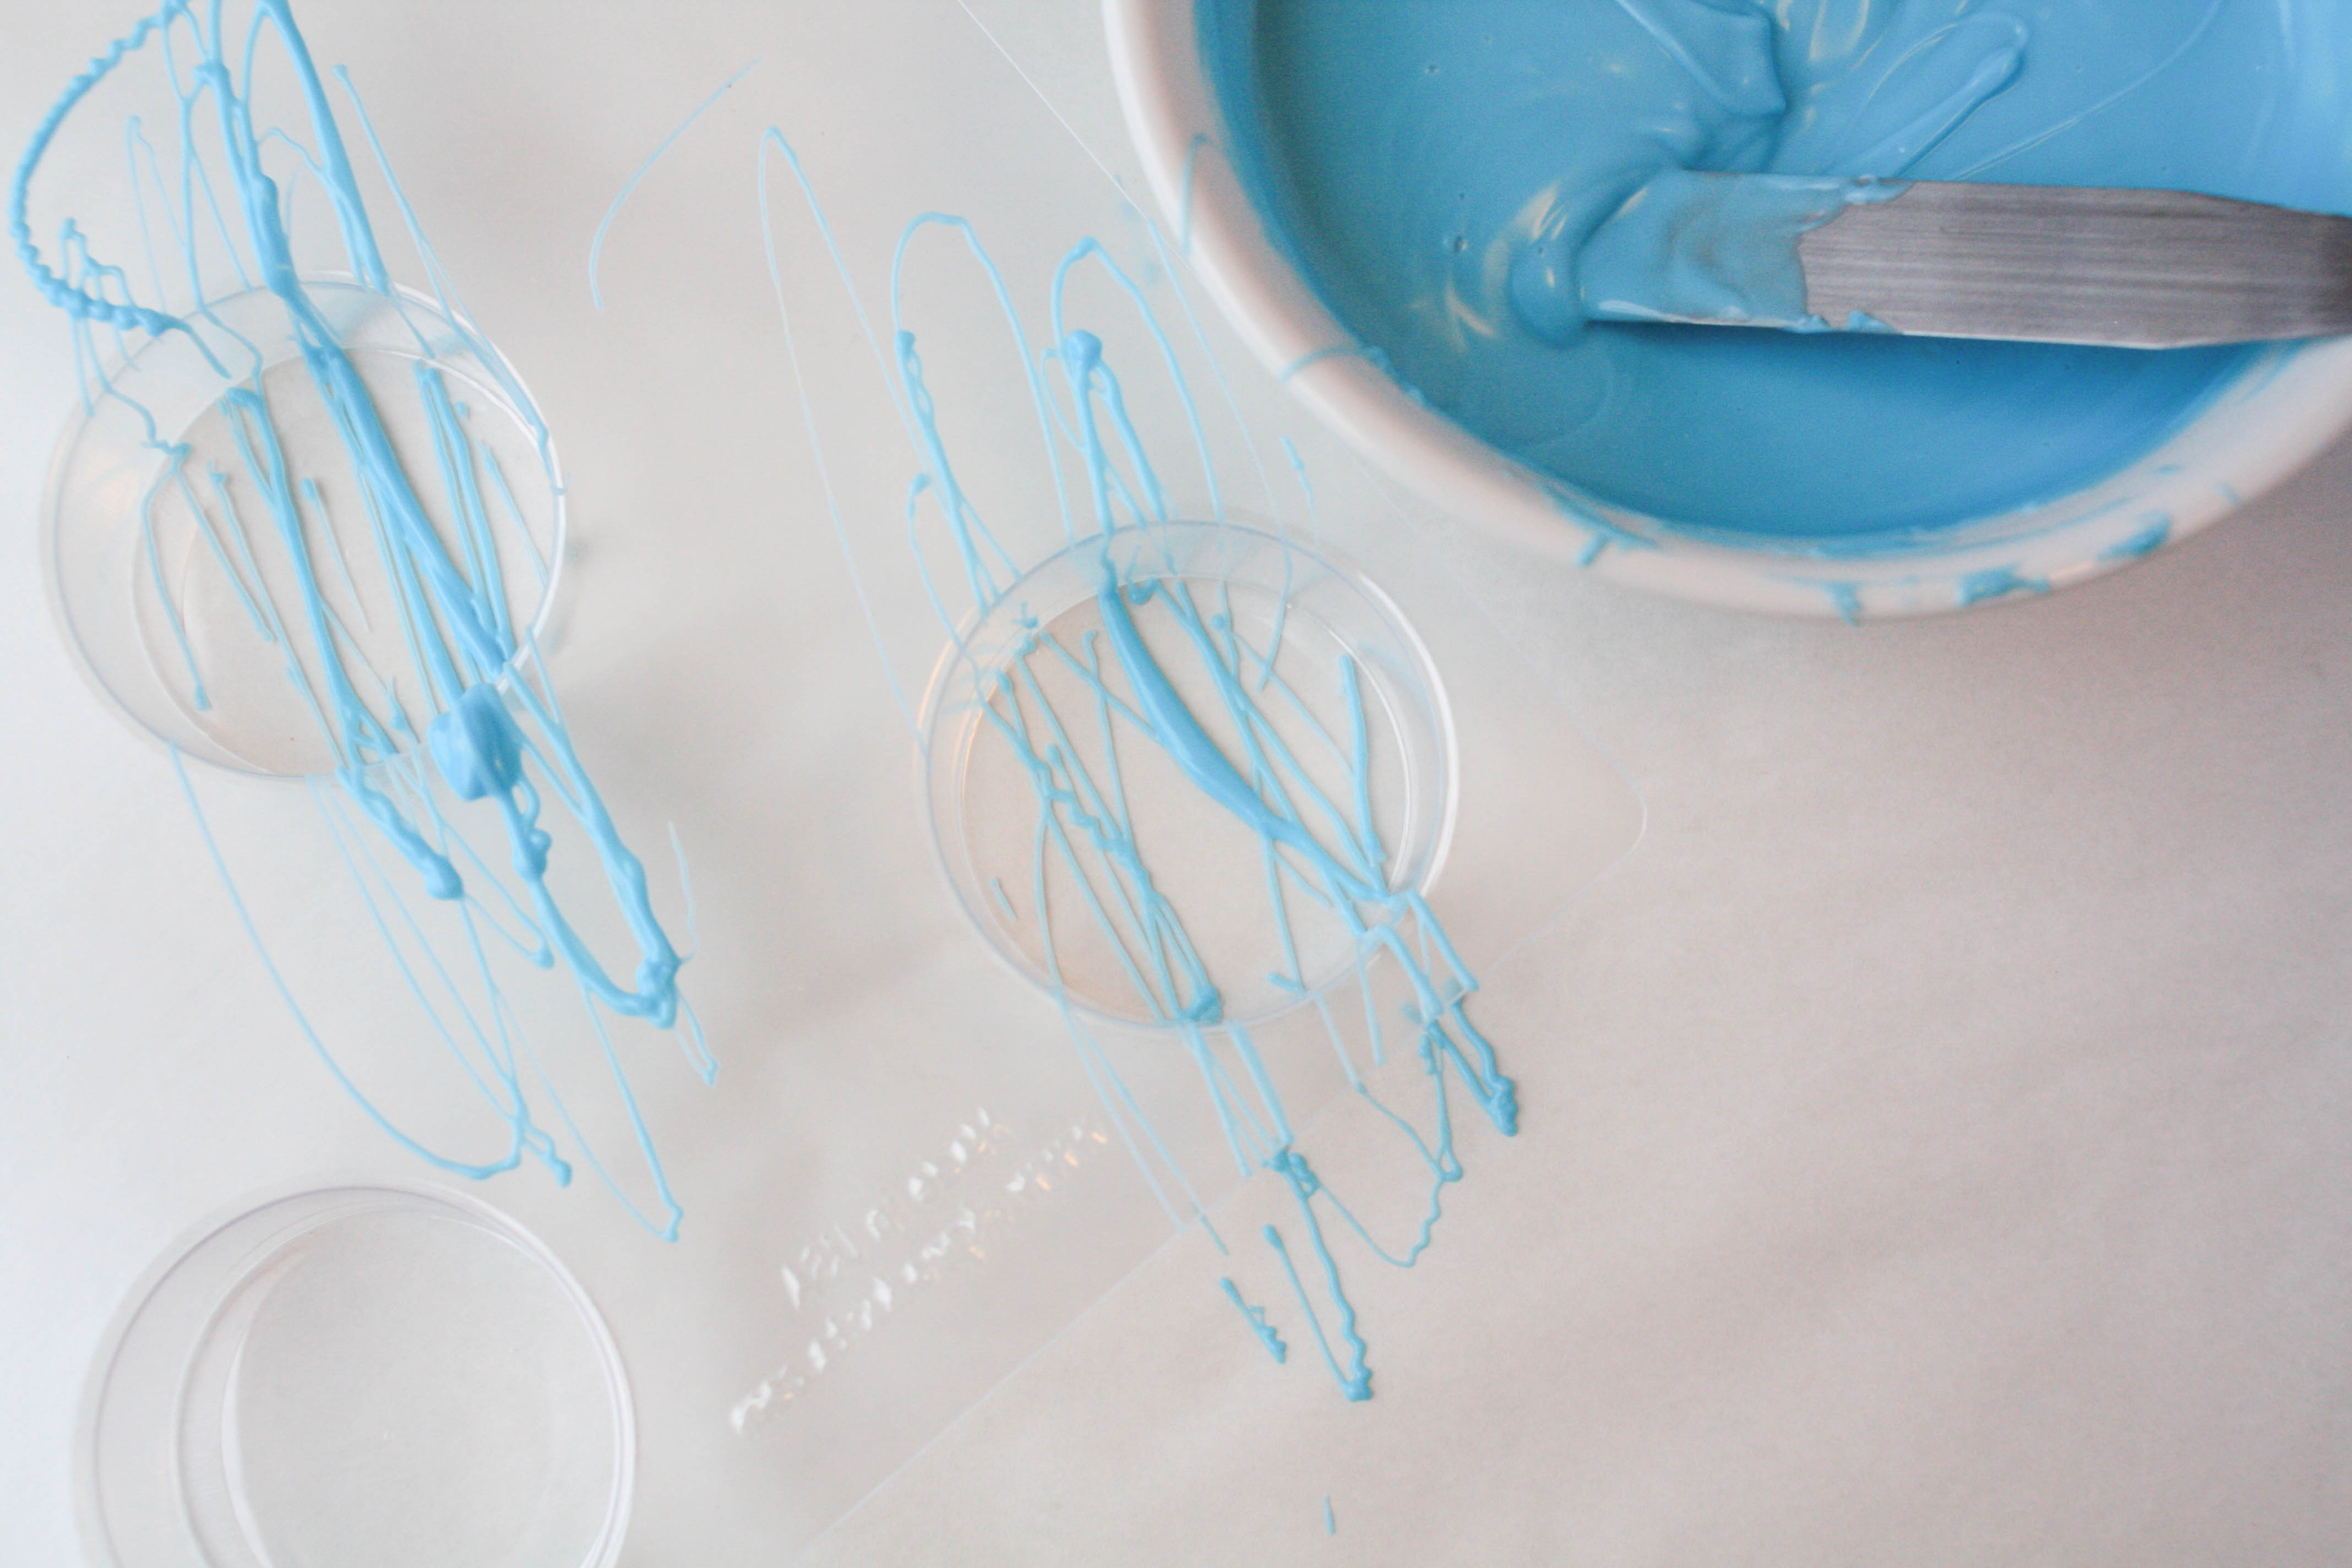
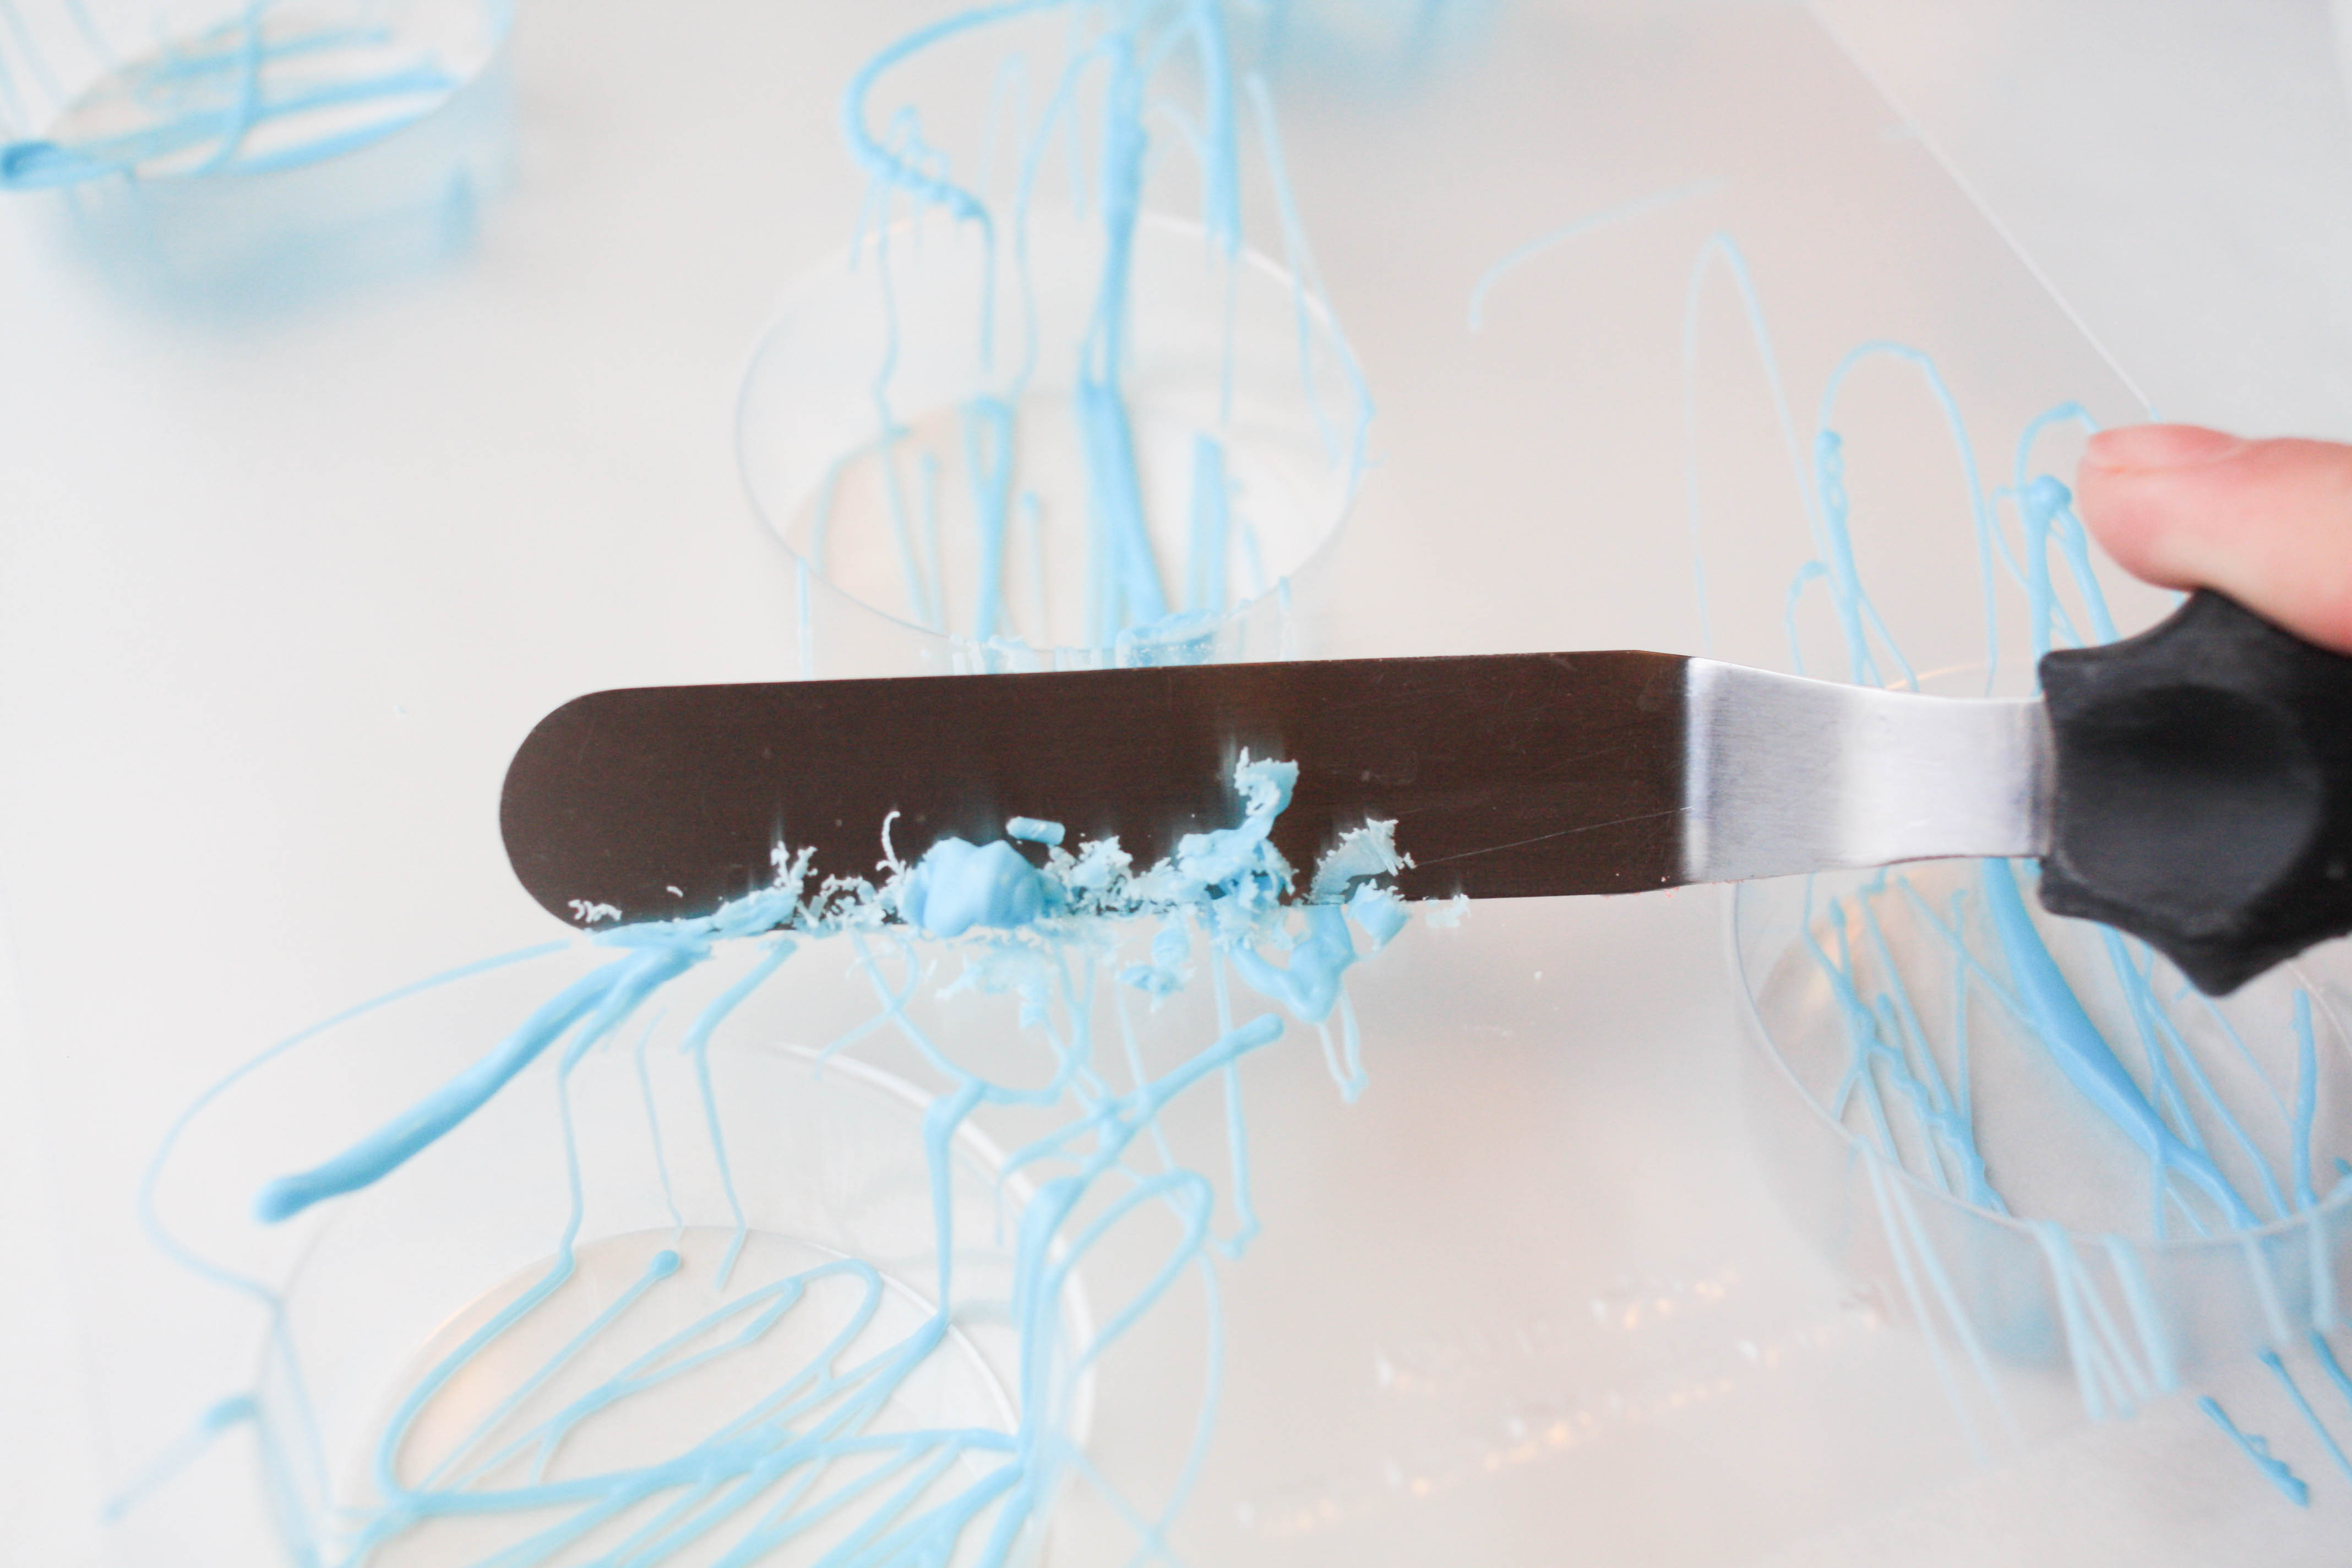
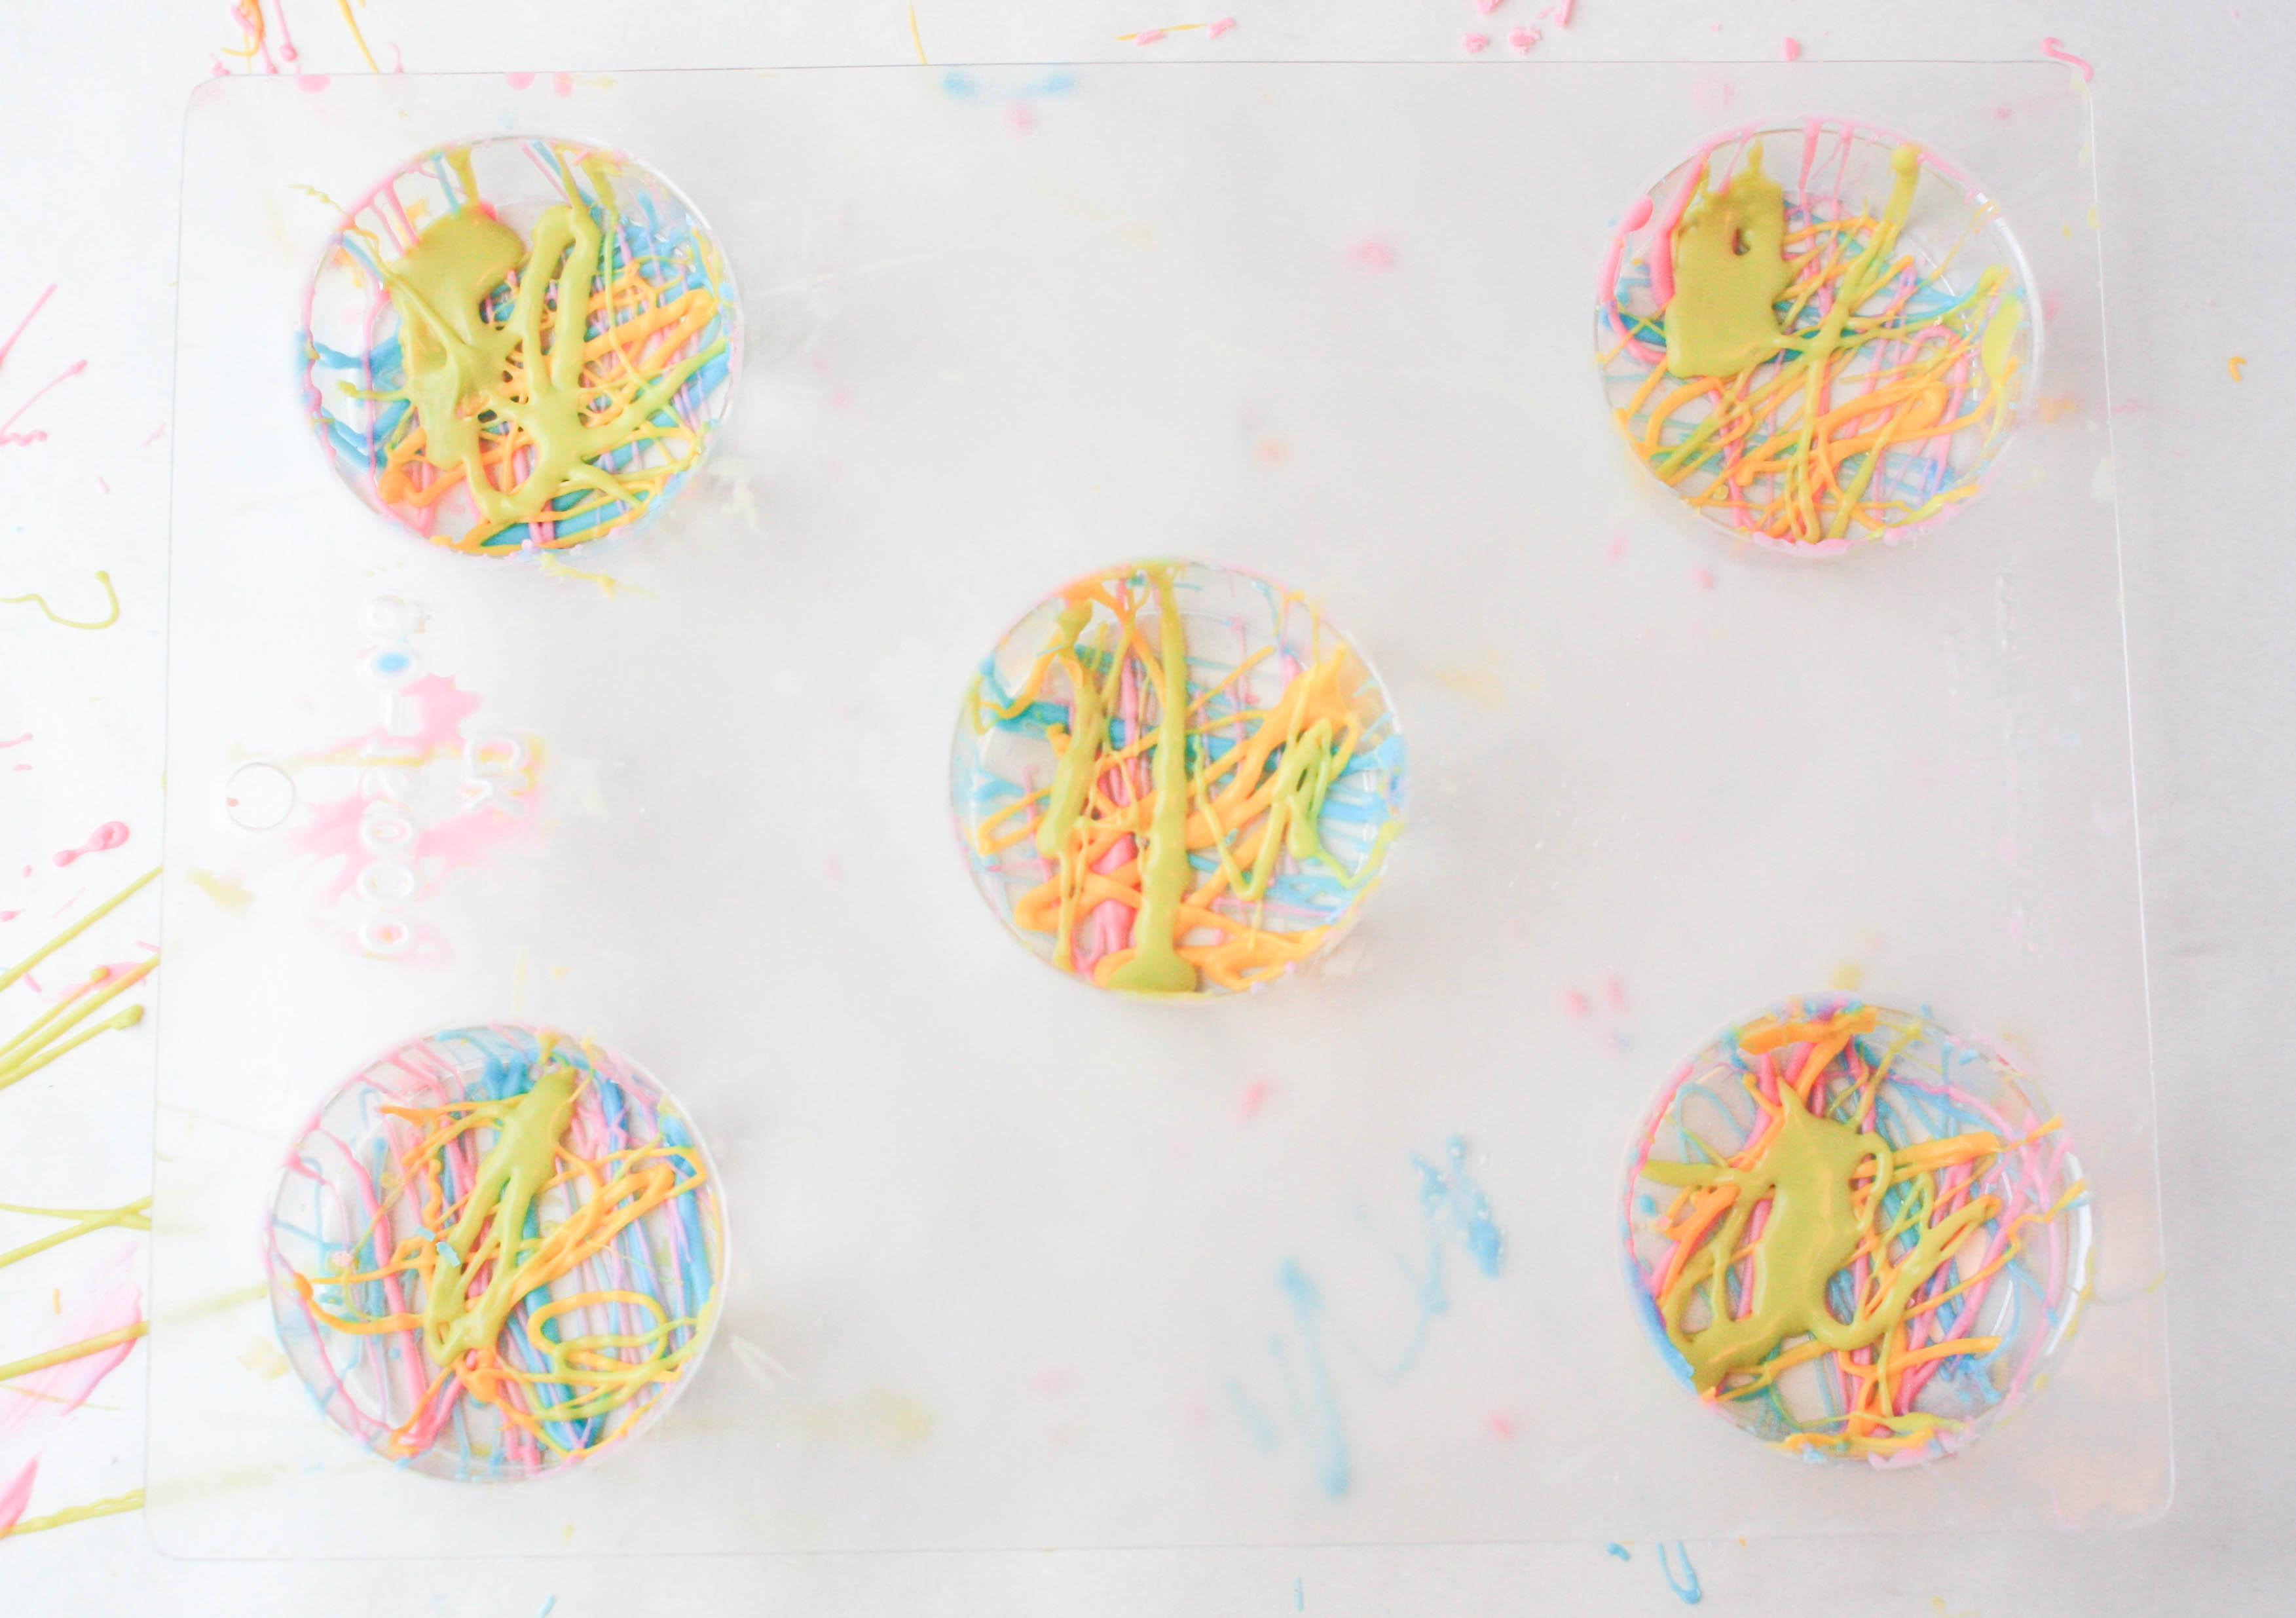
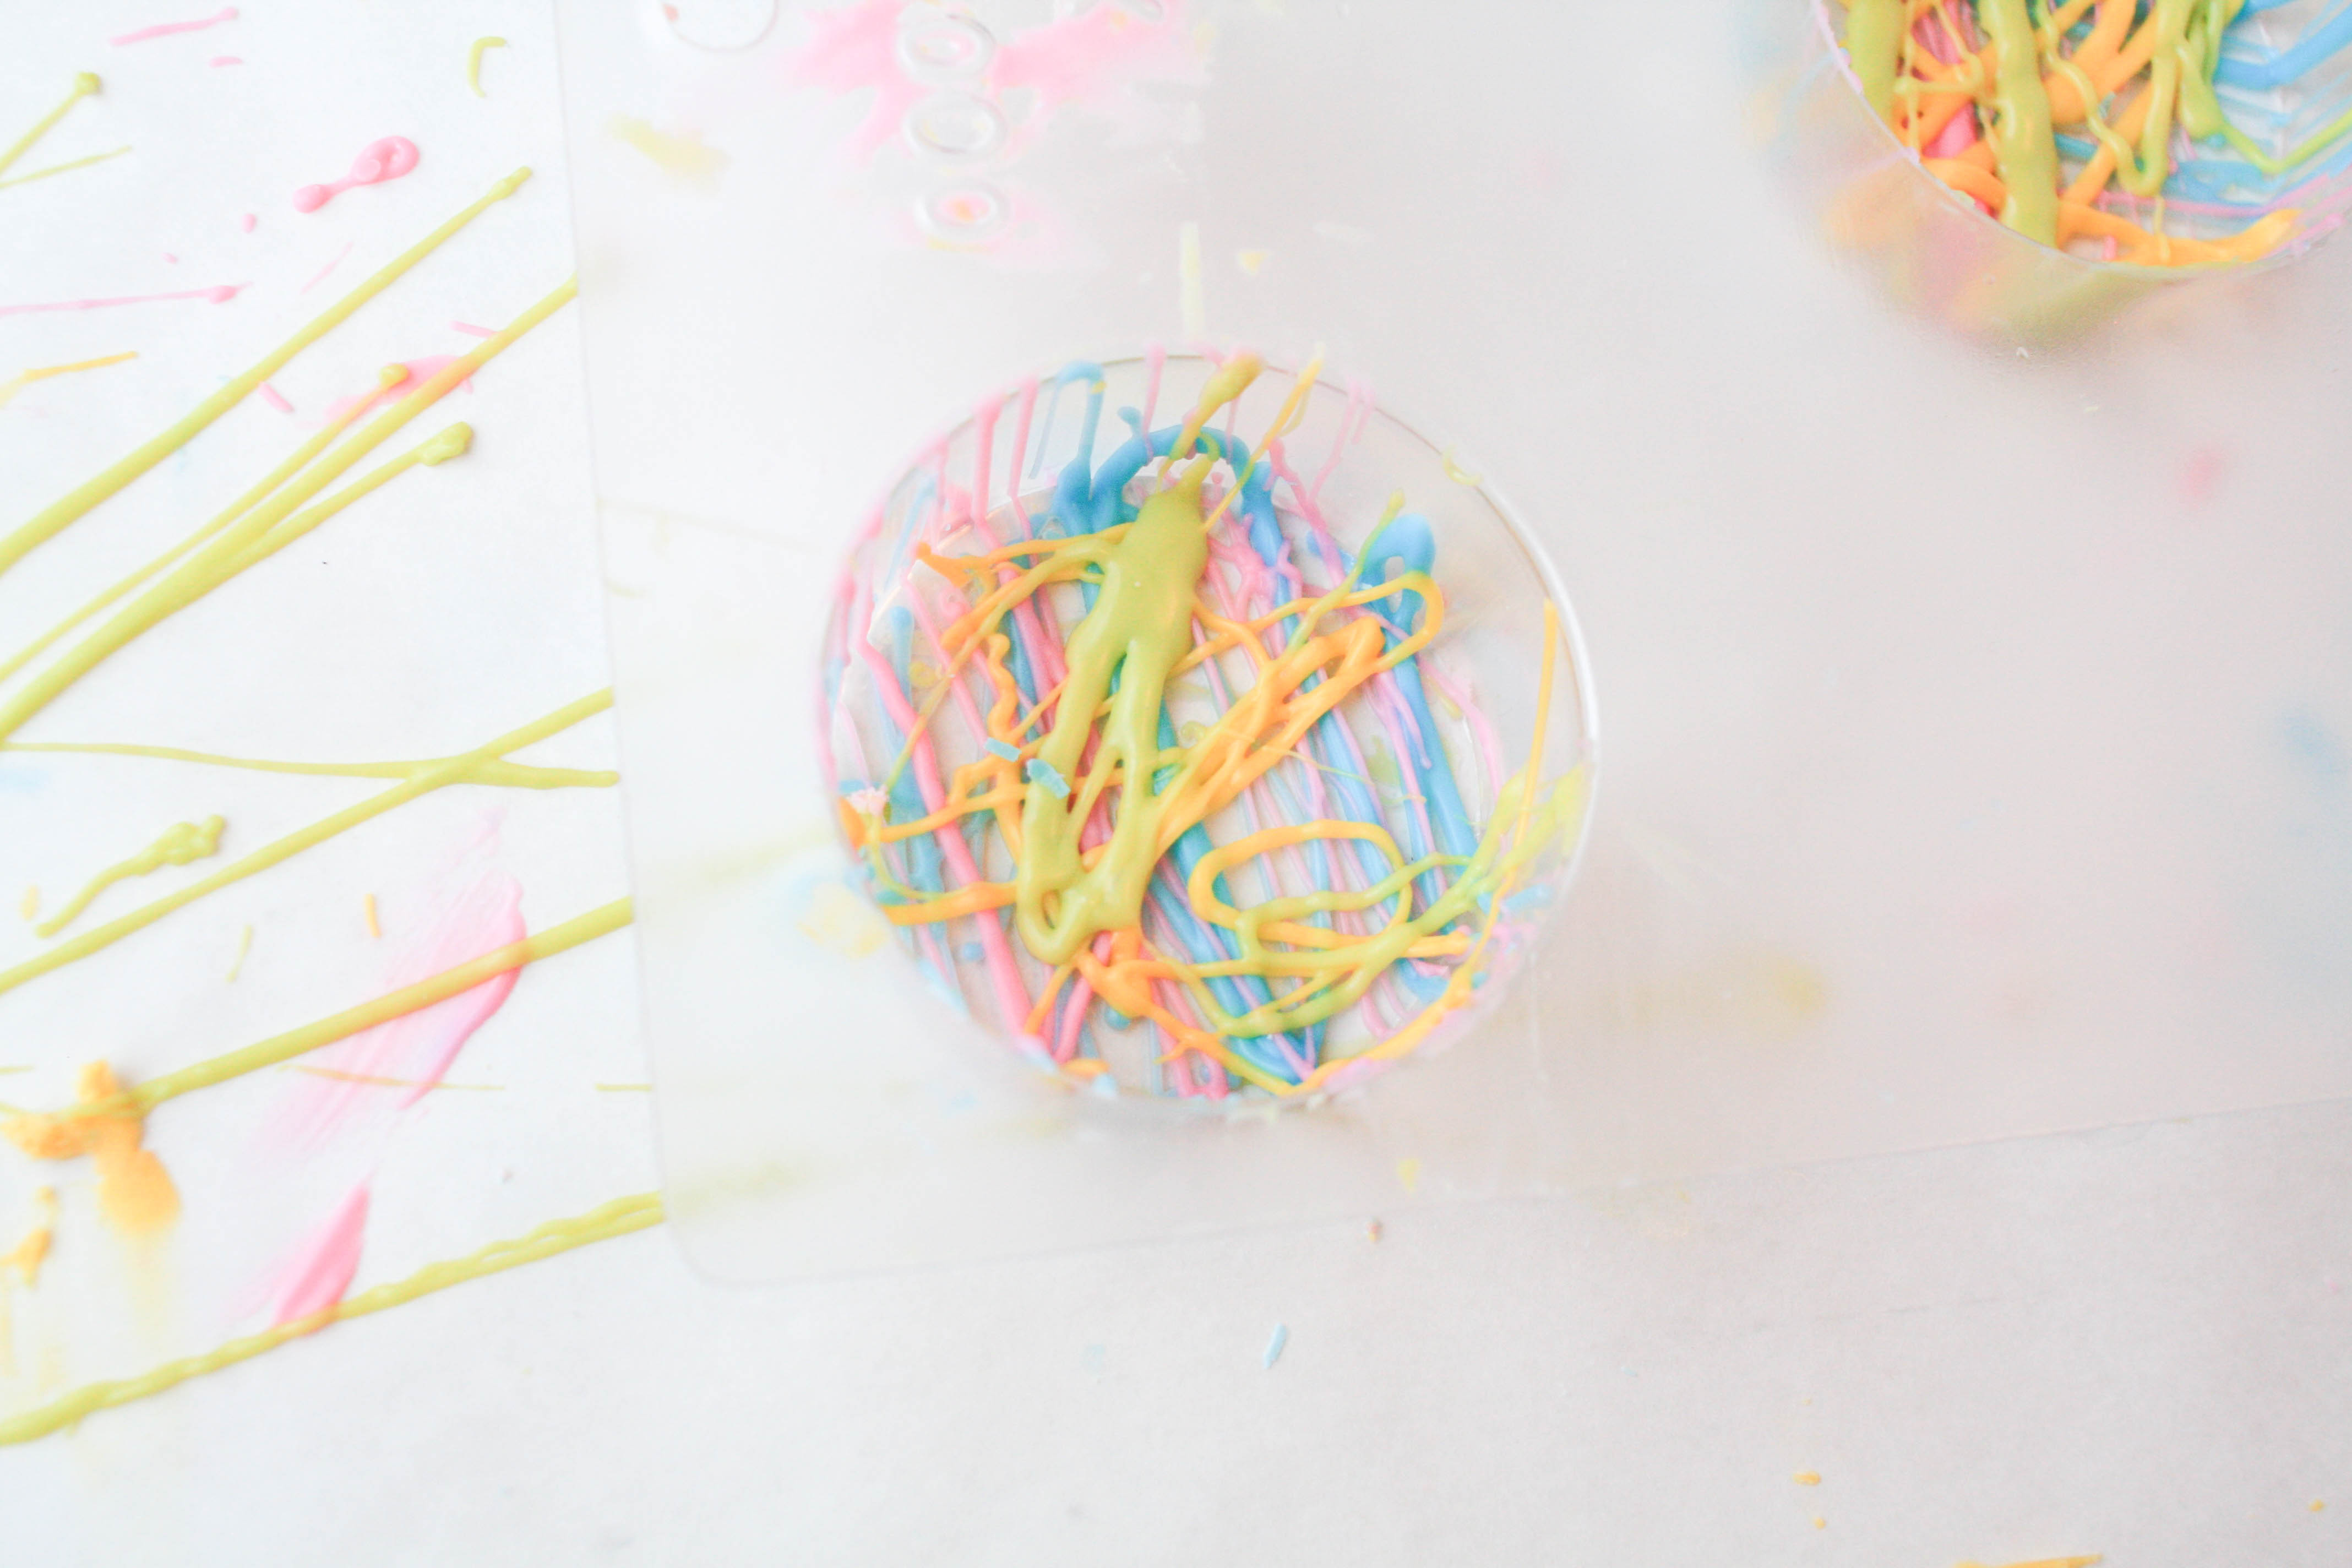
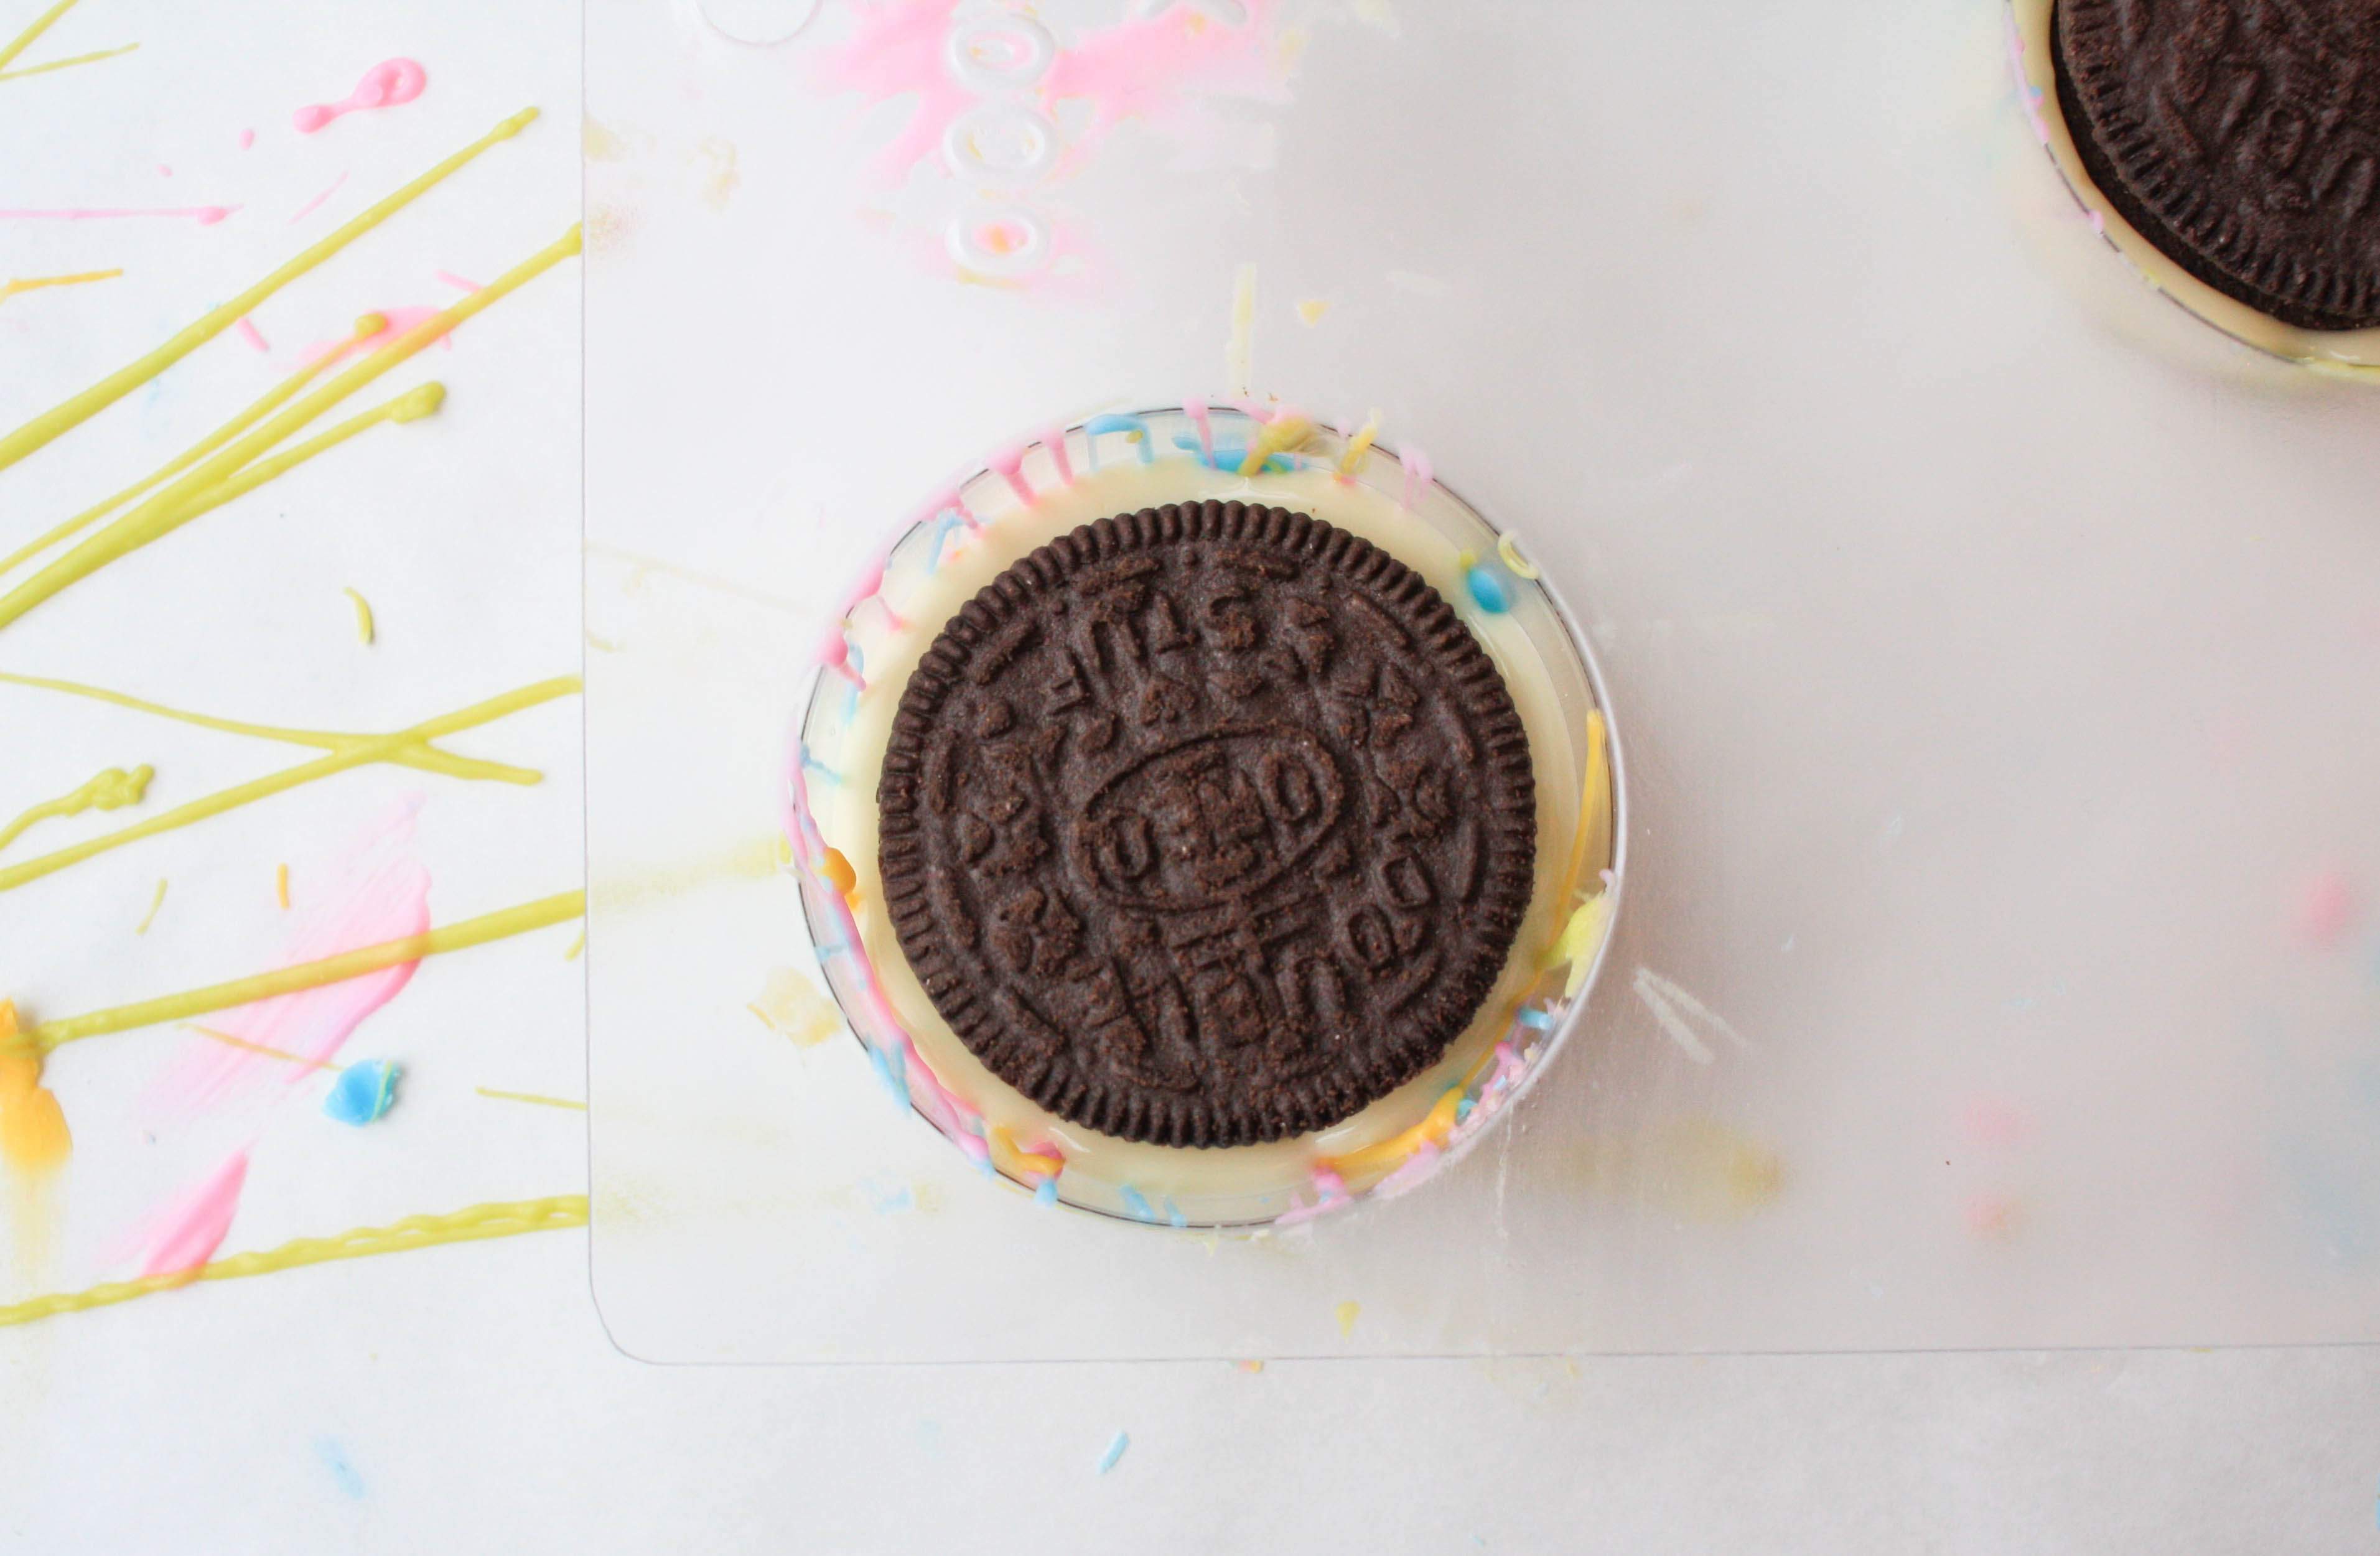
Melt a small amount of one of the colored candy melts in a heatproof bowl. Use an icing spatula to drizzle some of the candy melts into the openings of the mold. Clear away excess candy from the top of the mold with the offset spatula. Repeat the drizzling and cleaning with the remaining colors.
Step 2:
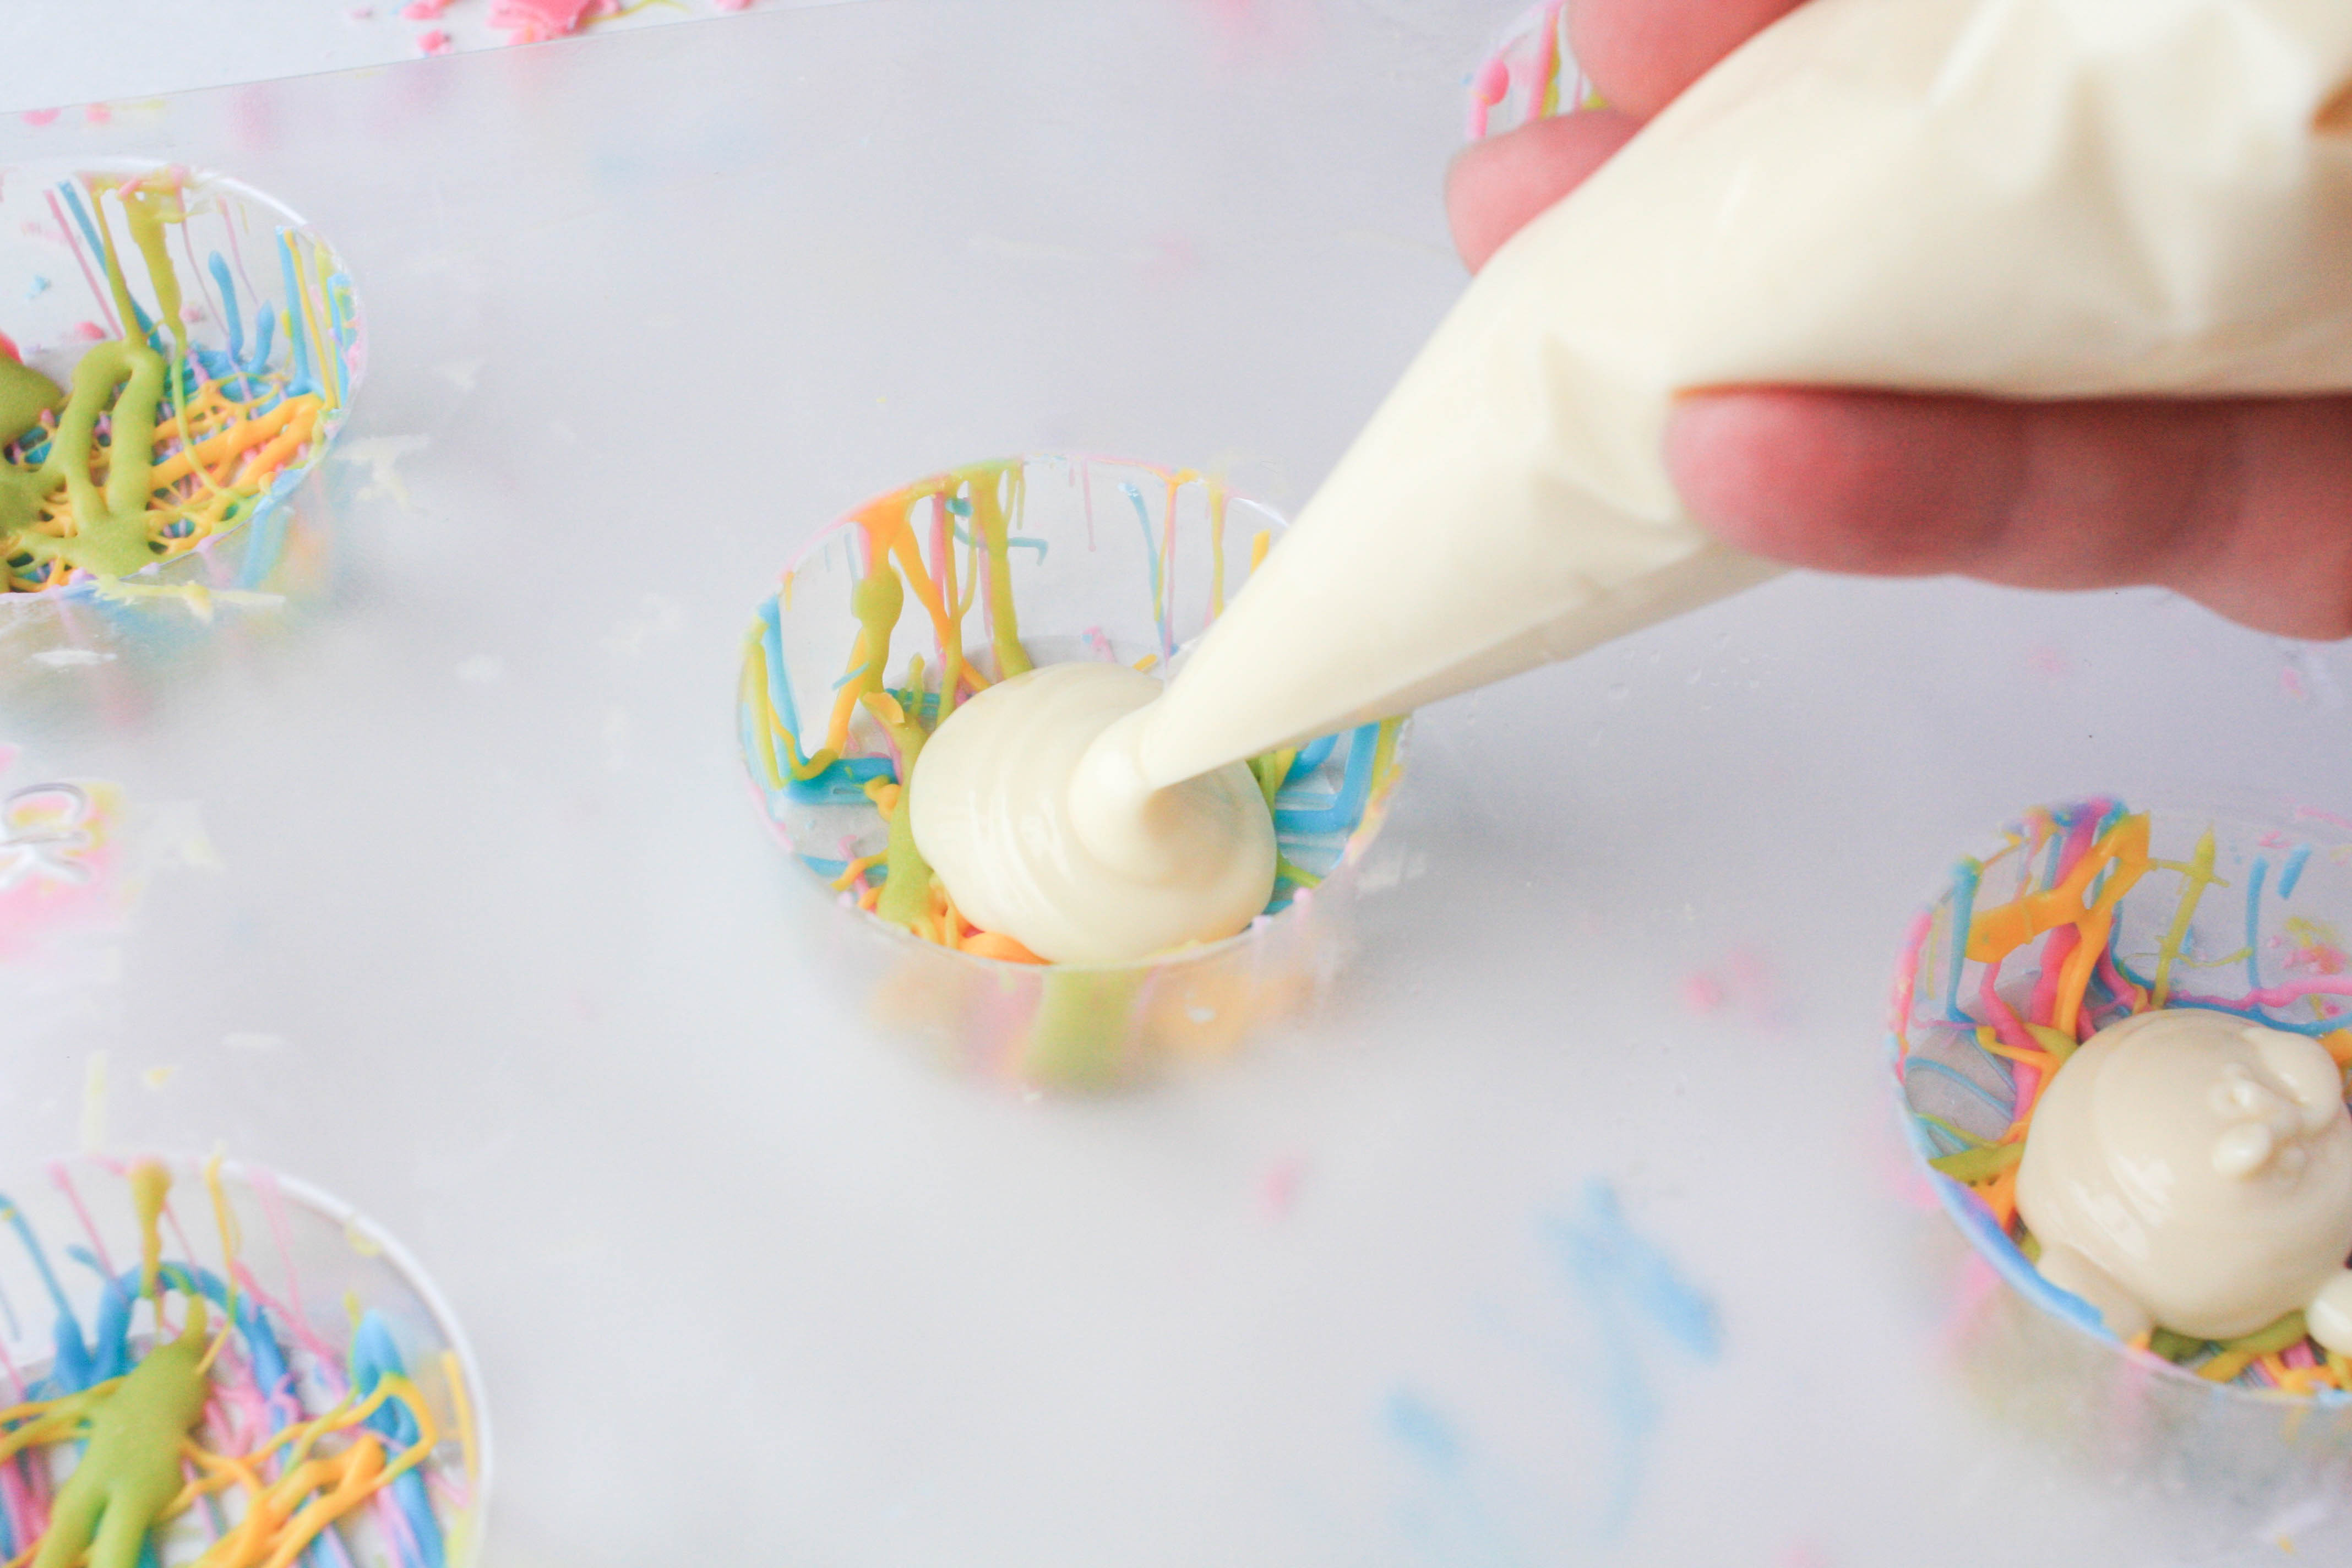
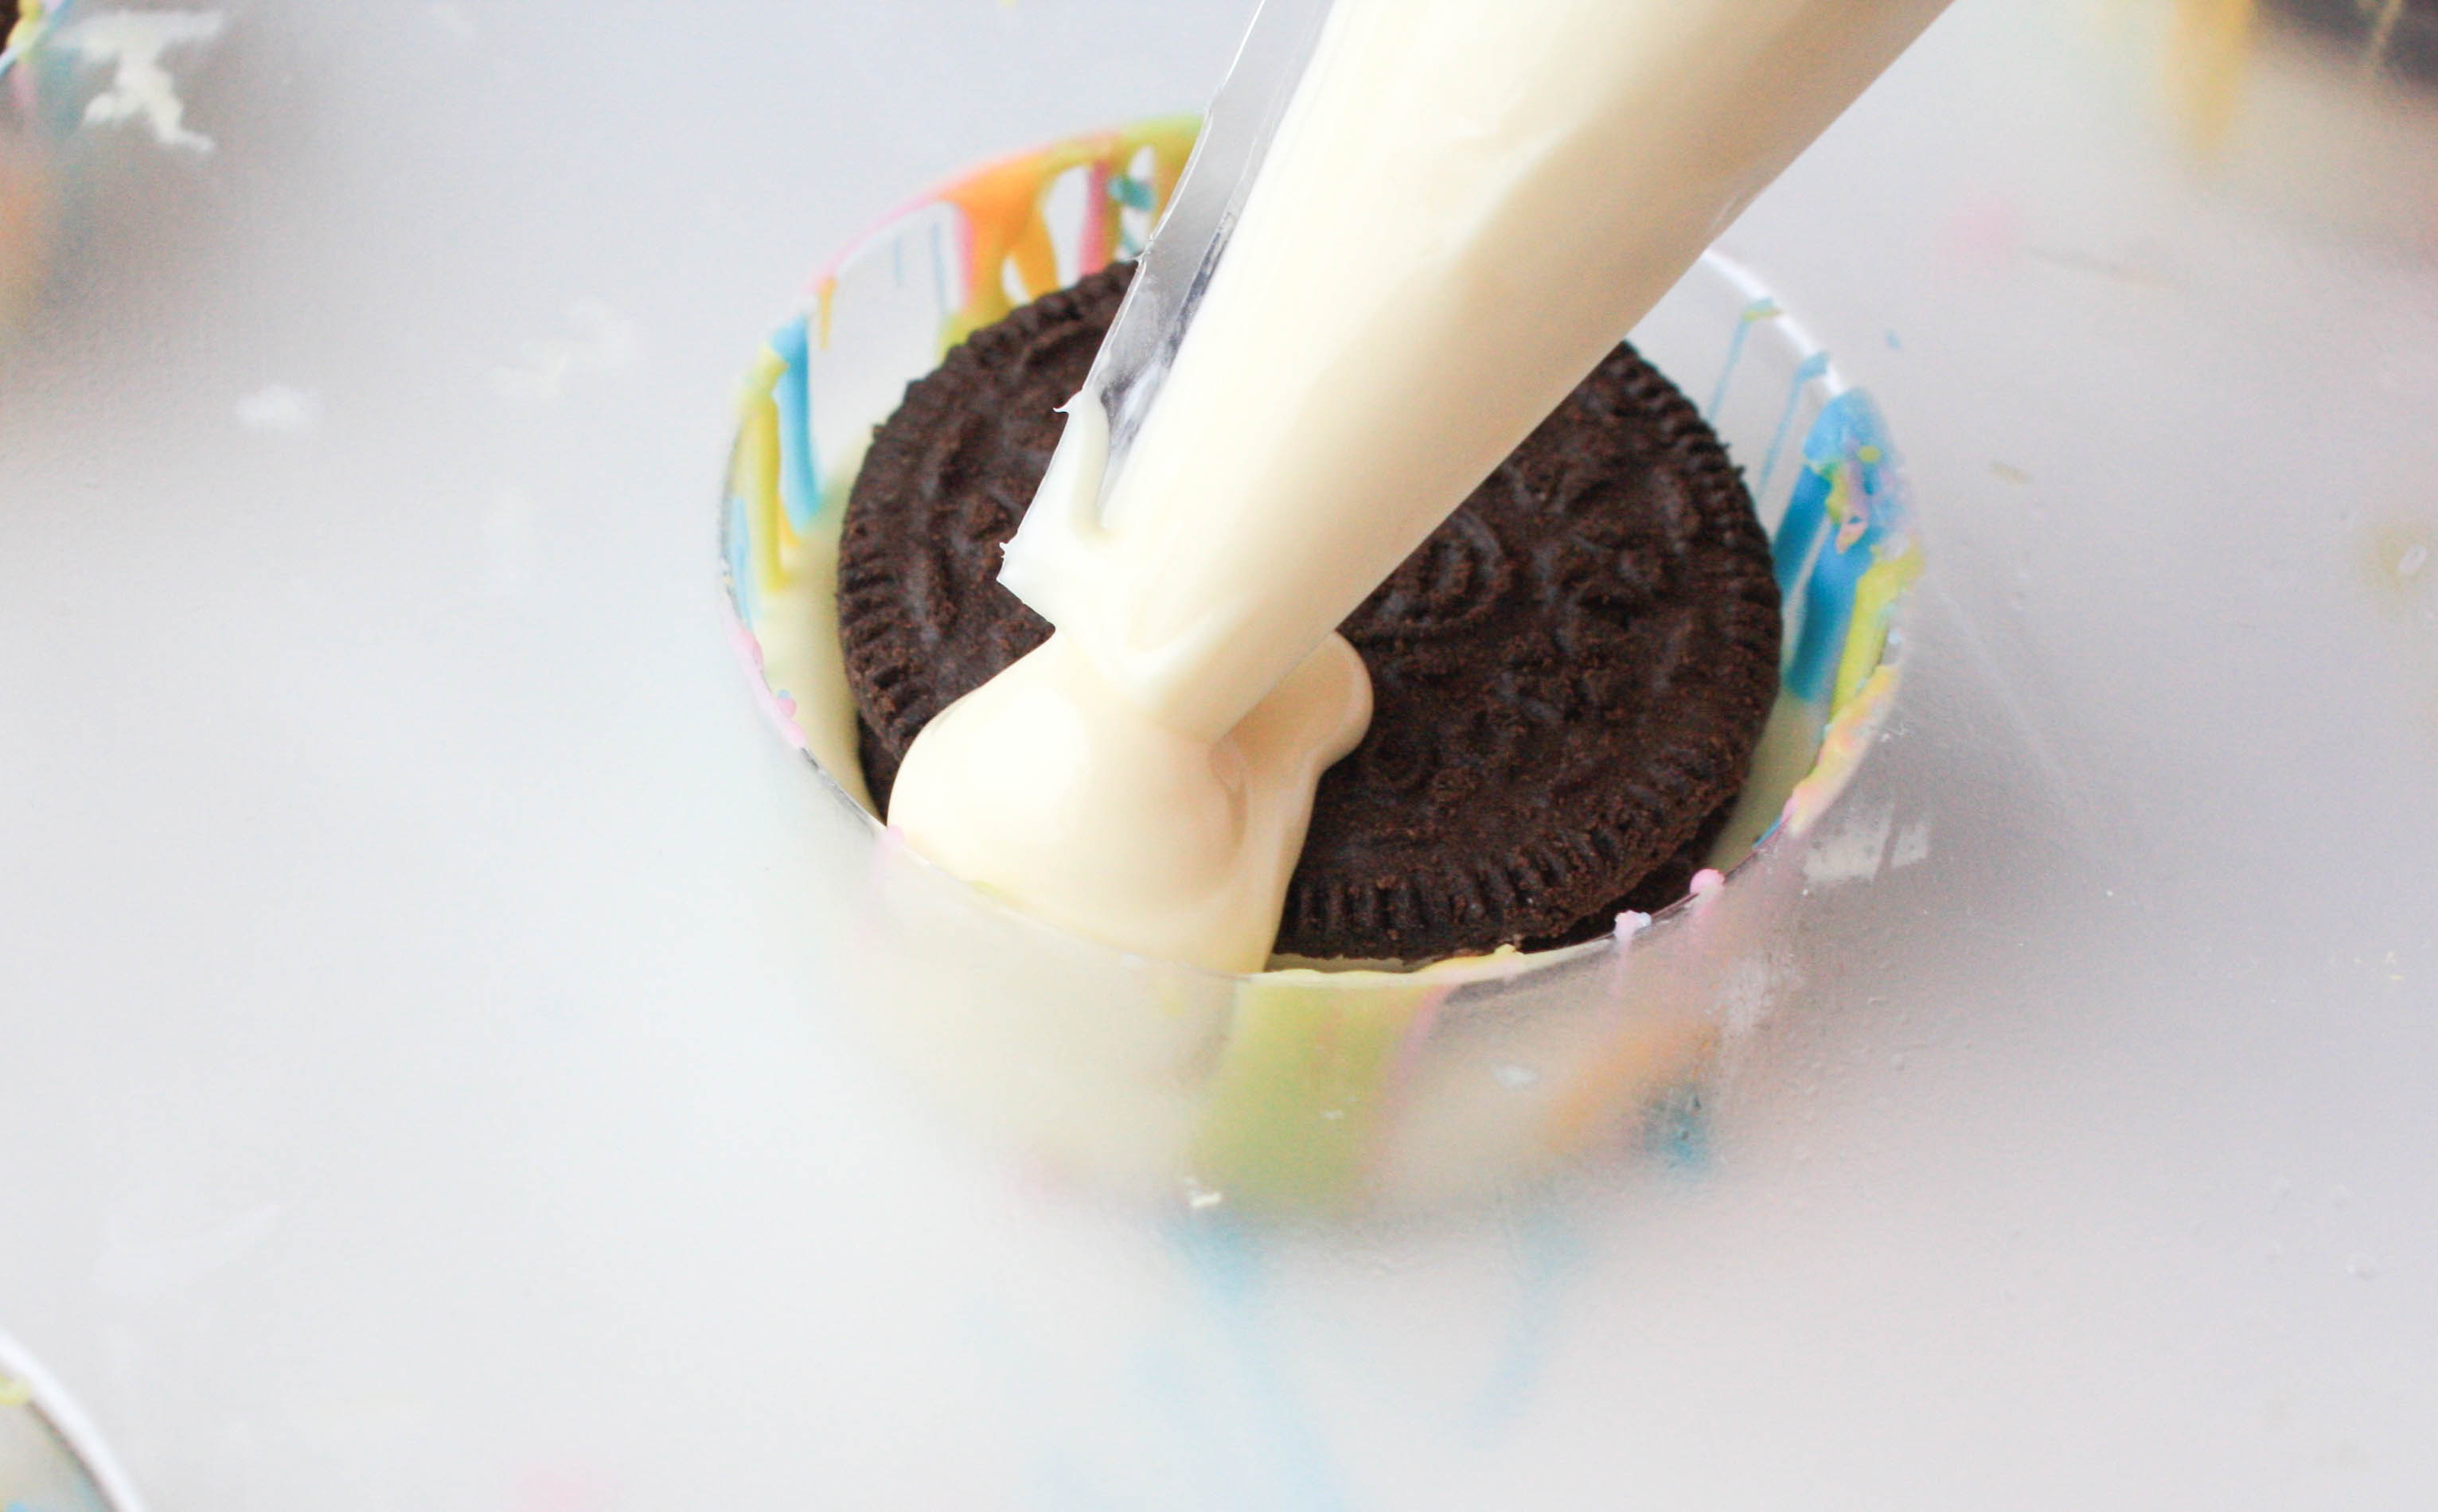
Fill a piping bag with melted white chocolate. You could also use white candy melts at this point depending on your flavor preference. Candy melts are ready to use as soon as you melt them, but regular chocolate (the good stuff in bar form, not chips) needs to be tempered first.
Pipe a thin layer of chocolate into the bottom of the mold. Tap the mold against your work surface to spread the chocolate out and to make sure it fills in all of the gaps in your splatter design.
Step 3:
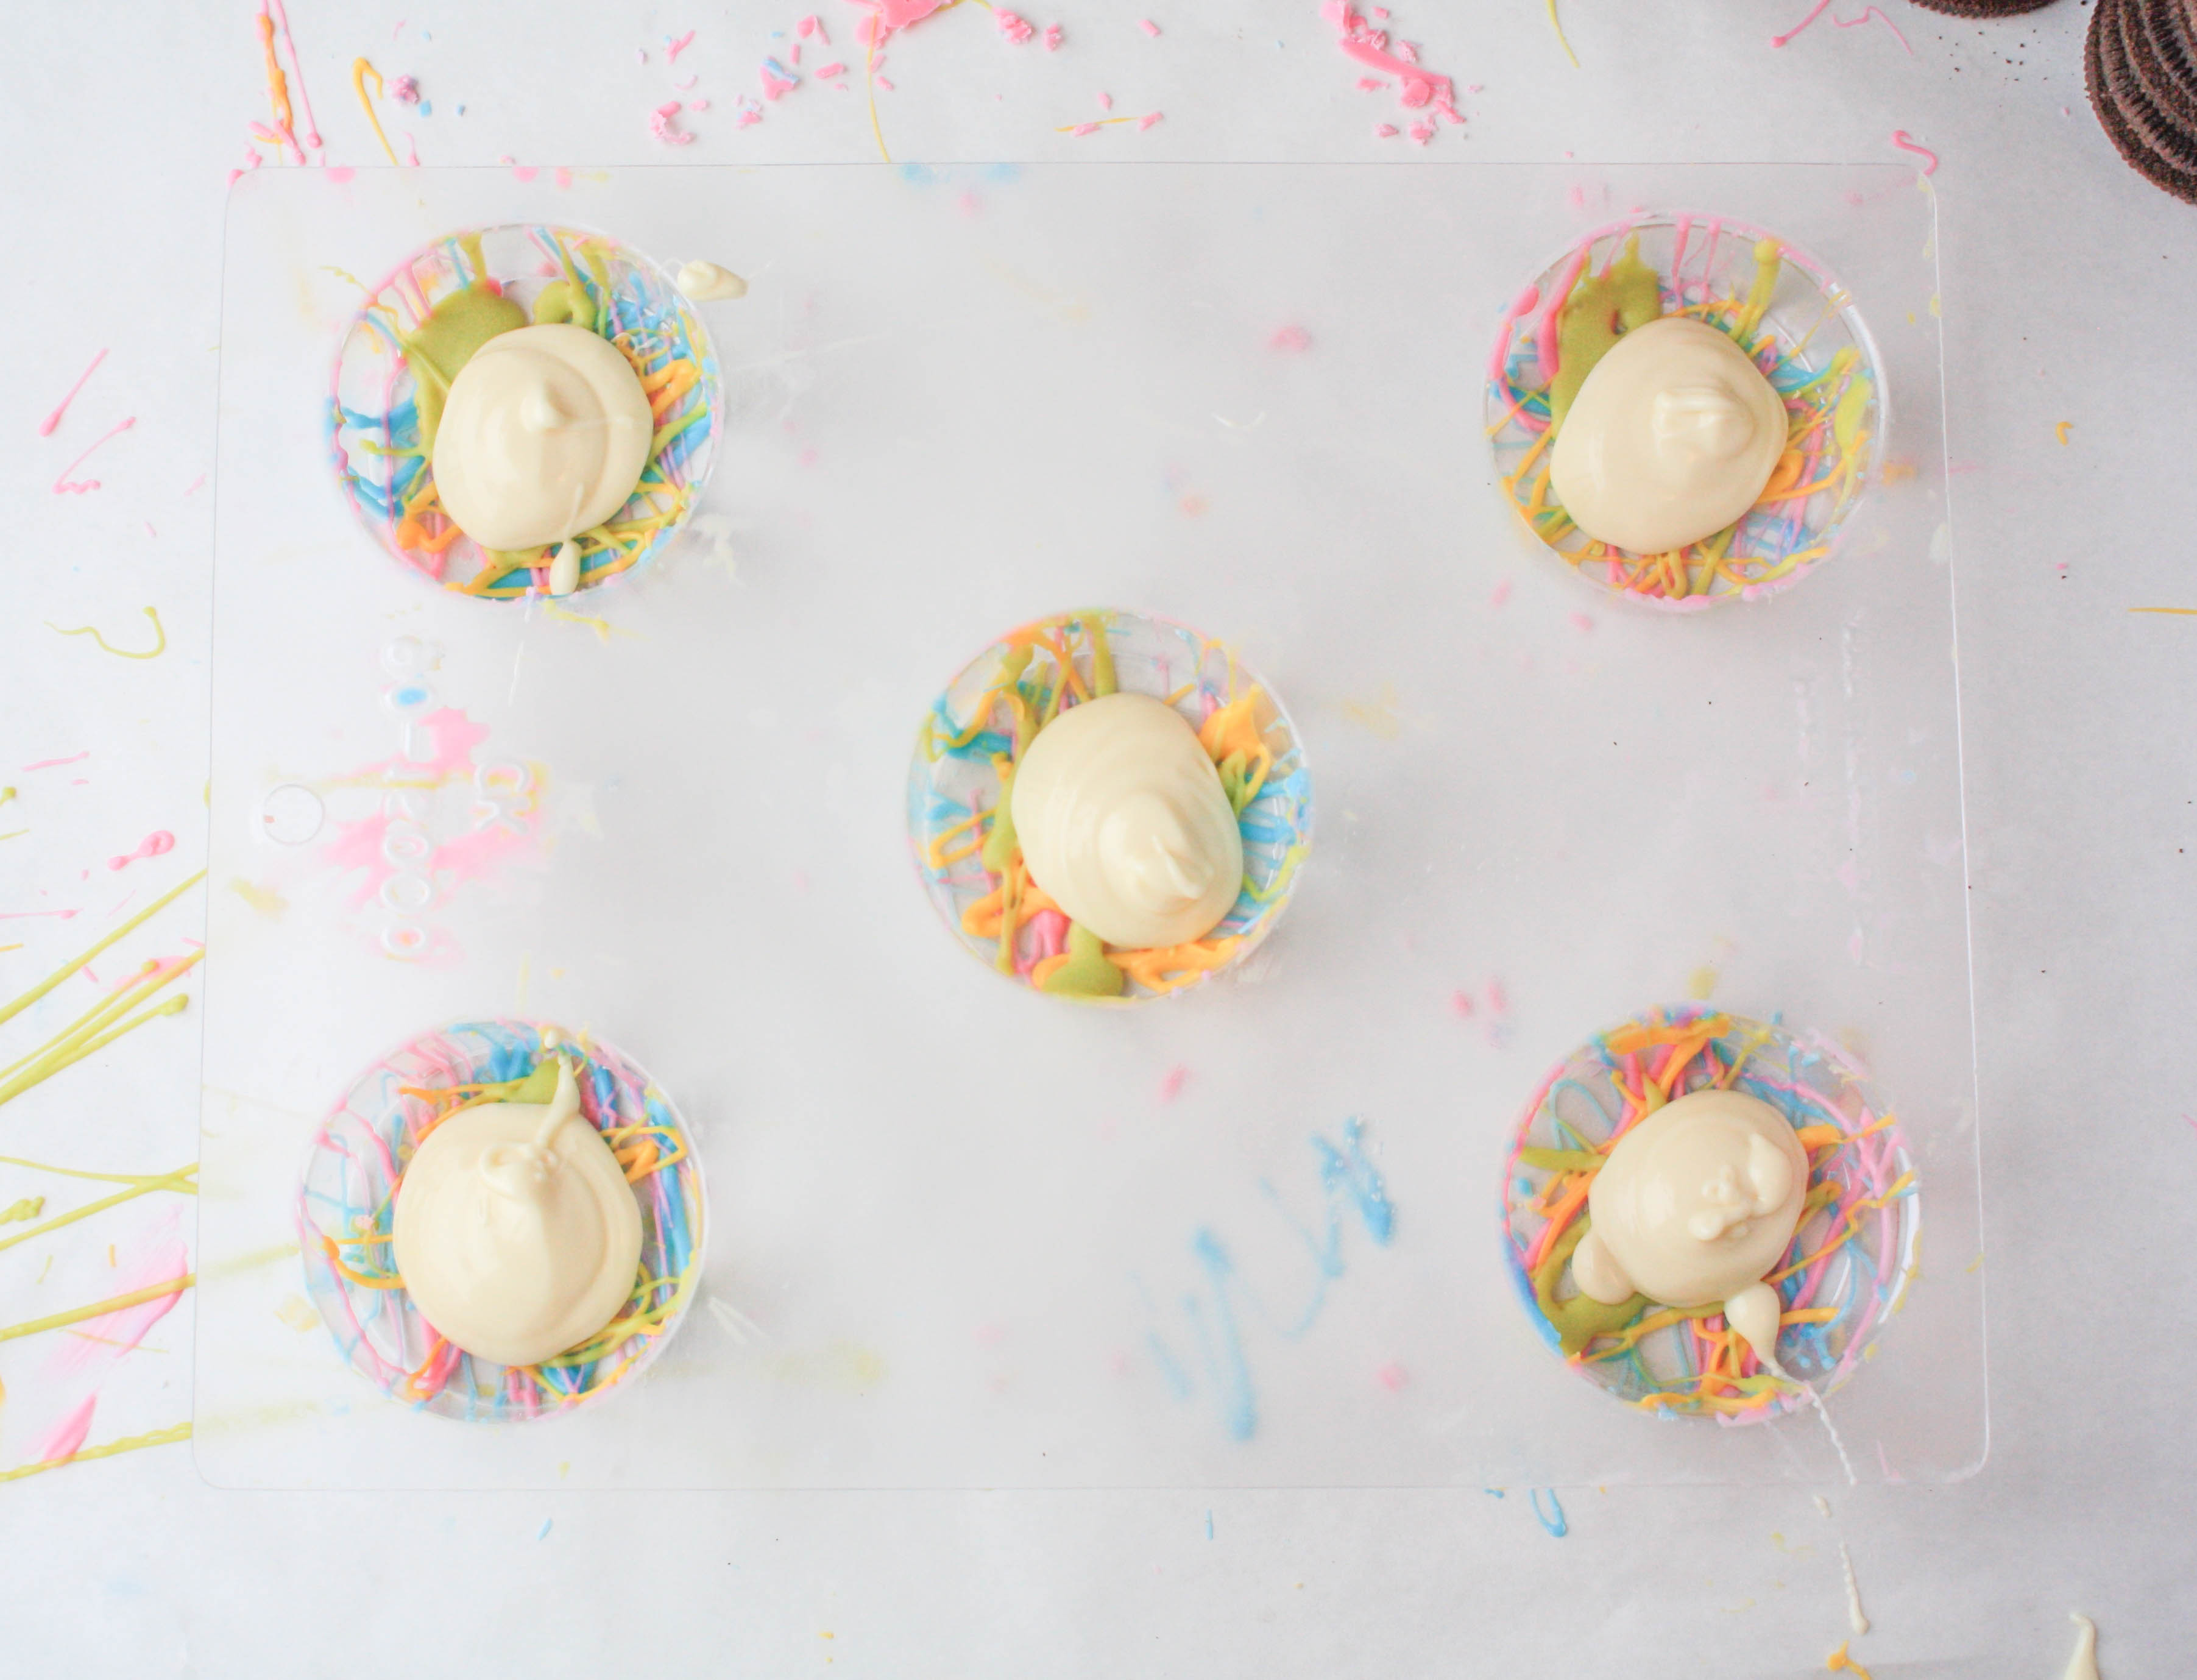
While the chocolate is still soft, drop an Oreo cookie into each of the mold’s openings. Make sure that each cookie is centered, leaving a gap all the way around the cookie.
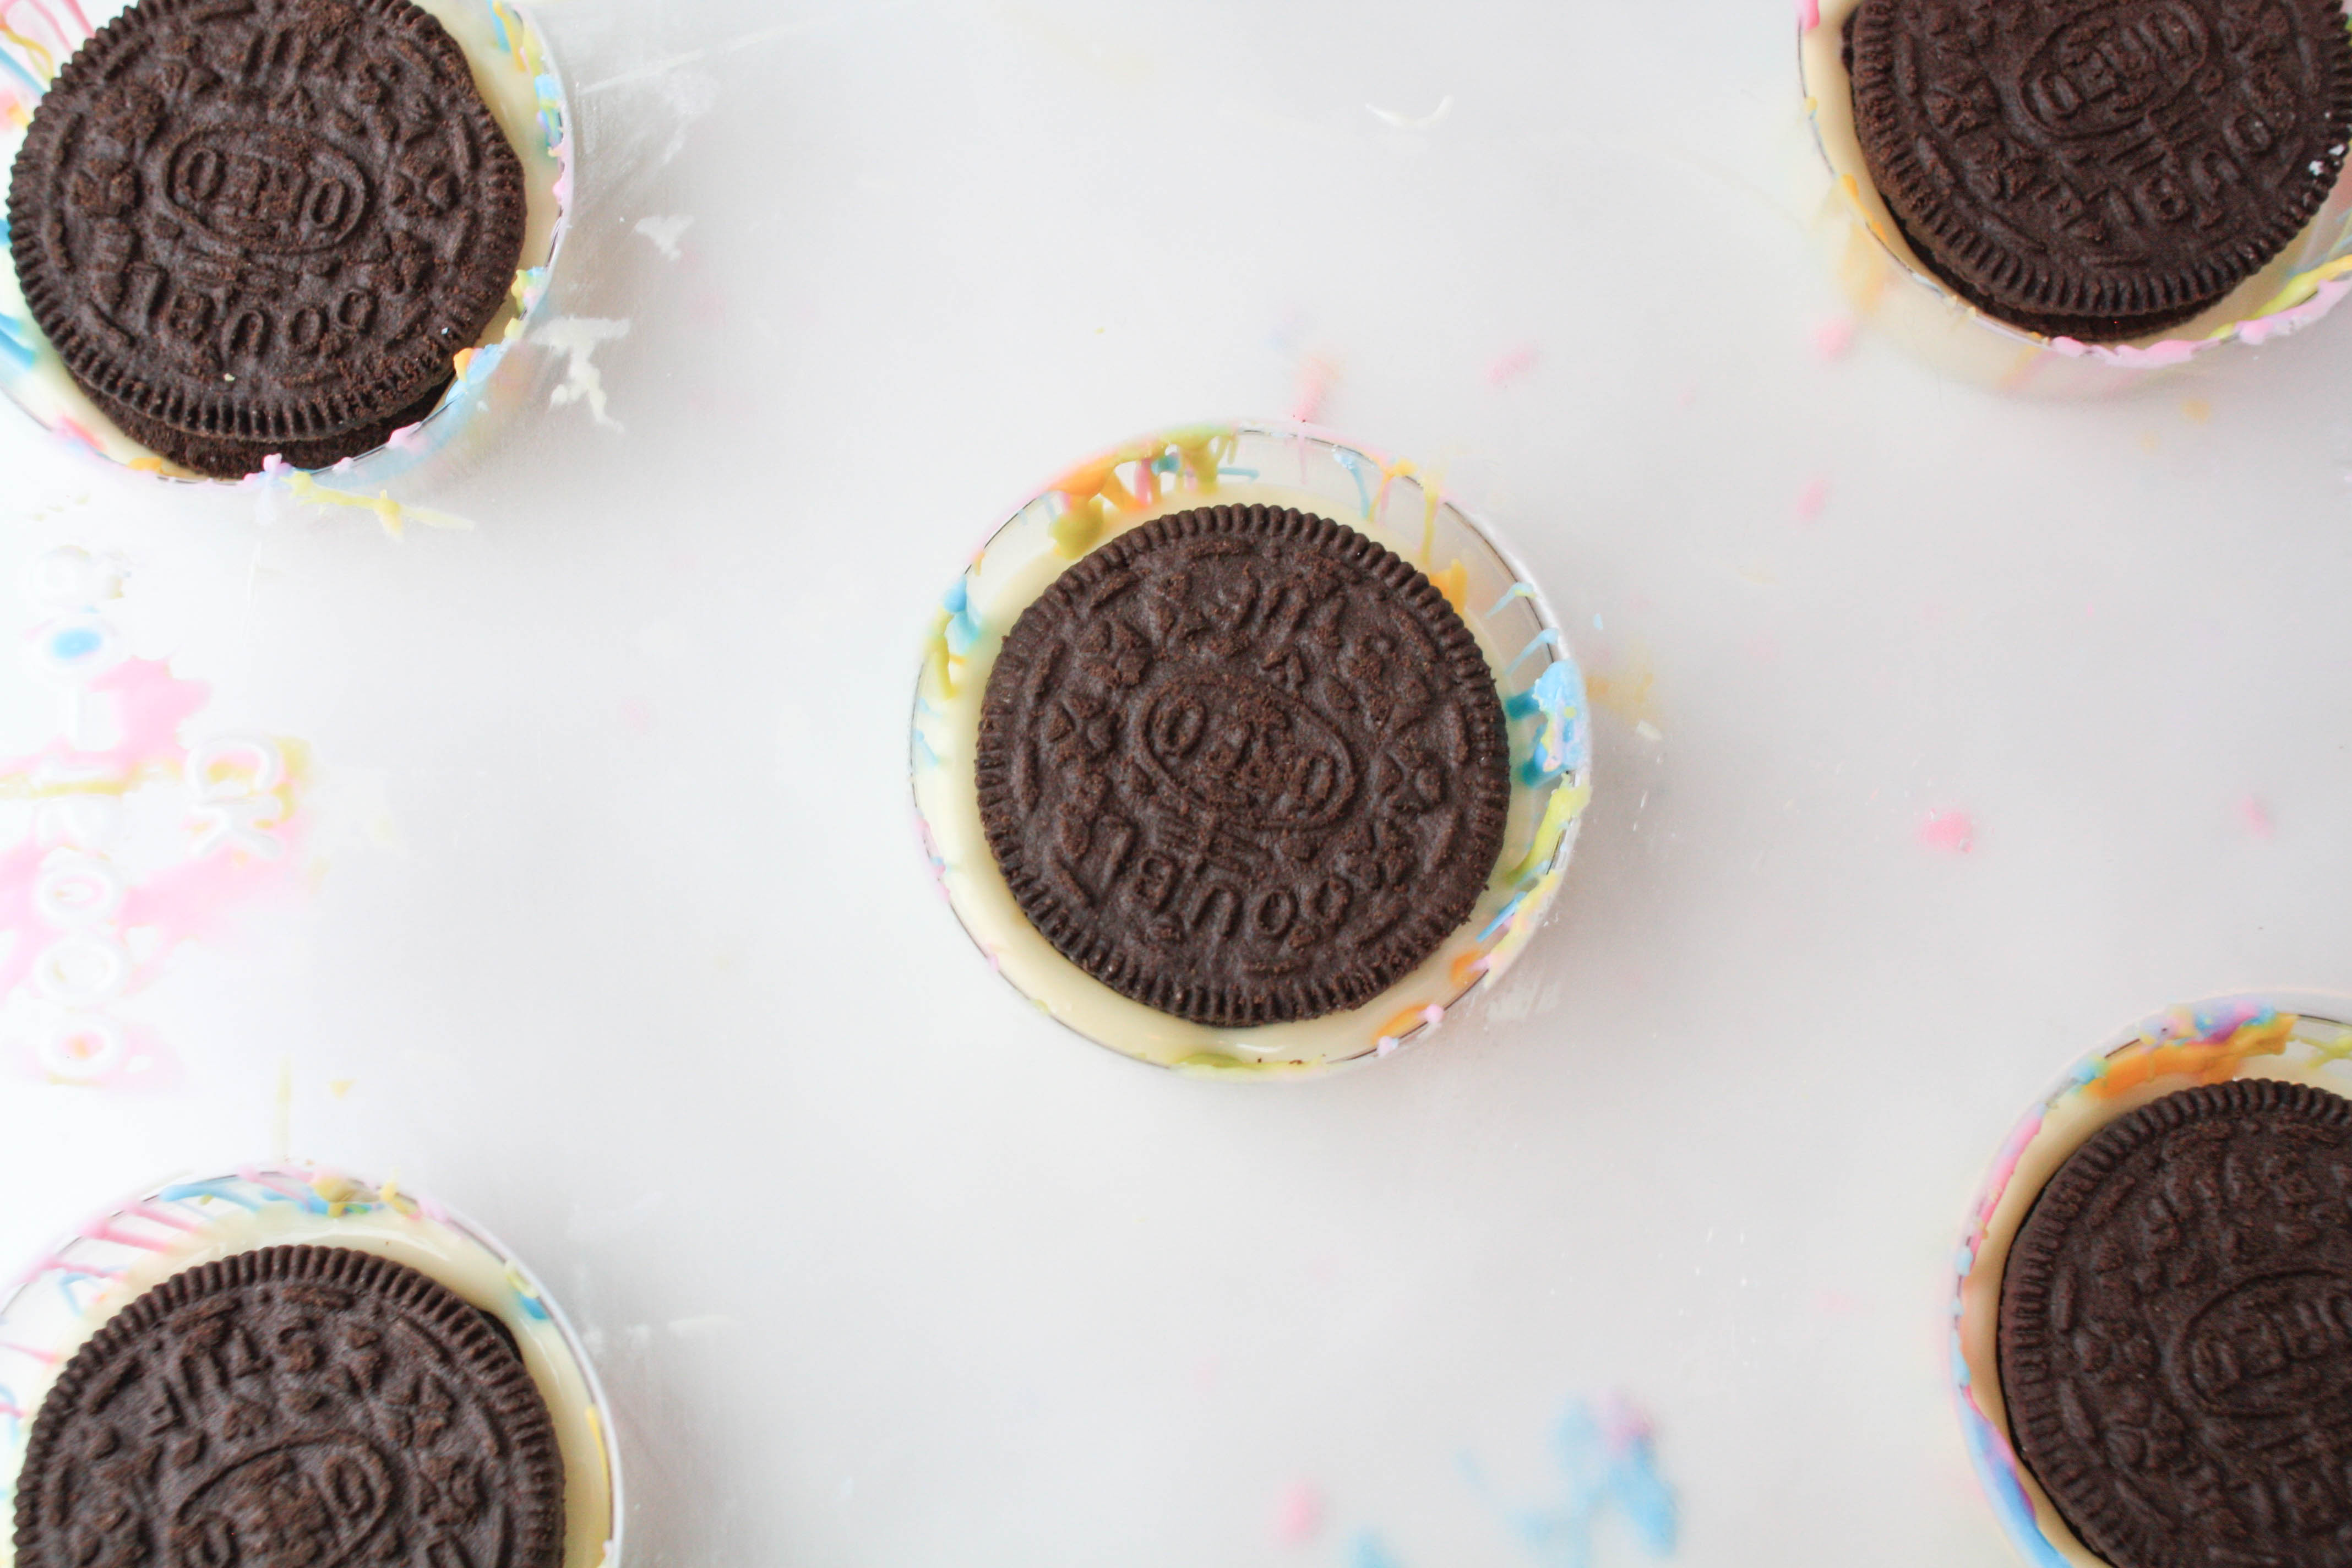
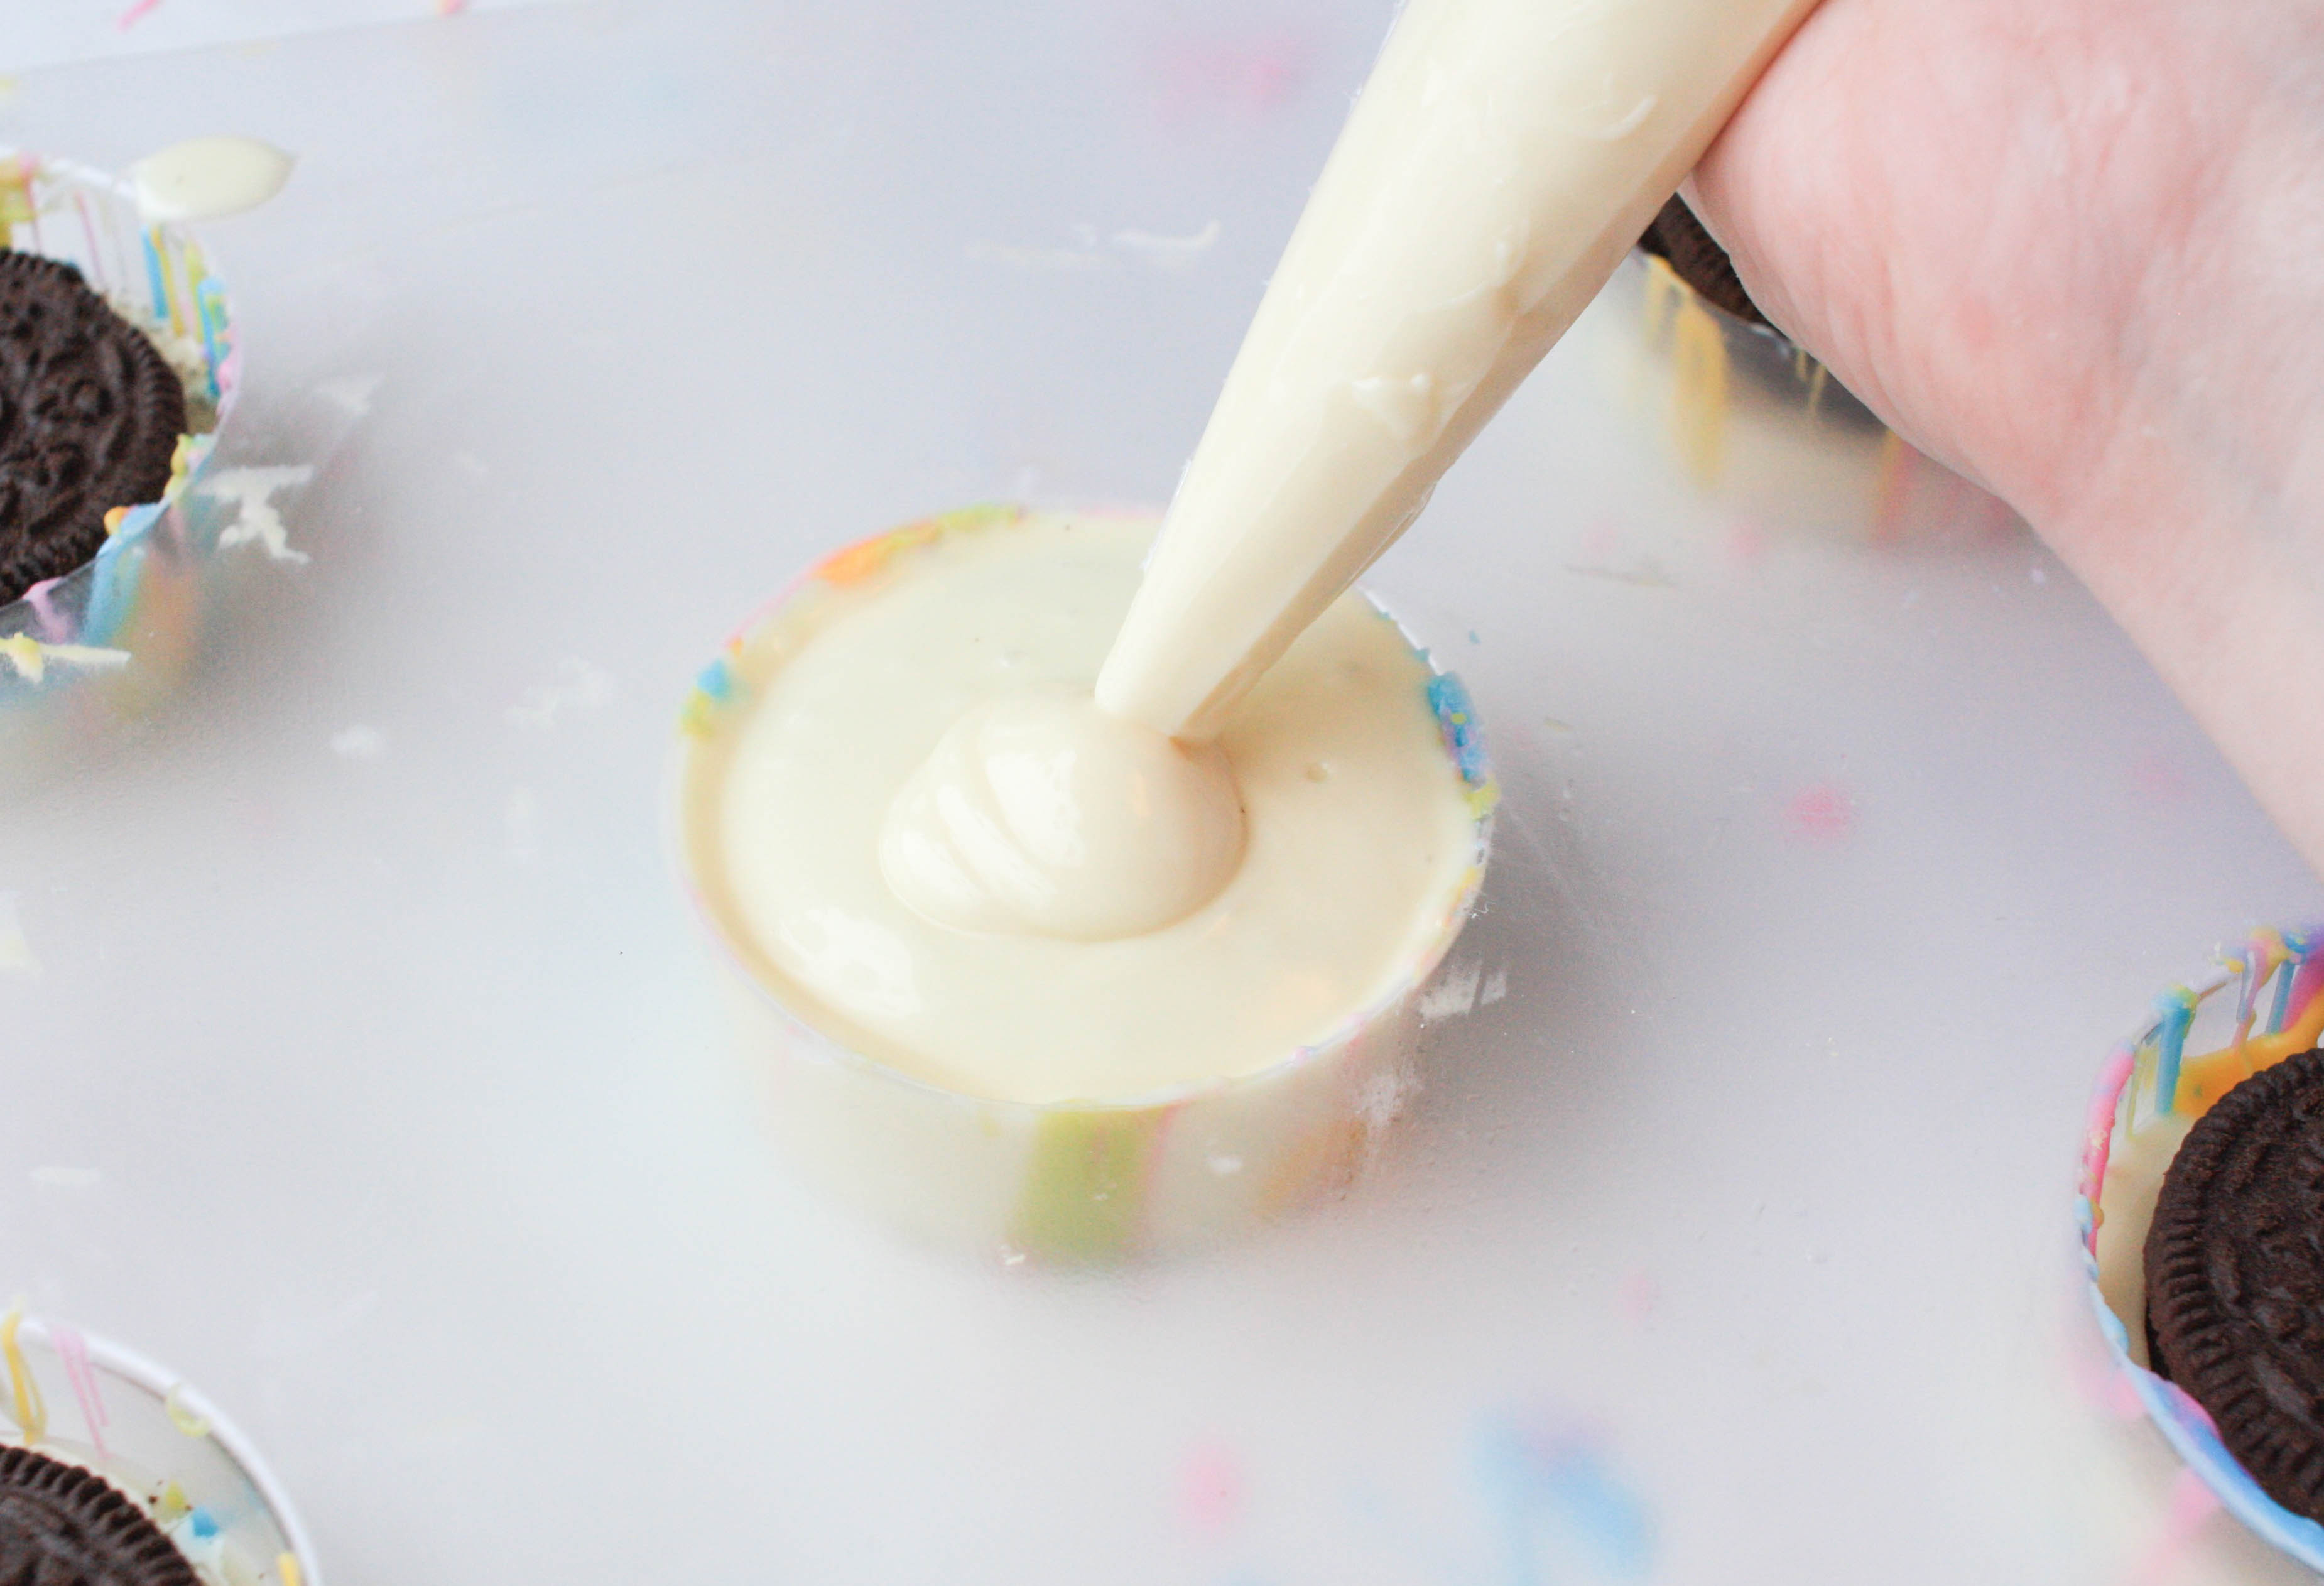
Step 4:
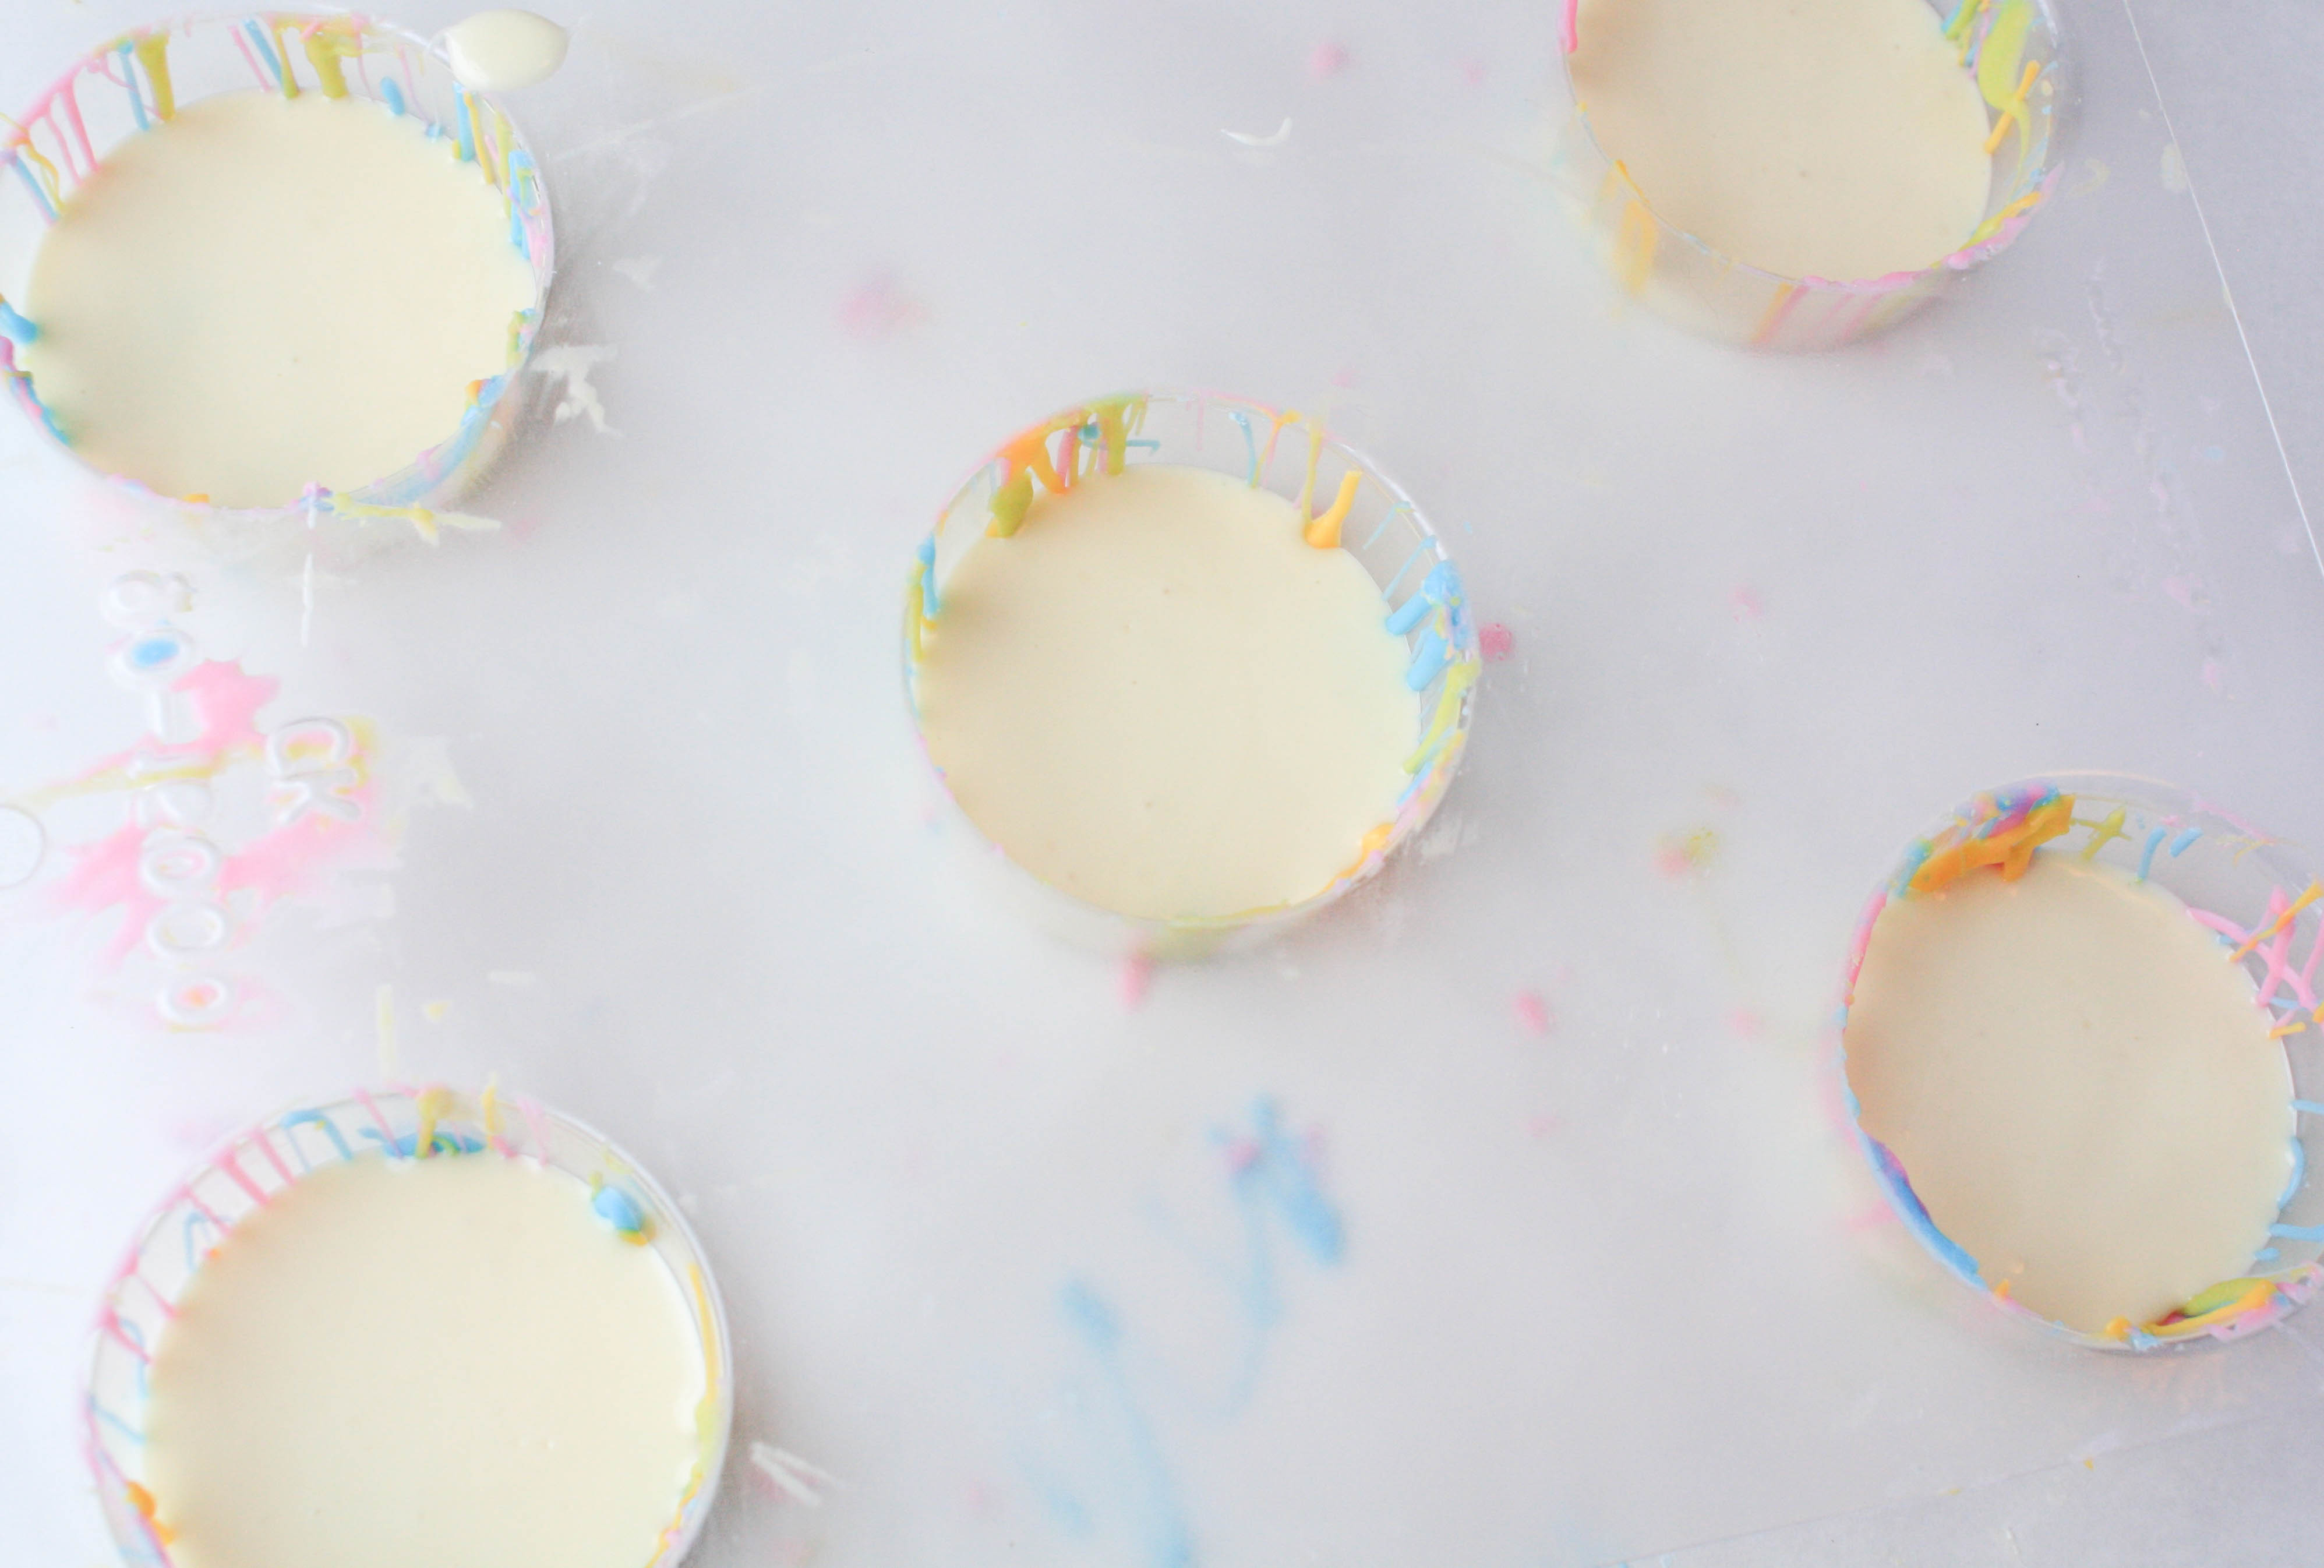
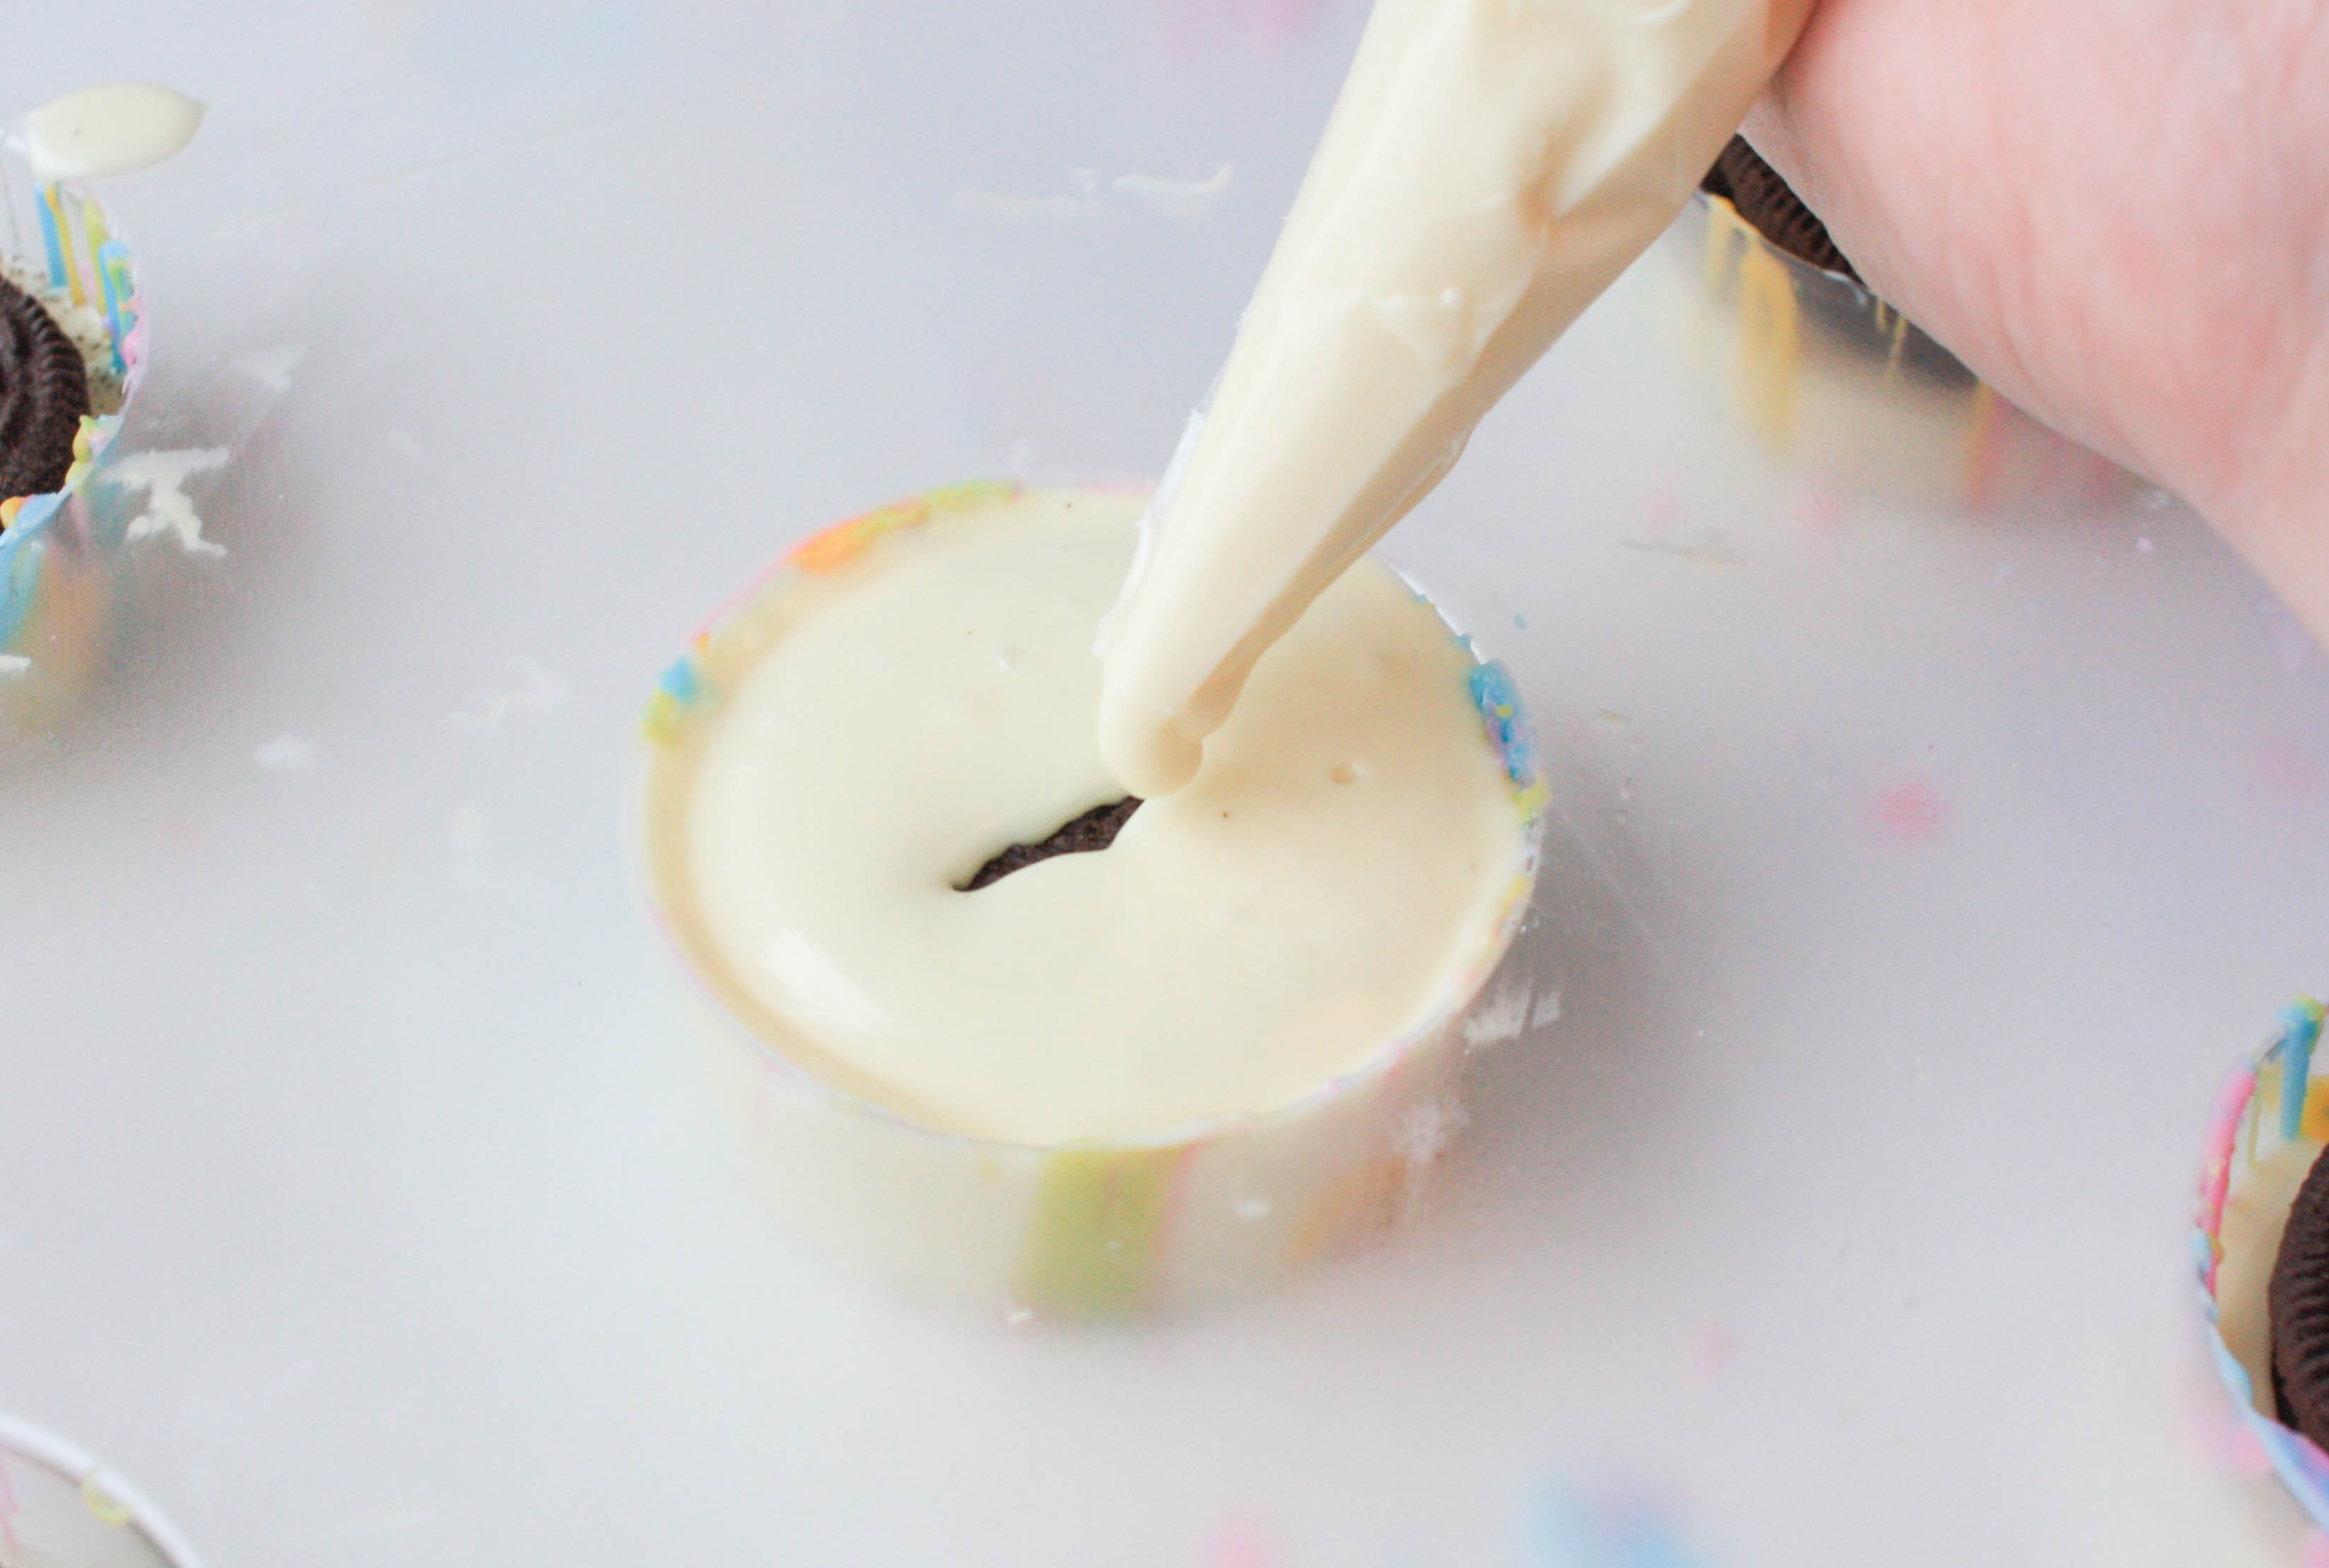
Pipe white chocolate between the cookie and the sides of the mold all the way around. Repeat with all of the cookies. Tap the mold against your work surface to make sure the chocolate gets in all of those delicious Oreo nooks and crannies. Finish by filling in the top of the mold with more white chocolate if needed.
Step 5:
Allow the Oreos to set up before removing them from the mold. If you’ve used candy melts, then you can pop the mold in the fridge for a few minutes to quicken the process. If you’ve used tempered chocolate, then leave the mold at room temperature to set up.
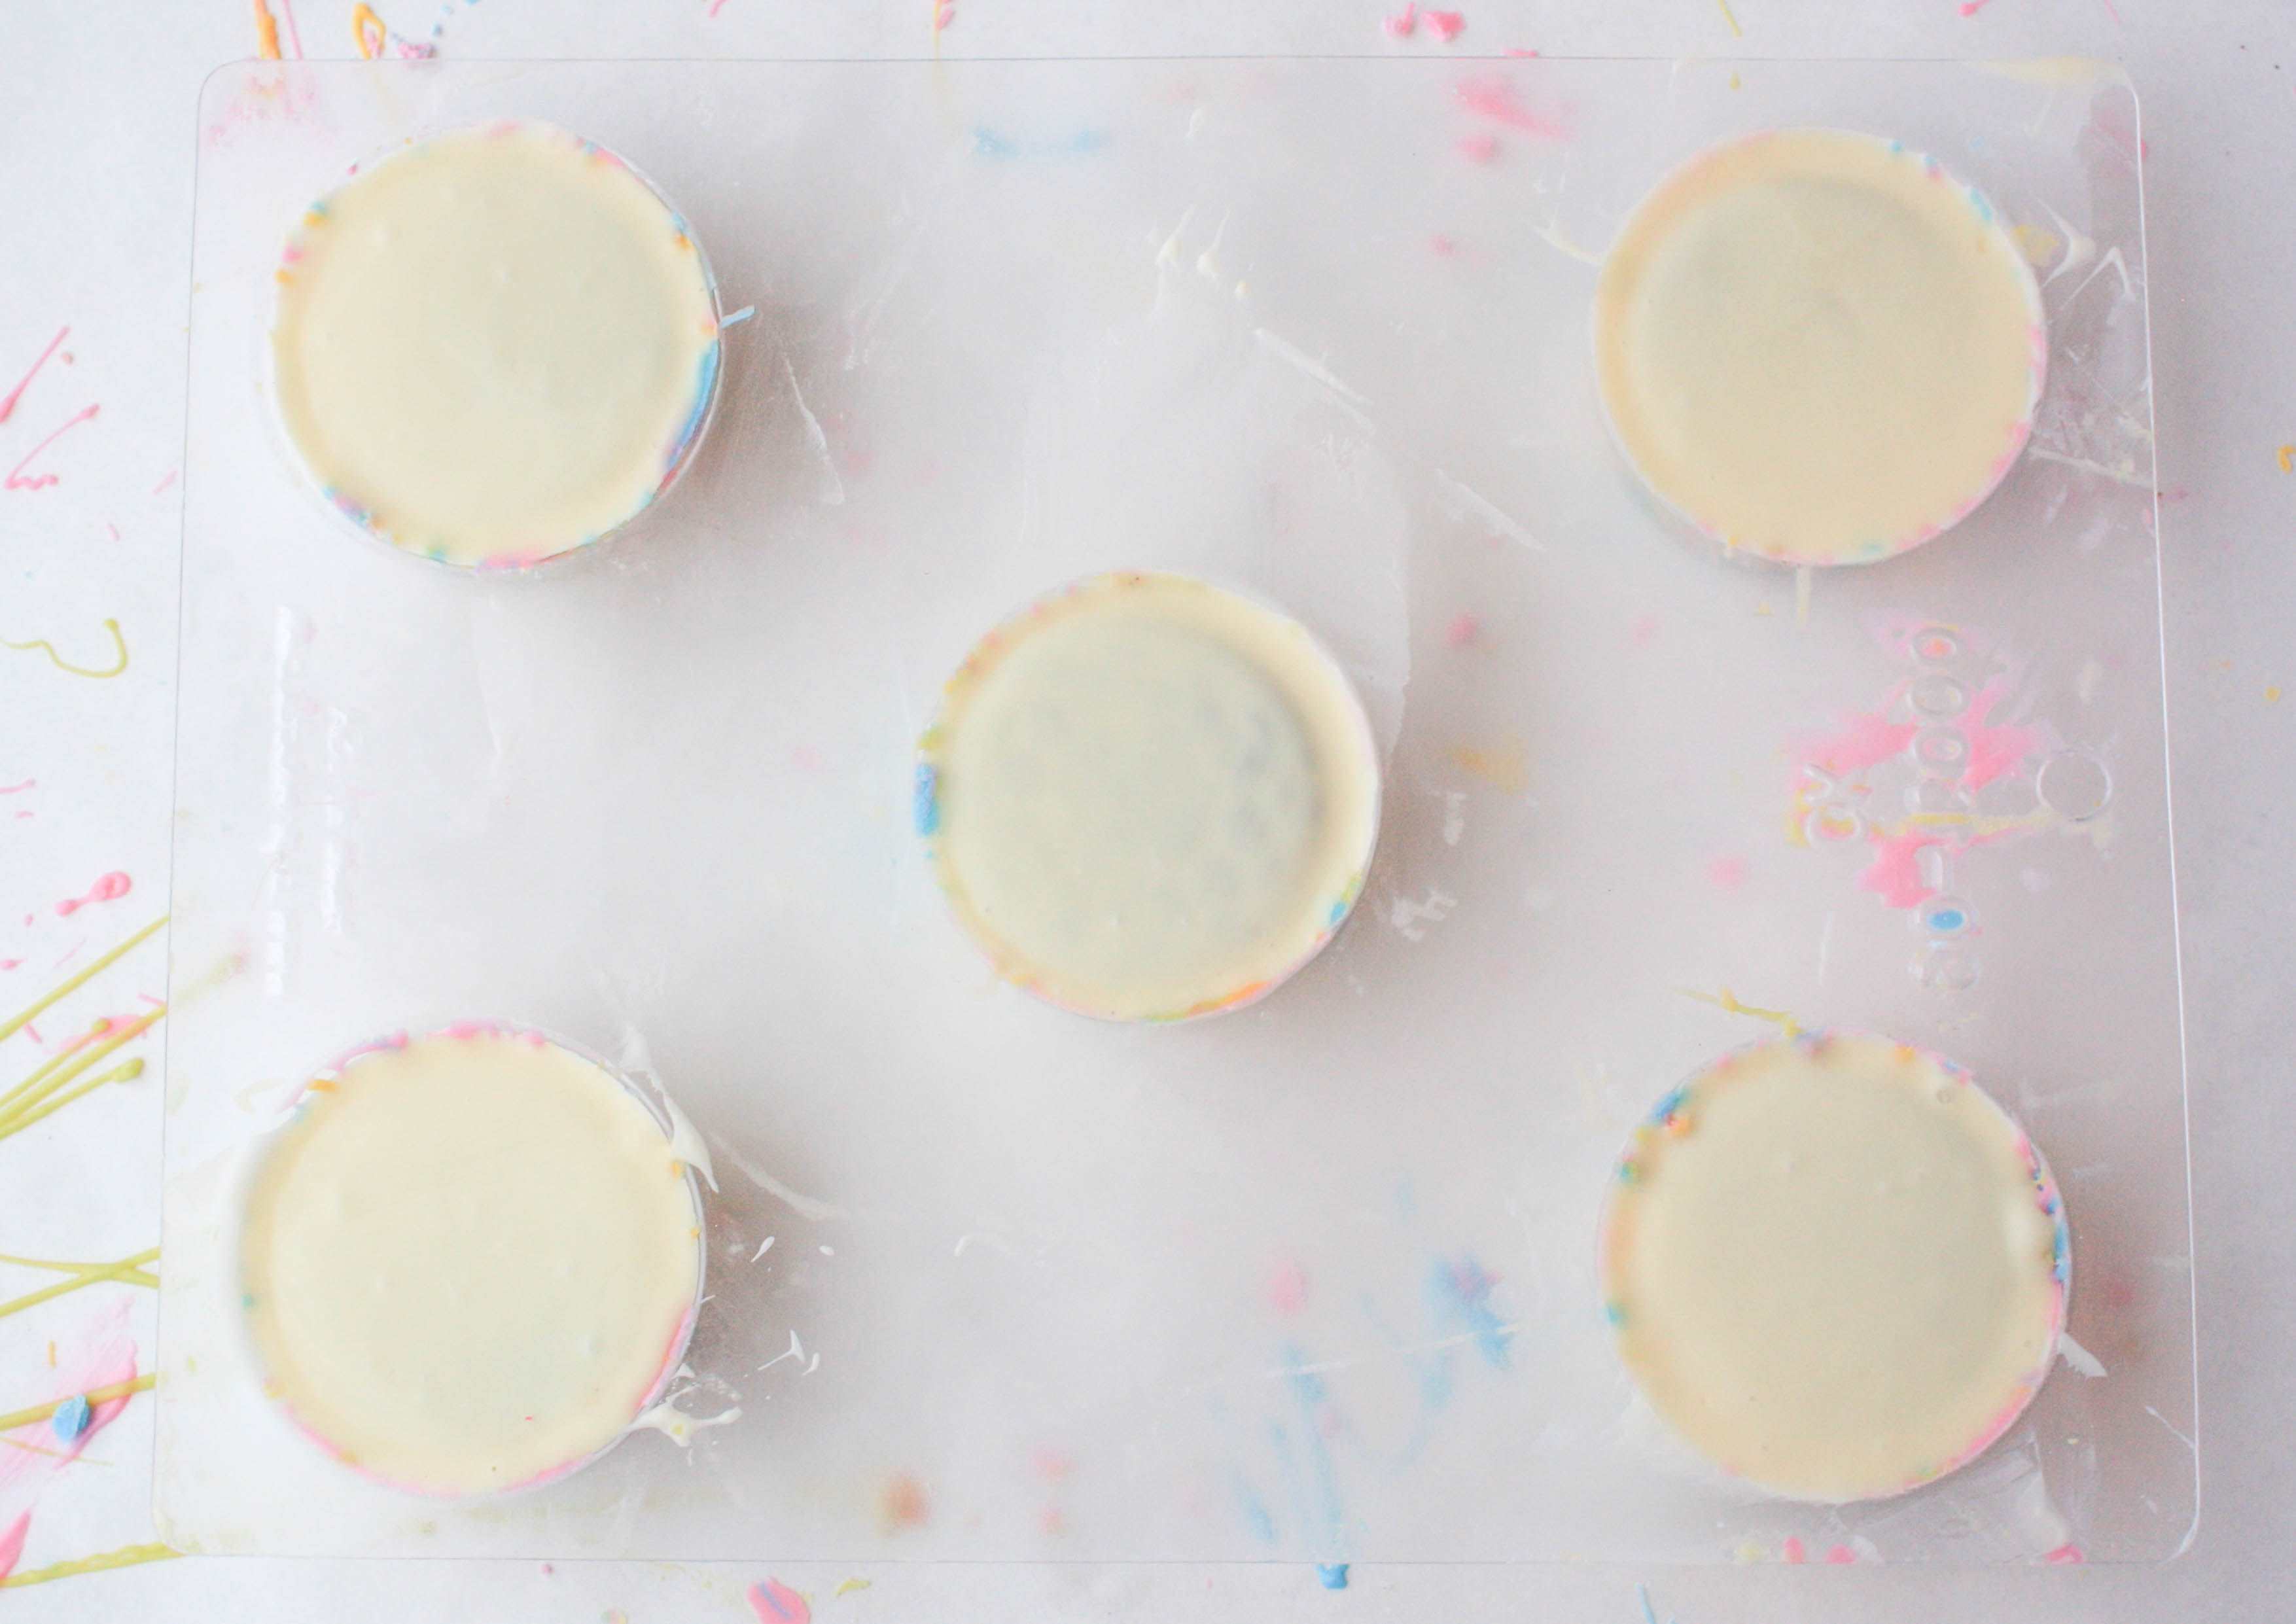
Step 6:
Once the chocolate has hardened, turn the mold over. The cookies should slide out pretty easily. Gently apply pressure to the surface of each cookie to help pop the cookies out of the molds.
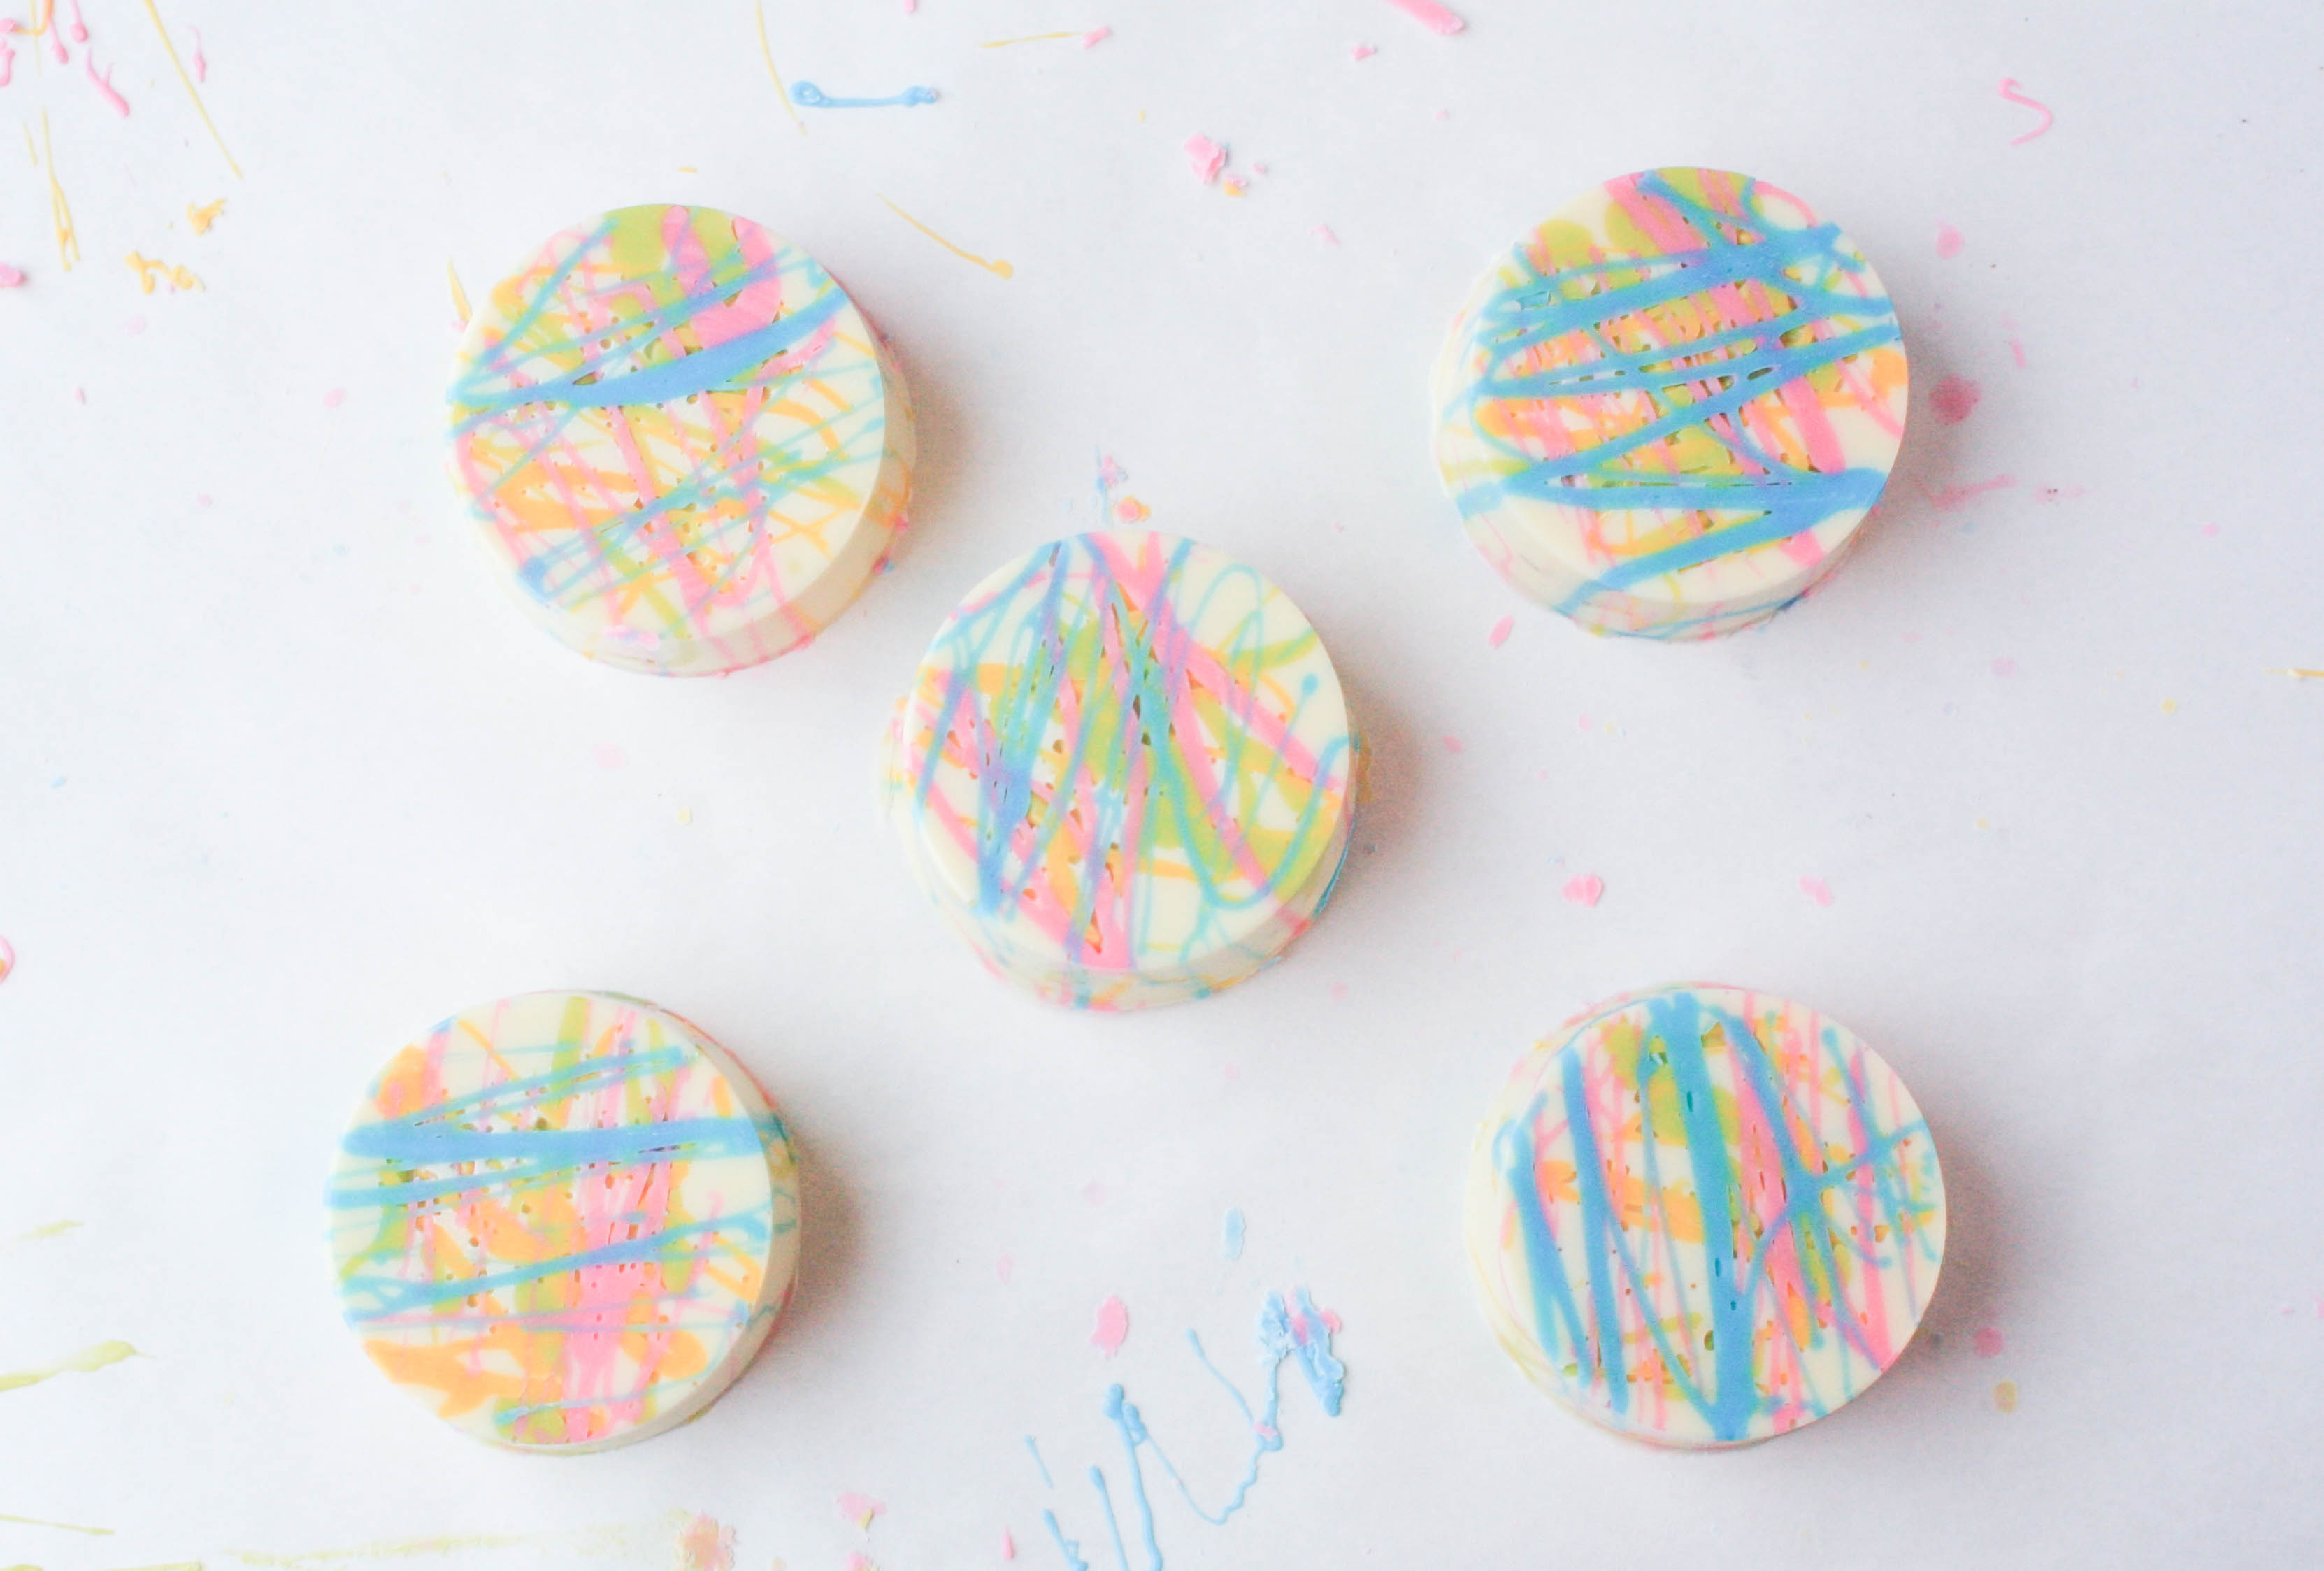
Have fun with your chocolate covered Oreos and change up the colors to match your event!
Share tips, start a discussion or ask one of our experts or other students a question.
No Responses to “Desserts That Break the Mold: How to Make Chocolate Covered Oreos”