
Ice cream cakes were the kind of special occasion dessert that my family reserved for summertime birthdays and anniversaries. Growing up, they were the kind of cake that I assumed you had to buy, since I had never seen anyone serve a homemade version. It turns out, however, they are easy to make — and you’ll never go back to store-bought after you’ve learned how to make an ice cream cake for yourself!
Follow along to learn the secrets of making your own ice cream cake!
Photos by Nicole Weston of Baking Bites
Ice cream cakes are all about construction, building layers with just the right balance of ice cream and cake. The key to building a good one is patience, as you need to allow plenty of time for the layers to set together firmly. Fortunately, since the finished cakes last quite a while in the freezer, they can be prepared well in advance when there is no need to rush.
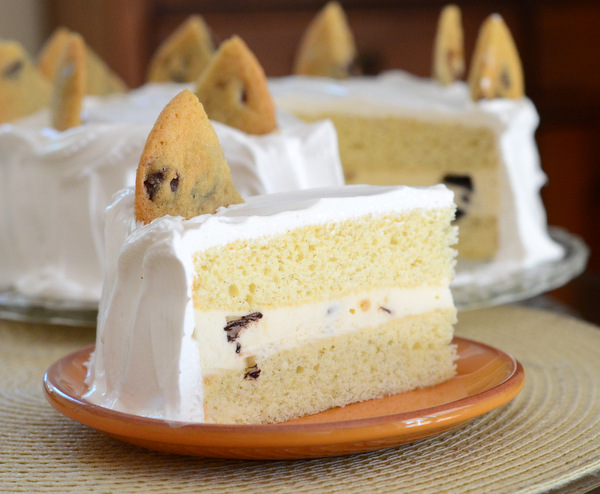
I made this cake with a vanilla cake base and a chocolate chip cookie dough ice cream filling. You could use other flavor combinations, such as chocolate cake with mint chocolate chip ice cream or vanilla cake with Cherry Garcia ice cream. Making your own ice cream cakes will give you the freedom to mix and match flavors to create your dream cake.
Step 1.
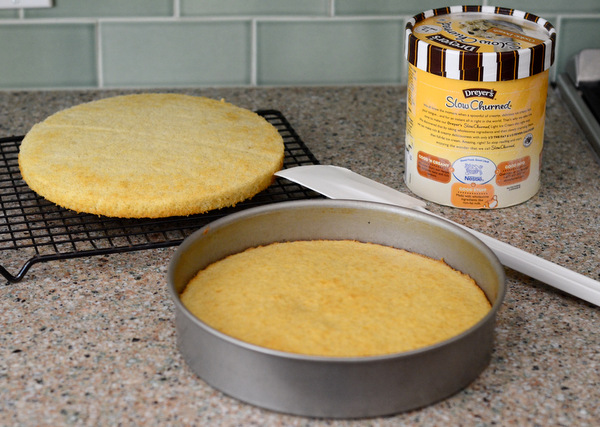
Bake two cake layers in your choice of flavors. You can use a recipe for a classic vanilla layer cake, a chocolate layer cake or even your favorite box cake mix. The important thing is that the two layers need to be even and baked in the same size pan. Cool the cakes completely.
Step 2.
Line the bottom of a cake pan with parchment paper. Place one layer of cake down into the pan on top of the parchment paper. The paper will prevent the frozen cake from sticking in the pan, allowing you to unmold it easily.
Step 3.
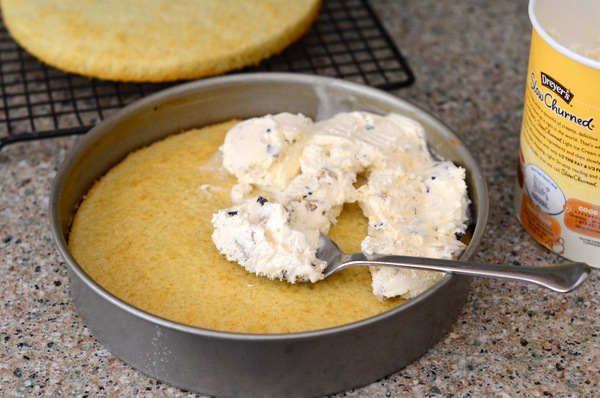
Soften your ice cream, then spoon it on top of the layer of cake. Small spoonfuls will soften more quickly than large spoonfuls, allowing you to spread the ice cream around into an even layer without tearing the cake.
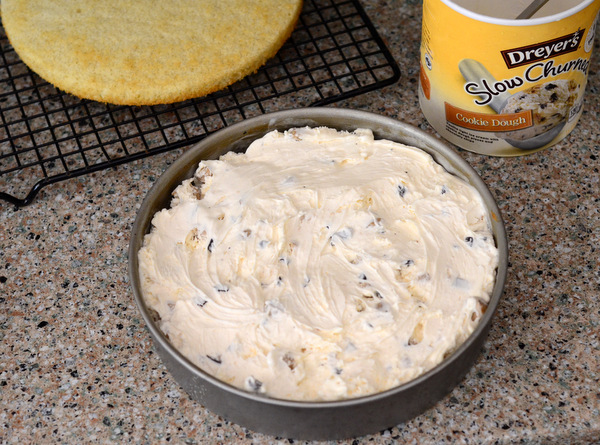
Step 4.

When the cake is completely covered in ice cream (approx 1 gallon for an 8- or 9-inch cake), place second layer of cake on top and press down very firmly. Freeze cake for at least 3-4 hours, until well-set.
Step 5.
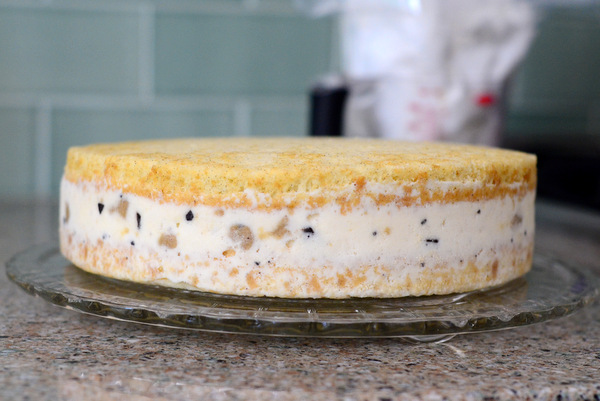
When cake is frozen, run a knife around the sides of the pan to loosen it, then turn the cake out onto a serving plate and peel off parchment paper. Ice with the icing of your choice.
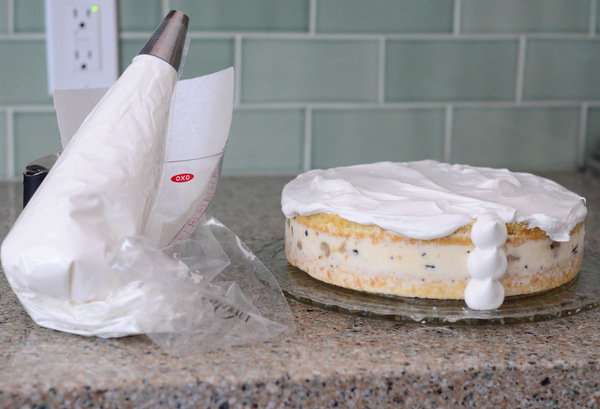
Buttercream and whipped cream are both good choices for a cake like this one. Buttercream will firm up in the freezer, but will allow you to pipe on fancier decorations and messages like “Happy Birthday,” while whipped cream will stay soft even after freezing.
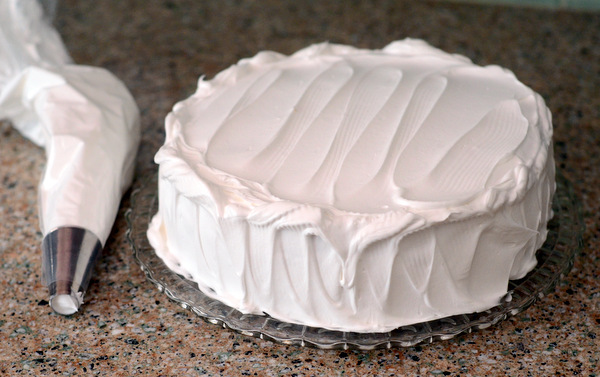
Add any decorations, such as swirls in the frosting or garnishes, then return cake to freezer for at least 1-2 hour to ensure it is set completely.
Step 6.
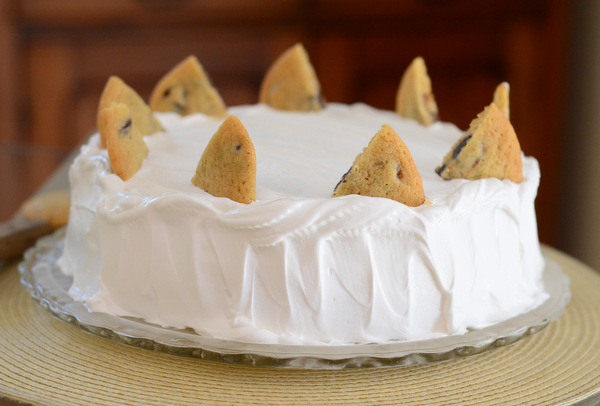
Serve the cake. To slice it neatly, run a sharp knife under warm water before cutting the cake.
Share tips, start a discussion or ask one of our experts or other students a question.
No Responses to “Learn the Secrets of Making a Homemade Ice Cream Cake”